
VS450 - Vacuum packaging machines BLACK & DECKER - Free user manual and instructions
Find the device manual for free VS450 BLACK & DECKER in PDF.
| Product Type | Vacuum Sealer |
| Brand | Black & Decker |
| Model | VS450 |
| Power Supply | 120 V, 60 Hz (polarized plug) |
| Approximate Dimensions | 41 x 20 x 10 cm |
| Approximate Weight | 2.5 kg |
| Main Functions | Vacuum sealing, jar sealing, custom bag making |
| Progress Indicator | Indicator light (green, red, amber) |
| Locking | Side locking latches |
| Release | Release button |
| Compatible Roll Widths | 21 cm (8 in) and 28 cm (11 in) |
| Included Accessories | Drip tray (ref. VS250-01) |
| Replaceable Parts | Upper foam gasket (ref. 2900-3211), lower foam gasket (ref. 2900-3201) |
| Maintenance | Clean the chamber after 30 uses or in case of overflow |
| Safety | Polarized plug, non-removable screw |
| Warranty | 1 year (United States and Canada) |
| Country of Manufacture | People's Republic of China |
| Additional Uses | Reusable bags, microwave and boiling water safe, FreshGuard jars |
Frequently Asked Questions - VS450 BLACK & DECKER
User questions about VS450 BLACK & DECKER
0 question about this device. Answer the ones you know or ask your own.
Ask a new question about this device
Download the instructions for your Vacuum packaging machines in PDF format for free! Find your manual VS450 - BLACK & DECKER and take your electronic device back in hand. On this page are published all the documents necessary for the use of your device. VS450 by BLACK & DECKER.
USER MANUAL VS450 BLACK & DECKER
vs250.pub1000001093 7/16/04 2:00 PM Page 1
PLEASE READ AND SAVE THIS USE AND CARE BOOK.
POR FAVOR LEA ESTE INSTRUCTIVO ANTES DE USAR EL PRODUCTO.
VEUILLEZ LIRE ET CONSERVER CE GUIDE D'ENTRETIEN ET D'UTILISATION.

Professional-Performance Vacuum System
Accessories/Parts (USA/Canada) 1-800-738-0245
IMPORTANT SAFETY INSTRUCTIONS
When using electrical appliances, basic safety precautions should always be followed, including the following:
Read all instructions.
Do not touch hot surfaces. Use handles or knobs.
To protect against a risk of electrical shock, do not immerse cord, plug or any part of this product in water or other liquid, or use on wet surfaces.
Do not place or store appliance where it can fall or be pulled into a sink or tub.
- Close supervision is necessary when any appliance is used by or near children.
Do not operate any appliance with a damaged cord or plug or after the appliance malfunctions or is dropped or damaged in any manner. Return the product to the nearest authorized service facility for examination, repair or electrical or mechanical adjustment. Or, call the appropriate toll-free number listed on the cover of this manual.
Do not use outdoors
Do not allow the cord to touch hot surfaces or hang over the edge of table or counter. Do not wrap the cord around the appliance.
To disconnect, grasp plug and remove from outlet. Do not pull by the cord.
SAVE THESE INSTRUCTIONS.
POLARIZED PLUG
This appliance has a polarized plug (one blade is wider than the other). To reduce the risk of electric shock, this plug will fit in a polarized outlet only one way. If the plug does not fit fully in the outlet, reverse the plug. If it still does not fit, contact a qualified electrician. Do not modify the plug in any way.
ELECTRICAL CORD
The cord of this appliance was selected to reduce the possibility of tangling in or tripping over a longer cord. If more length is needed, use an extension cord rated no less than 15-amperes. (For 220 volts rated products, use an extension cord rated no less than 6-amperes cord). When using an extension cord, do not let it drape over the working area or dangle where someone could accidentally trip over it. Handle cord carefully for longer life; avoid jerking or straining it at outlet and appliance connections.
Congratulations ...
On your purchase of the Black & Decker Professional-Performance Vacuum System! Your decision to purchase this product will have a permanent impact on your budget from now on. It will save you money because you will be able to purchase food in bulk and divide into portions that are exactly right for your family's size and tastes.
It will save you time, too. Imagine not having to worry what's for dinner, because you're able to give each family member a customized dinner that you've prepared, portioned, vaucuum-sealed and frozen in advance. Each meal needs only a few minutes heating in the microwave to be "fresh cooked."
The Black & Deckerb system is convenient, versatile and practical for today's busy lifestyles. In just seconds, you can make custom-sized bags to hold individual or family-sized portions of food, then vacuum seal to keep that food fresh for as much as 5 times longer.
- Keep meals, poultry and blanched vegetables fresh and flavorful and free from freezer burn.
- Pantry staples like flours, sugars and dried peas and beans stay fresh, dry and free of bugs.
- Refrigerated foods like cheese and cold cuts stay fresher longer.
All this means less food waste, so more money saved!
The more you use the Black & Decker system, the more ways you will find to expand its use in and around your home.
TAMPER-RESISTANT SCREW
This appliance is equipped with a tamper-resistant screw to prevent removal of the bottom cover. To reduce the risk of fire or electric shock, do not attempt to remove the bottom cover. There are no user serviceable parts inside. Repair should be done only by authorized service personnel.
SOFT-TOUCH PARTS
Note: The soft touch parts of the appliance are free of natural rubber and latex. They are safe for individuals allergic or sensitive to these materials.
VS250.Pub1000001093 7/16/04 2:00 PM Page 4
Product may vary slightly from what is illustrated.
-
Canister vacuum button
-
Vacuum channel
-
Canister hose port
How does the Black & Decker
Professional-Performance Vacuum Sealer Work?
TheScaler unit has a powerful vacuum-pump system that pulls out the air that surrounds food, leaving the food sealed in its owns 5-ply plastic storage bag.
What do I use to package my food for vacuum sealing?
The Black & Decker® System uses 8-inch (21 cm) wide rolls and 11-inch (28 cm) wide rolls of 5-ply plastic to make custom-sized bags for meats, poultry, blanched vegetables, etc.
The bags are freezer safe, hand washable and reusable. They are microwave safe and can be immersed in boiling water for reheating packaged food.
Also available is a 2-size canister set (1- and 1% -quart sizes/1 liter and 1% liters) for refrigerator storage of fragile food items, like berries, or items you want to keep crisp and dry in the pantry like cookies and crackers. It's also perfect for keeping coffee beans fresh in the pantry or freezer.
How to use the Black & Decker® FreshGUARD™ Professional-Performance Vacuum System Sealer to make custom-size bags with rolls:
- Place the unit on a flat, level surface that is comfortable to work on and plug in the power cord. You see the green progress light come on in the middle of the unit.
- Use sharp scissors to cut a piece from the roll that is long enough to hold the food item plus 3 inches.
- Lift the unit lid.
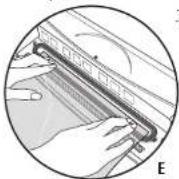
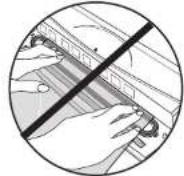
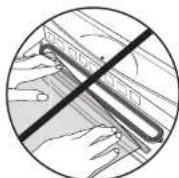
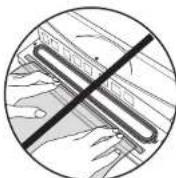
- Place one end of the bag on the sealing strip. Be sure the end does not extend over the black rubber strip or into the vacuum channel.
- Close the lid. The push bar on the lid pushes down the open end of the bag into position (A).
- Press down the top of the lid at the ends then press in the side latches until you hear them click into place (B). The vacuum sealing process begins automatically. The progress indicator light starts blinking; the unit makes a deep humming sound.
- When vacuum sealing process is complete, the sound stops and the light goes from blinking green to red and then back to steady green. Press the release button (C).
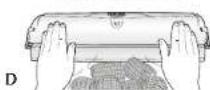
- Press down the lid at the ends to release the locking latches (D).
- Lift the lid and remove the sealed bag. Let the unit rest at least 20 seconds before using it again. 10.Unplug unit.
Tip: Using a sharp pair of scissors with long cutting blades makes it easier to cut the roll straight.
How to use the FreshGUARD™ Professional-Performance Vacuum Sealer to vacuum seal:
- Plug unit and lift lid.
- Place food or other item in the bag. Do not try to seal fragile foods (breads, chips, etc.) in vacuum-sealed bag. They will be crushed.
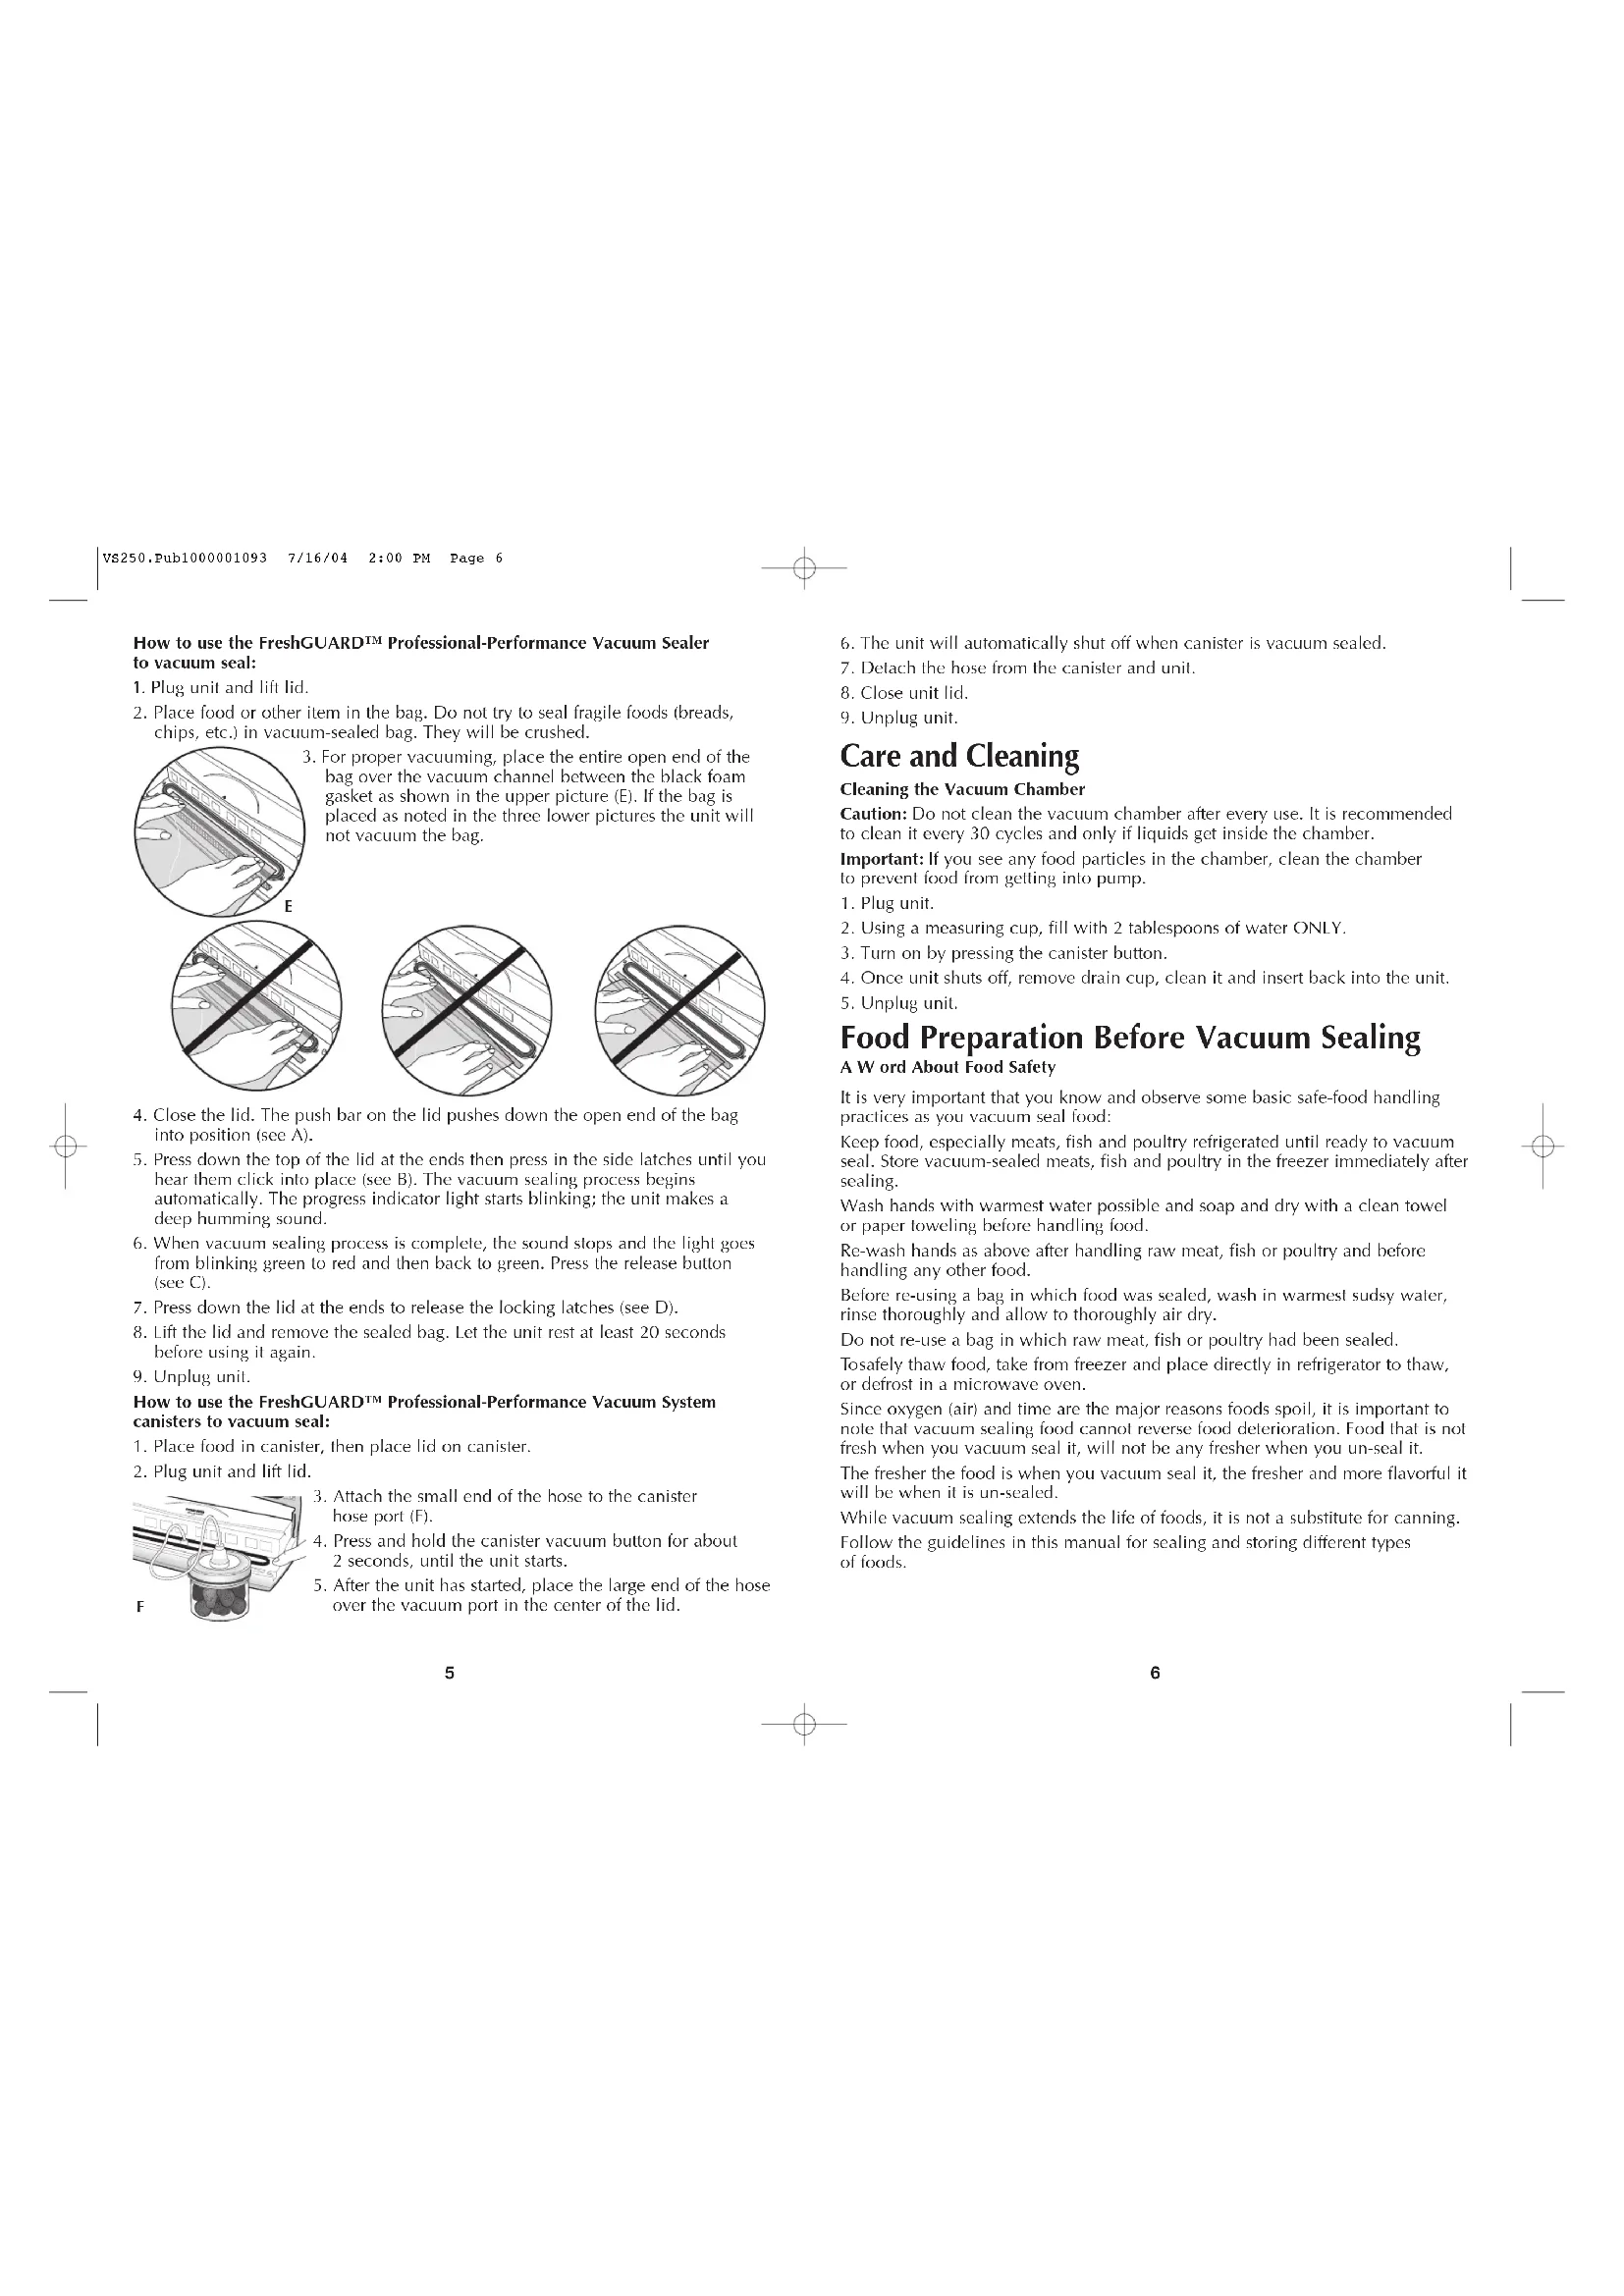
- Close the lid. The push bar on the lid pushes down the open end of the bag into position (see A).
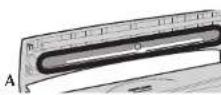
- Press down the top of the lid at the ends then press in the side latches until you hear them click into place (see B). The vacuum sealing process begins automatically. The progress indicator light starts blinking; the unit makes a deep humming sound.
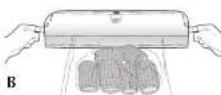
- When vacuum sealing process is complete, the sound stops and the light goes from blinking green to red and then back to green. Press the release button (see C).
- Press down the lid at the ends to release the locking latches (see D).
- Lift the lid and remove the sealed bag. Let the unit rest at least 20 seconds before using it again.
- Unplug unit.
How to use the FreshGUARD™ Professional-Performance Vacuum System canisters to vacuum seal:
- Place food in canister, then place lid on canister.
- Plug unit and lift lid.
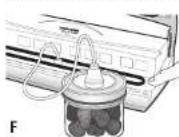
- Attach the small end of the hose to the canister hose port (F).
- Press and hold the canister vacuum button for about 2 seconds, until the unit starts.
-
After the unit has started, place the large end of the hose over the vacuum port in the center of the lid.
-
The unit will automatically shut off when canister is vacuum sealed.
- Detach the hose from the canister and unit.
- Close unit lid.
- Unplug unit.
Care and Cleaning
Cleaning the Vacuum Chamber
Caution: Do not clean the vacuum chamber after every use. It is recommended to clean it every 30 cycles and only if liquids get inside the chamber.
Important: If you see any food particles in the chamber, clean the chamber to prevent food from getting into pump.
-
Plug unit.
-
Using a measuring cup, fill with 2 tablespoons of water ONLY.
- Turn on by pressing the canister button.
- Once unit shuts off, remove drain cup, clean it and insert back into the unit.
- Unplug unit.
Food Preparation Before Vacuum Sealing
A W ord About Food Safety
It is very important that you know and observe some basic safe-food handling practices as you vacuum seal food:
Keep food, especially meats, fish and poultry refrigerated until ready to vacuum seal. Store vacuum-sealed meats, fish and poultry in the freezer immediately after sealing.
Wash hands with warmest water possible and soap and dry with a clean towel or paper toweling before handling food.
Re-wash hands as above after handling raw meat, fish or poultry and before handling any other food.
Before re-using a bag in which food was sealed, wash in warmest sudsy water, rinse thoroughly and allow to thoroughly air dry.
Do not re-use a bag in which raw meat, fish or poultry had been sealed.
Tosafely thaw food, take from freezer and place directly in refrigerator to thaw, or defrost in a microwave oven.
Since oxygen (air) and time are the major reasons foods spoil, it is important to note that vacuum sealing food cannot reverse food deterioration. Food that is not fresh when you vacuum seal it, will not be any fresher when you un-seal it.
The fresher the food is when you vacuum seal it, the fresher and more flavorful it will be when it is un-sealed.
While vacuum sealing extends the life of foods, it is not a substitute for canning.
Follow the guidelines in this manual for sealing and storing different types of foods.
STORAGEGUIDES\*
Preparing Meats/Poultry/Fish for Vacuum Sealing
For best results, freeze for 1 to 2 hours before vacuum sealing.
If pre-freezing is not an option, place a folded paper towel in the center of the bag to absorb excess liquid, then place meat in bag. Vacuum seal bag with paper towel and meat in place.
| Meal/Fish/Poultry | Where to Store | Recommended Storage System | Black & Decker® System Storage Time | Normal Recommended Storage Time** |
| Meat (beef stew type) | Freezer | Bag | 3 years | 6 to 9 months |
| Lamb (steaks and chops) | Freezer | Bag | 2 years | 3 to 4 months |
| Pork (chops) | Freezer | Bag | 2 years | 2 to 3 months |
| Ground beef | Freezer | Bag | 1 year | 2 to 3 months |
| Poultry (whole chicken) | Freezer | Bag | 3 years | 12 months |
| Fish (lean) | Freezer | Bag | 2 years | 6 to 8 months |
** Food Marketing Institute, January 2003.
Preparing Cheeses for Vacuum Sealing
If cheese is used frequently, you might want to make the bag longer than normal by 3 to 4-inches (7.5-10 cm). That will allow you to cut to open and leave enough room for 3 or 4 rescalls.
Tip: For cubed cheeses like Cheddar or Swiss, freeze cubes on a cookie sheet 30 minutes to 1 hour before vacuum sealing. For shredded cheeses, toss with 1 tablespoon (15 ml) all-purpose flour per 2 cups (500 ml) of cheese; spread cheese lightly on cookie sheet and freeze 20 minutes before sealing.
| Cheese | Where to Store | Recommended Storage System | Black & Decker* System Storage Time | Normal Recommended Storage Time** |
| Processed cheese (slices) | Refrigerator | Bag | 8 months | 1 to 2 months |
| Cheese, hard (opened) | Refrigerator | Bag | 6 to 8 months | 3 to 4 months |
| Parmesan, Romano (shredded) | Refrigerator | Bag | 6 to 8 months | 1 month |
| Hard and wax-coated cheese, Cheddar, Edam, Gouda, Swiss (opened) | Refrigerator | Bag | 6 to 8 months | 3 to 4 weeks |
** Food Marketing Institute, January 2003.
- Recommended storage times are for quality only. Follow safe food-handling procedures and consult individual product recommendations.
Preparing Vegetables for Vacuum Sealing
Vegetables should be blanched before vacuum sealing to retain nutrients, flavor and color.
Toblanch vegetables, place them in a large pot of boiling water and cook according to the chart below, then immediately drain and plunge drained vegetables into a pot of very cold water to stop the cooking. Drain vegetables then place on paper toweling or on a kitchen towel to dry, then vacuum seal and freeze.
| Vegetables Blanching Where Recommended (home frozen) Time to Store Storage System System | Black & Decker2 Storage Time Storage | Normal Recommended Time** | ||
| Asparagus 1 to 3 minutes Freezer Bag 3 years 10 months | ||||
| Broccoli 3 to 4 minutes Freezer Bag 3 years 10 months | ||||
| Brussels sprouts | 3 to 4 minutes Freezer Bag 3 years 10 months | |||
| Cabbage 3 to 5 minutes Freezer Bag 3 years 10 months | ||||
| Cauliflower | 3 to 4 minutes Freezer Bag 3 years 10 months | |||
| Corn, on the cob | 6 to 12 minutes Freezer Bag 3 years 10 months | |||
| Corn, whole kernel | 4 to 6 minutes Freezer Bag 3 years 10 months | |||
| Green beans | 2 to 3 minutes Freezer Bag 3 years 10 months | |||
| Snow peas 1 to 2 minutes Freezer Bag 3 years 10 months | ||||
| Sugar snap peas | 1 to 3 minutes Freezer Bag 3 years 10 months | |||
** Food Marketing Institute, January 2003.
Preparing Fruit for Vacuum Sealing
Soft or delicate fruits and berries of all kinds should be individually pre-frozen for 1 to 2 hours until solidly frozen before vacuum sealing in bags. For example, slice stone fruits (peaches, plums, nectarines, etc.) and place slices on a cookie sheet and freeze, then place solidly frozen pieces in bag to vacuum seal.
Berries can be individually frozen as above before vacuum sealing in a bag then freezing or vacuum-sealed fresh in a FreshGuard TM canister and stored in refrigerator.
| Fruit, Cut | Where to Store | Recommended Storage System | Black & Decker® System Storage Time | Normal Recommended Storage Time** |
| Apricots, Nectarines, Peaches, Plums | Freezer | Bag | 1 to 3 years | 2 to 3 months |
| Berries | Refrigerator | Canister | 10 days | 1 to 2 days |
** Food Marketing Institute, January 2003.
Preparing Other Foods for Vacuum Sealing
Baked goods (breads, rolls, cakes, pastries, bagels) should always be pre-frozen for 1 to 2 hours before vacuum sealing. Pre-freezing prevents baked goods from collapsing when the vacuum sealing process takes place.
When vacuum-sealing foods like soups and stews that are liquid-based, pre-freeze in a shallow casserole or pan that has been sprayed with non-stick cooking spray. The frozen food can then be easily removed from the container and placed in an appropriate sized bag.
| Food | Where | Recommended to Store Storage System System | Black & Decker* Storage Time | Normal Recommended Storage Time** |
| Baked pies/pastry | Freezer Bag 1 to 3 years 1 to 2 months | |||
| Quick Breads Freezer | Bag 1 to 3 years 3 to 6 months | |||
| Coffee, beans Refrigerator | Bag or canister 2 years 2 weeks (from can) | |||
| Ground coffee, (from can) | Pantry | Bag or canister 3 years 2 years | ||
| Cookies (packaged) | Pantry | Canister | 6 months | 2 months |
| Nuts | Freezer Bag or canister 2 years 6 to 12 months | |||
| Pasta (uncooked) | Pantry | Canister | 3 years | 2 years |
| Rice (uncooked) | Pantry | Canister | 2 years | 6 months |
| Granulated sugar | Pantry | Canister | 3 years | 2 years |
** Food Marketing Institute, January 2003.
Preparing Foods for Marinating
Marinating is a great way to tenderize a less expensive cut of meat, and give added flavor to meals, poultry, fish and vegetables.
The Black & Decker® Professional-Performance Vacuum System offers you two ways to have tender, flavorful meats, poultry and fish and flavor-infused vegetables and salads—and now it can be done in minutes, not hours.
For larger pieces of meal, poultry or fish, use the 8-inch (21 cm) or 11-inch (28 cm) wide rolls to prepare a custom-sized bag. Place the food and marinade in bag and vacuum seal. Place in refrigerator for 30 to 45 minutes.
For cubes of meat, poultry or fish, or for marinated vegetables or salads use the appropriate size canisler for the amount of food and marinade.
Always place marinating food, whether in canister or bags, in the refrigerator until ready to cook or eat.
IMPORTANT MISES EN GARDE
For service, repair or any questions regarding your appliance, call the appropriate "800" number on the cover of this book. Do not return the product to the place of purchase. Do not mail the product back to the manufacturer nor bring it to a service center. You may also want to consult the website listed on the cover of this manual.
One-Year Limited Warranty (Applies only in the United States and Canada)
What does it cover?
Any defect in material or workmanship; provided; however, Applica's liability will not exceed the purchase price of the product.
For how long?
One year after the date of original purchase
What will we do to help you?
- Provide you with a reasonably similar replacement product that is either new or factory refurbished
How do you get service?
Save your receipt as proof of the date of sale.
Check our on-line service site at www.prodprotect.com/applica, or call our toll-free
number, 1-800-231-9786, for general warranty service
If you need parts or accessories, please call 1-800-738-0245.
What does your warranty not cover?
D amage from commercial use
-
Damage from misuse, abuse or neglect
-
Products that have been modified in any way
-
Products used or serviced outside the country of purchase
Glass parts and other accessory items that are packed with the unit
-
Shipping and handling costs associated with the replacement of the unit
-
Consequential or incidental damages (Please note, however, that some states do not allow the exclusion or limitation of consequential or incidental damages, so this limitation may not apply to you.)
How does state law relate to this warranty?
- This warranty gives you specific legal rights, and you may also have other rights that vary from state to state or province to province.
NECESITAAYUDA
Co. Centre Mexico, D.F.C., P.O. 0505 TEL: +552-56327113
Tel.: (35) 5512-7112
Fax: (35) 5518-6576
Del interior marquoc sin costo
01800714-2503

2004/4-28-105ESF
Copyright © 2004 Applica Consumer Products, Inc.
Pub.No.1000001093-00-RV00
Made in People's Republic of China
Printed in People's Republic of China
Importado por:
Aplica de Mexico S.de R.L.de C.V.
Blvd. Manuel Avila Camacho 2900 Int. 902
Los Pirules, Tlalnepantla,
Edo, Mex.
C.P. 54820
C.P. 51404 Minnie

- Professional-Performance Vacuum System
- IMPORTANT SAFETY INSTRUCTIONS
- SAVE THESE INSTRUCTIONS.
- POLARIZED PLUG
- ELECTRICAL CORD
- Congratulations ...
- TAMPER-RESISTANT SCREW
- SOFT-TOUCH PARTS
- How does the Black & Decker
- Professional-Performance Vacuum Sealer Work?
- What do I use to package my food for vacuum sealing?
- How to use the Black & Decker® FreshGUARD™ Professional-Performance Vacuum System Sealer to make custom-size bags with rolls:
- How to use the FreshGUARD™ Professional-Performance Vacuum Sealer to vacuum seal:
- How to use the FreshGUARD™ Professional-Performance Vacuum System canisters to vacuum seal:
- Care and Cleaning
- Cleaning the Vacuum Chamber
- Food Preparation Before Vacuum Sealing
- A W ord About Food Safety
- STORAGEGUIDES\*
- Preparing Meats/Poultry/Fish for Vacuum Sealing
- Preparing Cheeses for Vacuum Sealing
- Preparing Vegetables for Vacuum Sealing
- Preparing Fruit for Vacuum Sealing
- Preparing Other Foods for Vacuum Sealing
- Preparing Foods for Marinating
- IMPORTANT MISES EN GARDE
- One-Year Limited Warranty (Applies only in the United States and Canada)
- What does it cover?
- For how long?
- What will we do to help you?
- How do you get service?
- What does your warranty not cover?
- NECESITAAYUDA
Brand : BLACK & DECKER
Model : VS450
Category : Vacuum packaging machines