
10032042 - Dehumidifier Klarstein - Free user manual and instructions
Find the device manual for free 10032042 Klarstein in PDF.

| Product type | Air dehumidifier |
| Brand | Klarstein |
| Model | 10032042 |
| Power supply | 220-240 V ~ 50 Hz |
| Power | 420 W |
| Dehumidification capacity | 20 L/day (at 30°C, 80% relative humidity) |
| Water tank | 5 L |
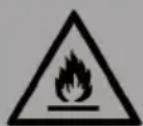
| Refrigerant | R290 (flammable) |
| Operating modes | Automatic (AUTO) and continuous (CONTINUOUS) |
| Timer | 24 hours (delayed start and stop) |
| Internal drying function | Yes (duration approx. 1 hour) |
| Oscillation function | Yes (simultaneous press of Internal Drying and Timer buttons) |
| Fan speed | Adjustable (fast/slow) |
| Adjustable humidity range | 30% to 80% (in 5% increments) |
| Operating temperature | 5 °C to 32 °C |
| Required clearance | Min. 20 cm around, min. 50 cm above |
| Filter cleaning | Every 2 weeks |
| Continuous drainage | Possible with hose inner Ø 9 mm (not supplied) |
| Drainage type | Manual (tank) or continuous (hose) |
| Control panel | Digital display with touch buttons |
| Carrying handle | Yes (at back) |
| Swivel castors | Yes (4 wheels) |
| Panel lock | Yes (long press on MODE) |
Frequently Asked Questions - 10032042 Klarstein
User questions about 10032042 Klarstein
0 question about this device. Answer the ones you know or ask your own.
Ask a new question about this device
Download the instructions for your Dehumidifier in PDF format for free! Find your manual 10032042 - Klarstein and take your electronic device back in hand. On this page are published all the documents necessary for the use of your device. 10032042 by Klarstein.
USER MANUAL 10032042 Klarstein
Congratulations on purchasing this equipment. Please read this manual carefully and take care of the following hints to avoid damages. Any failure caused by ignoring the mentioned items and cautions mentioned in the instruction manual are not covered by our warranty and any liability.
CONTENTS
Safety Instructions 14
Notes on Refrigerant R290 15
Installation 16
Product Description 16
Control Panel and Keys 17
Operation and Functions 18
Care and Cleaning 21
Troubleshooting 21
Hints on Disposal 22
TECHNICAL DATA
| Item number 10032042, | 10032663 10032043 | |
| Power supply 220-240 V ~ 50 Hz 220-240 V ~ 50 Hz | ||
| Power consumption 420 W | 530 W | |
| Dehumidifying capacity 20 L/day (30°C, RH 80%) 30 | L/day (30°C, RH 80%) | |
| Water tank 5 L 5 L | ||
DECLARATION OF CONFORMITY
Producer:
Chal-Tec GmbH, Wallstraße 16, 10179 Berlin, Germany.

This product is conform to the following European
Directives:
2014/30/EU (EMC)
2014/35/EU (LVD)
2011/65/EU (RoHS)
206/2012/EU (ErP)
SAFETY INSTRUCTIONS
- Please read the operating instructions carefully before using your dehumidifier for the first time and keep it on a safe floor.
- Never immerse the appliance in water or other liquids.
- Place the unit on a stable flat surface to avoid loud noises and vibrations.
- Never operate the appliance if a cable or connector has been damaged, after appliance malfunction or if the appliance was dropped or otherwise damaged.
- The appliance may only be repaired by qualified personal, improper repair work can be a source of considerable danger for the users.
- Pull out the power plug before transporting it and / or before cleaning.
- Operate the appliance only at the voltage specified on the rating label.
- The device may not be connected to a power strip with other household appliances.
- Use the appliance only in the household, and only for the purpose it was developed for.
- Do not operate this unit near heating appliances and flammable or dangerous objects.
- If the dehumidifier is operated in a room with gas driven devices, so the room must be aired regularly and often.
- Please use the function of the internal drying, if the device is not used for a long time. This will prevent formation of mildew and unpleasant smell inside the unit.
- Do not place heavy objects on the appliance.
- Do not hang curtains or wet clothes in front of the air outlet, this will overload the device.
- The drainage hose may not be installed outdoors at low temperatures.
- To prevent spillage, empty the water tank before relocating the appliance.
- Do not tip the appliance to any side as escaping water could damage the appliance.
- If the supply cord is damaged, it must be replaced by a qualified person to avoid a hazard.
- If you smell the smoke during start-up or if you can see the smoke, immediately disconnect the power plug out and contact your dealer.
- The unit should be installed with a minimum distance of 20cm from the wall or other obstacles.
- This appliance can be used by children aged from 8 years and above and persons with reduced physical, sensory and mental capabilities or lack of experience and knowledge if they have been given supervision or instruction concerning use of the appliance in a safe way and understand the hazards involved. Cleaning and user maintenance shall not be made by children without supervision.
Warnings
- The air conditioning system must be kept and transported upright. Otherwise, irreparable compressor damage may occur. Leave the unit for at least 24 hours before putting it into operation.
- Switch off the device and disconnect it from the power supply before cleaning.
- Make sure that the product creates a steady stream of air. Ensure the air inlets and outlets are not blocked.
- To prevent leaks, operate this unit on a horizontal surface.
- Any person performing work on a refrigerant circuit should have a current certifi cate from an industry-accredited assessment body. This ensures competence for the safe handling of refrigerants according to an industry-recognised assessment specifi cation.
- If the device stops working, dispose of it properly.
- Store the device in a well-ventilated place when not in use.
- Store the device so that it is not damaged.
- Repairs may only be carried out by the manufacturer or an authorised specialist company.
- The cables connected to the device may contain potential ignition sources.
- Do not damage any components of the refrigerant circuit. Escaping refrigerant may not be noticed because it is odourless.
- Maintenance and repairs must be carried out under the supervision of specialists in the use of flammable refrigerants.
Information for rooms with refrigerant pipes
- Limit the piping to a minimum.
- Be careful not to damage the piping.
- Appliances with flammable refrigerants may only be installed in a well-ventilated room.
- Comply with national gas regulations.
- All mechanical connections must be freely accessible for maintenance purposes.
CAUTION
Risk of fire! This device contains the flammable refrigerant R290. If the refrigerant escapes and is exposed to an external ignition source, there is a risk of fire.
INSTALLATION
- Empty the water tank before turn on the unit.
- During the operation, keep unit closed to the door and windows closed to save energy.
Make sure no block at air inlet and outlet - Place the appliance on a stable surface and allow at least 20cm of space around the appliance and at least 50cm in the area to allow air to circulate sufficiently.
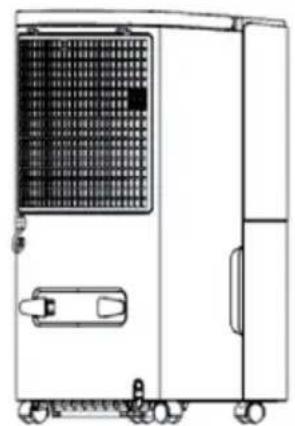
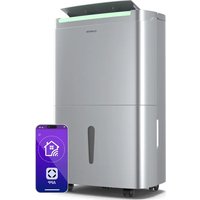
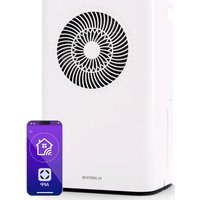
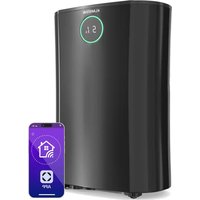
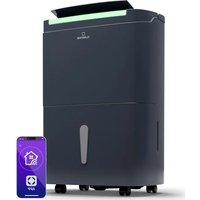
PRODUCT DESCRIPTION
Front
1 Wind blade
2 Water tank cover
3 Tank Handle
4 Watertank
5 Control Panel
6 Front cover
7 Back cover

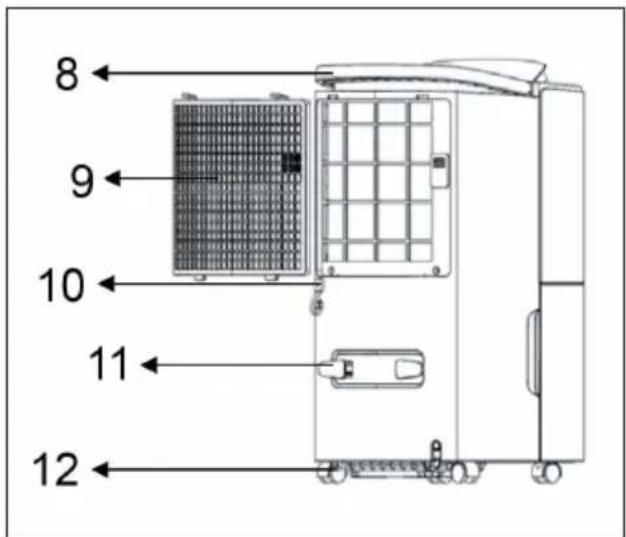
Back
8 Handle
9 Filter frame
10 Drain
11 Wrapping post
12 Wheels
CONTROL PANEL AND KEYS
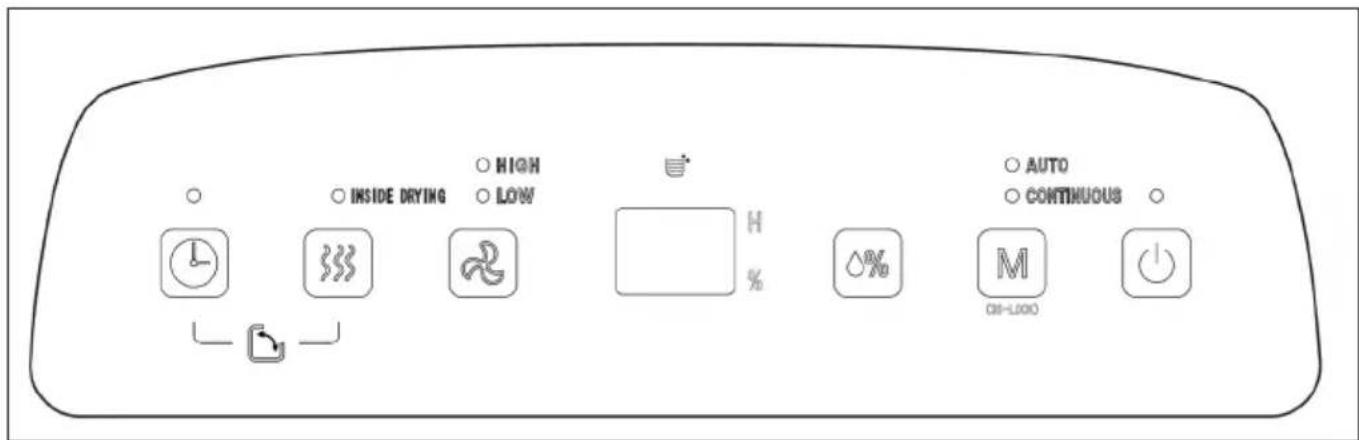
| Timer: 24 hours timing, press the key, to set the timing off or timing on, timing range is from 1 to 24hours, it will increase 1hour by each press. Press the key again, timing can be canceled. | |
| Internal drying function: press the key to start the inside drying function. | |
| Fan: In Auto dehumidifying and cloth dry mode, press this button to change fan speed, high-low-high. | |
| Display screen: In Auto dehumidifying or cloth dry mode, it will indicate the actual room humidity. In timing mode, it indicates the setting time. | |
| Humidity setting: In Auto dehumidifying mode, press the key to set humidity, humidity range is from 30% to 80%, it increases 5% by every press. | |
| M | Mode: When power on or timing power on, press this button to choose auto dehumidifying or continuous dehumidifying (dry cloth function). The lights will flash when choose the modes. Press MODE key for 3 seconds to lock/unlock the control panel. |
| On/Off: Press the key to turn on/turn off the unit. |
OPERATION AND FUNCTIONS
Timing off
When the dehumidifier is running, press "Timer" to start the function, then press "Humidity setting" button to set hours, timing range is from 1 to 24 hours, it will increase 1 hour by each press. When time is up to your setting, unit will turn off. After the setting is completed, if the Timer key does not act at all within 5s, the set time is confirmed.
Timing on
When the dehumidifier is in standby state, press "Timer" to start the function, then press "Humidity setting" button to set hours. When time is up to your setting, unit will turn on. After the setting is completed, if the Timer key does not act at all within 5s, the set time is confirmed.
Auto dehumidifying mode
Under this mode, if room humidity > setting humidity +5% , compressor will start, and fan will works; if room humidity setting humidity 5% , compressor will stops, fan will work according to the original setting; if setting humidity 5% room humidity setting humidity +5% , the unit will continue working according to the original settings. The initial humidity value is 50% .
Cloth dry mode
Under this mode, the unit will work regardless of the room humidity, compressor works, and fan will work from high speed, fan speed is adjustable.
Start Internal Drying Function
Press the [Drying key in dehumidifier] for over 2s to start drying in the dehumidifier, and the whole drying procedure needs approximate 1h. The dehumidifier starts at HIGH air speed and releases air continuously for 30min . The dehumidifier turns to run at LOW air speed and lasts for 15min .
Stop Internal Drying Function
To stop drying press the Drying button again to cancel and return to running state before the drying.
Air-swing function
Press the Timer button and the Drying button at the same time for more than 2 seconds to start or end the Air-swing function.
Drainage manually
When water tank is full, water-full indicator is on, the unit will stop working, and buzzer will sound 10 times till water is pour off.
- Place both hands respectively at the side of the back cover side of the depression, gently remove the water tank and open the tank cover on the right side of the body, then pour the water from the gap between water tank and the cover.
- Close the tank cover, and rotating water tank handle down, then put the water tank gently and put it back in the right place to restart dehumidifier.
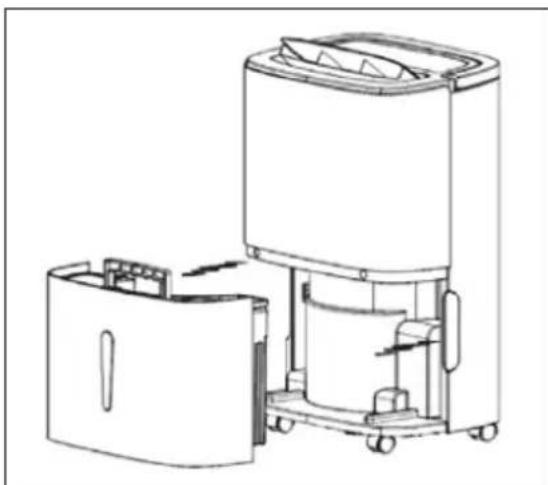
NOTE: Before putting in the water tank, please ensure the float is flexible.
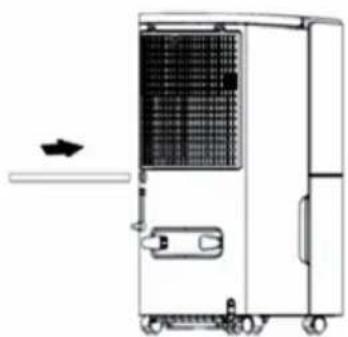
Continuous Drainage
If you do not want to drain water in the water tank frequently, you can connect a drainage pipe (with inner diameter 9mm) on the back of this dehumidifier to drain water, and this pipe shall be bought by the user.
NOTE: The drain hose is not included in the scope of supply!
Find the position where the water outlet is blocked on the back, as shown in figure below:
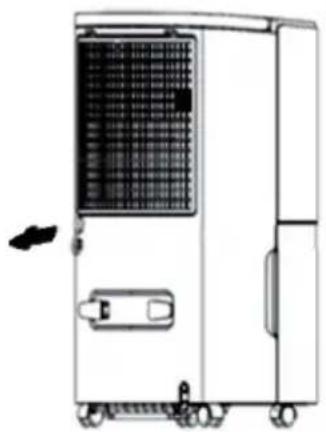
Pull down the water plug.
Connect a drainage pipe at proper length onto the water outlet.
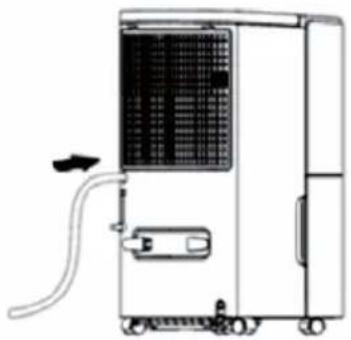
Before using please check whether the drainage pipe is connected firmly or not in case that water leaks.
ATTENTION: the level height of externally connected water pipe shall not be higher than the water outlet, and the water pipe at rear-end shall transit smoothly, otherwise, the leakage risk exists since drainage is not smooth.
CARE AND CLEANING
- Turn off this appliance and pull out plug before maintaining or repairing.
Pull out plug if dehumidifier is not used for long time - Please do not use benzene, alcohol, gasoline or other chemical reagent to clean unit.
| Clean the water tank with soft cloth. | Use wet cloth to clean appliance surface, do not use detergent or grinding sponge to damage surface. | Clean filter at least one time every two weeks. |
TROUBLESHOOTING
| Problem Possible | Cause Suggested Solution | |
| Unit doesn't work. | Is the power plug connected? Put the plug in the socket. | |
| Water tank is full or water tank is not assembled well. | Pour away the water in water-tank, and put water tank into the unit. | |
| Operation temperature is too low or too high | Use this dehumidifier under the environment 5-32°C. | |
| No outlet air. Operation temperature or humidity is too low. | Under dry environment, dehumidifying effect will be not so obvious. | |
| Is air outlet or air inlet blocked? | Clean the air outlet or air inlet. | |
| No outlet air. Is filter blocked? Clean the filters. | ||
| Water leakage. Drainage pipe is not tightly connected. | Check the drainage pipe. | |
| Pipe is blocked. Clean the debris in pipe. | ||
HINTS ON DISPOSAL

According to the European waste regulation 2012/19/EU this symbol on the product or on its packaging indicates that this product may not be treated as household waste. Instead it should be taken to the appropriate collection point for the recycling of electrical and electronic equipment. By ensuring this product is disposed of correctly, you will help prevent potential negative consequences for the environment and human health, which could otherwise be caused by inappropriate waste handling of this product. For more detailed information about recycling of this product, please contact your local council or your household waste disposal service.
Estimado cliente:

- CONTENTS
- TECHNICAL DATA
- DECLARATION OF CONFORMITY
- SAFETY INSTRUCTIONS
- Warnings
- Information for rooms with refrigerant pipes
- CAUTION
- INSTALLATION
- PRODUCT DESCRIPTION
- Front
- Back
- CONTROL PANEL AND KEYS
- OPERATION AND FUNCTIONS
- Timing off
- Timing on
- Auto dehumidifying mode
- Cloth dry mode
- Start Internal Drying Function
- Stop Internal Drying Function
- Air-swing function
- Drainage manually
- Continuous Drainage
- CARE AND CLEANING
- TROUBLESHOOTING
- HINTS ON DISPOSAL
- Estimado cliente:
Brand : Klarstein
Model : 10032042
Category : Dehumidifier