
10031664 - Waffle Maker Klarstein - Free user manual and instructions
Find the device manual for free 10031664 Klarstein in PDF.

| Product type | Waffle maker / Contact grill |
| Brand | Klarstein |
| Model | 10031664 |
| Article number | 10031664 |
| Power supply | 220-240 V ~ 50-60 Hz |
| Power | 1650-2000 W |
| Dimensions (H x W x D) | 130 mm x 365 mm x 400 mm |
| Weight | 4 kg |
| Plate material | Steel with non-stick coating |
| Non-stick coating | Yes |
| Removable plates | Yes, dishwasher safe |
| Drip tray | Removable and washable |
| Temperature control | From MIN to MAX, rotary knob |
| Indicator lights | Red (power) and green (temperature reached) |
| Open grill function | Yes, for single-surface cooking |
| Contact grill function | Yes, with floating lid |
| Floating lid | Yes, for varying thicknesses |
| Variable height adjustment | Yes, by movable spacer |
| Spacer | 3 positions: open, spaced, contact |
| Lid lock | Yes, for transport |
| Cable storage | Winder underneath the base |
| Cleaning the plates | Dishwasher or hand wash with soft sponge |
| Safety | Automatic shut-off not specified, cool handles |
Frequently Asked Questions - 10031664 Klarstein
User questions about 10031664 Klarstein
0 question about this device. Answer the ones you know or ask your own.
Ask a new question about this device
Download the instructions for your Waffle Maker in PDF format for free! Find your manual 10031664 - Klarstein and take your electronic device back in hand. On this page are published all the documents necessary for the use of your device. 10031664 by Klarstein.
USER MANUAL 10031664 Klarstein
Congratulations on purchasing this equipment. Please read this manual carefully and take care of the following hints to avoid damages. Any failure caused by ignoring the mentioned items and cautions mentioned in the instruction manual are not covered by our warranty and any liability.
Contents
Technical Data 10
Safety Instructions 10
Hints on Disposal 11
Product Description and Symbols 12
Before first Use 13
Use in Open Flat 13
Contact Grill and Height Control 14
Cooking Times and Food Safety 15
Cleaning and Care 16
Troubleshooting 17
Declaration of Conformity 17
Technical Data
| Item number 10031664 | |
| Power supply 220-240 V ~ 50-60 Hz | |
| Power consumption 1650-2000 W | |
| Dimensions (H x B x T) 130 mm x 365 mm x 400 mm | |
| Weight 4 kg |
Safety Instructions
- Please read these operating instructions thoroughly before first operating the grill and keep them in a safe place.
If you pass this appliance on to a third party, these operating instructions must also be handed over. - Incorrect operation and handling can lead to malfunction of the appliance and injures to user.
- This appliance is not suitable for commercial use or for use in the open air.
- Before inserting the plug into the mains socket, please check that the current and power supply comply with the specifications on the type plate.
- Disconnect the mains plug from the socket when the appliance is not in use and before cleaning.
CAUTION
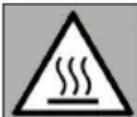
Risk of burns! Parts of the appliance become hot during use. Therefore, the appliance must only be held by the handle.
- Do not immerse the appliance or the mains plug in water or other liquids. There is danger to life due to electric shock!
- Children are unable to recognize the hazards associated with incorrect handling of electrical appliances. Therefore, children should never use electric household appliances unsupervised.
- Do not use the appliance if the mains cable or plug shows signs of damage, if the appliance has fallen on the floor or has otherwise been damaged. In such cases take the appliance to a authorized specialist for checking and repair
- Ensure that the mains cable is not hung over sharp edges and keep it away from hot objects and open flames.
- Ensure that the mains cable is not pressed between the baking plates or touch the baking plate edge in normal use
- Place the appliance on a stable, level surface and not dose to hot objects or open flames (e.g. hot plates).
- Never leave the appliance unattended during use.
- The temperature of accessible surfaces may be high when the appliance is operating.
- Bread may bum. Therefore roasters not used near or below curtains and combustible materials. They must be watched.
- This appliance is not intended for use by persons (including children) with reduced physical, sensory or mental capabilities, or lack of experience and knowledge, unless they have been given supervision or instruction concerning use of the appliance by a person responsible for their safety.
Children should be supervised to ensure that they do not play with the appliance. - If the supply cord is damaged, it must be replaced by the manufacturer, its service agent or similarly qualified persons in order to avoid a hazard.
- This appliance is not intended to be operated by means of an external timer or separate remote-control system.
Hints on Disposal
m = 311 ;
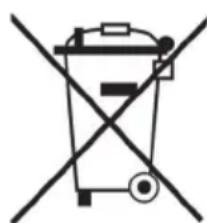
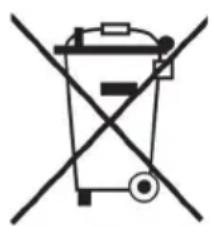
According to the European waste regulation 2012/19/EU this symbol on the product or on its packaging indicates that this product may not be treated as household waste. Instead it should be taken to the appropriate collection point for the recycling of electrical and electronic equipment. By ensuring this product is disposed of correctly, you will help prevent potential negative consequences for the environment and human health, which could otherwise be caused by inappropriate waste handling of this product. For more detailed information about recycling of this product, please contact your local council or your household waste disposal service.
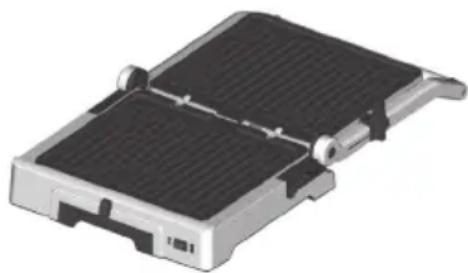
Product Description and Symbols
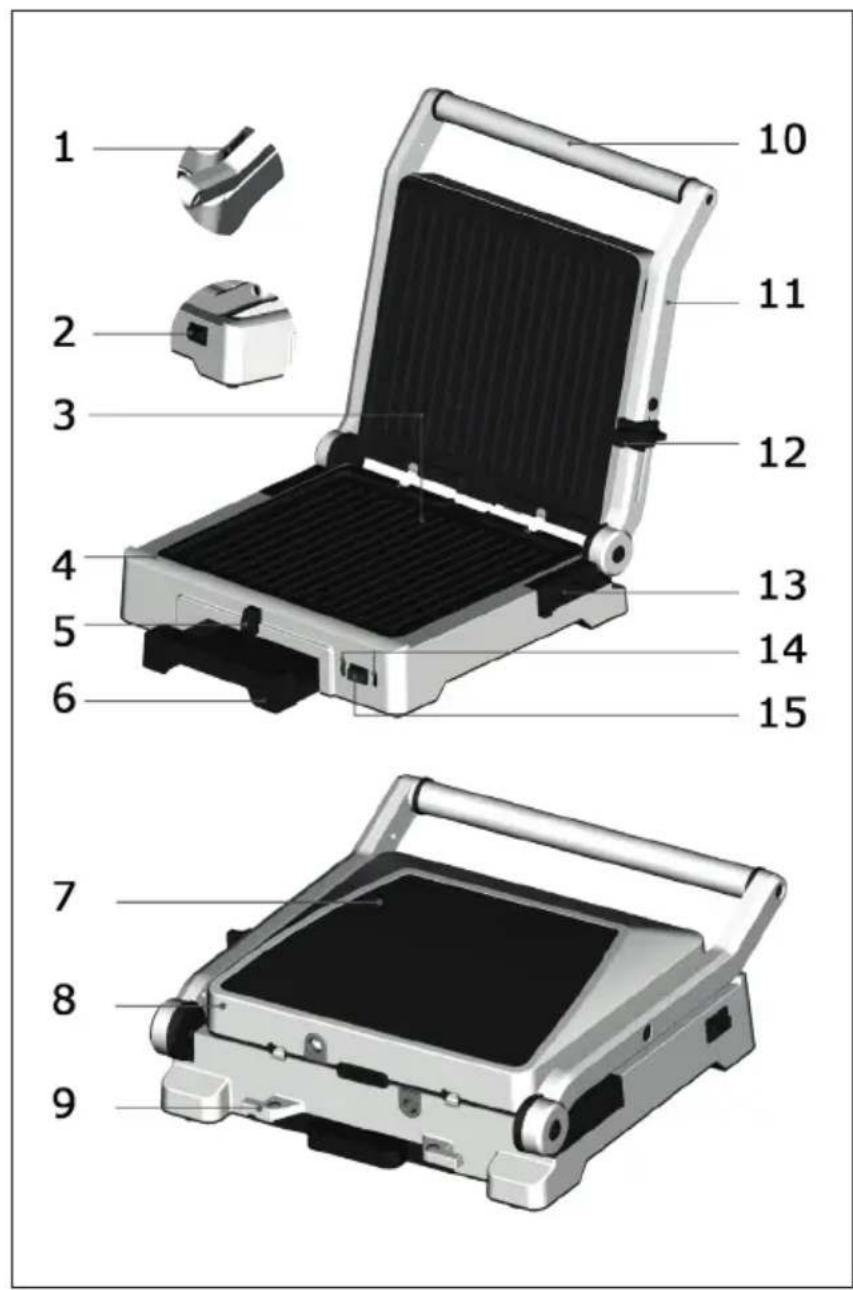
Part Description
1 Top Plate Release to remove the top cooking plate.
2 Bottom Plate Release to remove the bottom cooking plate.
3 Non-stick Cooking Plate
4 Bottom Housing
5 Temperature Knob
6 Removable Drip Tray
7 Decorative Cover
8 Top Housing
9 Cable Storage
10 Stainless Steel Brush
11 Arms
12 Lock Clip
13 Adjustable Height Settings
14 Green: Heat Indicator Light Red:Operation control light
15 On/Off Switch
Symbols on the Cover
| Open Grill | |
| Lock | |
| Unlock | |
| Connect Grill | |
| Heigh Setting |
Before first Use
1 Read these instructions before use and keep them safe. If you pass the grill on, pass on the instructions too.
2 Remove all packaging, but keep it until you are satisfied that the grill is working.
3 Clean the grill surfaces and drip tray with a soft damp cloth and then dry them.
4 Ensure the cooking plates are correctly inserted and securely locked into position.
5 Unwind the power cord completely and insert the power plug into a grounded wall outlet. The grill is now ready for the preheating cycle.
Use in Open Flat
Preparation
- Ensure the drip tray is correctly inserted into the grill.
- Ensure the cooking plates are correctly inserted and securely locked into position.
- Place the grill on a flat, dry surface.
Starting and Opening the Grill
- Unwind the power cord completely and insert the power plug into a grounded wall outlet
- Turn the temperature knob to adjust the temperature, and you can select the temperature from min to max, and then allow the grill to preheat.
- Once the grill has preheated to the selected temperature, the green indicator light illuminates.
How to open the Grill
- Ensure the grill has completely preheated and the green indicator light illuminate
- Ensure the top cooking plate is closed. The adjustable height control clip, located on the right side of the top plate, should be in the UNLOCK position
- With your left hand, grip the handle. With your right hand, pull the adjustable height control clip towards you, into the OPEN GRILL position. Continue to pull the clip forward and simultaneously lift the handle to open, and then gently lower the top plate into the horizontal position.
- Place food on either or both of the cooking plates.
- When the food is cooked, remove from the cooking plates using heat proof plastic or wooden utensils.
- When you are done, turn the unit off, unplug the appliance and allow the grill to cool down completely. Then remove the grill plates and the drip tray and clean the grill and all parts as described in the chapter CLEANING AND CARE.
Contact Grill and Height Control
Preparation
- Ensure the drip tray is correctly inserted into the grill.
- Ensure the cooking plates are correctly inserted and securely locked into position.
- Place the grill on a flat, dry surface.
Starting the Grill and Setting the Height
- Unwind the power cord completely and insert the power plug into a grounded wall outlet
- Turn the temperature knob to adjust the temperature, and you can select the temperature from min to max, and then allow the grill to preheat.
- Once the grill has preheated to the selected temperature, the green indicator light illuminates.
How to open the Grill
- Place food on the bottom cooking plate.
- Use the handle to close the top cooking plate .top cooking pate has two features designed to produce optimum cooking results:
Contact Grill with Floating Top Plate
The top cooking plate is hinged, allowing the top plate to be positioned horizontally on the food surface. This ensures the front of the food is as evenly cooked as the back. It also allows the top plate to float above the food surface, radiating heat to create open sandwich style melts.
- If you place only a few parts on the grill, place the food as centrally as possible or at the back of the grill.
- Lower the cover and slide the slider to the position CONTACT GRILL.
- Lower the lid until it disengages and then release it.
- When the food is finished open the lid and slide the slider to the position UNLOCK
- Remove the food and lower the lid completely until it snaps back into place.
| Adjustable Height Control | This feature reduces the weight of the top plate on delicate foods like fish and accommodates varying thicknesses of food like artisan breads. Located on the right side of the top plate, the clip fixes the top plate to a range of positions above the bottom plate. | |
| 1. If you place only a few parts on the grill, place the food as centrally as possible or at the back of the grill. 2. Lower the lid and slide the slider to the position HEIGHT SETTING Senken Sie den Deckel dann ab. 3. If the distance to the food is still too great, hold the handle and slide the slide step by step in direction to CONNECT GRILL the distance to the food is correct and the lid snaps out. 4. When the food is finished open the lid and slide the slider to the position UNLOCK 5. Remove the food and lower the lid completely until it snaps back into place. |
- When you are done, turn the unit off, unplug the appliance and allow the grill to cool down completely. Then remove the grill plates and the drip tray and clean the grill and all parts as described in the chapter CLEANING AND CARE.
IMPORTANT: Use only plastic or wood cooking utensils to remove the food. Otherwise, the non-stick coating may be damaged!
Cooking Times and Food Safety
Cooking Times
For fresh or fully defrosted foods. There will be about 2-3 minutes for reaching the working temperature, then the cooking time is about 5-6 minutes.
- When cooking frozen foods, add 2-3 minutes.
- For seafood, meat and poultry add 3-6 minutes.
These times are given purely as a guide, depending on the thickness of cut, and the density of the food.
Food Safety
- Check that it's cooked through before serving. If in doubt, cook it a bit more.
Cook meat, poultry, and any derivatives like mince or burgers until the juices run clear.
Cook fish until the flesh is opaque throughout. - When cooking pre-packed foods, follow any guidelines printed on the packaging or labels.
Cleaning and Care
Before you clean the unit
- Firstly, ensure the grill is turned off, and then remove the power plug from the wall outlet.
- Only clean when the appliance has completely cooled down.
Cleaning the outer body
- Wipe the outer body with a soft, damp sponge.
- Let all surface dry thoroughly prior to inserting the power plug into a wall outlet.
Cleaning the drip tray
After each use, slide out the drip tray and discard contents.
- Wash the tray in warm soapy water with a soft, damp sponge.
- Rinse and dry thoroughly. Always ensure to re-insert the drip tray into the grill.
Cleaning the cooking plates
- Wipe the cooking plates with a soft cloth to remove food residue.
- Release and remove the cooking plates. Always ensure the grill is completely cool.
- Alternatively, place the cooking plates in the dishwasher.
- Alternatively, wash the cooking plates in hot soapy water with a soft, damp sponge.
- Rinse and dry thoroughly. Always ensure the cooking plates are correctly re-insert and securely locked back into position after cleaning and prior to inserting the power plug into a wall outlet.
Storage
- ensure the grill, cooking plates and grip tray are clean and dry, the drip tray is correctly re-inserted into the grill, the cooking plates are correctly re-inserted and securely locked into position.
- The cooking plates are locked together by sliding the Adjustable Height Control clip to the LOCK position .
- Wrap the power cord in the cord storage located on the back of the grill.
IMPORTANT:
Do not immerse the appliance in water of other liquids. There is danger to life due to electric shock.
Troubleshooting
| Problem Possible Cause Solution | ||
| The operation indicator light does not light even though the unit is switched on. | The plug has not been inserted. Plug the plug into the socket. | |
| The fuse is loose or broken. Check the fuse in your fuse box and replace if necessary. | ||
| The socket is broken. Try a different outlet. | ||
| It comes to a short circuit. There are too many devices connected to the electrical outlet. | Do not plug the unit into any outlet that other devices are already connected to. | |
| Oil is running out of the device. | The drip tray was not inserted correctly or incorrectly. | Insert the drip tray correctly. |
| The drip tray is full. Switch the device off, remove the drip tray and empty it. | ||
| The device can not be folded over completely. | The slider was released during flipping. | Pull the slider all the way to the front and hold it while you fold the lid completely. Do not release the slide. |
Declaration of Conformity

Producer: Chal-Tec GmbH, Wallstraße 16, 10179 Berlin, Germany.
This product is conform to the following European Directives:
2014/30/EU (EMC)
2014/35/EU (LVD)
2011/65/EU (RoHS)
Estimado cliente:
m = 311 ;

- Contents
- Technical Data
- Safety Instructions
- CAUTION
- Hints on Disposal
- Product Description and Symbols
- Part Description
- Symbols on the Cover
- Before first Use
- Use in Open Flat
- Preparation
- Starting and Opening the Grill
- How to open the Grill
- Contact Grill and Height Control
- Starting the Grill and Setting the Height
- Contact Grill with Floating Top Plate
- Cooking Times and Food Safety
- Cooking Times
- Food Safety
- Cleaning and Care
- Before you clean the unit
- Cleaning the outer body
- Cleaning the drip tray
- Cleaning the cooking plates
- Storage
- Troubleshooting
- Declaration of Conformity
- Estimado cliente:
Brand : Klarstein
Model : 10031664
Category : Waffle Maker