USER MANUAL MZ-DH10P SONY
Portable Memory Stick Audio Player/
Portable MiniDisc Recorder/
Portable CD Player/
Portable IC Audio Player/
Portable Hard Disk Audio Player
Portable Audio
LIMITED WARRANTY
Sony Electronics Inc. ("Sony") warrants this Product (including any accessories) against defects in material or workmanship as follows:
- LABOR: For a period of 90 days from the date of purchase, if this Product is determined to be defective, Sony will repair or replace the Product, at its option, at no charge, or pay the labor charges to any Sony authorized service facility. After the Warranty Period, you must pay for all labor charges.
- PARTS: In addition, Sony will supply, at no charge, new or rebuilt replacements in exchange for defective parts for a period of one (1) year. After 90 days from the date of purchase, labor for removal and installation is available from Sony authorized service facilities or a Sony Service Center at your expense.
To obtain warranty service, you must take the Product, or deliver the Product freight prepaid, in either its original packaging or packaging affording an equal degree of protection, to any authorized Sony service facility.
This warranty does not cover customer instruction, installation, set up adjustments or signal reception problems.
This warranty does not cover cosmetic damage or damage due to acts of God, accident, misuse, abuse, negligence, commercial use, or modification of, or to any part of the Product, including the antenna. This warranty does not cover damage due to improper operation or maintenance, connection to improper voltage supply, or attempted repair by anyone other than a facility authorized by Sony to service the Product. This warranty does not cover Products sold AS IS or WITH ALL FAULTS, or consumables (such as fuses or batteries). This warranty is valid only in the United States.
Proof of purchase in the form of a bill of sale or receipted invoice which is evidence that the unit is within the Warranty period must be presented to obtain warranty service.
This warranty is invalid if the factory applied serial number has been altered or removed from the Product.
REPAIR OR REPLACEMENT AS PROVIDED UNDER THIS WARRANTY IS THE EXCLUSIVE REMEDY OF THE CONSUMER, SONY SHALL NOT BE LIABLE FOR ANY INCIDENTAL OR CONSEQUENTIAL DAMAGES FOR BREACH OF ANY EXPRESS OR IMPLIED WARRANTY ON THIS PRODUCT. EXCEPT TO THE EXTENT PROHIBITED BY APPLICABLE LAW, ANY IMPLIED WARRANTY OF MERCHANTABILITY OR FITNESS FOR A PARTICULAR PURPOSE ON THIS PRODUCT IS LIMITED IN DURATION TO THE DURATION OF THIS WARRANTY.
Some states do not allow the exclusion or limitation of incidental or consequential damages, or allow limitations on how long an implied warranty lasts, so the above limitations or exclusions may not apply to you. In addition, if you enter into a service contract with the Sony Partnership within 90 days of the date of sale, the limitation on how long an implied warranty lasts does not apply to you. This warranty gives you specific legal rights, and you may have other rights which vary from state to state.
For your convenience, Sony Electronics Inc. has established telephone numbers for frequently asked questions:
To locate the servicer or dealer nearest you, or for service assistance or resolution of a service problem, or for product information or operation, contact:
www.sony.com/walkmansupport
Sony Network Portable Audio Support Line
1-866-456-7669
For an accessory or part not available from your authorized dealer, call:
1-800-488-SONY (7669)
D 324343304
Hi-MD Walkman
Portable
MD Player

Hi-MD
AUDIO
Hi-MD
PHOTO

NetMD
MDLP
"WALKMAN" is a registered trademark of Sony
Corporation to represent Headphone Stereo products.

WALKMAN is a trademark of Sony Corporation.
WARNING
To prevent fire or shock hazard, do not expose the unit to rain or moisture.
Do not install the appliance in a confined space, such as a bookcase or built-in cabinet.
To prevent fire, do not cover the ventilation of the apparatus with newspapers, tablecloths, curtains, etc. And don't place lighted candles on the apparatus.
To prevent fire or shock hazard, do not place objects filled with liquids, such as vases, on the apparatus.
Certain countries may regulate disposal of the battery used to power this product. Please consult with your local authority.
Caution
The use of optical instruments with this product will increase eye hazard.
CAUTION – INVISIBLE LASER
RADIATION WHEN OPEN
AVOID EXPOSURE TO BEAM
CAUTION – CLASS 1M INVISIBLE
LASER RADIATION WHEN OPEN
DO NOT VIEW DIRECTLY WITH
OPTICAL INSTRUMENTS
IN NO EVENT SHALL SELLER BE LIABLE FOR ANY DIRECT, INCIDENTAL OR CONSEQUENTIAL DAMAGES OF ANY NATURE, OR LOSSES OR EXPENSES RESULTING FROM ANY DEFECTIVE PRODUCT OR THE USE OF ANY PRODUCT.
For customers who purchased this product in the USA
Owner's Record
The serial number is located at the rear of the disc compartment lid and the model number is located at the side.
Record the serial number in the space provided below. Refer to them whenever you call upon your Sony dealer regarding this product.
Model No. MZ-DH10P
Serial No
Product registration
Please register this product on line at www.sony.com/walkmanreg
http://www.sony.com/walkmanreg
Proper registration will enable us to send you periodic mailings about software upgrades, new products, services and other important announcements. Thank you.
If you have any questions about this product, contact:
www.sony.com/walkmansupport
Sony Network Portable Audio Support Line
1-(866)-456-7669
Sony Customer Information Services Center
12451 Gateway Blvd., Ft. Myers, FL 33913
Trade Name: SONY
Model No.: MZ-DH10P
Responsible Party: Sony Electronics Inc.
Address: 16450 W. Bernardo Dr, San
Diego, CA 92127 USA
Telephone No.: 858-942-2230
This device complies with Part 15 of the FCC Rules. Operation is subject to the following two conditions: (1) This device may not cause harmful interference, and (2) this device must accept any interference received, including interference that may cause undesired operation.
This equipment has been tested and found to comply with the limits for a Class B digital device, pursuant to Part 15 of the FCC Rules. These limits are designed to provide reasonable protection against harmful interference in a residential installation. This equipment generates, uses, and can radiate radio frequency energy and, if not installed and used in accordance with the instructions, may cause harmful interference to radio communications. However, there is no guarantee that interference will not occur in a particular installation. If this equipment does cause harmful interference to radio or television reception, which can be determined by turning the equipment off and on, the user is encouraged to try to correct the interference by one or more of the following measures:
– Reorient or relocate the receiving antenna.
- Increase the separation between the equipment and receiver.
- Connect the equipment into an outlet on a circuit different from that to which the receiver is connected.
- Consult the dealer or an experienced radio/TV technician for help.
You are cautioned that any changes or modifications not expressly approved in this manual could void your authority to operate this equipment.
RECYCLING LITHIUM-ION BATTERIES
Lithium-ion batteries are recyclable.
You can help preserve our environment by returning your used rechargeable batteries to the collection and recycling location nearest you.
For more information regarding recycling of rechargeable batteries, call toll free 1-800-822-8837, or visit http://www.rbrc.org/
Caution: Do not handle damaged or leaking Lithium-ion batteries.

The validity of the CE marking is restricted to only those countries where it is legally enforced, mainly in the countries EEA (European Economic Area).
Disposal of Old Electrical & Electronic Equipment (Applicable in the European Union and other European countries with separate collection systems)

This symbol on the product or on its packaging indicates that this product shall not be treated as household waste. Instead it shall be handed over to the applicable collection point for
the recycling of electrical and electronic equipment. By ensuring this product is disposed of correctly, you will help prevent potential negative consequences for the environment and human health, which could otherwise be caused by inappropriate waste handling of this product. The recycling of materials will help to conserve natural resources. For more detailed information about recycling of this product, please contact your local city office, your household waste disposal service or the shop where you purchased the product.
Applicable accessories: Remote control, Earphones
About the supplied manuals
Please refer to the following manual, and use that suits your need.
To find out how to operate the player When you have trouble operating the player
→ “Operating Instructions” (“Player Operation” of this book)

When you want to know the features of Hi-MD Walkman
→ “What you can do with the Hi-MD Walkman”

About the supplied softwares (SonicStage/ MD Simple Burner)
To find out how to transfer audio data When you have trouble doing this
→ “Operating Instructions” (“Software Operation” of this book)
→ “SonicStage Help”

Table of Contents
Notice for Users 6
Enjoying the Music and Camera Features....8
Player Operation
Getting Started
Checking the Supplied Accessories ... 10
Guide to Parts and Controls.... 12
Preparing a Power Source .... 14
Setting the Clock....17
Transferring Audio Data from Your Computer
→ “Software Operation”
Listening to Music
Listening to Music 18
Display When Listening to Music ...... 21
Searching for a Music Track...... 23
Viewing Still images
While Listening to Music ....23
Shooting/Viewing Still Images
Hi-MD mode
Shooting Still Images 24
Shooting a cover art....26
Viewing Still Images 28
Display When Shooting/
Viewing Still Images .... 29
Functions When Shooting/ Viewing Still Images .... 30
Using the zoom feature....31
Using the self-timer 31
Selecting a flash mode 31
Shooting close-ups (Macro) ...... 32
Checking the last image you shot in the shooting mode (Quick Review)....32
Viewing an index screen
(Nine-image screen)....32
Enlarging a portion of a still image (Playback zoom)....32
Playing back successive still images (Slide Show)....33
Listening to selected tracks only (Bookmark Play) 39
Listening to a section of a track repeatedly (A-B Repeat)....39
Customizing sound quality (Custom) (except European model)....40
Setting a still image as the music cover art (Cover art setting)....41
Viewing a JPEG file image
(JPEG Viewer) 46
Storing Non-Audio Data Connecting to Your Computer Hi-MD mode
Connecting the Player to Your Computer....47
Copying Still images to Your Computer 49
Storing Non-audio Data to a Disc ..... 51
Troubleshooting
Troubleshooting....52
Messages....58
Precautions....60
Specification....64
Glossary 66
Index for "Player Operation" 68
Continued
Instructions in this manual mainly describe the controls on the player. Hi-MD _mode means that the functions can be used in Hi-MD mode only.
Software Operation
What you can do with SonicStage/MD Simple Burner
Installing
Providing the required system environment....72
Installing the software onto your computer....73
Using SonicStage
Importing audio data 75
Transferring audio data from your computer to the MD Walkman....77
Transferring back audio data from the MD Walkman to your computer.....79
Writing audio data to a CD-R/
CD-RW disc 82
Using SonicStage Help 84
Referring to SonicStage Help...... 86
Using MD Simple Burner
Before using MD Simple Burner ..... 88
Recording using MD Walkman operations (Simple mode) 89
Recording by computer operations (Standard mode) 91
Uninstalling SonicStage/MD Simple Burner 92
On copyright protection 93
Troubleshooting....94
Index for "Software Operation" 97
Notice for Users
On the supplied software
- Copyright laws prohibit reproducing the software or the manual accompanying it in whole or in part, or renting the software without the permission of the copyright
- In no event will SONY be liable for any financial damage, or loss of profits, including claims made by third parties, arising out of the use of the software supplied with this player.
- In the event a problem occurs with this software as a result of defective manufacturing, SONY will replace it. However, SONY bears no other responsibility.
- The software provided with this player cannot be used with equipment other than that which is so designated.
- Please note that, due to continued efforts to improve quality, the software specifications may be changed without notice.
- Operation of this player with software other than that provided is not covered by the warranty.
- The ability to display the languages on the software will depend on the installed OS on your PC. For better results, please ensure that the installed OS is compatible with the desired language you want to display.
- We do not guarantee all the languages will be able to be displayed properly on the software.
- User-created characters and some special characters may not be displayed.
- Depending on the type of the text and characters, the text shown on the software may not be displayed properly on the device. This is due to:
– The capability of the connected device.
– The device is not functioning normally.
Trial recording
Before you record one-time events, you may want to make a trial recording to make sure that the player is working correctly.
No compensation for contents of the recording
Contents of the recording such as still images and audio data cannot be compensated for if recording or playback is not possible due to a malfunction of this player or recording media, etc.
Notes on image data compatibility
- This player conforms with the Design rule for Camera File system universal standard established by the JEITA (Japan Electronics and Information Technology Industries Association).
- Playback of still images recorded with this player on other equipment and playback of still images recorded or edited with other equipment on this player are not guaranteed.
Precaution on copyright
- Television programs, films, video tapes, and other materials may be copyrighted. Unauthorized recording of such materials may be contrary to the provision of the copyright laws.
- Unauthorized transferring of image files may be contrary to the provisions of copyright laws.
Trademarks
- SonicStage is trademark or registered trademark of Sony Corporation.
- MD Simple Burner, OpenMG, “MagicGate”, “MagicGate Memory Stick”, “Memory Stick”, Hi-MD, Net MD, ATRAC, ATRAC3, ATRAC3plus and their logos are trademarks of Sony Corporation.
- Microsoft, Windows, Windows NT and Windows Media are trademarks or registered trademarks of Microsoft Corporation in the United States and /or other countries.
- IBM and PC/AT are registered trademarks of International Business Machines Corporation.
• Macintosh is a trademark of Apple Computer, Inc. in the United States and/or other countries.
- Pentium is a trademark or registered trademark of Intel Corporation.
- All other trademarks and registered trademarks are trademarks or registered trademarks of their respective holders.
- ^TM and ^® marks are omitted in this manual.
- CD and music-related data from Gracenote, Inc., copyright © 2000-2004 Gracenote. Gracenote CDDB® Client Software, copyright 2000-2004 Gracenote. This product and service may practice one or more of the following U.S. Patents: #5,987,525; #6,061,680; #6,154,773, #6,161,132, #6,230,192, #6,230,207, #6,240,459, #6,330,593, and other patents issued or pending. Services supplied and/or device manufactured under license for following Open Globe, Inc. United States Patent 6,304,523. Gracenote is a registered trademarks of Gracenote. The Gracenote logo and logotype, and the “Powered by Gracenote” logo are trademarks of Gracenote.
Program © 2001, 2002, 2003, 2004, 2005
Sony Corporation
Documentation © 2005 Sony Corporation
Enjoying the Music and Camera Features
In addition to playing music, you can shoot still images and save them in the disc when using this player in Hi-MD mode. For details about the disc mode (Hi-MD/MD mode), see page 67.

Enjoying Music
You can transfer audio data from your computer.
Install the supplied software (SonicStage/MD Simple Burner) in your computer (see “Software Operation” of this book).
SonicStage
SonicStage allows you to import audio data and a cover art to your computer from music sources such as audio CDs and the Internet, and then transfer the audio data stored in your computer to a disc.
MD Simple Burner
MD Simple Burner allows you to record music tracks onto a disc directly from an audio CD in the CD drive of your computer, without first recording the music tracks on the computer's hard disc.

natural_image
Illustration of a person using a computer with a magnifying glass (no text or symbols visible)
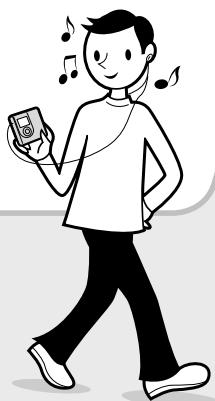
You can also play a 60/74/80-minute standard discs. When using a disc in Hi-MD mode, you can shoot a still image for a cover art and set it as the cover art of the music group. And also you can search for the desired music group by a cover art ( page 23).
natural_image
Illustration of a person walking while holding a smartphone with musical notes floating around (no text or symbols)

Enjoying music and an image together
Hi-MD mode
You can shoot an image and enjoy it as a cover art together with the music.
Shoot a still image ( page 26).

natural_image
Illustration of a hand holding a camera with a violin nearby (no text or symbols)
Set the still image as the music cover art ( page 26, 41).

natural_image
Abstract graphic with a violin, dot pattern, and musical notes (no text or symbols)
You can view the cover art while listening to the music ( page 22, 23).
You can also search for the desired music group by a cover art ( page 23).
natural_image
Illustration of a person playing a violin while holding a radio, with musical notes floating nearby (no text or symbols)
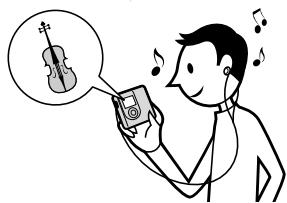
You can play back still images while listening to music.
See page 23.

natural_image
Illustration of a film strip with four cartoon icons: tree, violin, baby, and child waving (no text or symbols)
Let's start!
Checking the Supplied Accessories
- AC power adaptor

natural_image
Line drawing of a connected cable and plug with a rectangular device (no text or symbols)
- Remote control ^1)

natural_image
Line drawing of a handheld electric toothbrush with attached cable (no text or symbols)
- USB cradle

natural_image
Line drawing of a cylindrical electronic device with a flat top and internal components (no text or symbols)
- Earphones

• Dedicated USB cable ^2)

natural_image
Illustration of a coiled cable with connectors and connectors (no text or symbols)
• LIP-4WM Lithium-ion rechargeable battery

• Rechargeable battery case

- Carrying pouch
- Ferrite core (for the remote cord, European model only)
- CD-ROM ^3) (SonicStage/MD Simple Burner)
- Operating Instructions
1) For USA model, remote control with a ferrite core is supplied.
2) For China and Tourist models, the ferrite core is not attached to the dedicated USB cable.
3) Do not play a CD-ROM on an audio CD player.
Note
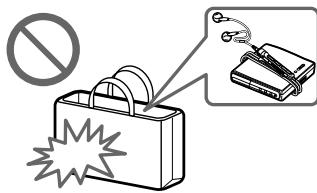
When using this player, remember to follow the precautions below in order to avoid warping the cabinet or causing the player to malfunction.
- Make sure not to sit down with the player in your back pocket.

- Make sure not to put the player into a bag with the remote or the headphones/earphones cord wrapped around it and then subject the bag to strong impact.
How to use the supplied ferrite core (European model only)
The ferrite core is supplied with this player. Make sure to attach the ferrite core in the way described below. (You must attach a ferrite core to comply with the applicable EMC standards.)
When the player with the remote is connected to your computer, make sure to attach the ferrite core to the remote cord in the way described following. When the player is not connected to your computer, attaching the ferrite core is not necessary.
1 Open the ferrite core.

2 Wind the cord around the ferrite core once.

3 Close the ferrite core. Make sure the clasps are fully engaged.

Optional accessories
- MDR-series Stereo Headphones/earphones*
• SRS-series Active Speakers
• Recordable MDs ES-series
• 1GB Hi-MD disc HMD1G
• LIP-4WM Lithium-ion rechargeable battery
- MCMD-R1 dedicated memory card reader for Hi-MD Walkman
* When using optional headphones/earphones, use only headphones/earphones with stereo mini plugs. You cannot use headphones/earphones with micro plugs.
You cannot use as follows.
• Rotally commander RM-WMC1
• MD label printer MZP-1
- IC memory repeat learning MD controller RPT-M1
Your dealer may not handle some of the above listed accessories. Please ask the dealer for detailed information about the accessories in your country.
Guide to Parts and Controls
Player
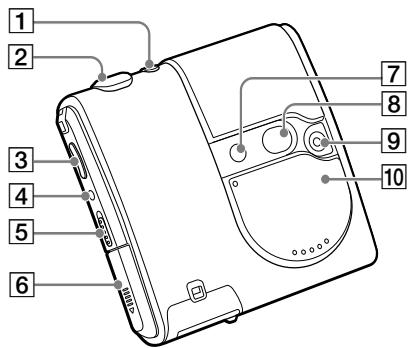

Remote

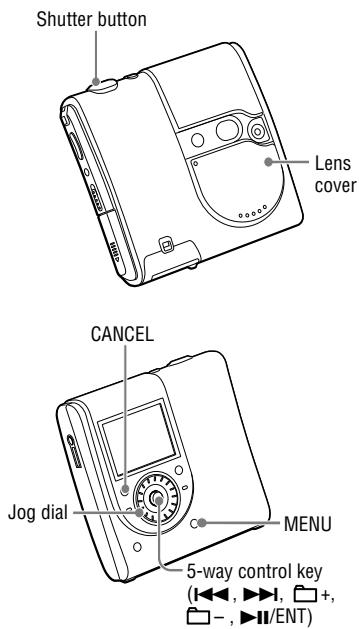
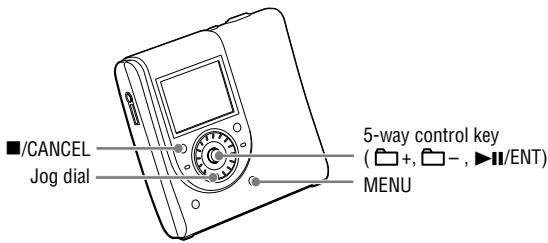
1 / (shooting/viewing) button (page 24)
2 Shutter button ( page 25)
3 Player: VOL +1)/- buttons ( page 18)
Remote: VOL +/- control ( page 19)
4 DOWNLOAD ^2) button
5 HOLD switch (page 19)
6 Battery compartment
7 Flash
8 Mirror
9 Lens
10 Lens cover (AUDIO/PHOTO) ^3)
11 Ⓞ (earphones) jack ( page 18)
12 CHG lamp ( page 14)
13 Player: ■(stop)/CANCEL button ( page 20)
Remote: ■(stop) button ( page 20)
14 Jog dial
15 • DISPLAY/ • SLIDE SHOW button
( page 22, 23, 33)
16 OPEN switch ( page 18)
17 Display
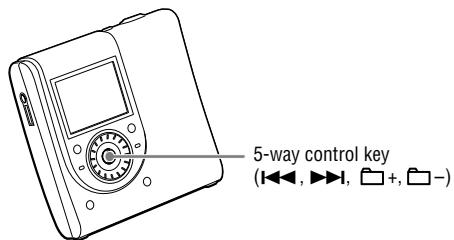
18 Player: 5-way control key
(◀◀, ▶▶▶/ENT ^1 ), ▶▶▶, □+, □−)

flowchart
graph TD
    A[" "] --> B["ENT"]
    C[" "] --> B["ENT"]
    D[" "] --> B["ENT"]
    E[" "] --> B["ENT"]
    F[" "] --> B["ENT"]
    G[" "] --> B["ENT"]
    H[" "] --> B["ENT"]
    I[" "] --> B["ENT"]
    J[" "] --> B["ENT"]
    K[" "] --> B["ENT"]
    L[" "] --> B["ENT"]
    M[" "] --> B["ENT"]
    N[" "] --> B["ENT"]
    O[" "] --> B["ENT"]
    P[" "] --> B["ENT"]
    Q[" "] --> B["ENT"]
    R[" "] --> B["ENT"]
    S[" "] --> B["ENT"]
    T[" "] --> B["ENT"]
    U[" "] --> B["ENT"]
    V[" "] --> B["ENT"]
    W[" "] --> B["ENT"]
    X[" "] --> B["ENT"]
    Y[" "] --> B["ENT"]
    Z[" "] --> B["ENT"]
    AA[" "] --> B["ENT"]
    AB[" "] --> B["ENT"]
    AC[" "] --> B["ENT"]
    AD[" "] --> B["ENT"]
    AE[" "] --> B["ENT"]
    AF[" "] --> B["ENT"]
    AG[" "] --> B["ENT"]
    AH[" "] --> B["ENT"]
    AI[" "] --> B["ENT"]
    AJ[" "] --> B["ENT"]
    AK[" "] --> B["ENT"]
    AL[" "] --> B["ENT"]
    AM[" "] --> B["ENT"]
    AN[" "] --> B["ENT"]
    AO[" "] --> B["ENT"]
    AP[" "] --> B["ENT"]
    AQ[" "] --> B["ENT"]
    AR[" "] --> B["ENT"]
    AS[" "] --> B["ENT"]
    AT[" "] --> B["ENT"]
    AU[" "] --> B["ENT"]
    AV[" "] --> B["ENT"]
    AW[" "] --> B["ENT"]
    AX[" "] --> B["ENT"]
    AY[" "] --> B
    AZ[" "] --> B
    BA[" "] --> B
    BB[" "] --> B
    BC[" "] --> B
    BD[" "] --> B
    BE[" "] --> B
    BF[" "] --> B
    BG[" "] --> B
    BH[" "] --> B
    BI[" "] --> B
    BJ[" "] --> B
    BK[" "] --> B
    BL[" "] --> B
    BM[" "] --> B
    BN[" "] --> B
    BO[" "] --> B
    BP[" "] --> B
    BPB[" "] --> BA
    BPBb["B"] --> BA
    BPBb["B"] --> BA
    BPB["C"] --> BA
    BPB["C"] --> BA
    BPB["C"] --> BA
    BPB["C"] --> BA
    BPB["C"] --> BA
    BPB["C"] --> BA
    BPB["C"] --> BA
    BPB["C"] --> BA
    BPB["C"] --> BA
    BPB["C"] --> BA
    BPB["C"] --> BA
    BPB["C"] --> BA
    BPB["C"] --> BA
Remote: ▶■ button ( page 19)
19 ✗ SEARCH button ( page 23)
20 OPR lamp ( page 48)
21 MENU button ( page 34)
22 Connector for the USB cradle
23 Clip
24 (group) +/- button ( page 20)
25 ◀◀◀/▶▶▶ button ( page 20)
1) There is tactile dot.
2) To read music tracks onto a disc directly from an audio CD in the CD drive of your computer using MD Simple Burner, use this button (page 88).
3) When the lens cover is closed, the player is in the music mode. When the lens cover is open, the player is in the shooting mode or in the viewing mode.
Note
When shooting and viewing still images, you cannot use the remote.
Locking the controls (HOLD)
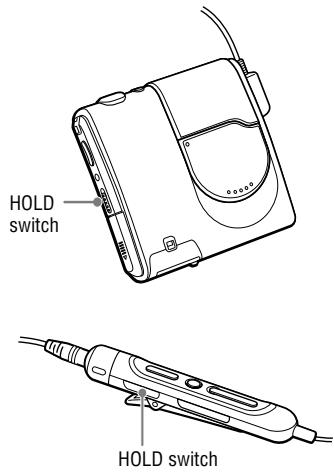
Slide the HOLD switch on the player or on the remote in the direction of the arrow. You can prevent accidental button presses while carrying the player by locking the controls. You can use the HOLD function for the player and the remote separately. For example, even if the HOLD function on the player is activated, you can operate the player by using the remote unless you set HOLD on the remote to on, too.
Preparing a Power Source
Charge the rechargeable battery before using it for the first time or when it is depleted. To maintain the original battery capacity longer, charge the battery only when it is completely depleted.
Since the supplied USB cradle is for this player only, you cannot charge other model using this cradle.
Operations can be done on the player or the remote while charging.
1 Slide and open the battery compartment lid in the direction of the arrow.

natural_image
Line drawing of a device rear panel with ports and connectors (no text or symbols)
2 Insert the rechargeable battery.
Insert it starting with the ⊕ and ⊖ terminal end and with the label side facing front

3 Close the lid.

natural_image
Line drawing of a device rear panel with ports and connectors (no text or symbols)
4 Connect the AC power adaptor to the USB cradle and the AC power adaptor to a wall outlet.

5 Place the player on the USB cradle and push it in firmly.
6 Make sure that the CHG lamp on the player lights up.
Charging of the battery starts.
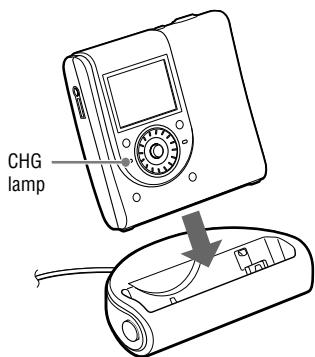
When the battery is completely charged, the CHG lamp goes off.
If the battery is completely drained at the start of charging, it will take about one hour for the CHG lamp to go off and the battery to become sufficiently charged to allow use of the player. When the CHG lamp goes off, the battery is charged up to 80%. After 2 more hours of charging, the battery will be fully charged.
If the CHG lamp turns off after a short time, the rechargeable battery is sufficiently charged.
When using the player powered by the AC power source
You can use the player without draining the rechargeable battery.
1 Connect the AC power adaptor to the USB cradle and the AC power adaptor to a wall outlet.
2 Place the player on the USB cradle and push it in firmly.
To remove the player from the USB cradle
Press RELEASE.

For models supplied with the AC plug adaptor
If the AC power adaptor does not fit the wall outlet, use the AC plug adaptor.
Notes
- Because of the battery's characteristics, the capacity of the rechargeable battery may be smaller than normal when it is used for the first time or after a long period of disuse. In this case, charge and discharge the battery several times. The normal battery life will be restored.
- Charge the rechargeable battery at a temperature of +5^ (+41^) to +35^ (+95^) . The charging time may vary according to the surrounding temperature.
- Stop the player before replacing the rechargeable battery.
- You cannot charge the rechargeable battery in the shooting mode.
To check the remaining power of the battery
The remaining power of the battery is indicated in the display as shown below. As the black indicator section decreases, the remaining power is depleted further.

When the battery is depleted, charge the rechargeable battery.
Notes
- The display shows the approximate battery power remaining. For example, one section does not always indicate one-fourth of the battery power.
- Depending on the operating conditions, the display may increase or decrease relative to the actual power remaining.
Continued
Battery life ^1)
This value varies depending on how the player is used.
When listening to music (hour) (Approx.)
| Hi-MD mode | Linear PCM | Hi-SP | Hi-LP | MP3 ^2) |
| 1GB Hi-MD disc | 8.5 | 12 | 14 | 13 |
| 60/74/80-minute standard disc | 7 | 11.5 | 14 | 12.5 |
| MD mode | SP | LP2 | LP4 |
| 60/74/80-minute standard disc | 13 | 14 | 14.5 |
Measured in accordance with the JEITA (Japan Electronics and Information Technology Industries Association) standard.
1) When using a 100% fully charged lithium-ion rechargeable battery
2) When transferring at 128kbps
When viewing still images while listening to music in the slide show (hour) (Approx.)
| Hi-MD mode | Linear PCM | Hi-SP | Hi-LP | MP3 ^2) |
| 1GB Hi-MD disc | 1.75 | 2 | 2 | 2 |
| 60/74/80-minute standard disc | 1.75 | 2 | 2 | 2 |
Measured in accordance with the JEITA (Japan Electronics and Information Technology Industries Association) standard.
When shooting still images (Approx.) ^3)
| Image size | Number of still images |
| 1GB Hi-MD disc | 110 |
| 60/74/80-minute standard disc | 100 |
Measured in accordance with the CIPA (Camera & Imaging Products Association) standard.
3) Shooting in the following situations:
– Shooting one time every 30 seconds
– The flash strobes once every two times
– The power turns on and off once every ten times
– The image size is 1.3M Fine
When viewing still images (hour) (Approx.) ^4
| Image size | Battery life |
| 1GB Hi-MD disc | 1 |
| 60/74/80-minute standard disc | 1 |
Measured in accordance with the CIPA (Camera & Imaging Products Association) standard.
4) Viewing single still images in order at about 5-second intervals
Note
• Leaving the display on continuously, the battery life reduces significantly.
- The number of still images when shooting still images may differ depending on the shooting conditions.
Setting the Clock
If you have set the clock, the date and time that the image was shot will be saved. If the player is connected to your computer while SonicStage is activated, the data and time of your computer is automatically transferred to the clock of the player.
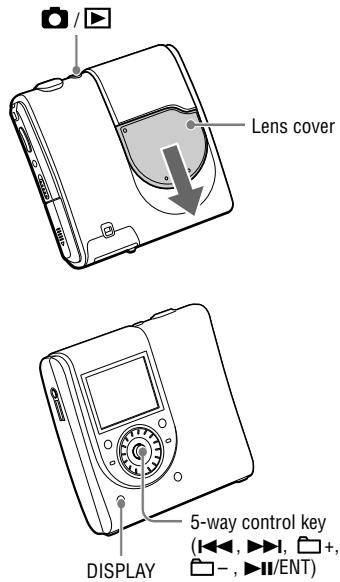
1 Slide the lens cover.
The player is in the shooting mode. When the player is in the shooting mode for the first time, Clock Set screen appears in the display.

2 Push the 5-way control key toward I◀◀/▶▶I repeatedly to select the item you want to set.

3 Push the 5-way control key toward ☐ +/- repeatedly or turn the jog dial to select the numeric value.
If you press DISPLAY, you can select the time on a 24-hour cycle or on a 12-hour cycle.
4 Repeat step 2 and 4 to set the all items.
5 When "m" is selected, press the 5-way control key (▶II/ENT).
The date and time are set and the clock starts to keep time.
Notes
- To reset the date and time, select “Clock Set” in the menu ( page 44).
- The clock settings are cancelled if the rechargeable battery is depleted or left out of the player for a few minutes.
Listening to Music
1 Slide the OPEN switch to open the lid (①). Insert a disc in the direction of the arrow (②), and close the lid.
Connect the earphones with the remote to the player beforehand.


② with the label side facing front
2 Press the 5-way control key (▶II/ENT) to play, and adjust the volume by pressing the VOL +/-.
The volume will be shown in the display.

On the remote
Insert a disc and press ▶II. Playback starts. You can adjust the volume by turning the VOL +/- control.

If the play does not start
Make sure the player is not locked ( page 13). Slide the HOLD switch on the player or on the remote in the opposite direction of the arrow.
Note
- If you do not operate the player for about 10 seconds after stopping playback, the player turns off automatically to prevent wearing down the battery (Auto Power-Off function).
- If you do not operate the player for about 30 seconds while playing back music, the display turns off automatically to save battery power. To turn on the display again, press DISPLAY. When the player is connected to an AC power adaptor, the display remains on.
Basic playback operations
| To | | Operation on the player (Operation on the remote is in parentheses) |
| Play | Play from a point where you stopped the player previously | Press the 5-way control key (▶II/ENT).(Press ▶II.) |
| Play from the first track | From stop, press and hold the 5-way control key (▶II/ENT) until playback starts.(From stop, press and hold ▶II until playback starts.) |
| Stop | Pause/Resume play after pausing | Press the 5-way control key (▶II/ENT).(Press ▶II.) |
| Stop playback | Press ■/CANCEL. (Press ■.) |
| Search | Select a track directly viewing track number or name | Turn the jog dial to select the desired track, and then press the 5-way control key (▶II/ENT). |
| Find the beginning of the current track or previous tracks | Push the 5-way control key toward ◀◀◀ once, or push the 5-way control key toward ◀◀◀ repeatedly until you reach the beginning of the desired track.(Press ◀◀◀ once, or press ◀◀◀ repeatedly to select the desired track.) |
| Find the beginning of the next track | Push the 5-way control key toward ▶▶▶ once.(Press ▶▶▶ once.) |
| Go backwards or forward | During playback or pause, push and hold the 5-way control key toward ◀◀◀/▶▶▶.(During playback or pause, hold ◀◀◀/▶▶▶.) |
| Cue to the next or previous group while playing track in a group* (Group skip) | Push the 5-way control key toward □+/- repeatedly.(Press □+/- repeatedly.) |
| Remove the disc | Press ■/CANCEL and open the lid**. (Press ■ and open the lid.) |
* Cues to the beginning of every 10th track during playback of the disc with no group settings.
** Once you open the lid, the point to start play will change to the beginning of the first track.
Notes
The playback sound may skip if:
– the player is subjected to strong, repeated shocks.
- a dirty or scratched disc is played.
When using a disc in Hi-MD mode, the sound may drop out for a maximum of about 12 seconds.
Display When Listening to Music
Display on the player

1 Playback condition ( page 20)
▶: Playback
■: Stop
II: Pause
◀◀/▶▶: Forward/backward
◀◀/▶▶: Finding the beginning
2 Character information
• Information of current track
Track number (example: 01)
Playing time (example: 03:45)
Remaining time (example: -00:52)
- Information of remaining tracks
Remaining number of tracks
(example: 📄 -06)
Remaining time
(example: 📄 -01:55:14)
- Name
♪ : Track name
♩ : Group name
Ⓖ : Disc name
♣ : Artist name
Ⓞ : Album name
- Information of recording
Date of recording (year month/date)*
(example: '03 08/29)
Recording format
(example: ATRAC3plus)
Recording mode (example: Hi-SP)
Bit rate (example: 256k)
- Cover art
3 Hi-MD/MD mode ( page 67)
4 Main play mode ( page 36)
5 Sub play mode ( page 36)
6 Repeat ( page 36)
7 Sound ( page 36)
8 Battery remaining indicator ( page 15)
* Date of recording is displayed if the date has been recorded.
Continued
To change the display
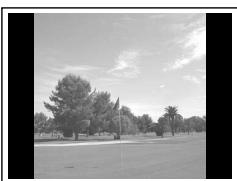
Press DISPLAY on the player repeatedly. Each time you press the button, the character information ( page 21) changes cyclically as follows.
→ Information of current track, Name

Name
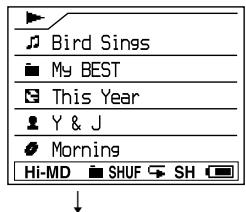
Information of Recording and remaining tracks

Cover art
natural_image
Black-and-white photo of a paved road with trees and distant buildings under a cloudy sky (no visible text or symbols)
Notes
- Depending on the group settings, the operating conditions, and the disc settings, you may not be able to select certain indications or the indications may appear differently.
- When playing a VBR (Variable Bit Rate) MP3 audio track, the displayed bit rate may differ from the bit rate displayed in the SonicStage software.
- When an audio track is transferred from your computer, the date of recording that is included in the audio track information on the supplied software is displayed. If the date of recording is older than 1979, it is not displayed.
Searching for a Music Track
You can search for a track from the group list.
1 Press ✗ SEARCH.
The list of music groups appears.
When the “Main P. Mode” is set to “Normal Play” or “Group Play” in Hi-MD mode
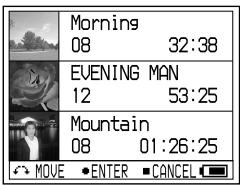
In other modes

2 Turn the jog dial to select a group, and then press the 5-way control key (▶II/ENT).
3 Turn the jog dial to select the desired track, and then press the 5-way control key (▶II/ENT).
Playback starts.
To search for a track from the list of CD cover art still images
Press ✗ SEARCH again in step 1. When “Main P.Mode” is set to “Normal Play” or “Group Play” in Hi-MD mode, the display switches to the index (twelve-image) screen.
Viewing Still images While Listening to
Music Hi-MD mode
You can play back the recorded still images continuously (slide show) while listening to music.
1 Press and hold SLIDE SHOW for more than 2 seconds while playing music.
All the still images that you shot using the player and saved to the disc are played.
To change the playback order
You can play back the recorded still images in random order. See ☑ page 38 for details.
To stop slide show playback
Press and hold SLIDE SHOW for more than 2 seconds.
Notes
- The display remains on during a slide show; therefore the music playing time is significantly reduced.
- The music playback is paused temporarily when starting or ending the slide show.
- All still images in the disc that you shot using the player are displayed. You cannot select the folder and the still images to play.
- When “Slide Show” ( page 38) is set to “Normal Play,” still images appear in the display from the side. When “Slide Show” is set to “Shuffle Play,” still images appear in the display from random directions.
- An image is displayed for about 3 seconds. The length of display cannot be changed.
- The slide show will not stop even after all the still images have been displayed. To stop the slide show, press and hold SLIDE SHOW for more than 2 seconds.
- You cannot go backwards or forward music tracks during a slide show.
- The image displayed in the slide show is rougher than the original image.
Shooting Still Images Hi-MD mode
The exposure and focus are adjusted automatically to the center of the display because the player has the AE/AF (automatic exposure/automatic focus) function. The minimum focus distance to the subject is 50 cm (20 inches). When the distance to the subject is less than 50 cm, use the macro recording mode ( page 32).
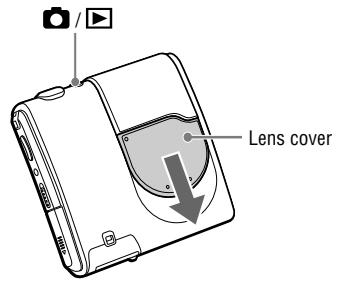
1 Slide to open the lens cover in the direction of the arrow.
The player is in the shooting mode. When the player is turned off while the lens cover is open, press 📄 / ▶.
2 Hold the player steadily with both hands and position the subject in the center of the display.
Do not cover the lens or flash with your fingers.

natural_image
Line drawing of a person holding a smartphone (no text or symbols)

natural_image
Line drawing of hands holding a digital camera with a screen (no text or symbols visible)
3
The beep sounds. The image will be recorded in JPEG format in the disc. When “DATA SAVE” disappears, you can shoot the next image.

Basic operations using the 5-way control key
| Operation | Function |
| Turn the jog dial | Zoom ( page 31) |
| Press ▶II/ENT | Quick Review ( page 32) |
| Push toward ◀◀◀ | Shooting cover art ( page 26) |
| Push toward ▶▶I | Macro ( page 32) |
| Push toward ☐– | Flash ( page 31) |
| Push toward ☐+ | Self-timer ( page 31) |
To cancel shooting
Release the shutter button.
About folders to save still images
If you insert a disc that does not have a folder for saving images, the screen to create a new folder appears after step 1.

If you select “Enter”, a “101_HIMD” folder is created in the “DCIM” folder. If you select “After shooting,” a “101-HIMD” folder is automatically created after shooting the first image. Because of that, it takes longer to save the first image.
Continued
About Auto Focus
When you try to shoot a subject that is difficult to focus on, 📄 (Icon of shooting) indicator changes to flashing slowly.
The Auto Focus function may have difficulty working under the following conditions. In such cases, release the shutter button, then recompose the shot and focus again.
- The subject is distant from the camera and dark.
– The contrast between the subject and its background is poor.
- The subject is seen through glass, such as a window.
– A fast-moving subject.
- The subject reflects or has a lustrous finish, such as a mirror or a luminous body.
– A flashing subject.
About writing the system file
The system file is the space on a disc that is used to store information. The player rewrites the system file whenever an operation such as closing the lens cover after shooting still images has been done. “SYSTEM FILE WRITING” appears in the display and you cannot operate the player while the player is rewriting the system file. Do not remove the rechargeable battery while “SYSTEM FILE WRITING” is displayed. The data in the disc may be damaged.
The player rewrites the system file when
– you close the lens cover.
– you shoot a still image using a disc that has no folder to save images.
– you created a new folder.
- you press 📄 / ▶ and the mode is changed to the viewing mode.
– you delete still images.
- you set a still image as the music cover art ( page 41).
Notes
- If you press 📄 / ▶ in the shooting mode, the function is changed to the viewing mode.
- Clean the lens with a soft cloth if it is dirty ( page 62).
- When shooting outdoors during clear weather or under other intense light, undesired light (ghosting) may enter the screen. If this happens, shade the lens with your hand or other object while shooting.
- If the menu is currently displayed, press MENU first so that the menu disappears.
- If you do not operate the player for about 3 minutes during shooting, the player turns off automatically to prevent wearing down the battery (Auto Power-Off function).
Shooting a cover art
If you shoot a still image for a cover art and set it as the cover art of the music group, you can view the cover art while listening to the music ( page 22, 23), and you can search for the desired track by a cover art ( page 23). You can also set a still image that was shot in another mode as the music cover art ( page 41).
1 Open the lens cover.
The player is ready to shoot a still image.
2 Push the 5-way control key toward once.
Indicator changes from 📄 to 🌐 in the display and both sides of the display change to black.

natural_image
Black-and-white outdoor scene with trees and a cross symbol, no readable text or symbols present
The still image is taken and the display for cover art setting appears.

4 Turn the jog dial to select "Yes."
The list of audio groups appears.

If you select “NO,” you can set the still image as the music cover art later (page 41).
5 Turn the jog dial to select the desired group, and then press the 5-way control key (▶II/ENT).
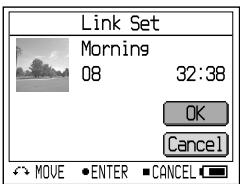
6 Turn the jog dial to select "Enter," and then press the 5-way control key (▶II/ENT).
The still image is set as the cover art of the selected music group.
To stop operation
Press ■/CANCEL.
Notes
- The still image is set as the cover art of the music group. When transferring audio data using SonicStage, select a music group and transfer it. If you transfer individual music tracks, you cannot set a cover art to them because they are not set as a group.
- If there are no music groups in a disc, the display for cover art setting does not appear.
- When shot in the cover art image mode, the still image size is 200 × 200 pixels and image quality (compression) is “Fine.” The image size and quality settings cannot be selected.
- When you set a cover art to music that already has a still image as a cover art, the new still image replaces the old one.
1 Open the lens cover to start up camera, then press 📄/▶.
The player is in the viewing mode.

If you push the 5-way control button toward ☐+/- repeatedly, you can view the still images in the previous or next folder.
Note
- If you press 📄 / ▶ in the viewing mode, the mode is changed to the shooting mode.
- If you do not operate the player for about 3 minutes during viewing, the player turns off automatically to prevent wearing down the battery (Auto power-off function).
Display When Shooting/Viewing Still Images
Hi-MD mode
When shooting

When viewing

1 Mode indicator
: Shooting ( page 24)
: Shooting cover art ( page 26)
2 Functions while shooting
: Macro ( page 32)
: Self-timer indicator (page 31)
Exposure ( page 42)
Zoom ( page 31)
③ Folder number/number of images that can be shot*
4 Operating guide ( page 35)
Buttons for various operations and their functions are displayed.
: Flash (page 31)
: Self-timer (page 31)
: Shooting cover art ( page 26)
: Macro ( page 32)
: Quick Review ( page 32)
5 Battery remaining indicator ( page 15)
6 Image size and quality indicator (page 42)
7 Mode indicator
▶: Viewing
8 Recording date of the playback image (year month/date)
9 Folder number/image file number
10 Number of still images in the folder
* The number of still images that can be shot varies depending on the setting and shooting conditions. The value in the display shows the approximate number of still images that can be shot.
Continued
To change the display when shooting
Press DISPLAY on the player repeatedly. Each time you press the button, the display changes cyclically as follows.


natural_image
Black-and-white outdoor scene with trees and a road, no visible text or symbols
To change the display when viewing
Press DISPLAY on the player repeatedly. Each time you press the button, the display changes cyclically as follows.


natural_image
Black-and-white landscape photo showing a paved road with trees and distant buildings under a cloudy sky (no text or symbols visible)
Functions When Shooting/Viewing Still Images Hi-MD mode
Using the zoom feature
1 In the shooting mode, turn the jog dial to select the desired zoom scale for shooting.
You can set the zoom in 10 levels to enlarge a part of an image up to 4 times the size of original.

The image is recorded in the selected zoom scale.
Note
This function is not an optical zoom; therefore the image will be rough when zoomed.
Using the self-timer
1 In the shooting mode, push the 5-way control key toward ☐+ once.
The ⚙ (self-timer) indicator appears in the display.

The self-timer lamp flashes in red and the beep sounds. The image will be shot after approximately 10 seconds.
To return to the normal shooting mode
Push the 5-way control key toward ☐ + once. The ⚙ (self-timer) indicator disappears in the display.
Selecting a flash mode
1 In the shooting mode, push the 5-way control key toward ☐– repeatedly to select a flash mode.
The selected flash mode appears.

Each time you push the 5-way control key, the indicator changes as follows.
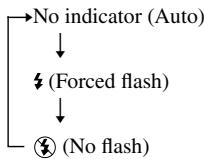
flowchart
graph TD
    A["No indicator (Auto)"] --> B["↓"]
    B --> C["⚡ (Forced flash)"]
    C --> D["↓"]
    D --> E["☒ (No flash)"]
No indicator (Auto): Based on the lighting conditions, the player will decide if there is enough light, and will use the flash accordingly (factory setting).
(Forced flash): The flash strobes regardless of the surrounding brightness.
(No flash): The flash does not strobe.
Continued
Shooting close-ups (Macro)
The macro recording mode is used when zooming up a small subject, such as flowers or insects. You can shoot close-ups of subjects up to the 10 cm (4 inches) from the lens surface.
1 In the shooting mode, push the 5-way control key toward ▶▶ once.
The ⚪ (macro) indicator appears in the display.
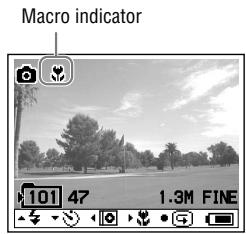
To return to the normal shooting mode
Push the 5-way control key toward ▶▶ once. The ⚪ (macro) indicator disappears in the display.
Note
It may take some time for the focus to adjust.
Checking the last image you shot in the shooting mode (Quick Review)
1 In the shooting mode, press the 5-way control key (▶II/ENT).
The last image you shot appears in the display.
To return to the normal shooting mode
Press the 5-way control key (▶II/ENT).
To delete the image displayed
Press MENU. Turn the jog dial to select "Delete," and then press the 5-way control key (▶/ENT).
Notes
- Once you turn off the player, the last image you shot cannot be displayed.
- The last image shot in the Burst mode is displayed. The other three still images cannot be displayed.
- The still image that is taken and set as the cover art cannot be displayed.
Viewing an index screen (Nine-image screen)
1 In the viewing mode, press ✗ SEARCH.
The display switches to the Index (nine-image screen) screen.
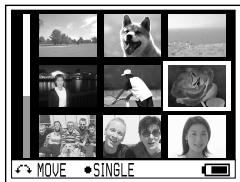
natural_image
Grid of black-and-white photo collage showing a dog, person, and family scenes (no text or symbols)
To display the next (previous) index screen, turn the jog dial to move the blue border.
To return to the single-image screen
Press the 5-way control key (▶II/ENT).
Enlarging a portion of a still image (Playback zoom)
You can enlarge a part of an image up 4 times the original size.
1 In the viewing mode, turn the jog dial to select the desired image size for shooting.
You can set the zoom in 10 levels to enlarge a part of an image up to 4 times the size of original.
2 Push the 5-way control key toward ◀◀, ▶▶, □+ or □- repeatedly to select the desired portion of the image.
To return to the original size
Press ■/CANCEL.
Note
You cannot select the previous or next still images while enlarging a portion of the current still image.
Playing back successive still images (Slide Show)
You can play back recorded still images in order.
1 In the viewing mode, press and hold SLIDE SHOW.
The slide show begins. After all the still images have been played back, the slide show ends.
To change the playback order
You can playback recorded still images in random order. See ⓕ page 38 in details about setting.
To stop operation
Press ■/CANCEL.
Notes
- All still images in the disc that you shot using the player are displayed. You cannot select the folder and the still images to play.
- Still images display at about 3-second intervals. The interval settings time cannot be changed.
- The slide show cannot be repeated automatically.
- The image displayed in the slide show is rougher than the original image.
The menu display appears. The contents of the menu vary depending on the operating conditions. For details on the items and options, see ➤ page 36 to 46.
- When listening to music ( page 36)

- When shooting still images ( page 42)

- When viewing still images ( page 45)

2 Turn the jog dial to select the item.
The display of selected items appears.
3 Press the 5-way control key (▶II/ENT).
4 Repeat steps 2 to 3
The setting will be entered.
To return the preceding setting
Press ■/CANCEL.
To stop operation
Press ■/CANCEL for more than 2 seconds.
About the operating guide
When you operate the player, the buttons for various operations and their functions are displayed.
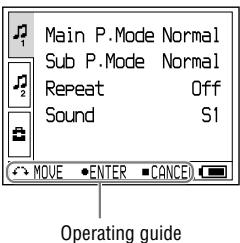
The following are the buttons that appear in the operating guide.
| Buttons | Operation |
| Turn the jog dial. |
| ● | Press the 5-way control key (▶II/ENT). |
| ■ | Press ■/CANCEL. |
| Push the 5-way control key toward ◀◀◀. |
| ▶ | Push the 5-way control key toward ▶▶I. |
| ▲ | Push the 5-way control key toward ☐−. |
| ▼ | Push the 5-way control key toward ☐+. |

Music Play
| Items | Options (●: Default settings) |
| Main P. Mode | Normal Play ● | Tracks are played once. |
| Group Play | Tracks in the selected group are played. |
| Artist Play | Tracks of a selected artist are played. |
| Album Play | Tracks in the selected album are played. |
| Bookmark Play | Tracks to which Bookmarks have been added are played. |
| Sub P. Mode | Normal ● | Tracks are played once. |
| 1Track | Current track is played once. |
| Shuffle | All tracks are played in random order. |
| A-B Repeat | Tracks between the selected points A and B are played repeatedly. |
| Repeat | Off ● | Tracks are played once. |
| On | Tracks are played repeatedly. The playback tracks vary depending on the selected main play mode and sub play mode. |
| Sound | Normal ● | Tracks are played in normal sound quality. |
| Sound EQ | SH Heavy Tracks are played in powerful sounds, further emphasizing high and low ranges compared with pops sound. |
| SP Pops Tracks are played in sound for vocal, stressing middle range audio. |
| SJ Jazz Tracks are played in lively sounds, emphasizing high and low range audio. |
| SU Unique Tracks are played in special sounds, emphasizing high and low range audio more than middle range. |
| S1 Custom1* Tracks are played in customized sound ( page 40). |
| S2 Custom2* Tracks are played in customized sound ( page 40). |
* “Custom1” and “Custom2” are not available for European models.
| Items | Options (●: Default settings) |
| AVLS (Limiting volume) | Off ● | The volume changes without limiting the volume level. |
| On | The maximum volume is limited to protect your hearing. |
| Beep (Sound of operation) | Off | The beep is turned off. |
| On ● | The beep sounds when you operate the player. |
| Disc Memory | Off | The player does not store the setting for a disc. |
| On ● | The player automatically stores the settings for a disc and retrieves them whenever the disc is inserted. |
| 1Memory Erase | The disc information of current disc is erased. |
| Quick Mode | Off | If you do not operate the player for a while, the player turns off automatically to prevent wearing down the battery. |
| On ● | The player does not turn off automatically. Playback starts quickly after the playback button is pressed. |
| Disc Mode | Hi-MD ● | When you insert a 60/74/80-minute standard disc that contains no audio data and no still images, the disc mode is set to the Hi-MD mode. |
| MD | When you insert a 60/74/80-minute standard disc that contains no audio data and no still images, the disc mode is set to the MD mode. If you want to use the disc recorded on this player on another component that does not support Hi-MD, record the disc with “Disc Mode” set to “MD.” |
Notes
- The following setting can be stored when “Disc Memory” is set to “On”:
- Bookmark
- “Custom1” and “Custom2” settings of “Sound EQ.”
- Settings for up to 30 discs can be stored in the “Disc Mode.” Any settings stored afterwards will replace the settings with the lowest frequency of use among the 30. The numbers of discs that can be stored depend on the numbers of tracks recorded on the discs. More tracks recorded per disc means fewer discs can be stored.
- When the “Quick Mode” is set to “On,” the power remains on within the player even when nothing appears in the display. When the rechargeable battery becomes completely drained, the internal power supply of the player turns off automatically.
- Even if you select “MD” as the “Disc Mode” setting, the operation mode can only be “Hi-MD” when using a 1GB Hi-MD disc.
- The operation mode set in the “Disc Mode” menu is applied to a blank 60/74/80-minute standard disc used on the player even if a different operation mode was selected in the SonicStage software or a different operation mode appeared on the display after the disc was formatted by the SonicStage software.
Continued
| Items | Options (●: Default settings) |
| CoverArtLink | Set | The still image shot using the player is set as the cover art of the music group ( page 41). |
| Release | The cover art setting is released. |
| Slide Show | Normal ● | The still images shot using the player are played in order. |
| Shuffle | The still images shot using the player are played in random order. |
| Language | 日本語* | The menu items and messages are displayed in Japanese. |
| English ● | The menu items and messages are displayed in English. |
| Français | The menu items and messages are displayed in French. |
| Deutsch | The menu items and messages are displayed in German. |
| Italiano | The menu items and messages are displayed in Italian. |
| Español | The menu items and messages are displayed in Spanish. |
| 簡体中文* | The menu items and messages are displayed in Simple Chinese. |
| 繁體中文* | The menu items and messages are displayed in Traditional Chinese. |
| Clock Set | | You can set the date and time ( page 17). |
* For European and USA models, 日本語, 簡体中文 and 繁體中文 are not displayed.
Listening to selected tracks only (Bookmark Play)
You can bookmark tracks on a disc and play them only. The sequence of bookmarked tracks cannot be changed.
1 While playing the track you want to bookmark, press and hold the 5-way control key (▶II/ENT).
"BOOKMARK ON" appears.
2 Repeat step 1 to bookmark the other tracks.
3 Select "Bookmark Play" of "Main P. Mode" in the menu ( page 36), and then press the 5-way control key ( ▶II/ENT).
4 Turn the jog dial to select a track, and then press the 5-way control key (▶II/ENT).
The player plays from the selected bookmarked track to the last bookmarked track.
On the remote
1 While playing the track you want to bookmark, press and hold ▶II.
2 Repeat step 1 to bookmark the other tracks
3 Select “Bookmark Play” of “Main P. Mode” in the menu ( page 36), and then press ▶II.
4 Press ◀◀◀/▶▶▶I repeatedly to select a track, and then press ▶II. The play of tracks with Bookmarks starts in track number order.
To erase bookmarks
While playing the track for which you want to erase the bookmark, press and hold the 5-way control key (▶II/ENT). “BOOKMARK OFF” appears and the bookmark is erased.
Listening to a section of a track repeatedly (A-B Repeat)
You can listen to a specific section within a track repeatedly by selecting the starting point A, and ending point B. Make sure that points A and B are within the same track.
1 Select "A-B Repeat" in the menu (page 36).
“A” (starting point) flashes in the display.
2 During playback, press the 5-way control key (▶II/ENT) at the starting point (A).
Point “A” lights on and “B” flashes in the display.
3 Press the 5-way control key (▶II/ENT) at the ending point (B).
“A-B Repeat” appears and the section between point A and B starts playing repeatedly.
Note
This function cannot be set using the remote.
Continued
Customizing sound quality (Custom)
(except European model)
1 Select "Sound EQ" of "Sound" in the menu ( page 36), and then select "Custom1" or "Custom2."

2 Push the 5-way control key toward I◄◄/►►I repeatedly to select the frequency range.
There are six frequency ranges.
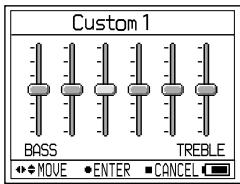
3 Push the 5-way control key toward ☐+/- repeatedly to select the sound level.
The sound level can be adjusted in seven levels.

4 Repeat steps 2 and 3 to make adjustments for the remaining frequency ranges.
5 Press the 5-way control key (▶II/ENT).
Notes
- If the sound is distorted by your sound settings when you turn up the volume, turn the volume down.
- If you feel difference in sound volume between the “Custom1” or “Custom2” sound setting and other sound settings, adjust the volume to your preference.
Setting a still image as the music cover art
(Cover art setting) Hi-MD mode
1 Select "Set" of "CoverArtLink" in the menu ( page 38), and then select "Set."
The index (nine-image screen) screen appears.

2 Turn the jog dial to select an image, and then press the 5-way control key (▶II/ENT).
The list of music groups appears.

3 Turn the jog dial to select the desired group, and then press the 5-way control key (▶II/ENT).

4 Turn the jog dial to select "Set," and then press the 5-way control key (▶II/ENT).
The still image is set the cover art of the selected music group.
To release the cover art setting
Select "Set" of "CoverArtLink" in the menu ( page 38), and then select "Release."
Notes
- The still image is set as the cover art of the music group. When transferring audio data using SonicStage, select a music group and transfer it. If you transfer individual music tracks, you cannot set a cover art to them because they are not set as a group.
- When you set a cover art to music that already has a still image as a cover art, the new still image replaces the old one.
- Playback stops if you set “Coverartlink” to “Set” or “Release” during playback of music.
- Only the images that were shot using this player can be set as cover art images.
- If there are no music groups in a disc, the display for cover art setting does not appear.
(Shooting/Settings/Common Settings) Hi-MD mode

Shooting
| Items | Options (●: Default settings) |
| Exposure | +2.0EV to -2.0EV | The exposure compensation value can be set from +2.0EV to -2.0EV in 13 steps. The default setting is 0.0EV. |
| White Balance | Auto ● | The white balance is adjusted automatically. |
| ☀ (Daylight) | The setting is effective when shooting outdoors, shooting night scenes, neon signs, fireworks or sunrises, or shooting just before and after sundown. |
| ☀ (Shade) | The setting is effective when shooting under a cloudy sky. |
| ☀ (Fluorescent) | The setting is effective when shooting under fluorescent lighting. |
| ☀ (Tungsten) | The setting is effective when shooting under incandescent lamp. |
| Burst | Off ● | Still images are shot normally. |
| On | Each time you press the shutter button, the player records four still images in succession. |
| Night Mode | Off ● | Still images are shot normally. |
| On | The setting is selected when shooting night scenes. You can shoot beautiful still images of both subjects and night scene backgrounds at the same time. |
| Size/Quality | 1.3M Fine ● | Still images are recorded at 1,280 × 960 size image with fine quality. |
| 1.3M Standard | Still images are recorded at 1,280 × 960 size image with standard quality. |
| VGA Fine | Still images are recorded at 640 × 480 size image with fine quality. |
| VGA Standard | Still images are recorded at 640 × 480 size image with standard quality. |
Note
“Burst” and “Size/Quality” settings cannot be changed in the cover art image mode. The still image size is 200 × 200 pixels and image quality (compression) is “Fine.”
About image size and quality
You can choose image size (number of pixels) and image quality (compression ratio) based on the kind of still images you want to shoot. The larger you make the image size and the higher you make the image quality, the better your image, but also the larger the amount of data needed to preserve your image. This means you can save fewer still images in your disc.
The number of still images that can be saved in a disc (Approx.) ^1)
| Size/Quality^2) | 1GB Hi-MD disc | 80-minute standard disc | 74-minute standard disc | 60-minute standard disc |
| 1.3M Fine | 1,200 | 360 | 340 | 270 |
| 1.3M Standard | 2,300 | 700 | 640 | 520 |
| VGA Fine | 4,200 | 1,200 | 1,100 | 960 |
| VGA Standard | 7,200 | 2,100 | 2,000 | 1,600 |
| Cover art | 24,000 | 7,200 | 6,700 | 5,400 |
1) These values indicate how many still images can be taken when you insert a blank disc for the first time after purchasing the player. The actual values may differ depending on the shooting conditions. When you insert a blank disc after shooting some images, the player saves the number of those still images and reduces the amount of images that can be taken.
2) Image size is the size when viewing the still images on a personal computer. Still images viewed in the display of the player all appear the same size.

Settings
| Items | Options (●: Default settings) |
| New Folder | OK | A new folder is created for saving images. The folder is given a number that is one higher than the current highest number in the disc. The next still images shot are saved in the newly created folder. |
| Cancel | Operation is stopped. |
| Shutter Beep | Off | The beep is turned off. |
| On ● | The beep sounds when you set the self-timer, activate the AE/AF lock function, or shoot still images. |
| Format | OK | All data (including audio data) in the disc are erased. If you set to Hi-MD mode, a new folder for saving still images is created. |
| Cancel | Operation is stopped. |
| Flicker* | 50Hz | The setting prevents flickering when shooting under lighting such as fluorescent lights. Selected when the frequency in your area is 50Hz. |
| 60Hz | The setting prevents flickering when shooting under lighting such as fluorescent lights. Selected when the frequency in your area is 60Hz. |
* For USA models, the default setting is 60Hz. For other models, the default setting is 50Hz.
Continued
Notes
- If you have not created a new folder, the “101_HIMD” folder will be selected as the folder for saving still images. You can create up to “999_HIMD” folders.
- Up to 1000 still images can be stored in one folder. When the folder capacity is reached, a new folder is automatically created.
- Still images are saved to the last created folder. You cannot select the folder.
- You cannot use the player to move images to a different folder.
- You cannot use the player to delete any folders.
- If no still images have been saved to the last created folder, you cannot create a new folder.

Common Settings
| Items | Options (●: Default settings) |
| Slide Show | Normal ● | The still images shot using the player are played in order. |
| Shuffle | The still images shot using the player are played in random order. |
| Language | 日本語* | The menu items and messages are displayed in Japanese. |
| English ● | The menu items and messages are displayed in English. |
| Français | The menu items and messages are displayed in French. |
| Deutsch | The menu items and messages are displayed in German. |
| Italiano | The menu items and messages are displayed in Italian. |
| Español | The menu items and messages are displayed in Spanish. |
| 簡体中文* | The menu items and messages are displayed in Simple Chinese. |
| 繁體中文* | The menu items and messages are displayed in Traditional Chinese. |
| Clock Set | | You can set the date and time ( page 17). |
* For European and USA models, 日本語, 簡体中文 and 繁體中文 are not displayed.
(Viewing/Common Settings) Hi-MD mode
Viewing
| Items | Options (●: Default settings) |
| Delete | 1File Delete | The displayed still image is deleted. |
| All Delete | All still images that were shot using the player are deleted. |
| JPEG Viewer | | If still images recorded in your computer are saved to a disc, you can view them on the player ( page 46). |
| Format | OK | All data (including audio data) in the disc are erased. A new folder for saving images is created and the disc mode is changed to Hi-MD mode. |
| Cancel | Operation is stopped. |
Note
- When you select “All Delete,” it may take a long time to delete them if there are a large number of image files or folders in the disc.
- A still image that is set as a music group cover art cannot be deleted even if you delete the image file.

Common Settings
| Items | Options (●: Default settings) |
| CoverArtLink | | The still image shot using the player is set as the cover art of the music group ( page 41). |
| Slide Show | Normal ● | The still images shot using the player are played in order. |
| Shuffle | The still images shot using the player are played in random order. |
| Language | 日本語* | The menu items and messages are displayed in Japanese. |
| English ● | The menu items and messages are displayed in English. |
| Français | The menu items and messages are displayed in French. |
| Deutsch | The menu items and messages are displayed in German. |
| Italiano | The menu items and messages are displayed in Italian. |
| Español | The menu items and messages are displayed in Spanish. |
| 簡体中文* | The menu items and messages are displayed in Simple Chinese. |
| 繁體中文* | The menu items and messages are displayed in Traditional Chinese. |
| Clock Set | | You can set the date and time ( page 17). |
* For European and USA models, 日本語, 簡体中文 and 繁體中文 are not displayed.
Continued
Viewing a JPEG file image (JPEG Viewer)
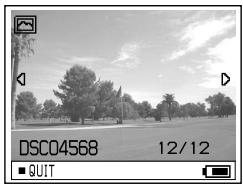
If still images in your computer are saved to a disc, you can view them on the player's display.
JPEG file images that you can view on the player's display are as follows:
– Supported files: “.jpg”*
– Maximum file size: 7,000 kB or less
– Maximum image size: 4,080 × 4,080 pixels
– Minimum image size: 16 × 16 pixels
- Minimum image unit: 8 × 8 pixels
We do not guarantee the playback of JPEG which was processed with PC. Progressive JPEG files are not supported.
* Design rule for Camera File system (DCF) standard conformity
2 Turn the jog dial to select a desired folder/image file, and then press the 5-way control key (▶II/ENT).
natural_image
Black-and-white outdoor photo of a park with trees and a clear sky (no text or symbols visible)
To view the previous/next JPEG file images
Push and hold the 5-way control key toward

Notes
- If the number of folder directories is more than 16, you cannot view the JPEG files on the player.
- You cannot delete JPEG files with the player.
- When the folder or file name is too long, the name will be partially changed and displayed with 8 characters or fewer.
- A folder or file name in 2-byte characters such as Japanese characters may not be displayed correctly.
Connecting the Player to Your Computer
When connecting to the computer, power (bus power) is supplied from the USB port of the computer. This allows the player to be used without power being supplied from the rechargeable battery.
Notes
- When you use a disc that contains audio tracks recorded in MD mode, make sure to install the software using the supplied CD-ROM before connecting your computer ( page 72).
- When using Windows ME or Windows 98SE
If you connect the player to the computer with the disc mode on the player set to “Hi-MD” (default setting), and then insert a 60/74/80-minute standard disc, the operation mode of the disc may automatically change to Hi- MD mode even if you do not record anything.
- When using Windows ME or Windows 98SE
When you disconnect the dedicated USB cable, the message “Unsafe Removal of Device” appears in the computer display. This is not a problem. Merely click “OK” to make the message disappear.
1 Insert a disc into the player.
2 Connect the USB cradle and your computer using the dedicated USB cable.
Connect the large connector of the USB cable to a USB jack on your computer and the small connector to the USB connector on the USB cradle.

Continued
3 Place the player on the USB cradle and push it in firmly.
The OPR lamp lights up in orange.

natural_image
Line drawing of a device being placed into a battery, showing the next portion with a downward arrow indicating motion (no text or symbols present)
You can connect the dedicated USB cable directly to the player.

natural_image
Diagram showing cable connection between two electronic devices (no text or symbols present)
To disconnect the dedicated USB cable from the USB cradle or the player
1 Make sure that the OPR lamp on the player is not flashing rapidly.
2 Press ■(stop) on the player.
Make sure that the OPR lamp on the player is not flashing rapidly again.
3 Disconnect the dedicated USB cable. While pressing the buttons on the sides of the plug, push the plug inward, and then pull it outward to disconnect the dedicated USB cable from the player.

natural_image
Diagram of a medical device with arrows indicating force or movement (no text or symbols)
To remove the player from the USB cradle
1 Follow steps 1 and 2 of “To disconnect the dedicated USB cable from the USB cradle or the player” ( page 48).
2 Press RELEASE on the USB cradle to remove the player ( page 15).
When removing the disc from the player
1 Follow steps 1 and 2 of “To disconnect the dedicated USB cable from the USB cradle or the player” ( page 48).
2 Remove the disc from the player.
Notes
- Nothing appears in the player's display when it is connected to your computer.
- When the OPR lamp is flashing rapidly, do not remote the dedicated USB cable. This may cause the malfunction.
- If you use the player connected to the computer, it is recommended that you insert a fully charged rechargeable battery as a precaution against power failures, disconnection of the dedicated USB cable or other unforeseen occurrences. We do not assure the results should there be a misoperation, transfer failures, or destruction of audio data caused by unforeseen occurrences.
- If you disconnect the dedicated USB cable from the player and want to reconnect it, make sure to wait at least 2 seconds before connecting it again.
- Make sure to place the player at a stable, vibration-free place during recording.
- The player is not recognized by your computer during recording or playing.
- The system may malfunction if your computer changes to system suspend, sleep, or hibernation mode while connecting to the player. Make sure to disable any changes to suspend, sleep, or hibernation mode.
- Make sure not to connect the player and the computer through a USB hub.
- It is not possible to charge the rechargeable battery in the player while using the bus power connection.
- We do not ensure trouble-free operation on all computers that satisfy the system requirements.
Copying Still images to Your Computer
Hi-MD mode
Image files recorded with the player are grouped as folders in the disc.
Example when using Windows XP

The steps of copying still images to your computer vary depending on your OS.
When using Windows 98SE/2000/Me
1 Insert a disc in Hi-MD mode, and then connect to your computer ( page 47).
2 Double-click [My Computer].
"My computer" screen appears.
3 Double-click [Removable Disk].
The contents in the disc appear.
Continued
4 Double-click [DCIM].
5 Double-click the folder where the desired still image saved in.
6 Drag and drop the image files into the [My Documents] folder.
The image files are copied to the “My Documents” folder.
Note
When you try to copy an image to a folder in which an image with the same file name is stored, the overwrite confirmation message appears. When you want to overwrite the existing image with the new one, click [Yes]. In this time, the original one is deleted. When you do not want to overwrite it, click [No], then change the file name.
When a removable disk icon is not shown
1 Right-click [My Computer], then click [Properties].
The “System Properties” screen appears.
2 Click [Device Manager] - [Other Devices], and then confirm if there is a “Sony DSC” or “Sony Handycam” with a mark.
3 If you find either of the devices above click [Remove]- [OK].
The device is deleted.
4 Try the USB driver installation again using the supplied CD-ROM.
When using Windows XP
The steps of copying still images to your computer vary depending on the setup of your computer.
1 Insert a disc in Hi-MD mode, and then connect to your computer ( page 47).
2 Click [Copy pictures to a folder on my computer using Microsoft Scanner and Camera Wizard], then click [OK].
The “Scanner and Camera Wizard” screen appears.
3 Click [Next].
The contents in the disc appear.
4 Click the checkbox of still images that you do not want to copy to your computer and remove the checkmark, then click [Next].
The “Picture Name and Destination” screen appears.
5 Specify the image group names to be copied and the copy destination, then click [Next].
Image copying starts. When the copying is completed, the “Other Options” screen appears.
6 Select [Nothing. I'm finished working with these pictures], then click [Next].
The “Completing the Scanner and Camera Wizard” screen appears.
7 Click [Finish].
The wizard closes. To continue copying other still images, disconnect the USB cable and reconnect it. Then, perform the procedure from step 1 again.
Storing Non-audio Data to a Disc Hi-MDmode
If you connect the player to a computer with a disc in Hi-MD mode inserted, the disc is recognized as storage media by the Windows Explorer, allowing you to store non-audio data such as text data or image data. For the storage space for each disc, see page 51.
1 Insert a disc in Hi-MD mode, and then connect to the computer (page 47).
The player is recognized as an external device and can be viewed on the Windows Explorer. You can use the player in the same way as other devices.
Notes
- When the SonicStage software is active, the player is not recognized as a data storage device.
- If you format a disc on the computer, make sure to format the disc using the SonicStage software.
- Make sure not to delete the file management folder (HMDHIFI folder and HI-MD.IND file) on the Windows Explorer.
- When you create a new folder in the DCIM folder, the number of images that can be taken may be fewer.
The storage space is varied depending on disc type.
| 1GB Hi-MD disc | 80-minute standard disc | 74-minute standard disc | 60-minute standard disc |
| Total size | 964MB | 291MB | 270MB | 219MB |
| Disc management space * | 1.65MB | 1.65MB | 1.65MB | 1.65MB |
| Free space | 963MB | 290MB | 268MB | 217MB |
* This is space that is used for managing the files on the disc. The size of the disc management space changes according to the operating conditions of your computer and other factors. Therefore, the actual space available for use may be lower than that displayed by Windows Explorer.
Troubleshooting
If a problem occurs during player operation, follow the steps described below before consulting the nearest Sony dealer. If any messages appear, it is recommended to take notes.
1 Check to see if the problem is listed in “Troubleshooting.”
Check “Messages” ( page 58) for the problem as well.
2 If after step 1 you still cannot solve the problem, consult your nearest Sony dealer.
While charging
| Symptom | Case and/or corrective action |
| The rechargeable battery does not start charging. The rechargeable battery cannot be fully charged. | → The rechargeable battery has been inserted incorrectly or the AC power adaptor has been connected incorrectly. Insert the rechargeable battery correctly or connect the AC power adaptor correctly.→ No rechargeable battery is inserted. Insert the rechargeable battery (@ page 14).→ Because of the battery's characteristics, the capacity of the rechargeable battery may be smaller than normal when it is used for the first time or after a long period of disuse. Charge and discharge the battery several times. The normal battery life will be restored.→ The rechargeable battery is drained. Charge the rechargeable battery. It takes one minute after placing the player on the USB cradle for an indication to appear and charging to start. If charging does not start even after a minute, replace the player on the USB cradle again.→ The surrounding temperature is too high or too low (“CHARGE +5°C – +35°C (41F–95F)” appears in the display). Charge the battery at a temperature of +5°C (+41°F) to +35°C (+95°F). |
| The rechargeable battery has become drained even when the player was not used for a while. | → “Quick Mode” was set to “On” (@ page 37). If you set “Quick Mode” to “On”, the power stays on inside player even when there is no operation, causing the rechargeable battery life to shorten. If the rechargeable battery is not fully charged, the battery may become drained after a while. If this happens, charge the rechargeable battery again. |
| Even when fully charged, the life of the battery is only about half what it normally is. | → The useful life of the rechargeable battery may be ending. Replace the rechargeable battery with the new one. |
| The USB cradle and the player become hot during the charging procedure. | → This is normal and poses no danger. |
| The player is turned off. | → If you do not operate the player for about 3 minutes, the player is turned off automatically to prevent wearing down the battery (Auto power-off function). Turn on the player. |
Listening to music
| Symptom | Case and/or corrective action |
| A disc is not played normally. | → “Repeat” is set to “On.” Set to “Off” ( page 36).→ Playback mode is changed. Enter “Main P. Mode” or “Sub P. Mode” to change back to “Normal Play” ( page 36). |
| A disc is not played from the first track. | → Disc playing stopped before it came to the last track. Press and hold the 5-way control key (▶II/ENT) for 2 seconds or more to start playing ( page 20). |
| Playback sound skips. | → The player is placed where it receives continuous vibration. Put the player on a stable place. |
| Sound has a lot of static. | → Strong magnetism from a television or such device is interfering with operation. Move the player away from the source of strong magnetism. |
| Volume cannot be turned up. | → “ALVS” is set to “On.” Set to “Off” ( page 37). |
| No sound comes through the earphones. | → The earphones plug is not firmly connected. Plug in the plug of the earphones firmly to the player.→ The plug is dirty. Clean the plug. |
| The disc cannot be played on another component. | → The component does not support Hi-MD. Discs used in Hi-MD mode can be played only on components that supports Hi-MD. |
| The edited tracks may exhibit sound dropout during search operations. | → This occurs due to the MiniDisc system limitation. The fragmentation of data may cause sound dropout while searching because the tracks are played in higher speed than normal playback. |
| The group function does not operate. | →While using a disc without group setting, an attempt was made to select some group-related menu. Use a disc with group setting. |
| The display turns off. | → If you do not operate the player for about 30 seconds while playing back music, the display turns off automatically to save battery power. To turn on the display again, press DISPLAY. |
| You cannot play an MP3 audio track. | → Playable MP3 file format are those: transferred using the SonicStage software/MPEG-1 Audio Layer-3/sampling frequency of 44.1kHz. |
| Date of recording is not displayed. | → Date of recording is displayed if the date has been recorded. When an audio track is transferred from your computer, the date of recording that is included in the audio track information on the supplied software is displayed. If the date of recording is older than 1979, it is not displayed. |
Shooting/Viewing still images
| Symptom | Case and/or corrective action |
| The subject does not appear in the display. | → The player is in the viewing mode. Press 📄 / ▶ to change to the shooting mode. ( page 24). |
| The image is out of focus. | → The subject is too close. Make sure to position the lens farther away from the subject than the shortest allowable shooting distance (normal shooting mode: 50 cm (20 inches); macro recording mode: 10 cm (4 inches)) when shooting. |
| The player cannot record still images. | → No disc is inserted. Insert a disc.→ The capacity of the disc is insufficient. Delete the still images saved in the disc or format it ( page 45).→ You tried to shoot and save still images when using a disc in MD mode. Use a disc in Hi-MD mode ( page 67). |
| The flash does not work. | → The flash is set to ( no flash). Set the flash to auto (no indicator) or ( Forced flash) ( page 31). |
| The date and time are recorded incorrectly. | → The date and time are not set correctly. Set the correct date and time ( page 17). |
| The player cannot playback still images. | → The player may not playback image files copied from the hard disk of your computer if the file name or file size has been changed or the image has been modified. |
| Even though you attempted to delete all of the files, the disc is still not empty. | → The disc contains a file with a file name or storage destination that was changed through the computer. Format the disc ( page 45). |
| You have deleted an image by mistake. | → Once you have deleted a file, you cannot restore it. |
Connecting your computer
| Symptom | Case and/or corrective action |
| The player is not recognized by the computer. | → The dedicated USB cable is not firmly connected. Connect the dedicated USB cable firmly to the player and the computer.→ A USB hub is used. Connect the dedicated USB cable directly to the USB port of the computer.→ Network communication has failed. Disconnect the dedicated USB cable, wait at least 2 seconds, and then reconnect it. If the player is still not recognized, disconnect the dedicated USB cable, restart the computer, and then connect the dedicated USB cable again. |
| Even though the player is recognized by the computer, it does not operate normally. | → A USB hub is used. Connect the dedicated USB cable directly to the USB port of the computer.→ You are using the player at a place with vibration. Use the player at a place with no vibration. |
| The player cannot be used as a storage device. | → The SonicStage or MD Simple Burner software is active. Close the SonicStage or MD Simple Burner software. |
| The playing time of a transferred track is different from the time that appears on your computer monitor. | → This is due to a calculation discrepancy between the player and the computer. |
| You cannot transfer audio data from your computer that will fill up the remaining recording time on the disc. | → Due to the limitations of the system, the audio data is recorded in several-second steps. Therefore, when you record many short tracks, the total recording time increases but does not tally with the remaining recording time. |
| The disc size displayed on the computer is not the same as the disc size printed on the disc. | → The difference is due to the use of the binary system to indicate the disc size on the computer and the decimal system to express the disc size on the disc (@ page 51) and other recording media. |
Continued
| Symptom | Case and/or corrective action |
| You cannot operate the player. | → You cannot operate the player while the player is connected to the computer. |
| You cannot transfer audio data when pushing DOWNLOAD. | → The player is not correctly connected to your computer. Connect the player and your computer correctly using the USB cable.→ Audio CD is not inserted in CD drive of your computer. Insert Audio CD.→ The capacity of the disc is insufficient. Insert another disc. |
| The lid does not open. | → It happens if you disconnect the dedicated USB cable in the middle of a data transfer, recording, or editing operation on the computer, but while the rechargeable battery is missing from the player or is drained. Reconnect the dedicated USB cable or insert a fully charged rechargeable battery into the player, and then press ■. |
| You cannot copy still images. | → The player is not correctly connected to your computer. Connect the player and your computer correctly using the USB cable (@ page 47).→ You are not using the correct copy procedure for your OS. Follow the designated copy procedure for your OS (@ page 49). |
Others
| Symptom | Case and/or corrective action |
| The player does not work or works poorly. | → The rechargeable battery is not charged. Charge the rechargeable battery.→ The volume is low. Turn up the volume.→ No disc is inserted. Insert a recorded disc.→ The HOLD function is turned on. On the player, disable HOLD by sliding the HOLD switch to the opposite direction of the arrow ( page 13).→ The lid is not firmly closed. Close the lid until it clicks. Then slide OPEN to open the lid.→ Moisture has condensed inside the player if the player is brought directly from a cold to a warm location. Take the disc out and leave the player in a warm place for several hours until the moisture evaporates ( page 63).→ The AC power adaptor is not firmly connected. Connect the AC power adaptor firmly to the DC IN 6V jack on the battery charging stand.→ The rechargeable battery is weak (“LOW BATTERY” flashes or nothing appears). Charge the rechargeable battery ( page 14), or use the supplied AC power adaptor.→ The disc is damaged or does not contain proper recording or editing data. Reinsert the disc. Rerecord the disc. If the error message still appears, replace it with another disc.→ There is a built-in malfunction in the system. While operating, the player received a mechanical shock, too much static, abnormal power voltage caused by lightning, etc. Disconnect all the power sources and the dedicated USB cable. Leave the player for about 30 seconds and connect the power source. |
| The display window is not normal. | → The player was disconnected from the power source. Let the player sit for a while, or disconnect the power source, reconnect it, and then press any of the operation buttons. |
| When using with the AC power adaptor, the display window remains faintly lit even when the player is not operating. | → The display window lights up when charging of the rechargeable battery reaches approximately 80% and stays lit until charging reaches 100% ( page 14). |
Messages
| Message | Case and/or corrective action |
| AUDIO DISC FOR PLAYBACK ONLY | → You tried to shoot still images in a disc that can only play music tracks. |
| AUDIO FILE ERROR | → There is no audio data that can be played on the player. The audio data or disc management file has been damaged. |
| AVLS ON NO VOLUME OPERATION | → “AVLS” is set to “On” and so the volume cannot rise higher. Set to “Off” ( page 37). |
| BLANKDISC | → A disc with no recording on it is inserted. |
| BUSY WAIT A MOMENT | → The player is accessing disc information. You tried to operate the player while it was accessing the recorded data. Wait until the message goes out (in rare cases, it may take a few minutes). |
| CANNOT PLAY | → There is no audio data that can be played on the player. The audio data or disc management file has been damaged.→ You tried to play an MP3 audio track that the player cannot play. Playable MP3 file format are those: transferred using the SonicStage software/MPEG-1 Audio Layer-3/sampling frequency of 44.1kHz. |
| CHARGE +5°C-+35°C 41F-95F | → You tried to charge the rechargeable battery at a place with a temperature outside the specified range for the player. Charge the battery at a temperature of +5°C (+41°F) to +35°C (+95°F). |
| CLOSE LENS COVER | → You removed the disc while the system file was being rewritten after you shot a still image. Press / ▶ . |
| DC IN TOO HIGH | → Voltage of the power supply is too high (The supplied AC power adaptor or the recommended car battery cord is not used). Use the supplied AC power adaptor or the recommended car battery cord. |
| DISC FULL | → You tried to shoot still images using a disc that does not have enough storage space. |
| END | → The player reached to the end of the disc while playing or pushing the 5-way control key toward ▶▶▶ (press and hold ▶▶▶ on the remote). |
| FOLDER FULL | → The folder capacity is reached. |
| FOLDER NO EXPAND | → If the number of folder directories is more than 16, you cannot view the JPEG files on the player. |
| FORMAT ERROR DISC | → A disc with a format that the player does not support was inserted. Insert a standard MD or a disc used in Hi-MD mode.→ A disc formatted on the computer was inserted. When formatting a disc on the computer, make sure to use the SonicStage software. |
| HOLD | → The player is locked. Slide HOLD against the arrow to unlock the player ( page 13). |
| LOW BATTERY | → Recharging was attempted with a non-rechargeable battery inserted. Insert a rechargeable battery and start the charging process again. |
| NO BOOKMARKED TRACK | → You selected bookmark play without setting bookmarks. Set bookmarks ( page 39). |
| NO COVER ART | → You tried to release the cover art setting of an album that is not set a still image. |
| NO DISC | → You tried to play or record with no disc in the player. Insert a disc. |
| NO DISC MEMORY | → You tried to erase a setting in the Disc Memory on a disc that contains no settings in the Disc Memory ( page 37). |
| NO GROUP | → You selected “Group Play” in the “Main P. Mode” with a disc without group setting. |
| NO IMAGE | → You tried to set a still image as the music cover art with a disc that has no still images. |
| NO JPEG FILE | → You selected a folder in “JPEG Viewer” that has no JPEG files. |
| NO NAME | → You tried to select “Album Play” in the “Main P. Mode” with a disc that has no album name information. |
| NO QUICK REVIEW IMAGE | → Once the player is turned off, you cannot view the latest image in quick review mode. |
| NO TITLE | → You tried to select “Album Play” in the “Main P. Mode” with a disc that has no album name information. |
| NO TRACK | → You tried to play a disc with no recorded tracks. Insert a recorded disc. |
| NOT Hi-MD DISC | → You tried to shoot and save still images when using a disc in MD mode. Use a disc in Hi-MD mode. |
| OPEN LENS COVER | → You tried to press / while the lens cover is closed. |
| PROTECTED DISC | → You tried to record or edit on a disc with the tab in the record-protect position. Slide the tab back ( page 61). |
| PROTECTED IMAGE NO EDIT | → You tried to delete a protected still image. |
| READ ERROR | → The player cannot read the disc information correctly. Reinsert the disc. |
| RECOVERING DATA | → The player was turned off while the system file was being rewritten after you shot a still image. Leave the player for a while. |
| SYSTEM FILE WRITING | → The player is storing information (track start and end position) from the memory to the disc. Wait until this process is completed. |
| TOC DATA ERROR | → The player cannot read the disc information correctly. Insert another disc. |
Precautions
On safety
- Do not put any foreign objects in the DC IN 6V jack.
- Do not touch the optical pickup lens on the player and keep it clean. If you do so, the lens may be damaged and the player will not operate properly.
On power sources
- Use house current or rechargeable battery.
- For use in your house: For the supplied USB cradle, use the AC power adaptor supplied with this player. Do not use any other AC power adaptor since it may cause the player to malfunction.
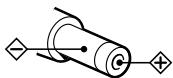
- Connect the AC power adaptor to an easily accessible AC outlet. Should you notice an abnormality in the AC power adaptor, disconnect it from the AC outlet immediately.
- The player is not disconnected from the AC power source (mains) as long as it is connected to the wall outlet, even if the player itself has been turned off.
- If you are not going to use this player for a long time, be sure to disconnect the power supply (AC power adaptor or rechargeable battery). To remove the AC power adaptor from the wall outlet, grasp the adaptor plug itself; never pull the cord.
On the player
- Do not shake or strike the player. In addition to malfunctions and inability to record images, this may render the disc unusable or image data breakdown, damage or loss may occur.
- Do not get the player wet. When taking pictures outdoors in the rain or under similar conditions, be careful not to get the player wet.
- Your player is designed for use between the temperatures of 0^ and 40^ (32°F and 104°F). Shooting in extremely cold or hot places that exceed this range is not recommended.
- After using your player at the seashore or other dusty locations Clean your player carefully. Otherwise, the salty air may corrode the metal fittings or dust may enter the inside of your player, causing a malfunction.
On heat build-up
Heat may build up in the player if it is used for an extended period of time. This, however, is not a malfunction.
On mechanical noise
The player gives off mechanical noise while operating, which is caused by the power-saving system of the player and it is not a problem.
On installation
- If you use the player at a place subject to static or electrical noise, the recording may not be properly done or the recorded data may be lost.
- Never use the player where it will be subjected to extremes of light, temperature, moisture or vibration.
- Never wrap the player in anything when it is being used with the AC power adaptor. Heat build-up in the player may cause malfunction or damage.
On charging
- The supplied USB cradle can be used only with this player. Any other models cannot be charged.
- Do not use the supplied USB cradle to charge any other battery beside the supplied one or the one designated for it (LIP-4WM).
- Be sure to use the supplied AC power adaptor.
- Charge the rechargeable battery at a temperature of +5^ (+41^) to +35^ (+95^) . The charging time will vary according to the surrounding temperature. (If the surrounding temperature is low, the required charging time will be longer. This is a characteristic of the lithium-ion battery.)
- If you do not use the player for a long time, remove the rechargeable battery from the player and keep it in the cool, dry place. To prevent degradation of the rechargeable battery, make sure not to store the rechargeable battery when it is either completely discharged or fully charged.
- The USB cradle and the player may become hot during the charging procedure; this, however poses no danger.
- Because of the battery's characteristics, the capacity of the rechargeable battery may be smaller than normal when it is used for the first time or after a long period of disuse. In this case, charge and discharge the battery several times. The normal battery life will be restored.
- If the capacity of the rechargeable battery drops to half the normal amount, replace with the new one.
- If the player will be unused for a long time, remove the rechargeable battery, remove the player from the USB cradle and remove the AC power adaptor from the wall outlet.
On the MiniDisc cartridge
- When carrying or storing the MiniDisc, keep it in its case.
- Do not break open the shutter.
- Do not place the cartridge where it will be subject to light, extreme temperatures, moisture or dust.
- Attach the supplied disc label only in the space designated for it on the disc. Do not stick it on any other disc surface.
To protect a recorded disc
To record/save-protect a disc, slide open the tab at the side of the disc. In this position, the disc cannot be recorded/saved. To record/save again, slide the tab back so the tab is visible.

natural_image
Line drawing of a compact floppy disk with a circular vent and cable (no text or symbols)
Back of the disc

Recorded/saved material is protected.

natural_image
Pure technical line drawing of a mechanical bracket or bracket (no text or symbols)
Recorded/saved material is not protected.
If you have any questions or problems concerning your player, please consult your nearest Sony dealer. (If a trouble occurred when the disc was in the player, we recommend that the disc be left in the player when you consult your Sony dealer so that the cause of trouble may be better understood.)
Continued
On the earphones
Road safety
Do not use earphones while driving, cycling, or operating any motorized vehicle. It may create a traffic hazard and is illegal in many areas. It can also be potentially dangerous to play your player at high volume while walking, especially at pedestrian crossings. You should exercise extreme caution or discontinue use in potentially hazardous situations.
Preventing hearing damage
Avoid using earphones at high volume. Hearing experts advise against continuous, loud and extended play. If you experience a ringing in your ears, reduce the volume or discontinue use.
Caring for others
Keep the volume at a moderate level. This will allow you to hear outside sounds and to be considerate of the people around you.
On the remote control
The supplied remote control is designed for use with this player only. The player cannot be operated with a remote control that was supplied with another device.
On the LCD screen and lens
- The LCD screen is manufactured using extremely high-precision technology so over 99.99% of the pixels are operational for effective use. However, there may be some tiny black points and/or bright points (white, red, blue or green in color) that constantly appear on the LCD screen. These points are normal in the manufacturing process and do not affect the recording in any way.
- Be careful when placing the player near a window or outdoors. Exposing the LCD screen or the lens to direct sunlight for long periods may cause malfunctions.
- The image pickup device of the camera uses very sophisticated technology; however, bright or dark dots and lines may appear in the LCD screen. Also, when shooting under low-light conditions, white lines or “noise” may appear in the LCD screen. These dots and lines are normal and are not a problem of the camera.
On cleaning
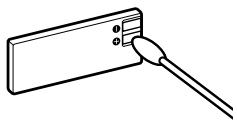
natural_image
Simple line drawing of a tool interacting with a rectangular panel (no text or symbols)
On moisture condensation
If the player is brought directly from a cold to a warm location, or is placed in a very damp room, moisture may condense inside or outside the player. Should this occur, the player will not operate properly.
Moisture condensation occurs easily when:
- The player is brought from a cold location such as a ski slope into a warmly heated room.
- The player is taken from an air-conditioned room or car interior to the hot outdoors, etc.
How to prevent moisture condensation
When bringing the player from a cold place to a warm place, seal the player in a plastic bag and allow it to adapt to conditions at the new location over a period of time (about an hour).
If moisture condensation occurs
Turn off the player and wait about an hour for the moisture to evaporate. Note that if you attempt to shoot with moisture remaining inside the lens, you will be unable to record clear images.
Back up recommendation
To avoid the potential risk of data loss, always copy (back up) data to a disk.
The pictures used in this manual
The photographs used as examples of pictures in this manual are reproduced images, and are not actual images shot using this player.
Specification
Audio playing system
MiniDisc digital audio system
Laser diode properties
Material: GaAlAs
Wavelength: λ = 790 nm
Emission duration: continuous
Laser output: less than 44.6 μW
(This output is the value measured at a distance of 200mm from the lens surface on the optical pick-up block with 7mm aperture.)
Recording and playback time
See “List of the recording time for each disc”
(page 65)
Revolutions
Approx. 350 rpm to 3,600 rpm (CLV)
Error correction
Hi-MD:
LDC (Long Distance Code)/BIS (Burst Indicator Subcode)
MD:
ACIRC (Advanced Cross Interleave Reed Solomon Code)
Sampling frequency
44.1 kHz
Linear PCM (44.1 kHz/16 bit)
ATRAC3plus (Adaptive TRansform Acoustic
Coding 3 plus)
ATRAC3
ATRAC
MP3 (MPEG-1 Audio Layer-3/sampling frequency
44.1 kHz/bit rate 32-320 kbps (fixed/variable bit rate)
Modulation system
Hi-MD:
1-7RLL (Run Length Limited)/PRML (Partial
Response Maximum Likelihood)
MD:
EFM (Eight to Fourteen Modulation)
Frequency response (When outputting through earphone)
20 to 20,000 Hz ±3 dB
Onput connector
○: stereo mini-jack (dedicated remote jack)
Maximum output (DC)
Headphones:
2.8mW + 2.8mW (16 ) (European model)
5 mW + 5 mW (16 Ω) (Other models)
Image device
5.6 mm (1/3.2 type) color CMOS
Primary color filter
Total pixels number of camera
Approx. 1,330,000 pixels
Effective pixels number of camera
Approx. 1,300,000 pixels
Lens Single focal lens
f = 4.7 mm (7/32 inches) (35 mm camera
conversion: 36 mm (1 5/16 inches)), F3.2
Exposure control
Automatic
Still images: DCF compliant
(Exif Ver. 2.2 JPEG compliant),
Flash
Recommended distance: 0.5 m to 0.7 m (1.6 to 2.3 ft)
LCD screen
38mm in opposite angle (1.5 type)
Total number of dots 114 960 (479 × 240) dots
Power requirements
Sony AC Power Adaptor connected at the DC IN 6V jack:
120 V AC, 60 Hz (Models for USA, Canada,)
220 V AC, 50 Hz (Model for China)
100 - 240 V AC, 50/60 Hz (Other models)
The player:
Lithium-ion rechargeable battery
LIP-4WM, 3.7 V, 370 mAh, Li-ion
USB cradle:
AC power adaptor DC 6V
Operating temperature
+5^ C (+41^ F) to +35^ C (+95^ F)
Battery operation time
See "Battery life" ( page 15)
Dimensions
Approx. 83.6 × 81.1 × 21.4 mm (w/h/d)
(33/8 × 31/4 × 27/32 in.) (excluding projecting parts and controls)
Mass
Approx. 145 g (5.1 oz.) (the player only)
Approx. 155 g (5.5 oz.) (including the rechargeable battery)
US and foreign patents licensed from Dolby Laboratories.
Design and specifications are subject to change without notice.
List of the recording time for each disc (Approx.)
The recording time is varied depending on disc type, disc mode, codec, and bit rate.
When using a disc in Hi-MD mode
| Recording time* |
| Codec/Bit rate | 1GB Hi-MD disc | 80-minute standard disc | 74-minute standard disc | 60-minute standard disc |
| Linear PCM/1.4Mbps | 1 hour and 34 minutes | 28 minutes | 26 minutes | 21 minutes |
| ATRAC3plus/256kbps | 7 hours and 55 minutes | 2 hours and 20 minutes | 2 hours and 10 minutes | 1 hour and 40 minutes |
| ATRAC3plus/64kbps | 34 hours | 10 hours and 10 minutes | 9 hours and 20 minutes | 7 hours and 40 minutes |
| ATRAC3plus/48kbps | 45 hours | 13 hours and 30 minutes | 12 hours and 30 minutes | 10 hours |
| ATRAC3/132kbps | 16 hours and 30 minutes | 4 hours and 50 minutes | 4 hours and 30 minutes | 3 hours and 40 minutes |
| ATRAC3/105kbps | 20 hours and 40 minutes | 6 hours and 10 minutes | 5 hours and 40 minutes | 4 hours and 40 minutes |
| ATRAC3/66kbps | 32 hours and 40 minutes | 9 hours and 50 minutes | 9 hours | 7 hours and 20 minutes |
| MP3**/128kbps | 17 hours | 5 hours | 4 hours and 30 minutes | 3 hours and 30 minutes |
When using a disc in MD mode
| Recording time* |
| Codec/Bit rate | 80-minute standard disc | 74-minute standard disc | 60-minute standard disc |
| ATRAC (stereo)/292kbps | 1 hour and 20 minutes | 1 hour and 14 minutes | 1 hour |
| ATRAC3/132, 105kbps | 2 hours and 40 minutes | 2 hours and 28 minutes | 2 hours |
| ATRAC3/66kbps | 5 hours and 20 minutes | 4 hour and 56 minutes | 4 hours |
* When transferring 4-minute tracks
**MP3 file formats are as follows: MPEG-1 Audio Layer-3/sampling frequency 44.1 kHz/fixed bit rate.
Glossary
AE
The AE (Auto Exposure) function automatically adjusts the exposure based on the brightness of the object as determined by the camera.
AF
The AF (Auto Focus) function adjusts the focus automatically.
ATRAC3plus
ATRAC3plus is an enhanced version of ATRAC3. Compared to ATRAC3 (used in LP2 and LP4 mode), which attains a compression ratio 10 times higher than that of a CD, ATRAC3plus (used in Hi-SP and Hi-LP mode) achieves a higher compression ratio that is 20 times higher than that of a CD, but with no loss in sound quality.
CMOS
CMOS (Complementary Metal Oxide Semiconductor) is a semiconductor that can convert optical signals into electric signals.
DCF
DCF (Design rule for Camera File) system, is a standard determined by JEITA (Japan Electronics and Information Technology Industries Association).
DSP TYPE-S for ATRAC/ATRAC3
This player supports DSP TYPE-S, a specification for high-level Sony MiniDisc decks equipped with digital signal processors (DSP). This specification allows the player to produce high-quality sound from tracks recorded in MDLP mode. Since it retains DSP TYPE-R support, the player produces superior results during recording or playback in SP (normal stereo) mode.
Exif
Exif is a file format that allows you to add information such as recording data determined by JEITA (Japan Electronics and Information Technology Industries Association).
When you format a disc, all the data (including audio data) on the disc are erased so that you can save new data.
Hi-MD
“Hi-MD” is a new MiniDisc format. Incorporating the new ATRAC3plus audio compression technology, Hi-MD is a new recording format that delivers longer recording times than standard MD discs. Hi-MD discs can also be used as a computer storage medium for non-audio data such as text and still images. For more details on Hi-MD, refer to the supplied flyer “What you can do with the Hi-MD Walkman.”
"Hi-MD mode" and "MD mode"
This player has two operation modes, “Hi-MD mode” and “MD mode” that are automatically recognized whenever a disc is inserted.
| Disc | Mode |
| 1GB Hi-MD disc | Hi-MD |
| 60/74/80-minute standard disc | Blank disc | The operation mode set in the “Disc Mode” menu is applied. |
| Disc containing music in Hi-MD mode | Hi-MD |
| Disc containing music in MD mode | MD |
JPEG
JPEG is a compression format for the color still images often used on the internet. The images shot using this player are recorded in JPEG format in the disc.
Linear PCM
Linear PCM is a digital, non-compressed audio coding system. You can enjoy high-quality sound equal to that of CDs by recording in this mode.
Net MD
Net MD is a technical standard that allows you to transfer audio data from a computer to a MiniDisc using an USB cable. Previously, it was impossible to record audio data from a computer because the only source audio data that could be recorded were analog signals from a microphone and analog input or PCM audio of music CDs. Using the software (SonicStage, etc.) that meets the technology of copyright protection (“OpenMG,” “MagicGate,” etc.), the audio data format can be converted to “ATRAC” or “ATRAC3,” which makes it possible to then transfer the audio data to a MiniDisc.
1) Copyright technology to manage audio data stored in your computer from audio CDs
2) Technology to authenticate copyright protection between computer and NetMD equipment
3) Conventional format to be transferred when recording to MiniDisc
Continued
System File
The system file is space on the disc that is used to store information other than audio files; for instance, track numbers. If the MiniDisc were a book, the system file would correspond with the index or table of contents. The player rewrites the system file whenever an operation such as recording, adding or deleting track marks, or moving tracks has been done. (“SYSTEM FILE WRITING” appears in the display when the player is rewriting the system file.) While the player is writing disc information, make sure not to move or jog the player or disconnect the power source as this may cause the information to be incorrectly recorded or the disc contents to be lost.
USB
USB (Universal Serial Bus) is a standard for connecting computer equipment such as a keyboard and a mouse.
VGA
VGA (Video Graphics Array) refers to the image size of 640 × 480 pixels.
Index for "Player Operation"
A
A-B Repeat 39
AE 66
AF 66
ATRAC3plus 66
Auto power-off function 26
AVLS 37
B
Battery life 16
Beep 37
Bookmark Play 39
Burst 42
C
Cleaning 62
Clock Set 17, 38, 44, 45
CMOS 66
Computer 47
CoverArtLink 38,45
Cover art 26
Cover art setting 41
D
DCF 66
Delete 45
Disc Memory 37
Disc Mode 37
DSP TYPE-S 66
E
Enlarging a portion of a still image 32
Exif 66
Exposure 42
F
Flash 31
Flicker 43
Format 43, 45, 66
H
Hi-MD 66
Hi-MD mode 67
HOLD 13
|
Image quality 43
Image size 43
Index screen 32
J
JPEG 67
JPEG Viewer 46
L
Language 38, 44, 45
Linear PCM 67
M
Macro 32
Main P. Mode 36
Moisture 63
N
Net MD 67
Night mode 42
0
Optional Accessories 11
Q
Quick Mode 37
Quick Review 32
R
Repeat 36
s
Searching for a Music Track 23
Self-timer 31
Slide Show 33, 38, 44, 45
Sound 36
Sound EQ 36
Storage space 51
Sub P. Mode 36
Supplied Accessories 10
System File 68
U
USB cable 10
USB cradle 10
W
White balance 42
Z
Zoom 31
What you can do with SonicStage/MD Simple Burner
What you can do with SonicStage
SonicStage allows you to import audio data to your computer from music sources such as audio CDs and the Internet, and then transfer the audio data stored in your computer to an MD.

flowchart
graph LR
    A["Audio CD"] -->|Import| B["Laptop"]
    C["Internet"] -->|Music files in the MP3,WAV, and WMA* formats| B
    B -->|Transfer| D["MD Walkman"]
* Copyright-protected WMA files cannot be transferred.
What you can do with MD Simple Burner
MD Simple Burner allows you to record music tracks from an audio CD in the CD drive of your computer to an MD Walkman, without first recording the music tracks to the computer.

flowchart
graph LR
    A["Audio CD"] -->|Music| B["Laptop"]
    B --> C["MD Walkman"]
    C -->|Music| B
    B -->|Music| A
Basic operational flow using an MD Walkman

SonicStage

MD Simple Burner
Providing the required system environment (page 72)

Installing the software onto your computer (page 73)

Importing audio data to your computer (page 75)


Connecting an MD walkman to your computer (see page 47 on "Player Operation")


Transferring audio data from your computer (page 77)
Connecting an MD walkman to your computer (see page 47 on "Player Operation")


Listening to an MD
Providing the required system environment
System requirements
The following system environment is required in order to use the SonicStage Ver. 3.0/MD Simple Burner Ver. 2.0 software for the MD Walkman.
| Computer | IBM PC/AT or Compatible |
| CPU: Pentium III 450 MHz or higherHard disk drive space: 200 MB or more (1.5 GB or more is recommended) (The amount space will vary according to Windows version and the number of music files stored on the hard disk.)RAM: 128 MB or more |
| OthersCD drive (capable of digital playback by WDM) (A CD-R/RW drive is necessary for CD writing)Sound BoardUSB port |
| Operating System | Factory installed:Windows XP Media Center Edition 2005/Windows XP Media Center Edition 2004/Windows XP Media Center Edition/Windows XP Professional/Windows XP Home Edition/Windows 2000 Professional/Windows Millennium Edition/Windows 98 Second Edition |
| Display | High Color (16bit) or higher, 800 × 600 dots or better ( 1024 × 768 dots or better is recommended) |
| Others | Internet access: for Web registration, EMD services and CDDBWindows Media Player (version 7.0 or higher) installed for playing WMA files |
This software is not supported by the following environments:
- OSs other than the indicated above
- Personally constructed PCs or operating systems
- An environment that is an upgrade of the original manufacturer-installed operating system
- Multi-boot environment
- Multi-monitor environment
- Macintosh
Notes
- We do not ensure trouble-free operation on all computers that satisfy the system requirements.
- The NTFS format of Windows XP/Windows 2000 Professional can be used only with the standard (factory) settings.
- For Windows 2000 Professional users, install Service Pack 3 or later version before using the software.
- We do not ensure trouble-free operation of the system suspend, sleep, or hibernation function on all computers.
Installing the software onto your computer
Before installing the software
- Make sure to close any virus-check software, as such software usually demands a large amount of system resources.
- When you use the MD Walkman, make sure to install the software with the supplied CD-ROM.
— If OpenMG Jukebox, SonicStage or Net MD Simple Burner is installed already, the previous software will be overwritten by the new version. The new version retains the functions of the older version, but with new functions added.
— If SonicStage Premium or SonicStage Simple Burner is installed already, the previous software will co-exist with the new version.
— You will still be able to use music data registered by an older software version even after SonicStage has been installed. As a precaution, we recommend that you back up your music data. To back up the data, refer to [Backing Up My Library] on SonicStage Help.
The method for managing music data differs in part from conventional methods. For details, refer to [For Users of Earlier Versions of SonicStage] in SonicStage Help.
- If the MD Walkman is connected to the computer with the USB cable, make sure to disconnect the USB cable first before installing the software.
1 Turn on your computer and start up Windows.
2 Insert the supplied CD-ROM into the CD drive of your computer. The setup program starts up automatically and the installation window appears.
3 When the [Region Selection] screen appears, select the region where the SonicStage software will be used, and then click [Next].
4 Click [Install SonicStage and MD Simple Burner] and then follow the displayed instructions.

Click [Install SonicStage and MD Simple Burner]
Read the instructions carefully.
Depending on your region, the buttons other than [Install SonicStage and MD Simple Burner] may differ from those in the illustration above.
The installation may take 20 to 30 minutes, depending on your system environment.
Make sure to restart your computer only after the installation is completed.
Was the installation successful?
If any trouble occurs during the installation, see “Troubleshooting” (page 94).
Importing audio data
This section explains how to record and store audio data from an audio CD to My Library of SonicStage on the hard disk drive of your computer. You can also assign cover art for imported albums.
You can record or import music from other sources such as the Internet and your computer's hard disk. Refer to SonicStage Help for details.
Notes
- Only audio CDs with a COMPACT DISC mark can be used with SonicStage.
- We do not guarantee normal operation in the case of the copy-controlled CDs.
![Playback control section [▼ Music Source] CD Album Title Album name Import a CD CD Info [Settings] Cover art display [CD Info] CD Info Music Source My Library Transfer [Settings] [Settings] My Library From 1.0 GB Options [158] (Blnd) 256 Radio (Blnd) GPS](/content/2019/11/46948/images/390683a8ec03a478b9506103adb0b3c734e416eba1f4a2e45fa79fc9850fa2e7.jpg)
1 Start up SonicStage.
Select [Start] - [All Programs]* - [SonicStage] - [SonicStage].
*[Programs] in the case of Windows 2000 Professional/Windows Millennium Edition/Windows 98 Second Edition
SonicStage starts up and the main window appears.

You can also start SonicStage with double click SonicStage ([SonicStage] icon) on the desktop.
2 Insert the audio CD that you want to record into the CD drive of your computer.
3 Point to [▼ Music Source] on the upper-left side of the screen and click [Import a CD].
The screen switches to the “Music Source” (Importing CD) screen and all the tracks on the audio CD are listed.
4 If necessary, click ☑ to uncheck tracks you do not want to record.
If you unchecked a box by mistake, click it again to restore the check.
To check all boxes, click ☑.
To uncheck all boxes, click ☐.
5 If necessary, change the format and bit rate for audio CD recording.
When you click [Settings] on the right side of the screen, “CD Importing Format” dialog box will appear. The dialog box will ask you to select the format and bit rate for recording an audio CD.
6 Click →.
The recording of the tracks selected in step 4 starts.
To stop recording
Click .
To assign cover art for imported albums
Find the desired image file (jpg, gif, bmp file) using Windows Explorer and drag it to the cover art display in the playback control section.

If CD information such as album title, artist name, and track names could not be obtained automatically, click [CD Info] on the right side of the screen. When you do this, your computer must be connected to the Internet.
Transferring audio data from your computer to the MD Walkman
Audio data stored in My Library of SonicStage can be transferred to your MD Walkman an infinite number of times.
![[Transfer ▼] VOL Music Source Mc Library Transfer [Transfer ▼] View Albums Transfer My Library Free 5.0 GB Up + Back cAlbum xwoo 9 Tracks 00:34:45 1 Track 01 2 Track 02 3 Track 03 4 Track 04 5 Track 05 6 Track 06 7 Track 07 8 Track 08 9 Track 09 Hi-MO(F:) Free 267.4 MB Mode Disc Name Hi-MO Title Status The My Library list Settings DeviceMedia Info [Settings]](/content/2019/11/46948/images/00924ccdfd759f8e18e25ea194045a74d01dc6c73e2a8820f9eb6569c8b697fb.jpg)
1 Insert a disc into the MD Walkman and connect the MD Walkman to your computer.
Use the supplied MD Walkman-dedicated USB cable to connect the MD Walkman to your computer.
For details about connections, see page 47 on “Player Operation.”
Do not disconnect the power source or the dedicated USB cable before the transfer has completed.
2 Point to [Transfer ▼] on the upper-right side of the screen and click [Hi-MD] or [Net MD].
The screen is switched to the transfer (Hi-MD or Net MD) screen.
3 Click the tracks you want to transfer in the My Library list on the left side of the screen.
To transfer more than one track, hold down the [Ctrl] key while selecting the tracks.
To transfer all tracks of the album, click the album.
4 If necessary, change the transfer mode.
As the default setting, tracks in the OpenMG (PCM/ATRAC3/ATRAC3plus) format will be transferred in the same format and bit rate (normal transfer).
If the device connected to the computer does not support the above format, the format and bit rate will be converted to those of the device. In some case, this process may take time.
If you want to change the format and bit rate, click [Settings] in the center of the screen to display “Transfer Mode Settings” dialog box.
5 Click → .
Transfer of the tracks selected in step 3 begins.
To stop transferring
Click .
To play a disc on a Net MD device that does not support Hi-MD
If you want to play the transferred tracks on a Net MD Walkman that does not support Hi-MD, select [Net MD] for the mode (operation mode) on the right side of the screen after step 2. This operation mode can be selected only when using a 60/74/80-minute standard disc in Hi-MD mode for recording.
Notes
- A transfer will fail and an error message will appear in the following cases:
—When there is no enough free space on the disc.
—When the track is subject to playback restrictions.
- During the transfer, the system suspend, sleep, or hibernation function will not operate.
- Depending on the type of the text and number of characters, the text entered by SonicStage may not be displayed on the connected MD Walkman. This is due to the limitations of the connected MD Walkman.

If you are using a camera-equipped Hi-MD Walkman in Hi-MD mode, whenever you select an album for which album art has been registered, the cover art is transferred to the Hi-MD Walkman along with the album. Cover art is not be transferred in the case of individual tracks.
Transferring back audio data from the MD Walkman to your computer
![SonicStage File Edit View Controls Tools Help vou Music Source My Library Transfer Album zero / 00:00:00 Normal Suggest Transfer My Library Up Back album zero 9 Tracks 00:34:45 No. File 1 Track 01 2 Track 02 3 Track 03 4 Track 04 5 Track 05 6 Track 06 7 Track 07 8 Track 08 9 Track 09 [Transfer ▼] Hi-MD(F:) Mode Disc Name Hi-MD Disc zero Status Album zero 01 Track 01 02 Track 02 03 Track 03 04 Track 04 05 Track 05 06 Track 06 07 Track 07 08 Track 08 09 Track 09 10 Track 10 11 Track 11 List of tracks on the MD Device/Media Info The My Library list](/content/2019/11/46948/images/6fe8a36bbba720c591f6456ec875d46bbf75e93845cd9239ff593e31fbd2089c.jpg)
Transferring from the MD Walkman back to your computer
Audio data that has been transferred from your computer and stored on the MD can be transferred back to My Library of SonicStage on your computer.
1 Insert a disc into the MD Walkman and connect the MD Walkman to your computer.
Use the supplied dedicated USB cable for the MD Walkman to connect the MD Walkman to your computer.
For details about connections, see page 47 on “Player Operation.”
Do not disconnect the power source or the dedicated USB cable before the transfer has completed.
2 Point to [Transfer ▼] on the upper-right side of the screen and click [Hi-MD] or [Net MD].
The screen is switched to the transfer (Hi-MD or Net MD) screen.
3 In the list on the right side of the screen (Hi-MD or Net MD), click to select the tracks you want to transfer to your computer.
4 Click ← in the middle of the screen.
The transferring of the tracks selected in step 3 starts.
To stop transferring
Click .
To import cover art set using a camera-equipped Hi-MD Walkman to My Library
If you are using a camera-equipped Hi-MD Walkman in Hi-MD mode, you can modify the cover art for any group transferred from My Library, as well as register the covet art for another group. The following two ways can be used to import the cover art to My Library.
- Insert the disc with the updated cover art, and then press the [Auto Import] button on the bottom-right side of the screen.
The cover art in My Library is automatically updated.
- Select the group for which you want to import the cover art by clicking it on the right side (Hi-MD side) of the display, select [Import Cover Art] from the right-click menu, and then select the album for which you want to add the cover art from the “Select an Album” dialog box.
Note
Tracks transferred to the MD Walkman from another computer cannot be transferred back to My Library on your computer.
Importing tracks recorded on a Hi-MD Walkman\* to your computer
Tracks that have been recorded on a Hi-MD Walkman* can be imported to My Library of SonicStage on your computer only once.
* Only tracks recorded in Hi-MD mode
1 Insert recordable disc into the Hi-MD Walkman and connect the Hi-MD Walkman to your computer.
2 Point to [Transfer ▼] on the upper-right side of the screen and click [Hi-MD]. The screen is switched to the transfer (Hi-MD) screen.
3 Click the tracks you want to transfer in the Hi-MD list on the right side of the screen.
To transfer more than one track, hold down the [Ctrl] key while selecting the tracks. To transfer all tracks of the group, click the group.
4 Click ← in the middle of the screen.
The “Import” dialog box appears.
5 Click [Yes].
The importing of the tracks selected in step 3 starts.
To stop importing
Click .

When tracks recorded in analog are included on a Hi-MD, a dialog box appears confirming whether to save those tracks in WAV format. To save the tracks as WAV format music files, select the check box next to “Save in WAV format when importing”, click Browse button and specify a destination folder as necessary, and click the [OK] button.
Notes
- You cannot import tracks that were recorded in a Net MD mode (MD mode) to your computer, or tracks that have been recorded on a device that does not support Hi-MD mode.
- Before importing tracks recorded on the Hi-MD Walkman to the computer, click [Settings] in the middle of the screen to display “Transfer Mode Settings” dialog box, and then confirm the status of the [Import settings] check box (it is checked by default) in [Advanced...]. Then do as follows:
— To import tracks to My Library while deleting them on the Hi-MD Walkman, uncheck the box.
— To import tracks to My Library while leaving the copy of them on the Hi-MD Walkman, check the box. Tracks left on the Hi-MD Walkman are treated the same as tracks that have been automatically transferred from the computer. For this reason, they cannot be divided or combined on the Hi-MD Walkman.
- When you transfer tracks recorded in linear PCM on the Hi-MD Walkman to a computer for editing (dividing or combining) in My Library, the editing may take a long time, depending on the length of the tracks and capabilities of your computer. This is due to limitations in the MiniDisc system. If you want to edit long tracks recorded in linear PCM, we recommend that you do the editing on the Hi-MD Walkman first, and then transfer the edited data to a computer afterwards.
Writing audio data to a CD-R/CD-RW disc
You can write tracks in My Library of SonicStage to a CD-R/CD-RW disc. Analog tracks recorded on a Hi-MD device and imported to My Library can be written to and enjoyed on a CD-R/CD-RW. The number of times data can be written may be limited due to copyright restrictions.
![SonicStage File Edit View Controls Tools Help VOC Music Source My Library Transfer [Transfer ▼] Album weeo / 00:34:45 Normal Track 07 data 00:00:00 Sugars Create a CD View Albums My Library Up Album weeo 9 Tracks 00:34:45 No. File 1 Track 01 2 Track 02 3 Track 03 4 Track 04 5 Track 05 6 Track 06 7 Track 07 8 Track 08 9 Track 09 Audio... Drive CD R (G) Top Track 02 Track 03 Track 04 Track 05 Track 06 Track 07 Track 08 Track 09 Media Info. Operation Status Display The My Library list The tentative list of items to be written to the CD-R/CD-RW disc](/content/2019/11/46948/images/14af78d337509eaa38d26a9f2f795eaad7d26076753f970f204fc4d7e9764a3f.jpg)
1 Point to [Transfer ▼] on the upper-right side of the screen, and then select the type of CD to be created.
To create an audio CD, select [Create an Audio CD]. To create an ATRAC CD, select [Create an ATRAC CD]. To create an MP3 CD, select [Create an MP3 CD].
ATRAC CDs can be played only on devices that support ATRAC CDs. MP3 CDs can be played only on devices that support MP3 CDs.
2 Insert a blank CD-R/CD-RW disc into the disc drive of your computer.
Use a CD-R/CD-RW with a recording capacity of 650MB or 700MB. Data may not be correctly written if a disc of another capacity is used.
3 Select the albums or tracks to be written to the CD-R/CD-RW disc by clicking them in the My Library list on the left side of the screen.
By double-clicking an album, you can see a list of the tracks on the album and select the tracks you want.
4 Click → in the middle of the screen.
The selected albums or tracks appear on the right side of the screen (the CD-R/CD-RW) as a tentative list of items to be written.
5 Click in the right of the screen.
The “Writing Settings” dialog box appears allowing you to set options for writing.
6 Click [OK].
Writing to the disc begins.
A message appears when writing has completed.
7 Click [OK].
The disc is automatically ejected, and the screen returns to the Transfer (CD Creation) screen.
To cancel track writing
1 Click in the Operation Status Display while tracks are being written to the disc. Writing to the disc is canceled and a message appears.
2 Click [OK].
The disc is automatically ejected, and the screen returns to the Transfer (CD Creation) screen.
Notes
- Only tracks in MP3 format can be written to an MP3 CD.
- Tracks that have been digitally recorded on a Hi-MD device and then imported to SonicStage cannot be written to an audio CD. However, analog tracks recorded on a Hi-MD device can be written to a CD.
Using SonicStage Help
SonicStage Help provides further details on how to use SonicStage. SonicStage Help allows you to search easily for information from a list of operations, such as “Importing Tracks” or “Transferring Tracks”, or from large list of keywords, or by typing in words that might lead you to the appropriate explanations.
To display SonicStage Help
Click [Help] – [SonicStage Help] while SonicStage is running.
![[SonicStage Help] SonicStage Help F1 Product Registration Product Support Related Web Sites About SonicStage My Library Transfer Normal 00:34:45 00:00:00 Suggest My Library](/content/2019/11/46948/images/e25029712242942e0fca8e8056eb5da9c2137d5ebd24880107f7b9f83cc79a71.jpg)

You can display SonicStage Help by selecting the following: [Start] – [All Programs]*– [SonicStage] – [SonicStage Help]
* [Programs] in the case of Windows 2000 Professional/Windows Millennium Edition/Windows 98 Second Edition
Notes
- In SonicStage Help, “Device/Media” is the general term for the external device such as the MD Walkman, the Network Walkman, and the CD Walkman.
- Follow the instructions of your internet provider regarding such things as recommended system environment when using EMD services.
Understanding SonicStage Help
The left side frame

The right side frame
1 Double click [Overview] in the left-side frame.
2 Click [About This Help File].
The explanation will appear in the right-side frame.
3 Read the text.
Scroll the display if necessary.
Click underlined words to jump to their explanations.
Searching for a word inside an explanation
![[Search] "Type in the keyword to find" text box [List Topics] The list of the words that you searched [Display] [Search] A B C D E E M N O R I W IN Album: Gon:Gn:Gn Manager group of lists called "advanced". For example, when receiving lists from audio CC:Gn:Gnage automatics creates an array with the same name as the audio CD. ATRAC1 ATRAC2, which stands for Adobe Thramware Acoustic Coding Log is an audio convenience encoding that facilitates the demand for high sound signals and single compliance using ATPAC2 component audio CD sizes approximately two with as original code. ATRAC3 ATRAC4, which stands for Adobe Thramware Acoustic Coding Log is an audio component encoding that is a more pronounced version of ATPAC3 ATRAC5: provides high sound signals of a high convenience ratio. It comprises signal CD size approximately one hundred times the original code. In addition, ATRAC6: it is used when referring to both the original ATPAC6 and ATPAC6 plus convenience encoding. ATRAC7 Audio Devices A formal identified user when recording lists to packets hand bits inside in ATRAC8, ATRAC9 is also linked to the following text: the original video content.](/content/2019/11/46948/images/dede6e993ee2a2939a7031f6e0ac0797c958d0f78bfac44b13b72bab4443e809.jpg)
1 Click [Search] to open the “Search” window.
2 Type in the words.
3 Click [List Topics].
A list of the words that were searched is displayed.
4 Click to select the desired item among those displayed.
5 Click [Display].
An explanation of the selected item is displayed.
Referring to SonicStage Help
Click [Contents] on the left side of the Help window to view a list of items for each operation. Click on any items for details.
Importing audio data to the computer
| To | SonicStage Help |
| Import audio data from the Internet | [Importing Tracks] – [Purchasing Tracks from a Music Service Site] |
| Import audio files on the computer in SonicStage | [Importing Tracks] – [Importing Music Files] |
Listening to audio data on the computer
| To | SonicStage Help |
| Listen to audio data from the CD drive or My Library | [Music Playback] – [Playing Back an Audio CD] or [Playing Back a Track in My Library] |
| Listen to audio data on the MD Walkman connected to the computer | [Music Playback] – [Playing Back a Track on a Device/Media] |
Managing and editing imported tracks
| To | SonicStage Help |
| Change information related to CD information downloading | [Changing SonicStage Settings] – [Changing Settings for the CD Drive] |
| Edit an albumDelete the tracks | [Managing Tracks and Albums] – [Creating/Editing Albums] |
| Change the destination directly for track storage | [Changing SonicStage Settings] – [Changing the Location for Saving Imported Files] |
Backing up audio data
We recommend that you back up your music data as a precaution against hard disk crashes or computer replacement.
| To | SonicStage Help |
| Back up audio data in My Library | [Backing Up My Library] – [Backing Up Data to a Disk] |
| Look up about SonicStage backup | [Backing Up My Library] – [FAQ-About SonicStage Backup Tool] |
Troubleshooting
| To | SonicStage Help |
| Look up troubleshooting procedure | [Additional Information] – [Troubleshooting] |
When you want to know
| To | SonicStage Help |
| Look up unknown words | [Additional Information] – [Glossary] |
| Look up the kinds of audio data that can be managed by SonicStage | [Overview] – [Content Handled Within SonicStage] |
| Look up the kinds of functions that can be used with SonicStage | [Overview] – [Features] |
| Look up changes since an earlier version | [For Users of Earlier Versions of SonicStage] – [Differences from Earlier Versions] |
Before using MD Simple Burner
MD Simple Burner allows you to record music tracks from an audio CD in the CD drive of your computer to the MD Walkman.
There are two ways to record from an audio CD.
- Simple mode (page 89)
You can use MD Walkman operations to record an entire CD or only the first track without launching MD Simple Burner.
- Standard mode (page 90)
You can launch MD Simple Burner to record using computer operations. Record an entire CD or selected tracks.
Notes
- You cannot record in simple mode while the MD Simple Burner in standard mode or OpenMG software (SonicStage, OpenMG Jukebox, etc.) is active.
- Only audio CDs with a COMPACT DISC mark can be used with MD Simple Burner.
- We do not guarantee normal operation in the case of the copy-controlled CDs.
Recording using MD Walkman operations (Simple mode)
1 Insert a recordable disc into the MD Walkman and then connect the MD Walkman to the computer.
For details about connections, see page 47 on “Player Operation” section.
Do not disconnect the power source or the dedicated USB cable before the transfer has completed.
2 Insert the audio CD that you want to record into the CD drive of your computer.
The CDDB registration window appears when you use the CDDB for the first time.
You need to connect the computer to the Internet in order to use the CDDB.
3 Press and hold DOWNLOAD for 2 seconds or more on the MD Walkman.
The recording starts.
All tracks on the CD are recorded as a new group.
To stop recording
Click ▶ Abort on the computer display.
While the first track is being recorded, you can use ■ (stop) button to stop on the MD Walkman.
Setting the recording mode
Before starting recording, right-click the MD Simple Burner icon in the task tray, and then select in [recording mode].
• [Net MD]: [LP2] or [LP4]
• [Hi-MD]: [PCM], [Hi-SP], [Hi-LP], or [48kbps]
Recording first track only
Before starting recording, right-click the MD Simple Burner icon in the task tray, and then select [Recording settings] – [Record 1st Track Only].
Right-click the MD Simple Burner icon in the task tray, and then select the setting by clicking [CDDB(r)] – [Multiple Matches].
— [User Selection]: A selection window is displayed
— [No Resolve]: No CD information is downloaded
— [First Choice]: The first item is downloaded
Recording by computer operations (Standard mode)
To start MD Simple Burner, click [Start] – [All Programs]* – [MD Simple Burner] – [MD Simple Burner].
* [Programs] in the case of Windows 2000 Professional/Windows Millennium Edition/Windows 98 Second Edition

There are other ways to start up MD Simple Burner as follows:
- Double-click the MD Simple Burner icon in the task tray, or right-click and select [Show
Standard Mode].
- Double-click the MD Simple Burner shortcut icon on the desktop.


The window for recording all tracks on the CD
![[REC/STOP] To start recording all tracks on the CD as a new group, click here. To stop recording, click [STOP]. CD icon Total time of the selected tracks of CD MD icon Disc name (MD) N D SIMPLE BURNER CONFIG CD Artist Album Time Hi-SP Hi-MD Disc Name Remaining Disc xxxxx 146:56 Album name (CD) Artist name (CD) [Open] To open the display as shown on page 91, click here. Recording mode drop down menu Net MD: LP2/LP4 Hi-MD: PCM/Hi-SP/Hi-LP/48kbps](/content/2019/11/46948/images/4084ea30371ab392c5d6d00b6869d151e2ad3b94366f10b48a97ab415e721fe1.jpg)
The window for recording selected tracks from an audio CD
![Track information (CD) Artist name Total time of the selected tracks of CD Album Title [REC/ STOP] Disc name (MD) Track information (MD) You can change the track name and track number CD Artist xxxxx Album xxxxxx 47:06 No. | Title | Time | 1 Track 01 7:04 2 Track 02 4:40 3 Track 03 6:02 4 Track 04 4:32 5 Track 05 7:31 6 Track 06 3:24 7 Track 07 4:27 8 Track 08 4:58 9 Track 09 4:28 Hi- MD Disc Name Remaining 148:56 Title | Artist | Time | REC → Hi-SP [Get CD Info] Information of an audio CD (album name, track title, etc.) will be reflected in the track list. [Close] Recording mode drop down menu To close the display as shown on page 90, click here. CD operating section Use these controls to confirm the tracks on audio CD to be recorded. To deselect all tracks, click here. [Erase] To select all tracks, click here. [All Erase]](/content/2019/11/46948/images/d5e65b5e38538a494a53f86e61384e61644e0d710b2269f0246fa5bd16173f25.jpg)
Check boxes
Check the box of the tracks
that you want to record
Remaining time of the inserted MD
Uninstalling SonicStage/MD Simple Burner
To uninstall SonicStage/MD Simple Burner, follow the procedures below.
1 Click [Start]–[Control Panel]\*.
* [Settings]–[Control Panel] in the case of Windows 2000 Professional/Windows Millennium Edition/Windows 98 Second Edition
2 Double-click [Add/Remove Programs].
3 Click [SonicStage 3.0.xx] or [MD Simple Burner 2.0.xx] in the “Currently Installed Programs” list, and then click [Change and Remove]\*.
Follow the displayed instruction and restart your computer. The uninstallation is completed when the computer has restarted.
* [Change/Remove] in the case of Windows 2000 Professional, [Add/Remove] in the case of Windows Millennium Edition/Windows 98 Second Edition
Note
When you install SonicStage Ver. 3.0/MD Simple Burner Ver. 2.0, OpenMG Secure Module 4.1 is installed at the same time. Do not delete OpenMG Secure Module 4.1 since it may be used by other software.
On copyright protection
The OpenMG technology allows you to enjoy digital music, while maintaining the copyrights of its holders.
Restrictions on audio content
High-quality digital audio content is widely available through music distribution services on the Internet. To protect the copyrights of its holders from unauthorized distribution, some audio content is distributed with certain restrictions on recording and playback. For example, the playback period or playback count for the data may be limited.
Troubleshooting
Please refer to the following steps if you encounter a problem while using SonicStage/MD Simple Burner.
1 Check the symptoms in this “Troubleshooting” section.
2 Check the symptoms in SonicStage Help when you use SonicStage.
3 If the problem cannot be solved after checking the above references, check the following table and then consult your nearest Sony dealer.
| Computer• Manufacturer:• Model:• Type: Desktop type / Laptop type |
| Name of operating system: |
| RAM capacity: |
| Hard disk drive (containing SonicStage/MD Simple Burner and audio data)• Capacity of the drive:• Free space: |
| Version of the software• SonicStage Ver. 3.01)• MD Simple Burner Ver. 2.02) |
| Error Message (if one appear): |
| If an externally connected CD-ROM drive is used• Manufacturer:• Model:• Type: CD-ROM / CD-R/RW / DVD-ROM / Other ( )• Type of connection to the computer: PC card / USB / IEEE1394 / Other ( ) |
| If another device with USB connection is used• Name of the device (or devices): |
1) To check the SonicStage software version, go to [Help] – [About SonicStage] in the SonicStage window.
2) To check the MD Simple Burner software version, go to [CONFIG] - [Version] in the MD Simple Burner window.
The software cannot be installed onto your computer
| Problem | Cause/Remedy |
| The installation was not successful. | You are using an OS that does not support this software.→See page 72 for more details.All windows applications are not closed.→If you start the installation while other programs are running, a malfunction may occur. This is especially true for programs that require large amounts of system resources, such as virus-check software.There is not enough hard disk space on your hard disk.→You need 200MB or more free space on your hard disk. |
| The installation appears to have stopped before it has completed. | Check for the appearance of an error message beneath the installation window.→Press the [Tab] key while holding down the [Alt] key. If an error message has appeared, press the [Enter] key. The installation will resume. If there is no message, the installation is still in progress. Wait a little while longer. |
| The progress bar on the display is not moving. The access lamp has not lit for a few minutes. | The installation is progressing normally.→Please wait.The installation may take 30 minutes or more, depending on your CD drive or system environment. |
Using a MD Walkman connected to the computer
| Problem | Cause/Remedy |
| Your computer does not recognize the MD Walkman. | The MD Walkman is not firmly connected with the supplied dedicated USB cable to the computer.→Reconnect the MD Walkman to the computer firmly.→Remove and reconnect the MD Walkman. If the computer still does not recognize the MD Walkman, disconnect the cable, restart the computer, and then make the connection again.A disc is not inserted in the MD Walkman.→Check if a disc is inserted in the MD Walkman.The Net MD driver is not be installed.→Install the SonicStage/MD Simple Burner software using the supplied CD-ROM.The software installation failed.→Disconnect the connected device and install the software again using the supplied CD-ROM.The supplied dedicated USB cable is disconnected.→Connect the supplied dedicated USB cable firmly.The connections are made through a USB hub.→Operations are not guaranteed for USB-hub connections. Connect the MD Walkman directly to the USB connector on the computer. |
| Even though the dedicated USB cable is used to connect the MD Walkman to the computer, the display on the MD Walkman does not indicate it is connected. | It takes time to recognize SonicStage.→Please wait.The other application software is running.→Reconnect the supplied dedicated USB cable after a while. If the computer still does not recognize the MD Walkman, disconnect the MD Walkman, restart the computer, and connect the dedicated USB cable again. |
| Even though your computer recognize the MD Walkman, it does not operate normally. | The supplied dedicated USB cable is disconnected.→Connect the supplied dedicated USB cable firmly.The connections are made through a USB hub.→Operations are not guaranteed for USB-hub connections. Connect the MD Walkman directly to the USB connector on the computer. |
Index for "Software Operation"
For the index for “Player Operation,” see page 68.
C
CD drive 72
CDDB 72, 89
CD-R/RW drive 72
CD-ROM 73
Connecting 89
Copyright protection 93
E
EMD service 72
H
Hard disk
free space 72
|
Importing 75
Installing 72
M
MD Simple Burner 88
My Library 75
0
OpenMG Secure Module 4.1 92
R
Recording mode 89
Recording mode (Bit rate) 76
S
Simple mode 89
SonicStage 75
SonicStage Help 84
Start (software)
MD Simple Burner 90
SonicStage 75
System environment 72
System limitations 72
T
Transferring
to the MD Walkman 77
to your computer 79
U
Uninstalling 92
USB port 72
W
WAV 81
Windows 2000 Professional 72, 75, 84, 90, 92
Windows 98 Second Edition 72, 75, 84, 90, 92
Windows Media Player 72
Windows Millennium Edition 72, 75, 84, 90, 92
Windows XP Home Edition 72
Windows XP Media Center Edition 72
Windows XP Media Center Edition 2004 72
Windows XP Media Center Edition 2005 72
Windows XP Professional 72
WMA 70, 72



