
R3 R3000 - Shaver REMINGTON - Free user manual and instructions
Find the device manual for free R3 R3000 REMINGTON in PDF.
| Brand | Remington |
| Model | R3 R3000 |
| Product type | Rotary shaver |
| Power supply | Mains 100-240 V, corded operation |
| Shaving head | Pivoting and flexible head, 3 blades |
| Integrated trimmer | Retractable precision trimmer |
| Included accessories | Stubble cap, cleaning brush, power cord |
| Main functions | Dry shaving, trimming, 3-day beard look |
| Maintenance and cleaning | Clean after each use; washable head under water; brush blades |
| Lubrication | Sewing machine oil on trimmer teeth every 6 months |
| Safety | Use by children under supervision; do not use if cord damaged; keep dry |
| Spare parts | Replacement cord available via consumer service |
| Repairability | Replaceable blades and heads |
| Recommended adaptation period | 4 weeks for best performance |
| Recycling | Do not dispose of with household waste; take to collection center |
Frequently Asked Questions - R3 R3000 REMINGTON
User questions about R3 R3000 REMINGTON
0 question about this device. Answer the ones you know or ask your own.
Ask a new question about this device
Download the instructions for your Shaver in PDF format for free! Find your manual R3 R3000 - REMINGTON and take your electronic device back in hand. On this page are published all the documents necessary for the use of your device. R3 R3000 by REMINGTON.
USER MANUAL R3 R3000 REMINGTON
Style Series Rotary Shaver

natural_image
Black Remington electric shaver with three circular dials and a button (no visible text or symbols on body)R3
natural_image
Line drawing of a hand holding a multi-pin electric shaver (no text or symbols)
natural_image
Diagram of a device's internal components, showing a top-down view and a close-up of internal parts (no text or symbols)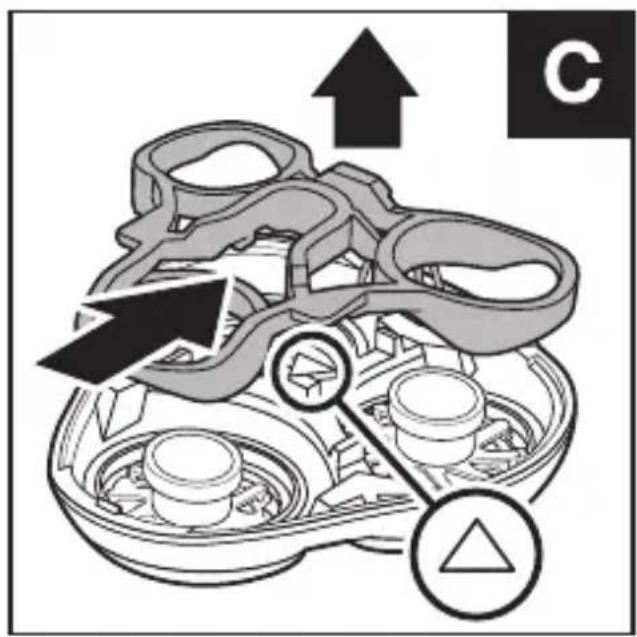
natural_image
Mechanical gear assembly diagram showing three interconnected gears with upward arrows indicating motion (no text or labels)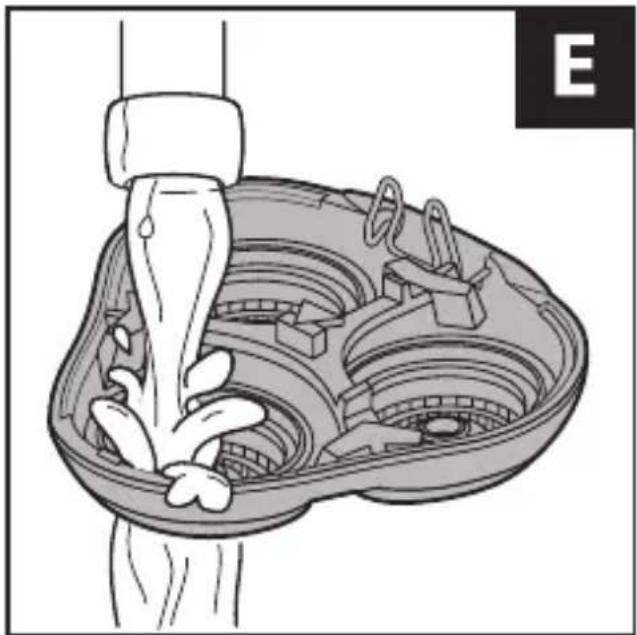
natural_image
Diagram of a hand pouring liquid into a container with internal compartments and a valve (no text or symbols)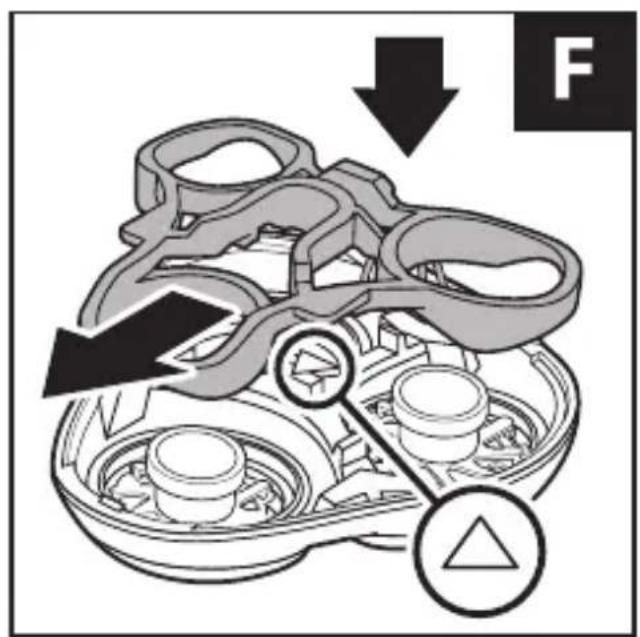
natural_image
Diagram showing a device with internal components and a downward arrow, no text or symbols presentThank you for buying your new Remington ^® product. Please read these instructions carefully and keep them safe. Remove all packaging before use.
IMPORTANT SAFEGUARDS
- This appliance can be used by children aged from 8 years and above and persons with reduced physical, sensory or mental capabilities or lack of experience and knowledge if they have been supervised/instructed and understand the hazards involved. Children shall not play with the appliance. Cleaning and user maintenance shall not be done by children unless they are older than 8 and supervised. Keep the appliance and cable out of reach of children under 8 years.
- WARNING: Keep the appliance dry.
- Do not use the product with a damaged cord. A replacement can be obtained via our International Service Centres.
- Do not leave the appliance unattended while plugged in.
- Keep the power plug and cord away from heated surfaces.
- Make sure the power plug and cord do not get wet.
- Do not plug or unplug the appliance with wet hands.
- Do not twist or kink the cable, or wrap it round the appliance.
- This appliance is not intended for commercial or salon use.
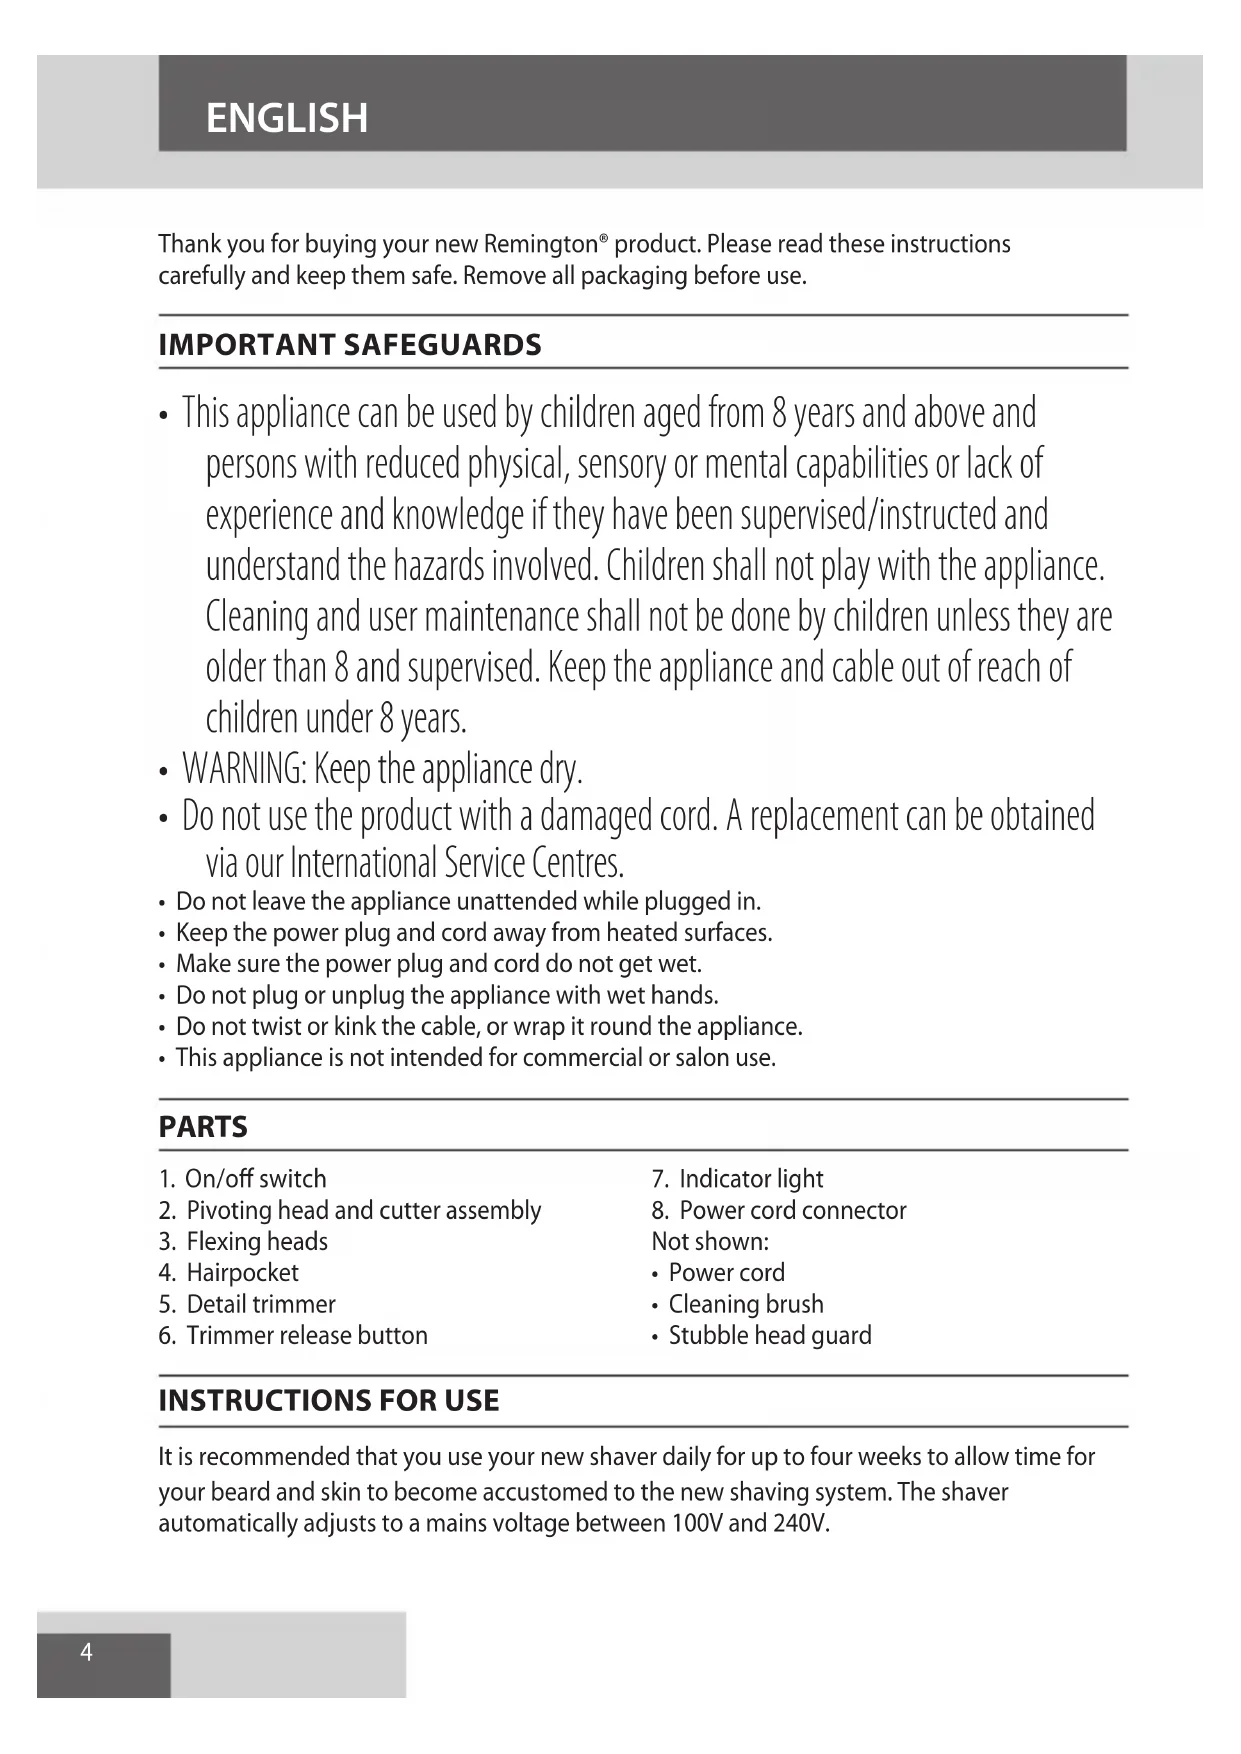
PARTS
- On/off switch
- Pivoting head and cutter assembly
- Flexing heads
- Hairpocket
- Detail trimmer
- Trimmer release button
- Indicator light
- Power cord connector
Not shown: - Power cord
- Cleaning brush
- Stubble head guard
INSTRUCTIONS FOR USE
It is recommended that you use your new shaver daily for up to four weeks to allow time for your beard and skin to become accustomed to the new shaving system. The shaver automatically adjusts to a mains voltage between 100V and 240V.
SHAVING
Note: this product is for corded use only.
- Connect the shaver to the power cord and then to the mains.
- Slide the power switch to turn on.
- Stretch the skin with your free hand so the hairs stand upright.
- Only apply light pressure on the shaving head while shaving (pressing too hard can damage the heads and make them vulnerable to breakage).
- Use short, circular strokes.
TRIMMING
- Slide the trimmer button to release the detail trimmer.
- Hold the trimmer at right angles to your skin.
- Place the trimmer at desired trim line for a quick, easy professional trim.
- To retract the trimmer, push down until it locks into position.
STUBBLE LOOK
Fit the stubble head guard to your shaver for a 3-day stubble look.
TIPS FOR BEST RESULTS
- Ensure your skin is dry. Always hold the shaver at right angles to the skin so that all three heads are touching the skin with equal pressure.
- Use moderate to slow stroking movements. The use of short circular motions in stubborn areas may obtain a closer shave, especially along the neck and chin line.
- DO NOT press hard against the skin in order to avoid damage to the rotary heads.
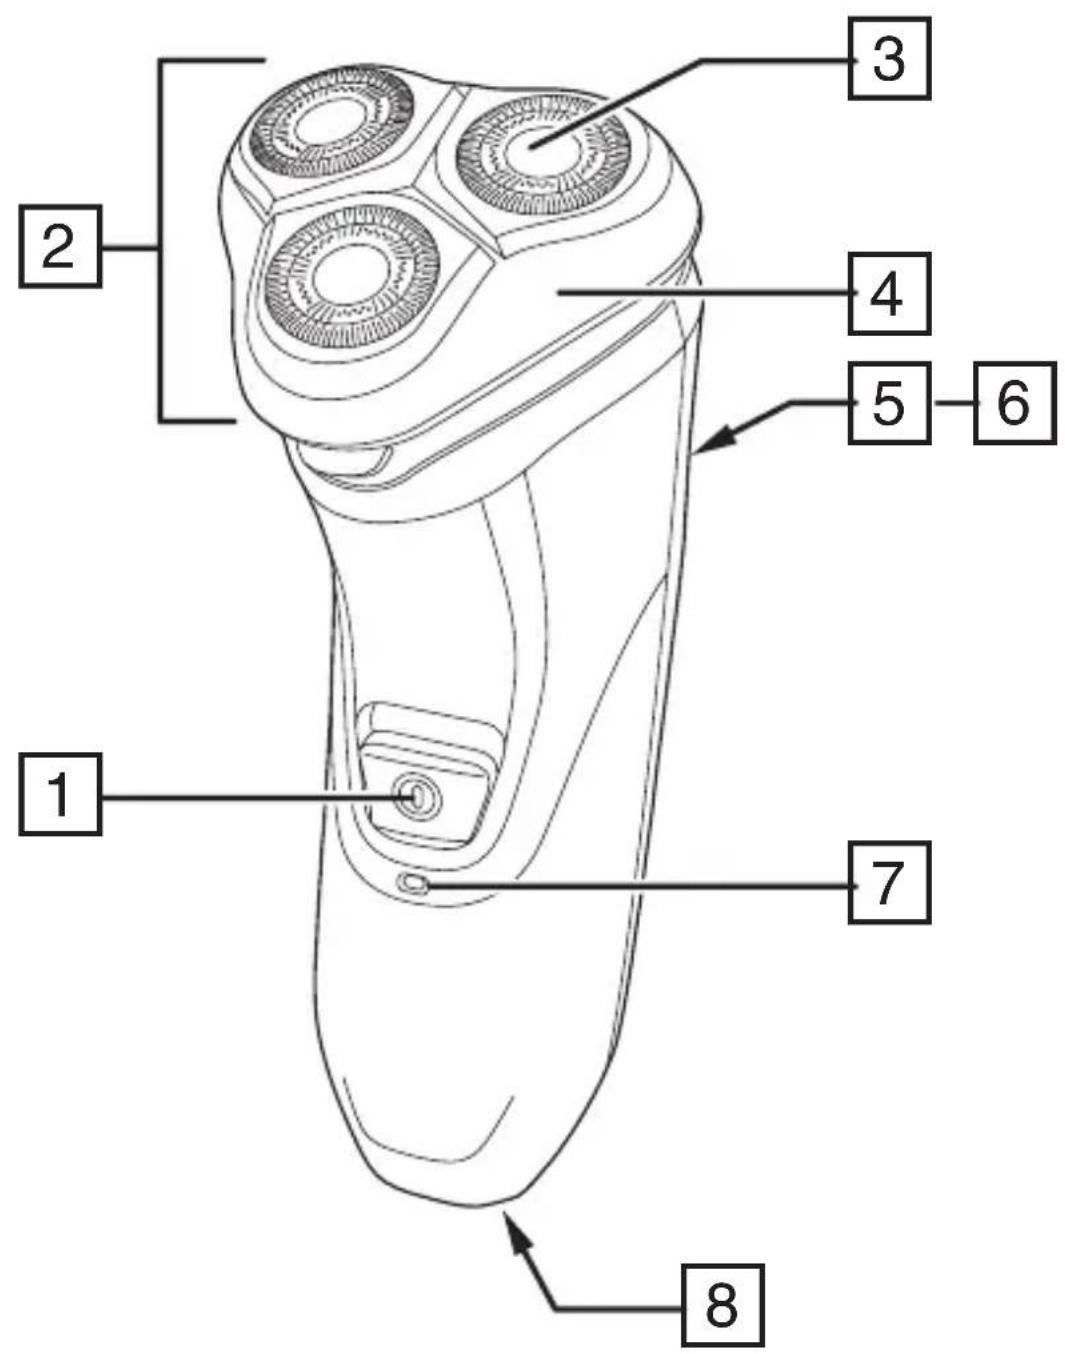
CARE FOR YOUR SHAVER
Care for your appliance to ensure a long lasting performance. We recommend you clean your appliance after each use.
- Ensure the appliance is switched off and unplugged from the mains before cleaning.
- Open the shaver head by pressing the release button (Fig. A).
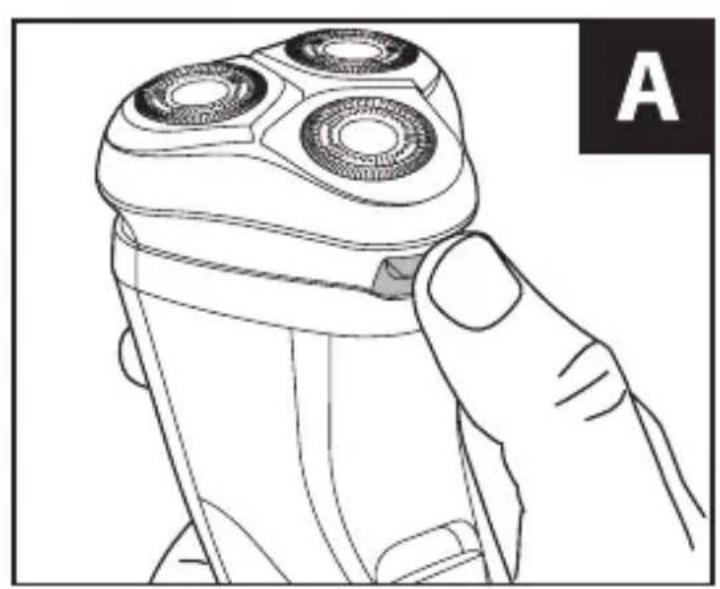
- Empty out any hair clippings.
- Pull the shaver head upwards to remove it from the body (Fig. B).
-
Locate the centre arrow and slide the retainer in the opposite direction to release it. Once released, lift it out of the shaver head (Fig. C). Make a note of the correct orientation of the retainer to make refitting easier.
-
Carefully brush away any hairs from the cutters.
-
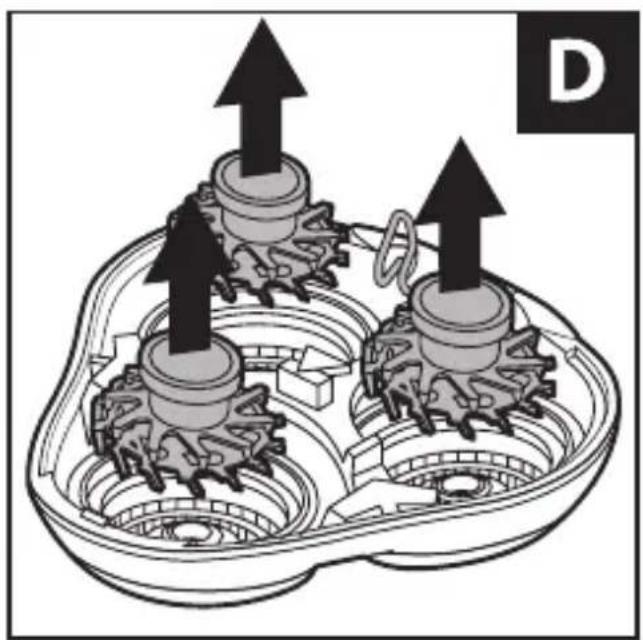
For a more thorough cleaning, lift out the three cutters (Fig. D).
-
Wash the shaving head unter running water (Fig. E). Allow to dry thoroughly.
-
Carefully refit the three cutters.
-
Refit the retainer. Locate the centre arrow and slide the retainer in the same direction as the arrow until it clicks into place (Fig. F).

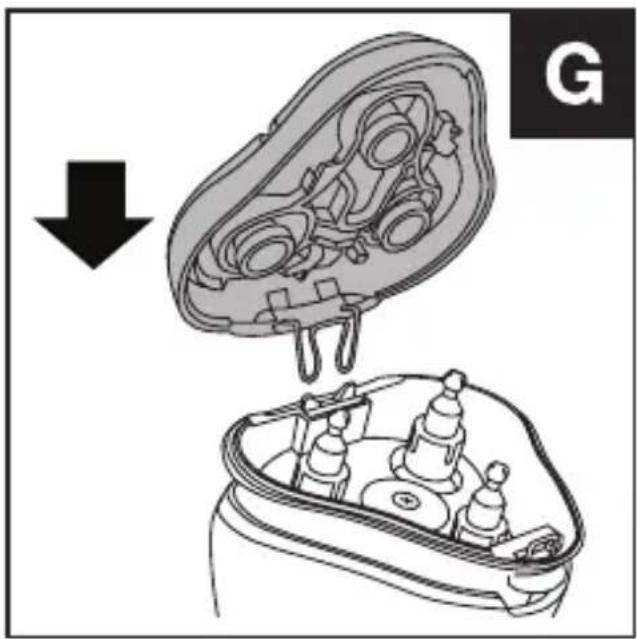
- Once the shaver head is assembled, align the spring hinge with the slot at the back of the hair pocket and press into place (Fig. G). Finally, close the head assembly.
TRIMMER
Lubricate the teeth of the trimmer every six months with a drop of sewing machine oil.
RECYCLING
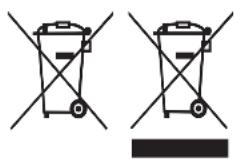
To avoid environmental and health problems due to hazardous substances, appliances and rechargeable and non-rechargeable batteries marked with one of these symbols must not be disposed of with unsorted municipal waste. Always dispose of electrical and electronic products and, where applicable, rechargeable and non-rechargeable batteries, at an appropriate official recycling/collection point.
UW APPARAAT VERZORGEN
EN IYI SONUÇLAR IÇIN IPUÇLARI
ΕΜΦΑΝΙΣΗ ΉΕΝΙΑ 3 ΗΜΕΡΩΝ
natural_image
Solid gray rectangular shape with no text, symbols, or discernible featuresRef. No. R3000
Type No. R08A
19/INT/R3000 T22-7000791 Version 04/19
Remington ^® is a Registered Trade Mark of Spectrum Brands, Inc., or one of its subsidiaries
VARTA Consumer Batteries GmbH & Co. KGaA, Alfred-Krupp-Str. 9, 73479 Ellwangen, Germany www.remington-europe.com