
L02SMS10E - Sandwich maker Logik - Free user manual and instructions
Find the device manual for free L02SMS10E Logik in PDF.
| Product type | Sandwich maker |
| Brand | Logik |
| Model | L02SMS10E |
| Power supply | 230 V, 50 Hz |
| Power | 750 W |
| Material | Plastic and metal |
| Plate coating | Non-stick |
| Number of plates | 2 (upper and lower) |
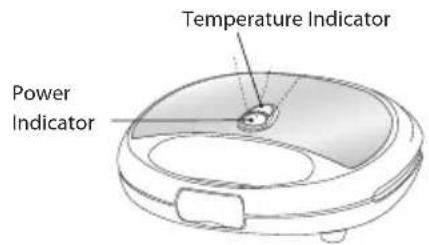
| Power indicator | Yes, indicator light |
| Temperature indicator | Yes, indicator light |
| Built-in thermostat | Yes |
| Lock | Handle locking clip |
| Handles | Yes, heat-insulated |
| Cleaning | Damp cloth, do not immerse |
| Removable plates | No |
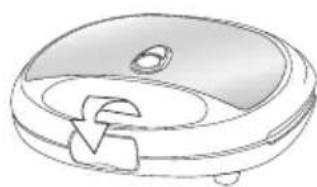
| Cord storage | Yes, wrap around base |
| Recommended use | Grilled sandwiches, sweet or savory fillings |
| Safety | Do not use with raw meat, supervision required |
| Approximate dimensions | 25 x 20 x 10 cm |
| Approximate weight | 1.2 kg |
Frequently Asked Questions - L02SMS10E Logik
User questions about L02SMS10E Logik
0 question about this device. Answer the ones you know or ask your own.
Ask a new question about this device
Download the instructions for your Sandwich maker in PDF format for free! Find your manual L02SMS10E - Logik and take your electronic device back in hand. On this page are published all the documents necessary for the use of your device. L02SMS10E by Logik.
USER MANUAL L02SMS10E Logik
Recipes for sandwich fillings 8
Specifications 8
Cleaning your Sandwich Maker 8
Innhold
NO
Utpakking 9
Produktoversikt 9
Forthegangsbruk 10
Operasjon. 11
Congratulations on the purchase of your new Logik Sandwich Maker.
We recommend that you spend some time reading this instruction manual in order to fully understand all the operational features it offers.
Read all the safety instructions carefully before use and keep this instruction manual for future reference.
Unpacking
Remove all packaging from the sandwich maker. Retain the packaging. If you dispose of it please do so according to any local regulations.
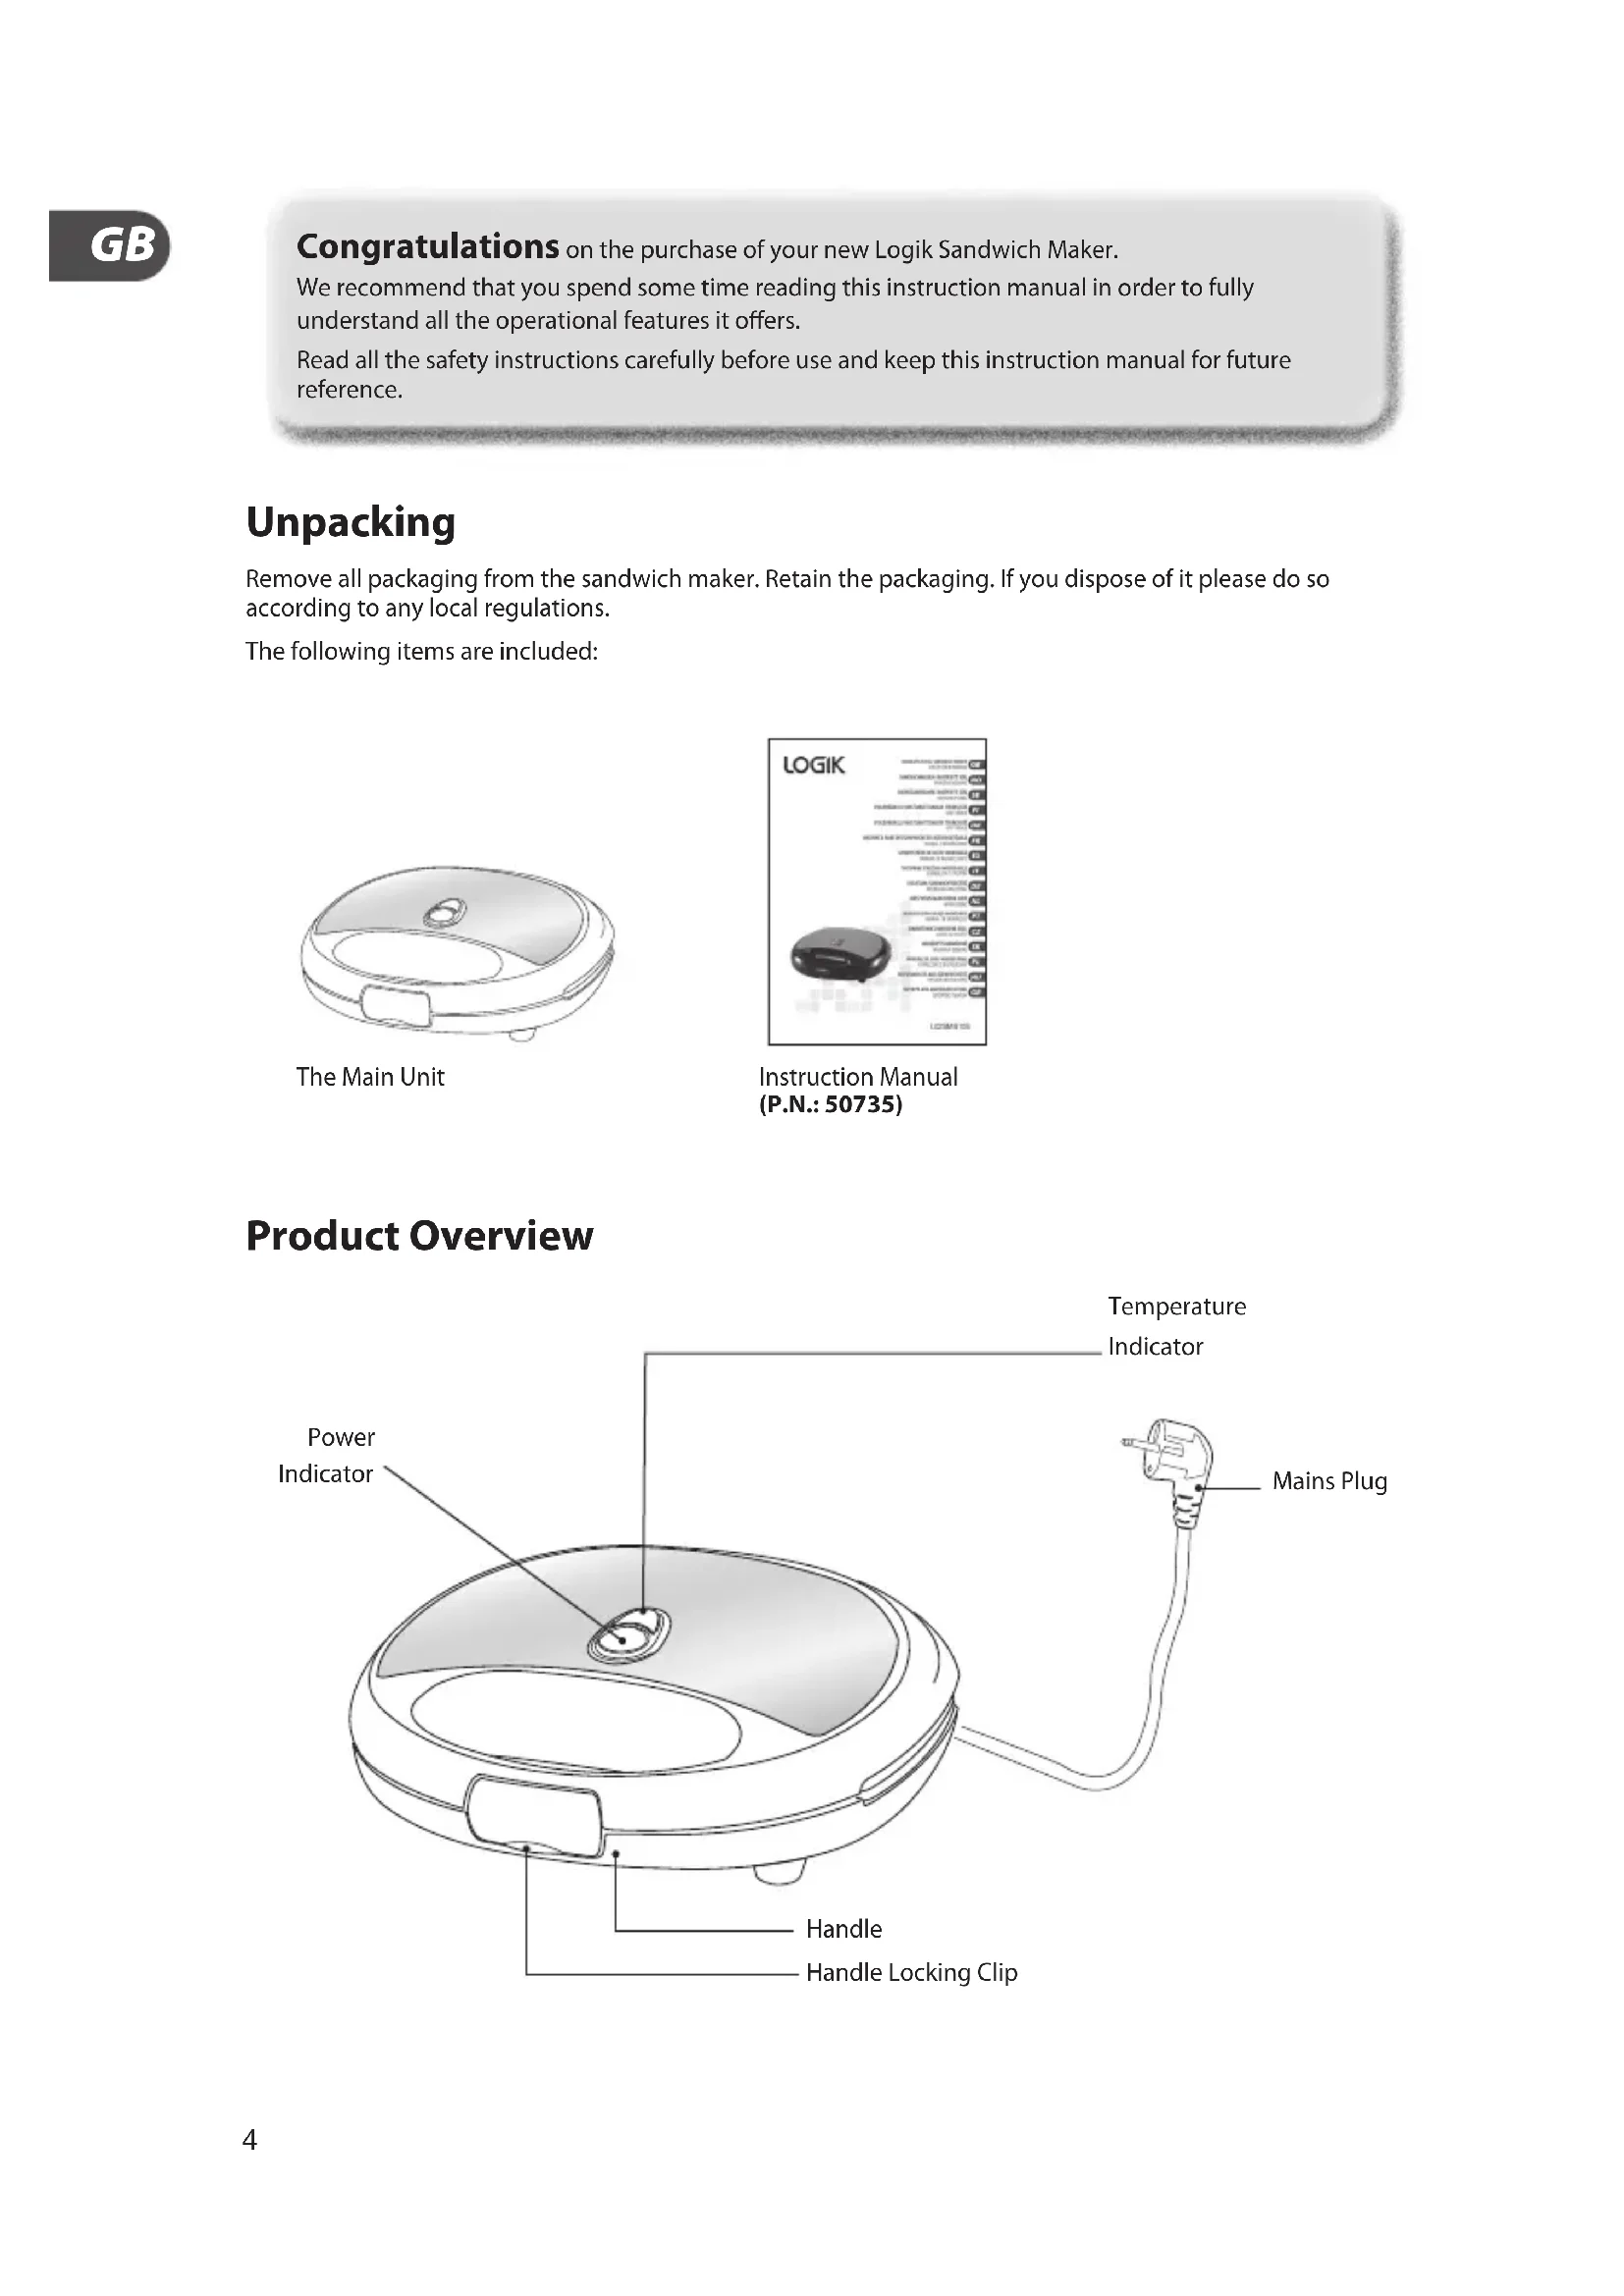
The following items are included:
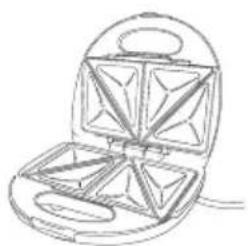
The Main Unit
Instruction Manual
(P.N.: 50735)
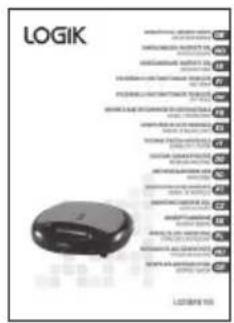
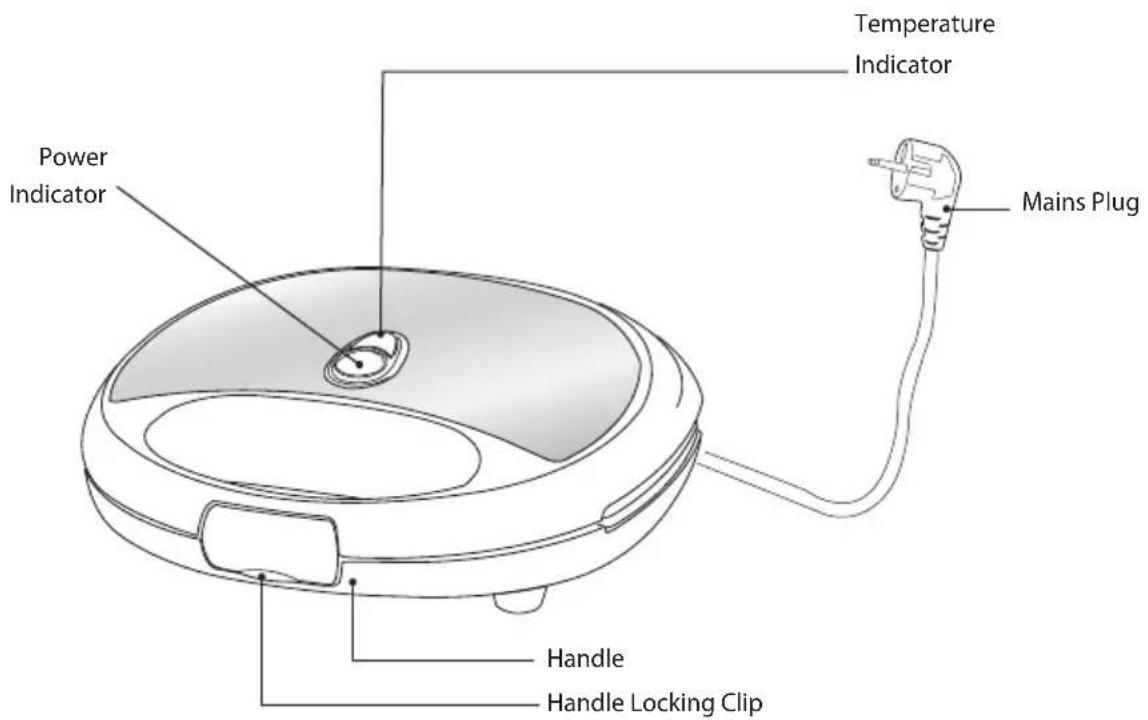
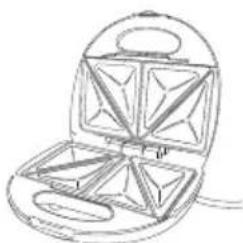
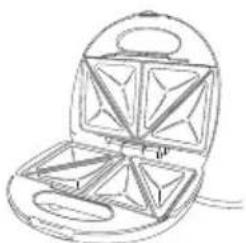
Product Overview
First Time Use
Always watch your sandwich maker when in use.
(1)
Do not connect to the main socket yet.
(3)
Clean the surface of the cooking plates with a damp cloth and wipe dry.
(5)
Gently squeeze the handles together and close the handle locking clip.
⑦
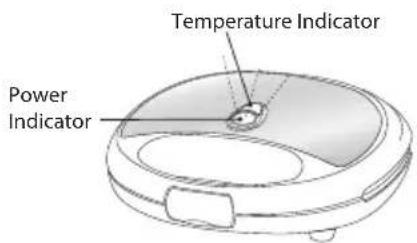
Turn the power on at the mains socket. The power indicator will turn on.
(2)
Open up your sandwich maker by releasing the handle locking clip and lifting up the top half of the sandwich maker.
(4)
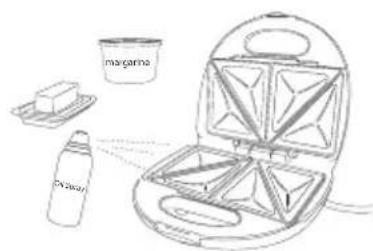
Smear a layer of butter, margarine or cooking fat over the plates.
6
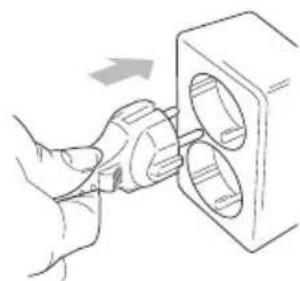
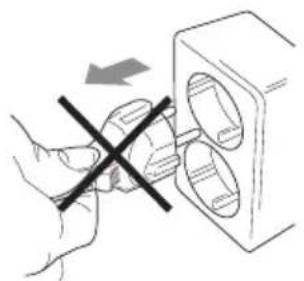
Connect the plug to the mains socket.
8

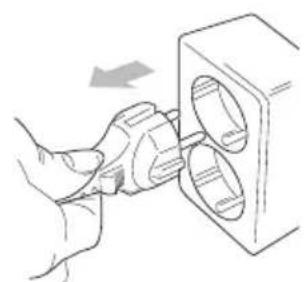
When the temperature indicator turns on, then remove the mains plug from the mains socket.
Operation
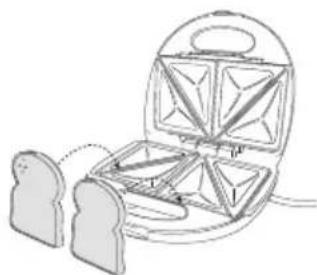
Make sure the bread covers the cooking plates.
①
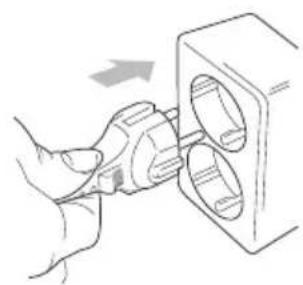
Connect the plug to the mains socket and switch on.
②
The power indicator will illuminate and remain lit until the sandwich maker reaches the cooking temperature.

3
When the temperature indicator turns on, open up your sandwich maker by releasing the handle locking clip and lifting up the top half of the sandwich maker.

(4)
Place your bread onto the lower half of the cooking plates with the buttered side facing down.
(5)
Add fillings to the surface of the bread and then place another slice of bread on top, with the buttered side facing up.
(6)
Gently squeeze the handles together and lock with the handle locking clip.

7

The temperature indicator will turn on and off whilst the built-in thermostat maintains the cooking temperature.
NOTE: Never use a metal object to remove your toasted sandwich as it may damage the cooking plates.
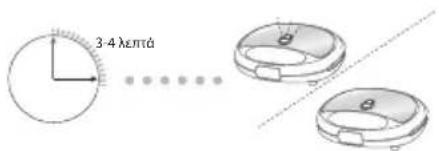
Your sandwich should be ready in approximately 3-4 minutes. When the temperature indicator turns on, open up the sandwich maker with caution as it will be hot.
If you have finished, remember to unplug the mains plug from the mains socket.
Recipes for Sandwich Fillings
Never use raw meat as a sandwich filling. Do not reheat sandwiches that have a meat filling.
Here are some recipe examples:
Tuna mayonnaise and sweet corn Cheese spread, ham and apple pieces
Pizza toppings, ham and grated cheddar cheese Brie with walnuts and apple
- Avacado, crab and celery - Cheddar cheese and onion
Tip: Sweet sandwiches are very easy to prepare.
White bread is recommended. Try apple pie filling, sultana and cinnamon.
Cooking Hints:
Prepare the next sandwich whilst one is cooking.
When the temperature indicator turns off, it is the best time to cook the next sandwich. Always close the cooking plates to preserve the heat for the next sandwich.
Cleaning Your Sandwich Maker
Do not use harsh cleaners, solvents or scouring pads as they may damage the casing.
(1)
②
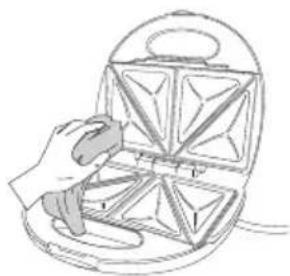
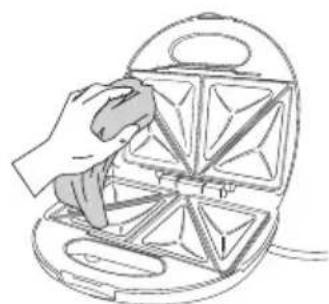
Remove the plug from the mains socket. Clean the surface of the cooking plates with a
damp cloth and wipe dry. Make sure you do not allow water to seep into the controls or heating elements.
(3)
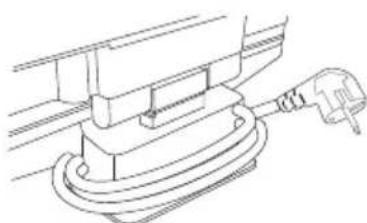
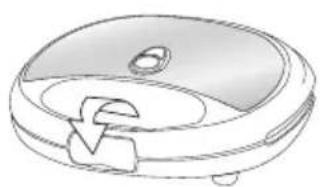
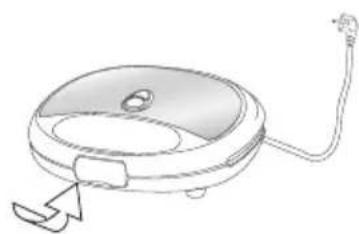
Wait until the sandwich toaster has cooled down, then wrap the cord around the mains cable at the bottom of the sandwich maker for storage.
NOTE: Do not remove the cooking plates.
Specifications
Mains supply: 230V 50Hz
Power consumption: 750W
We continually strive to improve our products, specifications may change without prior notice.
Uuvdeote to Buoua otyn npica kal EvpyonoiTE.

(2)
H evdeiE np epuatoc 0a qwiotei kai th a napaieive avauuevn xpi n tootiepa va taoei otn thepukpaia yapeipaeatoc.
3
Otauav avy n evdeiEg eepokpaiaac,avoiet Tnv tootiepa oac anoeouovtac to klln Klaedwatoctnc laahc kai onkwovtac to enavw mioo tnc tootiepac.
(4)
TooTheTne To ψwɪ OTO KATW μioo OTIC πλakec μayeipéμatoc μe Tn BOUTupωEvη πεuρá va koɪtacπpoc Ta návw.
(5)
Ppoothe Tn ymuon otyn enipaveia tou
psiou kai katoniTOnoThe note mia aAan
peTa eavw, me Tn Boutupuevn nEupa va
koitae npoc ta enaw.

(6)
Piote anaala taiae paai kai kaeiawtoe e to kii kaii dwaatoc nlaic.
7

H evdiEg Eepokpaoiac 0a avapei kai 0a oBnoeEvw O evowmuevoc eepooatntc diatnpei tn eepokpaoia maepipaeatoC.
HMEIOZH: Note mnu xpoiooioite eva eataaiko avtkeiuevo yia va byalete to snyevo oac avtouitc kaow mcnpei va npoknthe ietaia otic nakec maayepmuatoC.
To aovotouc oac 0a npenei va eivai etoiu oe nepinou 3-4
Aentia. Otav avapei n evdeiig thepuokpaoiac, aoieTe Tnv
tootiepa npoektika kaohc ta kaii.
Eav exete TEaewoei, Ouaeite va byalete tov peuatoan anto nvi pica.
Suvayec yia yémuon yia Sávtouitc
Mnv xnpoiopoiite note wo kpeac wc yemion ia to avtouitc. Mnv zetaivete avtouitc nou exouv yemion me kpeac.
Your appliance should be used in such a way that it is protected from moisture. e.g. condensation, splashed water etc. Do not place or store your appliance where it can fall or be pulled into water or any other liquid. Do not reach for the appliance if it has fallen in any water or any other liquid. Unplug immediately. Stand your appliance on a stable, level surface during use. Do not allow your appliance to sit on top of the mains cable.
Make sure that children cannot touch the appliance when hot or pull the mains cable.
It is DANGEROUS to insert fingers or objects other than bread into the appliance.
Bread may burn. Your appliance must not be used near or below curtains or other combustible materials. It must be watched when in use. Do not leave your appliance unattended. Your appliance should be placed away from heat sources such as radiators, gas/electric fires and direct sunlight.
Keep the mains cable away from any heated surfaces.
Use the appliance only for its intended use, as described in this manual.
Do not use outdoors.
Never use your appliance if it is damaged in any way. Do not remove any fixed covers. Never use this appliance if it is not working properly, or if it has been dropped or damaged.
If the mains cable is damaged it must be replaced by the manufacturer, its service agent, or similarly qualified persons in order to avoid a hazard.
This appliance is not intended for use by persons (including children) with reduced physical, sensory or mental capabilities, or lack of experience and knowledge, unless they have been given supervision or instruction concerning the use of the appliance by a person responsible for their safety.
Children should be supervised to ensure that they do not play with the appliance.
Sikkerhet Først!
NO
This symbol on the product or in the instructions means that your electrical and electronic equipment should be disposed at the end of its life separately from your household waste. There are separate collection systems for recycling in the EU. For more information, please contact the local authority or your retailer where you purchased the product.
NO
- Innhold
- NO
- Unpacking
- Product Overview
- First Time Use
- Operation
- Recipes for Sandwich Fillings
- Never use raw meat as a sandwich filling. Do not reheat sandwiches that have a meat filling.
- Cleaning Your Sandwich Maker
- Do not use harsh cleaners, solvents or scouring pads as they may damage the casing.
- Specifications
- Suvayec yia yémuon yia Sávtouitc
- Mnv xnpoiopoiite note wo kpeac wc yemion ia to avtouitc. Mnv zetaivete avtouitc nou exouv yemion me kpeac.
- Sikkerhet Først!
Brand : Logik
Model : L02SMS10E
Category : Sandwich maker