LifeTab P9514 - Tablet MEDION - Free user manual and instructions
Find the device manual for free LifeTab P9514 MEDION in PDF.



| Product type | Touchscreen tablet |
| Brand | Medion |
| Model | LifeTab P9514 |
| Operating system | Android (Android Market compatible) |
| Display | Capacitive touchscreen |
| Wireless connectivity | Wi-Fi 802.11 b/g/n, Bluetooth, 3G (GPRS/EDGE) |
| Expandable storage | microSD card slot |
| Camera | Front webcam with microphone |
| Battery | Rechargeable lithium-ion (charges via power adapter) |
| Power supply | Delta ADP-18TBAC power adapter (100-240 V~, 50-60 Hz) |
| Ports and connectors | Multi-connector (charge/HDMI), micro USB port, 4-pin headphone jack |
| Speakers | Two built-in speakers |
| SIM card | SIM card slot for mobile data (3G) |
| Sensors | Ambient light sensor |
| Buttons | On/off, volume control |
| Security | Pattern screen lock, SIM PIN code |
| Care and cleaning | Slightly damp lint-free cloth; avoid solvents and corrosive cleaning agents |
| Repair | Reserved for qualified technician; contact Medion customer service |
| Operating temperature | 5 °C to 30 °C; relative humidity 20% to 80% (non-condensing) |
| Storage temperature | 0 °C to 60 °C |
| Standards and compliance | CE, Directive 1999/5/EC, Ecodesign 2009/125/EC |
| Package contents | Tablet, power adapter with cable, documentation; HDMI adapter cable and earphones optional |
Frequently Asked Questions - LifeTab P9514 MEDION
User questions about LifeTab P9514 MEDION
0 question about this device. Answer the ones you know or ask your own.
Ask a new question about this device
Download the instructions for your Tablet in PDF format for free! Find your manual LifeTab P9514 - MEDION and take your electronic device back in hand. On this page are published all the documents necessary for the use of your device. LifeTab P9514 by MEDION.
USER MANUAL LifeTab P9514 MEDION
natural_image
Pure technical line drawing of a rectangular frame with corner supports and a small square symbol, no text or labels present.4 - Webcam
Ansicht von oben

natural_image
Diagram of a device with a labeled component '5' and internal components, no text or symbols present5 - Lautstärkeregler
Ansicht von unten

natural_image
Pure technical line drawing of a rectangular frame with corner supports and a small square symbol at the top (no text or labels)4 - Webcam
Bovenkant

natural_image
Diagram of a device with labeled component '5' and internal ports, no readable text or symbols beyond the label5 - Volumetoetsen
Onderkant

6 - Luidsprekers
7 - Reset opening
8 - Multiconnector (netadapter/HDMI)......(⇒ blz. 17)
Linkerkant
Schermblokkering configureren
Activer/désactiver Wi-Fi.... 25
natural_image
Pure technical line drawing of a rectangular frame with corner supports and a small square symbol, no text or labels present.4 - Webcam
Vue de dessus

natural_image
Diagram of a device with a labeled component '5' and internal ports, no text or symbols present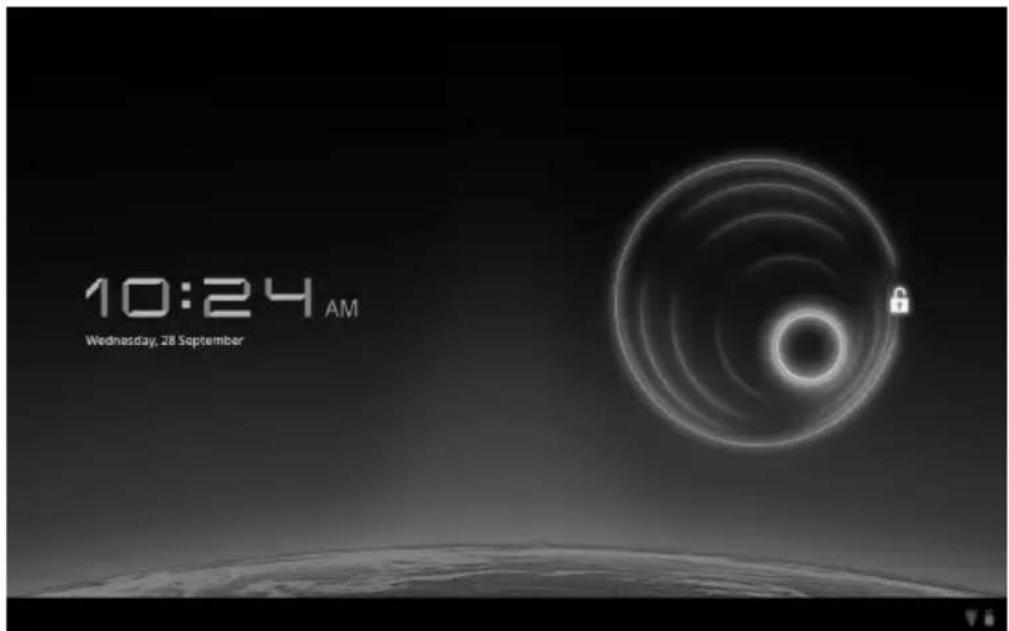
Activer/désactiver Wi-Fi
Attention!
natural_image
Pure technical line drawing of a rectangular frame with corner supports and a small square symbol, no text or labels present.4 - Webkameraet
Overside

natural_image
Diagram of a device with a labeled component '5' and internal components, no text or symbols present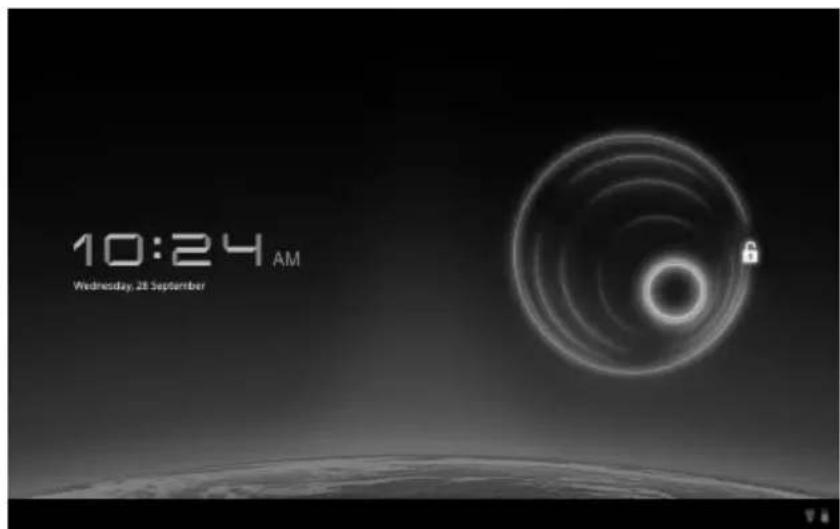
Information about Conformity.... 4
Safety Instructions 5
Ambient Temperature....6
Connecting....6
Power Supply....6
Cabling 6
Included with Your tablet 7
Views 8
Front Side 8
Rear Side....9
Top Side 9
Bottom Side....9
Left Side....10
Getting Started 11
First steps 11
Configuring your Google Account.... 11
Short Description of the Home Screen 12
Power Button.... 13
Powering On your tablet 13
Powering Off your tablet 13
Setting the tablet into standby mode.... 13
Waking up from Standby Mode.... 14
Adjusting Screen Lock Pattern Settings.... 14
Auto Shutdown 15
Power Adapter.... 15
Battery Operation 15
Charging the Battery 16
Resetting the Tablet-PC.... 16
How to carry out the Reset 16
Multi Connector 16
Operating the tablet 17
Switching Home Screens 17
Making/Checking Settings 18
Market....19
Using Non-Market Applications 19
SIM Card.... 20
Inserting SIM Card 20
Connecting to the Internet 21
Main Settings.... 21
Adding a New GPRS/3G/EDGE Connection.... 22
Activating/Deactivating 3G 22
Activating/Deactivating Wi-Fi 23
Adding Wi-Fi Network.... 23
The microSD Card Slot.... 24
Inserting microSD Cards 24
Accessing the microSD Card Contents 25
Removing microSD Cards 25
Customer Service 26
Additional Support 26
Maintenance....26
Repairs....26
Recycling and Disposal 27
European Norm EN ISO 13406-2 Class II....28
FCC Compliance Statement.... 30
Index 31
Copyright © 2012
All rights reserved.
This manual is protected by Copyright.
Trademarks:
All trademarks are the property of their respective owners.
Medion ® makes no warranty of any kind with regard to this material, including, but not limited to, the implied warranties of merchantability and fitness for a particular purpose.
Medion ® shall not be liable for errors contained herein or for incidental or consequential damages in connection with the furnishing, performance, or use of this material.
Medion® assumes no responsibility for the use or reliability of its software on equipment that is not furnished by Medion®.
This document contains proprietary information that is protected by copyright. All rights are reserved. No part of this document may be photocopied, reproduced, or translated to another language without the prior written consent of Medion®.
Manufactured under license from Dolby Laboratories. Dolby and the double-D symbol are trademarks of Dolby Laboratories.
The information in this document is subject to change without notice.
Proper use
Your tablet PC offers you various options in terms of its use: You can, for example, surf the internet anytime and anywhere, read messages and books, enjoy games and films and communicate with the whole world.
The device is intended for private use only and not for industrial/commercial use.
Please note that we shall not be liable in case of improper use:
- Do not modify the device without our consent and do not use any auxiliary equipment which we have not approved or supplied.
- Use only spare parts and accessories which we have supplied or approved.
- Follow all the instructions in these directions for use, especially the safety information. Any other use is deemed improper and can cause personal injury or damage to the product.
- Do not use the device in extreme ambient temperatures and conditions.
Attention!
The strip with the lettering LIFETAB ® is not a protective film, but an integral part of the device design. Do not under any circumstances remove the silver strip in order to prevent adhesive residues or scratches on the device housing.
Information about Conformity
The following remote equipment has been supplied with this tablet:
- Wireless LAN
- Bluetooth
• 3G
When used in France, the built-in wireless LAN solution may only be used in buildings due to the capacity of the device. Currently the other EU-countries and Australia do not have any restrictions.
The company declares herewith that these devices are in agreement with the fundamental requirements and the other relevant terms of the 1999/5/EG Guideline.
This device fulfils the basic requirements and the relevant regulation of the Ecodesign Guideline 2009/125/EG.
Complete declarations of conformity are available under www.medion.com/conformity.
C € 0682 Ⓞ
Safety Instructions
Please follow the instructions in this section for the safe operation of your tablet:
- Do not allow small children to play unattended with electrical equipment. Children are incapable of judging potential risks properly.
- Keep the packing materials, such as plastic away from children. The danger of suffocation could arise in the case of misuse.
- Do not open the case of the tablet, or the power adapter. When the case is open there is a danger of severe electric shock.
- Do not insert foreign objects through the slots and openings of the tablet. This may lead to electric shock, electrical short-circuit or fire that will damage your tablet.
- Operation under extreme environmental conditions can result in damage to your tablet.
- Do not operate the tablet during a thunderstorm, in order to avoid damage through a lightning strike.
- Never place objects on top of the tablet that would exert any pressure on the LCD display.
- An injury hazard exists when the LCD display breaks. Wear protective gloves when handling any broken parts. Wash your hands with soap.
- In order to avoid damage to the LCD display, do not touch it with sharp objects.
Switch off your tablet immediately or do not switch it on at all and contact the contact customer service if
- ...the power supply or the connectors attached to it are burnt or damaged. Replace the defective power supply with an original power supply. Under no circumstances may a defective power supply be repaired.
- ...the housing of the tablet is damaged or fluids have leaked into it. Have the tablet checked by customer service first as the tablet may not be safely operated and there may be a life-threatening risk of electrocution!
Ambient Temperature
- The tablet is most reliably operated at an ambient temperature between 5irc C and 30irc C and at a relative humidity between 20% and 80% (without condensation).
- When powered off, the tablet can be stored at temperatures between 0irc C and 60irc C.
- Unplug the power during thunderstorms and make especially sure to remove the antenna cables, if present. We recommend the use of a surge protector for additional safety, in order to protect your tablet from being damaged by power surges or lightning strikes through the power network.
- Wait until the tablet has reached ambient (room) temperature before turning it on or connecting it to the power adapter. Drastic variations in temperature and humidity can create condensation within the tablet and may cause it to short-circuit.
- For transporting the tablet keep the original packing.
Connecting
Pay attention to the following information in order to connect your tablet correctly:
Power Supply
- Do not open the power adapter housing. When the housing is open there is a danger of severe electric shock. It contains no user-serviceable parts.
- The electric outlet must be in the vicinity of the tablet and within reach of the power adapter cords.
- To disconnect your tablet from the power source, or set the tablet to battery operation, remove the power cord from the tablet's power socket.
- Only use the tablet with a power adapter operating at AC 110-240V\~/50-60 Hz. For details on power consumption, please refer to the rating plate on the rear of your tablet. If you are unsure of the type of power supply available at the point of use, ask your local power company.
- Use only the supplied power adapter.
- To detach the power adapter from the mains power supply remove the plug from the power source first and then remove the connector from the tablet. A reverse sequence could damage the power adapter or the tablet. Always hold the connector firmly when removing it. Never pull on the power cord.
Cabling
- Arrange cables so that no one can walk on or trip over them.
- Do not place objects on any of the cables.
Included with Your tablet
Please check that the contents are complete and notify us within 14 days of purchase if any of the following components are missing:
- tablet
• AC Adapter with Power Cord (Model: Delta ADP-18TBAC)
• HDMI Adapter Cable (optional)
• Headphones (optional) - Documentation

Views
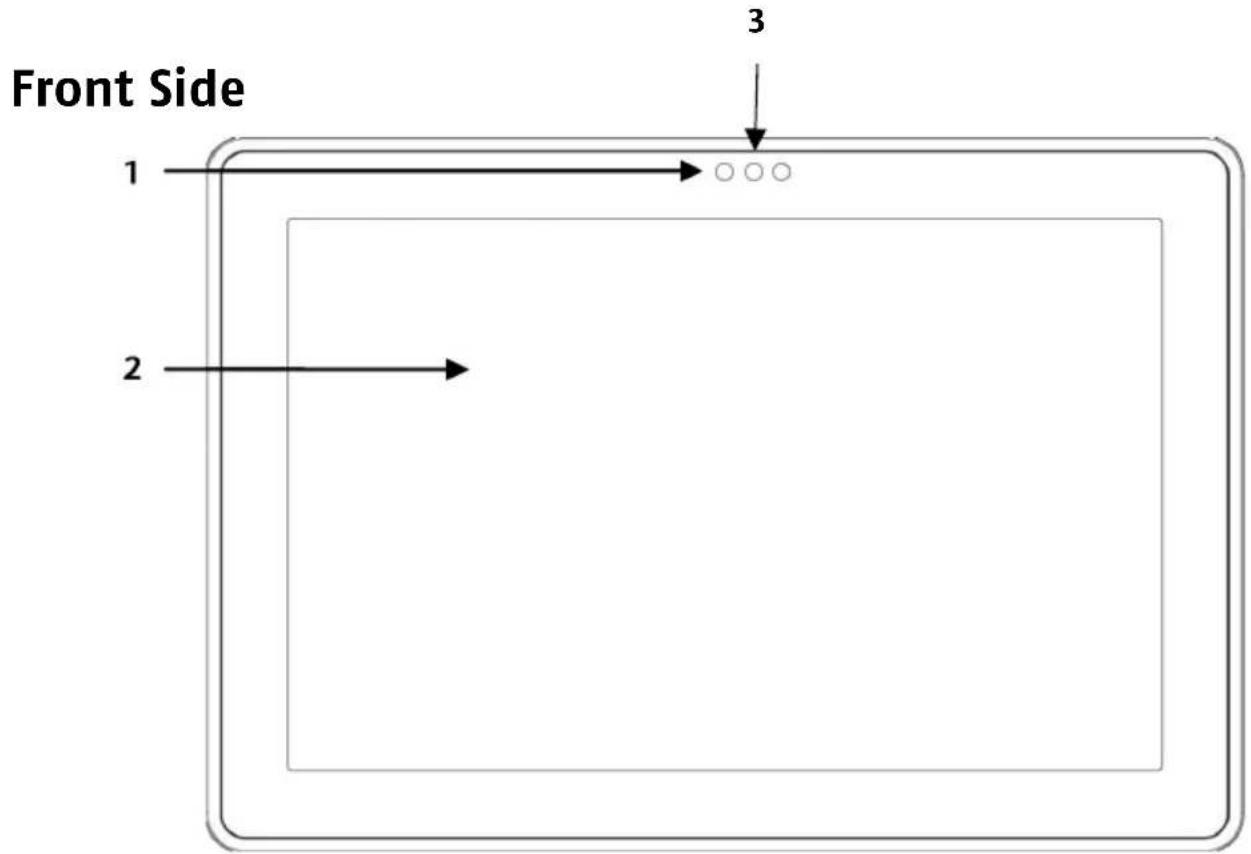
1 - Webcam with Microphone
2 - Multi-Touch Screen
3 - Ambient Light Sensor
Rear Side
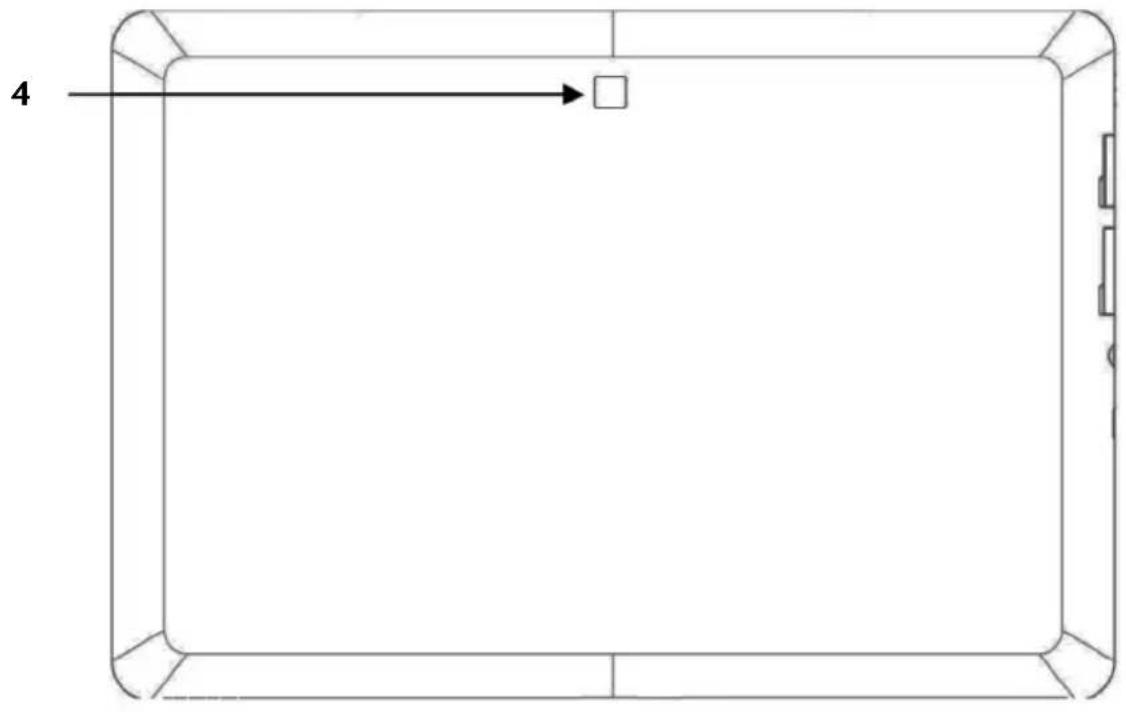
natural_image
Pure technical line drawing of a rectangular frame with corner supports and a small square symbol, no text or labels present.4 - Webcam
Top Side

natural_image
Diagram of a device with labeled component '5' and internal ports (no text or symbols beyond labels)5 - Volume Buttons
Bottom Side

6 - Loudspeakers
7 - Reset Opening
8 - Multi Connector (Power Adapter/HDMI) .....(⇒ p. 16)
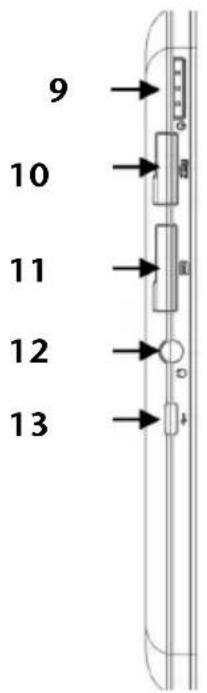
Left Side

9 - Power ON/OFF ......(⇒ p. 13)
10 - microSD Card Slot ......(⇒ p. 24)
11 - SIM Card Slot ......(⇒ p. 20)
12 - Headphone / 4-pin Headset
Caution!
The use of headphones/earphones with a high volume can lead to lasting damage to your hearing. Set the volume to the lowest level before reproducing any sound. Start the sound reproduction and increase the volume to the level that is comfortable for you. Changing the basic settings of the equaliser can also cause damage to the hearing of the listener.

It can cause damage to the hearing ability of the listener if a device is operated through earphones with an increased volume for a long period.
13 - Micro-USB Port
Getting Started
Before you get started using your tablet, first take a few moments to read the important section on Safety.
First steps
- Connect the supplied power adapter to the tablet at the tablet power socket (8). Connect the power adapter to a free AC power outlet.
- Switch the tablet on by operating the ON/OFF switch (9). Hold the ON/OFF switch until you feel it vibrate. The tablet starts and goes through a number of phases.
- If there is a SIM card inserted, please type in your SIM PIN code and confirm with OK.
Note
You will find your SIM code in the documentation from your provider.
• After the welcome screen has appeared, select your language and tap Start.
Note
The initial installation may take some time to complete.
- Follow the steps on the screen.
Configuring your Google Account
Your tablet provides you with access to a variety of applications from Google™. You need a Google™ account to use these applications. This account allows you to use a large number of different services, e.g. Google Mail™.
When you first switch on your tablet, enter the following settings.
- You can now create a Google™ account (tap on Create account). If you already have a Google™ account, enter your access details and tap Sign in.
Note
An Internet connection is required in order to create a Google™ account or to sign in. You can connect to the Internet either via your SIM card or a WLAN connection. Please bear in mind that costs will be incurred for the Internet connection if you do not have a flat-rate contract.
Short Description of the Home Screen
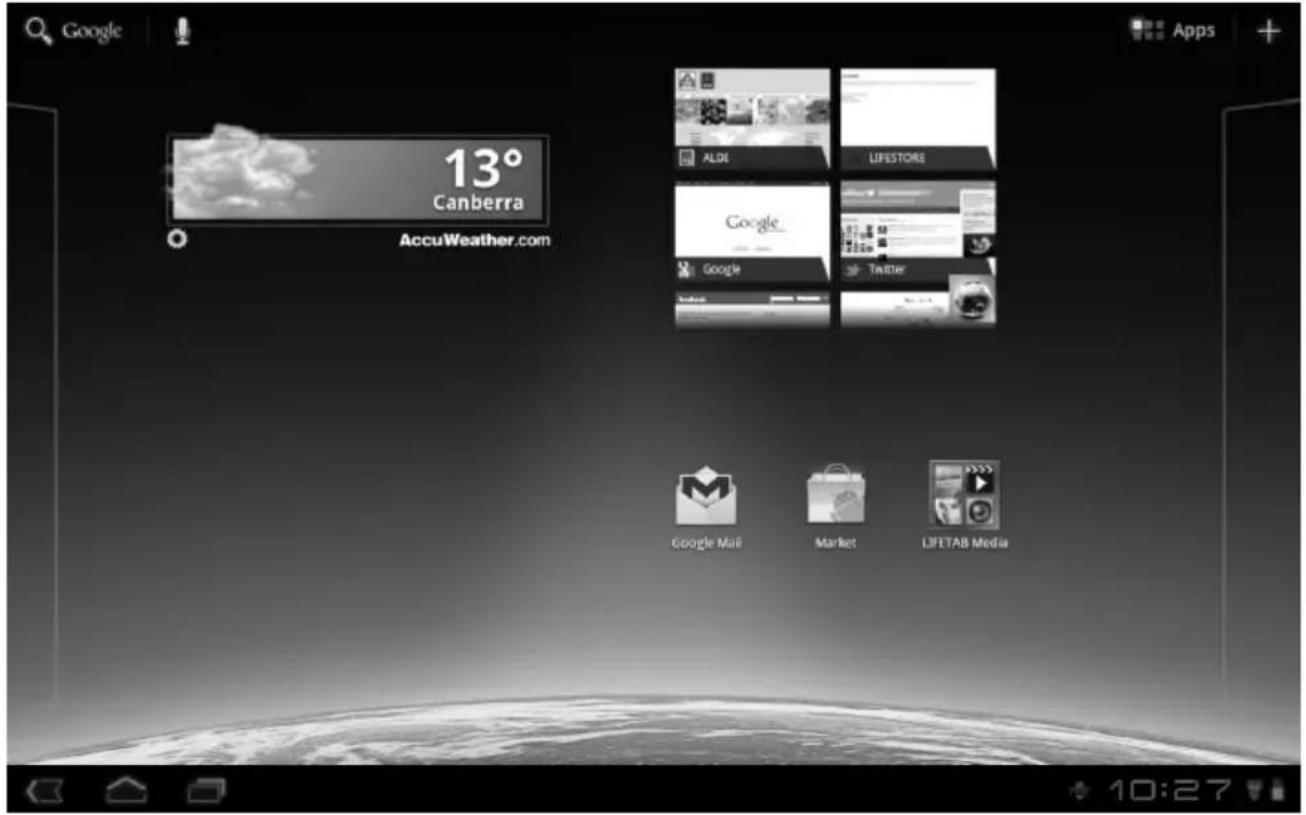
Icon
Description



Display all tablet's apps
Add widgets and shortcuts
Back to the home screen
Back to the previous screen
Display recent apps
Time
Internet connection status
Battery status
Power Button
Powering On your tablet
- Press and hold the ON/OFF button on the upper left side for about 2-3 sec. until you feel the vibration to power on the tablet.
Powering Off your tablet
- Press and hold the ON/OFF button on the upper left side until the following message appears on the screen: Would you like to shut down?
- Tap OK to power off your tablet.
Setting the tablet into standby mode
In sleep mode, your device will be placed into a low-energy standby mode with the display turned off in order to save battery power. If there is no operation within a preset time, the screen backlight will automatically turn off, and the device will be locked.
If your tablet is powered on and you do not use it temporarily, you can press the ON/OFF button quickly to dim the display. The device will then enter the standby mode and become locked.
You can adjust the preset time under Settings > Screen > Timeout.
Waking up from Standby Mode
-
While the screen display is off, press the ON/OFF button quickly to re-illuminate the screen.
-
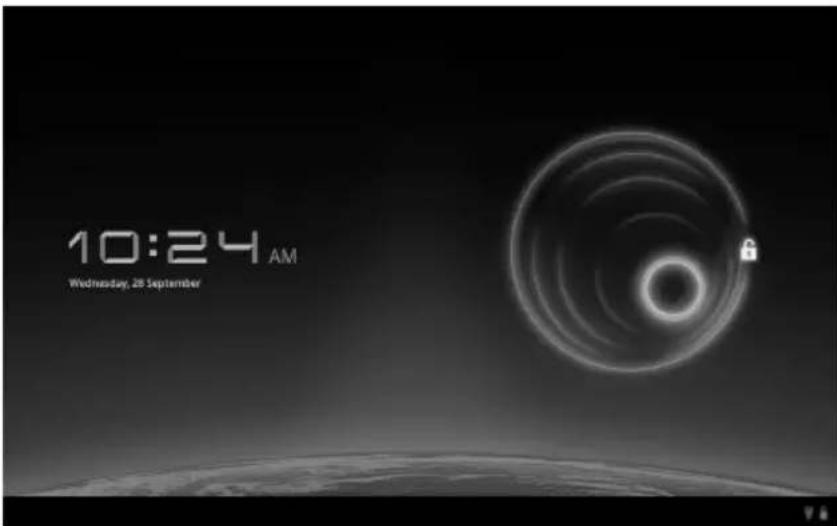
Toggle the button to unlock the screen orientation, allowing screen rotation.
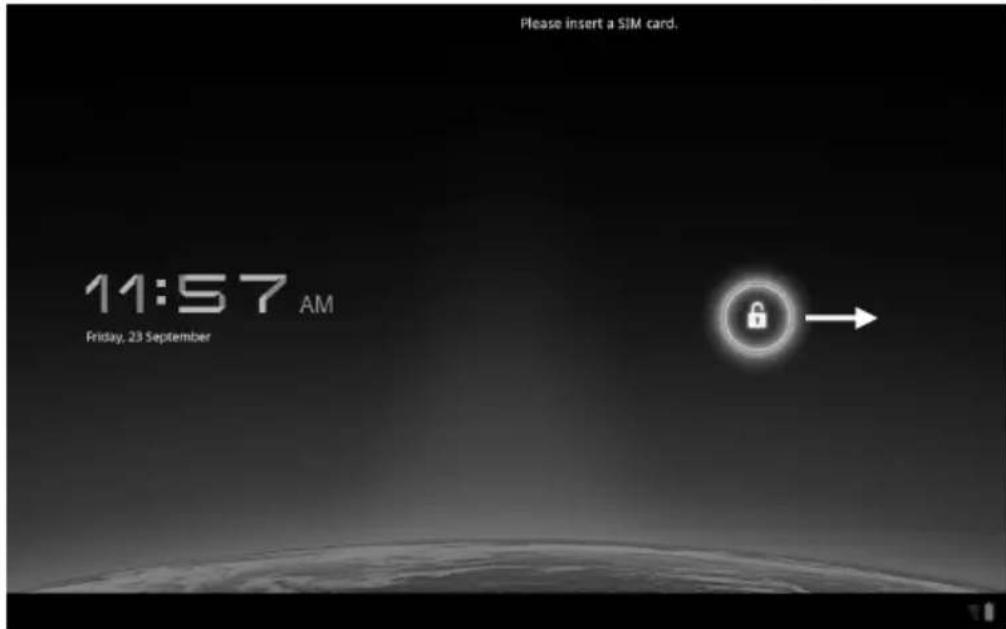
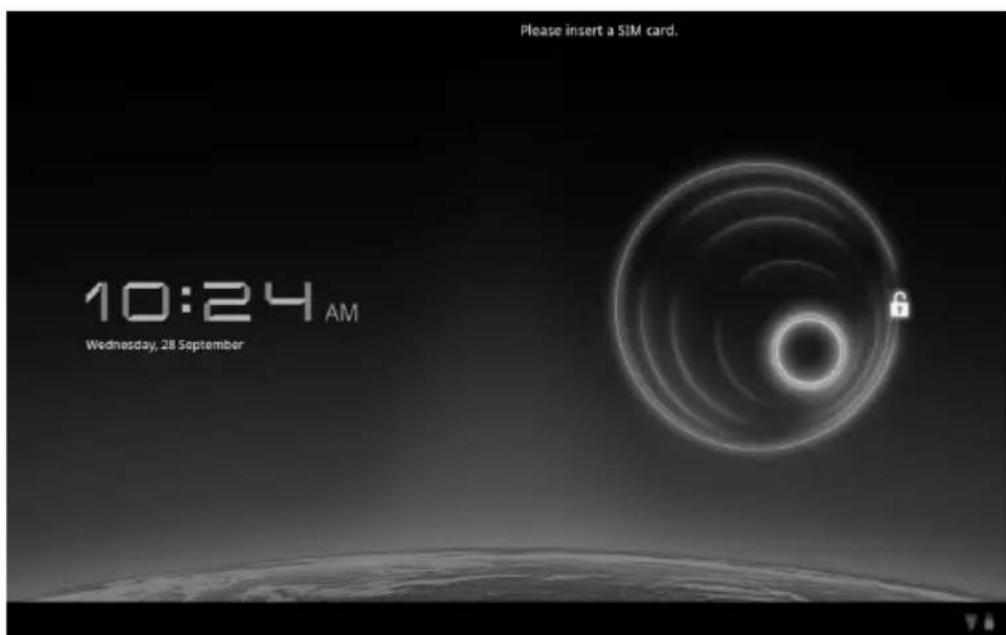
Adjusting Screen Lock Pattern Settings
You can adjust the screen lock pattern settings under Settings ⇒ Location & security ⇒ Configure Lock Screen.
Auto Shutdown
By default the tablet shuts automatically down after 4 hours in standby mode.
Under Settings Applications Auto shutdown you can adjust this time.
Power Adapter
Your tablet is supplied with a universal AC power adapter, which automatically adjusts to the available power source. The following levels are supported: AC 100-240V\~/50 - 60 Hz. Please follow the power supply safety instructions found on page 5.
The power adapter must be connected to a power outlet. The power lead from the power adapter connects to the Multi Connector (8) on the bottom of the tablet (see also Multi Connector on page 16).
The adapter provides the tablet with power and also charges the battery. The battery is also being charged when you are working on your tablet with the power adapter connected. The power adapter is still receiving power even when your tablet is not connected to it. You should therefore unplug the power adapter from the outlet if it is not connected to the tablet.
Warning!
Only use the power adapter supplied with your tablet.
Battery Operation
Note
Please charge and discharge the new battery completely two to three times in succession. Only then will it achieve its full performance level!
Batteries store electrical energy in their cells and then deliver it when needed.
The useful life and performance of your battery will depend on careful handling.
The battery should be completely discharged before a charging process and completely charged again in order to optimise its useful life and its performance.
Charging the Battery
The battery is charged via the power adapter. If the power adapter is connected, it charges the battery automatically, no matter if the tablet is turned on or off. If the tablet is switched on, the charging process takes a significantly longer time.
Note
The charging process will be interrupted if the temperature or the voltage of the battery is too high.
Resetting the Tablet-PC
You can reset your tablet if it is no longer reacting or working properly. This option restarts the navigation system, without reinstallation being necessary. A reset is often used in order to reorganise the memory. In doing so all programs that are running are interrupted and the working memory is reinitialised.
How to carry out the Reset
Insert a pointy object (e.g. a paper clip, which has been bent open) with slight pressure into the reset opening.
Multi Connector
Using the Multi Connector (8) at the bottom of the tablet you can
- Charge the battery with the supplied power adapter or
- Use the HDMI Adapter Cable to connect your tablet to the TV.
Note
When playing videos from your tablet PC on a TV the volume can only be adjusted on the TV.
Operating the tablet
You operate your tablet with your fingertips. Do not use any pointed or sharp-edged objects.
- Tap on the display to selects apps or to open applications.
- Tapping and holding your finger on an input field will cause any available advanced input options to be displayed.
- Drag your finger over the display to move it up, down, right or left.
- To move an app on the display, tap and hold on it for a few seconds, then drag it to the desired position.
- Drag two fingers apart on the screen at the same time or tap twice on the display in order to increase/reduce the size of a website.
Note
You can view the display in portrait or landscape format. Simply hold the tablet upright and turn it to the desired orientation to do this. The screen contents will rotate automatically.
Switching Home Screens
Your tablet has multiple home screens.
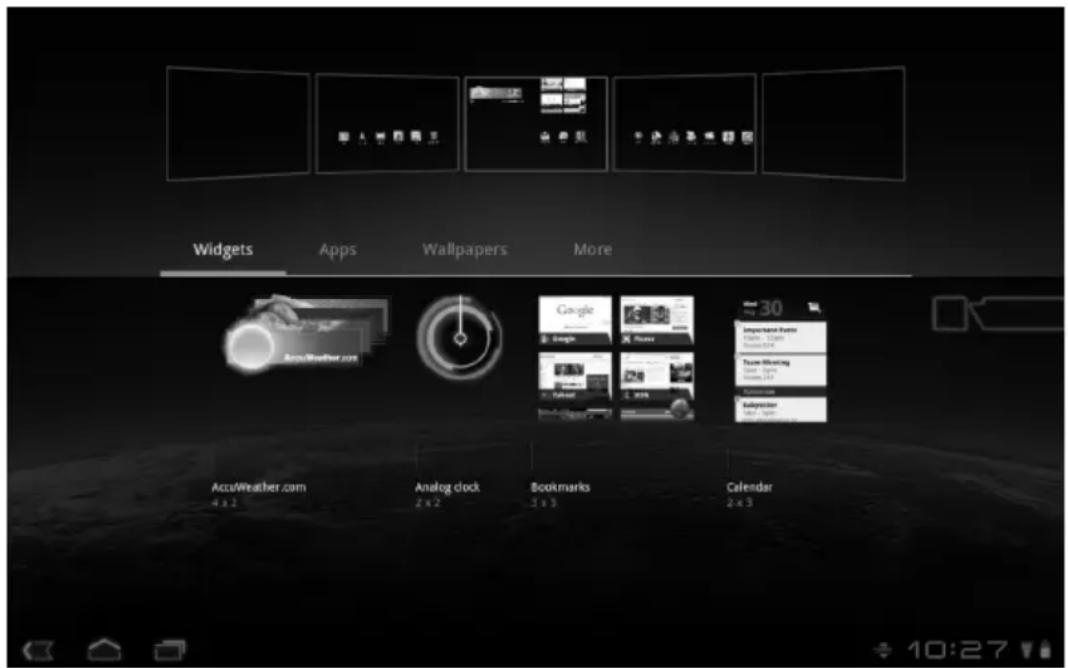
You can slide the screen with your fingers or switch the display and move icons among the home screens.
Making/Checking Settings
To change or display your tablet settings, tap on Settings.
| Icon | Menu name Description | |
 | Wireless & networks | Configure and administer your wireless connections, e.g. WLAN, Bluetooth®, mobile networks. Approve data connections and virtual private networks. You can also select the flight mode here. |
 | Sound | Configure the sound settings, e.g. ring tones and notifications |
 | Dolby Mobile | Turns ON/OFF Dolby Mobile and adjusts settings for music and video equalizers |
 | Screen | Configure display settings, e.g. brightness. |
 | Location & Security | Create your unlock pattern, define the SIM lock or memory management for the registration information on your mobile device.Under My Location you can also select the sources that are to be used for determining your location. |
 | Applications | Manage your applications and install new applications. |
 | Accounts & sync | Manage your accounts and configure the synchronisation settings. |
 | Privacy | Configure the data protection settings, e.g. backup, restoration and personal data. |
 | Storage | Check the available memory on an inserted microSD card and the internal device memory. |
 | Language & input | Set the operating system language and region, as well as the text input options. |
| Icon | Menu name | Description |
 | Accessibility | Select the input assistance options after the installation of input assistance applications. |
 | Date & time | Set the date, time, time zone and date/time format. |
 | About tablet | Display the mobile network status, battery level and legal information. You can also search for system updates. |
Market
As your tablet is based on the Android platform, you can expand its functions by installing
additional applications. The Android market other mobile applications.

offers a simple way to get games and
Note
Accessing the Android market requires you to be connected to the Internet and have a Google account (see page 11).
Using Non-Market Applications
If you want to install applications which are not downloaded via the marketplace, tap the tick box to enable this option. By default this option is not ticked.
Note
Using non-market applications can be risky and may damage your device.
SIM Card
You choose the network provider, telephone network and tariff when purchasing a SIM card. Therefore, check out which tariff from which network provider is best suited to your mobile data usage before purchasing the SIM card.
- Store all SIM cards out of the reach of small children.
- Handle your SIM card carefully because the card and its contact points can be easily damaged through scratching or bending.
Insert the SIM card carefully into the card bay with the contacts pointing downwards i.e. backwards. The card must lock easily.
Inserting SIM Card
Attention!
Always ensure that the tablet is switched off when carrying out this process to avoid any damage to the device or the SIM card.
- Slide the SIM card into the relevant slot. Insert the SIM card with the contacts facing downwards and the bevelled corner at the top right.
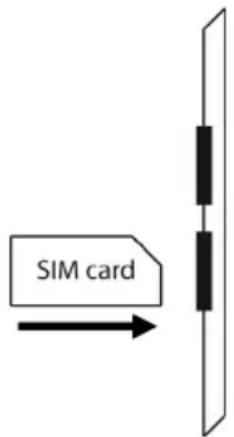
- Follow the instructions on the screen and enter your PIN code.
- The message Unlocking SIM card appears.
Connecting to the Internet
Main Settings
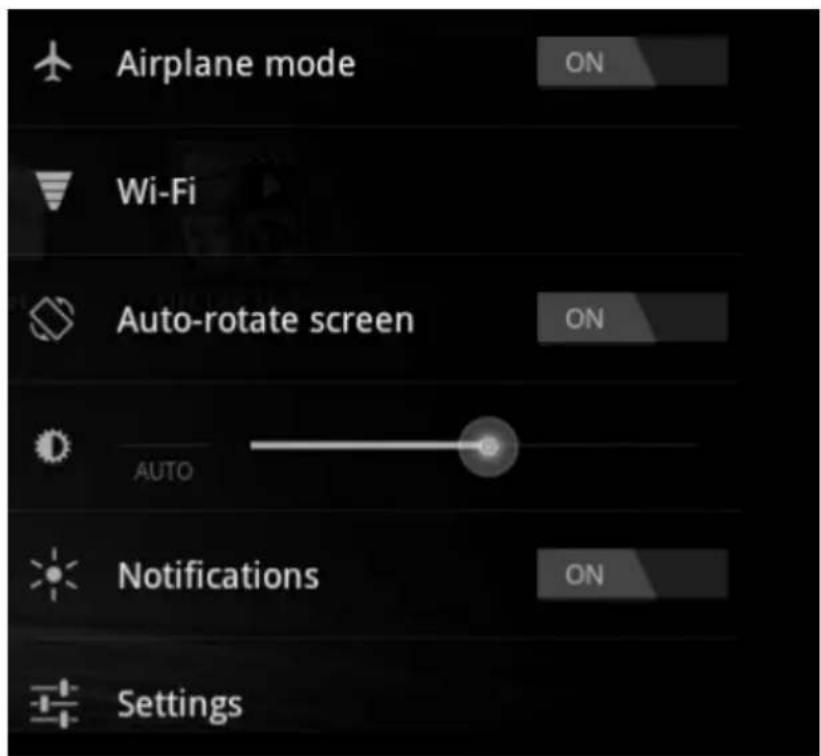
You can use the standard connection settings to access the Internet via your mobile network (GPRS/3G/EDGE) or use your WLAN connection.
In order to access the Internet via GPRS/3G/EDGE, an appropriate service must be active in your contract. Please contact your service provider if the GPRS/3G/EDGE settings are not preconfigured.
Adding a New GPRS/3G/EDGE Connection
Before you start, you should first ask your service provider for the following information:
• Name of the access point (APN)
- If required, your name and your password
• Server IP and port number, if the network uses a proxy server
- Tap on Apps Settings.
- Tap on Wireless & networks Mobile networks Access Point Names.
- Select the desired APN server provided by your mobile operator.
- If there is no APN configured by your mobile operator, tap the icon in the upper right corner, and then tap on New APN.
- Enter the necessary values for the new APN.
- When finished tap on 📋. Your new APN is saved.
- Tap on the desired APN to select it.
Attention!
You can restore the default APN entries that were originally saved on your SIM card by pressing the icon in the upper right corner and choosing the entry “Reset to default”.
Activating/Deactivating 3G
The 3G function can only be enabled/disabled via the Airplane mode.
- Tap on the lower right corner of the taskbar and then on Settings
- Tap on Airplane mode and then activate the 3G function by tapping on or off.
Activating/Deactivating Wi-Fi
Warning!
Make sure the Wireless LAN option is switched OFF in any environment where it might interfere with critical and sensitive devices, e.g. on aircraft, in hospitals and other medical centres, etc.
- Tap on Apps Settings.
- Tap on Wireless & networks.
- Tap on Wi-Fi/3G, to enable/disable this function.
Adding Wi-Fi Network
- Tap on Apps Settings.
- Tap on Wireless & networks Wi-Fi Settings.
The descriptions for the WLAN network and the relevant security settings (open or secure) that have been detected by your tablet are displayed under Wi-Fi networks. - Tap on the network to which you want to connect.
Note
If you attempt to make a connection to a secure network, you will be required to enter a password to gain access.
The microSD Card Slot
Memory cards are media that are being used for a variety of purposes, especially in digital photography. The form and capacity of a memory card can vary according to the manufacturer. Your tablet supports the microSD format.
Inserting microSD Cards
Note
Memory cards can only be installed in one direction.
Incorrect insertion of a card can cause damage to the card reader and/or the card.
- Insert the memory card carefully into the card bay with the contacts pointing downwards i.e. backwards. The card must lock easily.
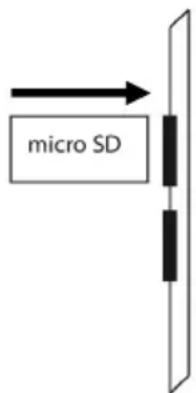
In the taskbar you will see an icon that shows the SD card is inserted.
Accessing the microSD Card Contents
To access the SD card you either can use the application the ES file explorer or another application of your choice (i.e. LIFETAB Media) to play music or watch photos from the SD card.
- Open the ES file explorer.
- Press the home button in the upper left corner.
- Select Ext-memory folder to access data from the SD card.
Removing microSD Cards
- Tap on the SD card icon in the taskbar and then tap on the eject button on the right hand side to remove safely the SD card.
- To remove the memory card pull it out and remove it.
Customer Service
Additional Support
Please contact the MEDION Help Desk on 1 300 884 987 and we will attempt to help you solve the problem. Before you call, however, please have your proof of purchase at hand and the following information available:
• What is the MD Number of your product?
• What messages, if any, appear on your screen?
• What steps have you already undertaken to solve the problem?
- Can you manually repeat the problem?
- If you have been given a customer number previously, please have this available.
Maintenance
Warning!
There are no user-serviceable or user-cleanable parts inside the tablet housing. Never open the tablet housing.
Following these measures can extend the lifetime of your tablet:
- Before cleaning, always remove the power adapter plug and all connecting cables.
- Only use a damp, lint-free cloth to clean the tablet.
- Do not use any solvents, corrosive or gaseous cleaning agents.
Repairs
- Only a qualified Service Engineer should perform upgrades and repairs to your tablet.
- If you do not have the necessary qualifications, go to an appropriate Service Engineer. Please contact the Service Centre if you are experiencing technical problems with your tablet.
Recycling and Disposal
Device
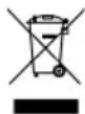
At the end of its life, the appliance must not be disposed of in household rubbish. Enquire about the options for environmentally-friendly disposal
Batteries
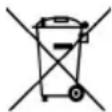
Do not dispose of used batteries in the household rubbish! They must be deposited at a collection point for used batteries.
Packaging

To avoid damage during transport, the tablet is stored in packaging. Packaging is produced mostly from materials which can be disposed of in an environmentally friendly manner and be professionally recycled.
Should you have any questions concerning the disposal please contact your dealer or MEDION Customer Service.
European Norm EN ISO 13406-2 Class II
There have been several attempts in the past to define the acceptable number of defective pixels. But this can be difficult and varies widely between different manufacturers.
We, therefore, adhere to the clear and strict requirements of ISO 13406-2, class II, for the warranty handling of all LCD display products. These requirements are summarised below.
Within ISO-standard 13406-2 the general requirements regarding pixel defects are defined. Pixel defects are classified into three failure types and four failure classes. Each individual pixel is made up of three sub-pixels in the primary colours (red, green, blue).
Pixel structure
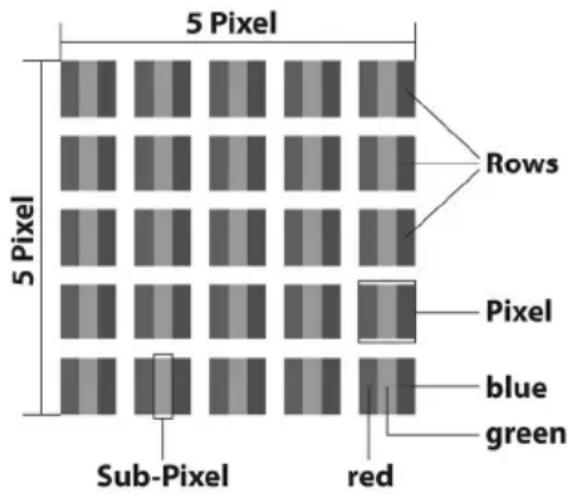
Types of Pixel Failures:
- Type 1: A constantly lit pixel (a bright, white spot), even though it is not addressed. A white pixel is caused when all three sub-pixel are lit.
- Type 2: A pixel that does not light up (dark, black spot), although it is addressed
- Type 3: Abnormal or defective red, green or blue sub-pixels. (E.g. constantly lit with half the brightness, one colour is not shining, blinking or flickering, but not belonging to Type 1 or 2 Pixel Failures)
In addition: A cluster of type 3 (= 2 or more defective sub-pixels in an array of 5 x 5 pixel). A cluster is an array of 5 x 5 pixel (15 x 5 sub-pixel).
ISO 13406-2, Class II
| Resolution Type 1 | Type 2 | Type 3 | Cluster | Type 1, Type 2 | Cluster Type 3 |
| 1024 x 768 | 2 | 2 | 4 | 0 | 2 |
| 1280 x 854 | 3 | 3 | 6 | 0 | 3 |
| 1280 x 1024 | 3 | 3 | 7 | 0 | 3 |
| 1366 x 768 | 3 | 3 | 7 | 0 | 3 |
| 1400 x 1050 | 3 | 3 | 8 | 0 | 3 |
Example:
A 17" (44 cm) - SXGA-display consists of 1280 horizontal and 1024 vertical picture dots (pixel), which amounts to a total of 1,31 million pixels. Based on one million pixels this translates into a factor of about 1.31.
Class II type failure consequently allows for three defects each of type 1 and type 2 and 7 defects of type 3 and 3 cluster of type 3.
These cases are normally not covered by warranty.
If the number of failures exceeds the figures of any category mentioned above then this may be covered by the warranty.
FCC Compliance Statement
This equipment has been tested and found to comply with the limits for a Class B digital device, pursuant to Part 15 of FCC Rules. These limits are designed to provide reasonable protection against harmful interference in a residential installation. This equipment generates, uses, and can radiate radio frequency energy and, if not installed and used in accordance with the instructions, may cause harmful interference to radio communications. However, there is no guarantee that interference will not occur in a particular installation. If this equipment does cause harmful interference to radio or television reception, which can be determined by turning the equipment off and on, the user is encouraged to try to correct the interference by one or more of the following measures:
- Reorient or relocate the receiving antenna.
- Increase the separation between the equipment and receiver.
- Connect the equipment into an outlet on a circuit different from that to which the receiver is connected.
- Consult the dealer or an experienced technician for help.
Changes or modifications not expressly approved by the party responsible for compliance could void the user's authority to operate the equipment. Shielded interface cables, if any, must be used in order to comply with the emission limits.
Index
A
Adding a New GPRS/3G/EDGE Connection....22
Ambient Light Sensor 8
Ambient Temperature....6
Auto Shutdown 15
B
Battery operation 15
Battery Operation Charging 16
C
Cabling....6
Charging the Battery 16
Configuring your Google Account ..... 11
Connecting to the Internet 21
Customer Service 26
D
Description of the Home Screen ..... 12
F
FCC Compliance Statement......30
G
Getting Started Configuring your Google Account .. 11 First Steps .... 11
H
Headphone / 4-pin Headset ...... 10
|
Included with Your Tablet PC ...... 7
Information about Conformity .... 4
Internet Main Settings 21
ISO 13406-2 Class II 28
K
Non-Market Applications ...... 19
0
Operating 17
P
Power Button 13
Power supply Main Operation .... 15
Battery Operation 15
Powering off the Tablet PC 13
Powering on the Tablet PC 13
Proper use 3
R
Recycling and Disposal 27
Repairs 26
Reset opening 9
S
Safety Instructions 5
Ambient Temperature 6
Cabling 6
Maintenance 26
Power Supply 6
Upgrades and Repairs 26
Screen Lock Pattern Settings 14
SIM Card 20
SIM Card Slot 10
Standards
FCC Compliance Statement......30
Standby Mode 13
Support 26
Switching Home Screen 17
U
Upgrades and Repairs 26
V
Views
Bottom Side 9
Front Side 8
Left Side 10
Power ON/OFF 10
Rear Side 9
Sim Card Slot 10
Top Side 9
Webcam with Microphone 8
W
Wi-Fi 22, 23
MEDION®

Medion Electronics Ltd. 120 Faraday Park, Faraday Road, Dorcan Swindon SN3 5JF, Wiltshire United Kingdom
Hotline: 0871 37 61 020 (Costs 7p/min from a BT ladline, mobiles costs maybe higher) Fax: 01793 71 57 16
To contact us by email please visit the „Service and Support“ section of our website at www.medion.co.uk.
www.medion.co.uk




- Bovenkant
- Onderkant
- Linkerkant
- Schermblokkering configureren
- Activer/désactiver Wi-Fi
- Attention!
- Proper use
- Information about Conformity
- Safety Instructions
- Ambient Temperature
- Connecting
- Power Supply
- Cabling
- Included with Your tablet
- Views
- Left Side
- Caution!
- Getting Started
- First steps
- Note
- Configuring your Google Account
- Icon
- Description
- Power Button
- Powering On your tablet
- Powering Off your tablet
- Setting the tablet into standby mode
- Waking up from Standby Mode
- Adjusting Screen Lock Pattern Settings
- Auto Shutdown
- Power Adapter
- Battery Operation
- Charging the Battery
- Resetting the Tablet-PC
- How to carry out the Reset
- Multi Connector
- Operating the tablet
- Switching Home Screens
- Making/Checking Settings
- Market
- Using Non-Market Applications
- SIM Card
- Inserting SIM Card
- Connecting to the Internet
- Adding a New GPRS/3G/EDGE Connection
- Activating/Deactivating 3G
- Activating/Deactivating Wi-Fi
- Warning!
- Adding Wi-Fi Network
- The microSD Card Slot
- Inserting microSD Cards
- Accessing the microSD Card Contents
- Removing microSD Cards
- Customer Service
- Additional Support
- Maintenance
- Repairs
- Recycling and Disposal
- Device
- Batteries
- Packaging
- European Norm EN ISO 13406-2 Class II
- Pixel structure
- Types of Pixel Failures:
- Example:
- FCC Compliance Statement
- Index
- A
- B
- C
- D
- F
- G
- H
- |
- K
- 0
- P
- R
- S
- MEDION®
Brand : MEDION
Model : LifeTab P9514
Category : Tablet