OP270ZT - Oven ETNA - Free user manual and instructions
Find the device manual for free OP270ZT ETNA in PDF.

User questions about OP270ZT ETNA
0 question about this device. Answer the ones you know or ask your own.
Ask a new question about this device
Download the instructions for your Oven in PDF format for free! Find your manual OP270ZT - ETNA and take your electronic device back in hand. On this page are published all the documents necessary for the use of your device. OP270ZT by ETNA.
USER MANUAL OP270ZT ETNA
Specifications techniques
| Introduction | 4 | |
| Description | 5 | |
| Guide rails 5 | ||
| Control panel 6 | ||
| Oven functions table 7 | ||
| First use 9 | ||
| Kitchen timer 11 | ||
| Use | ||
| Controls | 12 | |
| The delayed start function 13 | ||
| Child lock 13 | ||
| Energy saving function 14 | ||
| Cleaning | ||
| Cleaning the appliance 15 | ||
| Removing and cleaning the guide rails 15 | ||
| Removing the oven door 16 | ||
| The pyrolysis cleaning function | 17 | |
| Replacing the oven light 19 | ||
| Troubleshooting | 20 | |
| Technical specifications 22 | ||
| Your oven and the environment | ||
| Disposal of the appliance and packaging | 24 | |
Introduction
Congratulations on choosing this Etna oven. This product is designed with simple operation and optimum comfort in mind. The oven has a wide range of settings enabling you to select the correct cooking method every time.
This manual shows how you can best use this oven. In addition to information about operating the oven, you will also find background information that may be useful when using the appliance.

Read the separate safety instructions before using the appliance!
Read this manual before using the appliance and keep it in a safe place for future use.
Installation instructions are supplied separately.
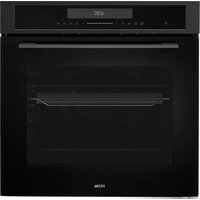
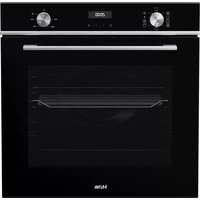
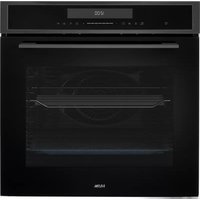
Description
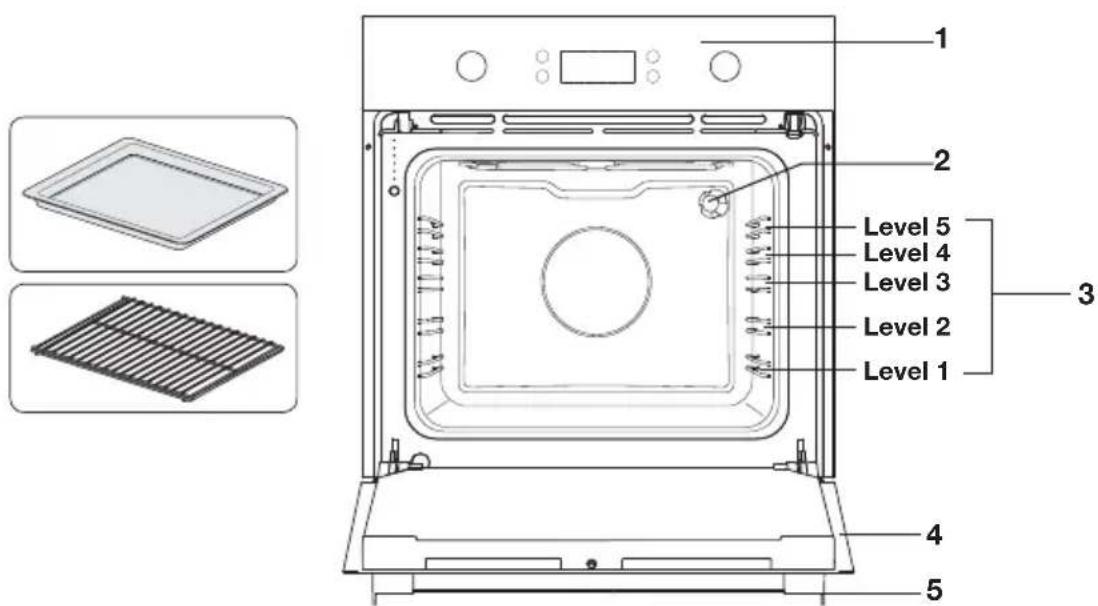
- Control panel
- Lighting
- Shelf levels
- Door
- Door handle
The following accessories come with your oven:
- Baking tray; used for pastries and cakes.
- Oven rack; primarily used for grilling.
A dish or pan with food can also be placed on the oven rack.
Guide rails
- The oven has 5 shelf levels. Level 1 is mainly used in combination with bottom heat. Levels 4 and 5 are used mainly for the grill function.
- Place the oven rack or baking tray in the gap between the guide rails.
- The oven rack and some of the trays have retention grooves to prevent them from accidentally being removed. Place these grooves towards the back of the oven, facing downwards.
- The surface of the rack on which the oven dish will rest must be below the side rails. This prevents the oven dish from accidentally sliding.
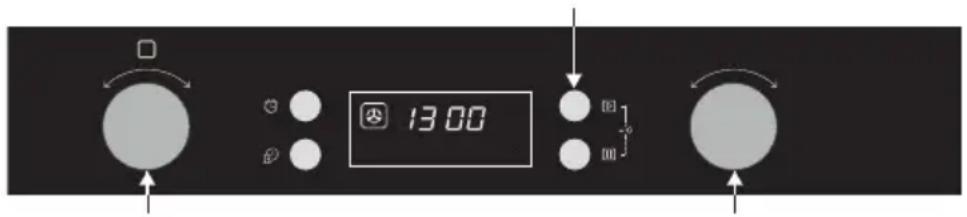
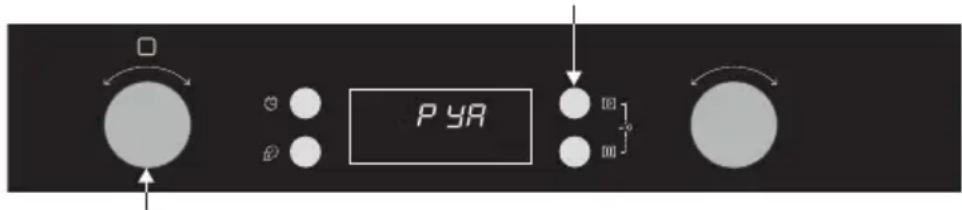
Control panel
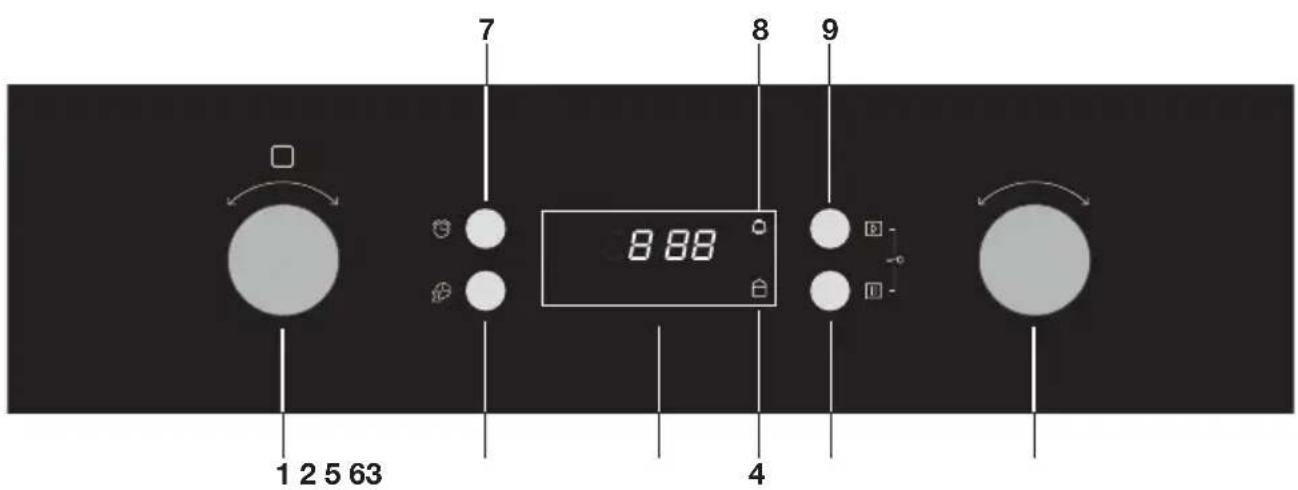
- Oven function dial
- Clock button
- Display
- Lock symbol
- Stop button
- Selection dial
- Kitchen timer button
- Clock symbol
9.Start button
This device is equipped with push-pull knobs.
- Press the knob slightly until it pops out of the control panel. Then turn the knob to the desired position.
After use, push the knob back into the control panel.
Oven functions table
Consult the table below to choose the correct function. Also read the preparation instructions on the food packaging.

Only use oven dishes that can withstand a temperature of 250^ .
| Function Description | |
| Oven lighting • Setting for cleaning the oven. • The light will stay on at any oven function. | |
| Defrost • This function circulates air by means of a fan. • The air is heated to a temperature of 30°C. • Use this function to defrost frozen food. | |
| Bottom Heat • Heating by means of the lowest heating element. • This setting is particularly useful for dishes and baked food that require a real bottom crust or browning. • Place the baking tray or oven rack at level 2. • Use this just before the end of the baking or roasting time. | |
| Top Heat + Bottom Heat • Heating by means of the upper and lower heating elements. • This setting is used for traditional baking and roasting. • Place the baking tray or oven rack at level 2. • Preheating is recommended. | |
| Top Heat + Bottom Heat + Fan • Heating by means of the upper and lower heating elements. The fan distributes this heat. • This setting can be used to bake leavened pastry and to preserve fruit and vegetables. • Place a baking tray that is not too high on level 2, so that hot air can also circulate over the top of the food. |
| Function | Description | |
| Grill ·Heating by means of the grill element. ·This function can be used to grill sandwiches and sausages and to toast bread. ·Place the oven rack on level 4/5 and the baking tray on level 2. ·Regularly keep an eye on the cooking process. At high temperatures, the dish can burn quickly. | 4 2 | |
| Large Grill ·Heating by means of the top heating element and the grill element. ·This setting is particularly useful for dishes and baked food that require a real bottom crust or browning. Use this just before the end of the baking or roasting time. ·Place the oven rack on level 4/5 and the baking tray on level 2. ·Regularly keep an eye on the cooking process. At high temperatures, the dish can burn quickly. | 4 2 | |
| Large Grill + Fan ·Heating by means of the top heating element. The fan distributes this heat. ·You can use this setting for grilling meat, fish and vegetables. ·Place the oven rack on level 4/5 and the baking tray on level 2. ·Regularly keep an eye on the cooking process. At high temperatures, the dish can burn quickly. | 4 2 | |
| Hot Air ·Heating by means of hot air from the back of the oven. ·This setting makes use of even heating and is ideal for baking. ·Place the baking tray or oven rack at level 2. ·Preheating is recommended. | 2 | |
| Pyrolytic mode | Pyrolysis ·This function allows automatic cleaning of the oven cavity/interior using high temperature, which incinerates the fat residues and other impurities, reducing them to ashes. ·See chapter ‘The pyrolysis cleaning function’ for more information. | |
| E | Eco ·Heating using the top heating element. The heat is distributed by the fan. ·For the preparation of dishes in your oven with minimum energy consumption. ·Switching the elements on and off more often makes optimum use of the residual heat of the oven. However, the temperature in the oven will vary slightly more. ·Suitable for fish dishes and a wide variety of meat dishes. | 2 |
First use
- Open the door, remove all the packaging and check the oven for damage. Don't install the oven if it is damaged, but contact your supplier.
- Remove the protective film from the casing.
- Clean the oven interior and accessories with a damp cloth. Do not use any abrasive cleaner or strong-smelling cleaning products.
- Connect the oven to the mains.
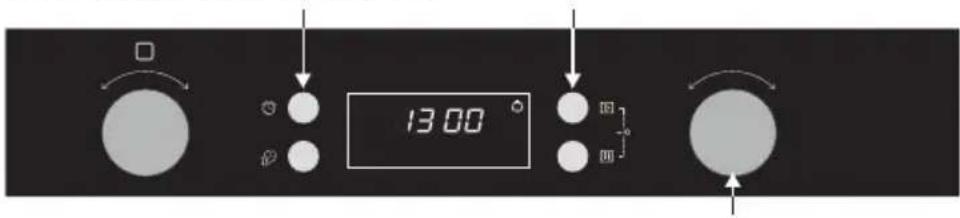
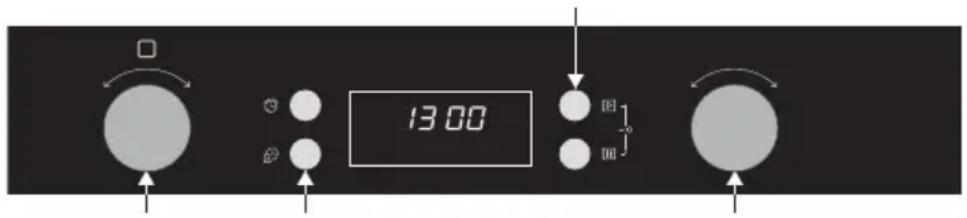
Setting the current time
When the oven is connected to the mains power '0:00' will appear in the display.
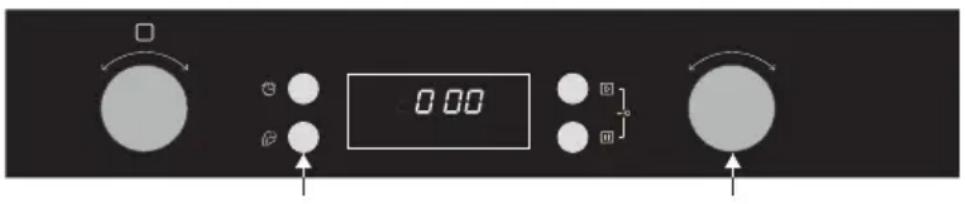
- Press the clock button.
The hour display will flash.
- Use the selection dial to enter the correct hour.
- Press the clock button again.
The minute indicator will flash.
- Use the selection dial to enter the correct minute.
- Press the clock button again to confirm the set time.

The time can be adjusted by press and hold the clock button until the 'hours' indicator starts to flash. Set the clock as described above.
Remarks
- When heating the oven for the first time, you will notice a 'new-oven smell'. This is normal.
- The temperature can be changed during cooking.
- Cooking times are rough estimates and can vary depending on a number of conditions.
- For certain dishes, the oven should be preheated.
- If you use baking paper, this should be able to withstand high temperatures.
- A lot of steam is released when cooking larger pieces of meat or dishes using dough, such as pies. This can cause condensation on the oven door. This is a normal occurrence and does not influence the functioning of the appliance. When the cooking process has ended, dry the door and the glass.
- Prevent condensation from forming and do not allow hot food to cool in a closed oven.
Kitchen timer
The audible signal of the kitchen timer will only sound after the expiry of the set time. The kitchen timer will not switch off the oven.
- Press the kitchen timer button to select the kitchen timer function.
- Set the kitchen timer to the required number of hours using the selection dial.
- Press the kitchen timer button again.
- Set the kitchen timer to the required number of minutes using the selection dial.
- Press the start button to confirm the set kitchen timer.
The clock symbol appears in the display.

When the set time has elapsed, a beep will sound 10 times and the clock symbol will disappear from the display.
- Press the stop button twice to end the kitchen timer.
Controls
Using the oven
The oven has 11 oven functions. Consult 'Oven functions table' to select the correct oven function to cook the dish.
- Place the dish in the oven.
- Turn the 'oven function dial' and select the desired setting by choosing the right symbol in the display.
- Set the oven to the desired temperature using the 'selection dial'.
- Press the start button to start the chosen function.
The oven light switches on.
- If desired use the 'oven function dial' to set a shorter cooking time.
The default cooking time is 9 hours. - Press the start button to confirm the chosen cooking time.
The oven switches on. The temperature is flashing.
As soon as the oven has reached the desired temperature, the temperature indication is displayed continuously.
At the end of the set cooking time the oven will switch off.
A signal will sound 5 times. - Press the stop button to pause or end the cooking process.
Press the stop button once to pause the cooking process.
Press the stop button twice to end the cooking process.

For some dishes, the oven must be preheated first! Consult the information about the dish.
The delayed start function
The oven can be started at a later time. Ensure that the clock is set to the time of day.
- Press the clock button.
The hour display will flash.
- Use the selection dial to enter the correct hour.
- Press the clock button again.
The minute indicator will flash.
- Use the selection dial to enter the correct minute.
- Turn the 'oven function dial' and select the desired setting by choosing the right symbol in the display.
- Press the start button to the temperature and cooking time.
- Turn the 'oven function dial' and select the desired cooking time.
- Use the selection dial to set the desired temperature.
- Press the start button.
The timer symbol and the delayed cooking time will appear in the display.
Child lock
The child lock function can be used to prevent undesired use of the oven.
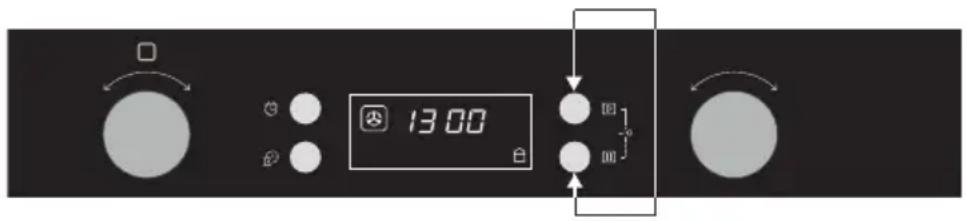
- Press the start button and stop button simultaneously until a beep is heard.
The 'lock symbol' appears in the display. The child lock function is activated.
- Press the start button and stop button simultaneously again until a beep is heard.
The 'lock symbol' disappears from the display. The child lock function is deactivated.
Energy saving function
The display can be disabled temporarily (energy saving function).
- Depress the start button until the display is switched off.
The energy saving function is activated. The time disappears from the display.
- Operate one of the dials or buttons to deactivate the energy saving function.
The time appears in the display again.

If the oven is not used for 10 minutes, the energy saving function is activated automatically.
Cleaning the appliance
Clean your appliance regularly to prevent a build-up of grease and food particles, especially on interior and exterior surfaces, the door and door gasket.
- Clean the exterior surfaces with a soft cloth and soapy warm water.
- Wipe afterwards with a clean, damp cloth and dry the surfaces.
- Remove splashes and stains on the interior surfaces with a soapy cloth.
- Wipe afterwards with a clean, damp cloth and dry the surfaces.

Take care that no water enters the vents.
Never use abrasive cleaning agents or chemical solvents.
Ensure that the door gasket is always clean. This will prevent a build-up of dirt so that the door can close properly.
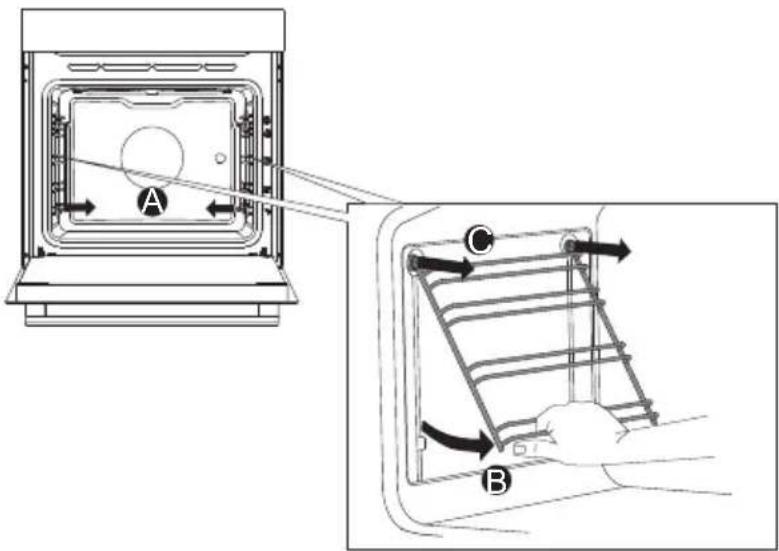
Removing and cleaning the guide rails
Use conventional cleaning products to clean the guide rails.
- Remove the screw at the bottom of the guide rails.
- Grasp the guide rails at the bottom and tilt them towards the middle of the oven.
- Remove the guide rails from the holes in the back wall.
Removing the oven door

Keep your fingers away from the hinges of the oven door. The hinges are spring loaded and can cause injury if they spring back. Make sure that the hinge latches are applied correctly to lock the hinges.
- First, fully open the door (as far as it will go).
- Rotate the stoppers back by 90^ .
- Slowly close the door until the stoppers are aligned with the hinge beds. At the angle of 15^ (relative to the closed door position), slightly lift the door and pull it out from both hinge beds on the appliance.
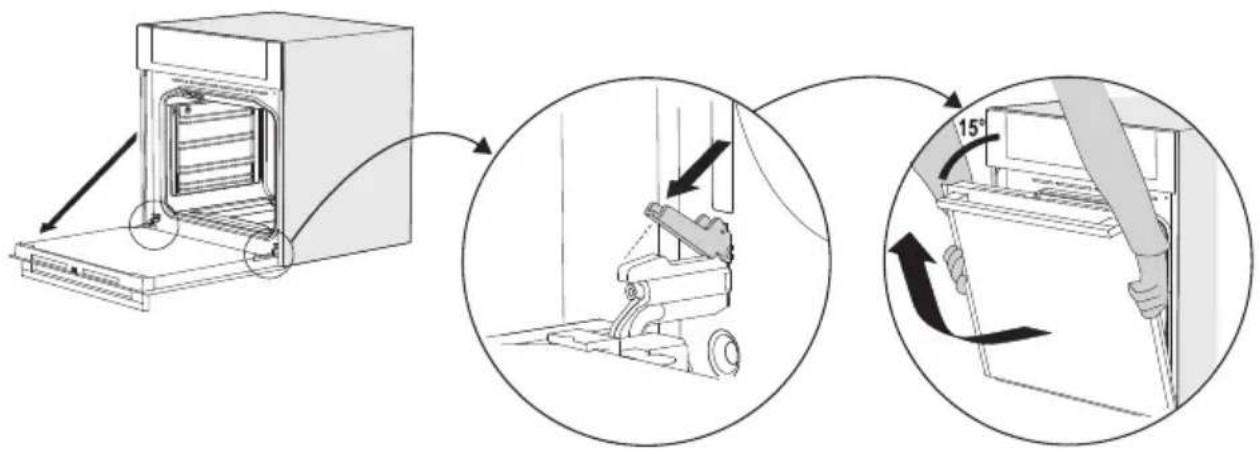
To replace the door repeat these actions in reverse. If the door does not open or close properly, make sure the hinges are positioned correctly in their slots.
The pyrolysis cleaning function
Instead of cleaning manually, you can clean the oven space or an enamelled baking tray using the 'Pyrolysis' oven feature. During pyrolysis the oven space is heated to a very high temperature. Contaminants that are present incinerate at this high temperature and only ash remains.

With average use of the oven, we recommend running the pyrolysis function once per month.

Caution!
- First, remove all accessories and guide rails / telescopic guide rails from the oven (see 'Removing and cleaning the guide rails').
- Then remove any remaining food from the oven space and wipe the space with a damp cloth. Chunks of food and fat may ignite during the pyrolysis process. Fire hazard!
Starting the Pyrolysis function
- Make sure the oven space is completely empty and no chunks of food and fat are present!
- Turn the function knob to 'Pyrolysis'
The display shows "PyR", along with the pyrolytic cleaning duration.
- Press the start button to start the Pyrolysis function.
Standard pyrolysis time is 2 hours. Turn the selection knob to adjust the time. The time can be set to 1:30 or 2:00.
After a certain period of time, the oven door will be locked automatically for your safety.
- The oven may produce an unpleasant smell during the cleaning process.
- At the end of the cleaning process, you will hear an audible signal. Touch the timer key to stop the audible signal.
- Turn the function knob and temperature knob to 'Off' position.
The oven door can be opened after the appliance has cooled down.

- When the oven has cooled down, wipe it with a damp cloth. Wipe the oven door and the adjacent surfaces in the gasket area. Do not rub the gasket.
- For very stubborn dirt, use conventional oven cleaners. Make sure to thoroughly rinse the oven afterwards with clean water to remove any residual cleaning agent.
Replacing the oven light bulb

The light bulb is a consumer item and therefore does not fall under the guarantee. Before replacing the light bulb, disconnect the appliance from electricity by unplugging it or switching off the fuse in the circuit breaker box!
The light bulb in this household appliance is designed exclusively for lighting this appliance. The light bulb is not suitable for lighting a household area.
Replacing the light bulb
-
Turn the cover to the left to remove it.
-
Unscrew the faulty bulb from the fitting and replace it with a new original bulb.
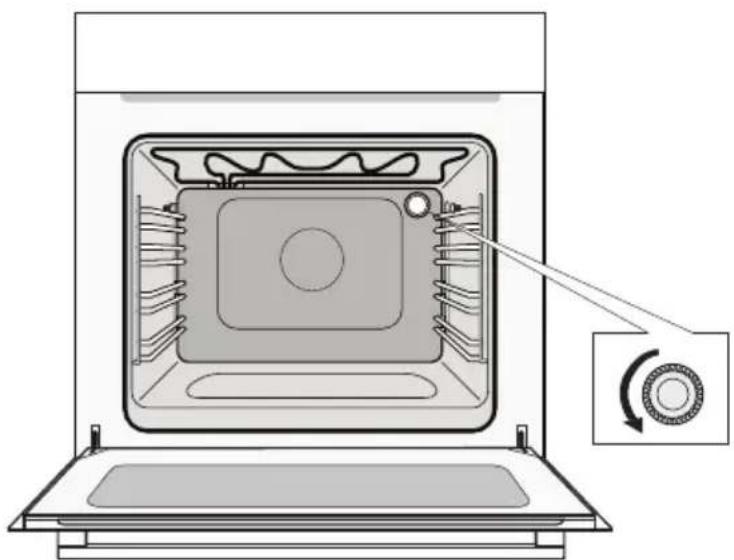

Please note: the light bulb can be very hot! Use protection to remove the light bulb.
General
Try the solutions below if you have problems with your oven. You could save yourself the time and effort of an unnecessary phone call to customer services.
The food stays raw.
- Check whether the timer has been set correctly.
- Check that the door is properly closed.
- Check that the electricity is working properly (fuse in the circuit breaker box/ plug in the socket).
The food is overcooked or undercooked.
- Check whether the correct oven function and temperature have been selected.
- Check that the correct cooking time has been set.
The touch keys don't respond; the display is locked.
- Disconnect the appliance from the power supply for a few minutes (unscrew the fuse or switch off the mains), then reconnect the appliance and switch it on.
- Set the time again.
Condensation appears inside the oven.
- This is normal. Wipe the oven clean after use.
The fan continues to operate after the oven has been switched off.
This is normal. The fan will keep working for a while after the oven has been switched off.
Air flow is detected around the door and outer casing.
This is normal.
Light is reflected around the door and the exterior of the appliance.
This is normal.
Steam escapes from around the door or vents.
This is normal.
A clicking sound occurs while the oven is operating, especially in defrosting mode.
This is normal.
The main fuse in your home trips often.
- Consult a service technician.
The display shows an error code.
- There is a fault in the electronic module. Disconnect the appliance from the power supply for a few minutes. Then reconnect it and set the current time.
- Consult a service technician if the error persists.
Storing and repairing the oven.
- Repairs should only be performed by a qualified service technician. If maintenance is required, take the plug from the socket and contact the Etna customer service.
Have the following information at hand when you call:
- The model number and serial number (stated on the inside of the oven door)
Warranty details
A clear description of the problem

Choose a clean, dry place if you have to store the oven temporarily, as dust and moisture can damage the appliance.
| Model | OP270ZT |
| Power source 220-240 V ~ 50 Hz | |
| Energy consumption | |
| Maximum power | 3200 W |
| Grill function (small) | 2000 W |
| Grill function (large) | 2950 W |
| Top heat | 950 W |
| Bottom heat | 1100 W |
| Hot air | 2000 W |
| Cooling method Motor cooling fan | |
| Dimensions | |
| Appliance dimensions: | W 595 x H 595 x D 575 mm |
| Built-in dimensions: | W 560 x H 600 x D 570 mm |
| Net volume 70 L |
Data determined according to standard EN 60350-1 and Commission Regulations (EU) No 65/2014 and (EU) No 66/2014.
| ETNA | |
| Model identification OP270ZT | |
| Energy Efficiency Index per cavity (EEI cavity) 94 | |
| Energy Efficiency Class per cavity A | |
| Energie consumption required to heat a standardised load in a cavity of an electric heated oven during a cycle in conventional mode per cavity (electric final energia / EC electric cavity) | 0,99 kWh/cycle |
| Energie consumption required to heat a standardised load in a cavity of an electric heated oven during a cycle in fan-forced mode per cavity (electric final energia / EC electric cavity) | 0,79 kWh/cycle |
| Number of cavities 1 | |
| Heat source per cavity Electricity | |
| Volume per cavity (V) 70 L | |
| Energy saving tips · During cooking, the oven door should remain closed except for turning food over. Do not open the door frequently during cooking to maintain the oven temperature and to save energy. · If cooking time is more than 30 minutes, the oven may be switched off 5-10 minutes before the end of the cooking time to save energy. The residual heat will complete the cooking process. · Plan oven use to avoid turning the oven off between cooking one item and the next to save energy and reduce the time for re-heating the oven. · Wherever possible, cook more than one item at a time. | |
Disposal of the appliance and packaging
This product is made from sustainable materials. However, the appliance must be disposed of responsibly at the end of its useful life. The government can provide you with information about this.
The appliance packaging can be recycled. The following materials have been used:
cardboard
polyethylene wrap (PE)
CFC-free polystyrene (hard PS foam)
Dispose of these materials responsibly in accordance with legal provisions.
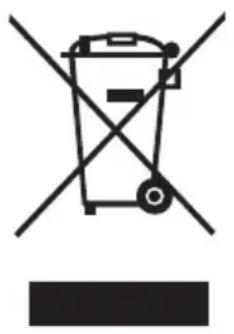
The product has a pictogram of a crossed-out waste container. This indicates that household appliances must be disposed of separately. This means that the appliance may not be processed via the regular waste flow at the end of its useful life. You should take it to a special municipal waste depot or a sales outlet that offers to do this for you.
Collecting household equipment separately prevents harm to the environment and public health. The materials used in manufacturing this appliance can be recycled, which provides considerable savings in energy and raw materials.

Declaration of conformity
We hereby declare that our products comply with the relevant European directives, standards and regulations as well as all requirements referred to in the standards.

The appliance identification card is located on the inside of the appliance.
When contacting the service department,
have the complete type number to hand.
You will find the addresses and phone numbers of the service organisation on the
guarantee card.

805230