AC6210 - Vacuum Cleaner UFESA - Free user manual and instructions
Find the device manual for free AC6210 UFESA in PDF.



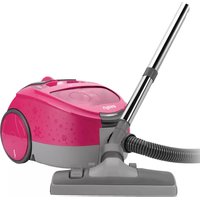
| Product type | Bagless vacuum cleaner |
| Brand | Ufesa |
| Model | AC6210 |
| Technology | Cyclone-tech |
| Suction power | Adjustable via power regulator and valve on the hose |
| Dust compartment capacity | Approx. 1.5 L (estimate) |
| Main filter | Permanent HEPA filter with sponge |
| Air outlet filter | Washable filter |
| Included accessories | Floor brush, wood floor brush, upholstery nozzle, furniture nozzle, crevice tool, telescopic tube, hose |
| Automatic cord rewinder | Yes, with pedal |
| On/off pedal | Yes |
| Power regulator | Yes, on the vacuum body |
| Fill indicator | Yes, red light |
| Parking assistant | Yes, for temporary storage |
| Mobility | Multi-directional wheels, carrying handle |
| Noise level | Approx. 75 dB (estimate) |
| Power consumption | Approx. 700 W (estimate) |
| Weight | Approx. 5 kg (estimate) |
| Maintenance | Regular cleaning of filters and cyclone cone |
| Safety | Overheating protection, automatic shutdown if openings are blocked |
Frequently Asked Questions - AC6210 UFESA
User questions about AC6210 UFESA
0 question about this device. Answer the ones you know or ask your own.
Ask a new question about this device
Download the instructions for your Vacuum Cleaner in PDF format for free! Find your manual AC6210 - UFESA and take your electronic device back in hand. On this page are published all the documents necessary for the use of your device. AC6210 by UFESA.
USER MANUAL AC6210 UFESA
natural_image
Exterior view of a white and black compact vacuum cleaner with attached circuit board (no visible text or symbols)AC6210 (TYPE: C_AC06)
AC6220 (TYPE: C_AC06)
AC6230 (TYPE: C_AC06)
INSTRUCCIONES DE USO
OPERATING INSTRUCTIONS
MODE D'EMPLOI
INSTRUÇÕES DE USO
HASZNÁLATI UTASÍT &
إرشادات التشفيل
ES
GB
FR
PT
HU
AR

natural_image
Pure geometric pattern of gray rectangles with no text, numbers, or symbols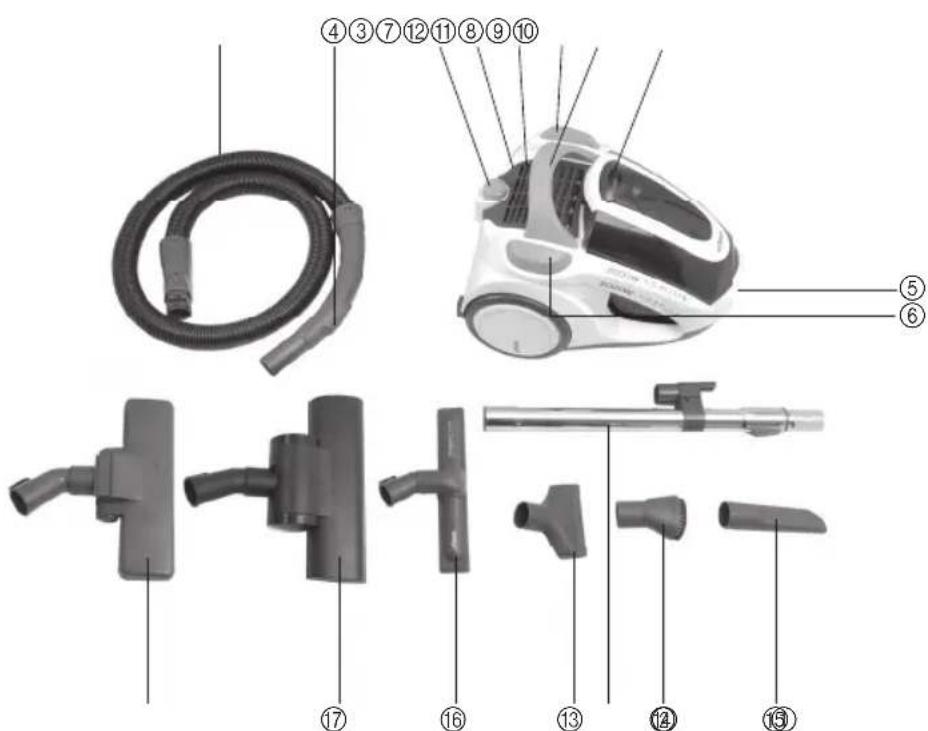
natural_image
Close-up of two hands holding a cylindrical mechanical part, one with an arrow pointing to the side (no text or symbols visible)
natural_image
Close-up of hands using a mechanical tool to adjust a cylindrical component (no text or symbols visible)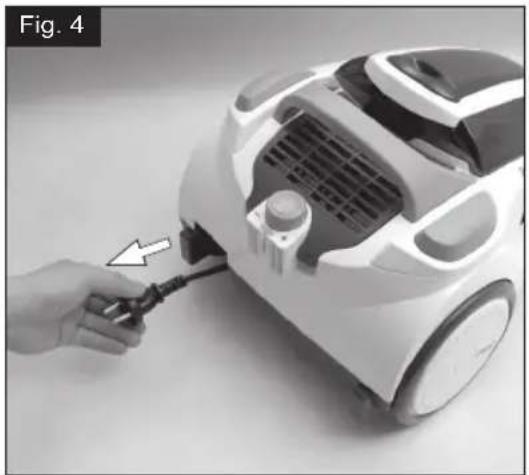
natural_image
Hand inserting a cable into a white vacuum cleaner's air purifier (no text or symbols visible)
natural_image
Hand placing a small component on a white vacuum cleaner's side panel (no visible text or symbols)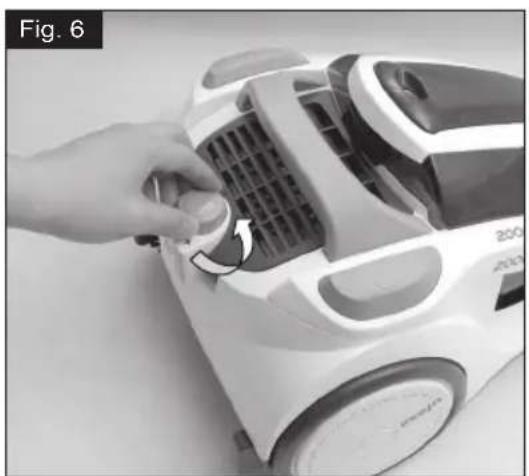
natural_image
Hand placing a small circular component into a white vacuum cleaner's air vent (no text or symbols visible)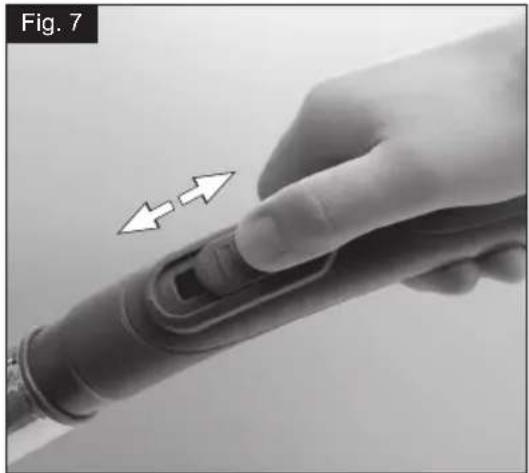
natural_image
Close-up of a finger pressing a rubber tool with two white arrows indicating movement (no text or symbols)
natural_image
Exterior view of a white vacuum cleaner with attached circuit breaker (no visible text or symbols)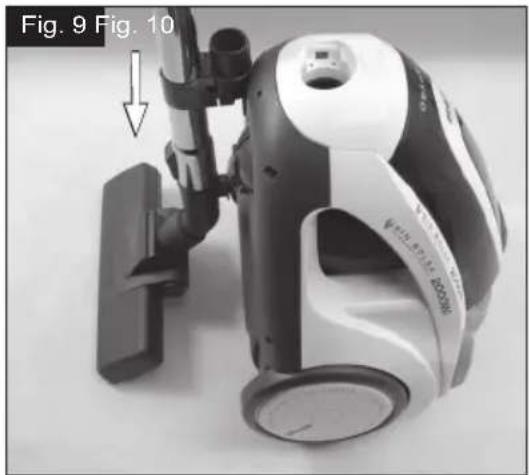
natural_image
Close-up of a black and white vacuum cleaner with attached circuit board (no visible text or symbols)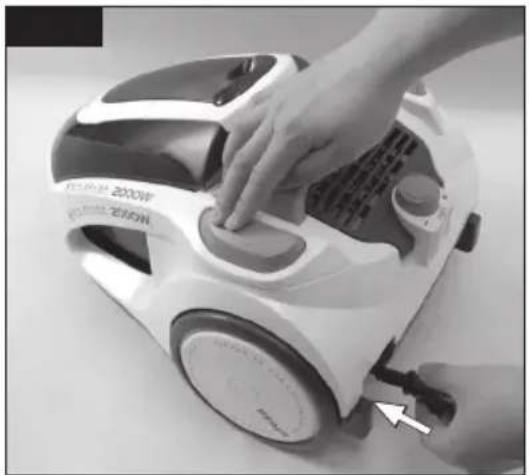
natural_image
Close-up of hands operating a white vacuum cleaner with a handle, no visible text or symbols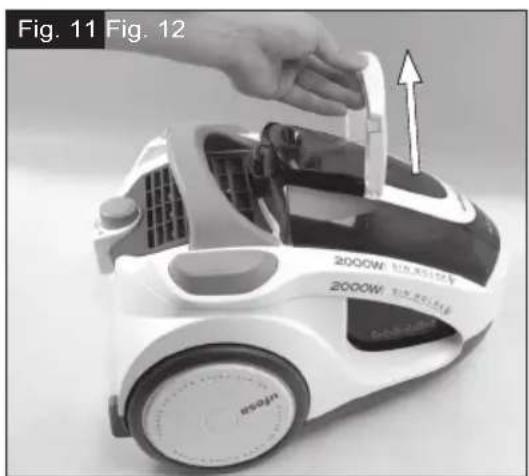
natural_image
Hand placing a component into a white robotic vacuum cleaner (no text or symbols visible)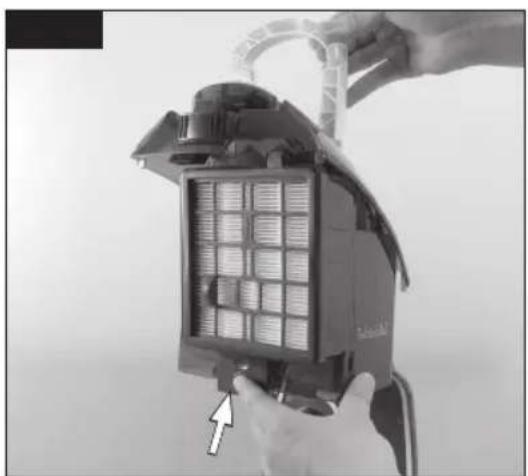
natural_image
Close-up of hands holding a small electronic device with grid-patterned panel, no visible text or symbols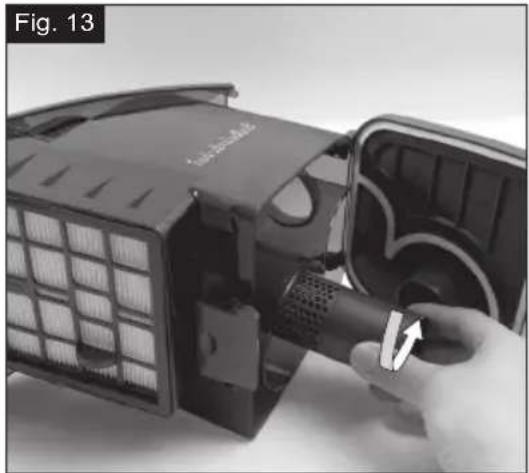
natural_image
Close-up of a black electric fan device with a hand inserting a plug into it, showing internal grid structure (no text or symbols visible)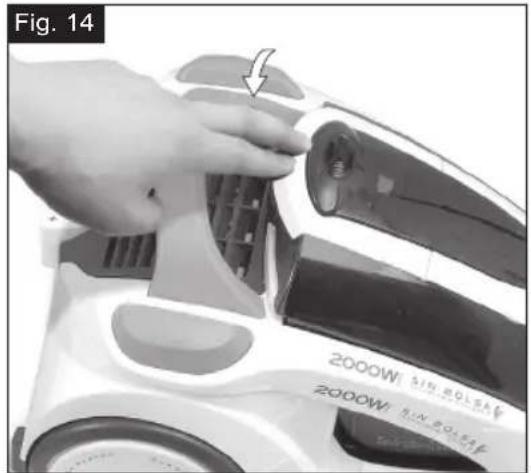
natural_image
Close-up of a hand inserting a grid into a device component, labeled 'Fig. 15' (no text or symbols on the device itself)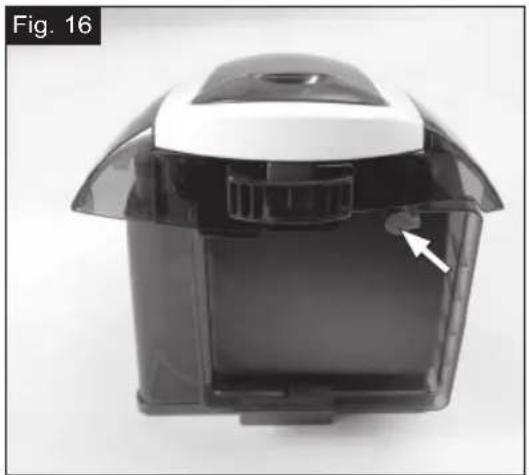
natural_image
Exterior view of a black and white disposable water dispenser with a white arrow pointing to the interior (no text or symbols visible)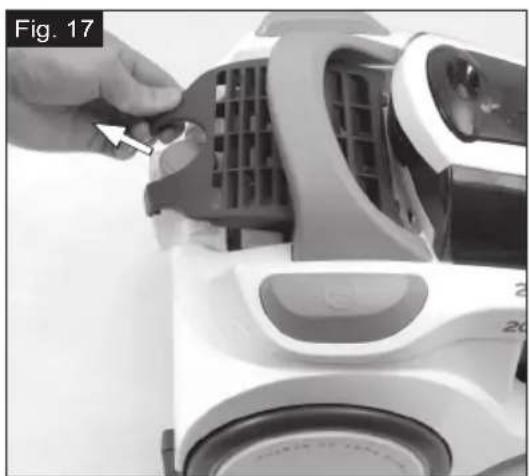
natural_image
Close-up of a hand adjusting a white robotic device's grille and vent (no visible text or symbols)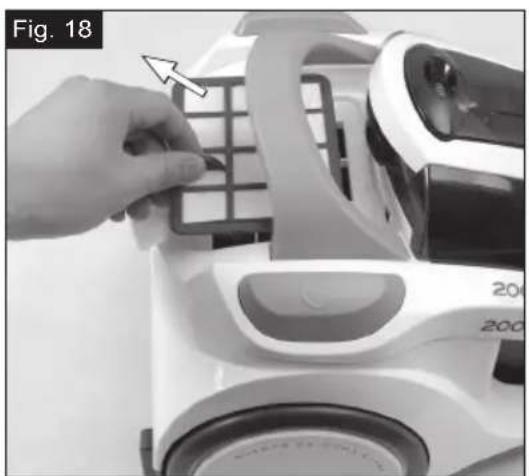
natural_image
Close-up of a robotic device with a hand adjusting a grid panel (no visible text or symbols)ESPAÑOL
DESCRIPTION OF THE APPLIANCE
- Floor brush
- Telescopic tube
- Hose
- Suction regulating flap
- Suction hole
- On/Off pedal
- Power regulator
- Automatic cable rewind pedal
- Container full indicator
- Carrying handle
- Air outlet grill
- Air outlet filter
- Upholstery nozzle
- Furniture nozzle
- Crevice nozzle
- Brush for wooden floor
- Beater brush (carpets)
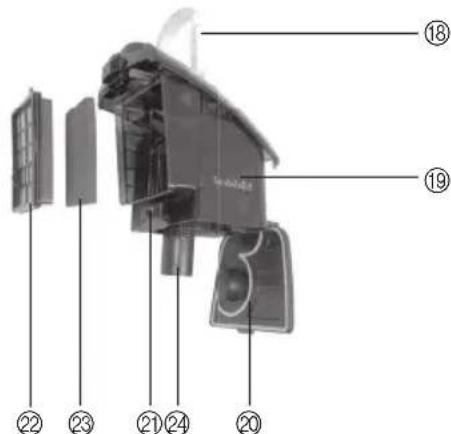
Cyclone-tech unit
- Cyclone-tech unit release handle
- Dust container
- Base flap
- Base flap release button
- Permanent HEPA filter
- Sponge
- Cyclone cone
IMPORTANT ADVICE
- This vacuum cleaner must not be used without the cyclone-tech unit and the permanent HEPA filter. This could damage the appliance.
- Do not use the vacuum cleaner if any of its openings are obstructed, as this will reduce the air flow causing it to overheat, which may damage the appliance.
- Do not handle either the vacuum or the plug with wet hands. Do not immerse the appliance in water.
- Do not use the appliance if either the cable or plug is damaged or if it can be detected that the appliance is not working correctly.
- This appliance can be used by children aged from 8 years and above and persons with reduced physical, sensory or mental capabilities or lack of experience and knowledge if they have been given supervision or instruction concerning use of the appliance in a safe way and understand the hazards involved. Children shall not play with the appliance. Cleaning and user maintenance shall not be made by children without supervision.
- Read these instructions carefully. Safeguard them for future reference.
- This appliance has been designed exclusively for domestic use. It must only be used in accordance with these instructions. The manufacturer will not be held any responsibility for any damage caused by improper use or incorrect operation.
- Do not use the vacuum cleaner on people or animals.
- Never vacuum up hot or glowing substances, sharp-edged objects and inflammable or explosive substances.
- Do not expose the vacuum cleaner to outdoor weather conditions, dampness or heat. Do not leave the vacuum cleaner beside hot ovens, heaters or radiators.
- Before plugging the appliance into the mains supply, make sure that the voltage corresponds to that stated on the characteristics plate.
- The appliance must be switched off before plugging it in or unplugging it.
- Do not operate the appliance with the cable still coiled.
- Do not unplug the appliance by tugging on the cable.
- Unplug the vacuum cleaner from the mains supply when not in use and before proceeding to clean it or change the bags or filters.
- Do not pull on either the cable or the suction tube to move the vacuum cleaner. Use the carrying handle.
- When closing doors, make sure not to pinch the cable.
- Cable repairs and replacements must be carried out exclusively by an authorized technical service centre.
SUCTION SYSTEM
This appliance operates without a dust bag using cyclone-tech technology. To do this just attach cyclone-tech unit to the appliance.
SWITCHING ON AND OPERATION
- Insert the hose (3) into the suction hole (5) so that it clicks into position.
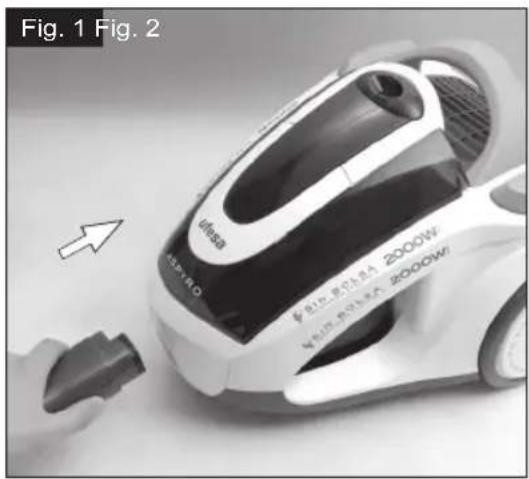
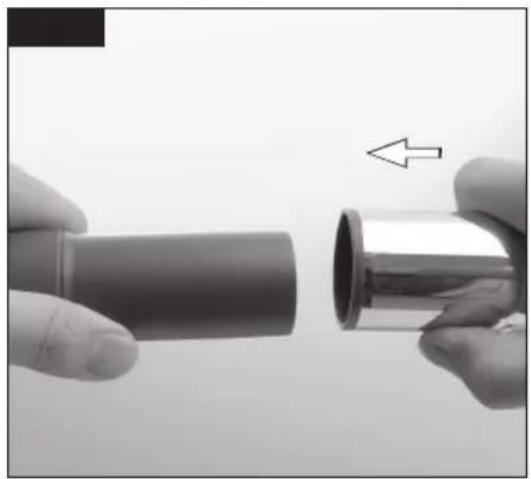
Pressing down the release button will help you to insert or remove the hose (3). (Fig. 1) - Attach the telescopic tube (2) to the suction hose (3), and adjust the length to suit the user. (Fig. 2)
- Fit the floor brush (1), or whichever accessory is required, to the vacuum tube. (Fig. 3)
- Holding the power cord by the plug, pull out the required length and plug it into the mains socket. (Fig. 4)
- Press the On/Off pedal (6), (Fig. 5)
Regulate the power using the power regulator (7), and turn clockwise to increase power while turning anti-clockwise to reduce power (Fig. 6). The intensity can be regulated from the handgrip. Opening the flap (4) reduces suction, whereas closing it increases suction. (Fig. 7)
- You can use the parking aid on the back of the vacuum cleaner if you wish to stop vacuuming for a short while. Slide the catch on the brush into the groove at the rear of the appliance (Fig. 8) or clip the tube onto the vacuum cleaner at vertical position. (Fig. 9)
- The wheels and 360° swivel joint and the carrying handle, make this vacuum cleaner extremely mobile.
WHEN FINISHED
When you have finished using the appliance, set the power regulator (7) to the minimum position and press the On/Off pedal. Press the automatic cable rewind pedal (8) to wind the cable back in. (Fig. 10)
CLEANING AND MAINTAINING
Container full indicator (9)
When suction power decreases considerably and a red marker is moved into a window mounted on the top of the vacuum cleaner. This means that the container is full or that the hose or filters are blocked. If this occurs follow the instructions for emptying the container (19) and cleaning the filters.
Emptying and cleaning the container
- Pull upward the release handle (18) and take out the cyclone-tech unit. (Fig. 11)
- Press the base flap release button (21) to open the base flap (20) and empty the contents into a dustbin. (Fig. 12)
- The cyclone cone (24) should be cleaned after each use. To do this, turn the nozzle anti-clockwise in the direction of the arrow marked on it to remove it, knock out the dirt or rinse it when it's very dirty. Turn it clockwise to fit it back. (Fig. 13)
- The inside of the container can be wiped clean by using a damp cloth, and then left them completely dry before reusing.
- Cover the base flap back up to close it again. Place the cyclone-tech unit back into its housing on the vacuum cleaner.
- To ensure the best cleaning performance, be sure to press down the handle until it totally clicks into position. (Fig. 14)
Cleaning the permanent HEPA filter
The HEPA filter (22) should be cleaned regularly by knocking out the dirt and rinsing, and It is advisable to clean the HEPA filter at least six uses.
- Pull upward the release handle and take the cyclone-tech unit out.
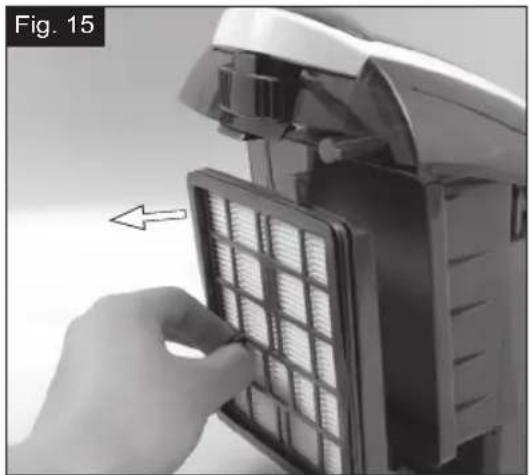
- Remove the permanent HEPA filter (22) and sponge (23). (Fig. 15)
- Tape it or wash them with water and mild detergent. Then leave them to completely dry.
This vacuum cleaner has a missing filter detection system which prevents the cyclone-tech unit from being put back on the container when the HEPA filter is absent or not fitted correctly. (Fig. 16)
Cleaning the air outlet filter
- Release the two grill catches and remove the outlet filter grill (11). (Fig. 17)
- Take the outlet filter (12) out and tap it or rinse it if very dirty. (Fig. 18)
- Leave it to completely dry before fitting it back and reusing.
Important:
- Always switch off the vacuum cleaner and disconnect the power cord from the mains before cleaning the appliance.
- The vacuum cleaner must never be switched on unless these filters are fitted correctly.
- Do not use a scourer, glass-cleaning agent or multipurpose cleaning product.
- Never immerse the whole vacuum cleaner in water.
- To guarantee trouble-free operation only use original Ufesa filters.
- Ufesa recommends that the HEPA filter and the air outlet filters be replaced yearly (depending on use). You can find these replacements at your local shopping center.
BRUSH FOR WOODEN FLOOR (16)
This brush has been specially designed to clean wooden floor surfaces. The soft hair bristles brush over the surface picking up the dust but without damaging the floor.
BEATER BRUSH FOR RUGS & CARPETS (17) (Only for AC6220)
This brush is specially designed for cleaning rugs and carpets. The rotating brush beats gently against the carpet fibers for deeper cleaning.
ACCESSORY
Upholstery nozzle (13)
This accessory has been designed to clean all types of upholstery.
Furniture nozzle (14)
This accessory is ideal for vacuum cleaning furniture and other delicate surface, prevent surfaces from being damaged.
Crevice nozzle (15)
Use this accessory to vacuum crevices and deep grooves and nooks, etc.
ADVICE ON DISPOSAL:
Our goods come in optimized packaging. This basically consists in using non-contaminating materials which should be handed over to the local waste disposal service as secondary raw materials.
This product complies with EU Directive 2002/96/CE. The crossed wheelie bin symbol shown on the appliance indicates that when it comes to dispose of the product it must not be included in with household refuse. It must be taken to a special refuse collection point for electric and electronic appliances or returned to the distributor when purchasing a similar appliance. Under current refuse disposal regulations, users who fail to take discarded appliances to special refuse collection points may be penalized. Correct disposal of discarded appliances means that they can be recycled and processed ecologically, helping the environment and allowing materials used in the product to be reused. For more information on available waste disposal schemes contact your local refuse service or the shop where the product was purchased. Manufacturers and importers are responsible for ecological recycling, processing and disposal of products, whether directly or via a public system. Your local town council can provide you with information about how to dispose of obsolete appliance.
FRANÇAIS
DESCRIPTION DE L'APPAREIL


- ESPAÑOL
- DESCRIPTION OF THE APPLIANCE
- Cyclone-tech unit
- IMPORTANT ADVICE
- SUCTION SYSTEM
- SWITCHING ON AND OPERATION
- WHEN FINISHED
- CLEANING AND MAINTAINING
- Container full indicator (9)
- Emptying and cleaning the container
- Cleaning the permanent HEPA filter
- Cleaning the air outlet filter
- Important:
- BRUSH FOR WOODEN FLOOR (16)
- BEATER BRUSH FOR RUGS & CARPETS (17) (Only for AC6220)
- ACCESSORY
- Upholstery nozzle (13)
- Furniture nozzle (14)
- Crevice nozzle (15)
- ADVICE ON DISPOSAL:
- FRANÇAIS
- DESCRIPTION DE L'APPAREIL
Brand : UFESA
Model : AC6210
Category : Vacuum Cleaner