M819DAB - Speakers KENWOOD - Free user manual and instructions
Find the device manual for free M819DAB KENWOOD in PDF.
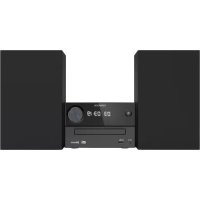
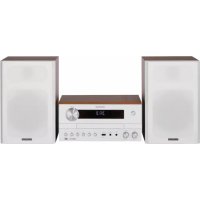
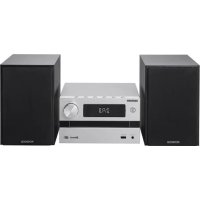
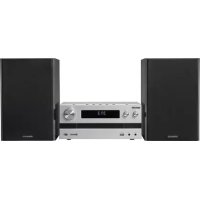
| Product Type | Compact Hi-Fi system with speakers |
| Brand | Kenwood |
| Model | M819DAB (M-819DAB) |
| Main unit dimensions | 260 x 110 x 260 mm |
| Main unit weight | 2.06 kg |
| Speaker dimensions | 173 x 263 x 240 mm (per speaker) |
| Speaker weight | 2.4 kg (per speaker) |
| Power supply | 100-240 V AC, 50/60 Hz |
| Power consumption | 40 W |
| Standby consumption | < 0.5 W |
| Output power | 2 x 50 W at 6 Ohms |
| Supported audio formats | CD audio, MP3 (via USB), audio files on USB drive |
| Tuner | DAB+ (Band III) and FM (87.5-108 MHz) |
| Bluetooth | Version 4.2, class 2, range ~10 m |
| Auxiliary input | 3.5 mm jack (Line-In) |
| Preset equalizer | Rock, Pop, Flat, Jazz, Classic |
| Playback functions | Random playback, repeat, programming (up to 20 CD tracks, 99 files) |
| Cleaning | Dry cloth, do not use liquid or abrasive products |
| Safety | Do not open the casing (Class 1 laser), unplug before cleaning, avoid water |
| Warranty | 2 years parts and labor |
Frequently Asked Questions - M819DAB KENWOOD
User questions about M819DAB KENWOOD
0 question about this device. Answer the ones you know or ask your own.
Ask a new question about this device
Download the instructions for your Speakers in PDF format for free! Find your manual M819DAB - KENWOOD and take your electronic device back in hand. On this page are published all the documents necessary for the use of your device. M819DAB by KENWOOD.
USER MANUAL M819DAB KENWOOD
Before switching on the power supply 3
Safety instructions 3
Before initial operation 6
Connecting 6
Handling CDs 7
Useful information about USB-devices 7
Component names and functions 8
Basic functions 9
Turning on the system 9
Switch off in standby 9
Volume control 9
Adjusting the sound 9
Using CD and USB 9
Preparation 9
Playback of CD or audio files (USB, CD) 10
Selecting a folder (only audio files) 10
Programming tracks and files 11
-
Procedure with audio CD 11
-
Procedure with audio files 11
Shuffle play and repeat function 12
-
Procedure with audio CD 12
-
Procedure with audio files 12
Use of the DAB+ radio 12
Setting the DAB+ transmitter 12
Dialling a DAB+ transmitter 13
Saving stations in station memory 13
Expanded DAB+ information 14
DAB+ menu functions 14
Use of the FM radio 15
Setting the FM transmitter 15
Saving stations in station memory 15
FM menu functions 15
Using BLUETOOTH 16
Pairing BLUETOOTH devices 16
Playback via BLUETOOTH 16
Using Line-in 16
Playing an external player 16
Troubleshooting 17
General Information 17
Maintenance and care 17
Disposal 18
Technical Data 19
Warranty 20
Before switching on the power supply
IMPORTANT SAFETY INSTRUCTIONS
Attention: Please read through this sheet carefully in order to ensure safe operation of the device.
Read notes carefully!
- Please comply with all safety and operation instructions when you put this product into operation.
Keep these instructions in a safe place!
- Please keep the safety and operating instructions for later reference.
Please comply with all warnings!
- Please comply rigorously with all warnings given on the product and cited in the operating manual.
1. Clean with a dry cloth only!
- Remove the mains plug of this device from the mains socket before you clean the product. Never use fluid cleaning solution or cleaning spray. Use only a damp cloth for cleaning.
2. Accessories
- Only use the accessories specified by the manufacturer.
3. Do not use this device near water
- The device should never be exposed to water drops or water spray - as for instance would be occur near a bath, bathroom sink, kitchen sink, washing machine in a damp cellar or near a swimming pool etc. Never place containers filled with liquid such as, for instance, a vase of flowers, on the device.
4. Ventilation
- The slits and openings in the housing serve to ventilate the device to ensure the reliable operation of the device and to protect the device from overheating and potential spontaneous combustion. Please do not block the ventilation openings. Please install the device according to the manufacturer's instructions. Never block the ventilation openings by placing the device on a bed, sofa, rug or similarly soft underlay. This device should not be installed in a bookshelf or built-in cupboard if sufficient ventilation has been ensured as described in the manufacturer's installation instructions.
5. Power supply
- This device may only be connected to the mains power supply which is specified on the device. If you are unsure which type of power supply is in your home, please contact your specialist supplier or the local energy supply company.
6. Mains cable
- Make sure that the mains cable is not in a position where someone can trip over it nor that it can be disconnected in the immediate vicinity of a socket including additional sockets. Also it should not be crushed in any way when coming out of the device.
7. Thunderstorms
- Disconnect from the mains supply in the event of thunderstorms or if not used for a longer period.
8. Overload
- Never overload the mains sockets, extension cables or power strips because otherwise there is a risk of fire or electrical shock.
9. Entry of foreign material or liquid
- Take care that foreign material or liquid never enter into the device through the ventilation openings, since otherwise contact with high voltage components or short circuit with a resulting fire or electric shock can occur. Never spill liquid of any kind on this device.
10. Service
- Never attempt to service this device yourself since if covers are opened or removed, live parts may be exposed, touching which can be a source of risk. Please refer all servicing to qualified customer service personnel.
11. Damage which requires repair
Service and repair work should only be carried out by qualified customer service department. Service/repair is required if the device is damaged (e.g. the mains cable or plug), if liquid had entered the device, if items have penetrated into the device, if the device was exposed to rain or moisture, if it no longer works properly or has fallen down.
12. Spare parts
- If replacement parts are needed, ensure that the customer service technician is using the spare parts which are stipulated by the manufacturer or which have the same properties as the original parts. Replacement parts which are not approved can lead to fire, electrical shock or other accidents.
13. Safety check
- Please ask the customer service technician to carry out a safety check on this device after finishing service or repair work in order to determine if the device is in proper working order.
14. Wall or ceiling mounting
-This device may only be mounted on a wall or ceiling following the manufacturer's recommendations.
15. Heat
- Do not install this device near hot surfaces such as radiators, fan heaters, ovens or other devices (including amplifiers) which can become hot. Never place items with open flames such as candles or lanterns on top of or near the device. The batteries which are installed should not be exposed to great heat such as sunlight or similar.
16. Electricity lines
- An outdoor antenna should not be installed near power lines or other electrical lines or in places where such electrical lines could fall. When installing outdoor antennas, great care should be taken not to unintentionally touch electrical lines because that can fatal.
To minimise the risk of electrical shock, fire etc.
- Do not remove any screws, covers or housing components.
- In no position does the power switch completely disconnect the power supply.
To disconnect the device completely from the power supply, please pull the mains plug from the power socket.
EU Declaration of Conformity
The JVCKENWOOD Corporation hereby declares that the radio equipment type M-819DAB is in compliance with the 2014/53/EU guidelines. The complete text of the EU Declaration of Conformity is available under the following internet address:
http://www.kenwood.com/cs/eudoc/
Manufacturer:
JVCKENWOOD Corporation
3-12. Moriyacho, Kanagawa-ku, Yokohama-shi, Kanagawa 221-0022, JAPAN
Agent (EU):
JVCKENWOOD EUROPE B.V.
Amsterdamseweg 37, 1422 AC UITHOORN, THE NETHERLANDS
IMPORTANT FOR LASER PRODUCTS
- CLASS 1 LASER PRODUCTS
- CAUTION: Do not open the housing. This device does not contain any parts which can be serviced by the user; only allow qualified specialist personnel to carry out servicing.
Automatic energy saving function
The stereo system is equipped with an automatic energy saving function. This switches to standby mode after 15 minutes under the following conditions:
- No CD is inserted or the CD player has not been started
- The USB port is not occupied or the Play function has not been started
- STOP or PAUSE in CD or USB mode
- In LINE-IN mode without music playback
- STOP or PAUSE in LINE-IN mode
- In BLUETOOTH mode without device connection
- With BLUETOOTH connection without audio playback
Unpacking
Carefully unpack the device and take care that all accessories are present:
Operating manual
Remote control
FM/DAB antenna
LR03/AAA 1.5 Volt Battery

Notes about reading the manual
Most functions can be controlled using the remote control.
Preparation of the remote control
- Insert the battery into the remote control, taking care that it is in the correct polarity (+ and -).
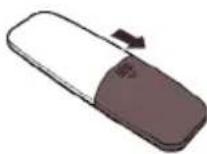
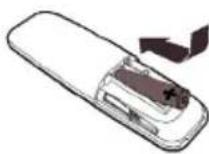
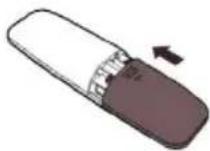
- The battery provided is intended for functional checking and can have a short service life.
- If the operating range of the remote control decreases, replace the old battery with a new one.
- If you expose the remote control sensor to direct sunlight or the light from high frequency fluorescent lamps, this may lead to malfunctions. In such situations, you should set up the system at another place to avoid such malfunctions.
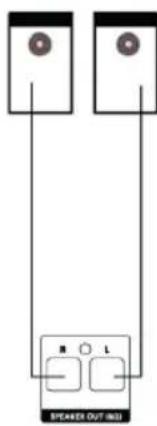
Connecting
- Carefully unpack the device and take care that all accessories are present.
- Connect the left and right speaker with the relevant (Speaker Out) port on the side of the device.
- Connect the mains plug firmly to an AC outlet.
DAB+ / FM antenna port
- Connect the cable to the [FM ANTENNA 75 ] jack.
- Find a place where the best reception is achieved.
-
Fix the antenna in position.
-
The antenna provided with the system is a simple dipole antenna. The use of a (commercially available) outdoor antenna is recommended for stable signal reception.
To connect an outdoor antenna, first take off the indoor antenna. - FM/DAB+ reception cannot be guaranteed when receiving radio transmissions from the cable network
First use
When you use the device for the first time, an automatic DAB+ station scan is started. Please wait until this procedure has completely finished. For further information on this, please refer to the "Using the DAB+ radio" section.
Handling CDs
Precautions when handling
Hold the CD in such a way that you are not touching the signal surface. (The side without printing is the playing side)
Precautions regarding CDs
Only use CDs with the mark. Among other issues, a CD without this mark cannot be correctly played back.
Useful information about USB-devices
Notes on using a USB device
This device is able to play back audio files saved on a flash memory or digital audio player if this device has a USB port (these devices are referred to as USB devices in this document).
The following restrictions apply to the USB devices which can be used:
Usable USB devices
- USB devices which belong to the USB mass storage class.
- USB devices which have a maximal power consumption of max. 500mA.
- USB mass storage class : USB devices which the PC recognises as external memory without the need for a special drive or special application software.
- Please consult your dealer if you are not sure if your USB device complies with the USB mass storage class specifications.
- Use of a USB device which is not supported can lead to faulty playback or display of the audio file.
Even if you use a USB device which complies with the above named specifications, depending on the type or condition of the USB device, audio file may not play back properly among other issues.
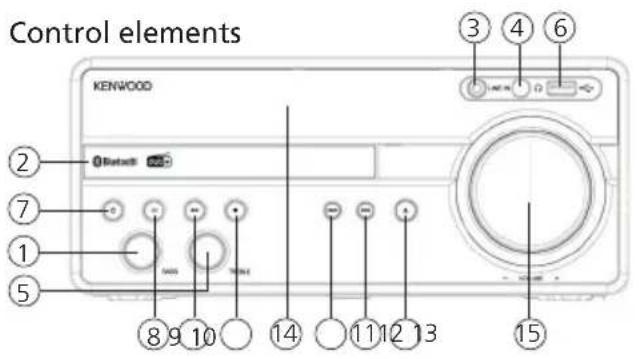
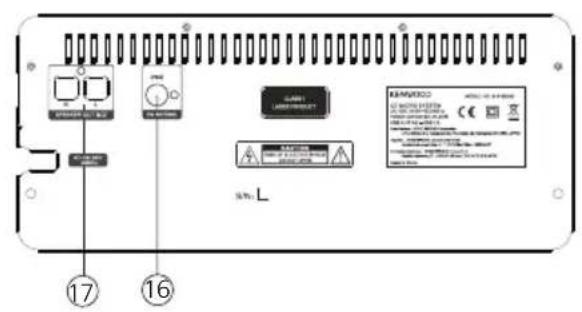
1-Bass control
10 - Stop
2 - CD tray
11 - Next
3 - Line-In port
12 - Previous
4 - Headphone port
13 - Open / Close
5 - Treble control
14 - Display
6 - USB port
15 - Volume
7 - Standby / On
16 - FM /DAB+ Antenna Port
8 - Select Source
17 - Speaker ports
9 - Playback / Pause
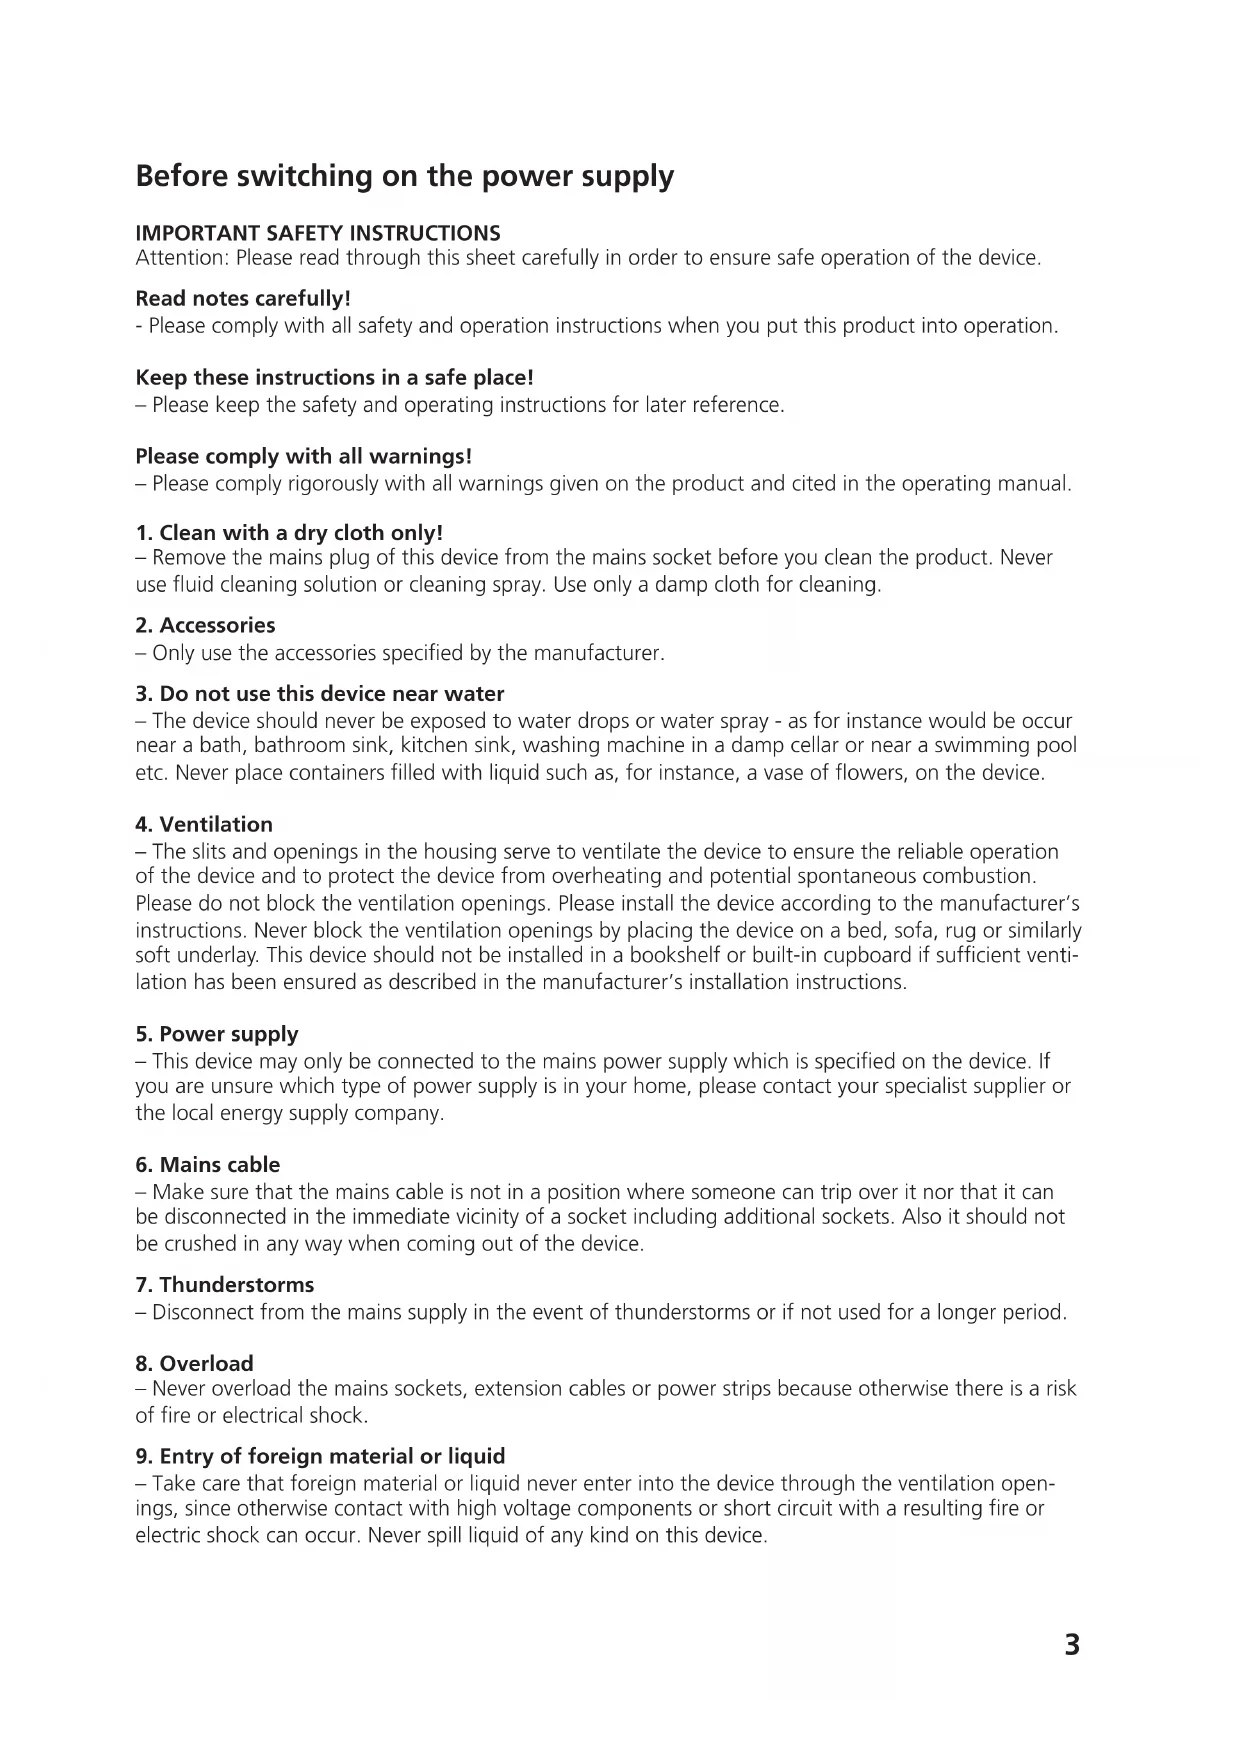
Remote control
1 - Standby / On
2-CD
3 - BLUETOOTH
4-DAB+/FM
5 - Memory / Programm
6 - Fast Rewind / Previous
7 - Enter / Playback / Pause
8 - Search Back / Skip Back10 Tracks
9 - Search Forward / Skip Forward 10 Tracks
0 - Select Folder Back
1 - Select Folder Forward
2 - Lower Volume
3 - Equalizer
4 - Open / Close
5 - Select Source
6 - Auto-Tune / Stop
7 -Fast Forward / Next
8 - Repeat / Menu
9 - Shuffle play / Information
0-IncreaseVolume
1 - Muting

Basic functions
Turning on the system: Press the button on the remote control or on the main device.
"HELLO" appears in the display.
Switch off in standby: Press the button on the remote control or on the main device.
"GOOD BYE" appears in the display and the device switches in standby mode.
Volume control
On the remote control: Press the VOL+ button to raise the volume or press the VOL- button to lower it.
On the main device: Turn the volume control to raise or lower volume.
At minimal volume, "VOL MIN" will be briefly shown in the display and at maximal volume,
"VOL MAX will be displayed.
Temporary turning off volume: Press the button on the remote control for this. "MUTE"
flashes on the display. When the button is pressed again, the original volumes will be reinstated.
Adjusting the sound
You can raise or lower the bass and treble to suit your musical preferences.
On the main device: Turn the BASS or TREBLE control to set the volume level in 2 steps: -8 to +8.
Equalizer
On the remote control: Press the EQ button to retrieve settings one after the other ROCK ->
POP -> FLAT -> JAZZ -> CLASSIC
Using CD and USB
Preparation
Insert a CD
- Press the button on the main device or on the remote control to open the CD compartment
- Lay a CD in the CD compartment with the printed side facing upwards
- Press the button on the main device or on the remote control to close the CD compartment
To remove a CD
- Press the button on the main device or on the remote control to open the CD compartment
- Carefully remove the CD from the CD compartment
- Press the button on the main device or on the remote control to close the CD compartment
Connection of USB devices
- Press the button to select standby mode.
- Connect the USB device to the USB port on the front side.
Removal of the USB device
- Press the button to select standby mode.
-
Remove the USB device from the USB port.
-
Always wait until the device has completely read the CD/USB device before continuing.
- If no CD has been laid in the CD compartment, "NO DISC" will be displayed.
- If there is no playable audio file in the USB device, "NO SONG" will be displayed.
- The reading time can exceed 10 seconds with audio files if there is a great quantity of music on a CD or USB device.
Playback of CD or audio files (USB, CD)
On the remote control: With the Source button, select the source and press the button to begin playback.
On the main device: Using the button, select the desired source and press the button to begin playback
In USB devices or CDs which contain audio files (e.g. MP3), the number of folders present and the files will be displayed as follows:
FXX XXX
Here the number behind "F" stands for the number of folders and the second block of numbers for the total number of files.
For audio CDs, the information about the number of tracks and total play time will be displayed as follows:
XX XX:XX
Here the first block of numbers stands for the number of tracks and the second for the total play time of the CD.
Basic Operating Functions
Stopping Playback: Press the button on the main device or on the remote control to stop playback.
Interrupting Playback: Press the button on the main device or on the remote control to interrupt playback. The display flashes during this. If you press the button one more time the playback continues.
Searching for a specific passages during playback: Keep the button on the main device or the remote control pressed down for longer than 2 seconds to activate fast rewind or fast forward. As soon as the desired place is reached, release the relevant button again.
Selecting a specific track: Press the button on the main device or on the remote control in playback, pause or stop mode.
Jump by 10 tracks: Press the +10 or -10 button on the remote control in playback, paus or stop mode.
Selecting a specific folder (only with audio files): Press the Fold+ or Fold- button on the remote control to select a folder.
Programming tracks and files
Using the remote control, you can programme tracks from an audio CD or files to play in the order you desire. The following number of spaces in memory is available to you for this:
Audio-CD: 20 memory spaces Files: 99 memory spaces
Procedure with audio CD
- The "CD" source must be in Stop mode, otherwise "STOP FIRST" will show in the display.
- Press the PRG button to start the programming mode.
- The display will now show "01 PR01" where "01" will be flashing. The first block of numbers shows the current track, the second block of numbers shows the current storage space.
- Using only the or button, select the track which you want to drop into the current storage space.
- Press the PRG button to confirm the operation.
- Afterwards the next storage space will be displayed. Repeat steps 4 and 5 until your selection is completed or the complete number of memory spaces in occupied. In this case, "Full" will be displayed.
- With the button, you can start playback of the programmed tracks. During playback the number of the track and that of the programme space will be alternately displayed.
- Pressing the button twice deletes the programming.
Procedure with audio files
- The "USB" source must be in Stop mode, otherwise "STOP FIRST" will show in the display.
- Press the PRG button to start the programming mode.
- The display will now show "01 PR01" where "01" will be flashing. The first block of numbers shows the current track, the second block of numbers shows the current storage space.
- Using the Fold+ or Fold- button, select a folder or retain the current folder. When a folder has been selected, the display changes to "FXX XXX". Here, "FXX" stands for the current folder and "XXX" for the current track.
- Using only the or button, select the track which you want to drop into the current storage space.
- Press the PRG button to confirm the operation.
- Afterwards the next storage space will be displayed. Repeat steps 4 and 6 until your selection is completed or the complete number of memory spaces in occupied. In this case, "Full" will be displayed.
- With the button, you can start playback of the programmed tracks.
-
Pressing the button twice deletes the programming.
-
If the button is pressed during playback the process is interrupted. Turning off the device deletes any programme which is present.
Procedure with audio CD
- Press the SHUFFLE button on the remote control to start shuffle play. "SHUFFLE" will appear in the display for 2 seconds and playback will start. Pressing the SHUFFLE button twice or pressing the button cancels random play.
- Press the REPEAT button on the remote control to activate the repeat function. Pressing several times switches the following functions:
Repeat current track (Display "REP ONE") Repeat all tracks (Display "REP ALL") Switch off repeat function (Display "OFF")
Start playback with the button.
Pressing the button switches off the repeat function.
Procedure with audio files
- Press the SHUFFLE button on the remote control to start shuffle play. "SHUFFLE" will appear in the display for 2 seconds and playback will start. Pressing the SHUFFLE button twice or pressing the button cancels random play.
- Press the REPEAT button on the remote control to activate the repeat function. Pressing several times switches the following functions:
Repeat current track (Display "REP ONE") Repeat current folder (Display "REP ALB") Repeat all tracks (Display "REP ALL") Switch off repeat function (Display "OFF")
Start playback with the button.
Pressing the button switches off the repeat function.
Use of the DAB+ stations
Press the DAB button on the remote control or the button on the main device until "DAB" appears on the display.
Setting the DAB+ stations
A station scan has already been carried out as part of the device's startup procedure. The stations found in the process are saved alphabetically in the stations list.
Starting the automatic station search again
- Press the MENU button to retrieve the DAB menu.
"FULL SCAN" will show on the display. Start the search with the Enter button.
-
During the search the display will show the number of stations found so far.
-
If no stations are found during the search, then "NO DAB" will be displayed for approx. 2 seconds and then change to the display "FULL SCAN".
Please then check that the antenna is connected correctly or try to find a different position- for the device to achieve a better reception.
Manual tuning of ensembles
- Press the [MENU] button to retrieve the DAB menu.
- Press the TUN+ button until "MANUAL" shows in the display.
- Using the Enter button, the function is confirmed and the display will show the station which is currently set with the corresponding frequency.
- Press the TUN+ or TUN- buttons to manually select another channel.
- Confirm selection using the Enter button. Then the signal level will be shown in the display, another press of the button will load the current ensemble.
Selecting a DAB+ station
The stations saved alphabetically in the stations list can be retrieved as follows:
- Press the TUN+ or TUN- buttons on the remote control to scroll backwards or forwards in the stations list.
- When you have selected the desired station, press the Enter button on the remote control or wait 2 seconds for the playback to start. "LOADING" appears in the display.
- If the reception level for the selected station is not sufficient for trouble-free playback, then "OFF AIR" will appear in the display. Please then select a different station.
Saving stations in station memory
There are 20 memory spaces available to make it easier to find DAB stations. To assign the memory, proceed as follows:
- Select a station to be saved
- Press the PRG button until the display flashes and shows a memory space. An empty memory space is indicated by "EMPTY", an assigned space is shown with its frequency. You can also re-assign a memory space which is already in use.
- Press the TUN+ or TUN- buttons to select a memory space.
- Confirm save using the Enter button. "STORED"flashes briefly on the display.
- The stations can now be selected with the ➔ buttons.
With DAB+, supplemental information is transmitted in addition to the music signal. This can be retrieved as follows.
Press the INFO button on the remote control to retrieve successively the following information:
- DLS (Dynamic Label Segment): Text information accompanying the programme, such as performer, song title, album name etc. "NO DLS" is shown for stations which do not support DLS.
- Signal level: This is shown from left to right in the display using symbols. The more symbols that are shown, the better is the reception.
- PTY (Programme Type): This indicated the classification of stations according to categories, e.g. Pop, News, Religion, Info, Classics, etc.
- Ensemble name, e.g. DR Deutschland
- Display of channel and frequency of the station assigned
- ERR XX: This information shows the error rate of the digital reception. This is also dependent on the signal level and can also be used for orienting the antenna.
- XX K BPS: Display of station data rate, e.g. 80 kBit/s. The data rate can differ from station to station.
- DABPLUS: Indicates the "DAB+ " receiving mode.
Current time
Current date
DAB+ menu functions
The MENU button opens a menu in which different DAB+ functions can be set. You can scroll through the menu using the TUN+ or TUN- buttons. The following functions can be set:
- FULL SCAN: Repeated automatic station scan. Confirm the function using the Enter button.
- MANUAL: With this you can set a specific receiving channel. Using the Enter button, the function is confirmed and the display will show the station which is currently set with the corresponding frequency.
- Press the TUN+ or TUN- buttons to manually select another channel.
- Confirm selection using the Enter button. Then the signal level will be shown in the display, another press of the button will load the current ensemble.
- DRC (Dynamic Range Control): With this you can adjust the dynamic range, provided that this is supported by the selected station. The available settings are "OFF", "LOW" and "HIGH". The selection is made with the TUN+ or TUN- buttons and confirmed with the Enter button.
- PRUNE: Invalid stations are deleted from the stations list with this. Select with the Enter buttons, Y/N with TUN+ or TUN- and confirm with Enter.
- SYSTEM: For customer service only!
Use of the FM radio
Press the DAB button on the remote control or the button on the main device until "FM" appears on the display.
Setting a FM station
- Press the TUN+ button on the remote control to increase the reception frequency.
- Press the TUN- button on the remote control to lower the reception frequency.
- If you hold down the TUN+ or TUN- buttons, an automatic station scan starts which stops at the first station which is found.
- Press the Auto Tune button to start a station scan with automatic storage of the stations which are found. A maximum of 20 stations will be stored in the order they were found.
- Press the or buttons on the remote control or on the main device to scroll through the memory list. Memory spaces which are unassigned will be indicated with "EMPTY".
Use of Radio Data System (RDS)
RDS is a transmission system whereby FM station transmit other useful information along with the actual transmitter signal. This can be extracted from the normal transmitter signal and used for a range of additional functions.
If an RDS signal is received, then "RDS" appears in the display below the frequency display and after a while the station name is displayed instead of the frequency.
RDS functions
The following information can be retrieved by repeatedly pressing the INFO button:
- Radiotext - If the station is not broadcasting any radio text, then "NO TEXT" appears.
- PTY (Program Type) - If the station is not broadcasting any PTY signal, then "NO PTY" appears.
Frequency and memory space of the station received - Stereo / Mono display
- Time - If the station is not broadcasting any time signal, then "00_00_00" appears.
- Date - If the station is not broadcasting any date signal, then "00-00-00" appears.
If there is insufficient reception signal, signal reception can be disturbed or impossible despite showing the "RDS" display.
Saving stations in station memory
There are 20 memory spaces available to make it easier to find FM stations. To assign the memory, proceed as follows:
- Select a station to be saved
- Press the PRG button until the display flashes and shows a memory space. An empty memory space is indicated by "EMPTY", an assigned space is shown with its frequency. You can also re-assign a memory space which is already in use.
- Press the TUN+ or TUN- buttons to select a memory space.
- Confirm save using the Enter button. "STORED"flashes briefly on the display.
- The stations can now be selected with the▶ buttons.
FM menu functions
The MENU button opens a menu in which different FM functions can be set. The menu can be scrolled through using the TUN+ or TUN- buttons and the desired menu point can be confirmed with the Enter button. The following functions can be set:
- SCAN SET: With this you can set which station should be considered for automatic storage during the station scan. The settings which are possible are "ALL" (all stations which can be received) or "Strong" (only the strongest stations). The selection is made + with the TUN- or buttons and confirmed with the Enter button.
- AUD SET: Setting for "Mono" or "Stereo" reception. The selection is made with the TUN+ or TUN- buttons and confirmed with the Enter button.
- SYSTEM: For customer service only!
Press the BT button on the remote control or the Source button on the main device until "BT" appears on the display. "BT" flashes in the display if there is no paired device in the vicinity
Pairing of BLUETOOTH devices
The BLUETOOTH function allows wireless transmission of music files (audio streaming) to the system. To couple appropriate devices (e.g. smartphones) please proceed as follows:
- Open the pairing function on your BLUETOOTH device and look for "M-819DAB".
- Select "M-819DAB" for pairing and wait until "BT" shows on the display and a sequence of tones is heard. Pairing is now complete.
- If your BLUETOOTH devices asks for a 4 digit PIN then please enter "0000".
- The BLUETOOTH device is now saved and in future will be automatically paired.
- To connect to another BLUETOOTH device, please repeat steps 1 - 3.
Playback via BLUETOOTH
To transmit music via audio streaming, use the music player of your choice on the BLUETOOTH device.
The following control options are available to you:
- Press the button on the remote control or on the device to pause or continue playback.
- Press the or button on the remote control or on the main device to jump to the previous or the next track.
- If you hold down the Enter button on the remote or on the main device for 3 seconds, the BLUETOOTH connection is canceled. "BT" flashes in the display. To renew connection, briefly change to a different source and then back to BLUETOOTH.
If the BLUETOOTH connection should be disconnected because of larger distances, automatic connection takes place once the distance is reduced again.
Using Line-in
Playing external components
External devices such as MP3 players, DVD players or games consoles can be connected to the Line-In port to play music.
To select this source, please press the Source button on the remote control or the button on the main device until "LINE IN" shows in the display.
In the event of malfunctions, please check the following points:
No sound
Insert the mains plug in properly.
Adjust the volume to the correct level.
Make sure that the correct source is selected.
Left and right channel mixed up
Check the speaker connection and their locations.
The system is not responding to button pressing
Remove the mains plug and connect it again.
Problems with radio reception
Readjust the antenna.
Look for a more suitable location.
If possible use an outdoor antenna.
Other electrical devices are disturbing the reception.
Location not suitable for DAB+ reception.
CD-Player - display "NO DISC"
Insert the CD with the labelled side facing up.
Clean the CD.
Use only compliant CDs.
USB operation
"NO USB" Turn the device off and then re-connect the USB device.
"NO SONG" Please make sure that the USB device contains compatible files.
Remote control - not working properly
Change the battery.
Remove any obstructions
Move closer to the main device and make sure that you are pointing towards the remote control sensor on the device.
Maintenance and care
Cleaning the housing: Use a cloth which is slightly dampened with a mild cleanser. Do not use any cleanser which contains alcohol, ammonia or abrasives.
Cleaning CDs
- Clean soiled discs with a special cleaning cloth. Wipe the disc in straight lines from the middle to the edge. Do not wipe with a circular motion.
- Do not use any solution, such as white spirit, thinner, commercial detergents or anti-static spray for analogue records.
Precautions regarding condensation formation
Condensation can form inside the device when there is a significant difference between the temperature of the device and the ambient temperature. If condensation should develop in the device interior, proper function can no longer be ensured. In this case, it is imperative to wait for several hours after the dampness has dried before the device can be used again.
Particular care must be taken in the following circumstances
If the device is moved from one location to another location which is significantly hotter or colder or if the humidity has increased in the installation location of the device etc.
Disposal of used electrical and electronic devices and batteries.

The (crossed out waste bin) symbol on a product or its packaging indicates that this product may not be treated like normal household waste but rather must be handed in to a collection centre for recycling electric and electronic devices and batteries. Your contribution to the correct disposal of this product helps to protect the environment and the health of your fellow human beings. Improper or incorrect disposal endangers the environment and health. Further information about recycling of this product can be received from your local council or the local waste disposal operators. Attention: The characters "Pb" under the symbol for batteries indicate that this battery contains lead.
The Bluetooth® word mark and logo are owned by the Bluetooth SIG, Inc. and any use of such marks by Guangzhou Changjia Electronics Co, Ltd. is under license. Other trademarks and tradenames are the property of their respective owners.
| Power supply AC voltage 100 - 240 V 50/60 Hz | |
| Power consumption 40 Watt | |
| Power consumption in standby mode < 0.5 Watt | |
| CD operation | |
| Signal to Noise Ratio (A-Filter) ≥ 65 dB | |
| Dynamic Range ≥ 60 dB | |
| Tuner FM/DAB+ | |
| DAB Tuning Range BAND III 174.928 MHz - 239.200 MHz | |
| FM Tuning Range 87.50 MHz - 108.00 MHz | |
| BLUETOOTH | |
| BLUETOOTH Version V4.2 | |
| Performance Class Class 2 | |
| Transmission Power max. 4dbm | |
| Range approx. 10 metres (can vary depending on surroundings) | |
| Frequency range 2.402 GHz - 2.480 GHz | |
| BLUETOOTH Profile A2DP (Advanced Audio Distribution) | ribution Profile, AVRCP (Audio/Video Remote Control Profile) |
| USB devices Playable files: MP3 | Compatible with USB1.1 Full-Speed Compatible with FAT16, FAT32 Maximal 500 mA Bit rates: 32 kBit/s bis 320 kBit/s |
| Line-In | 3.5 mm jack socket |
| Amplifier part | |
| Output Power | 2 x 50 Watt / 6 Ohm |
| Bandwidth | 70Hz - 20kHz (+- 3dB) |
| Dimensions and Weight | |
| Main Unit | (W x H x D) 260 x 110 x 260 mm / 2.06 kg |
| Speakers | (W x H x D) 173 x 263 x 240 mm / 2.4 kg each. |
| Temperature range | 0°C to 40°C |
Warranty
Dear Customer,
We would like to thank you for purchasing this Kenwood product. If this product is found to be defective in material or workmanship under normal operating conditions, in accordance with the provisions of the following warranty, we will rectify these faults free of charge or replace the device.
Please retain this warranty card in a safe place.
Kenwood grants a two year warranty for this device from the date of purchase according to the invoice or purchase receipt from the Kenwood dealer.
This warranty covers defects in materials or workmanship. We reserve the right to replace the product if economical repair is no longer possible. Costs for packaging and installation and risks associated with the actual repair are not included in the warranty coverage and will be invoiced.
Conditions
A. In addition to presentation of this warranty card, the following information is required to assert a claim:
(a) Your name with complete address
(b) The receipt or invoice of a retailer established in an EU state from which the original purchase date can be inferred.
(c) The complete name and address of the retailer from whom the product was purchased.
(d) The serial number and model of the product.
Kenwood reserves to right to deny warranty coverage if the above-mentioned information is missing or if changes have been made to the product after its initial purchase.
B. At the time of delivery of this product to the retailer, this product complied with all standards and safety regulations which apply in the country of destination. Modifications required to operate this device in countries outside the country of destination do not fall under the above-mentioned warranty provisions. Furthermore, we do not accept liability for work connected with this or for damage to the product which arise due to such work.
If the product is used in a country for which it is not designed and produced, then warranty work will only be carried out if the cost for converting the device to nationally valid standards and safety regulations is carried by the user.
Furthermore, if the product differs from the products distributed by the official importer and if replacement parts are not available for repairing this device, the user must carry the costs for the transport of the device to and from the land of purchase.
The same applies if no warranty coverage can be offered in the country under consideration because of other, justifiable reasons.
C. Exceptions from warranty coverage are:
(a) Changes to the product as well as normal service and adjustment work, including the regular checks mentioned in the operating manual.
(b) Damage to the product which have occurred as a result of defective or improper work if this work has been undertaken by third parties who are not authorised to carry out warranty services on behalf of the manufacturer.
(c) Damage due to negligence, accidents, modifications, incorrect mounting, defective packaging, incorrect operation or use of incorrect replacement parts during a repair.
(d) Damage due to fire, water damage, lightening, earthquake, insufficient ventilation, force majeure, connection to incorrect voltage or other causes external to Kenwood.
(e) Damage to speakers due to operation at higher outputs than those specified. Damage to records, tapes and video cassettes, CD Compact Discs and other articles which are not part of this product.
(f) Consumables and wear parts which must be replaced in the course of normal customer service, such as: Pickup systems, needles, drive belts, recording heads, slots, consoles, dry-cell batteries, rechargeable batteries, power tubes etc.
(g) All products on which the serial number(s) has/have been wholly or partially removed, changed or rendered unrecognisable.
This warranty can be invoked by anyone who has legally purchased the product.
In accordance with the above warranty provisions, the product will be either repaired or replaced free of charge. This right in now way restricts the user's other rights within the framework of the applicable legal regulations.
Repair or replacement do not effect any extension on the warranty period.
Any further claims shall be excluded, in particular any claims for order cancellation, price reduction or for compensation for any damage.
Contact address:
JVCKENWOOD DEUTSCHLAND GMBH