
AVENT SCD503 - Baby monitors PHILIPS - Free user manual and instructions
Find the device manual for free AVENT SCD503 PHILIPS in PDF.
| Product type | Baby monitor |
| Brand | Philips |
| Model | AVENT SCD503 |
| Baby unit power supply | Mains (included adapter, model S003PV0600050) |
| Parent unit power supply | Mains (included adapter) or 2 R6 AA batteries (alkaline or rechargeable) |
| Battery type (parent unit) | 2 R6 AA batteries, 1.5 V (alkaline) or 1.2 V (rechargeable) |
| Battery life | Up to 24 hours (with 1500 mAh or larger batteries) |
| Outdoor range | 300 meters maximum |
| Indoor range | 50 meters maximum (depending on obstacles) |
| Technology | DECT (digital wireless) |
| Frequency | 1880-1900 MHz |
| Maximum RF power | 250 mW |
| Functions | Smart ECO mode, nightlight, sound level indicators, volume control, out-of-range signal |
| Nightlight | Yes, on baby unit, can be turned on/off via button |
| Smart ECO mode | Automatic reduction of DECT signal to save energy |
| Cleaning | Dry cloth only; do not use spray or liquid detergent |
| Safety | Do not immerse; keep cords more than 1 m from baby; do not place baby unit in crib; minimum 1.5 m distance between units |
| Accessories and spare parts | Available at www.shop.philips.com |
| Warranty | Refer to international warranty leaflet |
Frequently Asked Questions - AVENT SCD503 PHILIPS
User questions about AVENT SCD503 PHILIPS
0 question about this device. Answer the ones you know or ask your own.
Ask a new question about this device
Download the instructions for your Baby monitors in PDF format for free! Find your manual AVENT SCD503 - PHILIPS and take your electronic device back in hand. On this page are published all the documents necessary for the use of your device. AVENT SCD503 by PHILIPS.
USER MANUAL AVENT SCD503 PHILIPS
natural_image
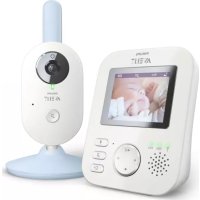
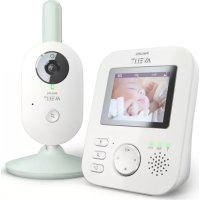
Two Philips AVEUT devices with control buttons and a green indicator light, shown from side and top (no text or symbols on the devices themselves)EN User manual 3
B
1 Introduction
Congratulations on your purchase and welcome to Philips AVENT! To benefit fully from the support that Philips AVENT offers, register your product at www.philips.com/welcome. Read this user manual carefully.
2 Important

natural_image
Icon of an open book with a lowercase 'i' in the front right, no text or symbols present.Symbol for ,follow instructions for use'.
2.0.1 Danger
- Never immerse any part of the baby monitor in water or any other liquid. Do not place where water or any other liquid can drip or splash onto it. Do not use in moist places or close to water.
- Never put anything on top of the baby monitor or cover it. Do not block any ventilation openings.
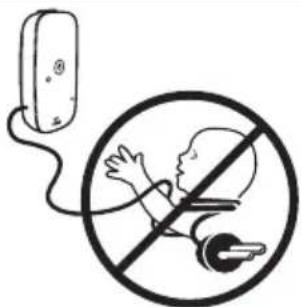
- Cords present a potential strangulation hazard. Keep cords out of the reach of children (more than 1 metre/3.5 feet away). Never place the baby unit inside the baby's bed or playpen.
2.0.2 Warning
- Check if the voltage indicated on the adapters of the baby unit and parent unit corresponds to the local mains voltage before you connect the appliance.
- Only use Philips recommended adapter (model S003PV0600050).
- Do not modify and/or cut and/or change any part of the adapter, this causes a hazardous situation.
- Do not use the baby monitor if the adapter of the baby or parent unit is damaged. Contact the Philips Consumer Care Centre.
- Do not unscrew the back panel of the baby unit to prevent an electric shock.
- This appliance is not intended for use by persons (including children) with reduced physical, sensory or mental capabilities, or lack of experience and knowledge, unless they have been given supervision or instruction concerning use of the appliance by a person responsible for their safety. Children shall not play with the appliance.
2.0.3 Caution
- This baby monitor is intended as an aid. Do not use it as a substitute for responsible and proper adult supervision.
- Use the appliance at a temperature between 0^ (32°F) and 40^ (104°F). Store the appliance at a temperature between -25^ (-13°F) and 70^ (158°F).
- Do not expose the baby unit and parent unit to extreme cold or heat or to direct sunlight. Do not put the baby unit and the parent unit close to a heating source.
- Never cover the parent unit and the baby unit with anything (e.g. a towel or blanket).
- Always place batteries of the correct type in the parent unit (see 'Inserting the batteries' in chapter 'Preparing for use').
- If you place the parent unit or the baby unit next to a transmitter or other DECT appliance (e.g. a DECT telephone or wireless router for the internet), the connection may be lost. Move the baby unit or parent unit further away from the other wireless appliances until the connection is restored.
- Switched-on mobile phones in the vicinity of the baby monitor may cause interference with the baby monitor.
- For pluggable equipment, the adapter shall be installed near the equipment and easily accessible.
2.0.4 Important information about batteries
• Always place batteries of the correct type in the parent unit to avoid the risk of explosion.
- The parent unit does not have a charging function. If you use rechargeable batteries in the parent unit, recharge them in a battery charger.
- Make sure that your hands are dry when you insert or replace batteries.
• To avoid battery leakage, damage or explosion:
1 Do not expose the appliance to temperatures higher than 40^ C. Batteries may explode if exposed to sunshine, fire or high temperatures.
2 Do not overcharge, short-circuit, reverse charge or damage batteries.
3 Remove the batteries of the parent unit if you are not going to use the appliance for one month or more.
4 Do not leave empty batteries in the parent unit.
- Dispose of non-rechargeable batteries and rechargeable batteries properly (see chapter 'Environment').
- To protect your skin, wear protective gloves when you handle damaged or leaking batteries.
- To have a cordless operating time of up to 24 hours, insert batteries with a capacity of 1500 mAh or more in the parent unit.
2.0.5 Compliance with standards
- This appliance complies with all applicable standards and regulations regarding exposure to electromagnetic fields.
- This appliance complies with the radio interference requirements of the European Community.
CE
- Philips Consumer Lifestyle, Tussendiepen 4, Drachten, Netherlands, hereby declares that this baby monitor is in compliance with the essential requirements and other relevant provisions of Directive 2014/53/EU (DECT: frequency band 1880-1900 MHz, maximum radio-frequency power: 250 mW). A copy of the EC Declaration of Conformity (DoC) is available online at www.philips.com/support.
3 Product overview
A Parent unit
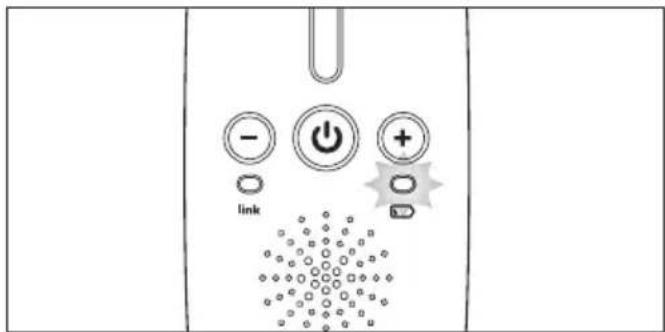
1 Sound level lights
2 On/off button ⏻
3 Volume - button
4 'link' light
5 Socket for small plug of adapter
6 Battery light
7 Volume + button
8 Release button of battery compartment lid
9 Battery compartment lid
10 Adapter
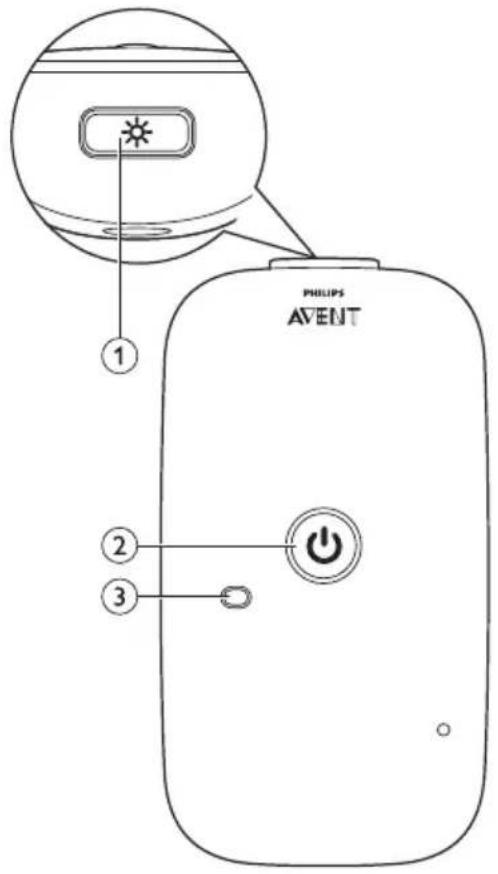
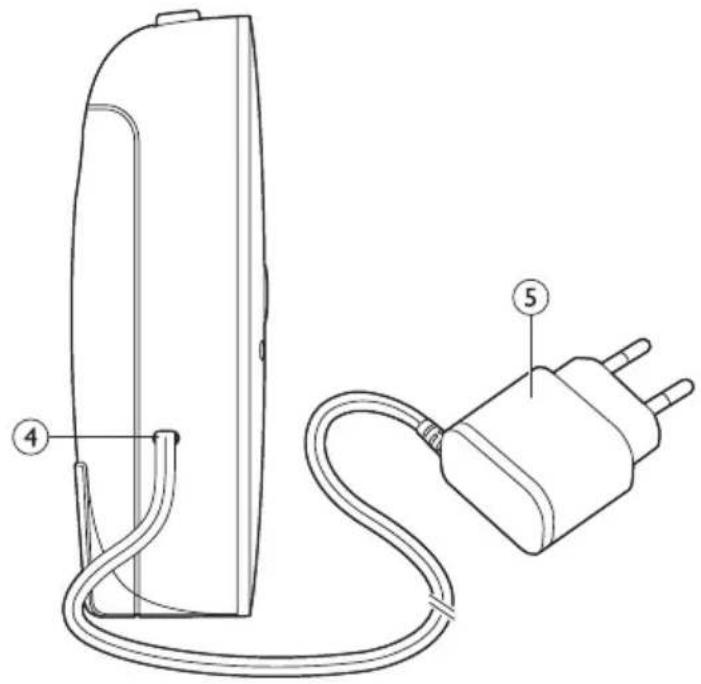
B Baby unit
1 Nightlight button
2 On/off button ⏻
3 Power-on light
4 Fixed mains cord
5 Adapter
4 Preparing for use
4.1 Baby unit
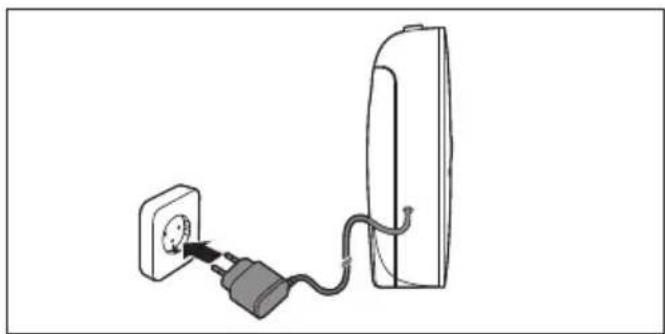
The baby unit is mains-operated and has a fixed mains cord.
1 Put the adapter of the mains cord in a wall socket to connect the baby unit to the mains.
natural_image
Simple line drawing of a wall socket connected to a power outlet (no text or symbols)4.2 Parent unit
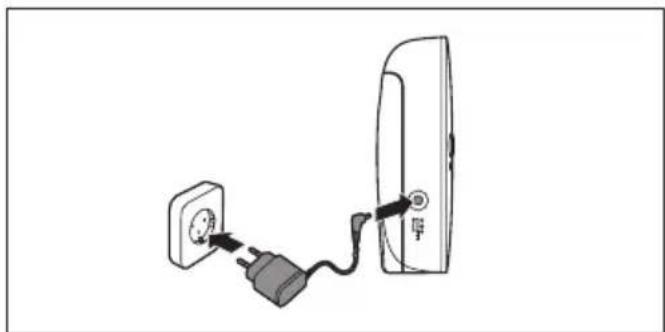
The parent unit runs on mains power. You can also insert batteries to allow mobile use of the parent unit.
4.2.1 Mains operation
1 Put the small plug in the socket in the side panel of the parent unit and put the adapter in a wall socket.
natural_image
Simple line drawing of a wall socket connected to a door, with a plug inserted (no text or symbols)4.2.2 Inserting the batteries
If the parent unit is not close to a wall socket, you can run it on two 1.5V R6 AA alkaline non-rechargeable batteries or two 1.2V R6 AA rechargeable batteries (not supplied). The operating time on full batteries is up to 24 hours, depending on the type of batteries used and on how long and how often you use the parent unit on batteries.

Note:
Please note that the parent unit does not charge the batteries when it is connected to the mains. You can use rechargeable batteries in the parent unit, but you need to charge them in a separate charger.

Warning:
Unplug the parent unit and make sure your hands and the unit are dry when you insert the batteries.
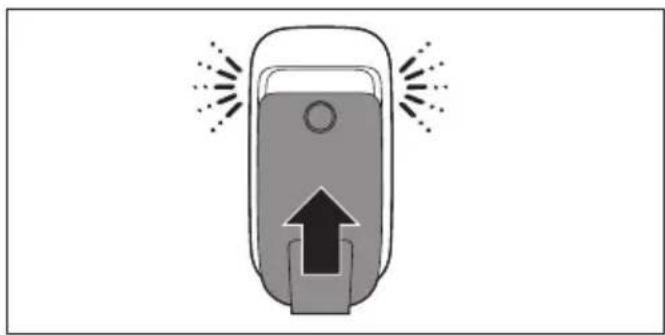
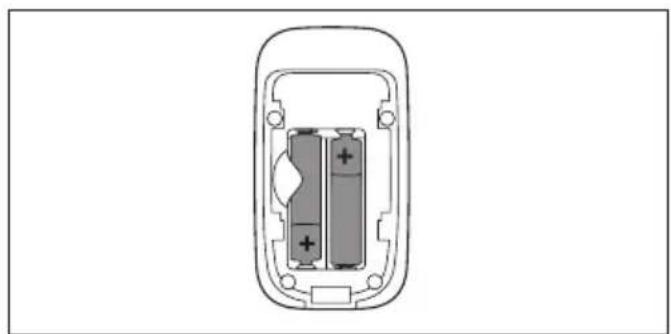
1 Press the release button (1) to unlock the battery compartment lid and remove the lid (2).
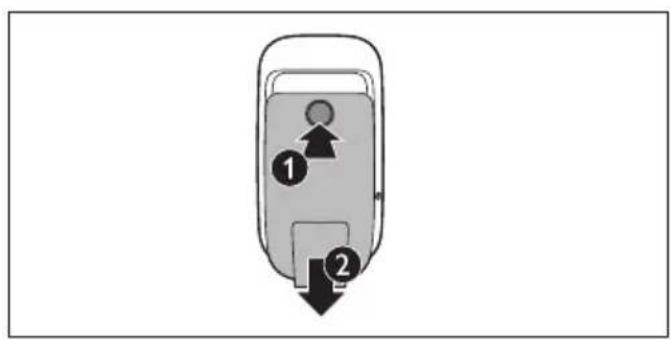

Insert the non-rechargeable batteries or fully charged rechargeable batteries.
natural_image
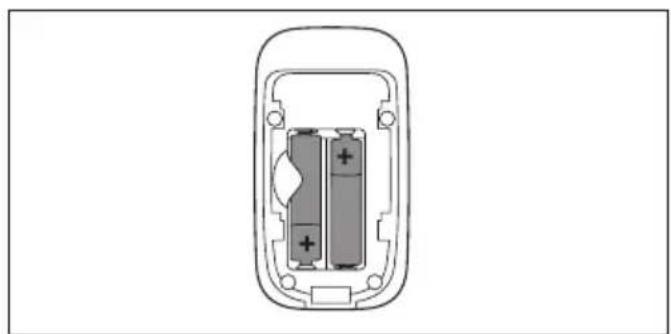
Diagram of a battery pack with two internal compartments and one battery, showing no text or symbols
Note:
Make sure the + and - poles of the batteries point in the right direction.
3 To reattach the battery compartment lid, first insert the lugs into the bottom rim of the battery compartment. Then push the lid home until it locks into place with a click.
• To prevent a high-pitched sound from one or both units, make sure the parent unit is at least 1.5 metres/4.9 feet away from the baby unit.
natural_image
Simple line drawing of a mobile phone with an upward arrow and sound waves (no text or symbols)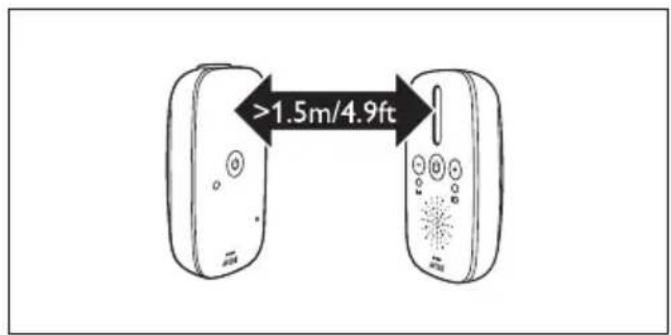
5 Using the baby monitor
5.2 Linking parent unit and baby unit
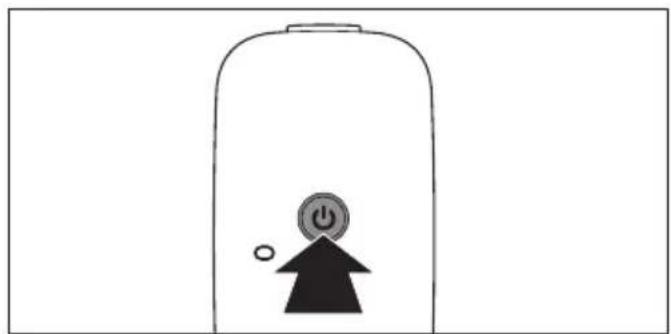
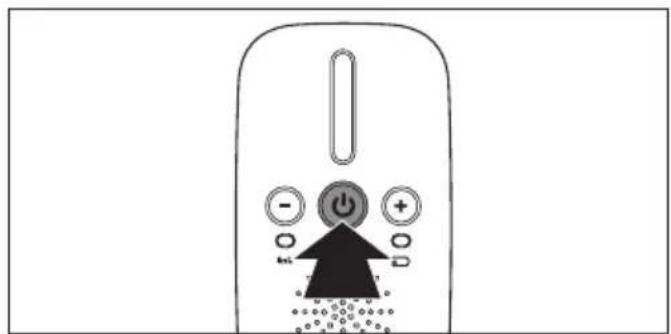
1 Press and hold the ⏻ button on the baby unit for 3 seconds until the power-on light lights up.
5.1 Positioning the baby monitor
Warning:
Keep the baby unit out of the reach of the baby. Never place the baby unit inside the baby's bed or playpen.
- Because the cord of the baby unit presents a potential strangulation hazard, make sure that the baby unit and its cord are at least 1 metre/3.5 feet away from your baby.
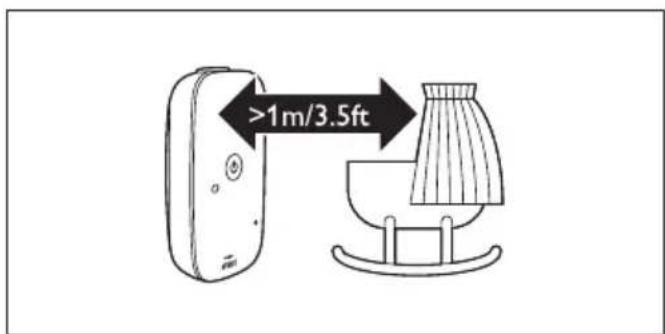
natural_image
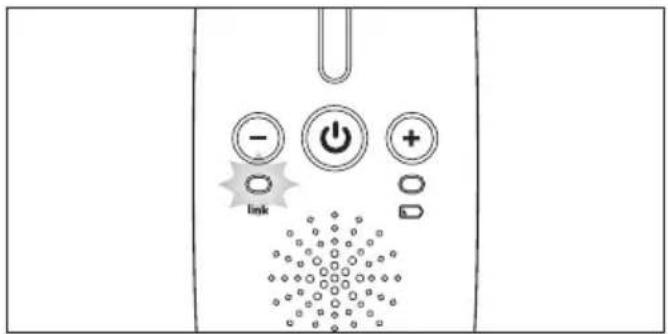
Simple line drawing of a bell jar with a person silhouette and power button inside (no text or symbols)2 Press and hold the ⏻ button on the parent unit for 3 seconds until the 'link' light starts flashing red.
- When the parent unit and baby unit are linked, the 'link' light turns solid green.
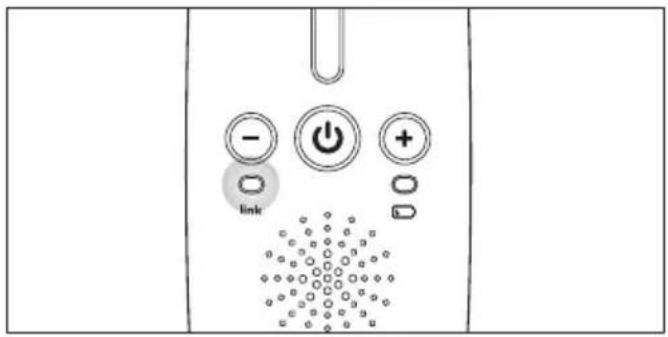
- If no connection is established, the 'link' light continues to flash red and the parent unit beeps.
What to do if no link is established
- If the parent unit is out of range, place it closer to the baby unit.
- If the baby unit or parent unit is too close to another DECT appliance (e.g. a cordless phone), switch off this appliance or move the unit away from this appliance.
- If the baby unit is switched off, switch it on.
5.2.1 Operating range
- The operating range is up to 300 metres/985 feet outdoors and up to 50 metres/150 feet indoors.
- The operating range of the baby monitor varies depending on the surroundings and factors that cause signal attenuation. Wet and moist materials cause so much signal attenuation that the range loss is up to 100%.
For signal attenuation from dry materials, see table below.
| Dry materials Material thickness | Loss of range |
| Wood, plaster, cardboard< 30cm glass (without metal, wires or lead) (12in) | 0-10% |
| Brick, plywood < 30cm (12in) | 5-35% |
| Reinforced concrete < 30cm (12in) | 30-100% |
| Metal grilles or bars < 1cm (0.4in) | 90-100% |
| Metal or aluminium sheets < 1cm (0.4in) | 100% |
6 Features
6.1 Smart Eco mode
This baby monitor has Smart Eco modes as a standard feature. This mode is always active and automatically reduces the DECT signal from the baby unit to the parent unit to save energy and reduce radio transmission.
6.2 Baby unit
6.2.1 Nightlight
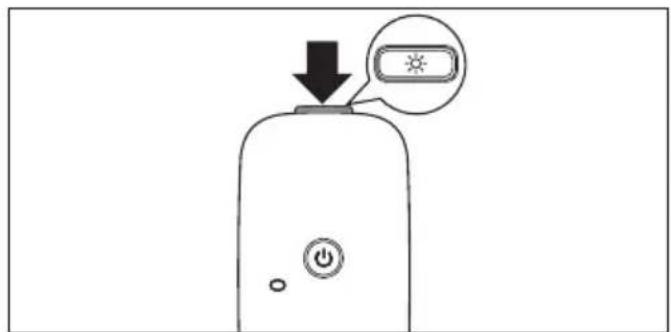
The nightlight produces a soft glow that comforts your baby.
1 Press the nightlight button on top of the baby unit to switch the nightlight on or off.
6.3 Parent unit
6.3.1 Battery light
1 The battery light is off when the parent unit is connected to the mains or the batteries contain enough energy.
2 When the batteries are low, the battery light flashes red and the parent unit beeps.
3 Replace the batteries when they are low (see 'Inserting the batteries' in chapter 'Preparing for use').
6.3.2 Setting the volume
1 Press the + button to increase the volume.
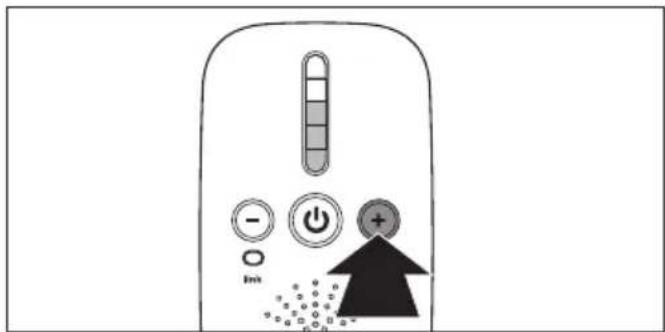
- You hear a beep each time you press the button to increase or decrease the volume by one level.
• The sound level lights light up briefly to show the current volume.
2 Press the - button to decrease the volume. If you hold down the - button for 2 seconds, you set the volume to mute.

Note:
If the volume is set to mute, the sound level lights show that the baby makes sounds. The louder the sound made by the baby, the more sound level lights light up.
7 Cleaning and maintenance
- Do not use cleaning spray or liquid cleaners.
- Unplug the parent unit and baby unit before cleaning.
- Clean the parent unit, the baby unit and the adapters with a dry cloth.
8 Storage
- Remove the batteries from the parent unit if you do not use it for more than a month.
- Store the parent unit, its adapter and the baby unit in a cool and dry place.
9 Ordering accessories
To buy accessories or spare parts, visit www.shop.philips.com/service or go to your Philips dealer. You can also contact the Philips Consumer Care Centre in your country (see the worldwide guarantee leaflet for contact details).
10 Guarantee and support
If you need information or support, please visit the Philips website at www.philips.com/support or read the separate worldwide guarantee leaflet.
11 Environment
- This symbol means that you must not throw away the appliance with the normal household waste. Dispose of the appliance at an official collection point for electrical appliances. Correct disposal helps to preserve the environment.
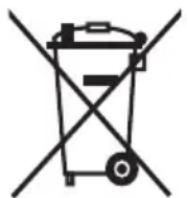

- This crossed-out wheeled bin means that the appliance contains disposable batteries that cannot be disposed of with normal household waste. Dispose of batteries at an official collection point for batteries. Correct disposal of batteries helps to preserve the environment.

12 Frequently asked questions
Why don't the power-on light of the baby unit and the 'link' light of the parent unit come on when I press the on/off buttons of the units?
- Perhaps one or both units are not plugged in properly. Connect the units to the mains and press the on/off buttons on both units for 3 seconds to establish connection between the parent unit and the baby unit.
- If you use the parent unit on batteries, the batteries of the parent unit are empty or there are no batteries in the battery compartment.
Why does the 'link' light on the parent unit flash red continuously?
- The baby unit and the parent unit are out of range of each other. Move the parent unit closer to the baby unit.
- The baby unit may be switched off. Switch on the baby unit.
Why does the parent unit beep?
- If the parent unit beeps while the 'link' light flashes red continuously, the connection with the baby unit is lost. Move the parent unit closer to the baby unit or switch on the baby unit if it was off.
- The baby unit may be switched off. Switch on the baby unit.
Why does the appliance produce a high-pitched noise?
- The units may be too close to each other. Make sure the parent unit and the baby unit are at least 1 metre/3.5 feet away from each other.
Why don't I hear a sound/Why can't I hear my baby cry?
- The baby unit and the parent unit may be out of range of each other. Reduce the distance between the units.
- You may have set the volume to the lowest level (mute). Increase the volume.
Why does the parent unit react too quickly to other sounds?
- The baby unit also picks up other sounds than those of your baby. Move the baby unit closer to the baby (but observe the minimum distance of 1 metre/3.5 feet).
The specified operating range of the baby monitor is 300 metres/985 feet. Why does my baby monitor manage a much smaller distance than that?
- The specified range is only valid outdoors in open air. Inside your house, the operating range is limited by the number and type of walls and/or ceilings in between. Inside the house, the operating range is up to 50 metres/150 feet.
Why is the connection lost or are there sound interruptions every now and then?
- The baby unit and the parent unit are probably close to the outer limits of the operating range. Try a different location or decrease the distance between the units. Please note that it takes about 30 seconds each time before a connection between the units is established.
- You may have placed the unit next to a transmitter or other DECT appliance, such as a DECT telephone or other 1.8GHz/1.9GHz baby monitor. Move the unit away from the other appliances until the connection is re-established.
Is my baby monitor secure from eavesdropping and interference?
- The DECT technology of this baby monitor guarantees no interference from other equipment and no eavesdropping.
Why do the batteries of the parent unit run low so fast when I use the unit on batteries?
- The operating time on batteries may be up to 24 hours, but this depends on the type of batteries and how often and how long you use the parent unit on batteries. Please note that the batteries are not charged when the parent unit is connected to the mains. Plug in the parent unit when a wall socket is available close by to save battery power.
- Make sure you use 1.5V R6 AA alkaline non-rechargeable batteries or charged 1.2V R6 AA rechargeable batteries. Recharge the rechargeable batteries in a separate battery charger.
Can I use the baby unit on batteries?
- No, you cannot use the baby unit on batteries. The baby unit can only be used on mains power.
1 Einführung
natural_image
Icon of an open book with an information symbol (no text or numbers present)2.0.2 Warnhinweis
natural_image
Simple line drawing of a wall socket connected to a power outlet (no text or symbols)4.2 Elterneinheit
natural_image
Simple line drawing of a wall socket connected to a plug and cable, with no text or symbols present.natural_image
Diagram of a battery pack inside a housing, showing two internal compartments with positive charges (no text or labels)Hinweis:
natural_image
Simple line drawing of a device with an upward arrow and radiating lines (no text or symbols)5 Verwenden des Babyphones
natural_image
Simple line drawing of a battery with a power button and a person silhouette (no text or symbols)6.3 Elterneinheit

Hinweis:
natural_image
Icon of an open book with an information symbol inside, no text or labels present2.0.2 Προειδοποίηση
natural_image
Simple line drawing of a wall socket connected to a wall-mounted cable (no text or symbols)4.2 Mováδα γονέα
natural_image
Simple line drawing of a wall socket connected to a door via cable (no text or symbols)
natural_image
Diagram of a battery pack with two electrolytic cells and one positive charge, enclosed in a rounded rectangular frame (no text or symbols)
Σημείωση:
natural_image
Illustration of a smartphone with an upward arrow and sound waves (no text or symbols)
natural_image
Simple line drawing of a battery with an icon of a power button and an upward arrow, no text or symbols present.6.3 Mováδα γονέα
Σημείωση:
natural_image
Symbol of a waste bin with no text or labels, crossed by diagonal lines and a solid rectangle below (no readable text or symbols)natural_image
Icon of an open book with an information symbol inside, no text or labels present2.0.2 Advertencia
natural_image
Simple line drawing of a wall socket connected to a power outlet (no text or symbols)natural_image
Simple line drawing of a wall socket connected to a plug, with a separate door and cable (no text or symbols)natural_image
Diagram of a battery pack with two internal compartments and a central socket (no text or symbols)Note:
natural_image
Simple line drawing of a device with an upward arrow and radiating lines (no text or symbols)natural_image
Simple line drawing of a battery with an icon of a power button and a circular symbol (no text or labels)Note:
natural_image
Symbol of a waste bin with crossed lines indicating no waste, and a solid black rectangle below (no text or labels)natural_image
Icon of an open book with an information symbol inside, no text or labels present2.0.2 Avertissement
natural_image
Simple line drawing of a wall-mounted power outlet connected to a wall-mounted electrical outlet (no text or symbols)4.2 Unité-parents
natural_image
Simple line drawing of a wall-mounted power plug connecting to a door (no text or symbols)4.2.2 Insertion des piles
natural_image
Diagram of a battery pack with two electrolytic cells and one positive charge, enclosed in an open casing (no text or symbols)Remarque :
natural_image
Illustration of a device with an upward arrow and radiating lines, no text or symbols presentnatural_image
Simple line drawing of a battery with a power button and a person silhouette (no text or symbols)6.3 Unité-parents
Remarque :
natural_image
Symbol of a trash bin with crossed lines indicating no waste or restriction, and a solid black rectangle below (no text or symbols)natural_image
Icon of an open book with an information symbol inside, no text or labels present2.0.2 Avviso
natural_image
Simple line drawing of a wall socket connected to a power outlet (no text or symbols)4.2 Unità genitore
natural_image
Simple line drawing of a wall-mounted power outlet connected to a wall-mounted switch (no text or symbols)4.2.2 Inserimento delle batterie
2 Inserite le batterie non ricaricabili o le batterie ricaricabili completamente cariche.
natural_image
Diagram of a battery pack with two internal compartments and one battery, showing no text or symbols
Nota:
natural_image
Simple line drawing of a device with an upward arrow and radiating lines, no text or symbols present.natural_image
Simple line drawing of a stylized human figure inside a cylindrical container with a power button symbol (no text or labels)6.3 Unità genitore
Note:
natural_image
Icon of an open book with a lowercase 'i' symbol on the right page, no text or labels present.2.0.2 Aviso
natural_image
Simple line drawing of a wall socket connected to a power outlet (no text or symbols)natural_image
Simple line drawing of a wall socket connected to a plug, with a separate door and cable (no text or symbols)natural_image
Diagram of a battery pack with two electrolytic cells and one positive charge, enclosed in a rounded rectangular housing (no text or symbols)Nota:
natural_image
Simple line drawing of a device with an upward arrow and emitting sparks (no text or symbols)natural_image
Simple line drawing of a battery with a power button and a person silhouette (no text or symbols)
Nota:
9 Encomendar acessórios
natural_image
Symbol of a trash bin with crossed lines indicating no waste or restriction, and a solid rectangle below (no text or labels)www.shop.philips.com/service
הכלה 10
www.philips.com/support
הכלה 11
•
:תַרְשָׁ
תְרָה אַרְה 6.3
תְׁבַעָה אַל 6.3.1
natural_image
Simple line drawing of a battery with a power button and a person silhouette (no text or symbols)הכלה 5.2
natural_image
Diagram of a battery pack with two internal compartments and positive charge indicators (no text or labels):תַרְשָׁ
natural_image
Simple line drawing of a device with an upward arrow and radiating lines (no text or symbols)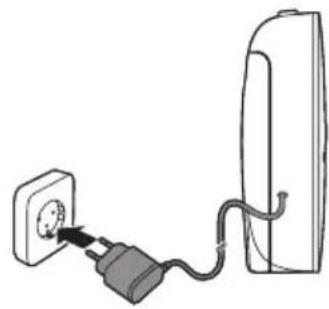
natural_image
Simple line drawing of a wall socket connected to a cable, with no text or symbols present.ה'ר'ר'ר'ר'ר'ר 4.2
natural_image
Simple line drawing of a wall socket connected to a door via cable (no text or symbols)הכלה 4.2.2
The Ground Truth image displays a single, solid horizontal line. According to Rule 2 (UNDERSCORE & LINE RULES), this is a stylistic or background line, not a placeholder underscore. Therefore, the OCR result must ignore it and output nothing or only meaningful text. The provided OCR content is "____", which consists of four underscores. This is an incorrect interpretation of the line as a placeholder, violating the rule that stylistic lines must be ignored. The OCR has hallucinated underscores where none should exist based on the GT's visual context. Hence, the OCR result is inconsistent with the Ground Truth.
[Non-Text]
[Non-Text]
[Non-Text]
[Non-Text]
[Non-Text]
[Non-Text]
[Non-Text]
הַרְשָׁה 2

natural_image
Icon of an open book with a lowercase 'i' symbol, commonly used to represent information (no text or symbols present)'בְרָהַעֹתִיָהַעֹתִיָהַעֹתִיָהַעֹתִיָהַעֹתִיָהַעֹתִיָהַעֹתִיָהַעֹתִיָהַעֹתִיָה
הַרְבָ 2.0.1
הכלה 2.0.2
•
www.philips.com/avent
Philips Consumer Lifestyle BV Tussendiepen 4, 9206 AD Drachten, Netherlands
Trademarks owned by the Philips Group. ©2018 Koninklijke Philips N.V. All rights reserved


- Introduction
- Important
- Symbol for ,follow instructions for use'.
- Danger
- Warning
- Caution
- Important information about batteries
- Compliance with standards
- CE
- Product overview
- A Parent unit
- B Baby unit
- Preparing for use
- Baby unit
- Parent unit
- Mains operation
- Inserting the batteries
- Note:
- Warning:
- Using the baby monitor
- Linking parent unit and baby unit
- Positioning the baby monitor
- What to do if no link is established
- Operating range
- Features
- Smart Eco mode
- Baby unit
- Nightlight
- Parent unit
- Battery light
- Setting the volume
- Cleaning and maintenance
- Storage
- Ordering accessories
- Guarantee and support
- Environment
- Frequently asked questions
- Why does the parent unit beep?
- Why does the appliance produce a high-pitched noise?
- Why don't I hear a sound/Why can't I hear my baby cry?
- Why does the parent unit react too quickly to other sounds?
- The specified operating range of the baby monitor is 300 metres/985 feet. Why does my baby monitor manage a much smaller distance than that?
- Why is the connection lost or are there sound interruptions every now and then?
- Is my baby monitor secure from eavesdropping and interference?
- Why do the batteries of the parent unit run low so fast when I use the unit on batteries?
- Can I use the baby unit on batteries?
- Einführung
- Warnhinweis
- Elterneinheit
- Hinweis:
- Verwenden des Babyphones
- Elterneinheit
- Προειδοποίηση
- Mováδα γονέα
- Σημείωση:
- Mováδα γονέα
- Advertencia
- Avertissement
- Unité-parents
- Insertion des piles
- Remarque :
- Unité-parents
- Avviso
- Unità genitore
- Inserimento delle batterie
- Nota:
- Unità genitore
- Aviso
- Encomendar acessórios
- הכלה 10
- הכלה 11
- תְרָה אַרְה 6.3
- הכלה 5.2
- :תַרְשָׁ
- ה'ר'ר'ר'ר'ר'ר 4.2
- הכלה 4.2.2
- הַרְשָׁה 2
- הַרְבָ 2.0.1
- הכלה 2.0.2
Brand : PHILIPS
Model : AVENT SCD503
Category : Baby monitors