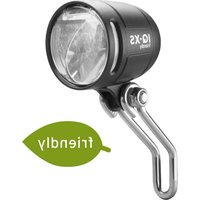
IQXM speed - Lighting Busch + Müller - Free user manual and instructions
Find the device manual for free IQXM speed Busch + Müller in PDF.
| Technical Features | LED front light, luminous power of 50 lux, lighting range up to 70 meters. |
|---|---|
| Usage | Designed for cyclists, ideal for nighttime use or in low light conditions. |
| Maintenance and Repair | Regularly check the condition of electrical connections and clean the lens for optimal lighting. |
| Safety | Complies with road safety standards, ensures increased visibility for the cyclist and other road users. |
| General Information | Easy installation on the handlebar, operates with rechargeable batteries, LED lifespan up to 50,000 hours. |
Frequently Asked Questions - IQXM speed Busch + Müller
User questions about IQXM speed Busch + Müller
0 question about this device. Answer the ones you know or ask your own.
Ask a new question about this device
Download the instructions for your Lighting in PDF format for free! Find your manual IQXM speed - Busch + Müller and take your electronic device back in hand. On this page are published all the documents necessary for the use of your device. IQXM speed by Busch + Müller.
USER MANUAL IQXM speed Busch + Müller
- Busch + Muller Battery LED Headlight LUMOTEC IQ-XM Speed with High Beam Function Page 22
- Packaging content
- Safety information
- Legal regulations
- Technical specification
5.1. Lighting modes, brightness and duration
5.2. Electrical data
5.2.1. Headlight
5.2.2. Battery pack
- Assembly Page 24
6.1. General assembly
6.2. Assembly of IQ-XM speed and battery pack Page 26-27
- Operation Page 27-28
- Protective functions Page 28-29
8.1. Battery level (display on battery pack)
8.2. Battery pack charging times
8.3. Battery pack protective functions Page 31-32
- Additional information Page 32
- Liability Page 32

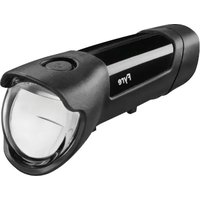
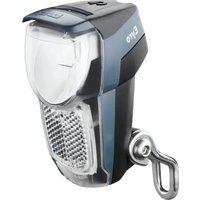
1. Busch + Müller Battery LED Headlight LUMOTEC IQ-XM Speed with High Beam Function
IQ-XM speed Type No.168/35LA-01
This Instruction Manual is intended for users with knowledge and experience in assembling and installing bicycle components. Special tools are required. If you do not know how to assemble or install bicycle components or do not have all the necessary tools for the job, please contact a bicycle specialist to have the installation done properly. Otherwise, the cyclist may fall off and suffer serious injuries as a result of improper assembly or installation of the light components. Read this Instruction Manual carefully, follow all the steps described and keep it in a safe place.
2. Packaging content
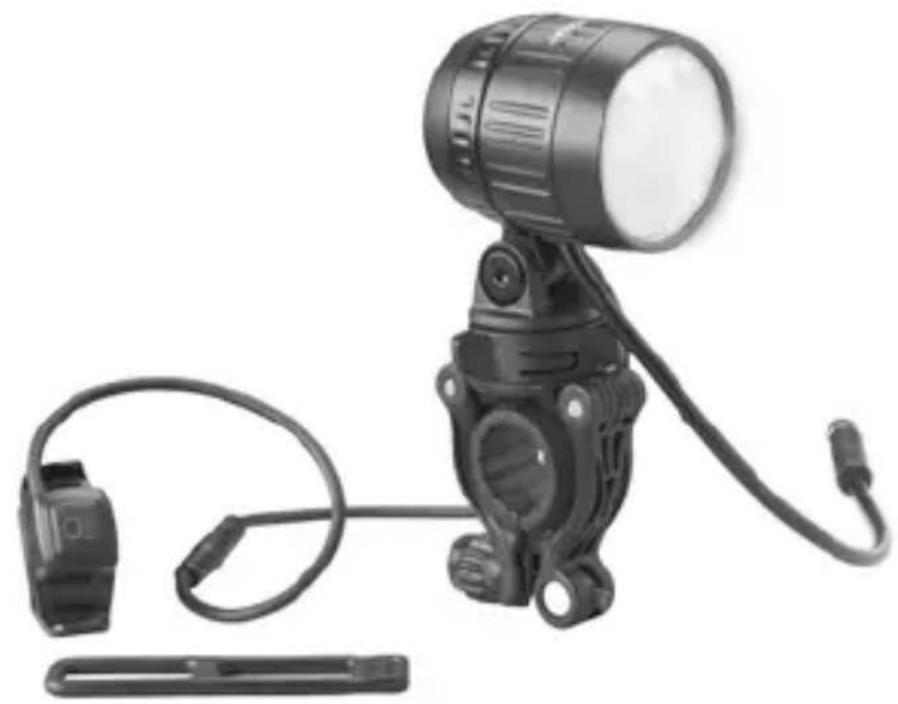
IQ-XM speed | Headlight bracket with rubber ring | Handlebar switch | Rubber bracket for handlebar switch | USB power supply unit | USB cable to micro USB | USB-port cable to micro USB | Battery pack 468A | Locking screws + locking knob | Velcro strap| Instruction manual
3. Safety information
This Instruction Manual uses signal words to alert you regarding potential hazards or important information.
The meaning of the signal words is listed below:
WARNING Describes a hazardous situation which, if not avoided, could result in a fatal accident or serious injury.
NOTICE Indicates information considered important, but not hazard-related (e.g. information related to property damage).
The symbol is used to provide other useful information about your new bicycle lights.
NOTICE Bicycle lights made by Busch + Müller are suitable for use on bicycles cycling on a firm surface. Avoid any extreme use, and never ride down stairs or perform jumps, stunts, tricks, bunny hops or vertical descents on rough terrain.
4. Legal regulations
Before cycling on public roads, you must learn and observe at any time the applicable national laws and statutes as well as local regulations. For information, either consult the Road Traffic Regulations or - depending on your respective place of residence - other sources for information.
5. Technical specification
Headlight dimensions: height: 64 mm | Length: 51 mm | Width: 46 mm | 110 g Battery pack dimensions: Height: 40 mm | Length: 97 mm | Width: 65 mm | 255 g
5.1. Lighting modes, brightness and duration
| Mode Brightness Duration* | ||
| Low-Power 20 Lux > 20 hrs. | ||
| Mid-Power 70 Lux > 6.5 hrs. | ||
| High-Power 120 Lux > 4 hrs. | ||
| High beam function 170 Lux > 1.5 hrs. |
- when battery pack is fully charged
5.2. Electrical data
5.2.1. Headlight
Nominal voltage: 7.4 V Capacity: 17.5 W max.
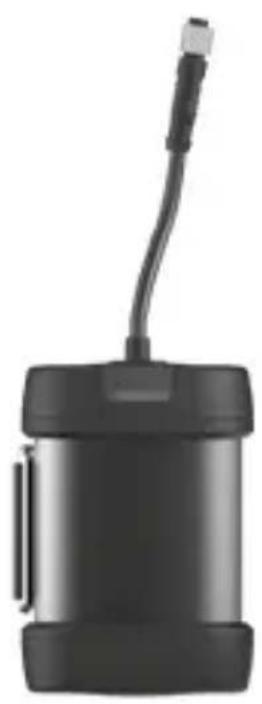
5.2.2. Battery pack (for the power supply of the headlight, can also be used as a power bank)
Nominal voltage: 7.4 V - Capacity: 4,600 mAh
Load-bearing capacity
Light output and power bank, together up to 5 A:
- Light output via cable: 4,600 mAh with 5 A (without using the power bank function), when using the power bank function, the electric current at the light output depends on the unit to be charged
- USB connection (4,200 mAh with max. 2 A usable as a power bank, in which case between 3 und 4,9 A are available at the light output)
Charging time with original mains adapter from Busch + Müller: abt. 5 hrs.
Charging time with other USB adapters / USB port on PC: up to 12 hrs.
6. Assembly
6.1. General assembly
Make sure the headlight is not covered under any circumstances. Also, take care that the headlight has been mounted and aligned as prescribed.
In Germany, the prescribed mounting height for headlights 1 ranges between about 400 and 1,200 mm. For details, consult your national Road Traffic Regulations or contact a local bicycle specialist retailer. Always make sure the headlight is mounted and aligned in a way to ensure that oncoming traffic is not blinded.
Not to be mounted underneath the handlebar: If the headlight is suspended, the light image is turned upside down and oncoming traffic is blinded in violation of traffic regulations. In addition, splash water damage can occur, the consequences of which are then excluded from our warranty.
WARNING To avoid falls, accidents and severe injuries, always use the enclosed Busch + Müller assembly bracket. If unsuitable or improperly positioned brackets are used, the headlight may probably come loose, slide down and, in the worst case, get caught in the wheel spokes.
WARNING Never mount brackets on forks or seat stays!
WARNING Never mount brackets on conical components!
Make sure to tighten all screws in a way to ensure the headlight cannot move all by itself.
This is especially important when cycling on uneven terrain.
Headlight alignment
Align the bicycle headlight in a way to ensure that oncoming traffic is not blinded. On a completely flat road, the horizontal light edge (cut-off line) must always be visible on the road!
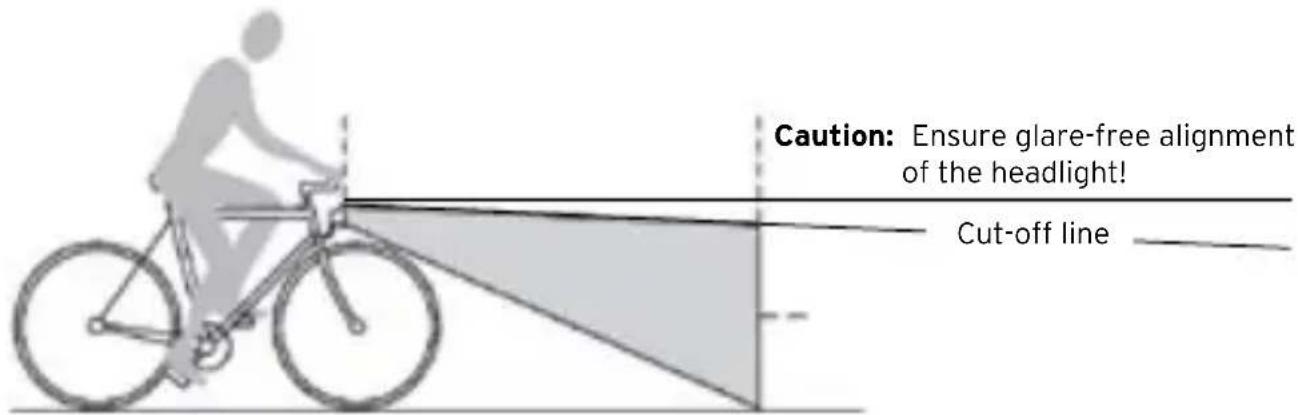
Fig.: Example of headlight alignment
WARNING Do not use the bicycle if the light beam of your headlight 1 is misaligned or the headlight 1 is too loose.
Only align or tighten the bicycle headlight 1 when the bicycle is not moving.
Blinding oncoming traffic can lead to accidents. Before aligning the bicycle headlight, loosen the bracket retaining screw. Make sure to retighten this screw again after aligning the headlight so that neither the screw nor the headlight can come loose or move all by themselves.
WARNING Never look directly into the light of the bicycle headlight when switched on 1.
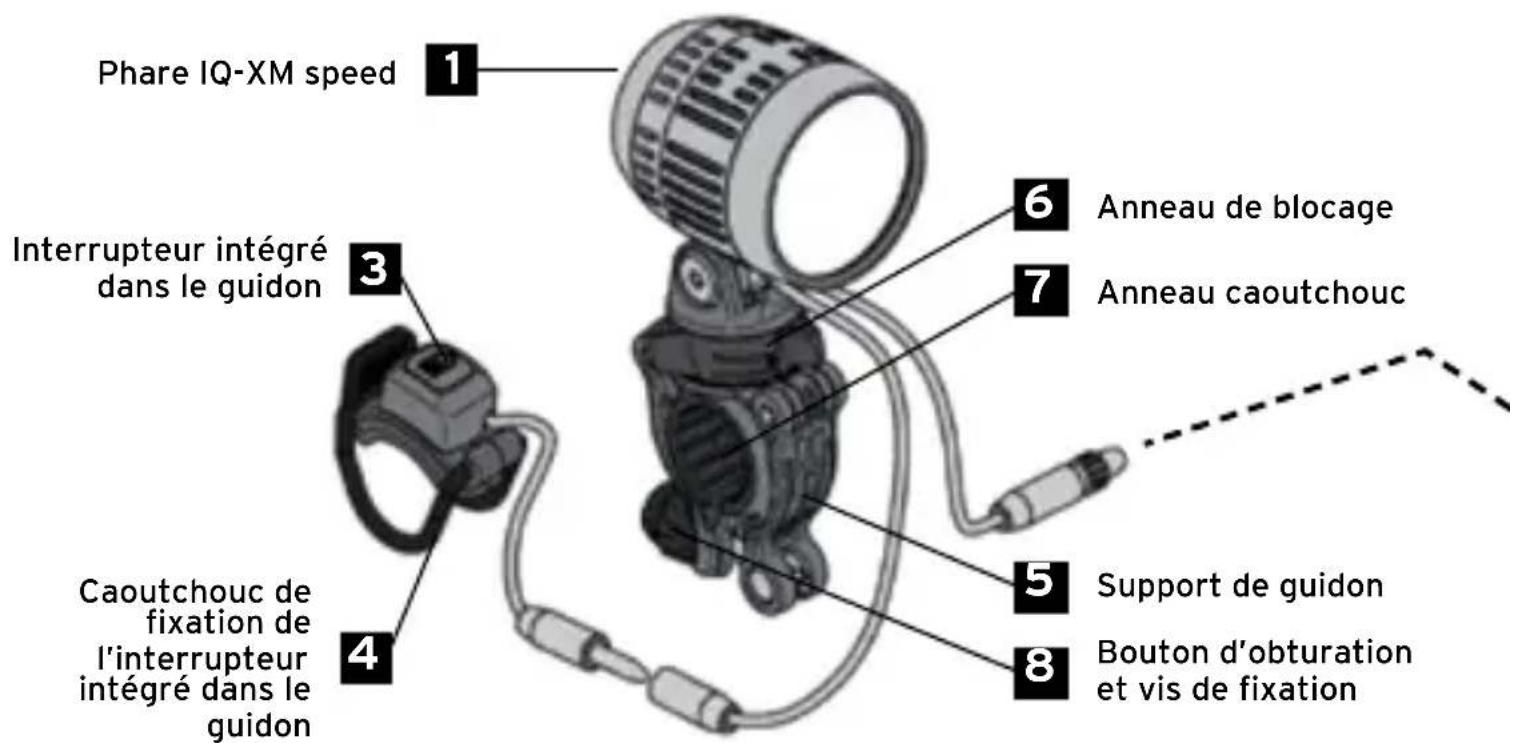
6.2. Assembly of IQ-XM speed and battery pack
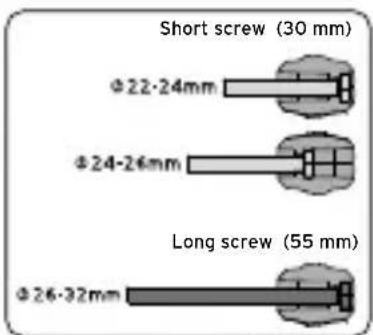
Place the rubber ring 7 of the handlebar bracket 5 around the handlebar. Depending on the handlebar diameter, screw the locking screw and the locking knob 8 into the handlebar bracket 5. Place the handlebar bracket 5 over the rubber ring 7 with the locking knob 8 facing the seat. Join the legs underneath the handlebar and fasten them using the locking screw 8.
Please note: The locking knob can be used either as a short or long version. (simply turn as required)!
Insert the headlight 1 vertically from above into the headlight bracket 5 in the direction of travel and press down firmly. It audibly engages in the locking ring 6. Make sure it is firmly seated in place. To remove the headlight 1, turn the locking ring 6 clockwise, hold the headlight 1 firmly and pull it upwards. We do not assume any liability in case of drop damage, e.g. because the headlight 1 was not held in place while releasing the locking ring 6. If the assembly situation on the bicycle only allows the locking knob 8 facing away
from the cyclist, use a screwdriver to unbolt the bracket on the underside of the headlight 1 turn by 180^ and then fasten again. The bracket is the headlight 1 component that is screwed into the locking ring 6
The position of the headlight 1 can be changed vertically and horizontally by a few degrees. Vertically, the slant of the headlight 1 is changed via the slant of the handlebar bracket 5. For horizontal adjustment, the headlight 1 can be swivelled (to a limited extent) continuously on the rubber ring 7 to the left or right. In both cases, the locking screw on the bracket must be loosened and securely re-tightened afterwards once again to ensure that the headlight 1 cannot come loose or move all by itself.
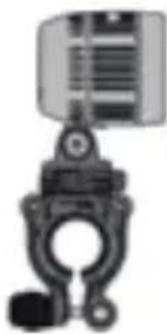
Assembly of handlebar switch using a bracket
Suitable for handlebars of 22 to 32 mm
Attach the handlebar switch 3 to operate the headlight 1 and the high beam function securely and easily accessible to the handlebar using the enclosed rubber bracket 4.
Mounting the battery pack
Securely fasten the battery pack using the Velcro strap at a suitable position on the bicycle, or alternatively, keep it safely elsewhere (e.g. in a bag or jersey). Connect the cables of the battery pack 2 and the headlight 1.
7. Operation
Switch the headlight 1 (low beam) on and off by keeping the handlebar switch 3 pressed for approx. 2-3 seconds. When switched on, the last activated lighting mode of the low beam (high-, mid- or low-power) is activated. To change the light mode, press the handlebar button 3 briefly (approx. 12 second). The light mode then changes to the next higher level (low-mid-high-low...). Repeat if necessary. If the battery level is low, the headlight 1 automatically switches to the low-power mode.
When the low beam function is active, briefly press the handlebar switch 3 to activate or deactivate the high beam function. The indicator lamp of the handlebar switch 3 lights up green for the low beam function and blue for the high beam function.
WARNING When the high beam function is active, make sure to dim the beam in good time! Oncoming traffic must not be blinded.
If the residual capacity of the battery pack 2 is low, the high beam function of the headlight 1 can no longer be activated. To make the cyclist aware of this situation, the green LED in the handlebar switch 3 briefly switches off every 10 seconds. The high beam function is automatically deactivated if active at that moment. Switching between the high-, mid-, and low-power mode as well as using the headlight flasher are still possible.
If the battery level continues to decrease, only operation in the low-power mode is possible, and the battery pack 2 must be recharged.
CAUTION: As soon as the green + blue LEDs in the handlebar switch 3 are flashing together, the lighting values are no longer fulfilled. In the course of the next 60 minutes, the headlight 1 gradually becomes darker and darker until it switches off completely (Safe-Way-Home-Function). This is a safety precaution to prevent depth discharge of the battery pack 2 which might result in severe falls or accidents. Therefore, always adjust your behaviour and speed to the available light and interrupt the ride in time. Never ride in insufficient brightness without adequate light.
WARNING Never regulate the range of your headlight or connect a device to the power bank while cycling! This may cause severe falls and injuries.
8. Handlebar switch functions - controls and activation
The LEDs in the handlebar switch 3 alternately display both the operating mode (permanently lit LED) and the charging level of the battery pack 2 (flashing LED) as well as the required actions:
| LEDs in handlebar switch Display of functions | (brightness) and/or action required | How to activate handlebar switch | ||
| Colour shining flashing | ||||
| green x Low | beam mode (High) Keep pressing: ON/OFF | Press briefly (abt. 1/2 second) while in the low beam mode: Change in brightness | ||
| green x Low | beam mode (Mid) | |||
| green x Low | beam mode (Low) | |||
| blue x | High beam mode Press briefly | fly while in the low beam mode: ON/OFFIn case of low battery level: headlight flasher | ||
| According to active mode (green or blue) | 1-5 times per minute | Battery level indicator in 20% steps: Flashing 5 times = 80 - 100% Flashing 4 times = 60 - 80% Flashing 3 times = 40 - 60% Flashing twice = 20 - 40% Flashing once = < 20% Indicator sequence repeated 3 times | ||
| green | switches off every 10 seconds | High beam mode can no longer be activated (battery level is too low) Automatic switching to low power mode. Charge battery pack! | ||
| green + blue | both flashing continuously | Safe-Way-Home function Decreasing brightness until automatic switch-off! | ||
8.1. Battery level (display on battery pack during charging and discharging)
The battery pack 2 also has a level indicator 10:5 blue and 1 red LED. The battery level is displayed in 10% steps, via the number and colour of the active LED and its light mode:
| Number of active LEDs | Lighting mode | Battery level indicator | ||
| Colour shining flashing | ||||
| 5 blue 5 0 100% | ||||
| 5 blue 4 1 90% | ||||
| 4 blue 4 0 80% | ||||
| 4 blue 3 1 70% | ||||
| 3 blue 3 0 60% | ||||
| 3 blue 2 1 50% | ||||
| 2 blue 2 0 40% | ||||
| 2 blue 11 30% | ||||
| 1 blue 1 0 20% | ||||
| 1 red | 1 0 | 10% | ||
| 1 red | 0 1 | 5% | ||
As soon as the red LED on the battery pack 2 lights up (battery level ≤ 10% ), recharging is required. When the red LED starts to light up, the low beam function is still available at the lowest lighting level for approx. 1 hour. At this stage, the high beam function can no longer be activated. If the red LED on the battery pack flashes, the headlamp is in the safe-way-home mode.
If the red LED on the battery level display 10 of the battery pack 2 lights up and one of the blue LEDs flashes up as well, an automatic protective shutdown has been activated. See Item 8.3. - Battery pack protective functions. When charging is complete, the 5 blue LEDs are switched off.
8.2. Battery pack charging times
With original mains adapter from Busch + Müller: abt. 5 hrs
With other USB adapters / with USB port on a PC: up to abt. 12 hrs
We do not assume any liability when third-party mains adapters are used.
The battery pack can provide up to 4,200 mAh with max 2 A as a power bank. As soon as a device to be charged is connected via the USB port, the charging process begins. If the battery capacity falls below a certain level, the power bank function is automatically deactivated because the light function has priority.
Tip to preserve the battery pack 2: When not in use over an extended period of time, store the battery pack 2 preferably in a cool and dry environment as well as with approx. 30 - 50 % residual capacity. If the battery pack 2 is discharged to below 10% capacity and then fully charged again, the battery pack 2 recalibrates itself. Calibration is complete when all LEDs are extinct during charging.
8.3. Battery pack protective functions
Protection against overheating: As soon as the temperature of the battery pack exceeds 70^ , all outlets are deactivated for approx. 60 minutes to prevent overheating. Also, charging the battery pack is not possible in this situation.
Overcharge protection: If the battery pack 2 is charged to 100% , or if excessive voltage is supplied into the battery pack 2, the USB port 9 automatically switches off for a short time to avoid damage.
Short-circuit protection of the power bank: If more than 2 A are supplied to devices to be charged by the power bank, the power bank function is temporarily deactivated to avoid damage to connected devices. This function is automatically reactivated after approx. 4 minutes.
Short-circuit protection of the light output: If more than 5 A (incl. power bank) are supplied when connecting a device to be charged, the light output is deactivated to protect the connected headlight 1 and the power bank. This function is automatically reactivated after approx. 4 minutes.
In the case of all errors described under 8.3, the red LED on the battery level indicator 10 of the battery pack 2 lights up. In addition, one of the blue LEDs flashes. This status remains the same as long as the error is not remedied or until one or more protective functions are deactivated.

WARNING
If such a malfunction occurs, stop cycling immediately to avoid accidents!
9. Additional information
Disposal: Electronic components must not be handled as household waste but are to be disposed of as hazardous waste.
10. Liability
In addition to the above-mentioned exclusions of warranty, we do not assume liability for any and all other damage caused by improper handling (e.g. dropping the system, inadequate safety of assembly and its consequences, submersion in water or other liquids etc.). Likewise, warranty is excluded if products are opened.
Have fun with your new headlight and enjoy safe cycling!
Technical modifications reserved.
Busch + Müller KG • 58540 Meinerzhagen, Germany • Tel. +49 2354 915-6000 • info@bumm.de • www.bumm.de


Sommaire :
Puisance:17,5Wau maximum
- Indicador de control yccionamento del boton del manillar - vista sinoptica de functions A工程技术 of the LED in the LED, which is a device that uses a 3D digital camera to detect the position of the robot. It is used to detect the position of the robot and its surrounding environment. The system is based on a 3D camera with a 3D camera and a 3D sensor. The camera is connected to the robot by a 3D sensor. The sensor is connected to the robot by a 3D camera. The camera is connected to the robot by a 3D sensor. The sensor is connected to the robot by a 3D camera.