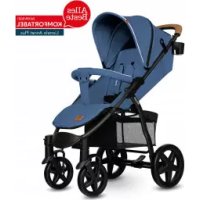
USER MANUAL Annet Plus Lionelo
natural_image
Line drawing of a baby stroller with two wheels and a back cover (no text or symbols)
natural_image
Two line drawings of a folding chair or table, labeled A and B, with no visible text or symbols on the diagrams themselves.

natural_image
Line drawing of two strollers with different seat designs, no text or symbols present
natural_image
Two line drawings of a stroller, labeled A and B, showing mechanical components and motion arrows (no text or symbols beyond labels)
A
natural_image
Close-up of a metallic object with a central hole and small protrusions (no visible text or symbols)
natural_image
Close-up of a dark, textured object resembling a leather or leather seat, possibly a vehicle or device (no visible text or symbols)
B
10
natural_image
Mechanical diagram showing a gear or cam mechanism with no visible text or symbols
A
natural_image
Mechanical assembly diagram showing a motor with rotating components and a downward arrow indicating motion (no text or symbols)
B
natural_image
Mechanical assembly diagram showing a bracket with levers and gears (no text or labels)
11
12
Dear Customer!
Should you have any remarks or questions concerning the product, please do not hesitate to contact us: help@lionelo.com
Note: The product must be assembled by an adult only. A failure to follow these warnings and assembly instructions may lead to serious injuries or death.
The product has been tested and complies with EN 1888:1-2018, EN 1888:2-2018
Producer:
BrandLine Group Sp. z o. o.
IMPORTANT - READ CAREFULLY AND KEEP FOR FUTURE REFERENCE
WARNING:
- Never leave the child unattended.
- Ensure that all the locking devices are engaged before use.
- To avoid injury ensure that the child is kept away when unfolding and folding this product.
- Do not let the child play with this product.
- Always use the restraint system.
- Check that the seat unit is correctly engaged before use.
- This product is not suitable for running or skating.
- The vehicle is suitable for a child up to 22 kg or up to 4 years (whichever comes first).
- For new born babies it is recommended to use the most reclined position.
- If you want to take the child out of the stroller or put it in, make sure the parking device is locked up.
- Maximum permissible load of the basket is 3 kg.
- Any load attached to the handle and/or on the back of the
backrest and/or on the sides of the vehicle will affect the stability of the vehicle.
- The vehicle shall be used by only one child at a time.
- Accesories which are not approved by the manufacturer shall not be used.
- Only replacement parts supplied or recommended by the manufacturer shall be used.
- Do not use the product on stairs.
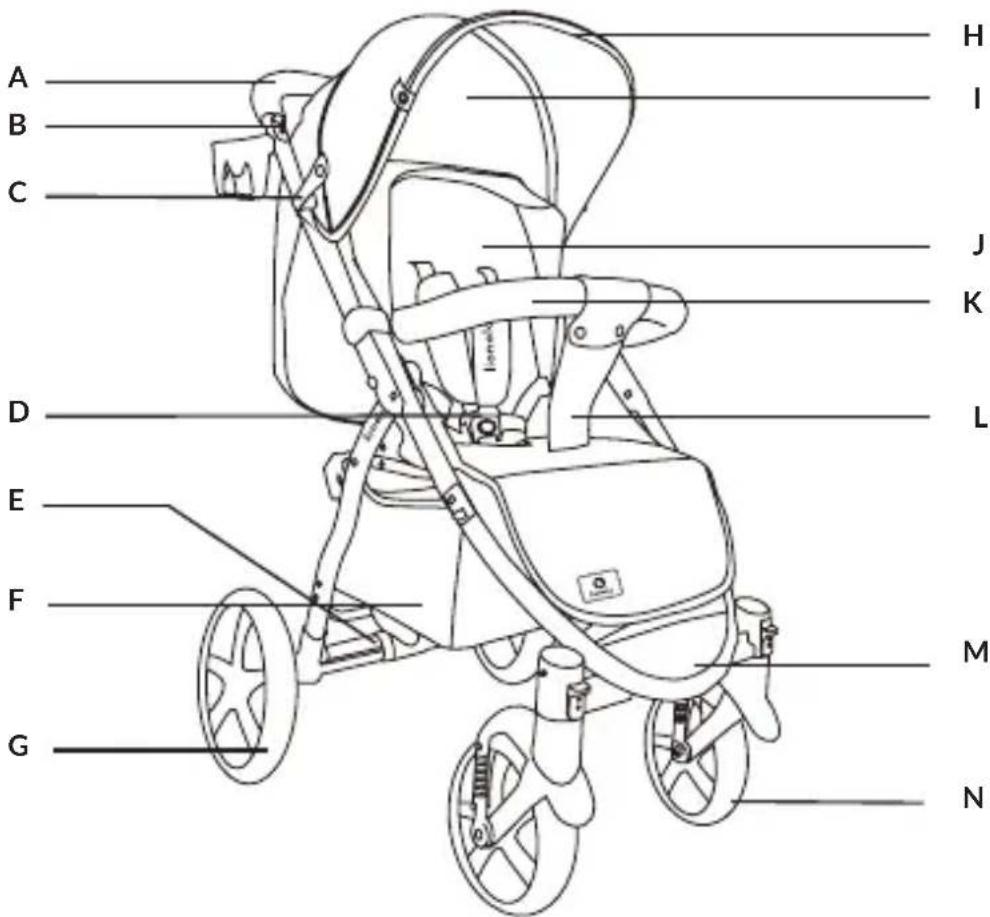
Description (12):
A. Handle
B. Fold button
C. Assembly lock
D. Safety belts
E. Parking device
F. Basket
G. Rear wheel
H. Sunshade
I. Window
J. Adjustable backrest
K. Bow-shaped handle
L. Additional crotch strap
M. Leg rest
N. Front wheel
How to assemble the stroller (1):
A. Release the assembly lock.
B. Lift the handle until you can hear a click.
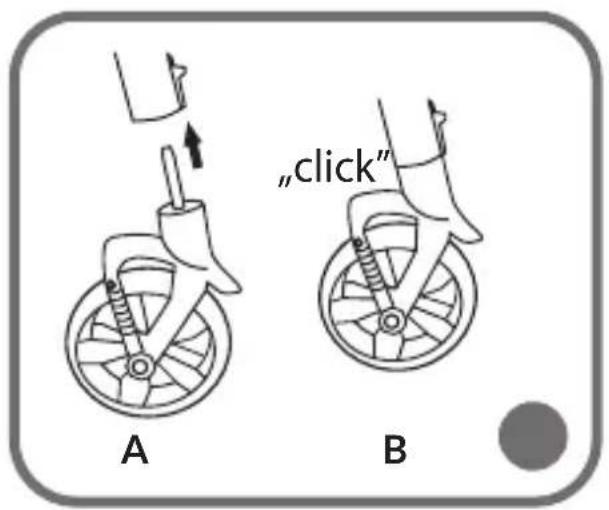
How to assemble front wheels (2):
A. Insert the metal shank of the front wheel in the guide.
B. Press the wheel until you can hear a click.
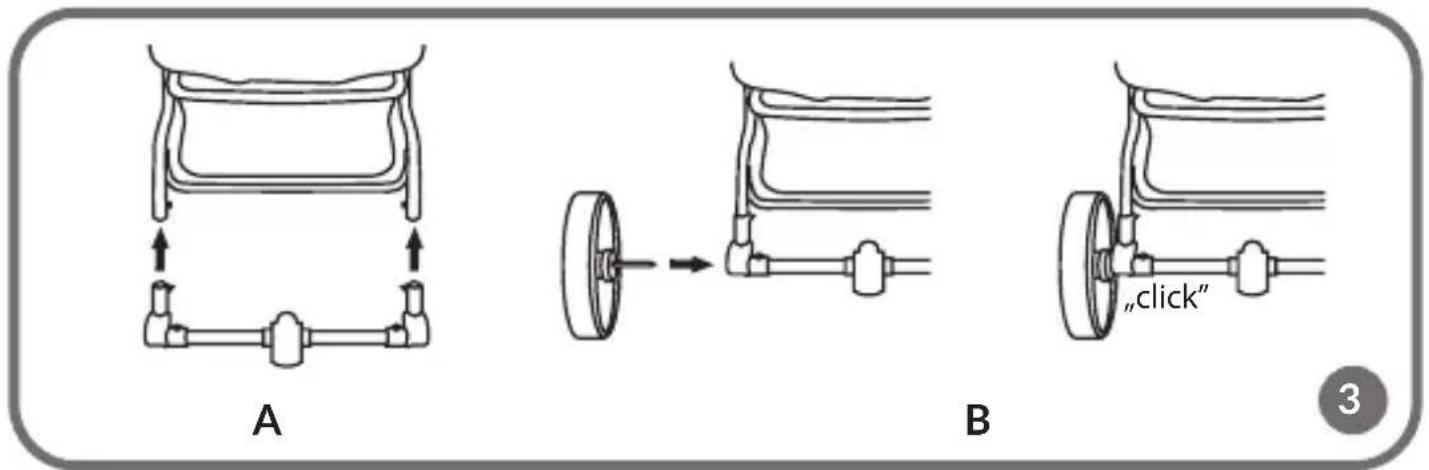
How to assemble rear wheels (3):
A. Insert the rear axis mechanism with a parking device in the frame, press on both sides until you can hear a click.
B. Insert a metal shank of the rear wheel in the axis, press until you can hear a click
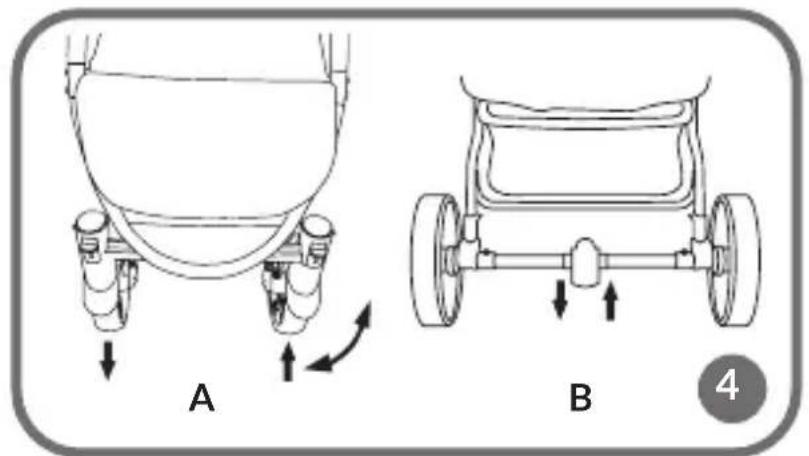
How to lock wheels (4):
A. Set front wheels straight and then press down the lock. The wheels will stop rotating. Lift to unlock it.
B. Parking device: press to lock the stroller. Lift to unlock it.
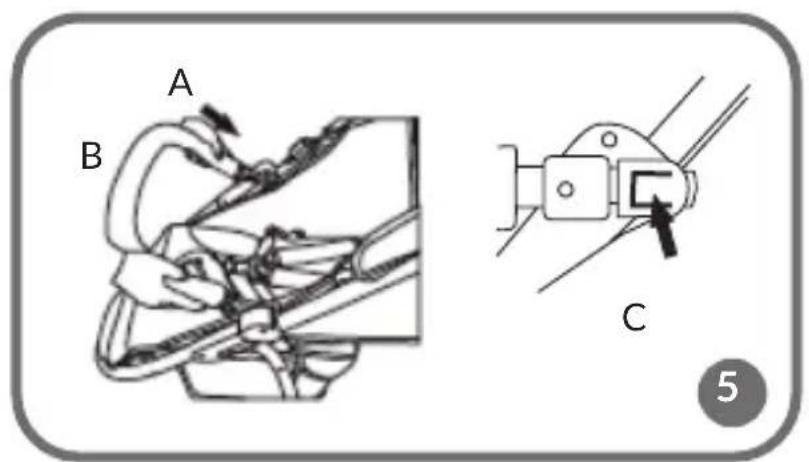
How to assemble the bow-shaped handle (5):
A. Push the guides of the bow-shaped handle inside the grips.
B. Press the bow-shaped handle until you can hear a click. Fasten the extra crotch strap on the bow-shaped handle. The additional crotch strap must always be fastened with the bow-shaped handle.
C. Press the buttons located from the inside to release locks and remove the bow-shaped handle.
How to unfold the sunshade (6):
Pull the sunshade forward to unfold it.
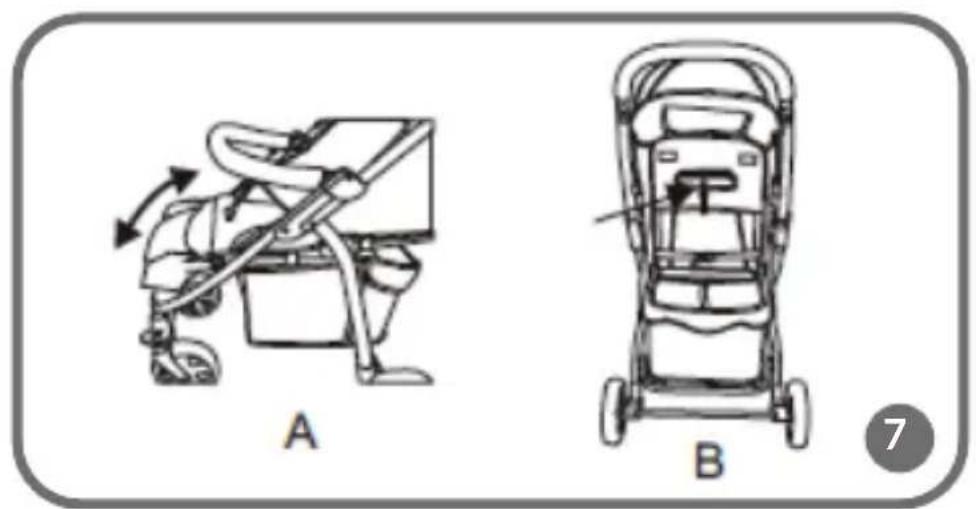
A. Footrest adjustment: Press buttons on both sides of the footrest and lift it or slide down, as desired, then release buttons.
B. Backrest adjustment: Lift the lever in the back of the backrest, next adjust the backrest and release the lever.
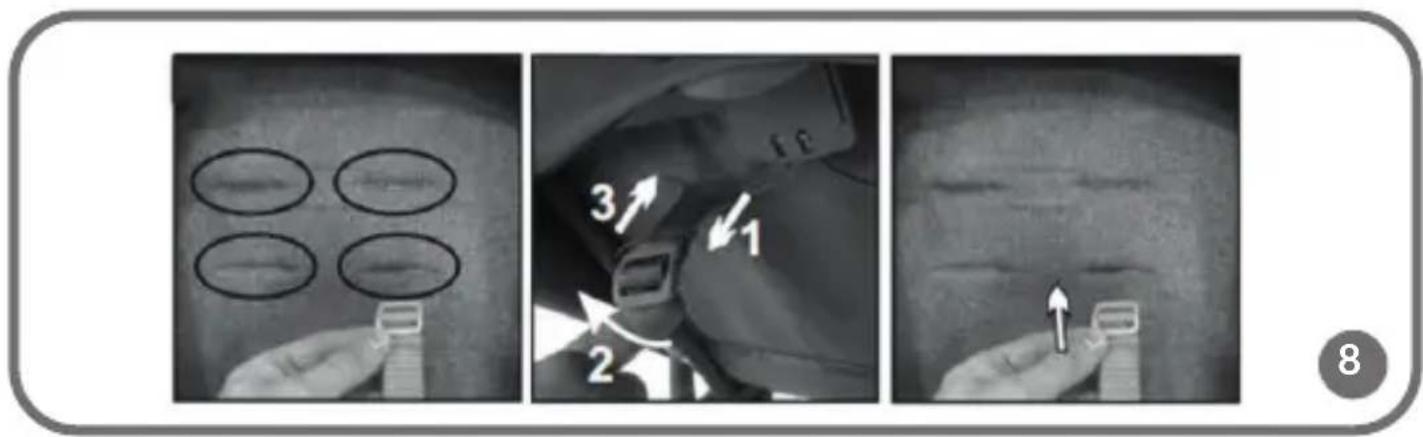
Belt height adjustment (8):
To adjust the height of the shoulder belts to the child's height, slide the belt buckles out of the slots of the adjustable positions. Pass them through the holes and turn the buckle. Outgoing child's straps should be at shoulder height.
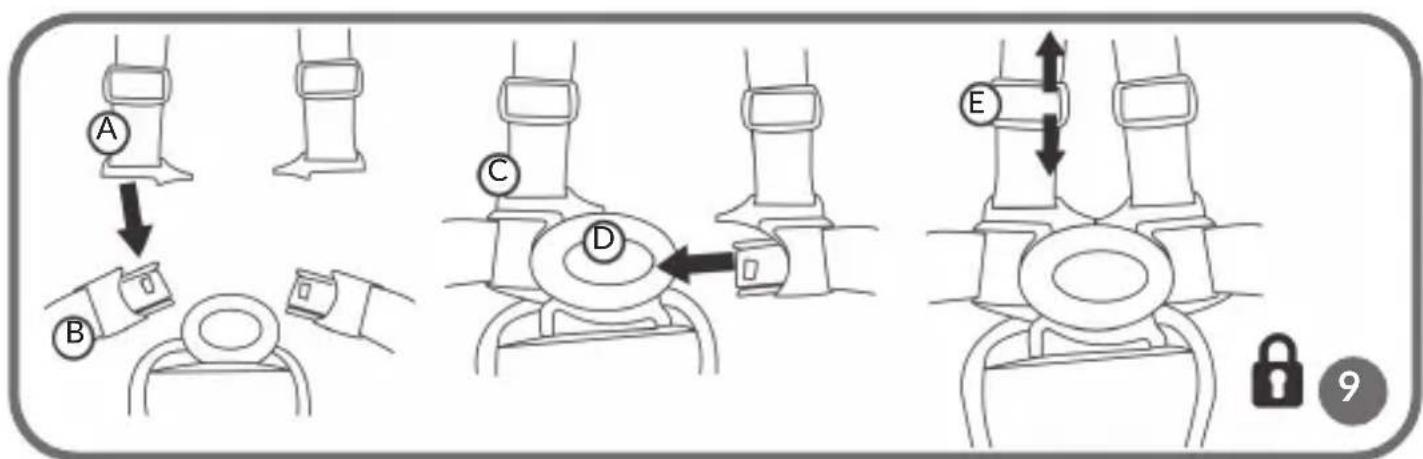
How to use safety belts (9):
Join the belt (A) and the belt (B) together with a quick coupling. Do the same on the other side. Insert the belt connector (C) in the handle (D). Do the same on the other side. To adjust the belts, slide the adjustment handle (E) up or down by tightening or releasing the belt. To disassemble safety belts, slide the buckle through the opening in the seat. To assemble, put the safety belts back again.
How to use the mosquito net (10):
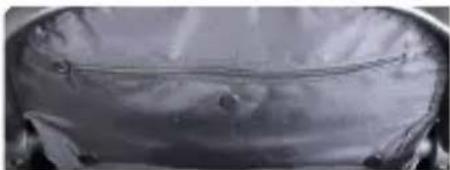
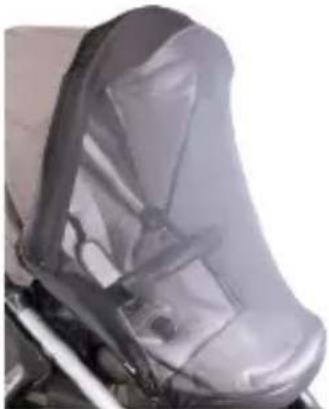
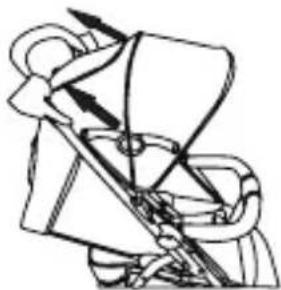
There is a mosquito net container at the bottom of the leg rest (A). Unzip it and take the mosquito net out (B). Put the mosquito net on the stroller (C).
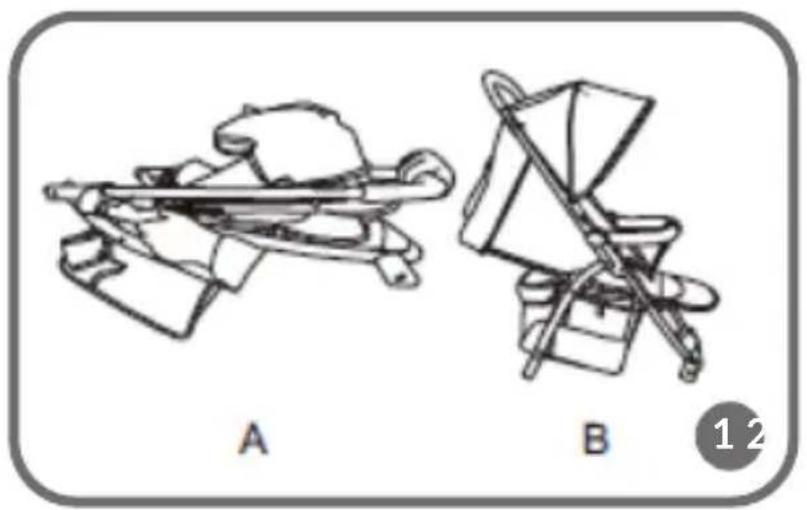
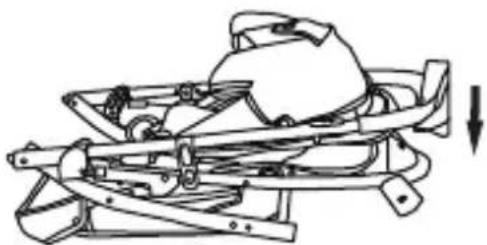
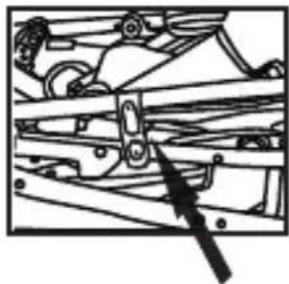
How to disassemble the stroller (11):
Fold the sunshade. Next lift assembly buttons on both sides of the handle, then
slide handles forward and downwards until the stroller folds. The lock will snap automatically. To confirm this, a click sound will be audible.
Cleaning and maintenance:
Wipe the frame of the stroller with a wet cloth. Clean the upholstery with a soft brush and wipe with a wet cloth.
The individual parts of the stroller should be regularly checked for functionality, durability and any possible damage. In the event of any faults, contact the authorized service centre.
The pictures are for reference only. The real design of the products may differ from the pictures presented.
PL
Drogi Kliencie!
BrandLine Group Sp. z o.o.
BrandLine Group Sp. z o.o.
BrandLine Group Sp. z o.o.
Detailed warranty conditions are available on the website:
Thank you for purchasing our product