
SRCOOL7KDUCT - IT rack accessory Tripp Lite - Free user manual and instructions
Find the device manual for free SRCOOL7KDUCT Tripp Lite in PDF.

| Product Type | Rack Air Conditioning Ventilation System |
| Brand | Tripp Lite |
| Model | SRCOOL7KDUCT |
| Category | Computer Rack Accessory |
| Compatibility | SRCOOL7KRM Rack-Mounted Air Conditioner |
| Package Contents | Manifold assembly (x1), short exhaust tube (x1), long exhaust tube (x1), tube adapter (x2), ceiling adapter (x1), ceiling tile insert (x1), M4 x 12mm screws (x4), self-tapping screws (x4) |
| Main Function | Dissipate heat from the air conditioner and direct hot air to a return air duct or ventilation system |
| Installation | Attaches to the back of the SRCOOL7KRM using 4 provided M4 screws |
| Maximum flexible tube length | 300 cm (118 in) |
| Exhaust panel adjustment range | 67.5 to 125 cm (26.6 to 49.2 in) |
| Required clearance above panel | 25.4 cm (10 in) minimum |
| Warranty | 5 years (limited) |
| Material | Plastic with internal magnets for magnetic attachment |
| Estimated weight | Approximately 2.3 kg |
| Power supply | Not applicable (passive device) |
| Maintenance | Periodically check connections and tube integrity |
| Safety | Ensure the ceiling installation is secure; some ceilings may require modified procedures |
| Spare parts | Available from Tripp Lite (contact support) |
Frequently Asked Questions - SRCOOL7KDUCT Tripp Lite
User questions about SRCOOL7KDUCT Tripp Lite
0 question about this device. Answer the ones you know or ask your own.
Ask a new question about this device
Download the instructions for your IT rack accessory in PDF format for free! Find your manual SRCOOL7KDUCT - Tripp Lite and take your electronic device back in hand. On this page are published all the documents necessary for the use of your device. SRCOOL7KDUCT by Tripp Lite.
USER MANUAL SRCOOL7KDUCT Tripp Lite
SmartRack® Accessories
Model: SRCOOL7KDUCT
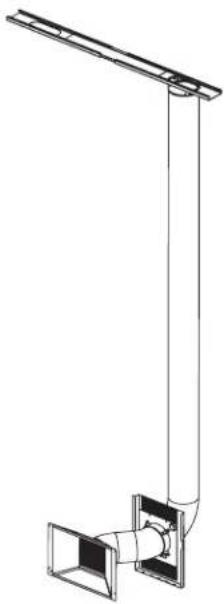
Table of Contents
Introduction 2
Parts List 2
Installation 3
Warranty and Product Registration 6
Espanol. 7
Francais 12
PROTECT YOUR INVESTMENT!
Register your product for quicker service and ultimate peace of mind.
You could also win an ISOBAR6ULTRA surge protector—a $100 value!
www.triplite.com/warranty


1111 W. 35th Street, Chicago, IL 60609 USA · www.triplite.com/support
Copyright © 2015 Tripp Lite. All rights reserved.
Introduction
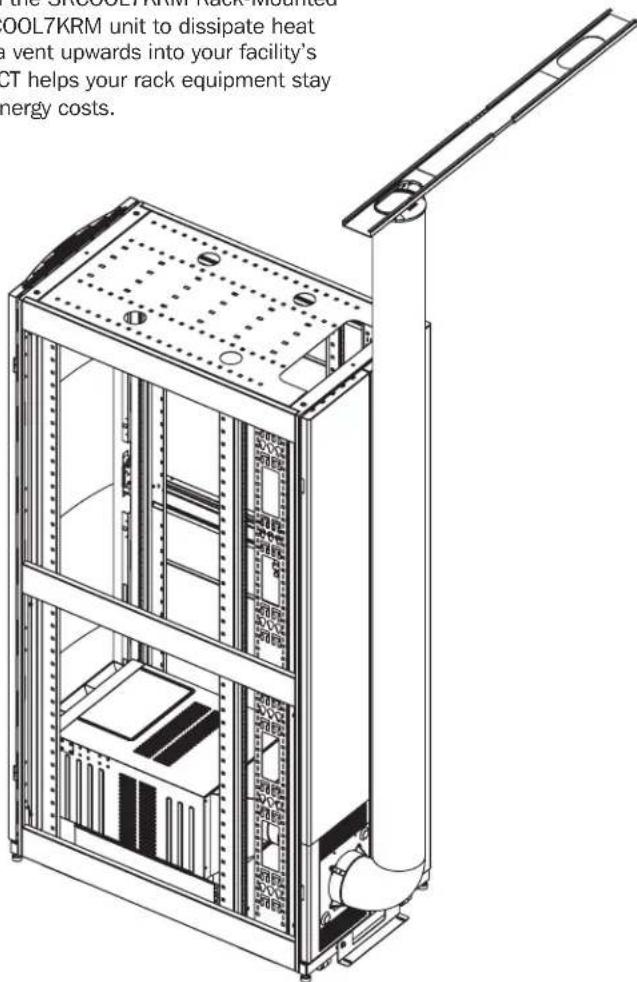
Tripp Lite's SRC00L7KDUCT is a venting system that is compatible with the SRC00L7KRM Rack-Mounted Air Conditioning Unit. The SRC00L7KDUCT attaches directly to the SRC00L7KRM unit to dissipate heat generated from the air conditioning unit and direct the hot air through a vent upwards into your facility's return air duct or other standard ventilation system. The SRC00L7KDUCT helps your rack equipment stay cool and perform at its peak while reducing your facility's cooling and energy costs.
Parts List
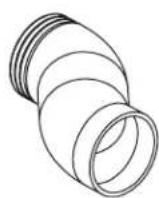
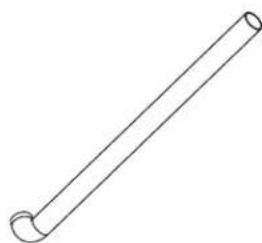
Manifold Assembly (x1) Short Exhaust Tube (x1) Long Exhaust Tube (x1) Tube Adapter (x2)
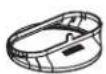
Internal magnets attach to rack enclosure.
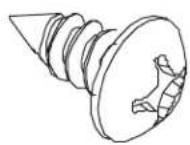
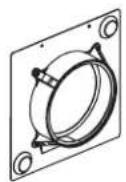
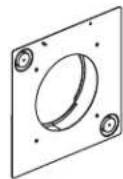
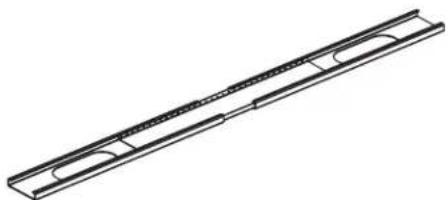
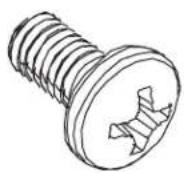
Ceiling Adapter (x1) Ceiling Tile Insert (x1) M4 x 12 mm Screws (x4) Self-Tapping Screws (x4)
Installation

Before proceeding to install the SRCOOL7KDUCT, first make sure the air conditioning unit is correctly installed per the instructions shown in the SRCOOL7KRM Owner's Manual.
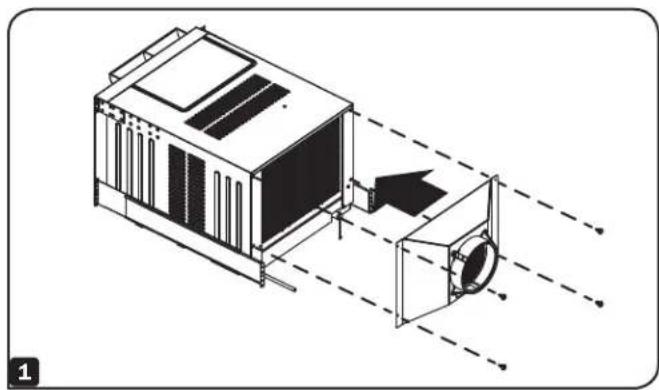
1 Fasten the Manifold Assembly to rear of SRCOOL7KRM using the four (4) included M4 screws.
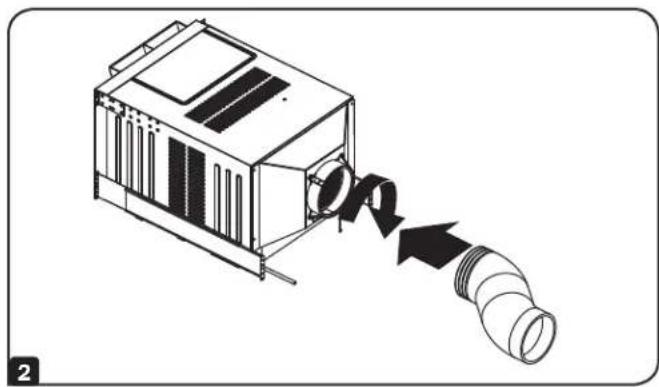
2 Attach the Short Flexible Tube to the Manifold Assembly by turning the tube's threaded end into the manifold's adapter.
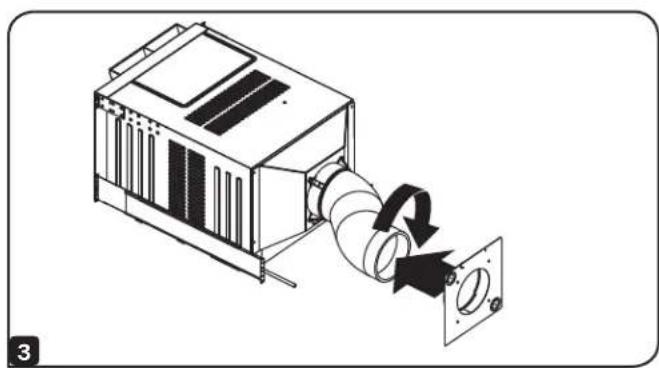
3 Attach the Short Flexible Tube to the Tube Adapter by turning the adapter onto the tube's threaded side.
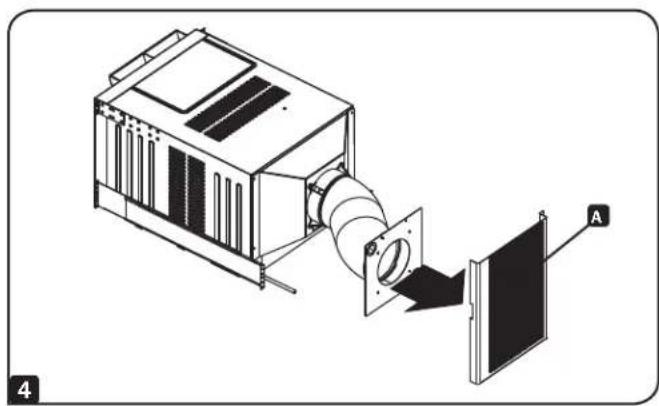
4 Attach the Tube Adapter to the inside of the perforated rack enclosure door A.
Note: The Tube Adapter uses internal magnets to attach to the rack enclosure.
Installation
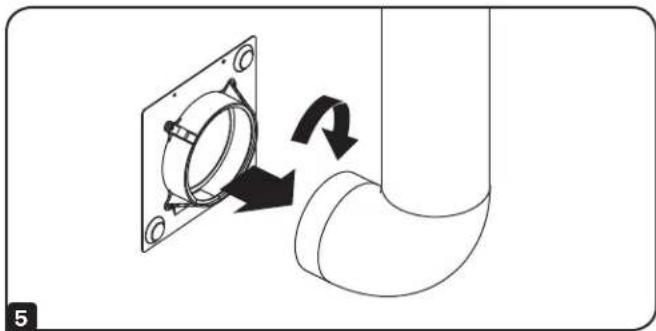
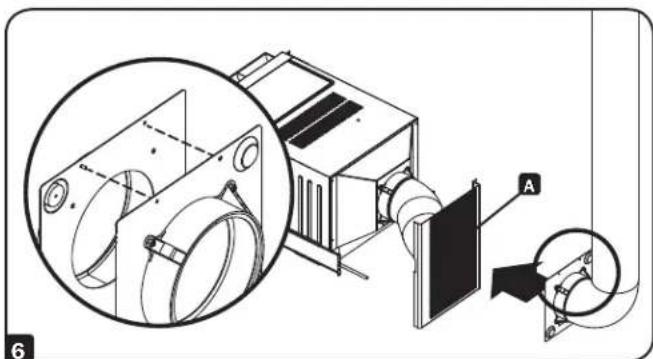
5 Attach the Long Flexible Tube to the Tube Adapter by turning the adapter onto the tube's threaded side.
Align the second Tube Adapter with the inner Tube Adapter and attach to the outside of the perforated rack enclosure door A. Make sure the pin on each tube adapter is aligned with the corresponding hole on the adjacent tube adapter before attaching to the rack enclosure door.
Note: The Tube Adapter uses internal magnets to attach to the rack enclosure.
7 Connect the Ceiling Adapter to the Long Flexible Tube by turning the adapter onto the tube's threaded side.
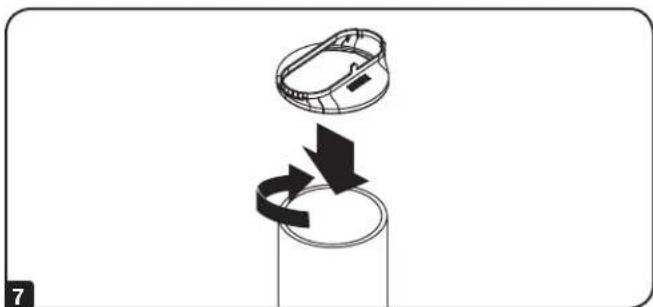

Warning: Some ceilings may require modified installation procedures. The user must determine the fitness of hardware and procedures before installing. The procedures described in this step may not be appropriate for all applications.
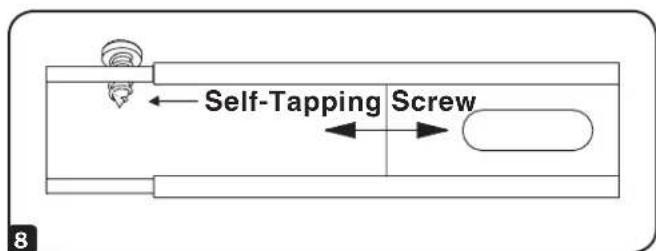
8 Choose a removable drop ceiling panel near the unit to provide the straightest, shortest path available for the Long Flexible Tube. Measure the width of the ceiling panel, including the portion that rests on the ceiling grid. Combine the two sections of the Ceiling Tile Insert, then adjust to match the width of the ceiling panel. After the Ceiling Tile Insert is set to the correct width, use the included self-tapping screw to lock it in place.
Note: The exhaust panel can adjust from 26.6 to 49.2 inches (67.5 to 125 cm).
Installation
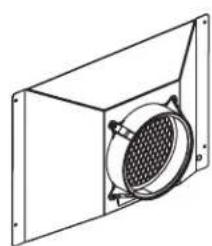
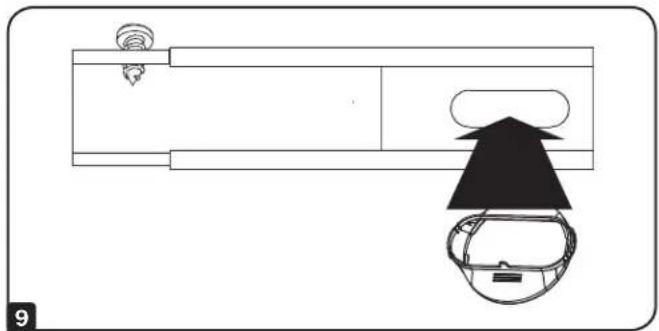
9 Insert the Ceiling Adapter into the oblong hole in the Ceiling Tile Insert. The adapter will snap into place.
10 Slide the ceiling panel out of the way and place the exhaust panel inside the ceiling space. Allow the exhaust panel to rest on top of the ceiling grid.
Note: There must be at least 10 inches (25.4 cm) of open space above the exhaust panel to allow adequate airflow.

11 Slide the ceiling panel back into place so that it adjoins the exhaust panel and closes any gaps in the ceiling. A tight seal will permit maximum cooling efficiency. If the installation is permanent, trim the ceiling panel so it doesn't overlap the ceiling grid.
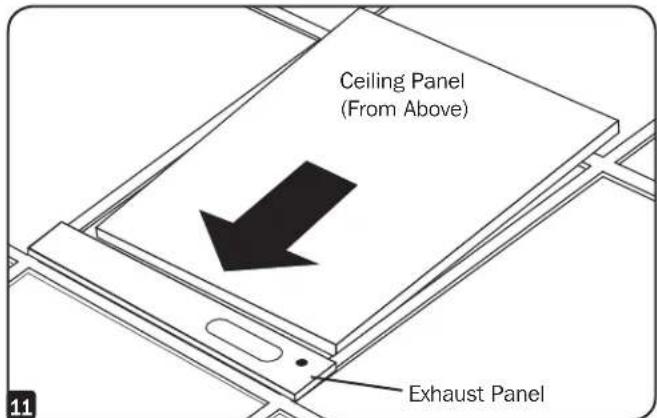
Note: The Long Flexible Tube can extend to a maximum length of 118 inches (300 cm). Provide the straightest, shortest path available. Excessive bending or stretching of the duct will reduce cooling efficiency.
Warranty and Product Registration
Limited Warranty
Sell wth t f r i t of initial purchase. If the product should prove defective in material or workmanship within that period, Seller will repair or replace the product, in its sole discretion.
THIS WARRANTY DOES NOT APPLY TO NORMAL WEAR OR TO DAMAGE RESULTING FROM ACCIDENT, MISUSE, ABUSE OR NEGLECT. SELLER MAKES NO EXPRESS WARRANTYES OTHER THAN THE WARRANTY EXPRESSLY SET FORTH HEREIN. EXCEPT TO THE EXTENT PROHIBITED BY APPLICABLE LAW, ALL IMPLIED WARRANTYES, INCLUDING ALL WARRANTYES OF MERCHANTABILITY OR FITNESS, ARE LIMITED IN DURATION TO THE WARRANTY PERIOD SET FORTH ABOVE; AND THIS WARRANTY EXPRESSLY EXCUSES ALL INCIDENTAL AND CONSEQUENTIAL DAMAGES. (Some states do not allow limitations on how long an implied warranty lasts, and some states do not allow the exclusion or limitation of incidental or consequential damages, so the above limitations or exclusions may not apply to you. This Warranty gives you specific legal rights, and you may have other rights which vary from jurisdiction to jurisdiction.)
Tripp Lite; 1111 W. 35th Street; Chicago IL 60609; USA
WARNING: The individual user should take care to determine prior to use whether this device is suitable, adequate or safe for the use intended. Since individual applications are subject to great variation, the manufacturer makes no representation or warranty as to the suitability or fitness of these devices for any specific application.
PRODUCT REGISTRATION
Visit www.triplite.com/warranty today to register your new Tripp Lite product. You'll be automatically entered into a drawing for a chance to win a FREE Tripp Lite product!
- No purchase necessary. Void where prohibited. Some restrictions apply. See website for details.
Tripp Lite has a policy of continuous improvement. Specifications are subject to change without notice.
Modelo: SRCOOL7KDUCT

Índice
Introduccion. 8
Lista de Partes 8
Instalacion 9
Garantía 11
English. 1
Francais. 12


1111 W. 35th Street, Chicago, IL 60609 USA • www.tripplite.com/support
1111 W. 35th Street, Chicago, IL 60609 USA • www.triplite.com/support
Brand : Tripp Lite
Model : SRCOOL7KDUCT
Category : IT rack accessory