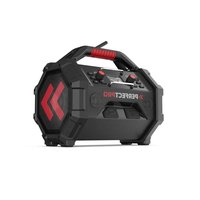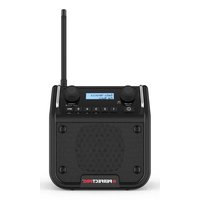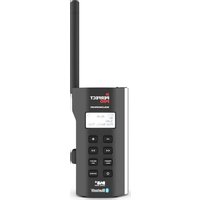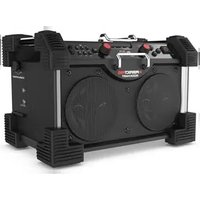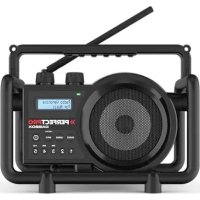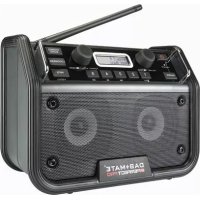
DAB+Mate - Radio PerfectPro - Free user manual and instructions
Find the device manual for free DAB+Mate PerfectPro in PDF.


| Features | Details |
|---|---|
| Product type | DAB+ Radio |
| Dimensions | Compact dimensions for easy use |
| Weight | Lightweight for easy transport |
| Power supply | Operates on mains or batteries |
| Connectivity | DAB+ and FM reception |
| Additional features | Digital display, station tuning, station memory |
| Usage | Ideal for indoor or outdoor use |
| Maintenance | Regular cleaning with a soft cloth recommended |
| Safety | Do not expose to water, use in a dry environment |
| Warranty | Check warranty conditions with the seller |
Frequently Asked Questions - DAB+Mate PerfectPro
User questions about DAB+Mate PerfectPro
0 question about this device. Answer the ones you know or ask your own.
Ask a new question about this device
Download the instructions for your Radio in PDF format for free! Find your manual DAB+Mate - PerfectPro and take your electronic device back in hand. On this page are published all the documents necessary for the use of your device. DAB+Mate by PerfectPro.
USER MANUAL DAB+Mate PerfectPro
Perfektor 9 V. Euordenstadt 9A Dosterman
The Netherlands

34816X61C0000
C
PERFECTPRO
Product name: Dab+mate
Art.nr:DMATE
ENG Declaration of Conformity
Prime Europe B.V. hereby declares that this model DMATE is in compliance with the essential requirements and other relevant provisions of Directive 2014/53/EU and also fulfills all the relevant provisions of EC/EU Directives: 2011/65/EU.
The EU declaration of conformity is available at the following internet address:
http://www.perfectpro.nl/support/ce-docs/
The Bluetooth® word mark and logos are registered trademarks owned by Bluetooth SIG, Inc. and any use of such marks by Perfectpro B.V. is under license.
WARNING!
WARRANTY BECOMES VOID ONCE THE DEVICE CABINET HAS BEEN OPENED OR ANY MODIFICATIONS OR ALTERATIONS TO THE ORIGINAL DEVICE HAVE BEEN MADE.
NEVER OPEN THE DEVICE CASING. THE MANUFACTURER WILL NOT ACCEPT ANY LIABILITY FOR DAMAGE RESULTING FROM IMPROPER HANDLING. THE TYPE PLATE IS LOCATED ON THE BACK OF THE DEVICE.
Important Safety Instructions
- Read these instructions.
- Keep these instructions.
- Heed all warnings.
- Follow all instructions.
- Do not use this apparatus near water.
- Clean only with dry cloth.
- Do not block any ventilation openings. Install in accordance with the instructions.
- Do not install near any heat sources such as radiators, heat registers, stoves or other apparatus (including amplifiers) that produce heat.
- Protect the power cord from being walked on or pinched particularly at plug, convenience receptacles, and the point where they exit from the apparatus.
- Only use attachments/accessories specified by the manufacturer.
- Use only with the cart, stand, tripod, bracket, or table specified by the manufacturer, or sold with the apparatus. When a cart is used, use caution when moving the cart/apparatus combination to avoid injury from tip-over.
- Unplug this apparatus during lightning storms or when unused for long periods of time.
- Refer all servicing to qualified service personnel. Servicing is required when the apparatus has been damaged in any way, such as power supply cord or plug is damaged, liquid has been spilled or objects have fallen into the apparatus, the apparatus has been exposed to rain or moisture, does not operate normally, or has been dropped.
-
To reduce the risk of fire or electric shock, do not expose this appliance to Rain or Moisture.
-
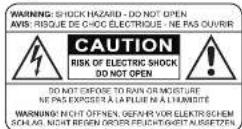
The Shock Hazard Marking and Associated Graphical Symbol is provided on the back of unit.
- Apparatus shall not be exposed to dripping or splashing and no objects filled with liquids, shall be placed on the apparatus.
- The power plug should be close to the radio, and easy to be approached that during the emergency, to disconnect the power from the radio, just unplug the power plug from the AC power slot.
- Notice:
The changes or modifications not expressly approved by the party responsible for compliance could void the user's authority to operate the equipment.
- Where the MAINS plug or an appliance coupler is used as the disconnect device, the disconnect device shall remain readily operable.
- A warning that batteries (battery pack or batteries installed) shall not be exposed to excessive heat such as sunshine, fire or the like.
- To prevent possible hearing damage, do not listen at high volume levels for long periods.
- No naked flame sources, such as lighted candles, should be placed on the apparatus.
Controls and connections
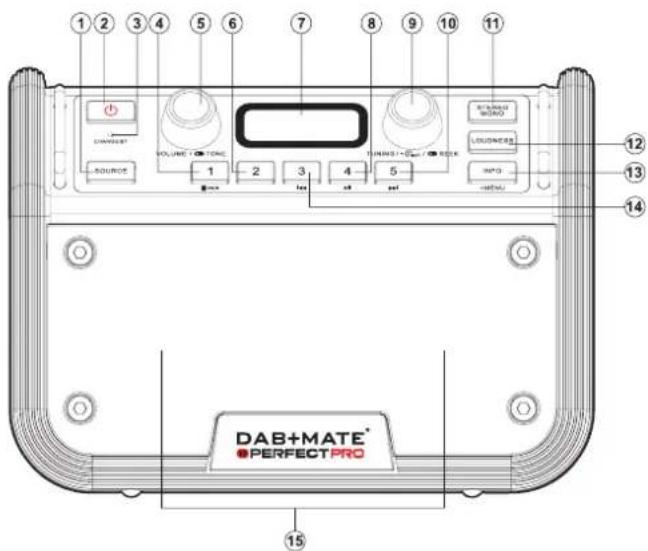
- Source button
- Power On/Off button(Power on/Standby)
- Charging indicator LED/Bluetooth status indicator
- Preset 1/Bluetooth pairing button
- Volume control/Tone control
- Preset 2
- LCD display
- Preset 4/Play & Pause button
- Tuning control knob/Seek/Time setting button
- Preset 5/Fast Forward button
- Stereo/Mono button
- Loudness On/Off button
- Info/Menu button
- Preset 3/Rewind button
- Speakers
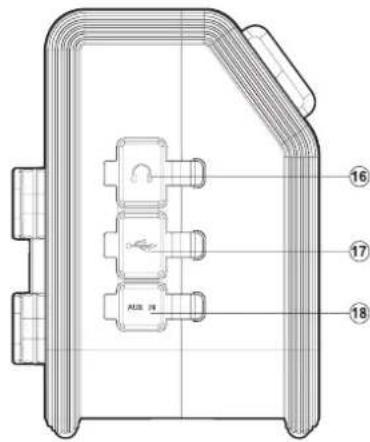
- Headphone socket
- USB socket
- Aux In socket
Controls and connections
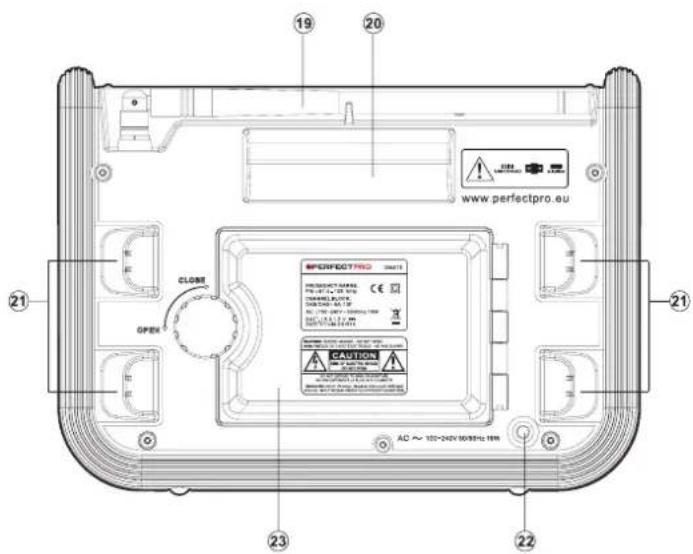
- FM/DAB+ antenna
- Handle
- Power cord storage
- AC power cord
- Battery compartment
Controls and connections
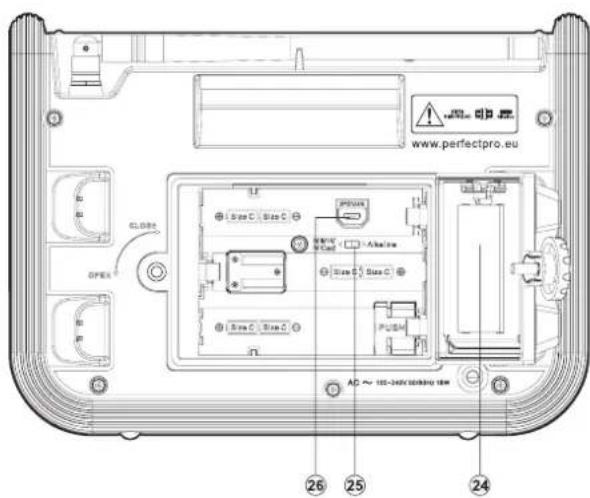
- Storage compartment
- Alkaline/NiMH/NiCad rechargeable battery switch
- Socket for software upgrade
Power the radio
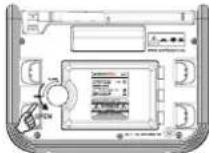
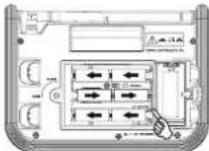
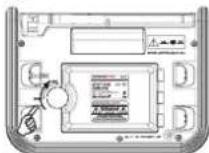
- Installing the batteries, first turn battery cover fixture anti-clockwise to loosen and open the battery cover.
Note:
Before you insert the batteries, if you use non-rechargeable batteries, make sure the NiMH/Alkaline switch is switched to Alkaline position.
- Insert 6 x C size (UM-2) batteries into the compartment. Ensure the batteries are completely inserted in accordance with the diagram shown. Close the battery cover and fasten the fixture by turning clockwise. Reduced power, distortion and a stuttering sound or "Battery Low" showing on the LCD display are all signs that the batteries need replacing or recharging (see below Charging the batteries). Run time of the radio on batteries varies strongly depending on the quality and capacity (mAh) of the batteries, temperature, volume level etc.
3. AC Operation
Before plugging the AC power cord into the AC socket, be sure the voltage is correct. If you have batteries in the radio and connect AC power cord into the AC socket, the batteries will automatically be disconnected.
Power cord storage is designed to store the cord when the radio is not in use.
1.
2.
3.
Charging the batteries
Reduced power, distortion and a "stuttering sound" or low battery sign flashing on the LCD display are all signs that the batteries need recharged if you use rechargeable batteries to power the radio.
Note:
The radio can be charged only when the radio is off. Connect the AC power cord into the AC socket to charge the batteries. Be sure the battery type switch is set to Ni/MH position. When the batteries are being charged, the red Charge LED will be on. Charging time can take up to approx. 10 hours depending on the battery capacity of the rechargeable batteries. When the batteries are fully charged, the charged LED will be steady on green color.
Note:
Charge new batteries fully the first time before first use. Duration for charging your batteries fully can vary according to the mAh capacity of the batteries. Higher mAh batteries require longer charging time.
Important:
Under some conditions the charging LED indicator may switch off after flashing briefly. This may happen if the batteries are already freshly charged, or if the radio detects that you may be attempting to recharge alkaline batteries or mixed different types or capacity of rechargeable battery. In these cases the charging will be stopped.
INSTALL ONLY PRE-CHARGED (TO THE SAME VOLTAGE LEVEL) NIMH BATTERIES WITH "LOW SELF-DISCHARGE" CHARACTERISTICS. USE OF ORIGINAL PERFECTPRO BATTERIES IS HIGHLY RECOMMENDED.
IMPORTANT INFORMATION ON CHARGING AND USING RECHARGEABLE BATTERIES
- Recharge the batteries in any case at least every 2 months.
- Make sure the Battery Select switch inside the battery compartment is set to the "CHARGE NiMH ON" position.
- Put the batteries in the compartment whilst paying attention to the correct polarity of the batteries (+ and -).
- First use: Charge new batteries in one continuous, uninterrupted, charge until they are full. This first charge may take longer than normal. For longer battery life it is advised to always recharge in one continuous, uninterrupted charge until batteries are full and to not recharge again whilst the batteries are still full.
- New batteries will only reach their full capacity after some time of use (several charge - discharge cycles).
- Leave the complete group of batteries in place inside the radio and do not use these batteries or a few of them for other purposes. This will result in a mix of (fully) charged and (partly) empty batteries. This can seriously damage the batteries and radio when recharged.
- It is advised to only charge batteries at room temperatures between 5 degrees C - 35 degrees C. In lower or higher temperatures full charge cannot be achieved.
- Depending on the capacity of the batteries, charging from "empty" to "full" can take several hours, even up to 10 hours or more.
- Do not charge batteries when the radio is hot or exposed to heat or heat sources.
- It is advised to clean the metal contacts of the batteries and of the charger inside the radio e.g. with a contact-spray from time to time.
- Do not use a mix of old and new rechargeable batteries.
-
Do not use a mix of rechargeable and non-rechargeable batteries.
-
Do not use a mix of full and empty rechargeable batteries.
- Do not use batteries that have a different mAh capacity.
- Do not use damaged, deformed or leaking batteries.
- Battery level indication is an approximate indication only and can vary with battery type used.
- Batteries can become hot during charging.
- In cold conditions the capacity of batteries will be much lower than when used at normal room temperature.
- Batteries (even when supplied with the radio), as being consumables, do not fall under the warranty conditions of the radio.
- It is advised to use Perfectpro rechargeable batteries as the radio and its charger were developed for use with these batteries.
Using the radio for the first time
- Place your radio on a flat surface.
- Straighten up the antenna.
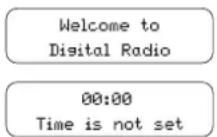
- Plug the AC power cord into an AC socket. The display will show "Welcome to Digital Radio" for a few seconds. After short time, the current time will appear on the display.
- If no time is displayed, the screen will show "00:00". Press the Power On/Off button to turn on your radio and it will find a DAB clock radio stations. It may be necessary to relocate your radio to a position giving better reception and carry out a scan to find stations as described in later sections.
IMPORTANT:
The mains plug is used as the means of connecting the radio to the mains supply. The mains socket used for the radio must remain accessible during normal use. In order to disconnect the radio from the mains completely, the mains plug should be removed from the mains outlet completely.
Operating your radio - DAB
- Straighten the antenna properly which is for both DAB and FM reception. Press the Power On/Off button to switch on your radio.
- Press the Source button to select DAB band.
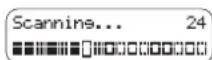
- If this is the first time the radio is used, a quick scan of Band III DAB channels will be carried out. If the radio has been used before, the last used station will be selected.
- During Autotune, as new stations are detected, the station counter on the right hand side of the display will increase and stations will be added to the list. The display shows a bar graph indicating progress of autotune.
- When the Autotune is completed, the first station (in numeric-alpha order 0...9...A...Z) will be selected.
- If the station list is still empty after the Autotune, your radio will display "No DAB Station".
- If no signals are found, it may be necessary to relocate your radio to a position giving better reception.
Note:
That radio station name and frequency displays shown in this user guide may differ from those that you see on your radio. Broadcasters may change radio station names that are transmitted, and the frequencies used for DAB and FM radio stations may not be the same in all parts of the country.
Selecting a station - DAB
- Press the Power On/Off button to switch on your radio.
- Press and release the Source button until the DAB mode is selected. The display will show the name of the radio station currently selected.
- Rotate the Tuning control knob to scroll through the list of available stations.
- Press and release the Tuning control knob to select the station. The display may show "Connecting..." while your radio finds the new station.
- Adjust the Volume control to the required setting.
Note:
If after selecting a station, the station is not found it may be necessary to relocate your radio to a position giving better reception.
Secondary service - DAB
- Certain radio stations have one or more secondary services associated with them. If a station has a secondary service associated with it, the display will show “>>” next to the station name on the station list. The secondary service will then appear immediately after the primary service as you rotate the Tuning control knob.
- Press and release the Tuning control knob to select the station. Most secondary services do not broadcast continually and if the selected service is not available, the radio will re-tune to the associated primary service.
DAB
Station list Radio 2
BBC Radio 2 Connectins...
Display mode - DAB
Your radio has a range of display options when in DAB mode:
- Press and release the Info/Menu button to cycle through the various modes.
a. Scrolling text (DLS) displays scrolling text messages such as artist/track name, phone in number, etc.
b. Signal strength displays the signal strength of radio reception. The clear unfilled rectangle indicates minimum signal level required for satisfactory reception.
c. Program type displays type of station being listened to e.g. Pop, Classic, News etc.
d. Multiplex name displays name of multiplex to which current station belongs.
e. Channel & frequency displays current channel and frequency.
f. Bit rate / audio type displays the digital bit rate and the audio type for the currently tuned DAB station.
g. Battery level displays current battery level of using batteries operation. (If using AC power cord operation, no battery level is shown on the screen.)
h. Time displays the current time.
i. Date displays the current date.
Finding new stations - DAB
- To carry out a full scan of the entire DAB Band III frequencies press and hold the Info/Menu button. The display will show "Full scan".
- Press and release the Tuning control knob to confirm setting. As new stations are found, the station counter on the right hand side of the display will increase and stations will be added to the list.
sunshine live electronic music
sunshine live
sunshine live
Pop Music
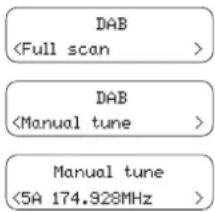
Manual tuning allows you to tune directly to the various DAB band III channels.
- Press and hold the Info/Menu button for 2 seconds, display will show "Full scan".
- Rotate the Tuning control knob to find "Manual tune". Press and release the Tuning control knob to enter DAB channels in the list. Rotate the Tuning control knob to select required DAB channel. When required DAB channel is found, press and release the Tuning control knob to select the required DAB channel.
Dynamic Range Control (DRC) setting - DAB
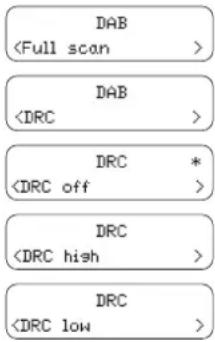
DRC can make quieter sound easier to hear when your radio is used in a noisy environment.
- In DAB band, press and hold the Info/Menu button for 2 seconds, display will show "Full scan".
- Rotate the Tuning control knob to find "DRC". Press and release the Tuning control knob to enter adjustment mode.
- Rotate the Tuning control knob to select required DRC setting (default is off).
DRC off DRC is switched off, Broadcast DRC will be ignored.
DRC high DRC is set as sent by broadcaster.
DRC low DRC level is set to 1/2 that sent by broadcaster.
- Press and release the Tuning control knob to confirm the setting.
Note:
Not all DAB broadcasts are able to use the DRC function. If the broadcast does not support DRC, then the DRC setting in the radio will have no effect.
Prune stations
If you move to a different part of the country, some of the stations which were listed may no longer be available. Also from time to time, some DAB services may stop broadcasting, or may change location or frequency. Stations which cannot be found, or which have not been received for a very long time are shown in the station list with a question mark. The prune stations function will delete the marked DAB stations from your station list.
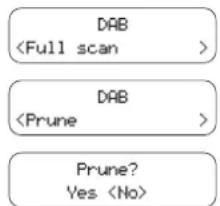
- Press and hold the Info/Menu button and the display will show "Full scan".
- Rotate the Tuning control knob to find "Prune". Press and release the Tuning control knob to enter adjustment mode. Then rotate the Tuning control knob to select "Yes" or "No". To activate the Prune function select "Yes", and press and release the Tuning control knob to confirm the setting.
- If you do not wish to prune stations, select "No" and then press and release the Tuning control knob to confirm the setting.
Note:
If you have moved your radio to a different part of the country you should also carry out a search for new stations (please see the section 'Finding new stations').
Operating your radio - FM
- Straighten the antenna properly above the radio. Press the Power On/Off button to switch on your radio.
- Press the Source button to select FM waveband.
- To scan up in frequency, first rotate the Tuning control knob in a clockwise direction and then press the Tuning control knob. Your radio will scan in an upwards direction (low frequency to high frequency) and stop automatically when it finds a station of sufficient strength. To scan down in frequency, first rotate the Tuning control knob in a anti-clockwise direction and then press the Tuning control knob within 10 seconds. Your radio will scan in a downwards direction and stop automatically when it finds a station of sufficient strength. After a few seconds the display will update. The display will show the frequency of the signal found. If the signal is strong enough and there is RDS data present then the radio will display the station name.
- When the waveband end is reached, your radio will recommence tuning from the opposite waveband end.
- Adjust the Volume control to the required setting.
- To switch off your radio, press the Power On/Off button.
Manual tuning - FM
- Press the Power On/Off button to switch on your radio.
- Press the Source button to select FM waveband.
- Rotate the Tuning control knob to tune to a station. The frequency will change in steps of 100kHz . When the waveband end is reached, the radio will recommence tuning from the opposite waveband end.
- Adjust the Volume control to the required setting. To switch off your radio, press the Power On/Off button.
Display Modes - FM
On FM the bottom line of the display can be set to any of the following modes:
- Press and release the Info/Menu button repeatedly to cycle through the various modes.
a. Radio text displays scrolling text messages such as artist/track name, phone in number etc.
b. Program type displays type of station being listened to e.g. Pop, Classic, News, etc.
c. Frequency displays the frequency of the station being listened to.
d. Audio type displays the audio type for the currently tuned FM station.
e. Signal strength displays the signal strength for the station being listened to.
f. Battery level displays current battery level of using batteries operation.(If using AC power cord operation, no battery level is shown on the screen.)
g. Time displays the current time.
h. Date displays the current date.
Note:
If no RDS information is available, the radio will be unable to display the station name, scrolling text and program type information.
U.H.B.N
[No RadioText]
U.H.B.N
News
U.H.B.N
106.50MHz
U.H.B.N
Stereo
U.H.B.N
SGLO
U.H.B.N
Bat. level
U.H.B.N
2:18PM
U.H.B.N
8-9-2016
U.H.B.N
Stereo / Mono switching
If the FM radio station being listened to has a weak signal, some hiss may be audible. It is possible to reduce this hiss by forcing the radio to play the station in mono rather than stereo.
- Press the Source button as needed to select FM radio mode and tune to the required FM station as previously described.
- Press the Stereo/Mono button to switch to mono or stereo.
Scan sensitivity setting - FM
Your radio will normally scan for FM broadcasts which are strong enough to give good reception. However, you may wish the Auto-scan function to also be able to find weaker signals, possibly from more distant radio transmitters.
Your radio includes "Strong stations only" and "All Stations" options for the Auto-scan function.
- Press the Power On/Off button to switch on your radio.
- If needed, press and release the Source button until the FM band is selected.
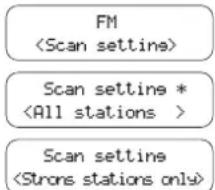
- Press and hold the Info/Menu button to access FM menu. Rotate the Tuning control knob until "Scan setting" shows on the display. Press and release the Tuning control knob to enter the scan sensitivity adjustment mode. The current setting will be marked with an asterisk.
- Rotate the Tuning control knob to switch between "Strong stations only" and "All Stations" options on the lower line of the display. The "All Stations" option will allow the radio to find weaker signals when scanning.
- Press and release the Tuning control knob to confirm your selection. The setting is stored in the radio and remains in force until changed or until a System Reset.
Preset stations in DAB and FM modes
There are 5 memory presets for each DAB/FM wavebands.
- Press the Power On/Off button to switch on your radio.
- Tune to the required station as previously described.
- Press and hold the required Preset button until the display shows e.g. Preset 1 stored. The station will be stored under the chosen preset button. The corresponding preset number e.g. "P1" will show on the display. Repeat this procedure for the remaining presets.
- Station stored in the memories may be over written by following the above procedure.
Recall a preset in DAB and FM modes
- Press the Power On/Off button to turn on the radio.
- Press the Source button to select the required waveband.
- Momentarily press the required Preset button, the preset number and station will appear in the display.
Note:
The display will show "Preset Empty" if no station has been stored to that preset.
Preset 1
stored
87.50MHz [No RadioText]
Listening to music via Bluetooth streaming
You need to pair your Bluetooth device with your DAB+MATE before you can auto-link to play/stream Bluetooth music through your DAB+MATE. Pairing creates a 'bond' so the two devices can recognize each other.
Pairing and playing your Bluetooth device for the first time
- Press the Power On/Off button to switch on your radio and press the Source button to select Bluetooth function. "Bluetooth Pairing" will show on the display. The Bluetooth status indicator on the radio will flash a fast blue to show the radio is discoverable.
- Activate Bluetooth on your device according to the device's user manual to link to the radio. Locate the Bluetooth device list and select the device named 'DAB+MATE' (With some Smartphone's that are equipped with earlier versions than BT2.1 Bluetooth device, you may need to input the pass code "0000").
- Once connected, there will be a confirmation tone sound and the name of your connected Bluetooth device will show on the display. The Bluetooth status indicator will turn a solid blue. You can simply select and play any music from your source device. The volume control can be adjusted from your source device, or directly from the radio.
- Use the controls on your Bluetooth-enabled device or on the radio to play/pause and navigate tracks.
Note:
1). If 2 Bluetooth devices are pairing for the first time, both will search for your radio, it will show its availability on both devices. However, if one device links with this unit first, then the other Bluetooth device will not find it on the list.
2). If you take your source device out of range, the connection will be temporarily disconnected to your radio. Your radio will automatically reconnect if the source device is brought back in range. Be aware that during the period of disconnection, no other Bluetooth device can pair or link with your radio.
3). If 'DAB+MATE' shows in your Bluetooth device list but your device cannot connect with it, please delete the item from your list and pair the device with the radio again following the steps described previously.
4). The effective operation range between the system and the paired device is approximately 10 meters (30 feet). Any obstacle between the system and the device can reduce the operational range.
5). Bluetooth connectivity performance may vary depending on the connected Bluetooth devices. Please refer to the Bluetooth capabilities of your device before connecting to your radio. All features may not be supported on some paired Bluetooth devices.
6). With some mobile phones, making/receiving calls, text messages, e-mails or any other activities unrelated to audio streaming may mute the Bluetooth audio streaming or even temporarily disconnect from your device. Such behavior is a function of the connected device and does not indicate a fault with your DAB+MATE.
Display modes - Bluetooth
Your DAB+MATE has a range of display options when in Bluetooth mode. Note that the availability of information depends on the specific media format.
- Press and release the Info/Menu button to cycle through the different options.
a. Track status Displays the current status of the track.
b. Track name Displays the track information for the track currently playing.
c. Artist Displays the artist information for the track currently playing.
d. Album Displays the album information for the track currently playing.
e. Battery level Displays current battery level of using batteries operation. (If using AC power cord operation, no battery level is shown on the screen.)
f. Time Displays the current time.
g. Date Displays the current date.
Playing audio files in Bluetooth mode
When you have successfully connected your radio with the chosen Bluetooth source device you can start to play your music using the controls on your connected Bluetooth device.
- Once playing has started adjust the volume to the required setting using the Volume control on your radio or on your enabled Bluetooth source device.
- Use the controls on your Bluetooth source device to play/pause and navigate tracks. Alternatively, control the playback using Play/Pause (4), Next track (5), Previous track buttons (3) on your radio.
- Press and hold the Fast-forward/Rewind button to move through the current track. Release the button when the desired point is reached.
Note:
Not all player applications or devices may respond to all of these controls.
H39-U10
H30-U10
Waitine For You
H30-U10
Isobel Anderson
H30-U10
In My Garden
H30-U10
Bat. level
H30-U10
16:55
H30-U10
4-10-2016
H30-U10
Playing a previously-paired Bluetooth source device
The DAB+MATE can memorize up to 2 sets of paired Bluetooth source devices, when the memory exceeds this amount, the earliest paring device will be over written from the device.
If your Bluetooth source device already paired with the DAB+MATE previously, the unit will memorize your Bluetooth source device and it attempts to reconnect with a Bluetooth source device in memory which is last connected. If the last connected Bluetooth source device is not available, the DAB+MATE will try to connect to the second last Bluetooth source device.
Disconnecting your Bluetooth device
- Press and hold the Bluetooth pairing button for 2-3 seconds to disconnect with your Bluetooth device or turn off Bluetooth on your Bluetooth source device to disable the connection. There will be a confirmation tone sound and the "Bluetooth Pairing" will show on the display. The Bluetooth status indicator on the radio will flash a fast blue to show the radio is discoverable again for pairing.
- You can also press the Source button to select any mode other than Bluetooth mode to disable the connection.
Loudness On/Off
When the radio is switched on, press the Loudness On/Off button to get compensation on lower and higher frequency. The effect will be more audible when the radio is in lower volume level. Display will show "Loudness on" when Loudness function is applied.
Loudness on
Equalizer function
- Press the Power On/Off button to switch on your radio.
- Press and hold the Volume/Tone control to enter the EQ setting menu.
- Rotate the Volume/Tone control to select your required mode. Then press the Volume/Tone control to confirm the selection.
EQ: Flat
EQ: Rock
EQ: Jazz
EQ:POP
EQ: Spoken
EO: Outdoor
Set up My EQ profile
- Press and hold the Volume/Tone control to enter the EQ setting menu.
- Rotate the Volume/Tone control to select "My Setting". Then press the Volume/Tone control to enter the setting.
- Rotate the Volume/Tone control to select your required Treble level (between -5 and +5). Then press the Volume/Tone control to enter Bass level setting.
- Rotate the Volume/Tone control to select your required Bass level (between -5 and +5). Then press the Volume/Tone control to confirm the setting.
EQ: My Setting
Treble+5 Bass 0
SAFETY AND COURTESY NOTE:
To prevent possible hearing damage, do not listen at high volume levels for long periods or put your ears too close to the speaker.
Please use the volume level responsibly with respectable consideration of the situation and other people or animals in the vicinity.
Clock time setting
Setting the time format
- Press the Power On/Off button to turn on the radio.
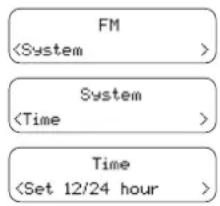
- Press and hold the Info/Menu button to access the menu for the current mode. Rotate the Tuning control knob to select "System" and press the Tuning control knob to enter the system settings menu.
- Rotate the Tuning control knob to select "Time" and press the Tuning control knob to enter the setting.
- Rotate the Tuning control knob to select "Set 12/24 hour" and press the Tuning control knob to enter the setting.
- Rotate the Tuning control knob to select 12 or 24 hour format and press the Tuning control knob to confirm the setting. The selected format is used in standby mode and on the playing mode screen. If the 12 hour clock format is chosen, the radio will then use the 12 hour clock with an AM or PM indicator.
Setting the date format
- Press the Power On/Off button to turn on the radio.
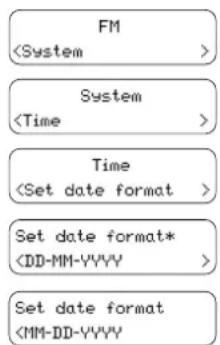
- Press and hold the Info/Menu button to access the menu for the current mode. Rotate the Tuning control knob to select "System" and press the Tuning control knob to enter the system settings menu.
- Rotate the Tuning control knob to select "Time" and press the Tuning control knob to enter the setting.
- Rotate the Tuning control knob to select "Set date format" and press the Tuning control knob to enter the setting.
- Rotate the Tuning control knob to select "DD-MM-YYYY" or "MM-DD-YYYY" date format and press the Tuning control knob to confirm the setting.
Automatically updating the clock
Your radio will normally update the clock automatically using the DAB or FM signal. If no signal is available, then you need to set the time manually. After a power failure the radio will then set its clock the next time that you turn on the radio in DAB or FM mode. Alternatively you may specify that the time is not automatically updated. In this case the clock must always be set manually after a power interruption.
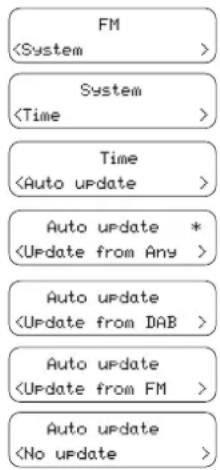
- With your radio switched on, press and hold the Info/Menu button to access the menu for the current mode.
- Rotate the Tuning control knob to select "System" and press the Tuning control knob to enter the system settings menu.
- Rotate the Tuning control knob to select "Time". Press the Tuning control knob to enter the time setting menu.
- Rotate the Tuning control knob to select "Auto update" and press the Tuning control knob to enter the setting.
- Rotate the Tuning control knob to choose an update option from "Update from Any" "Update from DAB" "Update from FM" or "No update" as required. Press the Tuning control knob to confirm your choice.
Note:
If you select "Update from Any", "Update from DAB", "Update from FM" the current time received will be displayed. If no signal is found you should either position the radio or its aerial so that a signal can be received, or revert to manual clock mode.
Setting the clock manually
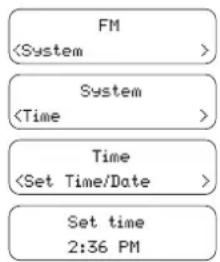
- With your radio switched on, press and hold the Info/Menu button to access the menu for the current mode.
- Rotate the Tuning control knob to select "System" and press the Tuning control knob to enter the system settings menu.
- Rotate the Tuning control knob to select "Time". Press the Tuning control knob to enter the time setting menu.
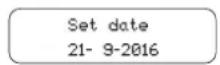
- Rotate the Tuning control knob to select "Set Time/Date" and press the Tuning control knob to enter the setting. The hour digits will flash on the display. Rotate the Tuning control knob to set the desired hour.
- Press the Tuning control knob. The minute digits will flash on the display. Rotate the Tuning control knob to set the desired minute.
Note:
If the radio has been set to use a 12 hour format, there will be an option here for setting AM or PM for the clock time. Rotate the Tuning control knob to select AM or PM. Press the Tuning control knob to confirm the setting.
6. If the radio has been set to use a DD-MM-YYYY date format (for example). The day will flash on the display. Rotate the Tuning control knob to change the day as needed.
7. Press the Tuning control knob. The month will flash on the display. Rotate the Tuning control knob to set the current month.
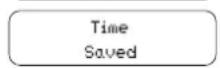
8. Press the Tuning control knob. The year will flash on the display. Rotate the Tuning control knob to set the current year. Then press the Tuning control knob to confirm the setting. The display will show "Time Saved".
Note:
If the radio has been set to use a MM-DD-YYYY date format, follow the steps above to set the month/day/year setting.
Note:
When the radio is in standby mode, you can also press and hold the Time setting button to enter the time/date setting.
Language selection
By default your radio will display all menus and messages in English. You can choose your preferred language.
- Press the Power On/Off button to switch on your radio.
- Press and hold the Info/Menu button to access the menu for the current mode.
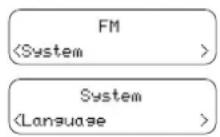
- Rotate the Tuning control knob to select "System" and press the Tuning control knob to enter the system settings menu.
- Rotate the Tuning control knob to select "Language" and press the Tuning control knob to enter the language adjustment menu.
- Rotate the Tuning control knob until your desired language appears on the display. Press the Tuning control knob to confirm your choice. The display will change to the chosen language. The chosen language will be marked with an asterisk.
Factory reset
If your radio fails to operate or some digits on the display are missing or incomplete, carry out the following procedure.
- Press the Power On/Off button to switch on your radio.
- Press and hold the Info/Menu button to access the menu for the current mode.
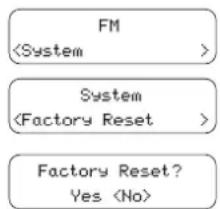
- Rotate the Tuning control knob to select "System" and press the Tuning control knob to enter the system settings menu.
- Rotate the Tuning control knob to select "Factory Reset" and press the Tuning control knob to enter the setting.
- Rotate the Tuning control knob to select "Yes" or "No". If you do not wish to carry out a system reset, select "No" and then press the Tuning control knob to confirm the setting.
- With "Yes" selected, press the Tuning control knob. A full reset will be performed. All preset and station lists will be erased. All settings will be set to their default values. After a system reset, the radio will be restarted. The display will show "Welcome to Digital Radio" and a scan of the DAB band III will be performed. In case of malfunction due to electrostatic discharge, reset the product (reconnection of power source may be required) to resume normal operation.
Socket for software upgrade
From time to time, new software features for your radio may be developed. Your radio has therefore been designed to allow its internal software to be updated using your USB upgrade port. You should not attempt to update your radio unless it is recommended to you by Perfectpro Customer Services. Updating the software may remove all radio station presets and settings from your radio.
Software updates for your radio may be available in the future. As software updates become available software and information on how to update your radio can be found at: www.perfectpro.eu For more information, please contact our Head Office by sending an email to info@perfectpro.eu
- Using the micro USB cable (not supplied) to connect the USB socket in the battery compartment and your PC.
- With your radio switched on, press and hold the Info/Menu button to access the menu for the current mode.
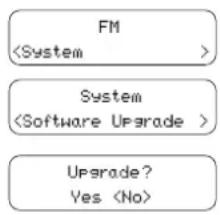
- Rotate the Tuning control knob to select "System" and press the Tuning control knob to enter the system settings menu.
- Rotate the Tuning control knob to select "Software Upgrade" and press the Tuning control knob to enter the setting.
- Rotate the Tuning control knob to select "Yes" or "No". If you do not wish to carry out a software upgrade, select "No" and press the Tuning control knob to confirm the setting.
- With "Yes" selected, press the Tuning control knob. The display will show "Waiting for PC wizard".
- Go to the website above to download the latest software. Follow the on-screen instructions on your PC provided with the upgrade software to complete the software upgrade.
Note:
Please use AC power cord as main power when upgrading software. Do not switch off the power to the radio until the update operation is complete and the radio has restarted, otherwise the unit may become permanently damaged.
Software version
The software display cannot be altered and is just for your reference.
- With your radio switched on, press and hold the Info/Menu button to access the menu for the current mode.
- Rotate the Tuning control knob to select "System" and press the Tuning control knob to enter the system settings menu.
- Rotate the Tuning control knob until "SW version" appears on the display and press the Tuning control knob. The software version shows on the display.
- Press and release the Info/Menu button to exit the software version display.
LCD illumination
When using the batteries to power the radio and the radio is switched on, pressing any button except the Power On/Off button will illuminate the LCD display for approx. 10 seconds. However if you use AC cord to power the radio, the LCD display will be always illuminated until you turn the radio off by pressing Power On/Off button.
Headphone socket
A 3.5mm headphone socket located on the left hand side of your radio is provided for use with headphones. Inserting a plug automatically mutes the internal loudspeakers.
Please be aware that the sensitivity of headphones can vary widely. We therefore recommend setting volume to a low level before connecting headphones to the radio. It is also recommended to reduce the volume before unplugging your headphones.
IMPORTANT:
Excessive sound pressure from earphones and headphones can cause hearing loss.
To prevent possible hearing damage, do not listen at high volume levels for long periods.

Charging MP3 player or mobile phone
DAB+MATE is capable of charging a MP3 media player or mobile phone via USB slot when the radio is in power on or standby mode and in DAB/ FM, Bluetooth, AUX IN mode.
Note:
The USB socket can offer 5V 1A power to charge external device by AC power or batteries power. It is recommended to use AC power to power the radio while charging MP3 media device or mobile phone via USB slot. Battery is also able to charge the device, however using the battery to charge the device will consume much energy and drain the battery easily. The USB charging may not support the entire iPod and iPhone range.
Note:
Charging the mobile phone (for example) or other devices may affect the listening quality while listening to the DAB/FM radio.
Auxiliary input socket
The 3.5mm Aux In socket is to connect audio source like MP3 player on CD walkman and listen the audio program via radio speaker.
- Connect a stereo or mono audio source (like CD walkman or MP3 player) to the Aux In socket, which is located on the side, behind the rubber cover.
- Press the Power On/Off button to switch on your radio.
- Press the Source button until "AUX IN" mode is shown on the display.
- Play the file in the CD walkman or MP3 player.
- Adjust the volume control to the required level.
Note:
Make sure the rubber covers of the headphone/USB/Aux In sockets are closed well after use to prevent moist and dirt from entering the radio. Never use the headphone/USB/Aux In sockets in rainy or moist conditions to prevent moist from entering the radio. Keep the rubber covers always closed under these conditions.
WARRANTY
This radio has a 2 year limited warranty.
WARNING! Warranty becomes void once the radio cabinet has been opened or any modifications or alterations to the radio have been made!
The terms of the warranty of this radio do not cover the following:
- Damage caused by misuse, abuse, neglect, alterations, accidents or unauthorized repair.
Normal wear and tear. - Batteries
Never open the device casing. The manufacturer will not accept any liability for damage resulting from improper handling. The type plate is located on the back of the device.
Specifications
Power Requirements
AC Power: AC 100-240V 50/60Hz 18W
Batteries: 6 x UM-2(C size, LR14)
Alkaline or NiMH/Nicad battery
Frequency Coverage:
FM 87.50-108MHz
DAB 174.928 - 239.200 MHz
Electronic features:
Speaker: 3^ 2 8 ohm, 12W full range waterproof-stereo
Output Power: 3W+3W 10% T.H.D. @ 1 kHz @ battery 9V
5W+5W 10% T.H.D. @ 1 kHz @ AC 100 - 240V
Rechargeable current of charger: 730mA
Aux-IN level:Typical 1.5V THD=3%
Maximum supplying power of USB socket: 5V/1A
The product definition operating temperature is from -10^ to +45^ .
Bluetooth
Bluetooth specification Bluetooth® Ver 4.1
Profile Support A2DP 1.2, AVRCP 1.5
Bluetooth Audio CODEC SBC,AAC
Transmitting Power Power Class 2
Line of sight range 10 meters/30 feet
Frequency and maximum
transmitted power: 2402-2480MHz: -1.96 dBm (Bluetooth EDR)

The company reserves the right to amend the specifications without notice.
If at any time in the future you should need to dispose of this product please note that: Waste electrical products should not be disposed of with household waste. Please recycle where facilities exist. Check with your Local Authority or retailer for recycling advice. (Waste Electrical and Electronic Equipment Directive)

Bluetooth
Welcome to Digital Radio
00:00 Time is not set
Scannins... 24
Station list Radio 2
BBC Radio 2 Connectins...
Weergave opties - DAB
sunshine live electronic music
sunshine live
sunshine live
Pop Music
Dynamic Range Control (DRC) - DAB
Output Power: 3W+3W 10% T.H.D. @ 1 kHz @ Alkaline/NiMH 9V
7W+7W 10% T.H.D. @ 1 kHz @ AC 100-240V
Stroom oplader: 730mA
Aux-in-niveau: Nominal 1.5V THD=3%
Maximum stroom USB: 5V/1A
Welcome to Digital Radio
00:00 Time is not set
Scannins... 24
Station list Radio 2
BBC Radio 2 Connectins...
Display-Modi - DAB
sunshine live electronic music
sunshine live
sunshine live
Pop Music
3W+3W 10% T.H.D. @ 1 kHz @ Alkali-/Ni-MH-Akku, 9V
5W+5W 10% T.H.D. @ 1 kHz @ AC 100 - 240V
Strom des Ladegerats: 730mA
Welcome to Digital Radio
00:00 Time is not set
Scannins... 24
Station list Radio 2
BBC Radio 2 Connectina...
sunshine live electronic music
sunshine live
sunshine live Pop Music
Réglages Dynamic Range Control (DRC) - DAB
Radio FM Stereo/Mono
Puisance de transmission Power Class 2
Portee du Bluetooth: 10 metres/30 pieds
Fréquence et max.
puissance de transmission: 2402 - 2480MHz: -1.96 dBm (Bluetooth EDR)
3 Watt + 3 Watt 10% T.H.D. @ 100Hz @ DC battery 9V
5 Watt + 5 Watt 10% T.H.D. @ 100Hz @ AC 100 - 240V