Adventure 624 - Bike rack Green Valley - Free user manual and instructions
Find the device manual for free Adventure 624 Green Valley in PDF.

User questions about Adventure 624 Green Valley
0 question about this device. Answer the ones you know or ask your own.
Ask a new question about this device
Download the instructions for your Bike rack in PDF format for free! Find your manual Adventure 624 - Green Valley and take your electronic device back in hand. On this page are published all the documents necessary for the use of your device. Adventure 624 by Green Valley.
USER MANUAL Adventure 624 Green Valley
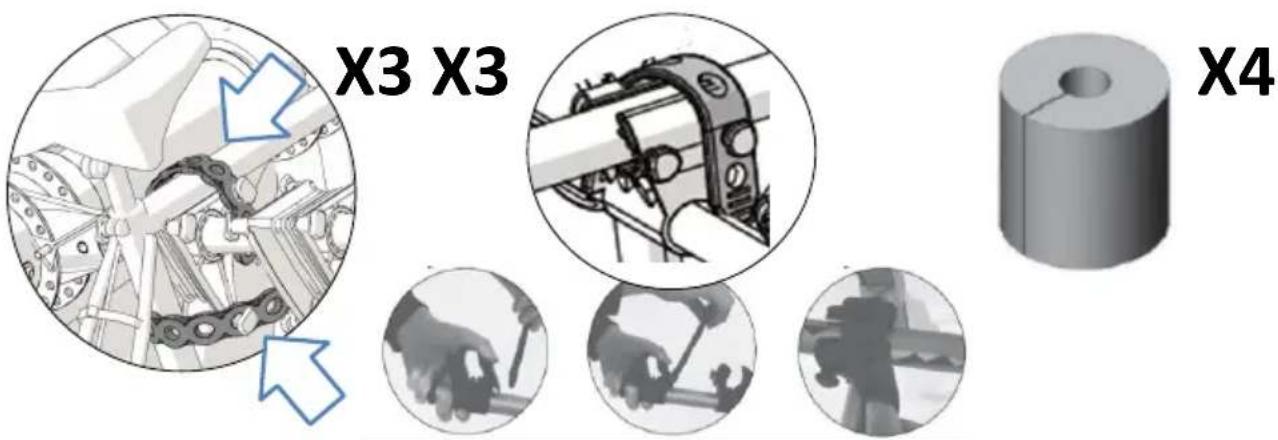
Assembly instrucons: 14
FR
Follow the assembly instrucons and instrucons for use listed in the document supplied. Keep these instrucons in a safe place for future reference.
1. General informaon
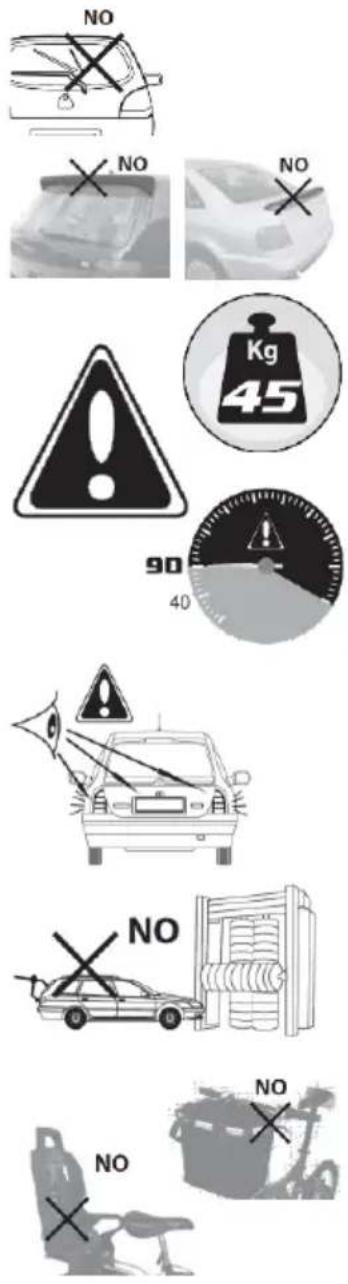
You must make sure that the bike rack is compatible with your vehicle (refer to the applicaon list).
- You must make sure that the bike rack is suitable for your vehicle and that the bike rack and bikes are correctly and rmly secured to it.
- Do not use your vehicle's rear windscreen wiper when the bike rack is used.
- Make sure that the bike rack and straps do not come into contact with any aerodynamic devices (spoilers, wings, rear view camera).
- During long trips, frequently and regularly check the ghtness of the fastening straps on the bike rack and make sure that the bikes are securely in place.
- The maximum capacity of this bike rack is 45kg (3 bikes). Never exceed this capacity.
- Limit your maximum speed to 90km / h
- This bike rack is not designed to be permanently installed on vehicles. Remove it when not in use.
- Remove the bike rack before entering an automac car wash.
- Your vehicle's number plate and taillights must not be hidden by the bike rack. If need be, aach an extra rear number plate and taillights to the bike rack (third brake light and reversing light excepted). All taillights must meet current applicable regulaons. Always follow the highway code.
- Bikes must be correctly secured to the rack using the fasteners supplied.
- The bike rack will act your vehicle's driving and handling behavior (sensitivity to side winds, behaviour when negoang corners and bends and during braking), particularly when it is loaded. Adjust your driving to these changes. We strongly advise you to slow down on corners and bends and to bear in mind that braking distances are longer.
It is important to keep the bike rack in proper condion. - Place the heaviest bike onto the rack rst (closest to your vehicle).
- Remove all accessories from bikes (child seats, baskets, bags, water boles) before placing them on the bike rack.
2. Mounting the bike rack on your vehicle
A. First clean the outside of your vehicle. This will avoid scratching the rack and your vehicle's nish.
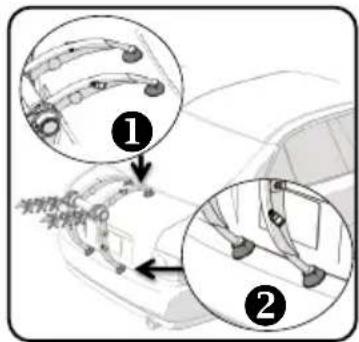
B. Install the bike carrier on the trunk by correctly placing upper and lower foot on structurally sound place so that the bikes are as far as possible from your
vehicle's bodywork. Make sure that the boom (2) and top (1) feet are rmly against your vehicle. If your vehicle has a hatchback, the boom foot (2) must be rmly against the bodywork and the top foot (1) must be posioned against the rear window. If your vehicle has a boot, the boom foot (2) and the top foot (3) must be rmly against the boot.
C. Place aach the hooks on the two top straps (3) to the top edge of the boot or hatchback*. Adjust the straps (3) before placing the bike rack.
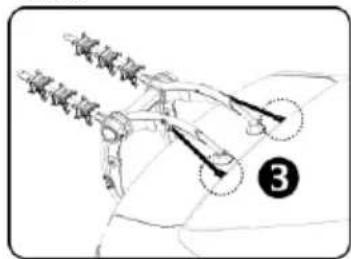
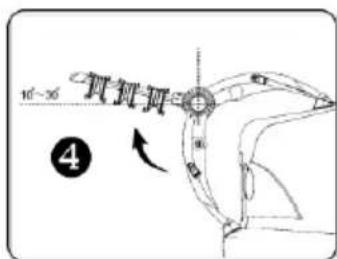
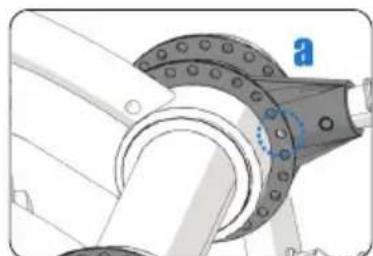
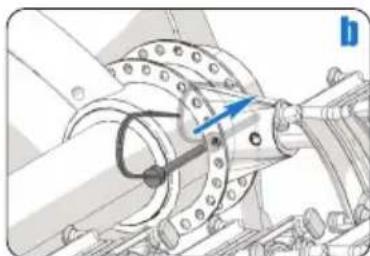
D. Adjust the arm (4) to an angle of 10 to 30 degrees above the horizontal.Insert the security pin through the hubs and the arm properly
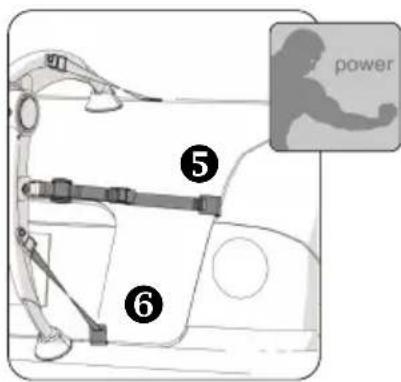
E. Fasten the boom straps (6) to the boom edge of the boot or hatchback.
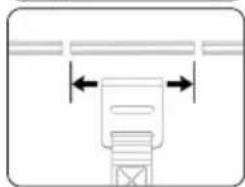
F. Fasten the side straps (5) in a correct posion* on the side of the boot, hatchback. While installing the bike rack, repeatedly check that the rack is correctly centred on the rear of your vehicle and that the straps are symmetrical.
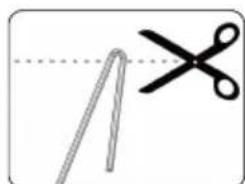
If necessary, cut enclosed rubber into the length wider than hook inser the rubber to door edge; then put the hook on. Make sure the strap is reghtened aer bikes mounted.
-
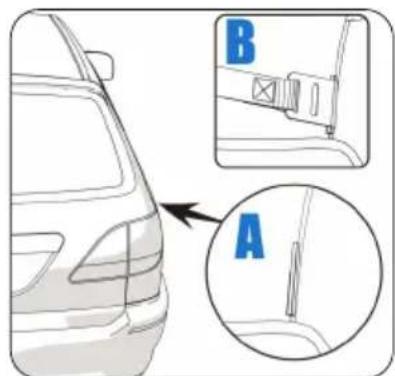
CAUTION: ALWAYS FASTEN THE STRAPS TO METAL EDGES ON YOUR VEHICLE (GENERALLY THE INSIDE OF THE BOOT OR HATCHBACK). NEVER FASTEN THEM TO HATCHBACK WINDOWS, RUBBER/PLASTIC PARTS OR VEHICLE TRIM.
-
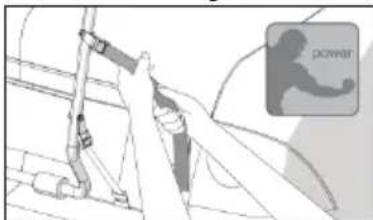
The straps must be as taut as possible and never twisted. Progressively ghten each strap alternately and equally. Make sure that the bike rack is centred and securely in place whilst doing so.
- Make sure that the rubber pads are in firm contact with your vehicle's bodywork.
3. Loading bikes on the bike rack
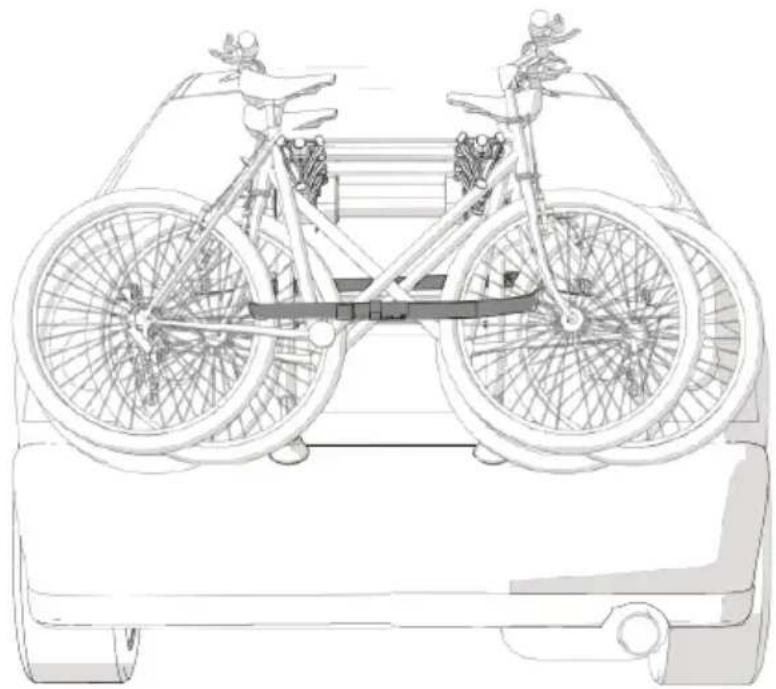
A. Load bikes in alternang direcons on the plasc cradles so as to have the lowest possible centre of gravity.

B. Secure the bikes to the bike rack with the rubber straps Also bikes holder can be rotaded to the best angle for mounng bikes Make sure that the bikes are not touching your vehicle's bodywork. To prevent the bikes from rubbing against the bike rack, insert the split foam cushions.
C. Aer loading bikes on the bike rack, reghten all the straps (5, 6, 7) and e the excess lengths into
ght knots at the booms of the loops to prevent them from.
apping in the wind.
D. Use the extra strap (8) to secure bike tyres/frames to the bike rack and prevent the bikes from swaying while on the road.
WARNING: THE DRIVER OF THE VEHICLE IS RESPONSIBLE FOR PROPERLY SECURING THE LOAD BEING TRANSPORTED. FREQUENTLY CHECK TH EBIKES AND BIKERACK WHILE ON THE ROAD.