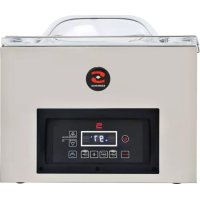
V641 T - Vacuum packaging machines Sammic - Free user manual and instructions
Find the device manual for free V641 T Sammic in PDF.
| Product Type | Vacuum Packing Machine |
| Brand | Sammic |
| Model | V641 T |
| Power Supply | 230 V single-phase or 230/400 V three-phase (depending on version) |
| Main Functions | Vacuum time programming (0-99 s), welding time (0-7 s), air return, hour counter, LED display, VAC-NORM function for containers |
| Pump Type | Oil-lubricated vane |
| Lid Material | Synthetic (plastic) |
| Noise Level | 75 dB(A) at 1 m |
| Recommended Oil | SAE10 or SAE30 non-detergent, paraffinic oil |
| Oil Change | Every 500 hours or 6 months |
| Cleaning | Damp cloth with mild detergent; do not use alcohol, solvents, or water jet |
| Safety | Mandatory grounding, emergency stop (STOP key), disconnect before maintenance |
| Optional Accessories | VAC-NORM kit (hose + adapter), bag cut-off bar |
| Spare Parts | Sealing gasket, oil filter (ref. AWS2), electronic board, power cord |
| Repairability | By Sammic authorized technical service |
| Country of Manufacture | Spain (SAMMIC, S.L., Azkoitia) |
| Installation | On floor, flat surface |
| Usage Conditions | Do not package hot products (>65°C) |
| Packaging Type | Heat-resistant vacuum bags |
Frequently Asked Questions - V641 T Sammic
User questions about V641 T Sammic
0 question about this device. Answer the ones you know or ask your own.
Ask a new question about this device
Download the instructions for your Vacuum packaging machines in PDF format for free! Find your manual V641 T - Sammic and take your electronic device back in hand. On this page are published all the documents necessary for the use of your device. V641 T by Sammic.
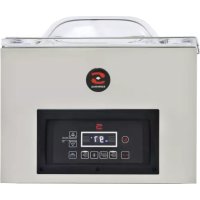
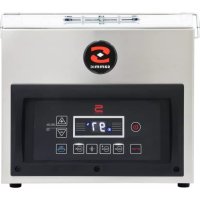
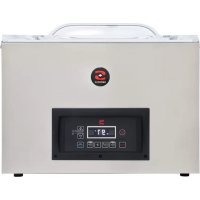
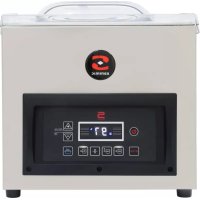
USER MANUAL V641 T Sammic
Vacuum packaging machines
natural_image
Exterior view of a stainless steel semi-micron industrial vacuum cleaner (no visible text or symbols on the device body)CE Marking Indications
Each appliance is identified by the following data:
Manufacturer's name and address: SAMMIC S.L. Basarte, 1, Azkoitia Gipuzkoa (SPAIN).
- "CE" mark.
- The machine model as stated in the next section.
- The serial number as indicated on the guarantee slip and the Declaration of Conformity.
MODELS
This manual describes the installation, operation and maintenance of the V-204TI, V-253TA, V-253TI, V-410TA, V-410TI, V-421TA, V-421TI, V-426TI, V-641TA, V-641TI, V-821TI packaging machines (time-controlled vacuum version).
The model reference and its specifications are shown on the nameplate affixed to the machine.
These vacuum packaging machines have been designed and manufactured in accordance with the following European directives: 89/392/EEC, 93/68/EEC, 73/23/EEC, and to the NSF Hygiene and Public Health standards.
INSTALLATION
For optimum performance and long service life of the machine, follow the instructions contained in this manual rigorously.
Location
Place the machine so that it stands perfectly levelled. To avoid damages, never lean the machine on one of its sides.
The V-410/V-421/V-426 machines must be installed on a smooth surface, since their legs are made of a sliding material for easy removal of the machine in order to clean the support surface.
Electric connection
1.MOTOR SPECIFICATIONS
- Single-phase motors are supplied for feeding at 230V.
- Three-phase motors are suitable for 230V or 400V (connection to 400V).
Before connecting the vacuum packaging machine to the mains, check if the motor is prepared for the same voltage as the mains. Otherwise, change the voltage.
To change the voltage:
- Connect the transformers to the suitable voltage, as shown in the terminal strip.
- If necessary, change the motor connections as shown in the terminal box.
- If necessary, adjust the temperature relay as shown on the electric diagram.
2.- CABLE SPECIFICATIONS
The SAMMIC vacuum packaging machines are supplied with one thermoplastic-sheathed cable 1.5m in length.
THEY MUST BE EARTHED. The grounding wire of the machine is identified.
- Three-phase machines: Prepare one 20A, 3PN+T wall socket and connect a sealed plug to the power cord of the vacuum packaging machine.
- Single-phase machines: Prepare one 20A, 2P+T wall socket and the corresponding plug.
- Power cord fitted plug to be accessible.
3.-TO CHANGE THE VACUUM PUMP DIRECTION OF ROTATION (three- phase machines only):
If the vacuum pump motor generates unusual noise on starting the machine, this means that the motor rotates in the wrong direction. In this event, immediately stop the machine and invert two feed wires.
Oil Filling
On models V-410, V-421, V-426, V-641 and V-821, the pump already contains oil.
If you have another model, fill the pump with oil through the inlet, until oil reaches 3/4 of the oil sight. Detergent-free oils are to be used.
- SAE10 oil (detergent-free) for pumps with outputs up to 20m³/h.
- SAE30 oil (detergent-free) for pumps with outputs over 20m^3/h .
Paraffin oils are recommended.
STARTING
After pressing the general switch, it is necessary to perform a few cycles on no load before proceeding with the first packing, so that the oil can heat up and provide the right vacuum.
Time-controlled vacuum
This concerns the models in which all the functions (vacuum, sealing and soft air) are microprocessor-controlled. The amount of vacuum will depend on the time setting and its value can be read on the vacuum gauge on the left side of the control panel.
Main features
- Fast and simple programming of the functions.
- Automatic counter of the machine running hours, with oil change warning signal.
-Automatic storage of the last executed cycle. - LED-display of every stage executed within the cycle.
- STOP key for stopping any phase of the cycle and going over to the next one.
- VAC-NORM system. This permits the external vacuum packaging of containers.
Technical description fo the control panel

Display
When the operator switches on the main switch of the machine, the display shows, for two seconds, the number which multiplied by ten gives the accumulated working hours of the vacuum pump. For example, the display of number 10 at any one time would mean that the accumulated working time is 100 hours. Afterwards, the vacuum, sealing time and other values can be displayed by pressing the respective key. On turning on the machine when the pump has been working for a total of 500 hours, the indicator will display 50 and will be flashing for 10 seconds, indicating that oil must be changed. During this lapse of time, the machine will not start, even if the cover is lowered.

+ Key Incrementer
It serves to increase any of the values
shown in the display. Keep the key depressed to reach the required value faster.

- Key Decrementer
It serves to decrease any of the values shown in the display. Keep the key depressed to reach the required value faster.

Sensor controlled vacuum
This key is used to select/display the vacuuming time, from 0 to 99. The key LED turns on while the operator selects the vacuuming time and during the performance of the vacuuming stage.

Sealing
This key is meant to select/display the sealing time, from 0 to 7 seconds. The key LED turns on while the operator selects the sealing time and during the sealing operation.
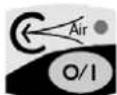
Soft air inlet
This is to enable/disable the soft air function. Soft air injection is fixed and there exists no possibility of changing it. The key LED is on when the function is enabled.

Cycle stop - VAC-NORM
This is a double-function key, depending on whether the lid is open or closed.
LID CLOSED- CYCLE SWITCH
It allows interrupting the cycle and going over to the next stage. Pressing the key several times results in activating the air inlet.
LID OPEN- VAC- NORM
If you press the key, when the lid is open, the machine starts extracting air, producing the vacuum in external containers. Pressing the key again restores the normal operating mode.
In order to set the parameters, it is an ESSENTIAL REQUIREMENT that the COVER SHOULD BE OPEN. The parameter setting procedure is described below, taking a possible cycle as an example:
Sealing: 3 s.Vacuu
- Press the Vacuum key. The LED of this key turns on. Then, press the incrementer key till 20 is displayed, which corresponds to the selected vacuuming time.
- Press the Sealing key. The LED of the key turns on. Using the Incrementer or Decrementer key, have value 3.0 being the duration in seconds of bag sealing, displayed.
- Press the Soft Air key. The built-in LED turns on, indicating that the Soft Air function is enabled.
- In order to change any of the entered values at any time, it is as simple as to press the relevant function key and to select the new value with the Incrementer or Decrementer key.
- Close the cover immediately after having selected all the values of the cycle. The settings are stored automatically.
On closing the cover, the working cycle starts automatically. As the cycle is carried out, the key built-in LEDs successively turn on, showing the stage of the cycle in progress. At the end of the sealing stage, air enters the chamber and the cover opens automatically.
VAC-NORM FUNCTION
The vacuum packer you have just bought features a VAC-NORM function that enables creating a vacuum in trays. To be able to use this function, you need to purchase the VAC-NORM kit that includes a hose and connector to the chamber of the vacuum packaging machine.
1 - Before activating the VAC-NORM
function, fit the connector and hose into the machine suction inlet.
2- Activate the VAC-NORM function, by pressing the STOP button with the lid of the vacuum packer open. Now, the machine starts extracting air.
3- Place the free end of the hose into the tray. Now, a vacuum is created inside the tray. A vacuum gauge shows the amount of vacuum produced. On reaching the desired vacuum, remove the hose from the tray.
4- Press the STOP button again or switch the machine off; this restores the normal mode of operation.
Warning! It is advisable to disable the VAC-NORM function when not in use; otherwise the machine would be extracting air continuously, which is harmful to the pump.
BAG CUTTING
The bars including bag cutting threads are supplied as an optional kit. To install them, the sealing bar must be replaced by the new bar provided with the cutting thread and one of the wires in the sealing transformer must be changed to the power indicated on the electric layout:
- V-410 /V-421 /V-426: 15V (20V depending on the bag type).
- V-641: 15V (short bar), 23V (long bar)
- V-821: 20V (short bar), 30V (long bar)
For the bag cutting operation, it is enough to programme the suitable sealing time in the control panel and, once the bag is sealed, it is separated manually along the line marked by the cutting thread.
DIRECTIONS FOR USE AND MAINTENANCE
Very important:
- Never pack products if they are still hot, since the vapour generated by them damages the vacuum pump.
-It is important to clean the interior and edges of the chamber, as well as the locking joint, every day.
- The outside of the machine must not be washed under a direct water jet; instead you can use a wet cloth and an ordinary detergent. Never clean the cover with
alcohol, solvent or glass-cleaners since they can affect the mechanical properties of the material and break it. If you appreciate a crack in the cover, stop the machine and call the authorised technical service for repairs; there is a risk of cover breaking.
- In the event the power cable should get damaged and have to be replaced, the repair may only be done by a SAMMIC approved assistance service.
- Before cleaning, repairing or checking the machine, you must unplug the machine from the mains.
- The noise level of a machine in operation, as measured at a height of 1.6m and a distance of 1 metre, is 75 dB(A). Background noise: 32 dB(A).
Oil change
The oil level must be checked weekly. It should not be below 3/4 of the oil indicator. Complete the level, if necessary.
Oil must be changed after the first 100 working hours. Afterwards, change oil every 500 working hours approximately or at least every 6 months, as well as each time oil is found to be emulsified. The accumulated working hours are displayed when the machine is switched on. To change oil, unscrew the draining plug and let the used oil drain out. To fill the pump with oil, follow the instructions given in the relevant section.
On pumps with outputs from 40m^3/h upwards, replace the oil filter at the same time. This filter is of the type used in cars, as per ref: AWS2, thread 3/4.
The exhaust filtre must be changed every 4 oil changes or on detecting either oil leaks or oil mist at the escape.
On turning on the machine when the pump has been working for a total of 500 hours, the indicator will display 50 and will be flashing for 10 seconds, indicating that oil must be changed. During this lapse of time, the machine will not start, even if the cover is lowered.
Once oil has been changed, reset the pump working time according to the following
sequence:
- With the cover open, press STOP. The vacuum pump will start.
- Lower the cover. The machine will start and perform a normal cycle.
- Once the vacuum process has started, press the STOP button quickly. At this moment, the working time has been reset to 0. Allow the machine to complete the cycle.
- Switch the machine off and on, to check that the working hour display shows 0.
CHANGE OF CONFIGURATION AND TESTING OF FUNCTIONS
There are three possible configurations of the electronic board, according to the machine in which it is fitted.
Configuration "0": Continuous duty, self-standing machines (V-641 and V-821). The pump remains on as from the time the main switch is pressed. This configuration is intended for machines to be installed in cold rooms and refrigerating chambers. Because the pump is on continuously, the machine is kept hot, which guarantees its proper operation.
Configuration "1": Discontinued duty, self-standing machines (V-641 and V-821). The pump is on only during the vacuuming and sealing stages.
Configuration "2": Discontinued duty, desktop machines (V-204, V-253, V-410, V-421 and V-426). The pump is on only during the vacuuming stage.
In order to change the machine configuration, follow the procedure described below:
WARNING!
The electronic board is fed at 230V, so care must be taken throughout the machine configuration changing and testing process.
1- Take off the control panel by removing its 6 front fixing screws and then remove the cover protecting the electronic circuit.
2- Press the general switch.
3- Locate two lugs near the word "TEST" on
the electronic board and short-circuit them with a screwdriver or similar object. At this moment, the test process starts: the electronic board activates each output (Motor, Sealing solenoid valve, etc.) for one (1) second and its associated LED on the board should then turn on. Next to each LED, there is a text identifying the component being tested.
4- On completion of the test sequence, the display indicates the machine configuration. If you press STOP at this stage, the pump working time counter will be zero-reset.
5- In order to change the machine configuration, press the Incrementer or Decrementer key until the required configuration value is shown.
6- To exit the test mode and save the new configuration, switch the machine off. If you lower the cover before exiting the test mode, the machine will not start. In the event that the working time counter has been reset, you can read the new value on the display when the machine is switched on again.
The electronic board has a function testing feature as an aid to troubleshooting in the event of a machine failure.
Execute steps 1, 2 and 3 described in the previous section. If any component fails to work during the test, proceed as follows:
- Verify that the component is connected correctly and is energised. If this is OK and the component still fails, replace it by a new one.
- If the component is not energised, check the voltage at the output of the electronic board when the associated LED is on. If there is no voltage, change the electronic board.
THE BASICS OF VACUUM-PACKING TECHNOLOGY
Vacuum is a method of natural food preservation that consists in removing air from the pack, eliminating oxygen, the principal food spoilage agent.
Advantages of vacuum-packing
1- Maximum reduction of product wastage.
2- Maximum return from labour hours by making good use of any idle times occurring within the week in order to speed up work and to quicken the process flow in the kitchen.
3- Rational storage of products in cold rooms:
- Odors will not mix up.
- Products can be labelled, which facilitates the turnover of raw materials.
- Improvement of inventory control, since anything to be purchased at a given time can be determined with greater accuracy.
4- Exploitation of the best-to-buy days:
- Shopping can be made when prices are lower.
- Less travels are needed.
5- Less washing-up.
Packing of cured products (sausages, hams, etc.)
These per se durable products can see their shelf-life at least doubled when vacuum-packed. Vacuum-packing also prevents them from drying up or losing weight, which would entail an economic loss. Except for some that are fragile in texture, these products require no gas injection.
Packing of cooked food
This concerns such food as roast meats,
stews, cannelloni, etc. Once cooked, these products must be cooled down to the core from +65°C to +10°C in less than two hours, in order to prevent microorganisms from developing.
Vacuum-packing is perhaps the most practical method of maintaining traditional cooking with these advantages:
- Easy food processing, without risk of product spoilage.
- Longer product life.
Cooking of vacuum-packed food
Put food into a tight and heat-resistant container. Remove any air from the inside, seal the container and heat it to cook the food inside. Cooking is done at low temperatures (65°C to 100°C), producing a pasteurising effect. This process has many advantages. Indeed, among others:
- it maintains the nutritional values.
- It safeguards hygiene, as there is less handling.
- It reduces weight loss, by preventing evaporation and drying.
- It allows rational work planning. Food processing and cooking outside service hours; preparation of banquets in advance, etc.
- It increases the storage time.
Food must be cooled down immediately after cooking, in order to stop the cooking process and to prevent the growth of microorganisms. Cooling is achieved with a temperature reducer.
Refrigerated foods: Temperature at the core of the product must descend from +65°C to +10°C in less than 2 hours.
Frozen foods: Temperature at the core of the product must descend from +65°C to -18°C in less than 4.5 hours..
Thereafter, food is to be kept at a temperature of 0^ C to 3^ C as for
refrigerated dishes and of -18°C if frozen.
When so-packed food is to be prepared to be savoured, the reconstitution process must start immediately after taking the pack out of the fridge or freezer. Basically, there are three reconstitution techniques: the low-pressure steam oven, a bain-marie, and a microwave oven. In the first two cases, food can be reconstituted within their packing, while the bag must be perforated or removed for reconstitution in a microwave oven, so that steam can escape without the bag bursting.
Any reconstituted product that is not consumed may not be stored again and must be disposed of.
Refrigerated food should not be stored for more than 6-21 days.
Freezing of vacuum-packed food
Conventional freezing techniques allow keeping the product, but not all of its qualities. Freezing vacuum-packed food has many advantages:
- No external frostbiting
- No surface frosting
- No loss of taste or aroma
- No drying
- No oxidation of fats