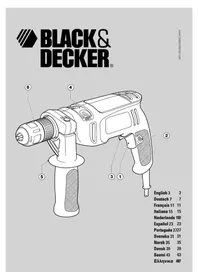
USER MANUAL KR500 BLACK & DECKER
Your Black & Decker hammer drill has been designed for drilling in wood, metal, plastics, and masonry as well as for screwdriving purposes. This tool is intended for consumer use only.
General safety rules
Warning! Read all instructions. Failure to follow all instructions listed below may result in electric shock, fire and/or serious injury. The term "power tool" in all of the warnings listed below refers to your mains operated (corded) power tool or battery operated (cordless) power tool.
SAVE THESE INSTRUCTIONS.
1. Work area
a. Keep work area clean and well lit. Cluttered and dark areas invite accidents.
b. Do not operate power tools in explosive atmospheres, such as in the presence of flammable liquids, gases or dust. Power tools create sparks which may ignite the dust or fumes.
c. Keep children and bystanders away while operating a power tool. Distractions can cause you to lose control.
2. Electrical safety
a. Power tool plugs must match the outlet. Never modify the plug in any way. Do not use any adapter plugs with earthed (grounded) power tools. Unmodified plugs and matching outlets will reduce risk of electric shock.
b. Avoid body contact with earthed or grounded surfaces such as pipes, radiators, ranges and refrigerators. There is an increased risk of electric shock if your body is earthed or grounded.
c. Do not expose power tools to rain or wet conditions.
Water entering a power tool will increase the risk of electric shock.
d. Do not abuse the cord. Never use the cord for carrying, pulling or unplugging the power tool. Keep cord away from heat, oil, sharp edges or moving parts. Damaged or entangled cords increase the risk of electric shock.
e. When operating a power tool outdoors, use an extension cord suitable for outdoor use. Use of a cord suitable for outdoor use reduces the risk of electric shock.
3. Personal safety
a. Stay alert, watch what you are doing and use common sense when operating a power tool. Do not use a power tool while you are tired or under the influence of drugs, alcohol or medication. A moment of inattention while operating power tools may result in serious personal injury.
b. Use safety equipment. Always wear eye protection.
Safety equipment such as dust mask, non-skid safety shoes, hard hat, or hearing protection used for appropriate conditions will reduce personal injuries.
c. Avoid accidental starting. Ensure the switch is in the off position before plugging in. Carrying power tools with your finger on the switch or plugging in power tools that have the switch on invites accidents.
d. Remove any adjusting key or wrench before turning the power tool on. A wrench or a key left attached to a rotating part of the power tool may result in personal injury.
e. Do not overreach. Keep proper footing and balance at all times. This enables better control of the power tool in unexpected situations.
f. Dress properly. Do not wear loose clothing or jewellery. Keep your hair, clothing and gloves away from moving parts. Loose clothes, jewellery or long hair can be caught in moving parts.
g. If devices are provided for the connection of dust extraction and collection facilities, ensure these are connected and properly used. Use of these devices can reduce dust related hazards.
a. Do not force the power tool. Use the correct power tool for your application. The correct power tool will do the job better and safer at the rate for which it was designed.
b. Do not use the power tool if the switch does not turn it on and off. Any power tool that cannot be controlled with the switch is dangerous and must be repaired.
c. Disconnect the plug from the power source before making any adjustments, changing accessories, or storing power tools. Such preventive safety measures reduce the risk of starting the power tool accidentally.
d. Store idle power tools out of the reach of children and do not allow persons unfamiliar with the power tool or these instructions to operate the power tool. Power tools are dangerous in the hands of untrained users.
e. Maintain power tools. Check for misalignment or binding of moving parts, breakage of parts and any other condition that may affect the power tools operation. If damaged, have the power tool repaired before use. Many accidents are caused by poorly maintained power tools.
f. Keep cutting tools sharp and clean. Properly maintained cutting tools with sharp cutting edges are less likely to bind and are easier to control.
ENGLISH
g. Use the power tool, accessories and tool bits etc., in accordance with these instructions and in the manner intended for the particular type of power tool, taking into account the working conditions and the work to be performed. Use of the power tool for operations different from those intended could result in a hazardous situation.
5. Service
a. Have your power tool serviced by a qualified repair person using only identical replacement parts. This will ensure that the safety of the power tool is maintained.
Additional safety instructions for impact drills
◆Wear ear protectors with impact drills.
Exposure to noise can cause hearing loss.
◆Use auxiliary handles supplied with the tool.
Loss of control can cause personal injury.
Electrical safety

This tool is double insulated; therefore no earth wire is required. Always check that the power supply corresponds to the voltage on the rating plate.
Features
This tool includes some or all of the following features.
- Variable speed switch
- Lock-on button
- Forward/reverse switch
- Drilling mode selector
- Side handle
- Chuck
Assembly
Warning! Before assembly, make sure that the tool is switched off and unplugged.
Fitting the side handle (fig. A)
◆Turn the grip (7) counterclockwise until you can slide the side handle (5) onto the front of the tool as shown.
◆Rotate the side handle into the desired position.
◆Tighten the side handle by turning the grip clockwise.
Fitting a drill bit or screwdriver bit (fig. B)
◆Open the chuck by turning the front part (8) with one hand while holding the rear part (9) with the other.
◆Insert the bit shaft (10) into the chuck and firmly tighten the chuck.
Removing and refitting the chuck (fig. C)
◆Open the chuck as far as possible.
◆Remove the chuck retaining screw (11), located in the front part of the chuck, by turning it clockwise using a screwdriver.
◆Tighten an Allen key (12) into the chuck and strike it with a hammer as shown.
◆Remove the Allen key.
◆Remove the chuck by turning it counterclockwise.
◆To refit the chuck, screw it onto the spindle and secure it with the chuck retaining screw.
Use
Warning! Before drilling into walls, floors or ceilings, check for the location of wiring and pipes.
Selecting the direction of rotation (fig. D)
◆For drilling and for tightening screws, place the forward/reverse switch (3) in the neutral position.
◆For loosening screws or removing a jammed drill bit, turn the forward/reverse switch (3) to the left.
Warning! Never change the direction of rotation while the motor is running.
Selecting the drilling mode
◆For drilling in masonry, set the drilling mode selector (4) to the T position.
◆For drilling in other materials and for screwdriving, set the drilling mode selector (4) to the 2 position.
Switching on and off (fig. E)
◆To switch the tool on, press the variable speed switch (1). The tool speed depends on how far you press the switch. As a general rule, use low speeds for large diameter drill bits and high speeds for smaller diameter drill bits.
◆For continuous operation, press the lock-on button (2) and release the variable speed switch. This option is available only at full speed.
◆To switch the tool off, release the variable speed switch. To switch the tool off when in continuous operation, press the variable speed switch once more and release it.
Accessories
The performance of your tool depends on the accessory used. Black & Decker and Piranha accessories are engineered to high quality standards and designed to enhance the performance of your tool.
By using these accessories you will get the very best from your tool.
Maintenance
Your tool has been designed to operate over a long period of time with a minimum of maintenance. Continuous satisfactory operation depends upon proper tool care and regular cleaning.
Mains plug replacement (U.K. & Ireland only)
If a new mains plug needs to be fitted:
◆Safely dispose of the old plug.
◆Connect the brown lead to the live terminal in the new plug.
◆Connect the blue lead to the neutral terminal.
Warning! No connection is to be made to the earth terminal. Follow the fitting instructions supplied with good quality plugs. Recommended fuse: 5 A.
Protecting the environment

Separate collection. This product must not be disposed of with normal household waste.
Should you find one day that your Black & Decker product needs replacement, or if it is of no further use to you, do not dispose of it with household waste. Make this product available for separate collection.

Separate collection of used products and packaging allows materials to be recycled and used again. Re-use of recycled materials helps prevent environmental pollution and reduces the demand for raw materials.
Local regulations may provide for separate collection of electrical products from the household, at municipal waste sites or by the retailer when you purchase a new product.
Black & Decker provides a facility for the collection and recycling of Black & Decker products once they have reached the end of their working life. To take advantage of this service please return your product to any authorised repair agent who will collect them on our behalf.
You can check the location of your nearest authorised repair agent by contacting your local Black & Decker office at the address indicated in this manual. Alternatively, a list of authorised Black & Decker repair agents and full details of our after-sales service and contacts are available on the Internet at: www.2helpU.com
KR480/KR500CRE/KR500RE/KR510XC/CD501CRE
Black & Decker declares that these products conform to: 98/37/EC, 89/336/EEC, 73/23/EEC, 2002/96/EC, EN 60745, EN 55014, EN 61000
L_pA (sound pressure) 91 dB(A), L_WA (acoustic power) 102 dB(A), hand/arm weighted vibration 5.2 m/s ^2
K_pA (sound pressure uncertainty) 3 dB(A), K_WA (acoustic power uncertainty) 3 dB(A)

Kevin Hewitt
Director of Consumer Engineering
Spennymoor, County Durham DL16 6JG,
United Kingdom
1-4-2005
Guarantee
Black & Decker is confident of the quality of its products and offers an outstanding guarantee. This guarantee statement is in addition to and in no way prejudices your statutory rights. The guarantee is valid within the territories of the Member States of the European Union and the European Free Trade Area.
If a Black & Decker product becomes defective due to faulty materials, workmanship or lack of conformity, within 24 months from the date of purchase, Black & Decker guarantees to replace defective parts, repair products subjected to fair wear and tear or replace such products to ensure minimum inconvenience to the customer unless:
◆The product has been used for trade, professional or hire purposes;
◆The product has been subjected to misuse or neglect;
◆The product has sustained damage through foreign objects, substances or accidents;
◆Repairs have been attempted by persons other than authorised repair agents or Black & Decker service staff.
Technical data
| KR480 KR500CRE KR500RE KR510XC CD501CRE |
| Voltage VAC | 230/240 230/240 230/240 230/240 230/240 |
| Power input W 480 500 500 500 500 | |
| No-load speed min-1 | 0-2,800 0-2,800 0-2,800 0-2,800 0-2,800 |
| Max drilling capacity | |
| Steel/concrete mm 10 10 10 10 10 | |
| Wood mm 20 20 20 20 20 | |
ENGLISH
To claim on the guarantee, you will need to submit proof of purchase to the seller or an authorised repair agent. You can check the location of your nearest authorised repair agent by contacting your local Black & Decker office at the address indicated in this manual. Alternatively, a list of authorised Black & Decker repair agents and full details of our after-sales service and contacts are available on the Internet at:
www.2helpU.com
Please visit our website www.blackanddecker.co.uk to register your new Black & Decker product and to be kept up to date on new products and special offers. Further information on the Black & Decker brand and our range of products is available at www.blackanddecker.co.uk
Spennymoor, County Durham DL16 6JG,
Royaume Uni
1-4-2005
Garantie
Director of Consumer Engineering
Spennymoor, County Durham DL16 6JG,
Verenigd Koninkrijk
1-4-2005
Garantie
98/37/CEE, 89/336/CEE, 73/23/CEE, 2002/96/CEE, EN 60745,
EN 55014, EN 61000
Director de Engenharia do Consumo
Spennymoor, County Durham DL16 6JG,
Reino Unido
1-4-2005
Garantia
Director of Consumer Engineering
Spennymoor, County Durham DL16 6JG,
Storbrittannien
1-4-2005
Reservdelar / reparationer
Spennymoor, County Durham DL16 6JG,
Storbritannia
1-4-2005
Director of Consumer Engineering
Spennymoor, County Durham DL16 6JG,
Storbritannien
1-4-2005
Reservedele / reparationer
Director of Consumer Engineering
Spennymoor, County Durham DL16 6JG,
Iso-Britannia
1-4-2005
• This is a key decision for the following: (1) if you are not able to know what you can find this
◆ Data protection act: Tick the box if you prefer not to receive further information ▼ Byte

Cat. no.:
◆ Διξυγων αντροσμου
revendor - Artificialis layers address
The Ground Truth image displays a single, solid horizontal line. According to Rule 2 (UNDERSCORE & LINE RULES), this is a stylistic or background line, not a placeholder underscore. Therefore, the OCR result must ignore it and output nothing or only meaningful text. The provided OCR content is "____", which consists of four underscores. This is an incorrect interpretation of the line as a placeholder, violating the rule that stylistic lines must be ignored. The OCR has hallucinated underscores where none should exist based on the GT's visual context. Hence, the OCR result is inconsistent with the Ground Truth.
N N N . N N
◆ Sim ◆ Ja ◆ Ja ◆ Ja ◆ Ja ◆ Ja ◆ Ja ◆ Ja ◆ Ja ◆ Ja ◆ Ja ◆ Ja ◆ Ja ◆ Ja ◆ Ja ◆ Ja ◆ Ja ◆ Ja ◆ Ja ◆ Ja ◆ Ja ◆ Ja ◆ Ja ◆ Ja ◆ Ja ◆ Ja ◆ Ja ◆ Ja ◆ Ja ◆ Ja ◆ Ja ◆ Ja ◆ Ja ◆ Ja ◆ Ja
■ Yes Ja Qui Si Ja ▲ S
nquim oq avoq?
konesei? ◆ Eival to epoxyrio auto in

Ar delta dit forsta B&D-verktyg? ♦ Er dette dit
◆ Is this tool your first purchases? ◆ Ist diseases
[Non-Text]
[əN ◆ ɪəN ◆ ʃəN ◆ ən ◆ ɒn ◆ □
No Non Non No Need
• Sim Ja Ja Ja Kylla Not
- Yes, Ia, Qui, Si, Ia
♦ To evaporatio activ grupo?
◆ Onko kone laha?
presente? ♦ Ar verkyaget en gava?
regalo? Recebu esta terramenta como
Dealer addresses Date of purchase
Handelarderesse Kaufatum
◆ Address ◆ Adverse ◆ Adverse ◆ indirizzo ◆
Adres ◆ Direction ◆ Morada ◆ Address ◆
Adresse ◆ Adresse ◆ Osource ◆ Disadvon:
Code postale ♦ Postcode
♦ Cedipo ♦ Cedipo postal ♦ Postnr.
◆ Postnr. ◆ Postnr. ◆ Postinumero
◆ Kawikos

English Please complete this section immediately after the purchase of your
tool and send it to Black & Decker in your country. If you live in Australia or New Zealand, please register by using the alternative
guarantee card supplied.
Black & Decker in uw land.