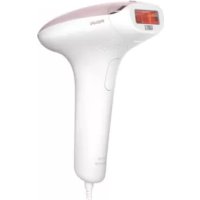
Lumea Advanced SC1994 - Epilator PHILIPS - Free user manual and instructions
Find the device manual for free Lumea Advanced SC1994 PHILIPS in PDF.



| Product Type | Intense Pulsed Light (IPL) Hair Removal Device |
| Brand | Philips |
| Model | Lumea Advanced SC1994 |
| Technology | Intense pulsed light (IPL) |
| Number of intensity levels | 5 |
| Emitted wavelengths | 530 nm - 1 400 nm |
| Pulse duration | <1.5 ms |
| Repetition time | 1 to 3.5 s |
| Optical exposure (body) | 2.5 - 5 J/cm² |
| Optical exposure (face) | 2.5 - 4.5 J/cm² (depending on version) |
| Optical exposure (bikini) | 2.5 - 5 J/cm² (depending on version) |
| Skin tone sensor | Yes, built-in |
| Treatment modes | Stamp-and-flash and glide-and-flash |
| Included accessories | Body attachment |
| Power supply | Power adapter 100-240 V, output 24 V 1500 mA |
| Safety | Integrated safety system, UV filter |
| Cleaning | Soft damp cloth, do not immerse |
| Warranty | 2 years (international) |
| Manufacturer | Philips Consumer Lifestyle B.V. |
| Recycling | Do not dispose of with household waste |
Frequently Asked Questions - Lumea Advanced SC1994 PHILIPS
User questions about Lumea Advanced SC1994 PHILIPS
0 question about this device. Answer the ones you know or ask your own.
Ask a new question about this device
Download the instructions for your Epilator in PDF format for free! Find your manual Lumea Advanced SC1994 - PHILIPS and take your electronic device back in hand. On this page are published all the documents necessary for the use of your device. Lumea Advanced SC1994 by PHILIPS.
USER MANUAL Lumea Advanced SC1994 PHILIPS
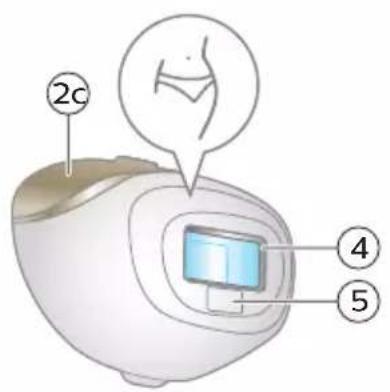
SC1994 (2a)
SC1997 (2a, 2b)
SC1998 (2a, 2b, 2c)
SC1999 (2a, 2b, 2c)
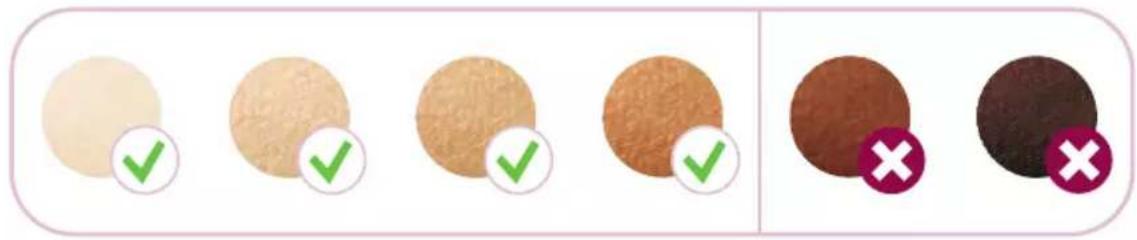
Skin tone table / Hauttontabelle / Tableau de teint de peau / Tabella del tono della pelle / Huidtinttabel
English 6
Deutsch 31
Français 60
Italiano 87
Nederlands 115
Contents
Welcome 6
Device overview 7
Contraindications 7
Important safety instructions 10
How IPL works 13
Recommended treatment schedule 14
What to expect 14
How to use your Lumea 15
Learning more about your Lumea 20
Attachments 20
Skin tone sensor 21
Selecting the light intensity 21
Two treatment modes: Stamp & Flash and Slide & Flash 22
Treatment time per area 23
Using your Lumea before and after tanning 24
Traveling with the device 24
After use 24
Troubleshooting 26
Warranty and support 28
Recycling 28
Technical specifications 28
Electromagnetic compatibility - Compliance information 29
Explanation of symbols 29
Welcome
Welcome to the beauty world of Lumea! You are only a few weeks away from silky-smooth skin.
Philips Lumea uses Intense Pulsed Light (IPL) technology, known as one of the most effective methods to continuously prevent hair regrowth. In close collaboration with skin experts we adapted this light-based technology, originally used in professional beauty salons, for easy and effective use in the comfort of your home. Philips Lumea is gentle and offers convenient and effective treatment at a light intensity that you find comfortable.
Unwanted hairs are finally a thing of the past. Enjoy the feeling of being hair-free and look and feel amazing every day.
Philips Lumea has been designed and developed for women, but may be suitable for use by men.
To fully benefit from the support that Philips offers, register your product and find further information about your product at
www.philips.com/support to find our experts' advice, tutorial videos and FAQs and make the most of your Lumea.
Note: Keep these instructions with your product at all times.
Device overview
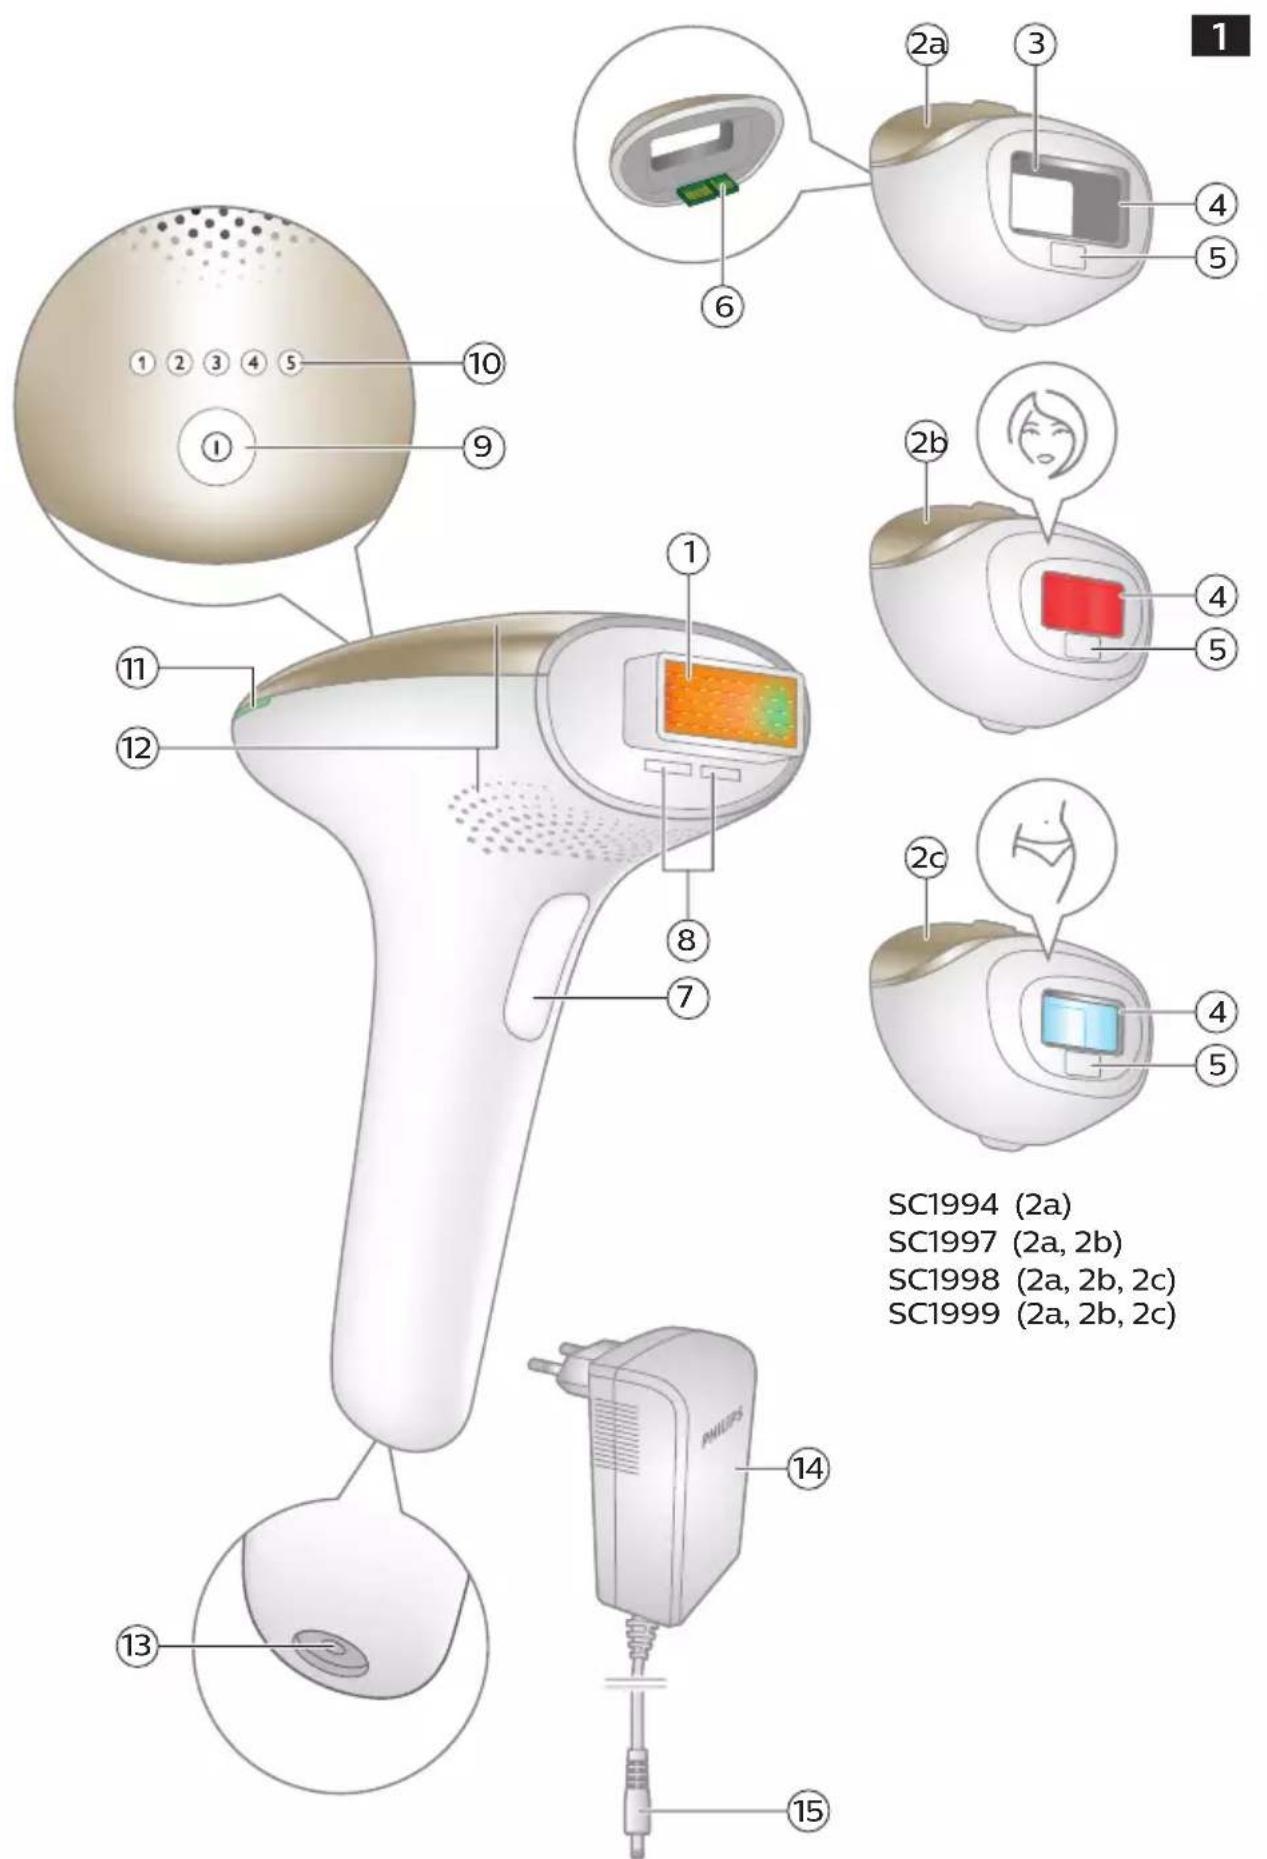
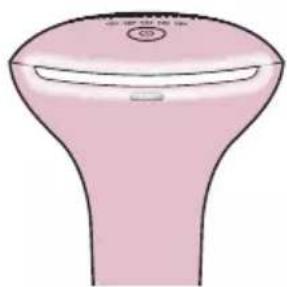
1 Light exit window with integrated UV filter
2 Attachments
a Body attachment
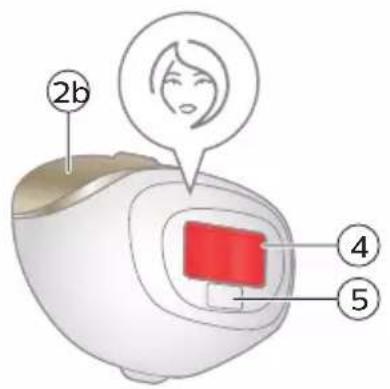
b Facial attachment (SC1997, SC1998 and SC1999)
c Bikini attachment (SC1998, SC1999)
3 Reflector inside the attachment
4 Integrated safety system
5 Skin tone sensor
6 Electronic contacts
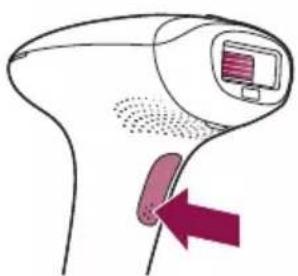
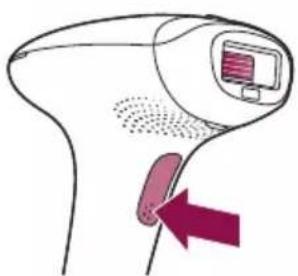
7 Flash button
8 Opening for electronic contacts
9 On/off and light intensity setting button
10 Intensity lights
11 'READY to flash' light
12 Air vents
13 Device socket
14 Adapter
15 Small plug
Contraindications

Conditions
Never use the device:
- If you have skin type V or VI (You rarely to never sunburn, very dark tanning). In this case you run a high risk of developing skin reactions, such as hyperpigmentation and hypopigmentation, strong redness or burns.
Note: To check if your skin type allows usage of the device, consult the skin tone table on the foldout page.
- If you are pregnant or breastfeeding as the device was not tested on pregnant or breastfeeding women.
- If you have any active implants such as a pacemaker, neurostimulator, insulin pump etc.
Medications/History
Never use the device if you take any of the medications listed below:
- If your skin is currently being treated with or has recently been treated in the past week with Alpha-Hydroxy Acids (AHAs), Beta-Hydroxy Acids (BHAs), topical isotretinoin and azelaic acid.
- If you have taken any form of isotretinoin Accutane or Roaccutane in the last six months. This treatment can make skin more susceptible to tears, wounds and irritations.
- If you are taking photosensitizing agents or medications, check the package insert of your medicine and never use the device if it is stated that it can cause photo-allergic reactions, photo-toxic reactions or if you have to avoid sun when taking this medicine.
- If you take anticoagulation medications, including heavy use of aspirin, in a manner which does not allow for a minimum 1-week washout period prior to each treatment.
Never use the device:
- If you have received radiation therapy or chemotherapy within the past 3 months.
- If you are on painkillers which reduce the skin's sensitivity to heat.
- If you take immunosuppressive medications.
Pathologies/Disorders
Never use the device:
- If you have diabetes or other systemic or metabolic diseases.
- If you have congestive heart disease.
- If you have a disease related to photosensitivity, such as polymorphic light eruption (PMLE), solar urticaria, porphyria etc.
- If you have a history of collagen disorder, including a history of keloid scar formation or a history of poor wound healing.
- If you have epilepsy with flashlight sensitivity.
-
If your skin is sensitive to light and easily develops a rash or an allergic reaction.
-
If you have a skin disease such as active skin cancer, you have a history of skin cancer or any other localized cancer in the areas to be treated.
- If you have a history of vascular disorder, such as the presence of varicose veins or vascular ectasia in the areas to be treated.
- If you have any bleeding disorder.
- If you have a history of immunosuppressive disease (including HIV infection or AIDS).
Skin conditions
Never use the device:
- If you have infections, eczema, burns, inflammation of hair follicles, open lacerations, abrasions, herpes simplex (cold sores), wounds or lesions and haematomas (bruises) in the areas to be treated.
- On irritated (red or cut), sunburned, recently tanned or fake-tanned skin.
- On the following areas: On moles, freckles, large veins, darker pigmented areas, scars, skin anomalies without consulting your doctor. This can result in a burn and a change in skin color, which makes it potentially harder to identify skin-related diseases.
- On following areas: warts, tattoos or permanent make-up.
Location/areas
Never use the device on the following areas:
- Around the eyes and near the eyebrows.
- On the lips, nipples, areolas, labia minora, vagina, anus and the inside of the nostrils and ears.
- If you have had surgery in the areas to be treated in the last three weeks.
-
Men must not use the device on the face and neck including all beard-growing areas, nor on the whole genital area.
-
On areas where you use long-lasting deodorants. This can result in skin reactions.
- Over or near anything artificial like silicone implants, subcutaneous injection ports (insulin dispenser) or piercings.
Note: This list is not exhaustive. If you are not sure whether you can use the device, we advise you to consult your doctor.
Important safety instructions

Warning
- This device has a detachable power supply unit that is IEC60950-1 class II compliant. Only use the adapter provided with this device. The reference number (S036Nz2400150) can be found on your device. The 'z' in this number refers to the plug type for your country.
- Keep the device and the adapter dry.
- This device is not washable. Never immerse the device in water and do not rinse it under the tap.
- Water and electricity are a dangerous combination. Do not use this appliance in wet surroundings (e.g. near a filled bath, a running shower or a filled swimming pool). Moisture can damage the device and lead to a potential safety hazard.
- No modification of this equipment is allowed. Do not modify, override or cut off any part of the device (e.g. adapter or the cord), as this causes a hazardous situation.
- Do not attempt to open or repair your device. Opening Philips Lumea may expose you to dangerous electrical components and to pulsed light energy, either of which may cause bodily and/or eye injury.
- Always return the device to a service center authorized by Philips for examination or repair. Repair by unqualified people could cause an extremely hazardous situation for the user.
- Always check the device before you use it. Do not use the device or adapter if it is damaged. Always replace a damaged part with one of the original type.
- If the device or adapter is broken or damaged, do not touch any inner part to avoid electric shock.
- This device is not intended for use by persons with reduced physical, sensory or mental capabilities, or lack of experience and knowledge, unless they have been given supervision or instruction concerning use of the device by a person responsible for their safety.
- Please read and follow these instructions to optimize the use of the device and prevent/ minimize the risk of injury, skin reactions and side effects.
- If you experience skin irritation or skin redness after treatment, wait until it disappears before applying any product to your skin. If you experience skin irritation after applying a product to your skin, wash it off with water. If you still get skin reactions, stop using the device and consult your doctor.
- If you notice a skin tone change since the last treatment we advise you to perform a skin test and to wait 24 hours before your next treatment.
- Do not treat the same skin area more than once during a session. This may increase the risk of skin reactions.
- Tanning with natural or artificial sunlight might influence the sensitivity and color of your skin. Perform a skin test to determine the appropriate light intensity setting.
- For hygienic reasons, the device should only be used by one person.
- Misuse can lead to eye damage. Protect the eye from exposure. Never use the device on, near, or around the eyes and eyebrows.
- Before you use Lumea, you should clean your skin and make sure it is hair-free, entirely dry and free from oily substances.
- Do not use any pencil or pen to mark the areas to be treated. This may cause burns on your skin.
- Children should be supervised to ensure that they do not play with the device. Supervision is required to avoid potential risks such as exposure to the light output, electrocution, strangulation from the cables or choking on the attachments.
- Do not use the device if the UV filter of the light exit window and/or attachment is broken, as safe operation cannot be guaranteed under these circumstances.
- Do not use hair removal creams in the area (to be) treated with the device, as chemicals may cause skin reactions.
- Always check the device before you use it. Make sure that the Skin tone sensor window is clean when using the device, to avoid improper operation. Please follow the instructions in Section 'Cleaning & Storage' for cleaning the device.
- The adapter, light exit window and the filter of the attachments can become very hot ( >210\ °C/>410\ °F ) during usage. Always let the adapter, the light exit window as well as the filter and inner parts of the attachments cool down before you touch them.
- The scattered light produced by the device is harmless to your eyes. Do not look at the flash while using the device. It is not necessary to wear goggles during use. Use the device in a well-lit room so that the light is less glaring to your eyes.
- Hair removal by intense pulsed light sources can cause increased hair growth in some individuals. Based upon currently available data, the highest risk groups for this response are females of Mediterranean, Middle Eastern and South Asian heritage treated on the face and neck.
- If shaving, epilating or waxing causes skin irritation, we advise you not to use the device until skin irritation has disappeared.
Caution
- Follow the recommended treatment schedule. Increasing the frequency, especially in the initial phase, can increase the risk of skin reactions.
How IPL works
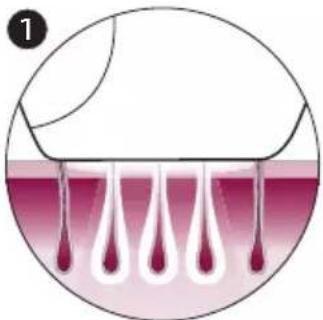
With Intense Pulsed Light technology, gentle pulses of light are applied to the skin and absorbed by the hair root. The lighter the skin and the darker the hair, the better the pulses of light are absorbed.
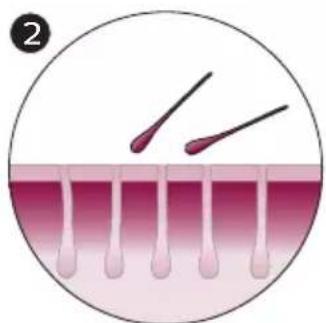
The pulses of light stimulate the hair follicle to go into a resting phase. As a consequence, the hair sheds naturally and hair regrowth is prevented.
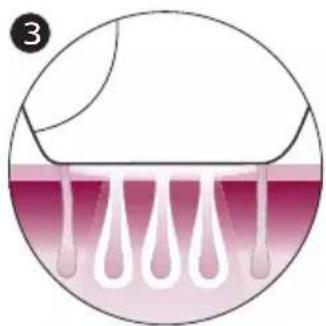
The cycle of hair growth consists of different phases. IPL technology is only effective when the hair is in its growing phase. Not all hairs are in the growing phase at the same time. This is why we recommend you to follow the initial treatment phase (4-5 treatments, every treatment 2 weeks apart) and then the follow-up treatment phase (touch-ups every 4-8 weeks) to make sure all hairs are effectively treated in the growing phase.
Tip: To assure long lasting hair removal, touch-ups every 4 weeks are recommended.
Suitable body hair colors
Treatment with Lumea is not effective if you have light blond, grey, red or white hairs as hairs with these colors do not absorb enough light. To check if your body hair color allows usage of the device, consult the hair color table on the foldout page.
Recommended treatment schedule
Initial phase
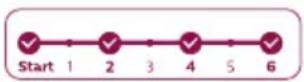
To achieve effective hair reduction, follow the initial treatment schedule. Initial treatment schedule
For the first 4 treatments, use Lumea once every two weeks to ensure that all hairs are treated.
- Treat yourself within 3 days before or after the planned treatment date.
- If you have not treated yourself within 3 days before or after the planned treatment date, restart the initial phase. Plan in 4 treatments, one treatment every two weeks.
Note: If you do not restart the initial phase, you may not see effective hair reduction.
Note: Replacing one of the IPL treatments with another hair removal method (e.g. waxing, epilating) will not help to reach the desired hair reduction.
If you want to remove hairs in between the Lumea treatments, you can use your normal hair removal method.
Touch-up phase
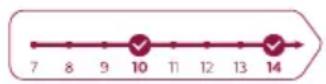
After the initial phase (4 treatments), we recommend touch-ups every 4 weeks.
Touch-up treatment schedule
Treat yourself every 4 weeks. Repeat this 8 times to achieve effective hair reduction. This is to maintain results and enjoy smooth skin for months.
- We advise you to treat yourself within 4 days before or after the planned treatment date.
- The results may vary based on your individual hair regrowth and also across different body areas.
- If you have completed the touch-up phase and you see the need to continue treatment (hair starts coming back), we advise you to restart the initial phase.
Tip: Mark the treatment schedule on your calendar to remind yourself of the planned treatments.
What to expect
After initial phase
- After the first treatment, it can take 1 to 2 weeks for the hairs to fall out. In the first weeks following the initial treatments, you still see some hairs growing. These are likely to be hairs that were not in their growing phase during the first treatments.
- After 2-3 treatments, you should see a noticeable reduction in hair growth. However, to effectively treat all hairs, it is important to keep on treating according to the recommended treatment schedule.
- After 4 treatments, you should see a significant reduction of hair growth in the areas that you treated with Lumea. A reduction of hair density should be visible as well.
During touch-up phase
- Keep on treating with frequent touch-ups (every 4 weeks) to maintain the result.
How to use your Lumea
A Remove hair & clean your skin
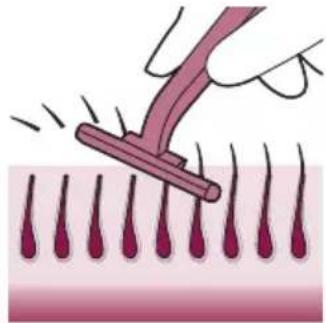
1 Remove hair before every treatment as long as hair is still visible. You can either shave, epilate or wax. If you choose to wax, wait 24 hours before you use Lumea.
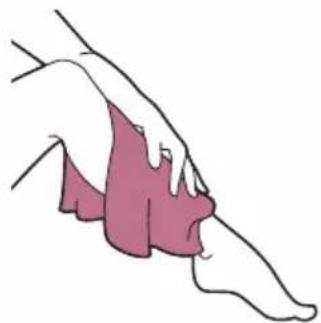
2 Clean and dry your skin. Make sure that it is free from oily substances.
B Test skin 24 hrs before treatment
1 Test your skin to find the correct light setting:
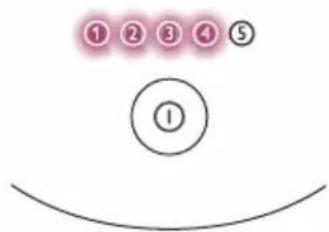
- For every new body area. - After recent tanning.
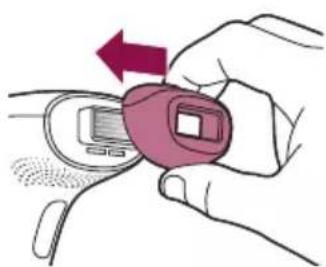
2 Select the correct attachment to test your skin.
There is one for the body, face (below the cheekbone) and bikini area, depending on the product version (see 'Attachments').
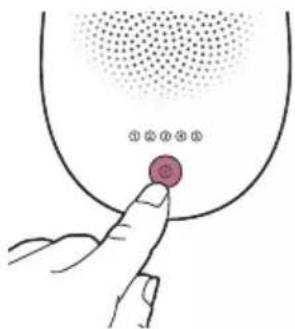
3 Press the on/off button to turn on the device.
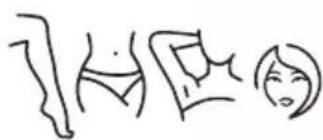
4 Choose an area for your skin test.
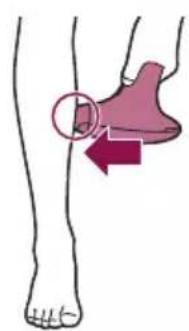
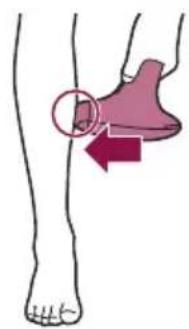
5 Press the device firmly onto your skin and hold it in place.
The integrated safety system prevents unintentional flashing without full skin contact.
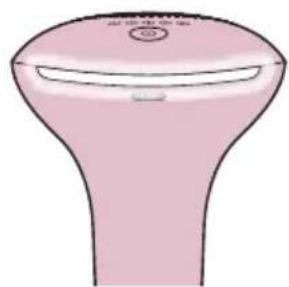
6 Confirm that the 'READY to flash' light lights up white to ensure that there is full contact with your skin.
- If the 'READY to flash' light is orange, your skin is too dark to treat. Try Lumea on a lighter body area.
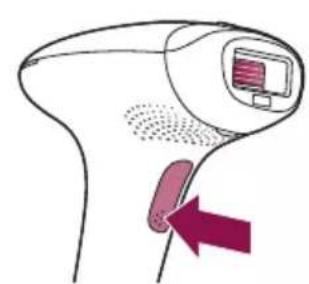
7 Try each setting on your skin if comfortable:
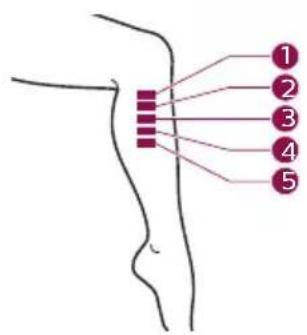
- When the 'READY to flash' light is white, press the flash button on the handle once to treat one spot with setting ①
The device makes a soft popping sound. The flash gives you a warm sensation.
- You will see a flash of light
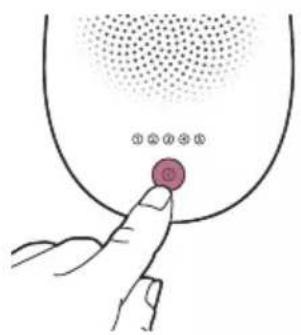
Note: You can toggle through the light intensity settings by pressing the on/off button (see 'Selecting the light intensity').
- Move to next area. Treat one spot with setting ②
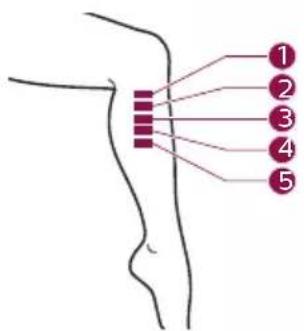
- Move to next area. Treat one spot with setting ③
- Move to next area. Treat one spot with setting ④
- Move to next area. Treat one spot with setting ⑤
24 hrs
8 Wait 24 hours.

9 Check your skin. The highest setting that...
- still felt comfortable and
- did not show a skin reaction (e.g. redness, irritation, rash)
... is the setting to start the treatment with.
C Treatment

IMPORTANT: First finish section A (Remove hair & clean your skin) and B (Test skin 24 hrs before treatment).
1 Connect the power adapter to the device and plug into a power outlet.
2 Press the on/off button to turn on the device.
3 Choose the setting you selected after the skin test (section B, step 9).
4 Press the device firmly onto your skin and hold it in place. The 'READY to flash' light should light up white.
5 Press the flash button to release a flash on your skin. The flash treats the skin in that spot. The device makes a soft popping sound. The flash gives you a warm sensation.
After each flash, it takes up to 3.5 seconds until the device is ready to flash again. You can release a flash when the 'READY to flash' light lights up white.
6 Move the device to the next spot, close to, but not overlapping the previous spot. Make sure that you flash the same area only once.
7 Continue until you have treated the full area. There are two treatment modes (see 'Two treatment modes: Stamp & Flash and Slide & Flash').
8 Switch off the device when you finished the treatment.
9 Remove hair before every next treatment, as long as hair is still visible.
D Clean & store after treatment
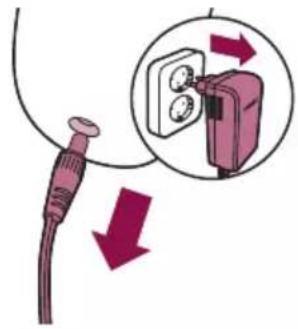
1 Unplug the device from the power outlet.
2 Let the device cool down.
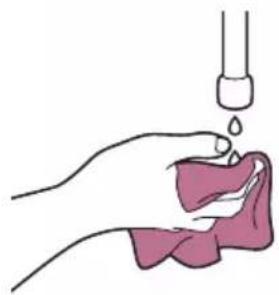
3 Moisten the soft cloth supplied, with a few drops of water.
4 Take the attachment off the device.
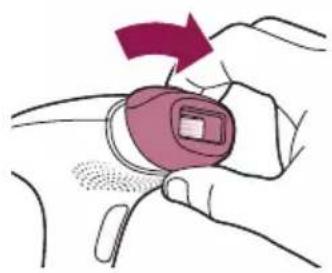
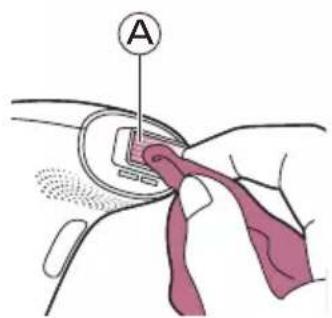
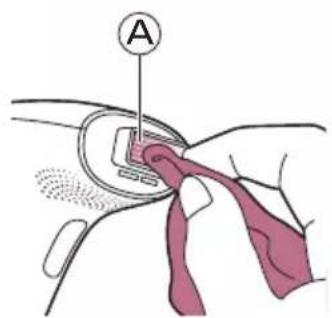
5 Clean the light exit window of the device (A).
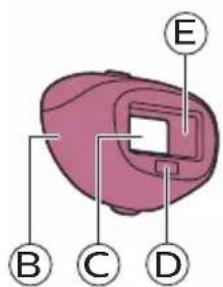
6 Clean all surfaces of the attachment, including the metal reflector (parts B, C, D, E).
7 Let all parts dry thoroughly.
8 Store in a dust-free place at room temperature.
Learning more about your Lumea
Attachments
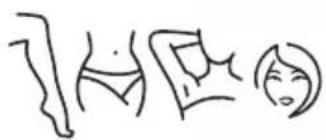
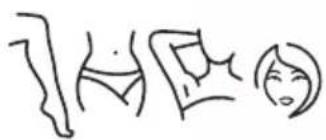
For safety reasons and to get optimal results, it is important to use the correct attachment intended for the specific body area you want to treat. Lumea offers full-body treatment with up to three attachments designed for use on specific body areas.
Note: The device may not work anymore and show an error when there is dirt on the attachment connector. Clean the contact leads when this occurs. To place the attachment, simply snap it onto the light exit window.
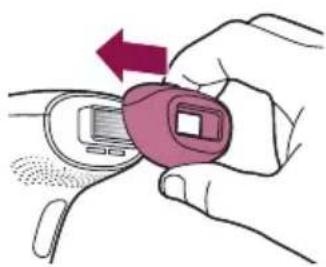
To remove the attachment, pull it off the light exit window.
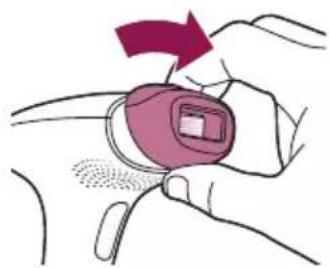
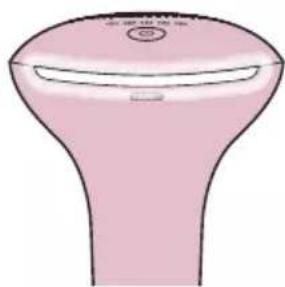
Body attachment
The body attachment has the largest treatment window to effectively cover and treat areas below the neckline, especially large areas such as legs, arms and stomach.
Facial attachment (SC1997, SC1998, SC1999)

The facial attachment has an extra integrated filter for safe and precise treatment on the sensitive skin above the upper lip, chin and sideburns. The device is only intended for removing unwanted body hair from areas below the cheekbones.
When you use the device on areas with sharp contours like the jawline and chin, it may be difficult to establish full skin contact and release a flash.
Tip: Place your tongue between your upper lip and your teeth or puff out your cheeks to make the treatment easier.
Bikini attachment (SC1998, SC1999)
The bikini attachment is designed for effective treatment of the bikini area. Hair in this area tends to be thicker and stronger than leg hair.
Skin tone sensor
Lumea has an integrated skin tone sensor which measures the skin tone at the start of each session and during the session.
The skin tone sensor prevents you to treat areas of your skin that are too dark. If it detects a skin tone that is too dark for treatment with Lumea, the 'READY to flash' light starts blinking orange. It does not flash when you press the flash button. The device automatically disables. This prevents you from developing skin reactions.
Selecting the light intensity
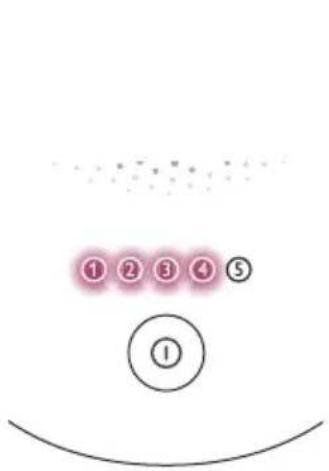
Lumea provides 5 different light intensities, you will always be able to change to a light intensity setting you find comfortable.
1 Press the on/off button to turn on the device and select the desired light intensity.
2 To adjust the light intensity setting, use the on/off button until you have reached the required setting.
Skin sensitivity can differ per person. Therefore, the skin test is the most important guide for selecting your light intensity setting (see 'B Test skin 24 hrs before treatment').
3 Using Lumea should never be painful. If you experience discomfort, reduce the light intensity setting.
Note: The device is automatically disabled when your skin tone is too dark (brownish black or darker), to prevent you from developing skin reactions. The 'READY to flash' light will blink orange to indicate if the skin tone is too dark.
4 After moving to another body area or after recent tanning (see 'Using your Lumea before and after tanning'), perform a skin test to determine the most comfortable light intensity setting. To re-activate the setting indication feature, turn on the device.
Note: Since body areas might differ in skin color, you need to select the most comfortable setting for each body area separately.
Two treatment modes: Stamp & Flash and Slide & Flash

Your Philips Lumea has two treatment modes for more convenient use on different body areas:
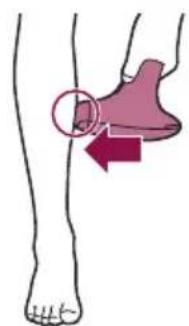
- The Stamp & Flash mode is ideal to treat small or curvy areas like knees and underarms. Simply press and release the flash button to release a single flash.
- The Slide & Flash mode offers convenient use on larger areas like legs. Keep the flash button pressed while you slide the device over your skin to release several flashes in a row.
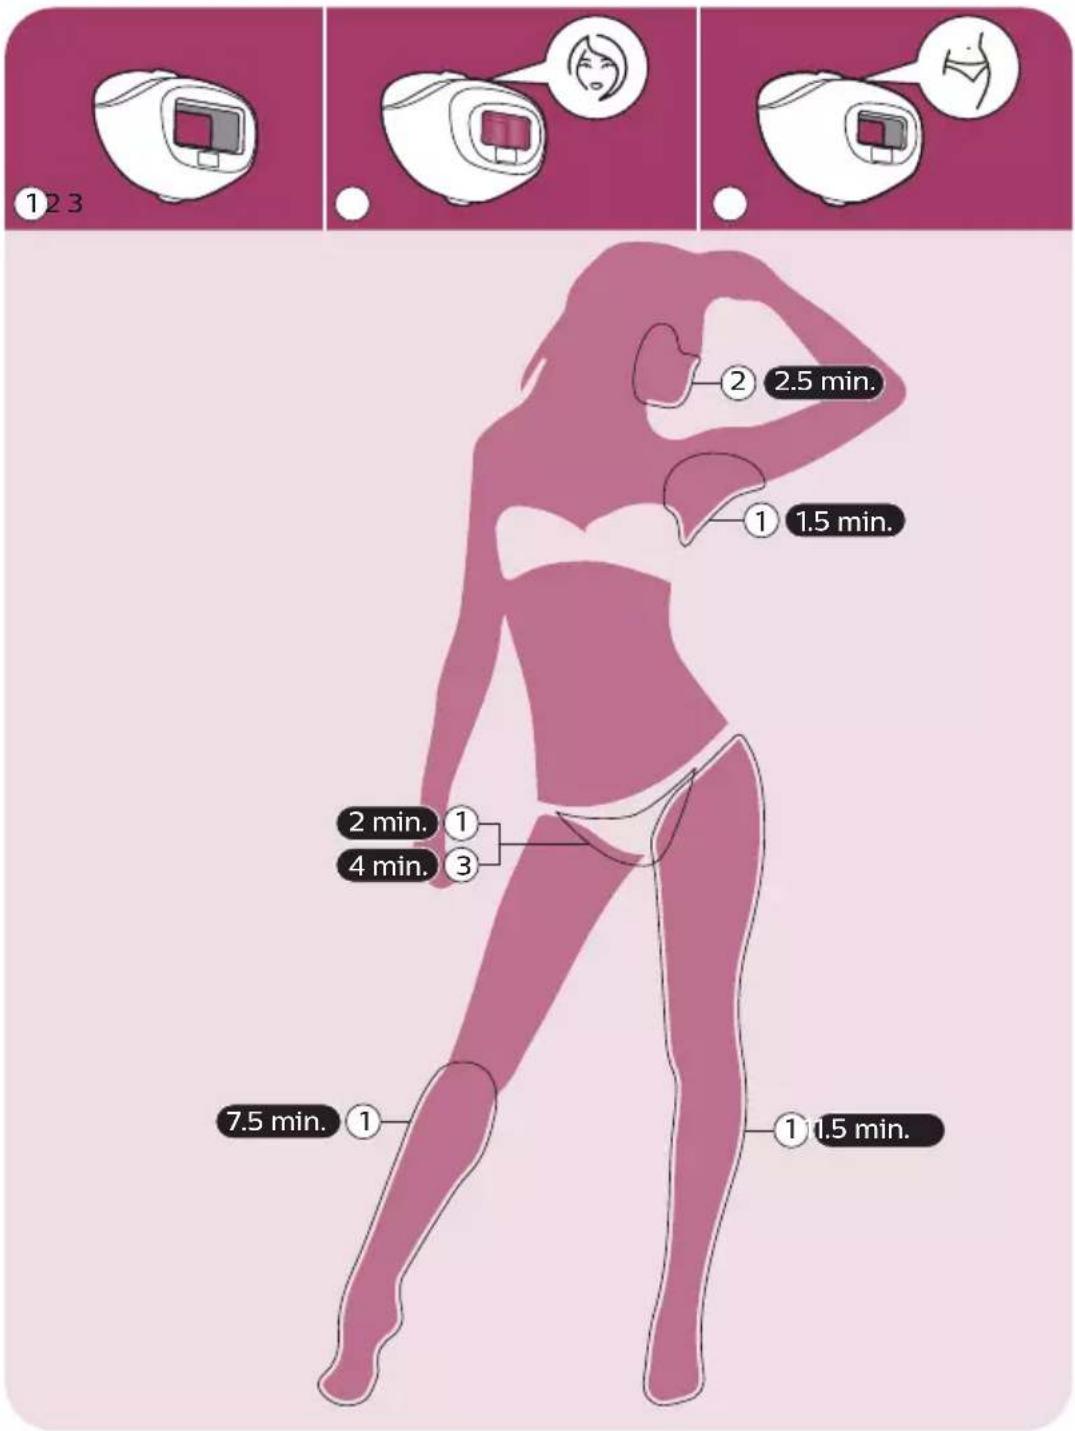
Treatment time per area
Using your Lumea before and after tanning
Tanning with natural or artificial sunlight
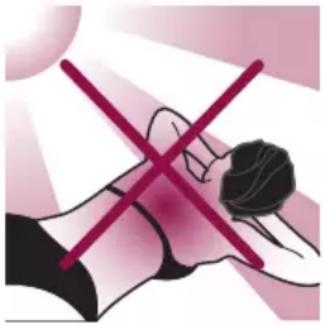
Intentionally exposing your skin to natural or artificial sunlight with the aim of developing a tan influences the sensitivity and color of your skin. Therefore the following is important:
- After each treatment, wait at least 48 hours before tanning. Even after 48 hours, make sure that the treated skin does not show any redness from the treatment anymore.
- If you expose your skin to the sun (without tanning intentionally) in the 48 hours after treatment, use a sunblock SPF 50+ on the treated areas. After this period, you can use a sunblock SPF 30+ for two weeks.
- After tanning, wait at least 2 weeks before you use Lumea and perform a skin test. This is to determine the appropriate light intensity setting (see 'Step B: Test skin 24 hrs before treatment').
- Do not use Lumea on sunburned body areas.
Note: Occasional and indirect sun exposure does not qualify as tanning.
Tanning with creams
If you have used an artificial tanning lotion, wait until the artificial tan is completely gone before you use the device.
Traveling with the device
When you travel with the device, check with the airplane carrier to confirm that the device can be carried and/or used on the airplane.
After use
Aftercare
After use, you can safely apply lotions, creams, deodorant, moisturizer or cosmetics to the treated areas.

Warning: If you experience skin irritation or skin redness after treatment, wait until it disappears before you apply any product to your skin. If you experience skin irritation after applying a product to your skin, wash it off with water. If you still get skin reactions, stop using the device and consult your doctor.
Common skin reactions
Your skin may show slight redness and/or may prickle, tingle or feel warm. This reaction disappears quickly.
Dry skin and itching may occur due to shaving or a combination of shaving and light treatment. You can cool the area with an ice pack or a wet face cloth. If dryness persists, you can apply a non-scented moisturizer on the treated area.
Rare side effects
- Burns, excessive redness (e.g. around hair follicles) and swelling: these reactions occur rarely. They are the result of using a light intensity that is too high for your skin tone. If these reactions do not disappear within 3 days, we advise you to consult a doctor. Wait with the next treatment until the skin has healed completely and make sure you use a lower light intensity.
- Skin discoloration: this occurs very rarely. Skin discoloration manifests itself as either a darker patch (hyperpigmentation) or a lighter patch (hypopigmentation) than the surrounding area. This is the result of using a light intensity that is too high for your skin tone. If the discoloration does not disappear within 2 weeks, we advise you to consult a doctor. Do not treat discolored areas until the discoloration has disappeared and your skin has regained its normal skin tone.
- Skin infection is very rare but is a possible risk following a (micro)wound, a skin burn, skin irritation etc.
- Epidermal heating (a sharply defined brownish area which often occurs with darker skin tones and is not accompanied with skin dryness): This reaction occurs very rarely. In case this reaction does not disappear within 1 week, we advise you to consult a doctor. Wait with the next treatment until the skin has healed completely and make sure you use a lower light intensity.
- Blistering (looks like small bubbles on the surface of the skin): this occurs very rarely. In case this reaction does not disappear within 1 month or when the skin gets infected, we advise you to consult a doctor. Wait with the next treatment until the skin has healed completely and make sure you use a lower light intensity.
-
Scarring: often the secondary effect of a burn, which can take longer than a month to heal.
-
Folliculitis (swelling around hair follicles combined with pustule formation): this reaction occurs very rarely and is the result of bacteria penetrating the damaged skin. In case this reaction occurs, we advise you to consult a doctor as folliculitis may need antibiotic ointment.
- Pain: this can occur during or after treatment if you have used the device on skin that is not hair-free, if you use the device at a light intensity that is too high for your skin tone, if you flash the same area more than once and if you use the device on open wounds, inflammations, infections, tattoos, burns, etc.
Troubleshooting
Problem Possible cause Solution
| The device/adapter becomes warm during use. | It is normal for the device and adapter to become warm (but not too hot to touch) during use. | Use the device in a slightly cooler environment and/ or let it cool down before continuing use. |
| The fan is not working. Check if connected. Clean the connectors on the attachment if needed. In case the attachment is well connected and it is possible to produce flashes with the device, contact the Consumer Care Center in your country, your Philips dealer or a Philips service center. | ||
| The cooling airflow of the fan is blocked by hands or a towel. | Make sure the cooling airflow of the fan is unblocked. | |
| When I place the device on the skin, it does not release a flash. The 'ready to flash' light blinks orange. | Your skin tone in the area to be treated is too dark. | Treat other body areas with lighter skin tones with Lumea. |
| The 'ready to flash' light blinks orange and all 5 intensity lights blink as well. | The device needs to be reset. | To reset the device, take the plug out of the socket, wait for 30 minutes to let the device cool down. The device should function normally again. In case it does not work again, contact the Consumer Care Center in your country. |
| The 'ready to flash' light does not light up white. | The device is not completely in contact with your skin. | Place the device at a 90 degree angle on the skin so that the integrated safety system in in contact with your skin. |
Problem Possible cause Solution
| The device produces a strange smell. | The light exit window or the SmartSkin sensor is dirty. | Clean the light exit window and the SmartSkin sensor carefully. |
| You have not removed the hairs on the area to be treated properly. These hairs may get burned and can cause the smell. | Pretreat your skin before you use Lumea. | |
| The device does not flash, the fan is not switched on and all 5 intensity lights blink. | The attachment is not attached properly. | Make sure you attach the attachment completely. If necessary, clean the electronic contacts on the attachment. |
| The skin feels more sensitive than usual during treatment. I experience discomfort when I use the device. | The light intensity setting you use is too high. | Check if you have selected the most comfortable light intensity setting. If necessary, select a lower setting. |
| You did not remove the hairs on the areas to be treated. | Pretreat your skin before you use Lumea. | |
| The UV filter of the light exit window is broken. | If the UV filter is broken, do not use the device anymore. Contact the Consumer Care Center in your country, your Philips dealer or a Philips service center. | |
| You treated an area for which the device is not intended. | Never use the device on the following areas: on moles, freckles, large veins, darker pigmented areas, scars, skin anomalies, warts, tattoos or permanent make-up, around the eyes and on or near the eyebrows, on the lips, nipples, areolas, labia minora, vagina, anus and the inside of the nostrils and ears. Men must not use the device on the face and neck including all beard-growing areas, nor on the whole genital area. | |
| There is no glass filter in my attachment. | This is normal. No action required: there is no filter in the body attachment. Only the facial and bikini attachments have a specialized filter. | |
| The skin reaction after treatment lasts longer than usual. | You have used a light intensity setting which is too high for you. | Select a lower intensity next time (see 'Selecting the light intensity'). |
| The flash is very bright to my eyes. Do I need to wear goggles? | No, Philips Lumea does not hurt your eyes. | The scattered light produced by the device is harmless to your eyes. Do not look at the flash while using the device. It is not necessary to wear goggles during use. Use the device in a well-lit room so that the light is less glaring to your eyes. Be sure to make good skin contact to avoid scattered light. |
Problem Possible cause Solution
| The results of the treatment are not satisfactory. | You have used a light intensity setting which is too low for you. | Select a higher setting next time. |
| You did not flash an area adjacent to an area you treated before. | You have to release the flashes close to, but not overlapping, the previous spot. | |
| The device is not effective on your body hair color. | If you have light blond, grey, red or white hair, the treatment is not effective. | |
| You do not use the device as often as recommended. | To remove all hairs successfully, we advise you to follow the recommended treatment schedule. You can reduce the time between treatments, but do not treat more often than once every two weeks. | |
| You respond more slowly to IPL treatment. | Continue using the device for at least 6 months, as hair regrowth can still decrease over the course of this period. |
Warranty and support
If you need information or support, please visit www.philips.com/support or read the international warranty leaflet.
Recycling
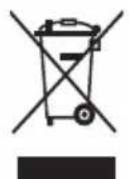
- This symbol means that this product shall not be disposed of with normal household waste (2012/19/EU).
- Follow your country's rules for the separate collection of electrical and electronic products. Correct disposal helps prevent negative consequences for the environment and human health.
Technical specifications
Adapter input 100 V - 240 V \~50/60 Hz 1000 mA
Adapter output 24.0 V 1500 mA
Emitted wavelengths 530 nm - 1400 nm
Pulse duration <1.5 ms
Repetition time 1-3.5 s, depending on chosen setting
Optical exposure Body attachment: 2.5 - 5.0 J/cm2
Bikini attachment: 2.5 - 5.0 J/cm2
Face attachment: 2.5 - 4.5 J/cm2
| Transport and storage conditions | Lumea remains operational in NORMAL USE within its specification after transport or storage in the following environmental range: -25 °C to +5 °C, and +5 °C to +35 °C at a relative humidity up to 90 % RH, noncondensing, and >35 °C to 70 °C at a water vapour pressure up to 50 hPa. |
| Operating temperature conditions | Lumea complies with its specifications when operated in NORMAL USE under the following environmental operating conditions: - a temperature range of +5 °C to +35 °C; - a relative humidity range of 15 % to 90 % RH, noncondensing, but not requiring a water vapour partial pressure greater than 50 hPa; and - an atmospheric pressure range of 700 hPa to 1060 hPa. |
Electromagnetic compatibility - Compliance information
This device complies with all applicable standards and regulations regarding exposure to electromagnetic fields.
Explanation of symbols
The warning signs and symbols are essential to ensure that you use this product safely and correctly and to protect you and others from injury. Below you find the meaning of the warning signs and symbols on the label and in the user manual.

This symbol indentifies the manufacturer: Philips Consumer Lifestyle B.V. Tussendiepen 4, 9206 AD Drachten. The Netherlands

This symbol means that you have to read the user manual carefully before you use the device. Save the user manual for future reference.
This symbol means that the user should consult the instructions for use for important safety information such as cautions that cannot, for a variety of reasons, be presented on the device itself.

This symbol means that the user should consult the instructions for use for important safety information such as contraindications and warnings that cannot, for a variety of reasons, be presented on the medical device itself.
To identify the manufacturer's serial number.

To identify the manufacturer's catalogue number.
Symbol to identify equipment meeting the safety requirements specified for Class II equipment.

This symbol indicates that the equipment is suitable for direct current only.
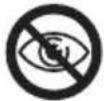 | Symbol indicates that the device should not be used around the eyes and near the eyebrows. |
 | This symbol means an object is capable of being recycled - not that the object has been recycled or will be accepted in all recycling collection systems. |
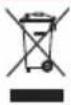 | This symbol indicates WEEE, waste electrical and electronical equipment. Electrical waste products should not be disposed of with household waste. Please recycle where facilities exist. Check with your local authority or retailer for recycling advice and see chapter 'Recycling' |
 | The symbol for the Green Dot ('Der Grüne Punkt' in German). The Green Dot is the license symbol of a European network of industry-funded systems for recycling the packaging materials of consumer goods. |
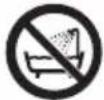 | This symbol means: 'Do not use this device in a bathtub, shower or water-filled reservoir. |
 | This symbol means that the transformer is designed to be short-circuit proof. |
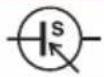 | This symbol means that the transformer is considered a Switch Mode Power Supply (SMPS) unit. |
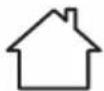 | This symbol means that the device is designed for indoor use. |
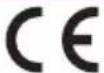 | Symbol applied to products to indicate that they conform with relevant EU directives regarding health and safety or environmental protection. |
 | This symbol indicates that RoHS substances above the maximum concentration limit are used in this product. |
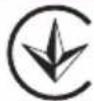 | Symbol applied to products to indicate that they conform with relevant safety and Electromagnetic Compatibility (EMC) requirements. |
 | Symbol indicates the enery efficiency of the device. |
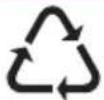 | A recycling symbol to identify the material of which an item is made, to facilitate recycling or other reprocessing. The symbol may include a number and/or abbreviation. |
Inhalt
Willkommen! 31
Produktüberblick 32
Gegenanzeigen 32
Hinweis: Replacing one of the IPL treatments with another hair removal method (e.g. waxing, epilating) will not help to reach the desired hair reduction.
24 hrs
Remarque : Replacing one of the IPL treatments with another hair removal method (e.g. waxing, epilating) will not help to reach the desired hair reduction.
24 hrs
Embout corps
Nota: Replacing one of the IPL treatments with another hair removal method (e.g. waxing, epilating) will not help to reach the desired hair reduction.
24 hrs
8 Attendete 24 ore.
Accessorio corpo
Accessorio viso (SC1997, SC1998, SC1999)

Opmerking: Replacing one of the IPL treatments with another hair removal method (e.g. waxing, epilating) will not help to reach the desired hair reduction.
24 hrs
Lichaamsopzetstuk


- SKIN TONE TABLE / HAUTTONTABELLE / TABLEAU DE TEINT DE PEAU / TABELLA DEL TONO DELLA PELLE / HUIDTINTTABEL
- CONTENTS
- WELCOME
- DEVICE OVERVIEW
- CONTRAINDICATIONS
- CONDITIONS
- MEDICATIONS/HISTORY
- PATHOLOGIES/DISORDERS
- SKIN CONDITIONS
- LOCATION/AREAS
- IMPORTANT SAFETY INSTRUCTIONS
- WARNING
- CAUTION
- HOW IPL WORKS
- SUITABLE BODY HAIR COLORS
- RECOMMENDED TREATMENT SCHEDULE
- INITIAL PHASE
- TOUCH-UP PHASE
- TOUCH-UP TREATMENT SCHEDULE
- WHAT TO EXPECT
- AFTER INITIAL PHASE
- DURING TOUCH-UP PHASE
- HOW TO USE YOUR LUMEA
- A REMOVE HAIR & CLEAN YOUR SKIN
- B TEST SKIN 24 HRS BEFORE TREATMENT
- C TREATMENT
- D CLEAN & STORE AFTER TREATMENT
- LEARNING MORE ABOUT YOUR LUMEA
- ATTACHMENTS
- BODY ATTACHMENT
- FACIAL ATTACHMENT (SC1997, SC1998, SC1999)
- BIKINI ATTACHMENT (SC1998, SC1999)
- SKIN TONE SENSOR
- SELECTING THE LIGHT INTENSITY
- TWO TREATMENT MODES: STAMP & FLASH AND SLIDE & FLASH
- TREATMENT TIME PER AREA
- USING YOUR LUMEA BEFORE AND AFTER TANNING
- TANNING WITH NATURAL OR ARTIFICIAL SUNLIGHT
- TANNING WITH CREAMS
- TRAVELING WITH THE DEVICE
- AFTER USE
- AFTERCARE
- COMMON SKIN REACTIONS
- RARE SIDE EFFECTS
- WARRANTY AND SUPPORT
- RECYCLING
- TECHNICAL SPECIFICATIONS
- ELECTROMAGNETIC COMPATIBILITY - COMPLIANCE INFORMATION
- EXPLANATION OF SYMBOLS
- INHALT
- EMBOUT CORPS
- ACCESSORIO CORPO
- ACCESSORIO VISO (SC1997, SC1998, SC1999)
- LICHAAMSOPZETSTUK
Brand : PHILIPS
Model : Lumea Advanced SC1994
Category : Epilator