
My Groom HC5100 - Beard trimmer REMINGTON - Free user manual and instructions
Find the device manual for free My Groom HC5100 REMINGTON in PDF.

| Brand | Remington |
| Model | My Groom HC5100 |
| Product type | Beard trimmer |
| Power supply | Mains via adapter (not shown) |
| Cord length | Approximately 1.8 m |
| Blade material | High-quality stainless steel |
| Included cutting guides | 3 mm, 6 mm, 9 mm, 12 mm, 18 mm |
| Cutting height adjustment | By removable combs and guide-free cutting |
| Usage | Hair and beard |
| Maintenance | Cleaning with soft brush, blade oil |
| Cleaning | Do not rinse with water, damp cloth |
| Safety | Keep device dry, out of reach of children |
| Protection rating | IPX0 (not waterproof) |
| Weight | Approximately 200 g |
| Dimensions (L x W x H) | 15 x 4 x 4 cm (approx) |
| Warranty | 2 years |
| Included accessories | Cutting guide, cleaning brush, oil, adapter |
| Recommended use | Domestic only |
Frequently Asked Questions - My Groom HC5100 REMINGTON
User questions about My Groom HC5100 REMINGTON
0 question about this device. Answer the ones you know or ask your own.
Ask a new question about this device
Download the instructions for your Beard trimmer in PDF format for free! Find your manual My Groom HC5100 - REMINGTON and take your electronic device back in hand. On this page are published all the documents necessary for the use of your device. My Groom HC5100 by REMINGTON.
USER MANUAL My Groom HC5100 REMINGTON
Thank you for buying your new Remington® product. Please read these instructions carefully and keep them safe. Remove all packaging before use.

IMPORTANT SAFEGUARDS
- This appliance can be used by children aged from 8 years and above and persons with reduced physical, sensory or mental capabilities or lack of experience and knowledge if they have been supervised/instructed and understand the hazards involved. Children shall not play with the appliance. Cleaning and user maintenance shall not be done by children unless they are older than 8 and supervised. Keep the appliance and cable out of reach of children under 8 years.
WARNING: Keep the appliance dry. - Do not use the product with a damaged cord. A replacement can be obtained via our International Service Centres.
- Do not leave the appliance unattended while plugged in.
- Keep the power plug and cord away from heated surfaces.
- Make sure the power plug and cord do not get wet.
- Do not plug or unplug the appliance with wet hands.
- Do not twist or kink the cable, or wrap it round the appliance.
- This appliance is not intended for commercial or salon use.
PARTS
- On/Off Switch
- Setting scale
- Blade set
- Comb lock
- Power Port
- Adaptor (not shown)
- Comb
INSTRUCTIONS FOR USE
TO ATTACH THE COMB
- Hold the comb with its teeth upward.
- Depress the comb lock.
- Slide it onto and along the clipper blade until the front of the comb firmly sits against the clipper blade.
TO REMOVE THE COMB
- Hold the clipper with the blades facing away from you.
- Depress comb lock and firmly push the comb upward and away from the blades.
AJUSTING THE COMB
Depress the comb lock then slide the comb up or down until the chosen marking on the setting scale is opposite the arrow on the body of the trimmer.
BEFORE STARTING THE CUT
- Inspect the clipper making sure that it is free from hair and dirt.
- Seat the person so that their head is approximately at your eye level.
- Before cutting, always comb the hair so it is tangle free and dry.
- For even cutting, allow the comb attachment/blade to cut its way through the hair. Do not force it through quickly.
STEP 1 - NAPE OF THE NECK
- Set the comb to 3mm or 6mm.
- Hold the clipper with the blade teeth pointing upwards. Begin starting at the centre of the head at the base of the neck.
- Slowly lift the clipper, working upwards and outwards through the hair, trimming just a little at a time.
STEP 2 - BACK OF THE HEAD
With the comb set at 12mm or 18mm , cut the hair at the back of the head.
STEP 3 - SIDE OF THE HEAD
Set the comb to 3mm or 6mm, trim sideburns then change the setting to 9mm and continue to cut the top of the head.
STEP 4 - TOP OF THE HEAD
- For longer hair on top, use without a guide comb. Lift the hair on top of the head with a small hand comb. Cut over the hand comb with the hair lifted or hold the hair between the fingers to lift it and cut it to the desired length.
Always work from the back of the head.
- Use the clipper without an attachment comb for close trimming around the base and sides of the neck.
- To produce a clean straight line at the sideburns, reverse the hair clipper. Place the reversed clipper at right angles to the head, tips of the blades lightly touching the skin and then work downwards.
SHORT TAPERED STYLES - "FLAT TOPS" AND SHORT CUTS
- Hold the guide comb flat against the head and slowly move the clipper through the hair.
-
Use the same procedure from the lower side to the upper side of the head. Then cut the hair against the direction in which it grows and level with the sides.
-
To give a "flat top" look, the hair on top of the head must be cut over the top of a flat comb.
- Use a closer guide comb to taper the hair down to the neckline as desired.

CARE FOR YOUR HAIRCLIPPER
Your clipper is fitted with high quality blades. To ensure long lasting performance of your clipper, clean the blades and unit regularly. Always keep the attachment guide comb on the trimmer blade.
AFTER EACH USE
- Ensure the clipper is switched off and disconnected from the mains before cleaning.
- Brush the accumulated hair from the blades. Do not submerge the clipper in water.
- To clean unit, wipe with damp cloth and dry immediately.
- Place a few drops of cutter or sewing machine oil onto the blades. Wipe off excess oil.
CLEANING CAUTIONS
- Cleaning should be done with a soft brush, such as the brush supplied with the product.
- Do not rinse under water.
- Do not use harsh or corrosive cleaners on the units or their blades.
- Ensure the appliance is switched off and unplug from the main outlet before cleaning.
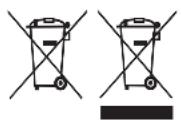
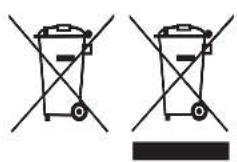
RECYCLING
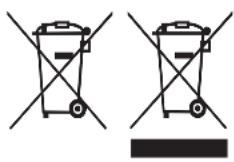
To avoid environmental and health problems due to hazardous substances, appliances and rechargeable and non-rechargeable batteries marked with one of these symbols must not be disposed of with unsorted municipal waste. Always dispose of electrical and electronic products and, where applicable, rechargeable and non-rechargeable batteries, at an appropriate official recycling/ collection point.
KORTE GESTRUCTUREERDE KAPSELS - "FLAT TOPS" EN KORT HAAR
UW APPARAAT VERZORGEN
INNAN DU BÖRJAR KLIPPA
KAZDYCH SEST MESIACOV
Kvapnite na cepele niedolkko kvapiek oleja na sijacie stroje. Prebytocny olej odstrante.
UPOZORNENIA PRI CISTENI
KROK 5 - KONEČNÁ UPRAVA
PERYUNPOBKA HACADKN-PACCHEKNI
HaxmTe Ha NKCaTOp HacAn-pacYeCKn I nepeBnHbTe ee BBepx Nn Bn3, Noka CTpeNka Ha Kopnyce TpMMepa He yKaKeT Ha HyKHyO OTMeTKy Ha ShKane.
IPEPCTPNKKOJ
- OcmotpuTe MaunHky, y6eintecb B OTCyTcBn Ha Hei BOLOc n Tpr3n.
- YcaIte yeNoBeka TaK, yTo6bI erO rONoBa hAxoIInacb npi6n3nteHbHO Ha ypoBHe BaXnx rJa3.
- Парастпжков BCERda paCuecBbAaTe BOLOcbl, qTO6bl OHI 6bln HeCnyTabuIMMCsI cyxIMN.
- Дя paBHOMePHoI CTpIXKn ПpoBOJNTe Jne3BnA Mn C HaeTeO'HacdKO' NO BOLOcAM. He nepemea'te MaunHky cInsKOM 6bICTpo.
WAF1-3ADHЯYACTb WEN
PPEIOCTEPEXKENI INCTKE
- UNCTNTb MOXHO TOJIbKO pR N POMOUI MRAKOH 1eTKU, KOTOPA NOCTaBnETCB MECTe C H3dennem.
- He npombyBaIte noD BDOJ.
He nCnoIb3yIte InIyNCTKn yCTpoIcTba nnI ne3Bn arpeccNBhIe nn Nbl3bIBaIOuNe Koppo3nIO BeIeCTBa. - Pered uNCTKoI npOBepbTe, UTo6bl yCToPoiCTBO 6blIO BBIKUoyeHO n OTCoEINHeHO O T CeTn.
ПОВТOPHA ПЕPEPAБOTKA
Bo n36eXaHHe Bo3DeiCTBnBpeiNbI X BeIeCTB Ha OkpykaIOU cyPeDy I 3dOpOBBe np6Opby i 6batapeu OndHopa3OBOrO IIN MHoropa3OBORO NcPONb3OBaHn, PomeueHHbIe OndHM I3 3Tnx CmMBoJOB, Heo6xOIMO yTUN3NpOBaTb OTJeBHO OT HecOpTnpOBaHHbIX 6bITOBbIX OTXODOB. O6aTeJIbHO yTUN3NpyIte 3JIeKTPnueckne I 3JIeKTPoHNbIe I3IeINa, a TAKKe (ecn 3TO npImeHMo) 6batapeu OndHopa3OBOrO IIN MHoropa3OBORO NCPOlb3OBaHn B COOTBeTCTByIOUx OfNUaJIbHbIX NyHKTax NOBTopHOI nepepa60TK / c6op a OTXODOB.

TIA NA IPOZAPTHSETE MIA XTENA
BRIGA O VAŠEM ŠIŠACU ZA KOSU
Vas sisaç je opremljen visokokvalitetnim ostricama. Kako biste osigurali dugotrajnu učinkovitost Vaseg sisaça, redovito Čistite ostrice i Jedinicu. Uvijek držite nastavak Češla na ostrici trimera.
NAKON SVAKE UPORABE
- Prijeciccenja osiguraje da je ureadaj iskljucen i iskopcan iz uticnice elektricne mreze.
- Otresite nakupljene dlacice iz ostrica. Nemojte uranjati sišač u vodu.
- Kako biste očistili Jedinicu, vlažnom krpom obrišite urežaj i odmah ga osušite.
SVAKIH EST MJESECI
- Stavite par kapi ulja za šišače ili šišać strojeve na oštrice. Obrisi visak ulja.
UPOZORENJE TIJEKOM CISCENJA
- Ciscenje treba vršiti samo mekanom Četkicom poput one koju ste dobili sa proizvodom.
- Nemojte ispirati podvodom.
- Ne koristite gruba ili abrazivna sredstva za cijscenje na Jedinicama ili njihovim ostricama.
- Prijce cisćenja osigurajte da je urežaj isklijčen i iskopčan iz uticnice elektricne mreze.
RECIKLAZA
Kako bi se izbjegle stetne posljedice na okoliš i zdravlje zbog opasnih supstanci, urežaji i punjive i nepunjive baterije obilježene jegnim od ovih simbola ne smiju se zbrinjavati kao nerazvrstani komunalni OTPad. Uvjek odložite elektricne i elektronicke proizvode i, gdje je primjenljivo, punjive i nepunjive baterije, u odgovarajućem zvaničnom mestreu za sakupljanje/reciklažu.
CTbIIKA 5-ΦINHAJIHHTE UPPNXI
HA BCEKN IECT MECELA
- Пoctabete Няколко Kaikn MaunHHo Macno Bbpy octpneTa. 36bpwe Te n3nnHOTOMacno.
ПРЕДПАЗНМЕРКИ ПРИ NOЧNTBAHE
-Почиствано Тразьда се ИЗвршва само с Meka YeТа, КATO ТАИ, РедостаBEна с подуКта.
He n3nlaKaBaiTe noD BOda.
He n3noJ3BaIte rpy6n KOpO3NBn NouchTbaun CpeDCTBa Ha ypeDa nn HeROBIne pe3u.
- YbepTe ce, Ye ypeIbTe e n3KIOueH OT 6yToHa I e n3KIOueH OT eJeKTpUeCKnKoHTaKT npEi Da rO NouCTBaTe.
PEÇUKJIIPAHE
3a da ce n36erHaT ekOJorHn H 3dpaBn npoBemn nopadn haHnue Ha onaChn cy6ctaHcnn, ypeiNe, akymlaTopHnTe N
HeakymyIaTOPHnTe 6aTePnN, o603NaYeHn C eHN OT Te3N CmBOnN, He
Tp6Ba da ce n3XBpbIaT 3aeHNo C hecOpTpapaHn 6uHHckn OTnaDbuN.
Bunaru n3XBbPnIe eKeKtpnueckn n eKeKtpoHn npoDyKTn N,
KbDeTo e npInIOxIMo, akymyIaTOPHn H heakymyIaTOPHn 6aTePnN, Ha
noxDxOJaO OfHuaJIHo Macto 3a peuKnIPAhe/cb6npaHe.
J So 150
J 1 J 1
aale aie g csej
8 8 8 8 8 8 8 8 8 8 8 8 8 8 8 8 8 8 8 8 8 8 8 8 8 8 8 8 8 8 8 8 8 8 8 8 8 8 8 8 8 8 8 8 8 8 8 8 8 8 8
lalj
4a + 1 = 9
1 1
.
a
=
a1 = 20, b1 = 25
. jieai ji
·s S1 = 12 · S1 = 12
aui jll jall
(On/off) /Jz
2
()J 3
以 A
pduwyl
b.
aaii
4ule biwally biwll jao
.3
1
slic 1
2
biuill buis
bll lcll jll lll lll lll ll lll lll lll
jie 1
AE
#
. jill
.
.
.
(a)
3 6 1
.2
.3
wirll -2 gbb
18 12 12
3 0
9 1 1 1 1 1 1 1 1 1 1 1 1 1 1 1 1 1 1 1 1 1 1 1 1 1 1
.
4-
( xt^2 + x) ( xt^2 - x) = 0
423 1 1
.
5gbs
·
y = - 12x + 3 BC//l
Jauo Jaojoo
aagg“aaas gogj”-aaalll aai
.
.
.
.
y
a 1 a
yill jie s jie gle lai jall jll jia
puiu
.
.
.
J
.
a.5i11 1e
.
. cll
.
y
J 1
i 1
aIblll lalbll (nS aI) 15
/2y 1
1
AE


Model No. HC5100
Remington® is a Registered Trade Mark of Spectrum Brands, Inc.,
or one of its subsidiaries
VARTA Consumer Batteries GmbH & Co. KGaA, Alfred-Krupp-Str. 9, 73479 Ellwangen, Germany
www.remington-europe.com