SBT 3.6 B1 - Lady shaver SILVERCREST - Free user manual and instructions
Find the device manual for free SBT 3.6 B1 SILVERCREST in PDF.
| Product Type | Electric shaver for women (Ladyshave) |
| Brand | SilverCrest |
| Model | SBT 3.6 B1 |
| Power supply | Built-in rechargeable battery, charges via charging station or direct cable (connector 18) |
| Charging time | At least 16 hours for the first charge |
| Runtime | Approximately 20 minutes |
| Usage | Dry shaving and wet shaving (with soap foam or shaving foam) |
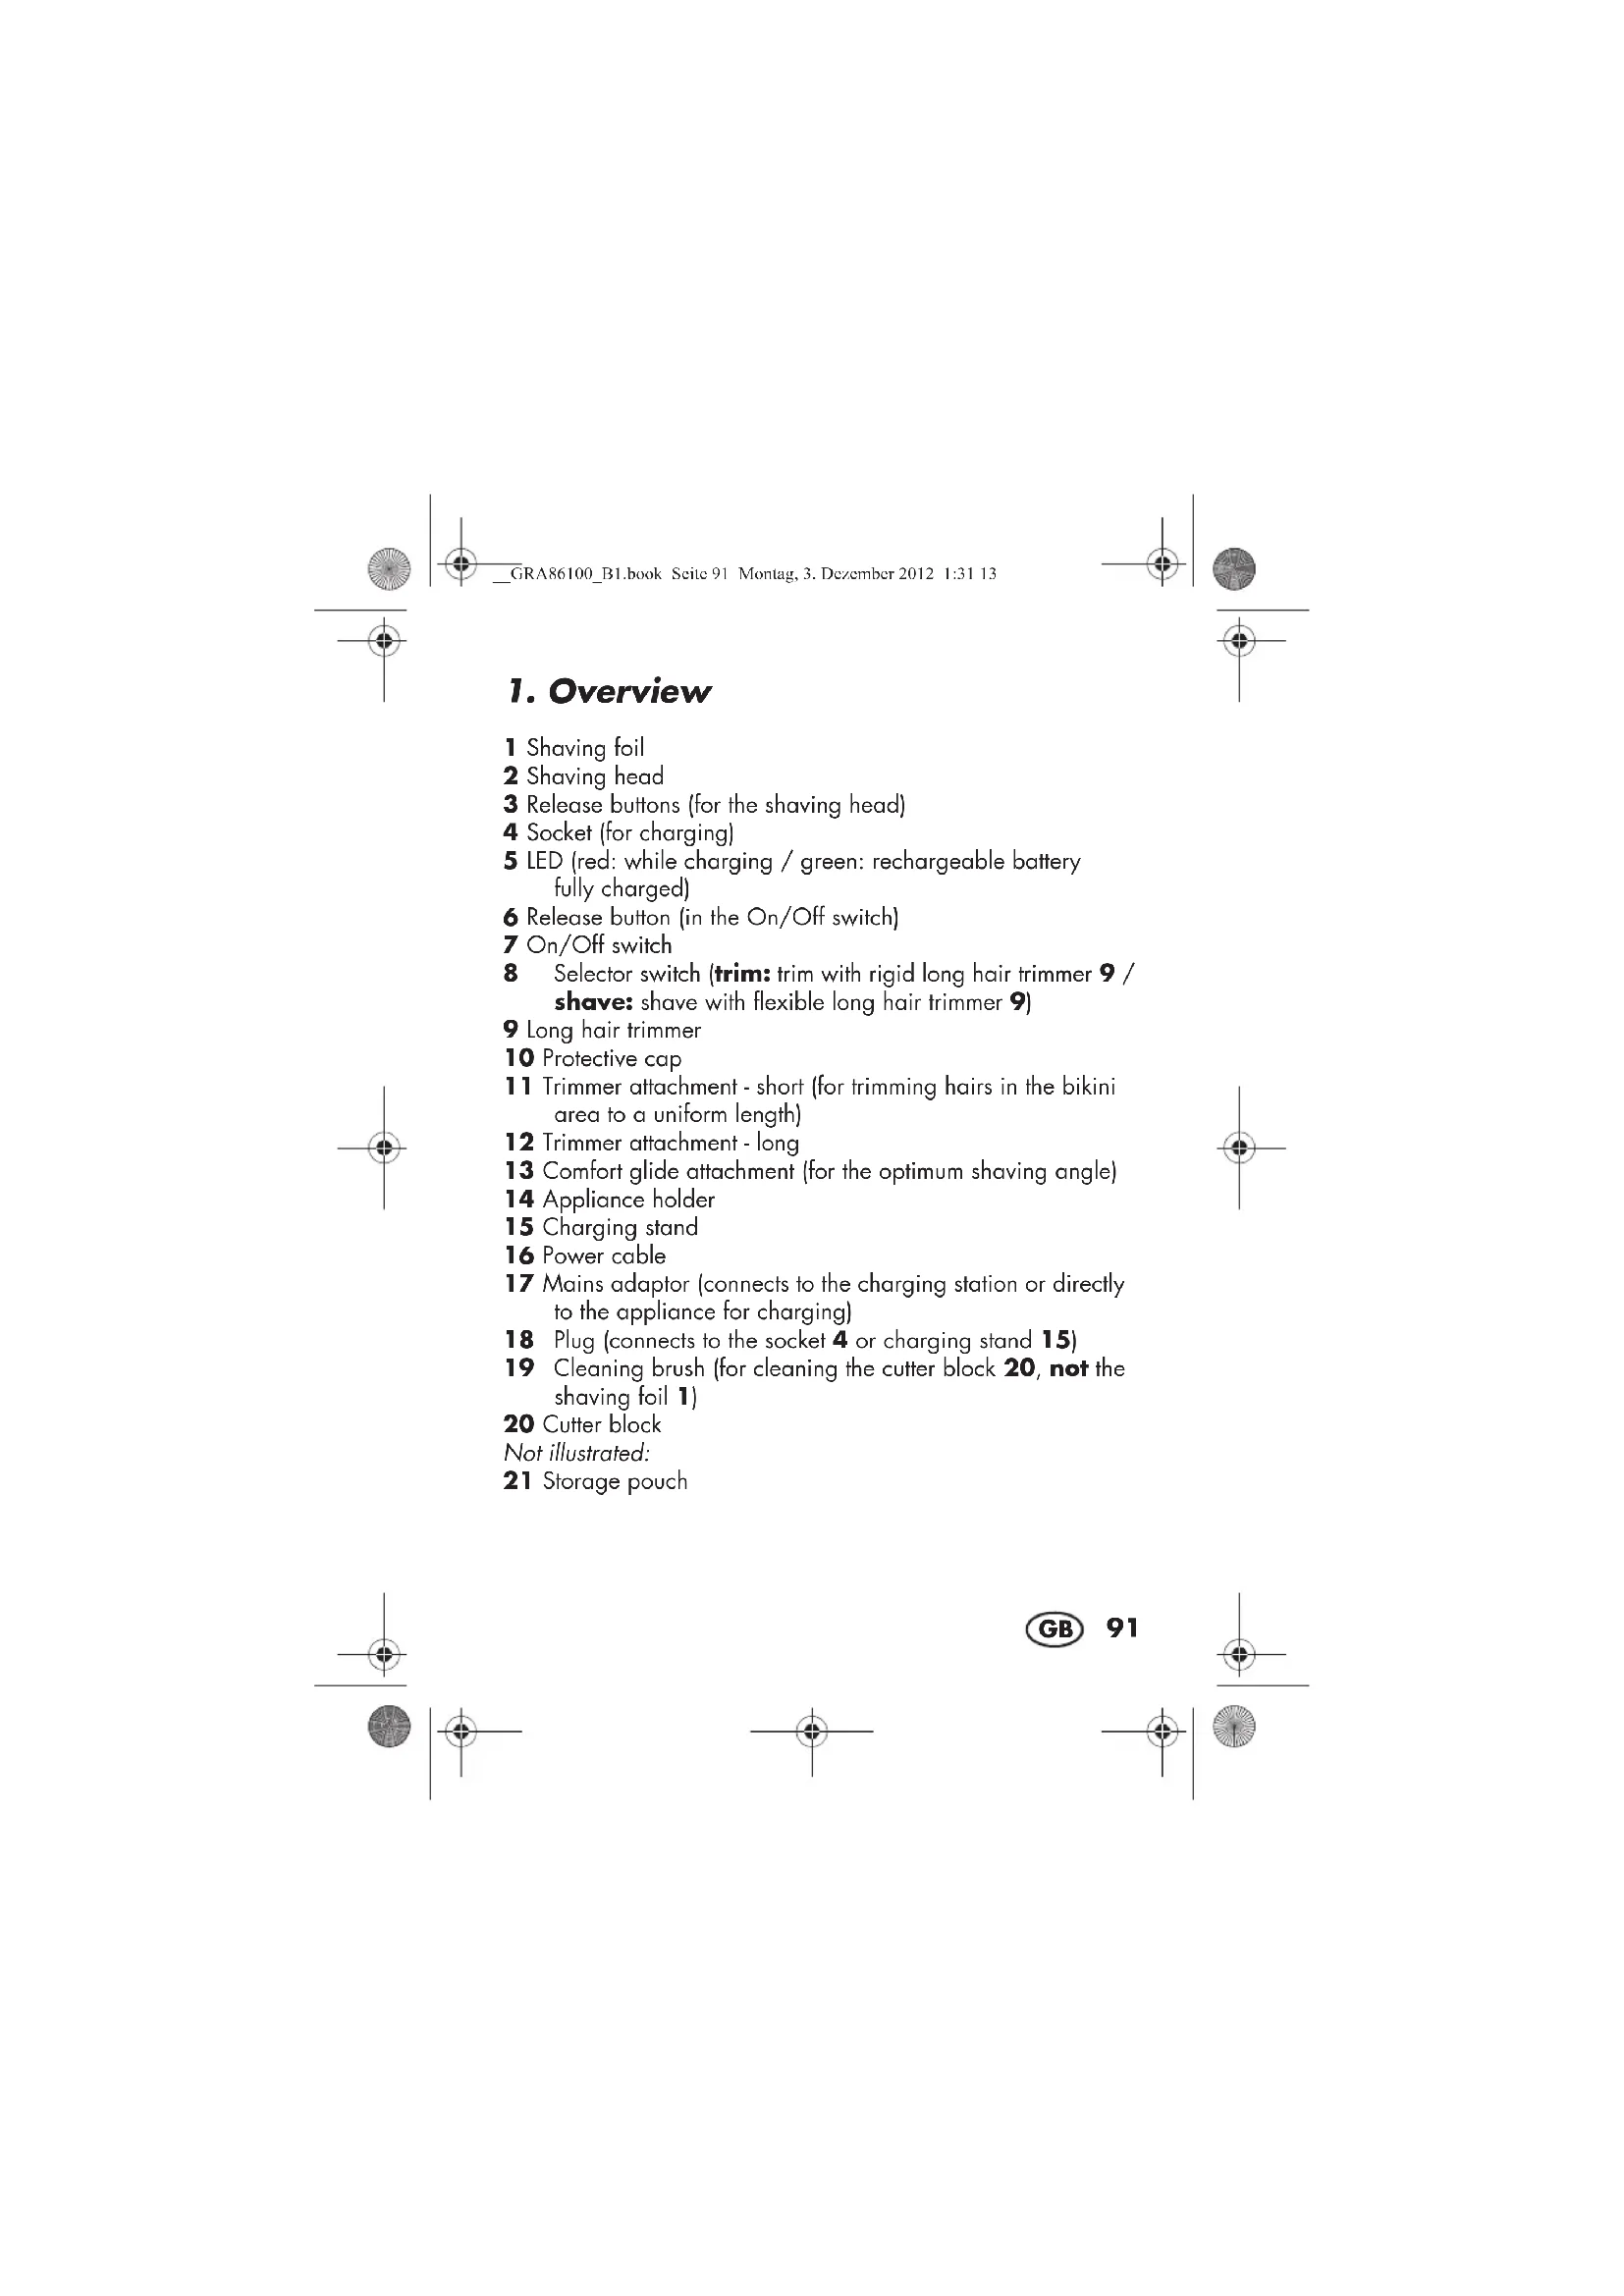
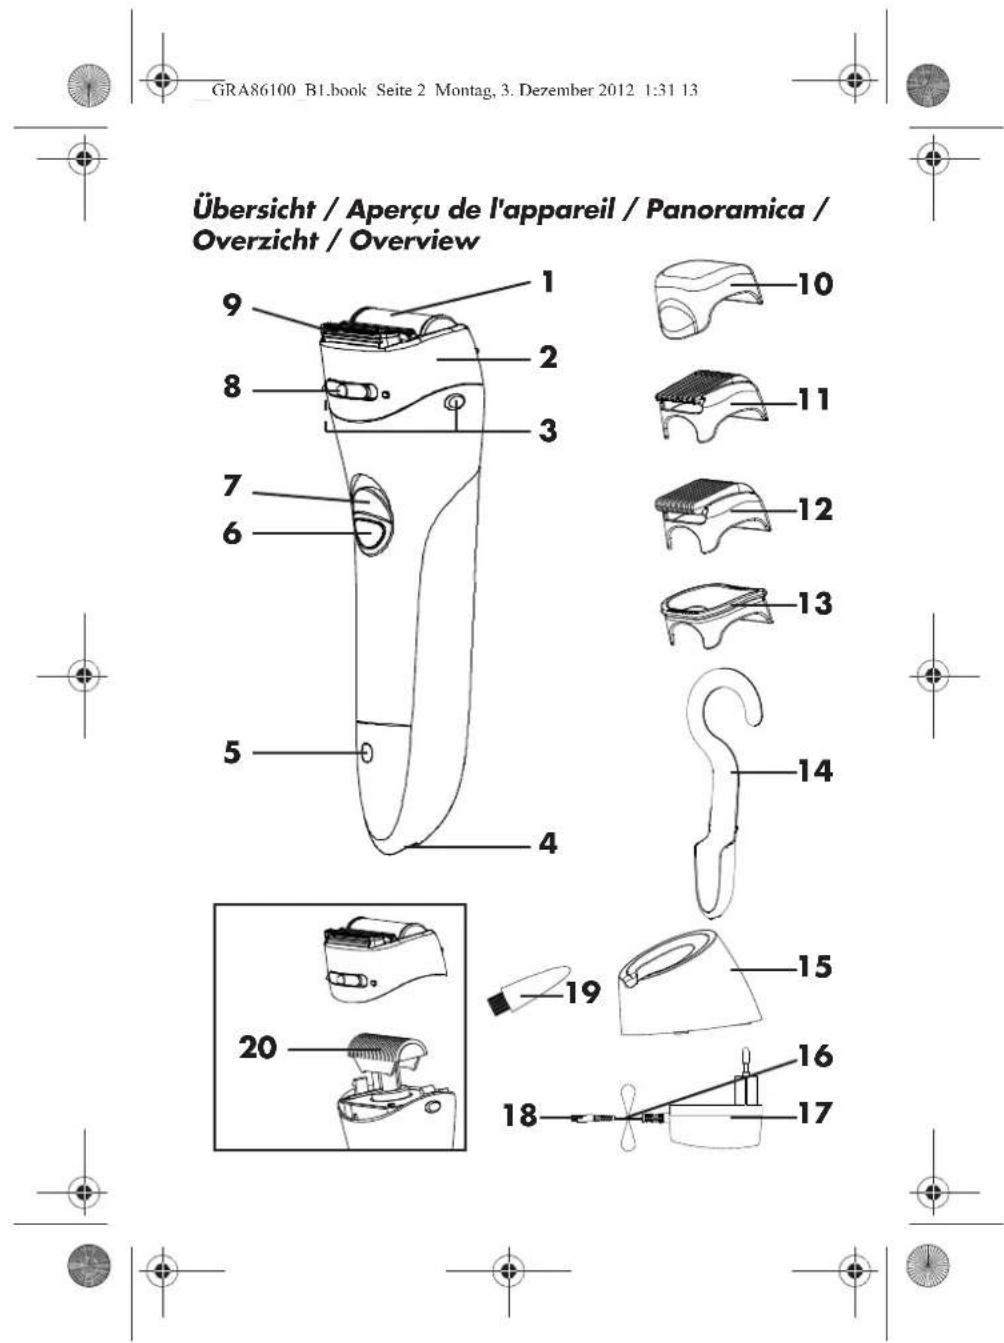
| Shaving head | Fine foil + integrated long hair trimmer |
| Additional function | Positioning insert for optimal shaving angle |
| Safety | Unlock button for power-on, protective cap, automatic shut-off? |
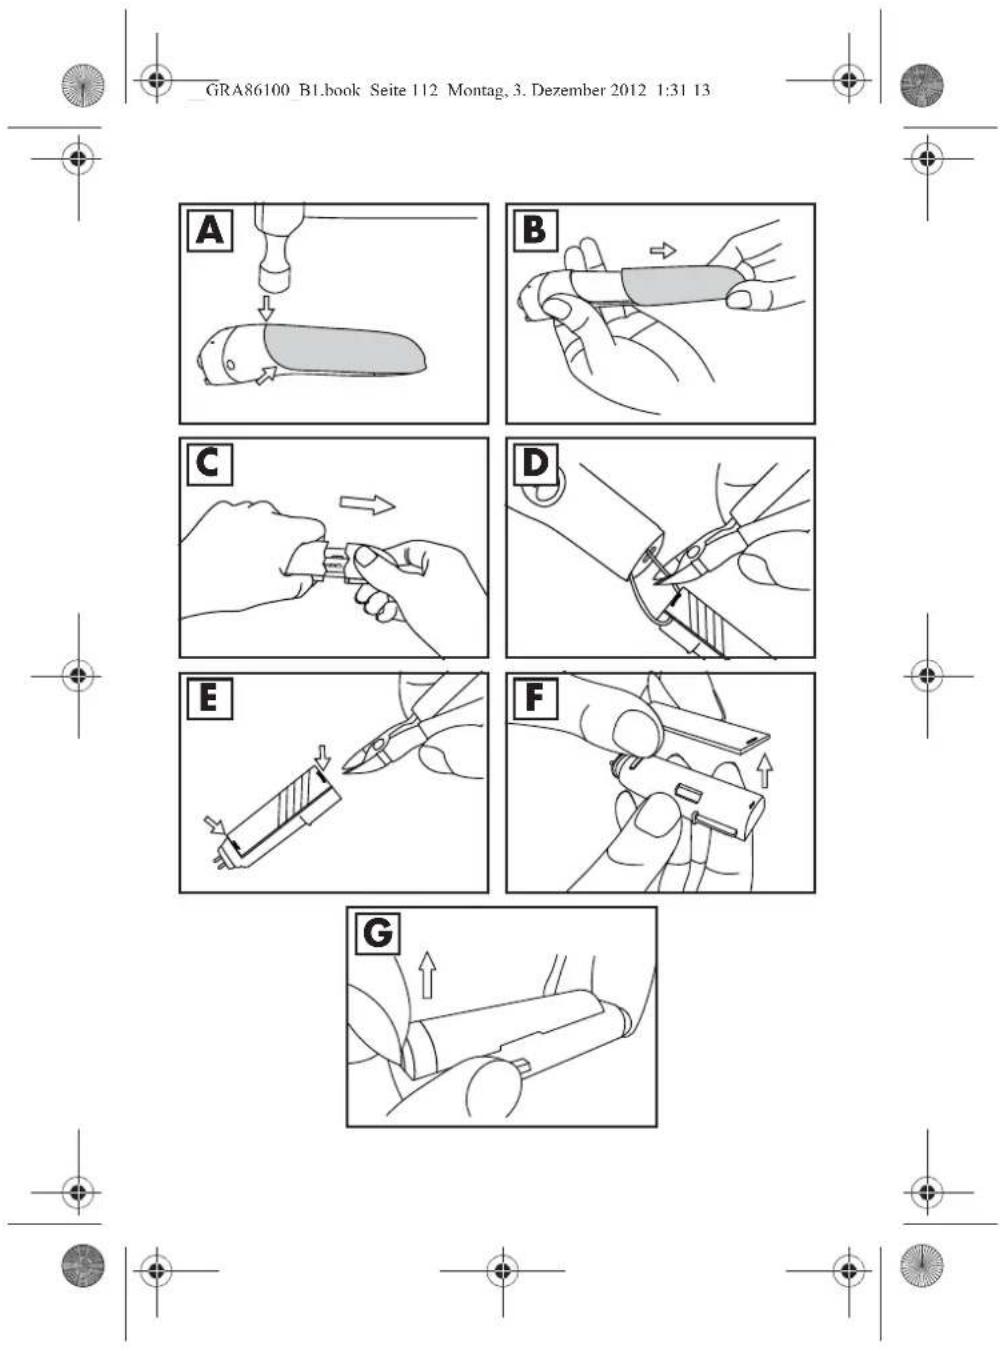
| Cleaning | Removable head washable under cold running water; do not use hot water or abrasive cleaners |
| Maintenance | Periodically oil the shaving foil |
| Charge indicator | Charge LED (LED 5): lights up during charging |
| Included accessories | Charging station, power adapter, replacement foil, positioning insert, protective cap, storage bag |
| Spare parts | Replacement foil available at www.hoyerhandel.com |
| Warranty | Warranty by HOYER Handel GmbH (see manual) |
| Material | Plastic body, fine metal foil |
| Water usage | Usable in the shower or bath (unplugged); do not submerge |
| Weight | Approximately 150 g (estimated) |
| Dimensions | Approximately 15 x 5 x 5 cm (estimated) |
Frequently Asked Questions - SBT 3.6 B1 SILVERCREST
User questions about SBT 3.6 B1 SILVERCREST
0 question about this device. Answer the ones you know or ask your own.
Ask a new question about this device
Download the instructions for your Lady shaver in PDF format for free! Find your manual SBT 3.6 B1 - SILVERCREST and take your electronic device back in hand. On this page are published all the documents necessary for the use of your device. SBT 3.6 B1 by SILVERCREST.
USER MANUAL SBT 3.6 B1 SILVERCREST
Operating instructions
IAN 86100
FR CH
RASOIR FEMME
Mode d'emploi
NL
DAMES-SCHEERAPPARAAT
Gebruiksaanwijzing
DE AT CH
FR IT NL
GB


Fault Possible causes/Action
| The appliance can-not be switched on. | ● Is the rechargeable battery flat? ● Did you press the release button 6 when switching on? |
| You experience a pulling sensation when shaving and/or the shave is less close than usual. | ● Oil the shaving foil 1. ● If that does not help, it may be necessary to replace the shaving foil 1. |
| The rechargeable battery cannot be charged or the rechargeable battery power is very low. | ● The rechargeable battery has reached the end of its service life. The rechargeable battery must be removed and the appliance disposed of. (See the Chapter "Disposal" on page 106) |
GB
105


| Model: SDR 1000 A1 | |
| Mains adaptor | |
| Model No.: HC-11-028015EU / HC-11-028015BS (UK) | |
| Input: 100-240V ~ 50/60Hz 0,5 A max. | |
| Output: 2,8 V = 50 mA | |
| Protection class: II □ | |
| Type of protection: IP44 | |
| Type of protection of handheld appliance: | IPX7 |
| Rechargeable battery: Ni-MH, AA | 1.2 V |
Subject to technical modifications.

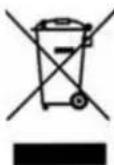
12. Disposal
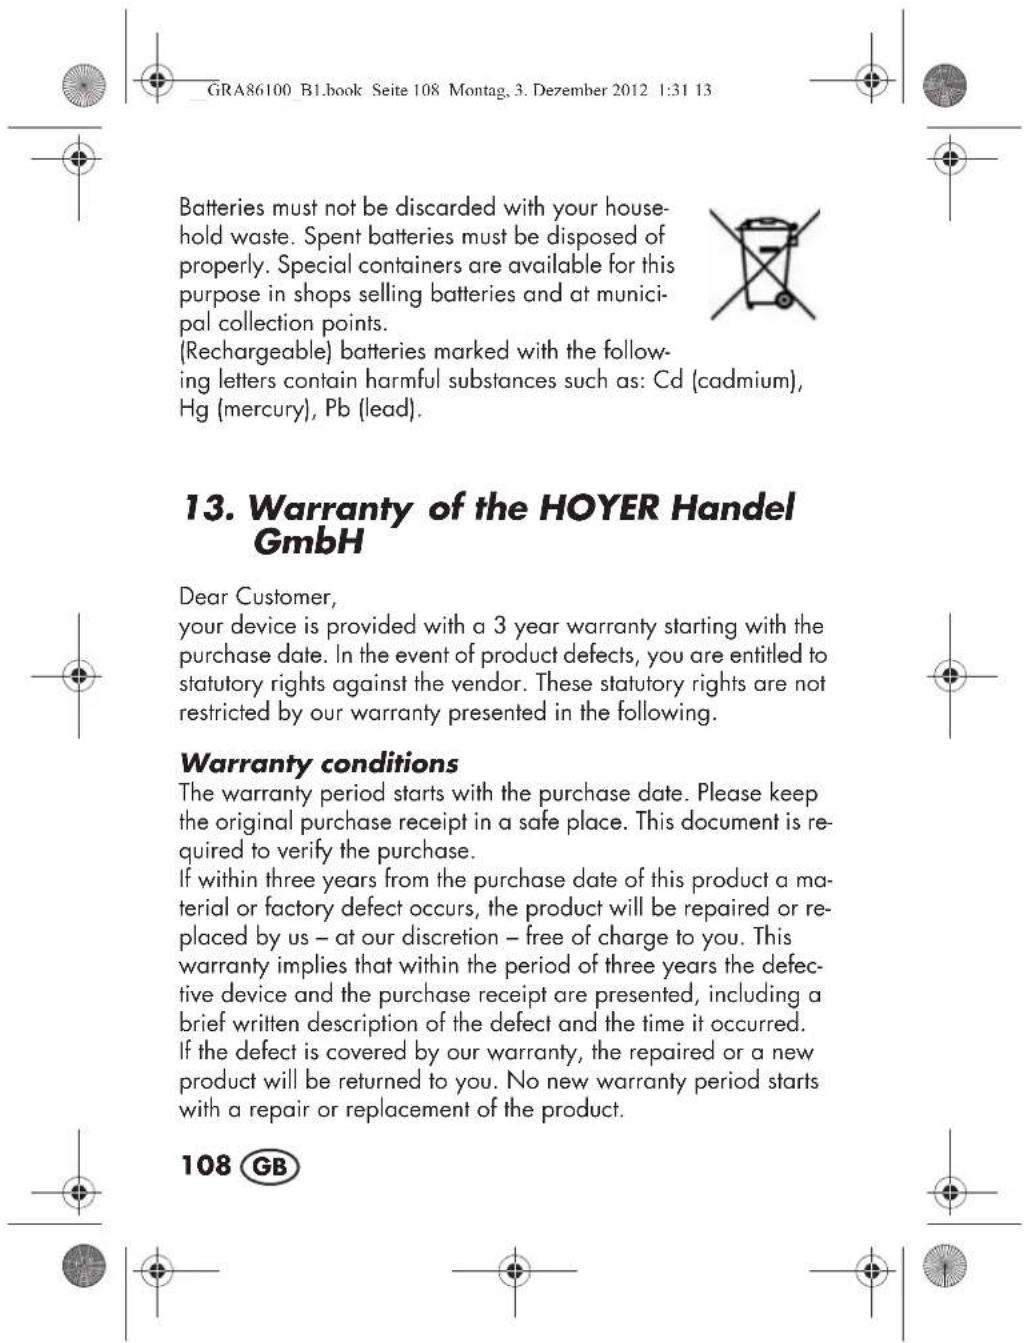
The symbol showing a wheelie bin crossed through indicates that the product requires separate refuse collection in the European Union. This applies to the product and all accessories marked with this symbol. Products identified with this symbol may not be discarded with normal household waste, but must be taken to a collection point for recycling electric
and electronic appliances. Recycling helps to reduce the consumption of raw materials and protect the environment.


HOYER HANDEL GMBH
Kühnehoe 5
D-22761 Hamburg