
W830 - Windshield wiper ECOVACS - Free user manual and instructions
Find the device manual for free W830 ECOVACS in PDF.
Frequently Asked Questions - W830 ECOVACS
User questions about W830 ECOVACS
0 question about this device. Answer the ones you know or ask your own.
Ask a new question about this device
Download the instructions for your Windshield wiper in PDF format for free! Find your manual W830 - ECOVACS and take your electronic device back in hand. On this page are published all the documents necessary for the use of your device. W830 by ECOVACS.
USER MANUAL W830 ECOVACS
natural_image
Exterior view of a white electric iron or power station with a control panel and cable (no visible text or symbols)Live Smart. Enjoy Life.
Congratulations on the purchase of your Ecovacs Robotics WINBOT!
We hope it brings you many years of satisfaction. We trust the purchase of your new robot will help keep your home clean and provide you with more quality time to do other things.
Before you go any further, please register your product on the Ecovacs website at www.ecovacsrobotics.com/registration/. We also suggest you record your model number, serial number, date of purchase and attach your receipt to this page for safekeeping.
MODEL # ____
SERIAL # ____
DATE OF PURCHASE ____ / ____ / ____
Should you have any problems programming the robot or getting your robot to function properly, please call us before contacting or returning it to the place of purchase. For more information, assistance or Warranty information, please visit the Ecovacs Robotics website at www.ecovacsrobotics.com or call 1-844-ECOVACS (1-844-326-8227).
Thank you for choosing WINBOT!
Contents
- Important Safety Instructions....2
- Package Contents and Technical Specifications....4
2.1 Package Contents....4
2.2 Specifications....4
2.3 Product Diagram....5
- Operating the Robot....6
3.1 Notes Before Cleaning....6
3.2 Attach Cleaning Pad....7
3.3 Assemble Power Adapter....7
3.4 Install Safety Tether....7
3.5 Place Safety Pod....9
3.6 Spray Cleaning Solution....9
3.7 Start....10
3.8 Pause....11
3.9 Stop....12
- Maintenance....13
4.1 Cleaning Pad....13
4.2 Fan and Sensors....13
4.3 Driving Treads....14
-
Status Indicator Light and Sounds....14
-
Troubleshooting....15
1. Important Safety Instructions
When using an electrical appliance, basic precautions should always be followed, including the following:
READ ALL INSTRUCTIONS BEFORE USING THIS APPLIANCE.
SAVE THESE INSTRUCTIONS
- This Appliance is not intended to be used by children under 8 or anyone lacking knowledge on proper use. Supervision may be necessary. Do not allow children to play with the Appliance.
- Do not use the Appliance in extremely hot or cold environments (below 0^ C/32°F or above 40^ C/104°F). The Appliance can be used to clean outside windows if it is properly tethered to the Safety Pod, winds are calm, and it is not raining or snowing.
- Please ensure the Appliance is plugged in while it is cleaning. The Appliance has a Back-Up Battery that charges during use. The Back-Up Battery powers the Appliance if it becomes unplugged or the electricity fails.
- Do not leave the Appliance unattended when it is plugged in.
- For household use ONLY. Do not use the Appliance in commercial or industrial environments.
- Do not use the Appliance on cracked glass.
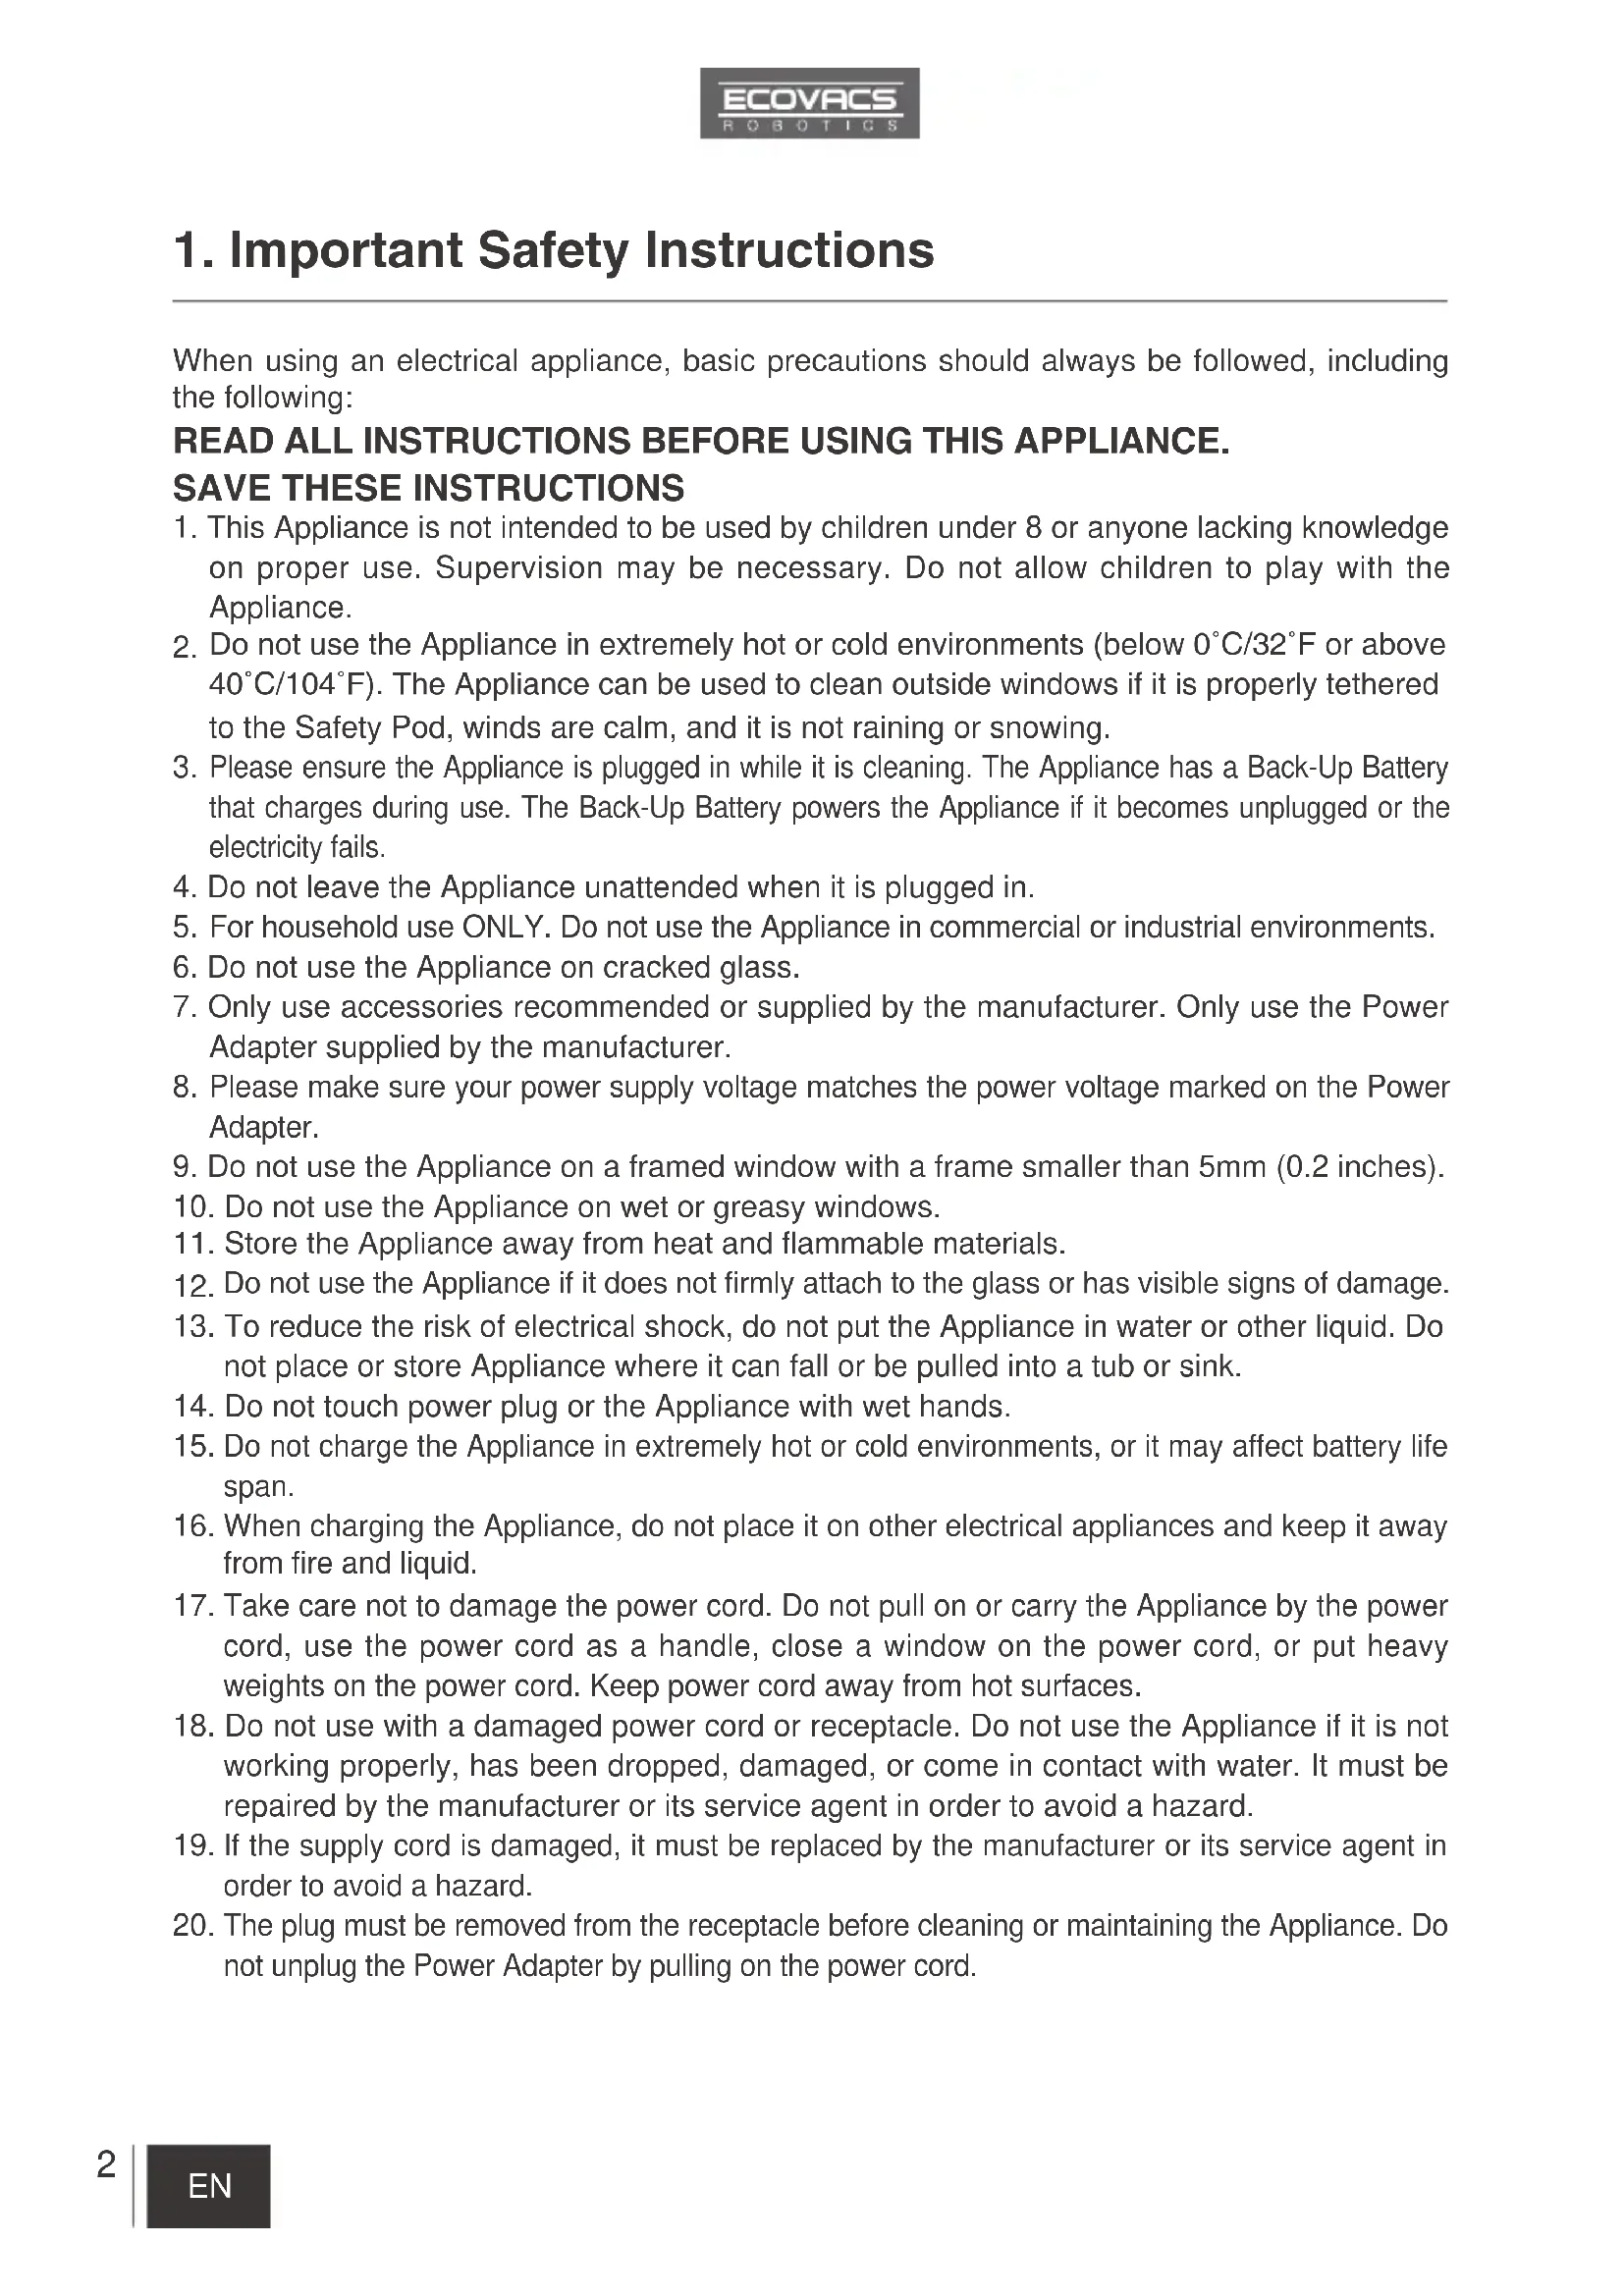
- Only use accessories recommended or supplied by the manufacturer. Only use the Power Adapter supplied by the manufacturer.
- Please make sure your power supply voltage matches the power voltage marked on the Power Adapter.
- Do not use the Appliance on a framed window with a frame smaller than 5mm (0.2 inches).
- Do not use the Appliance on wet or greasy windows.
- Store the Appliance away from heat and flammable materials.
- Do not use the Appliance if it does not firmly attach to the glass or has visible signs of damage.
- To reduce the risk of electrical shock, do not put the Appliance in water or other liquid. Do not place or store Appliance where it can fall or be pulled into a tub or sink.
- Do not touch power plug or the Appliance with wet hands.
- Do not charge the Appliance in extremely hot or cold environments, or it may affect battery life span.
- When charging the Appliance, do not place it on other electrical appliances and keep it away from fire and liquid.
- Take care not to damage the power cord. Do not pull on or carry the Appliance by the power cord, use the power cord as a handle, close a window on the power cord, or put heavy weights on the power cord. Keep power cord away from hot surfaces.
- Do not use with a damaged power cord or receptacle. Do not use the Appliance if it is not working properly, has been dropped, damaged, or come in contact with water. It must be repaired by the manufacturer or its service agent in order to avoid a hazard.
- If the supply cord is damaged, it must be replaced by the manufacturer or its service agent in order to avoid a hazard.
- The plug must be removed from the receptacle before cleaning or maintaining the Appliance. Do not unplug the Power Adapter by pulling on the power cord.
1. Important Safety Instructions
- The Back-Up Battery must be replaced by the manufacturer or its service agent in order to avoid a hazard.
- The Back-Up Battery must be removed and discarded according to local laws and regulations before disposal of the Appliance.
- The Appliance must be disconnected from the receptacle before removing the battery for disposal of the Appliance.
- Please dispose of used batteries according to local laws and regulations.
- Do not incinerate the Appliance even if it is severely damaged. The battery can explode in a fire.
- The Appliance must be used in accordance with the directions in this Instruction Manual. Ecovacs Robotics cannot be held liable or responsible for any damages or injuries caused by improper use.
2. Package Contents and Technical Specifications
2.1 Package Contents

natural_image
Simple line drawing of a rectangular device with a central button and cable (no text or symbols)Robot
natural_image
Simple line drawing of a rectangular electronic device with two cables and a connector (no text or symbols)Power Adapter Instruction Manual
text_image
WINDOTH 100% 2000 100% 2000 100% 2000 100% 2000 100% 2000 100% 2000 100% 2000 100% 2000 100% 2000 100% 2000 100% 2001 100% 2001 100% 2001 100% 2001 100% 2001 100% 2001 100% 2001 100% 2001 100% 2001 100% 2001 100% 2002 100% 2002 100% 2002 100% 2002 100% 2002 100% 2002 100% 2002 100% 2003 100% 2003 100% 2003 100% 2003 100% 2003 100% 2003 100% 2004 100% 2004 100% 2004 100% 2004 100% 2004 100% 2005 100% 2005 100% 2005 100% 2005 100% 2006 100% 2006 100% 2006 100% 2006 100% 2018 15.5% 15.5% 15.5% 15.5% 15.5% 15.5% 15.5% 15.5% 15.5% 15.5% 15.5% 15.5% 15.5% 15.5% 15.5% 15.5% 15.5% 15.5% 15.5% 15.5% 15.5%,
natural_image
Simple line drawing of two abstract shapes: a bundle of rope and a circular object with internal patterns (no text or symbols)Safety Pod and Tether
natural_image
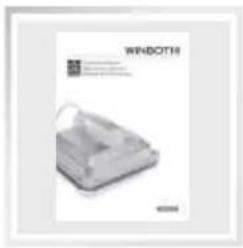
Simple line drawing of a remote control with two batteries (no text or symbols)Remote Control with Batteries

natural_image
Stacked square mechanical components with no visible text or symbols
natural_image
Simple line drawing of a dropper bottle with liquid (no text or symbols)
natural_image
Simple line drawing of a coiled cable with two connectors (no text or symbols)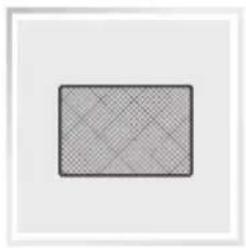
natural_image
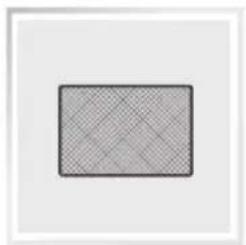
Simple geometric pattern with a shaded rectangle and grid lines inside, no text or symbols present.(3) Cleaning Pads Finish WinBOT(1) WINBOT Cleaning Solution Extension Cord (1.5m/4'11")
2.2 Specifications
| Model W830 | |||
| Working Voltage 24V DC Rated | Power 75W | ||
| Remote Control | |||
| Input Voltage 3V DC | |||
| Power Adapter:EA10952 | |||
| Input: 100-240V AC 50/60Hz 2.5A Output: 24V DC 3.75A | |||
* Technical and design specifications may be changed in the course of continuous product improvement.
2. Package Contents and Technical Specifications
2.3 Product Diagram
Robot

text_image
1 2 3 4 5 6 7 8 9 10- Status Indicator Light and START/PAUSE Button
- Handle
- Power Cord
- Power Switch
-
Cleaning Pad
-
Driving Treads
- Wheel Sensor
- Bottom Status Indicator Light
- Fan
- Edge Detection Sensors
Remote Control
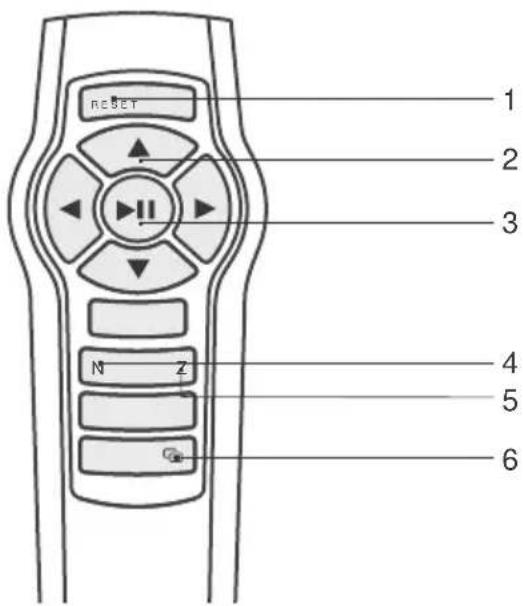
text_image
1 2 3 4 5 6 RESET N z- RESET Button
- Direction Control Buttons
- START/PAUSE Button
- "N" Cleaning Mode Button
- "Z" Cleaning Mode Button
- Remote Control Pairing Button
3. Operating the Robot
3.1 Notes Before Cleaning

text_image
≥5mmDo not use WINBOT 8 on a framed window with a frame smaller than 5mm (0.2").

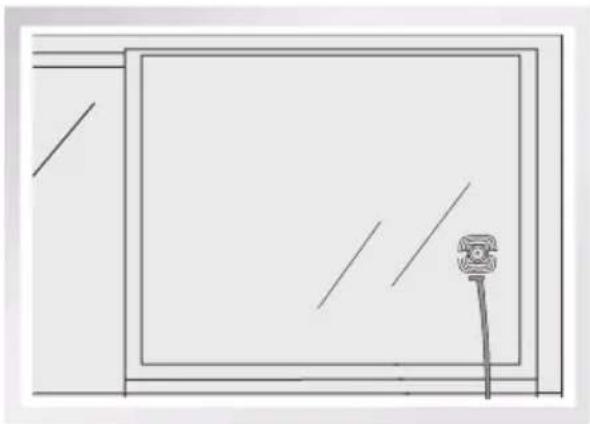
text_image
≥45cm ≥65cmWINBOT 8 can clean framed or frameless glass, larger than 45cm x 65cm (17.7" x 25.6").

natural_image
Line drawing of a wall-mounted device connected to an electrical outlet (no text or symbols)If WINBOT 8's Status Indicator Light flashes GREEN after powering ON, the Back-Up Battery requires charging. Keep WINBOT 8 plugged in to charge the Back-Up Battery until the Status Indicator Light flashes BLUE. WINBOT 8 will not clean until the Back-Up Battery is charged.

natural_image
Illustration of a hand cleaning a window with a brush (no text or symbols)If the window is covered with dirt, clean a small area on the glass before use and place WINBOT 8 there.
- Please ensure there is a 15cm (5.9") clearance between the glass and obstacles in the room like curtains or furniture.
■ WINBOT 8 can clean horizontally mounted glass only using the Direction Control Buttons on the Remote Control.
■ Do not use WINBOT 8 upside down. - WINBOT 8 should only be used with WINBOT Cleaning Solution. Using other cleaners significantly reduces WINBOT's performance and can damage the robot.
3. Operating the Robot
3.2 Attach the Cleaning Pad

natural_image
Technical illustration of a square electronic component with internal circuitry and mounting holes (no text or symbols)Turn WINBOT 8 over and attach the Cleaning Pad to the Velcro smoothly. Make sure the Cleaning Pad is placed exactly within its Velcro area and does not cover the Fan or Edge Detection Sensors.
3.3 Assemble the Power Adapter

natural_image
Line drawing of a device with plug, cable, and connector (no text or symbols)3.4 Install the Safety Tether
If WINBOT is used to clean an outside window, the Safety Pod and Tether MUST be used.
* If WINBOT 8 is being used to clean an inside window please skip to step 3.6.

text_image
A B C D DEnd A: Robot Power Cord
End C: Safety Pod
End B: Power Adapter Power Cord
End D: Safety Tether
3. Operating the Robot
1 Loop one end of the Safety Tether to End A on the Robot Power Cord and tighten.
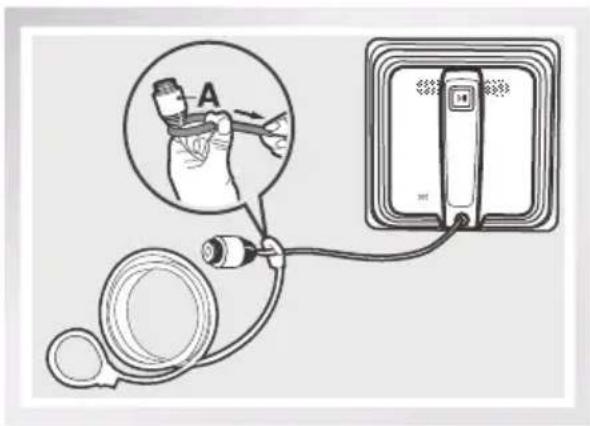
text_image
Diagram showing a hand holding a device labeled 'A' connected to a device with a cable and connector, illustrating electrical or medical setup.2 Connect End A and End B and tighten.

text_image
Diagram showing a medical device connected to a device with labeled parts A and B, including a magnified view of the device's internal structure.3 Loop the other end of the Safety Tether around the Safety Pod's channel and pull it tight.

natural_image
Diagram of a medical or electrical device setup with tubing, connectors, and a device (no text or symbols visible)* If the length of the power cord restricts WINBOT 8's movement, a WINBOT Extension Cord can be used. Disconnect End A and End B, and connect them with both ends of the Extension Cord respectively and tighten.
* Only one Extension Cord can be used when WINBOT 8 is cleaning an outside window.
3. Operating the Robot
3.5 Place the Safety Pod
The Safety Pod MUST be placed on the inside of the window.
- Press the Safety Pod FIRMLY on the inside of the window being cleaned. Make sure the Safety Pod is attached and securely in place.
natural_image
Simple line drawing of a room with a wall-mounted phone and a vertical rod (no text or symbols)3.6 Spray Cleaning Solution
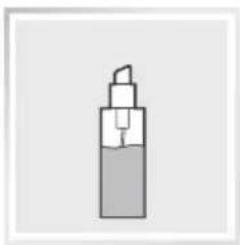
* WINBOT should only be used with WINBOT Cleaning Solution. Using other cleaners significantly reduces WINBOT's performance and can damage the robot.
Spray the upper and lower sides of the Cleaning Pad with the provided WINBOT Cleaning Solution 5 times each.
After spraying, wipe the bottom of WINBOT 8 with the provided Finishing Cloth.

text_image
x5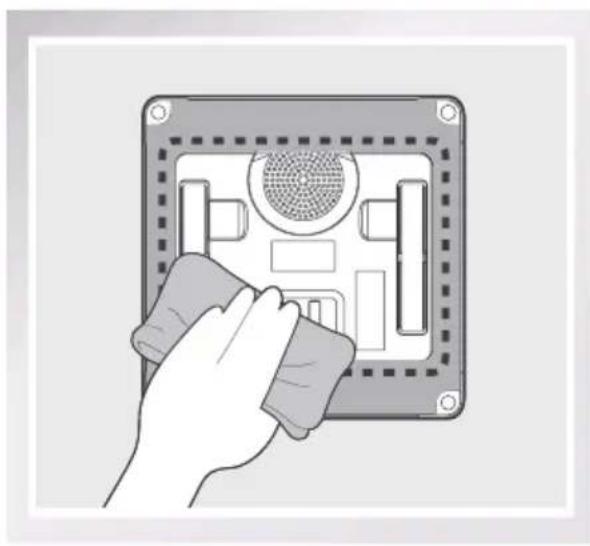
natural_image
Hand cleaning a device panel with a mesh cover (no text or symbols visible)3. Operating the Robot
3.7 Start
1 Plug in WINBOT 8
2 Power ON
Move the Power Switch to the “—” position. WINBOT 8 is powered ON when the Status Indicator Light flashes BLUE.
3 Place on the Glass
Place WINBOT 8 on the window at least 10cm (4") from window corners or other obstacles. WINBOT 8 has successfully attached to the window when the Status Indicator Light glows a continuous BLUE.
* Please ensure there is a 15cm (5.9") clearance between the glass and obstacles in the room like curtains or furniture.

natural_image
Hand inserting a socket into an electrical outlet (no text or symbols visible)
natural_image
Illustration of a hand holding a small electronic device with a magnified inset showing a device's left-side button (no text or symbols)
text_image
≥10cm3. Operating the Robot
4 Start
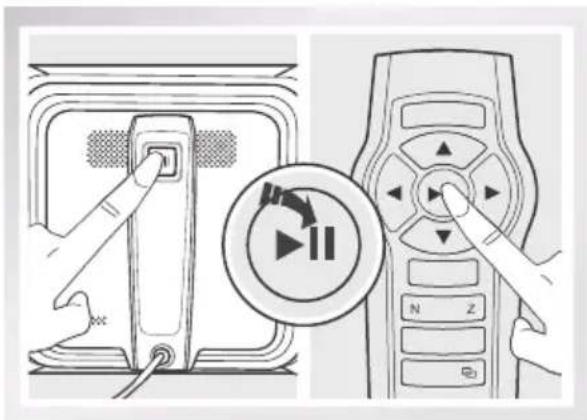
Press the START/PAUSE button on WINBOT 8 or on the Remote Control to begin cleaning.
text_image
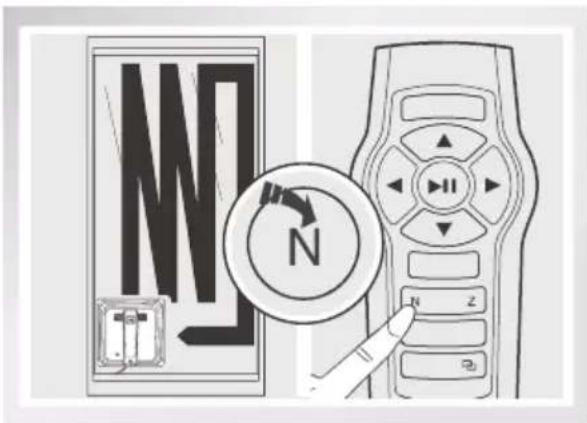
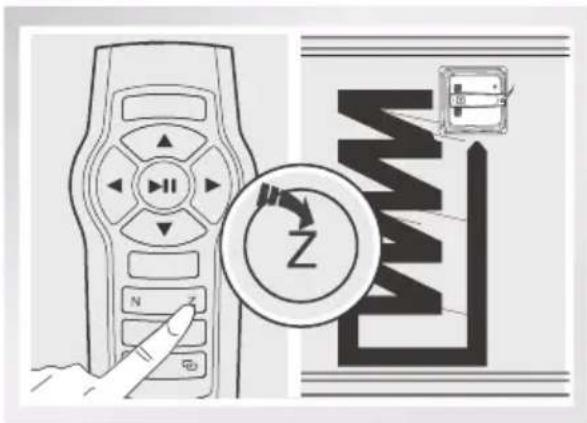
Diagram showing hands inserting a button into a device and interacting with a remote control via a play button icon.To change Cleaning Modes, Pause WINBOT by pressing the START/PAUSE button on WINBOT 8 or on the Remote Control, then press the "Z" or "N" Cleaning Mode Button on the Remote Control. "N" Cleaning Mode is the default Cleaning Mode and is also ideal for tall windows. "Z" Cleaning Mode is best for wide windows.
* Do not unplug WINBOT 8 while it is cleaning.
text_image
M N3.8 Pause
Pause WINBOT 8 during cleaning by pressing the START/PAUSE button on the robot or on the Remote Control.
text_image
Diagram showing a remote control with a hand interacting with a circular indicator labeled 'Z' and a device labeled 'W' with arrows, alongside a large stylized 'M'.WINBOT 8 can be directed to move forward, backward, left and right using the Direction Control Buttons on the Remote Control when Paused. WINBOT 8 will clean when Direction Control Buttons are used.

text_image
Diagram showing a device with a button labeled 'N' and a circular play button with directional arrows, next to a remote control interface.
text_image
Diagram of a remote control device with labeled buttons and a hand pointing to the button3. Operating the Robot
3.9 Stop
When WINBOT 8 completes its cleaning cycle, it returns to the place it started and beeps.
1 Remove WINBOT 8
Grasp WINBOT 8's Handle. Press and hold ▶ for approximately 5 seconds and the fan will stop. RemoveWINBOT 8 from the window. Polish away any marks left on the glass fromWINBOT's removal with the provided Finishing Cloth.

text_image
5"3 Remove the Safety Pod, if used
2 Power OFF
Move the Power Switch to the "O" position.

text_image
OFF -4 Unplug WINBOT 8

natural_image
Illustration of a hand cleaning a wall with a magnified inset showing the hand holding a cloth (no text or symbols)* If WINBOT 8 has a problem and the Indicator Light glows RED, it can be reset by pressing the Reset Button on the Remote Control.

natural_image
Hand inserting a switch into an electrical outlet, showing black arrow indicating rotation (no text or symbols)4. Maintenance
Before performing cleaning and maintenance on WINBOT 8, move the Power Switch to the "O" position and unplug it from the receptacle.
4.1 Cleaning Pad
Turn the robot over and remove the Cleaning Pad. Rinse the Cleaning Pad and allow it to dry completely before re-attaching it to the robot.
* Do NOT use a wet Cleaning Pad on WINBOT 8 or it may slip on the window.

natural_image
Illustration showing a faucet spraying water into a bowl and a sun symbolizing sunlight (no text or symbols)4.2 Fan and Sensors Fan
Turn the robot over and wipe any debris from the Fan with the provided Finishing Cloth to maintain suction.

natural_image
Diagram of a hand cleaning a wall-mounted device with a mesh pattern (no text or symbols)Wheel Sensor
Turn the robot over and wipe the Wheel Sensor with the provided Finishing Cloth to maintain its effectiveness.
natural_image
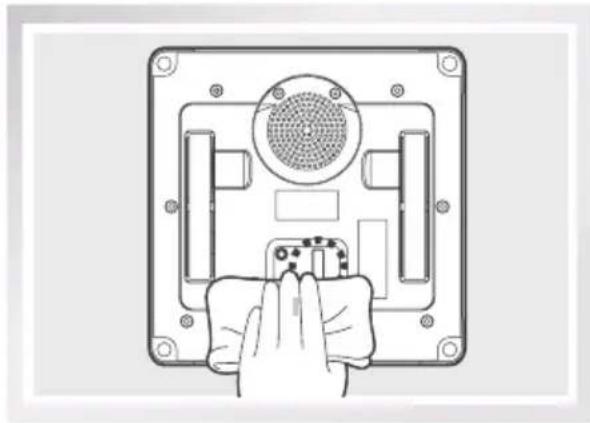
Hand holding a small electronic device component with a circular vent and sensor array (no text or symbols visible)Edge Detection Sensors
Turn the robot over and wipe the four Edge Detection Sensors clean with the provided Finishing Cloth to maintain their effectiveness.

natural_image
Diagram of a device with a central fan and surrounding components, held by a hand (no text or symbols)4. Maintenance
4.3 Driving Treads
Move the Power Switch to the "I" position. Press and hold the robot's START/PAUSE Button for 5 seconds to stop the Fan.
Turn WINBOT 8 over. Inspect the Driving Treads by using the ▲and ▼buttons on the Remote Control. Stop the Driving Treads if dirt is seen on the Treads.
Move the Power Switch to the "O" position. Clean any dirt on the Driving Treads with the provided Finishing Cloth.

text_image
ON
natural_image
Illustration of a hand cleaning a device panel with a fan and ventilation grille (no text or symbols)5. Status Indicator Light and Sound
| Indicator Description | |
| Status Indicator Light flashes GREEN | Back Up Battery is low and is charging. WINBOT will not clean until the Back-Up Battery is properly charged. |
| Status Indicator Light flashes BLUE | WINBOT 8 is powered ON and is ready to be placed on the glass. |
| Status Indicator Light glows a continuous BLUE | WINBOT 8 has successfully adhered itself to the glass and is ready to clean. |
| Status Indicator Light glows RED | WINBOT 8 has a problem. Please refer to Section 6, Troubleshooting, for details. |
| WINBOT Emits beeps | WINBOT 8 beeps in following situations:WINBOT 8 is powered ON.WINBOT 8 finishes cleaning.WINBOT 8 has a problem. |
6. Troubleshooting
| NO. | Malfunction Possible Causes Solutions | ||
| 1 | Remote Control does not work | WINBOT 8 is cleaning. When WINBOT 8 is cleaning, only the START/PAUSE Button works on the Remote Control. | Pause WINBOT 8 by pressing the START/PAUSE button on the robot or Remote Control. Other buttons on the Remote Control will function when WINBOT 8 is paused. |
| The Remote Control is not paired with WINBOT 8. WINBOT 8 arrives from the factory paired with its Remote Control. If the Remote Control becomes un-paired or is replaced, it can be re-paired. | Power ON WINBOT 8. At the same time, press and hold 📄 button on WINBOT 8 and 📄 button on the Remote Control. Paring is complete when START/PAUSE Button blinks RED, BLUE and GREEN. | ||
| WINBOT 8's Status Indicator Light is glowing RED. | Reset WINBOT 8 by pressing the RESET Button on the Remote Control. | ||
| 2 | Status Indicator Light flashes BLUE after WINBOT 8 is placed on the glass | The Cleaning Pad is attached incorrectly and is covering the Fan or the Edge Detection Sensors. | Remove the Cleaning Pad and re-attach it making sure it is placed exactly within its Velcro area and does not cover the Fan or Edge Detection Sensors. |
| Edge Detection Sensor malfunction. | A. Clean the Edge Detection Sensors as described in Section 4. B. If the problem persists, please contact Customer Service. | ||
| Fan malfunction. | A. Clean the Fan as described in Section 4. B. If the problem persists, please contact Customer Service. | ||
| Glass is too dirty for WINBOT 8 to adhere properly. | Clean a small area on the glass before use and place WINBOT 8 there. | ||
6. Troubleshooting
| NO. | Malfunction Possible Causes Solutions | ||
| 3 | Status IndicatorLight glows RED | Interruption of electricity while WINBOT 8 was cleaning due to power failure, plug displacement, or loose connection to the Power Adapter. | A. Connect WINBOT 8 to the Power Adapter and plug into the wall receptacle. Press START/ PAUSE Button on the robot or on the Remote Control. WINBOT 8 will resume cleaning.B. In case of power failure, and the above solution does not work, please use the Direction Control Buttons on the Remote Control to direct the robot to a position on the window where you can safely reach it, turn off the fan and remove it from the window. If power has resumed, place the robot on the window again and restart. |
| WINBOT has moved over a problem area and is losing suction. | A. Press the RESET Button on the Remote Control. Use the Direction Control buttons on the Remote Control to move WINBOT 8 away from the problem area and at least 10cm/4" from window corners and obstacles. Restart WINBOT 8.B. Press the RESET Button on the Remote Control, then use the Direction Control Buttons to direct WINBOT 8 to clean around the problem area. | ||
| Edge Detection Sensor malfunction. | Clean the four Edge Detection Sensors clean as described in Section 4. If the problem persists, please contact our Customer Service. | ||
| 4 | WINBOT 8 is stuck and unable to move, or it moves in an irregular pattern during cleaning. | There is too much dirt and debris on the window. | A. Spray additional Cleaning Solution on the upper and lower sides of the Cleaning Pad.B. Clean the Driving Treads as described in Section 4.C. Replace the Cleaning Pad and restart the cleaning cycle.D. Clean the window by hand first and use WINBOT 8 for regular cleaning after that.*WINBOT 8 is intended to be used for maintenance cleaning on common windows. The product is NOT designed to replace heavy duty or first time cleaning. |
Live Smart. Enjoy Life.
natural_image
Simple line drawing of a wall-mounted device with a central screen and cable (no text or symbols)Robot

natural_image
Simple line drawing of a rectangular electronic device with two cables and a connector (no text or symbols)natural_image
Simple line drawing of two abstract shapes: a rope tied with a ribbon and a circular object with concentric lines (no text or symbols)natural_image
Simple line drawing of a remote control with two batteries (no text or symbols)natural_image
Stacked square mechanical components with no visible text or symbols(3) Lingette de nettoyage
natural_image
Simple line drawing of a bottle with liquid and a stopper (no text or symbols)Solution de nettoyage WINBOT

natural_image
Simple line drawing of a coiled cable with two connectors (no text or symbols)rallonge WINBOT (1.5m/4'11")

natural_image
Simple geometric pattern with a shaded rectangle and grid lines, no text or symbols present.text_image
≥45cm ≥65cmnatural_image
Line drawing of a wall-mounted device connected to an electrical outlet (no text or symbols)natural_image
Line drawing of a hand cleaning a square window with a brush (no text or symbols)natural_image
3D technical illustration of a square electronic component with internal circuitry and mounting holes (no text or symbols)natural_image
Line drawing of a portable electronic device with plug, cable, and connector (no text or symbols)text_image
Diagram showing a medical device connected to a stethoscope and a device with a labeled component 'A'natural_image
Diagram of a medical or electrical device with tubing and connectors, no visible text or symbolsnatural_image
Simple line drawing of a window frame with a small camera on the right side (no text or symbols)3.6 Vaporiser la solution de nettoyage
natural_image
Hand cleaning a device panel with a circular vent and grid layout (no text or symbols visible)natural_image
Hand inserting a plug into an electrical outlet socket (no text or symbols visible)
natural_image
Illustration of a hand holding a small electronic device with a magnified inset showing an open device (no text or symbols)
text_image
≥10cmtext_image
Diagram showing hands inserting a button into a device with a circular play button icon, alongside a remote control interface.text_image
Diagram illustrating a remote control interface with a hand pressing a button labeled 'N' and 'gh', alongside a circular icon showing a 'Z' and a device.text_image
Diagram showing hands inserting a button into a device with a play button icon, alongside a remote control interface with N and Z buttons.
text_image
Diagram of a remote control device with labeled buttons and a hand pointing to the button3. Operating the Robot
3.9 Mise en arrêt
2 Mettre hors tension (OFF)
natural_image
Illustration of a hand holding a tool near a window, with a magnified inset showing a hand cleaning the interior (no text or symbols)natural_image
Hand inserting a wall-mounted switch into an electrical socket, with a black arrow indicating the motion (no text or symbols)4. Maintenance
natural_image
Illustration showing a faucet spraying water into a bowl and a sun symbol above it, next to a rectangular object (no text or symbols)natural_image
Diagram of a hand pressing down on a device component with a mesh grille (no text or symbols)natural_image
Diagram of a hand holding a small electronic device component, with no visible text or symbols
natural_image
Diagram of a computer monitor with a fan and drive mechanism, shown in cross-section view (no text or symbols)4. Maintenance
natural_image
Illustration of a hand cleaning a device panel with a fan and ventilation grille (no text or symbols)natural_image
Simple line drawing of a rectangular device with a central button and cable (no text or symbols)Robot

natural_image
Simple line drawing of a rectangular electronic device with two cables and a connector (no text or symbols)natural_image
Simple line drawing of two abstract shapes: a rope tied with a ribbon and a circular object with concentric lines (no text or symbols)natural_image
Simple line drawing of a remote control with two batteries (no text or symbols)natural_image
Stacked square mechanical components with no visible text or symbolsnatural_image
Simple line drawing of a bottle with liquid and a stopper (no text or symbols)natural_image
Simple line drawing of a coiled cable with two connectors (no text or symbols)(1) Cable de extensión WINBOT (1.5m/4'11")
natural_image
Simple geometric pattern with a shaded rectangle and grid lines, no text or symbols present.Paño de acabado
text_image
≥45cm ≥65cmnatural_image
Line drawing of a wall-mounted electrical outlet connected to a device (no text or symbols)natural_image
Illustration of a hand cleaning a square window with a brush (no text or symbols)natural_image
3D technical illustration of a mechanical component with mounting holes and internal cavity (no text or symbols)natural_image
Line drawing of a portable electronic device with plug, cable, and connector (no text or symbols)text_image
Diagram showing four labeled components (A, B, C, D) of a device with connectors and wiring, likely illustrating a safety or electrical setup.text_image
Diagram showing a medical device connected to a stethoscope and a device with a labeled component 'A'natural_image
Diagram of a medical device with tubing and connector, no text or symbols presentnatural_image
Simple line drawing of a window frame with a small screen and diagonal lines, no text or symbols present.natural_image
Illustration of a hand cleaning a device casing with a mesh cover (no text or symbols)natural_image
Hand inserting a plug into an electrical outlet socket (no text or symbols visible)
natural_image
Illustration of a hand holding a small electronic device with a magnified inset showing an open device (no text or symbols)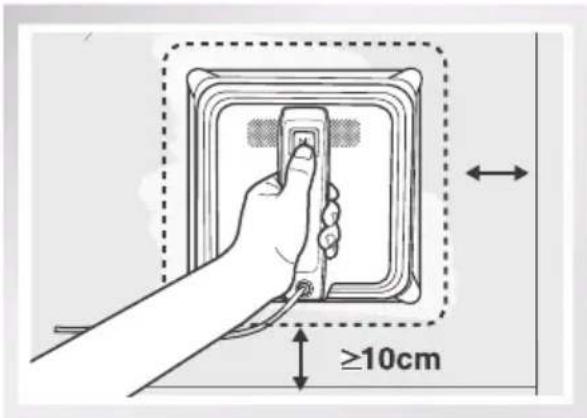
text_image
≥10cmtext_image
Diagram showing hand inserting a button into a device with a circular play button icon, alongside a remote control interface.text_image
M N N Z ID3.8 Pausa
text_image
Diagram showing a hand interacting with a remote control interface and a circular indicator labeled 'Z' with arrows, alongside a stylized electrical panel.text_image
Diagram showing hands inserting a button into a device with a circular play button icon, next to a remote control interface.
text_image
II N Z IDnatural_image
Illustration of a hand holding a tool near a door, with a magnified inset showing the hand holding a glove (no text or symbols present)
natural_image
Hand inserting a wall-mounted socket into an electrical outlet, with a black arrow indicating the action (no text or symbols present)natural_image
Illustration showing a faucet spraying water into a bowl and a sun symbol above it, next to a rectangular object (no text or symbols)natural_image
Diagram of a hand cleaning a wall-mounted device with a mesh pattern (no text or symbols)natural_image
Line drawing of a hand holding a small electronic device component with a circular vent and grid pattern (no text or symbols)