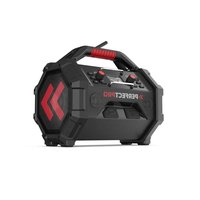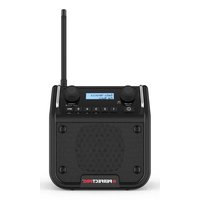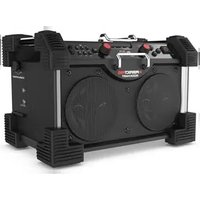
RockMate 2 - Radio PerfectPro - Free user manual and instructions
Find the device manual for free RockMate 2 PerfectPro in PDF.


Frequently Asked Questions - RockMate 2 PerfectPro
User questions about RockMate 2 PerfectPro
0 question about this device. Answer the ones you know or ask your own.
Ask a new question about this device
Download the instructions for your Radio in PDF format for free! Find your manual RockMate 2 - PerfectPro and take your electronic device back in hand. On this page are published all the documents necessary for the use of your device. RockMate 2 by PerfectPro.
USER MANUAL RockMate 2 PerfectPro
Operating instruction GB
natural_image
Technical line drawing of a rectangular electronic device with buttons and mounting holes (no text or symbols)WARNING!
WARRANTY BECOMES VOID ONCE THE DEVICE CABINET HAS BEEN OPENED OR ANY MODIFICATIONS OR ALTERATIONS TO THE ORIGINAL DEVICE HAVE BEEN MADE
Table of Contents
Important safety instructions 3
Controls and connections 4-6
Power the radio 7
Charging the batteries 7-8
Using the radio for the first time 9
Setting the clock time 9
Operating your radio - FM 9-10
Presetting stations / Recalling a preset station 10
Display modes - FM 11
FM Stereo Mono 11
Equalizer function 11
Set up My EQ profile 12
Loudness 12
Aux In Socket 12
Specifications 14
Important Safety Instructions
- Read these instructions.
- Keep these instructions.
- Heed all warnings.
- Follow all instructions.
- Do not use this apparatus near water.
- Clean only with dry cloth.
- Do not block any ventilation openings. Install in accordance with the instructions.
- Do not install near any heat sources such as radiators, heat registers, stoves or other apparatus (including amplifiers) that produce heat.
- Protect the power cord from being walked on or pinched particularly at plug, convenience receptacles, and the point where they exit from the apparatus.
- Only use attachments/accessories specified by the manufacturer.
- Use only with the cart, stand, tripod, bracket, or table specified by the manufacturer, or sold with the apparatus. When a cart is used, use caution when moving the cart/apparatus combination to avoid injury from tip-over.
- Unplug this apparatus during lightning storms or when unused for long periods of time.
-
Refer all servicing to qualified service personnel. Servicing is required when the apparatus has been damaged in any way, such as power-supply cord or plug is damaged, liquid has been spilled or objects have fallen into the apparatus, the apparatus has been exposed to rain or moisture, does not operate normally, or has been dropped.
-
To reduce the risk of fire or electric shock, do not expose this appliance to Rain or Moisture.
- The Shock Hazard Marking and Associated Graphical Symbol is provided on the back of unit.
- Apparatus shall not be exposed to dripping or splashing and no objects filled with liquids, shall be placed on the apparatus.
- The power plug should be close to the radio, and easy to be approached that during the emergency, to disconnect the power from the radio, just unplug the power plug from the AC power slot.
- Notice:
The changes or modifications not expressly approved by the party responsible for compliance could void the user's authority to operate the equipment. - Where the MAINS plug or an appliance coupler is used as the disconnect device, the disconnect device shall remain readily operable
- A warning that batteries (battery pack or batteries installed) shall not be exposed to excessive heat such as sunshine, fire or the like.
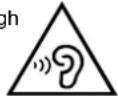
- To prevent possible hearing damage, do not listen at high volume levels for long periods.
Controls and connections
text_image
16 AUX IN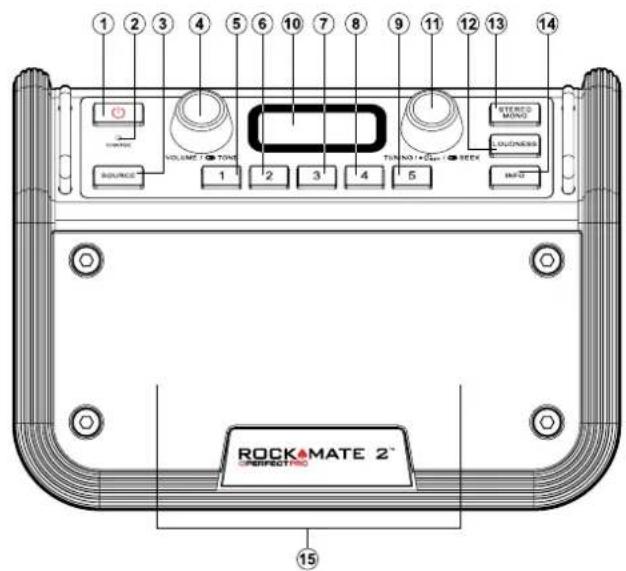
text_image
1 2 3 4 5 6 7 8 9 10 11 12 13 14 RIVER VOLUME TONE Tuning + Pin ● RECK STUDIO MONO DUSPENS INFO 1 2 3 4 5 ROCK&MATE 2™ SPRINGEOTRO- Standby (POWER ON/OFF)
- Charging indicator LED
- Source
- Volume control/Tone control
- Preset 1
- Preset 2
- Preset 3
-
Preset 4
-
Preset 5
- LCD display
- Tuning / Seek control
- Loudness ON/OFF
- Stereo / Mono (FM only)
- Info button
- Speakers
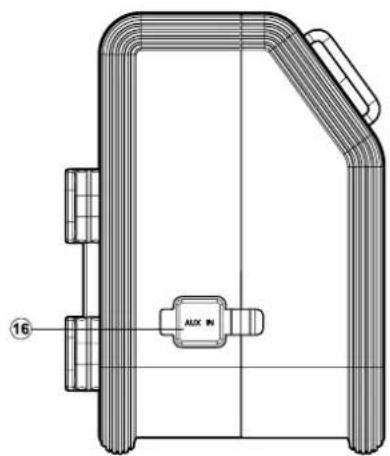
- Aux In socket
Controls and connections
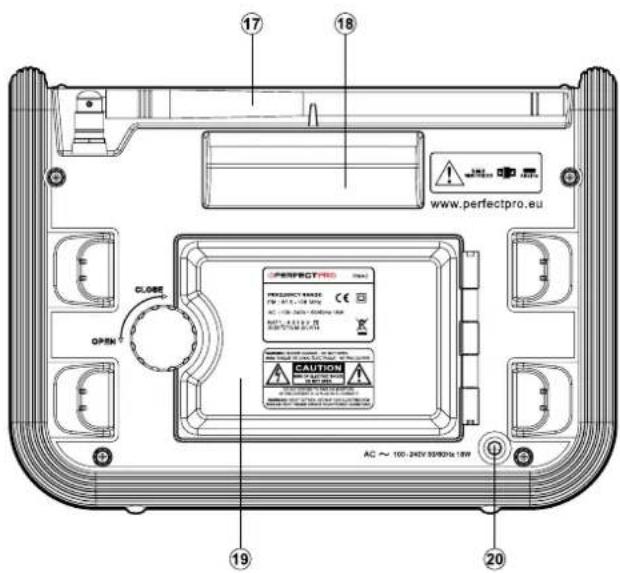
text_image
17 18 www.perfectpro.eu CLOSE OPEN CAUTION AC ~ 100-240V 350/92Hz 1.8W 19 20- FM antenna
- Handle
- Battery compartment
- AC power cord
Controls and connections
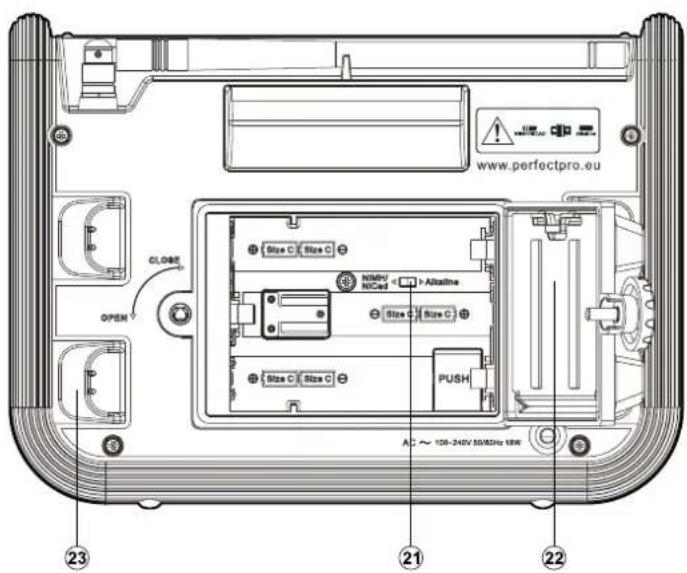
text_image
www.perfectpro.eu CLOSE OPEN Size C Size C NIMV NCad Alkaline Size C Size C PUSH A ~ 128-240V 55/65Hz 15W 23 21 22- Alkaline/NiMH/NiCad rechargeable battery switch
- Storage compartment
- AC cable hook
Power the radio
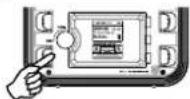
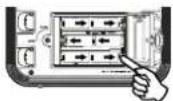
- Installing the batteries, first turn battery cover fixture anti-clockwise to loosen and pull down the battery cover.
Note:
Before you insert the batteries, if you use non-rechargeable batteries, make sure the NiMH/Alkaline switch is switched to Alkaline position.
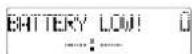
- Insert 6 x C size (UM-2) batteries into the compartment. Ensure the batteries are completely inserted in accordance with the diagram shown. Close the battery cover and fasten the fixture by turning clockwise. If the radio is not to be used for any extended period of time, it is recommended that the batteries are removed from the radio. Reduced power, distortion and a "stuttering sound", or low battery sign flashing on the LCD display are all signs that the batteries need replacing or recharging (see below Charging the batteries). Run time of the radio on batteries varies strongly depending on the quality and capacity (mAh) of the batteries, temperature, volume level etc.
3. AC Operation
Before plugging the AC power cord into the AC socket, be sure the voltage is correct. If you have batteries in the radio and connect AC power cord into the AC socket, the batteries will automatically be disconnected. AC cable hook is designed to store the cord when the radio is not in use.
1.
2.
3 led
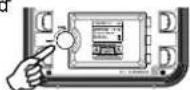
Charging the batteries
Reduced power, distortion and a "stuttering sound" or low battery sign flashing on the LCD display are all signs that the batteries need recharged if you use rechargeable batteries to power the radio.
Note:
The radio can be charged only when the radio is off. Connect the AC power cord into the AC socket to charge the batteries. Be sure the battery type switch is set to Ni/MH position. When the batteries are being charged, the red Charge LED will be on. Charging time can take up to approx. 10 hours depending on the battery capacity of the rechargeable batteries. When the batteries are fully charged, the charged LED will be steady on green color.
Note:
Charge new batteries fully the first time before first use. This can take longer depending on the capacity of the rechargeable batteries.
IMPORTANT INFORMATION ON CHARGING AND USING RECHARGEABLE BATTERIES
- Recharge the batteries in any case at least every 2 months.
- Make sure the Battery Select switch next the battery compartment is set to the "CHARGE NiMH ON" position.
- Put the batteries in the compartment whilst paying attention to the correct polarity of the batteries (+ and -).
- First use: Charge new batteries in one continuous, uninterrupted, charge until they are full. This first charge may take longer than normal. For longer battery life it is advised to always recharge in one continuous, uninterrupted charge until batteries are full and to not recharge again whilst the batteries are still full.
- New batteries will only reach their full capacity after some time of use (several charge – discharge cycles).
- Leave the complete group of batteries in place inside the radio and do not use these batteries or a few of them for other purposes. This will result in a mix of (fully) charged and (partly) empty batteries. This can seriously damage the batteries and radio when recharged.
- It is advised to only charge batteries at room temperatures between 5 degrees C – 35 degrees C. In lower or higher temperatures full charge cannot be achieved.
- Depending on the capacity of the batteries, charging from "empty" to "full" can take several hours, even up to 10 hours or more.
- Do not charge batteries when the radio is hot or exposed to heat or heat sources.
- It is advised to clean the metal contacts of the batteries and of the charger inside the radio e.g. with a contact-spray from time to time.
- Do not use a mix of old and new rechargeable batteries.
-
Do not use a mix of rechargeable and non-rechargeable batteries.
-
Do not use a mix of full and empty rechargeable batteries.
- Do not use batteries that have a different mAh capacity.
- Do not use damaged, deformed or leaking batteries.
- Battery level indication is an approximate indication only and can vary with battery type used.
- Batteries can become hot during charging.
- In cold conditions the capacity of batteries will be much lower than when used at normal room temperature
- Batteries (even when supplied with the radio), as being consumables, do not fall under the warranty conditions of the radio.
- It is advised to use Perfectpro rechargeable batteries as the radio and its charger were developed for use with these batteries.
Using the radio for the first time
- Place your radio on a flat surface.
- Please press the Standby button to switch on your radio. It may be necessary to relocate your radio to a position giving better reception. You should then carry out a scan to find stations in FM.
Setting the clock time
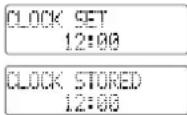
- Press and hold the Tuning knob until the hour digits of the clock time begins flashing. Rotate the Tuning knob to choose the hour digit as needed.
- Press and release the Tuning knob to save the hour setting, and the minute digits on the display will flash. Rotate the Tuning knob to choose the minute digits as needed.
- Press and release the Tuning knob to save the minute setting and complete the clock setting. The radio will save your setting. The radio will display saved time after clock time setting is completed.
Note: The clock time setting can be done at power Off or On status.
You can also set the clock time with the FM RDS. This can automatically set the time (CT) Press the source to FM radio, select a FM radio station which provides RDS CT service, the clock will be aligned in 2 minutes once the CT service is available. Once the FM radio station has been changed to one with RDS CT service, the clock time will be aligned again.
Operating your radio – Manual tuning FM
- Press the STANDBY button to switch on your radio.
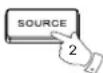
- Press the SOURCE button to select FM band and stand up the rubber antenna properly to get best FM reception.
- Rotate the Tuning/Seek knob to tune required frequency in the increment of 100 kHz.
- Select required loudness setting and stereo / mono mode for obtaining a best sounding quality.
- A stereo symbol will appear on the LCD display if a stereo broadcasting station is found.
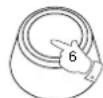
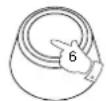
- Rotate the Volume control knob to get required sound level.
- To turn off the radio, press the STANDBY button. Display will show local time only.
FM 106.5 (6) P4 14:08
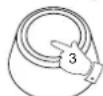
TUNING / ● SET / ● SEEK
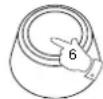
VOLUME / TONE
Search tuning FM
- Press the STANDBY button to turn radio on.
- Select FM band by pressing the SOURCE button as described. Stand up the FM rubber antenna properly to get best reception.
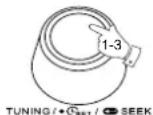
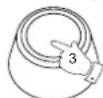
- Press and release the Tuning/Seek knob, and the radio will seek forward and stop automatically when it finds a radio station with good signal. The radio will seek forward for the next available station if pressing down the Tuning control knob again.
Presetting stations
You may store your preferred FM radio stations to the preset station memories (1 to 5). The procedure for setting presets and using them to tune stations is described below.
- Press the STANDBY button to turn on the radio.
- Press the SOURCE button and tune to the required station as previously described.
- Press and hold the required Preset button (1\~5) until radio beeps and the display shows corresponding "PX" on the upper right corner.
- Repeat this procedure for the remaining presets as you wish.
- Stations stored in preset memories may be overwritten by following above procedures if required.
Recalling a preset station
- Press the STANDBY button to turn on the radio.
- Press the SOURCE button to select FM band.
- Momentarily press the required Preset button (1\~5) to cause your radio to tune to the station stored in preset memory.
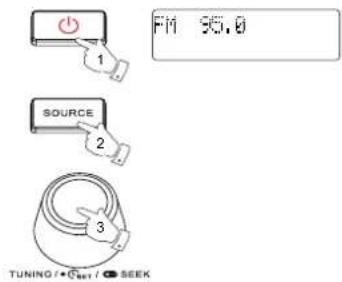
text_image
FM 35.0 SOURCE TUNING / ● Set / ● SEEK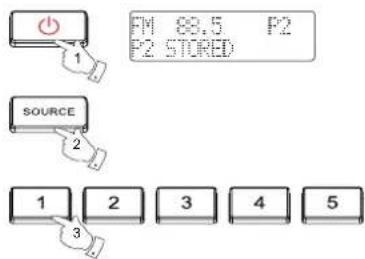
text_image
FM 88.5 F2 F2 STORED SOURCE 1 2 3 4 5 3Display modes – FM
On FM the bottom line of the display can be set to display any of the following modes:
- Press and release the Info button repeatedly to cycle through the various modes:
a. Program service name Displays the name of the station being listened to.
b. Program type Displays type of station being listened to e.g. Pop, Classic,
News, etc.
c. Radio text Displays radio text messages such as new items etc.
d. Clock time Displays the current RDS CT clock time and date.
e. Time Displays system clock time.
f. Signal level Displays the signal strength for the station being listened to.

FM stereo / mono
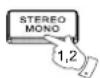
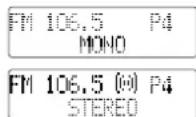
- If an FM station is received with a weak signal some hiss may be audible. To reduce the hiss press and release the STEREO/MONO button so that the Stereo indicator on the display is cancelled. Your radio will switch to mono mode.
- To return to stereo mode press and release the STEREO/MONO button so that Stereo indicator on the display is visible. The radio will switch to stereo mode.
Note:
This radio will always auto detect if there is stereo signal when you set the radio in Stereo mode. If there is not a stereo signal, the stereo mark will be cleared.
Equalizer function
- Press the Standby button to switch on your radio.
- Press and hold the Volume/ Tone control until your radio beeps and your radio enters to the EQ setting menu.
- Rotate the Volume/ Tone control to select your required mode. Then press the Volume/Tone control to confirm the selection.

text_image
FM 100.8 EQ: Flat FM 100.8 EQ: Rock FM 100.8 EQ: Jazz FM 100.8 EQ: Pop FM 100.8 EQ: Spoken FM 100.8 EQ: OutdoorSet up My EQ profile
- Press and hold the Volume/ Tone control until your radio beeps and your radio enters to the EQ setting menu.
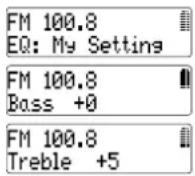
- Rotate the Volume/ Tone control to select "My Setting". Then press the Volume/Tone control to enter the setting.
- Rotate the Volume/Tone control to select your required Bass level (-5 and +5). Then press the Volume/Tone control to enter Treble level setting.
- Rotate the Volume/ Tone control to select your required Treble level (-5 and +5). Then press the Volume/Tone control to confirm the setting.
Loudness On/Off
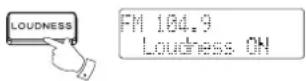
Press the Loudness button to get compensation on lower and higher frequency. The effect will be more audible when the radio is in lower volume level. Display will show Loudness ON when Loudness function is applied.
Note: Default is Loudness ON
Aux In Socket
There is a Aux In socket on this radio to connect external audio sources like a MP3 player to the speakers of this radio. The Aux In socket is located on the side of the radio. Remove the rubber cover and connect the audio source with a 3.5 mm stereo audio cable.
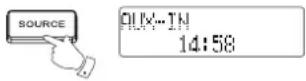
When radio is on, repeatedly press and release SOURCE button to select AUX-IN, rotate the volume control to play the audio program.
Please always close rubber cover (AUX-in) on the side of the radio when AUX input socket is not in use. This is to prevent moist and dust from entering the radio. This will also enhance overall sound quality.
LCD illumination
When radio is switched on, press any button except the POWER button will illuminate the LCD display for approx. 10 seconds. However if you use AC cord to power the radio, the LCD display will be always illuminated until you turn the radio off by pressing POWER button.
WARRANTY
This radio has a 2 year limited warranty.
WARNING! Warranty becomes void once the radio cabinet has been opened or any modifications or alterations to the radio have been made!
The terms of the warranty of this radio do not cover the following:
- Damage caused by misuse, abuse, neglect, alterations, accidents or unauthorized repair.
- Normal wear and tear.
- Breaking or bending of the antenna.
- Batteries, being consumables, do not fall under the 2 year warranty conditions of the radio.
Spécifications
Frequency range:
FM 87.50 – 108 MHz
AC Power:
AC 100 - 240V / 50-60HZ / 18W
Batteries:
ALKALINE battery
6 X C size (UM-2)
Rechargeable battery:
Ni-MH or Ni-cad 6 X C size
Speaker:
3" x 2, 8 ohm, 12W full range waterproof-stereo
Output Power:
3W+3W 10% T.H.D. @ 1 kHz @ battery 9V
5W+5W 10% T.H.D. @ 1 kHz @ AC 100 - 240V
The company reserves the right to amend the specification without notice.

text_image
16 AUX IN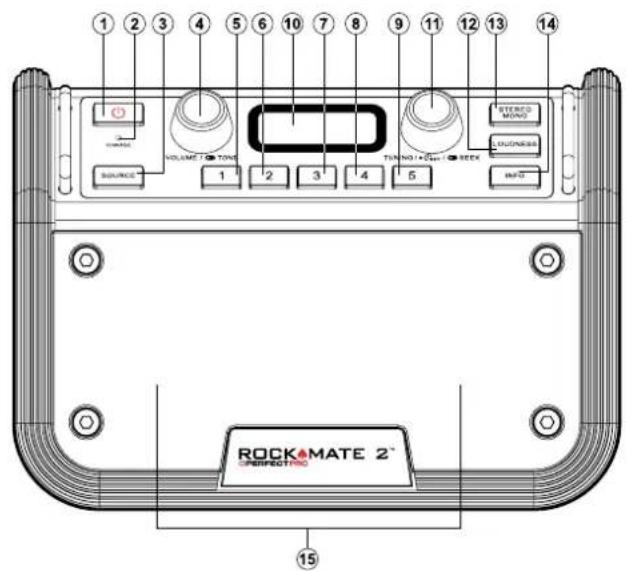
text_image
1 2 3 4 5 6 7 8 9 10 11 12 13 14 VOLUME TONE Tuning + Gain - REE RSTOCK MONO LEADWARE INFO SOURCE 1 2 3 4 5 ROCK&MATE 2™ SPRING-PRO- Standby (POWER AAN/UIT)
- Oplaad-indicator LED
- Source
- Volumeknop/Tone control-knop
- Voorkeurszender 1
- Voorkeurszender 2
- Voorkeurszender 3
-
Voorkeurszender 4
-
Voorkeurszender 5
- LCD-display
- Afstem/Zoek-knop
- Loudness AAN/UIT
- Stereo/Mono (alleen FM)
- Info-knop
- Luidsprekers
- Aux In-aansluiting
text_image
1.7 FM 106.5 (0) R4 14:08 SOURCE 2 14:09 TUNING / ● SET / ● SEEK 6 VOLUME / ● TONEZoeken afstemmen FM
text_image
FM 95.0 SOURCE TUNING / ● SET / ● SEEK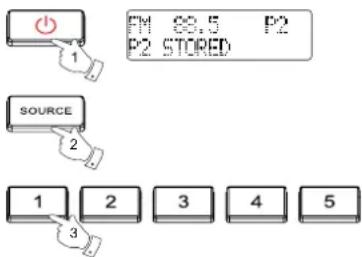
flowchart
graph TD
    A["Power Button"] --> B["FM 88.5 P2"]
    A --> C["P2 STORED"]
    D["SOURCE"] --> E["1"]
    D --> F["2"]
    D --> G["3"]
    D --> H["4"]
    D --> I["5"]
Displaymodi – FM
text_image
FM 100.8 EQ: Flat FM 100.8 EQ: Rock FM 100.8 EQ: Jazz FM 100.8 EQ: Pop FM 100.8 EQ: Spoken FM 100.8 EQ: OutdoorMy EQ profiel instellen
3W+3W 10% T.H.D. @ 1 kHz @ batterij 9V
5W+5W 10% T.H.D. @ 1 kHz @ netstroom 100 - 240V
Equalizer-Function 39
FM 106.5 (m) P4 14:08
14:69
TUNING / ● SET / ● SEEK
VOLUME / TONE
text_image
FM 50.0 SOURCE TUNING / ● Set / ● SEEK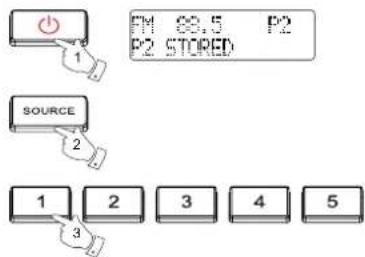
text_image
FM 88.5 P2 P2 STORED SOURCE 1 2 3 4 5Anzeigemodi – UKW
text_image
FM 100.8 EQ: Flat FM 100.8 EQ: Rock FM 100.8 EQ: Jazz FM 100.8 EQ: Pop FM 100.8 EQ: Spoken FM 100.8 EQ: Outdoor3 W + 3 W 10% THD @ 1 kHz @ 9V-Batterie
5 W + 5 W 10% THD @ 1 kHz @ AC 100 - 240 V
TUNING / ● SET / ● SEEK
VOLUME / TONE
text_image
nt. 1 FM 95.0 SOURCE 2 3 TUNING / ● SET / ● SEEK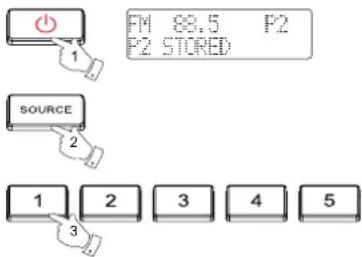
flowchart
graph TD
    A["1"] --> B["2"]
    B --> C["3"]
    C --> D["4"]
    D --> E["5"]
text_image
FM 100.8 EQ: Flat FM 100.8 EQ: Rock FM 100.8 EQ: Jazz FM 100.8 EQ: Pop FM 100.8 EQ: Spoken FM 100.8 EQ: OutdoorPiles rechargeables:
5 W + 5 W 10% T.H.D. @ 1 kHz @ alimentation CA 100 - 240 V