CK401IP - Electric heating Eurom - Free user manual and instructions
Find the device manual for free CK401IP Eurom in PDF.

Frequently Asked Questions - CK401IP Eurom
User questions about CK401IP Eurom
0 question about this device. Answer the ones you know or ask your own.
Ask a new question about this device
Download the instructions for your Electric heating in PDF format for free! Find your manual CK401IP - Eurom and take your electronic device back in hand. On this page are published all the documents necessary for the use of your device. CK401IP by Eurom.
USER MANUAL CK401IP Eurom
natural_image
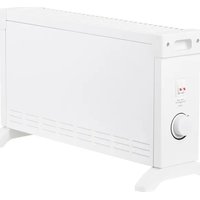
Exterior view of a white EUROM air conditioner unit with ventilation grilles and a small fan (no visible text or symbols on the device body)
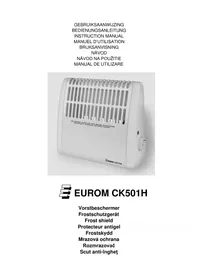
EUROM CK401IP
Vorstbeschermer
Frostschutzgerät
Frost shield
Protecteur antigel
Frostskydd
Mrazová ochrana
Rozmrazovač
Scut anti-înghet
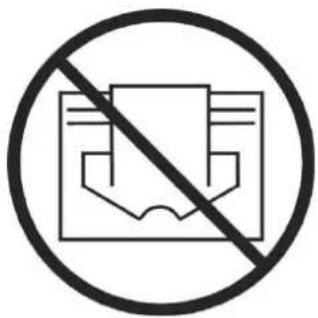
EN This symbol on your device means: do not cover!
natural_image
Technical line drawing of a mechanical bracket with screws and bolts (no text or symbols)natural_image
Technical line drawing of a mechanical bracket with four screws attached (no text or symbols)General safety instructions
- Before using the machine, carefully read this entire instruction manual.
- Before using your new heater, check it, including cord and plug, for any visible damage. Do not use a damaged heater, but send it back to your dealer for replacement.
- This heater is strictly intended for normal domestic use. Only use it for the additional heating of your home. Never install the frost shield in locations that may be susceptible to fire such as wooden sheds, stables, barracks etcetera. Fire hazard!!
- Under the terms and conditions described in this leaflet, the heater can be used in wet or damp indoor spaces such as bathrooms and laundry rooms. Do not place the heater in the vicinity of taps, bathtub,
shower, pool, fountains or other sources of moisture ( > 1m. ). Make sure it cannot fall into water, Also make sure that it cannot come into contact with jets of water, splashes, etc. and prevent water from getting into the heater itself. If, at any time, the heater does fall into water, unplug it immediately! Do not use a heater that has a damp interior but have it repaired. Never immerse the heater, cord or plug in water and never touch it with wet hands.
-
The supply voltage and utility frequency, specified on the machine, need to match those of the socket that is used. The electrical installation needs to be protected by a residual current device (max. 30 mAmp.).
-
Fully extend the cord before plugging in the heater. Make sure it does not come into contact with any part of the heater and prevent it from heating up any other way. Do not run the cord underneath carpeting; do not cover it with mats, carpet strips or similar and make sure it is not placed in any passageways. Make sure the cord cannot be stepped on and that no furniture is placed on top of it. Do not lead the cord around sharp corners and do not roll it up too tightly after use!
-
If possible, do not use an extension cord, as this poses a risk of overheating and fire. If the use of an extension cord is unavoidable, then make sure it is an undamaged, approved extension cord with a minimum diameter of 2 × 1 mm^2 . To prevent overheating, always fully extend the cord!
-
To prevent the circuit being overloaded and fuses blowing, make sure no other appliances are connected to the same socket or wired to the same electrical circuit as the heater.
-
Do not use the heater outdoors and do not use it in spaces smaller than 2m^2
-
A heater contains hot and/or glowing and sparking components. Do not, therefore, use it in areas where fuels, paint, flammable liquids and/or gasses etc. are stored.
-
Do not place the heater near, under, or directly opposite a socket and do not place it near an open fire or other heat source.
-
Do not use the heater near or directly opposite furniture, animals, curtains, paper, clothes, bedding or other inflammable objects. Keep them at least 1 metre away from the heater!
-
Never cover a heater! The heater's air inlets and outlets should never be obstructed in any way, so as to prevent the possibility of fire. Never use the heater to dry clothes and do not place anything on top of the heater. Do not place it on soft surfaces such as beds or deep-pile carpets as they can block openings.
-
Make sure that the air around the heater can circulate freely. In other words, do not place the heater too close to walls or large objects and do not place it under shelves, cupboards or similar. Ensure that the minimum distances, as set out in the assembly instructions, are always maintained.
-
Prevent foreign objects from entering the heater via the venting or exhaust openings as this may lead to electric shock, fire or damage.
-
Always switch the heater off before removing the plug from the socket. Always unplug the heater when not in use! Pull on the plug to remove from the socket, never pull on the cord.
-
Always switch the heater off, unplug it and leave to cool down before:
- cleaning the heater
- carrying out maintenance on the heater
- touching or moving the heater.
-
This machine gets hot when in use. To prevent burns, do not let bare skin come into contact with hot surfaces.
-
Do not use a timer or a similar product to automatically switch on the heater. Always perform safety checks before using the heater!
-
Close supervision is necessary when the product is used near children or incapacitated persons. Do not let children use the appliance as a toy. This appliance is not suitable to be operated by children or persons who have physical, sensory and/or mental limitations, or by persons who have no knowledge of, or experience with, this appliance.
-
Keep the heater clean. Dust, dirt and/or a build up of deposits in the heater are a common cause of overheating. Make sure these deposits are removed regularly.
-
Do not turn on the appliance if you have discovered damage to the heater itself, the cord or the plug, if the appliance is malfunctioning, if it has been dropped or if there are any other signs of a defect. Return the complete product to the vendor or to a certified electrician for inspection and/or repair. Always ask for original parts.
-
Do not use attachments and/or accessories that have not been recommended or supplied by the manufacturer.
-
The appliance (incl. cord and plug) may only be opened and/or repaired by properly authorised and qualified persons.
-
Only use this heater for its intended purpose and as described in this instruction manual.
Not abiding by instructions 23, 24 and 25 may lead to damage, fire and/or personal injuries. A failure to ahdere to these rules also immediately nullifies the guarantee and the vendor, importer and/or manufacturer take no responsibility for any of the consequences!
Description

The CK401IP frost shield is an electrical convector heater with a thermostat and an overheating safeguard. The light is illuminated when the frost shield is switched on. The CK401IP frost shield is intended to keep small domestic or similar spaces frost-free. The heater may only be used when mounted on the wall (never if it is standing up or lying down!) and only for the purpose for which it was designed.
1 = air outlet grill
2 = pilot lamp
3 = thermostat dial
4 = air inlet grills
Location and Connection
- Remove all packaging material and keep out of reach of children. After removing packaging, check the appliance for damage or other signs that could indicate a fault/defect/malfunction. In case of doubt, do not use the appliance, but contact your vendor for inspection or replacement.
- Choose a suitable location for the heater, i.e. at least one metre away from any obstructions, walls or inflammable materials (see also safety instructions).
- The heater needs to be mounted on the wall. Make sure the wall is solid, totally vertical and non-flammable. Do not use wooden or synthetic walls! The distance between the bottom of the heater and the floor should be at least 20 cm. The distance between the heater and the sidewalls should be at least 30 cm and the distance between heater and ceiling at least 50 cm. Do not mount the appliance directly below or in front of a socket.
natural_image
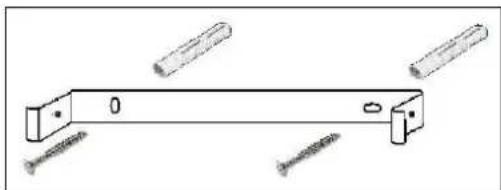
Technical line drawing of a mechanical bracket with four screws attached (no text or symbols)- Loosen both screws on the suspension bracket and fix the assembly bracket horizontally to the wall, using the screws provided. Slide the heater back over the bracket and secure both screws at the side of the
bracket. Make sure the heater and bracket are securely attached and that the heater is completely horizontal.
- If desired, the CK401IP can be permanently connected to the power supply by means of a suitable junction box (not included). This procedure needs to be performed by a professional! A disconnection device at a minimum distance of 3mm (e.g. an automatic power switch, an on/off switch) must be provided for heaters which are permanently connected to the power supply in order that they may be switched off.

Set-up and Operation
- The frost shield is now ready to use. Insert the plug into a suitable 220-240V-50Hz grounded socket to switch on the heater. Only connect the heater to an earthed socket!
- To set the desired temperature, turn the thermostat dial to maximum (biggest dot, or clockwise as far as it goes). Wait for the desired temperature to be reached and then slowly turn the knob until the pilot light goes off. The desired temperature is now set; when the temperature in the immediate vicinity drops to under this level the heater will switch on, as will the light. To set the temperature to a higher or lower level, turn the thermostat dial to either 'maximum' (biggest dot) or 'minimum' (star).
- Turning the thermostat dial to 'minimum' (star) means that the frost shield will keep the area frost-free (as long as the area is not too big or too cold).
- The appliance will function even when set to the lowest level. To fully switch off the heater, you must remove the plug from the socket (or, in case a switch has been installed, by switching this to 'off').
Safety features
In case of internal overheating, the overheating safeguard will switch the heater off. This may occur if the heater cannot give off enough heat or cannot draw in enough fresh air. As mentioned above, this is generally caused by (partially) covering the heater, obstructing the air intake and/or outlet grills or installing the heater too close to a wall or something similar. In case of overheating, turn off the heater, unplug and allow the heater to cool down. Once the reason for the overheating has been removed or amended, you can use the heater again as usual. If the cause of overheating is unclear and/or overheating occurs regularly, stop using the appliance and take it to a qualified professional for repair and/or inspection.
Once the heater has been turned off and allowed to cool down after overheating, it will resume its function automatically. This does not mean, however, that the cause of overheating has been rectified. If the heater repeatedly switches on and off due to overheating, this may pose a fire risk so make sure this does not occur!
Cleaning and Maintenance
Keep the heater clean. Deposits of dust and dirt in the appliance are a common cause of overheating and should, therefore, be regularly removed. Before carrying out cleaning or maintenance work, switch the heater off, remove the plug from the socket and allow the heater to cool.
- Wipe the outside of the heater regularly with a dry or slightly damp cloth. Do not use aggressive soaps, sprays, cleaners or abrasives, waxes, polishes or chemical solutions!
- Using a vacuum cleaner, carefully remove any dust and dirt from the grills and ensure that the air intake and outlet openings are clean. Be careful not to touch or damage any internal parts during cleaning!
- The heater contains no other parts which need maintenance.
- At the end of the season, store the cleaned heater in the original packaging if possible. Store upright in a cool, dry and dust-free place.
- Do not dispose of heater with household waste when it becomes worn or damaged beyond repair. Take it to your local authority's collection point for electrical appliances where any reusable materials will be collected and redistributed.
Problems and Solutions
If the heater does not work even though it is plugged into the socket, check the following:
- Is the plug properly inserted and is the socket live? Replace the fuse, if necessary.
- Is the thermostat set too high? If so, turn it down slightly.
- Did the overheating safeguard switch the heater off? See Safety Features for course of action.
For any other problems, please contact a qualified electrician. Never open the heater yourself!
CE-statement
Euromac bv, Genemuiden-NL hereby declares that the EUROCOM frost shield CK401IP complies with the LVD-guideline 2006/95/EC and the EMC-guideline 2004/108/EC and that it meets the following standards:
EN 60335-1:2002+A11,A1 :04+A12,A2 :06+A13 :08 EN 55014-1:2006
EN 60335-2-30:2003+A1 :04+A2 :07 EN 55014-2:1997/+A1 :2001/+A2 :2008
EN 62233:2008 EN 61000-3-2:2006
EN 61000-3-3:2008
Genemuiden, 19-05-2011 W.J. Bakker, gen.man,
Français
Données techniques
Type : CK401IP
natural_image
Technical line drawing of a mechanical bracket with screws and cylindrical components (no text or symbols)natural_image
Technical line drawing of a mechanical bracket with screws and bolts (no text or symbols)natural_image
Technical line drawing of a mechanical bracket with screws and cylindrical components (no text or symbols)Nastavení a provoz
natural_image
Technical line drawing of a mechanical bracket with screws and cylindrical components (no text or symbols)natural_image
Technical line drawing of a mechanical component with screws and cylindrical pins (no text or symbols)EUROMAC BV., Kokosstraat 20, 8281 JC Genemuiden
e-mail: info@euromac.nl www.euromac.nl