0101.01 - Steamer Stöckli - Free user manual and instructions
Find the device manual for free 0101.01 Stöckli in PDF.
| Product Type | Programmable Steam Cooker |
| Brand | Stöckli |
| Model | 0101.01 (CH) / 0102.02 (Export) |
| Dimensions (L x W x H) | 390 x 260 x 280 mm |
| Weight | 2.85 kg |
| Rated Power | 1700 W |
| Voltage / Frequency | 230 V / 50 Hz |
| Cable Length | 1.5 m |
| Materials | Plastic, cast aluminum, chrome-plated steel |
| Tank Capacity | 1 liter (approx. 60 min cooking time) |
| Timer | Up to 90 minutes |
| Delayed Start | Up to 36 hours |
| Functions | Steam cooking, keep warm (half power), programming of cooking time and end time |
| Included Accessories | 2 perforated baskets, separator, rice bowl, lid |
| Safety | Thermostat, thermal cut-out, audible alarm when water is low, automatic shut-off at end of cooking |
| Cleaning | Lower part: soft sponge and dish soap (do not immerse). Baskets: dishwasher safe. |
| Warranty | 24 months |
Frequently Asked Questions - 0101.01 Stöckli
User questions about 0101.01 Stöckli
0 question about this device. Answer the ones you know or ask your own.
Ask a new question about this device
Download the instructions for your Steamer in PDF format for free! Find your manual 0101.01 - Stöckli and take your electronic device back in hand. On this page are published all the documents necessary for the use of your device. 0101.01 by Stöckli.
USER MANUAL 0101.01 Stöckli
Important information and instruction manual page 29
STÖCKLI
Inhalt
Important information and instruction manual page 29
STÖCKLI
Sommaire
Important information and instruction manual page 29
STÖCKLI
Contents
| Congratulations! | 31 |
| Safety first 32 | |
| Short appliance overview 34 | |
| Intended use 35 | |
| Before putting into use 35 | |
| Steaming in 5 steps 36 | |
| Display overview 37 | |
| Steaming with the Stöckli Steamer program 38 | |
| Programming the timer 39 | |
| Important information 40 | |
| Care and cleaning 41 | |
| Warranty | 44 |
Local agent:
Austria:
Mathis Richard
BIRD Marketing & Consulting
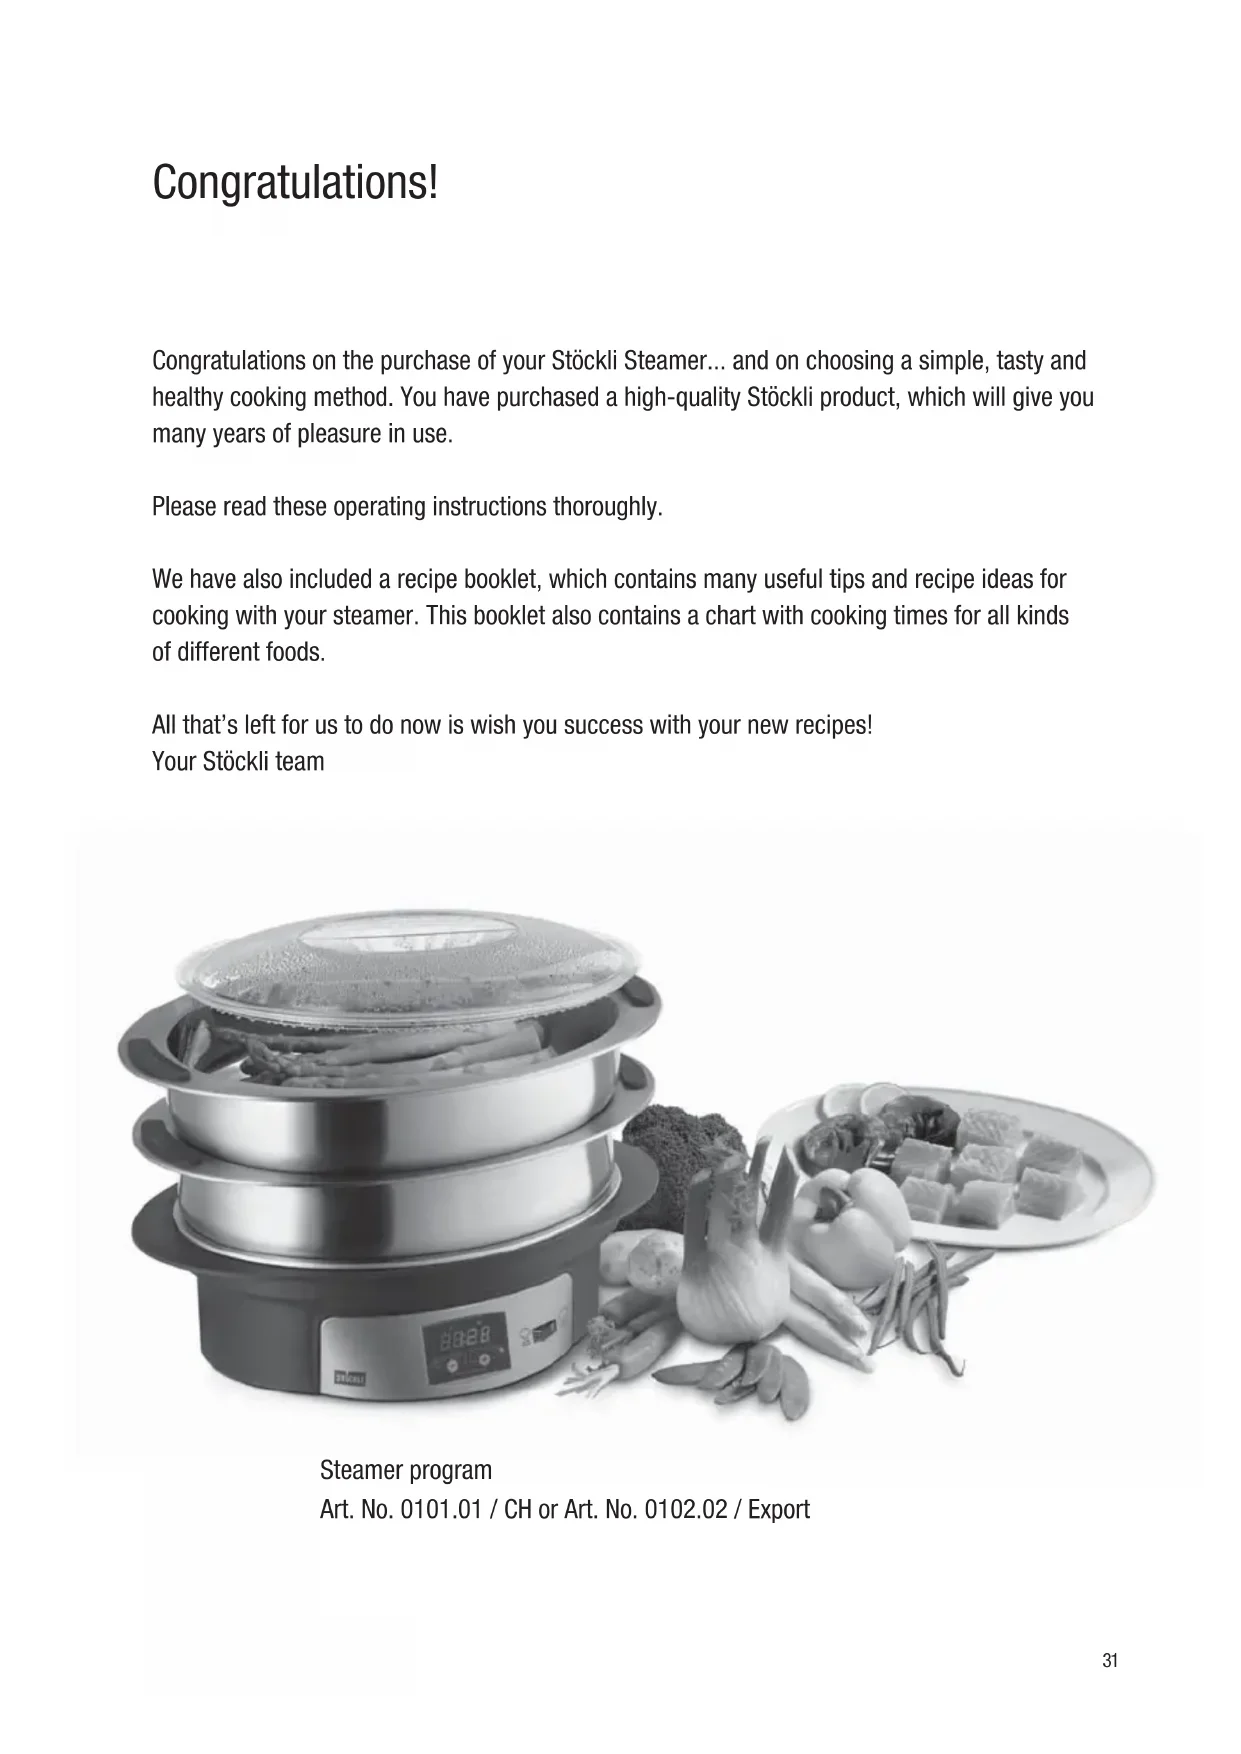
Congratulations on the purchase of your Stöckli Steamer... and on choosing a simple, tasty and healthy cooking method. You have purchased a high-quality Stöckli product, which will give you many years of pleasure in use.
Please read these operating instructions thoroughly.
We have also included a recipe booklet, which contains many useful tips and recipe ideas for cooking with your steamer. This booklet also contains a chart with cooking times for all kinds of different foods.
All that's left for us to do now is wish you success with your new recipes! Your Stöckli team
Steamer program Art. No.0101.01 / CH or Art.No.0102.02/Export
Safety first
Carefully read the safety advice before using your Stöckli «Steamer» for the first time. Store the operating instructions carefully. The manufacturer shall accept no liability for any consequences of improper use.


Caution!
The appliance becomes hot during use - there is a risk of burning!!


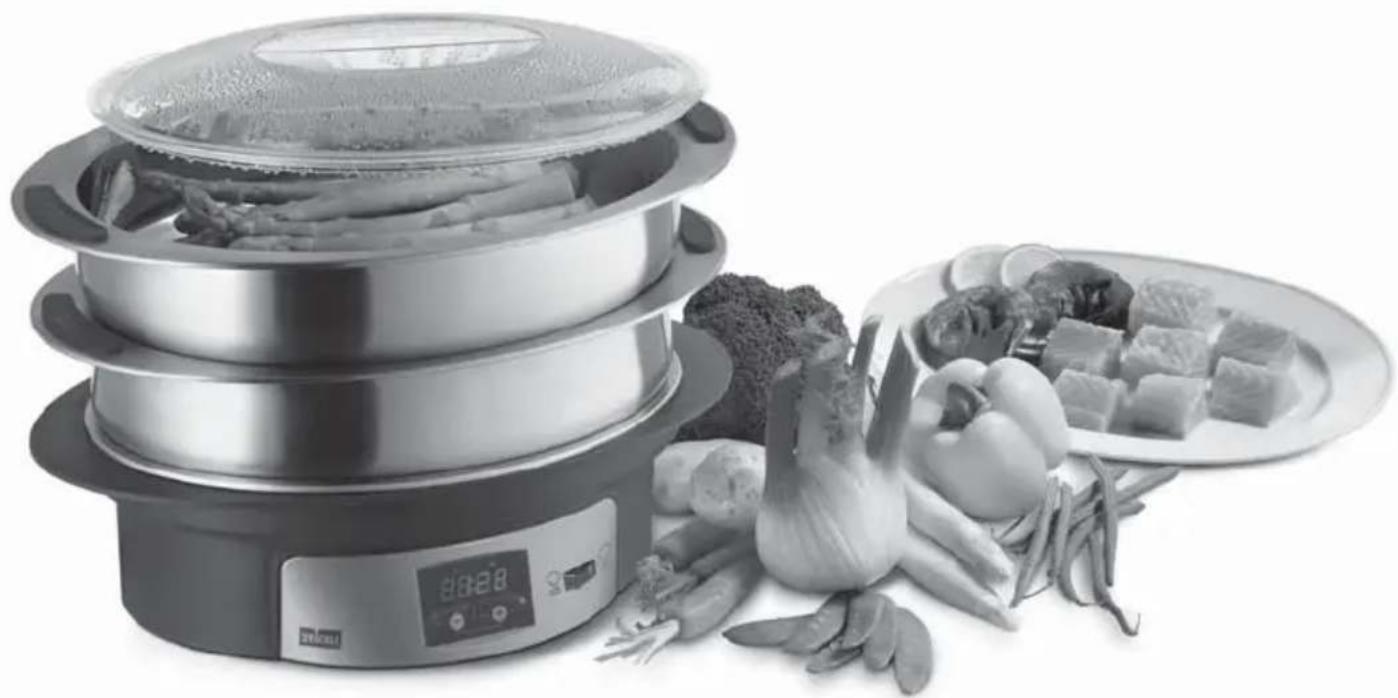
Never use an appliance which is damaged or has a damaged mains cable (1). Do not leave it out of sight when operating and do not carry it while it is hot.
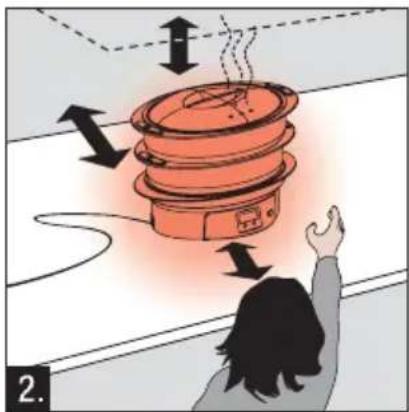
- Do not operate the appliance on or in the vicinity of heat-sensitive objects. Do not operate the appliance under a kitchen wall unit and always keep a safe distance to the wall. Use extra vigilance when operating in the presence of children (2).
Children should be supervised and must not be allowed to play with the appliance.
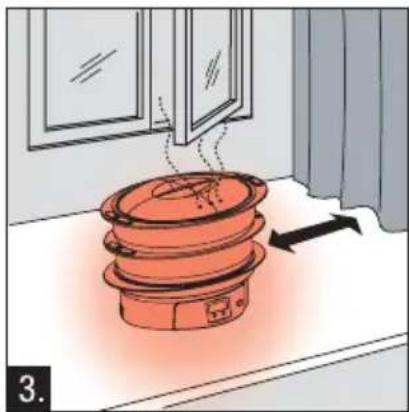
- Switch on the extractor fan or open a window in order to extract the steam when using the appliance (3).
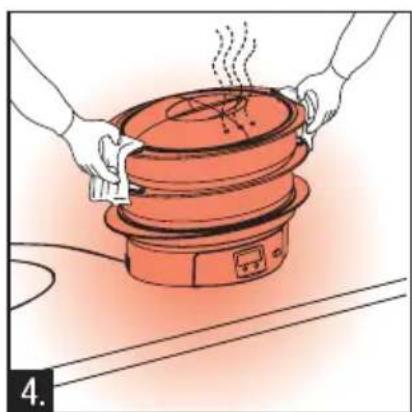
- When the steamer is used for longer time periods, the containers (also in the area around the silicone handles) become hot. Always lift the appliance using the handles and wear oven gloves if necessary (4).
- Avoid the area around the steam outlets. The steam coming out of the holes on the lid is hot. Always wear oven gloves when removing the lid or taking out the containers (4). Never place the strainer inserts on surfaces that are sensitive to heat or humidity.
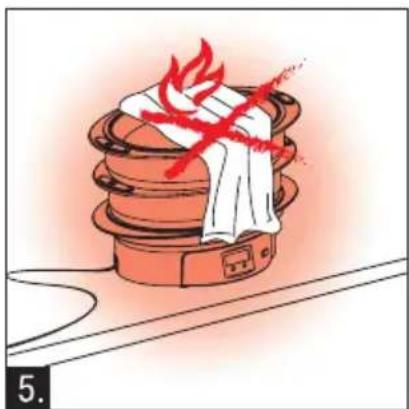
- Do not place cloths or similar items over the appliance (fire hazard!) (5).
The appliance must be used with a grounded power supply (230 V / 50 Hz) with a 10A fuse (6).
Only use power cables with a minimum current rating of 10A (6).
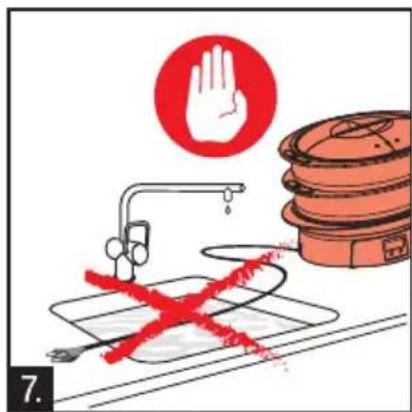
Always pull on the plug, not the mains cable, when disconnecting the cable. - Disconnect the mains cable from the power supply and let the appliance cool down before cleaning (7).
- Do not immerse the lower part of the appliance (heating element) in water to clean it. Instead, clean this using a soft sponge and ordinary detergent. Only the strainer inserts are dishwasher-proof (7). Also observe the notes on cleaning on page 41.
■ Ensure that the local mains voltage corresponds to that detailed on the appliance type label.
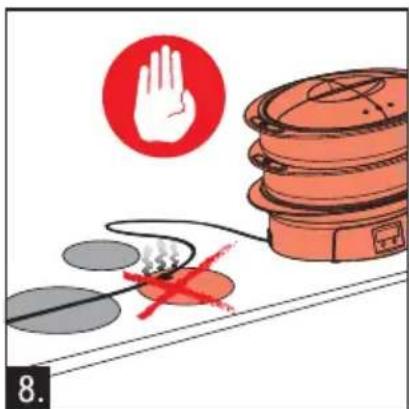
Position the mains cable and extension cable in a safe manner, so that nobody can trip over them. - Keep the mains cable away from hot surfaces or objects and naked flames (8). If the mains cable of the appliance is damaged, it must be replaced by the manufacturer or a customer service agent or a similarly qualified person to prevent hazardous situations.
If the appliance becomes damaged or defective, immediately disconnect the mains cable and have the appliance checked and repaired by a specialist dealer. Never attempt to repair the appliance yourself (9)! The manufacturer shall accept no liability for any damage or injury caused by non-professional repair.
■ Persons (including children), who – based on their physical, sensory or mental abilities or their inexperience or lack of knowledge – are unable to operate the appliance safely, must not operate the appliance without supervision or instruction by a responsible person.
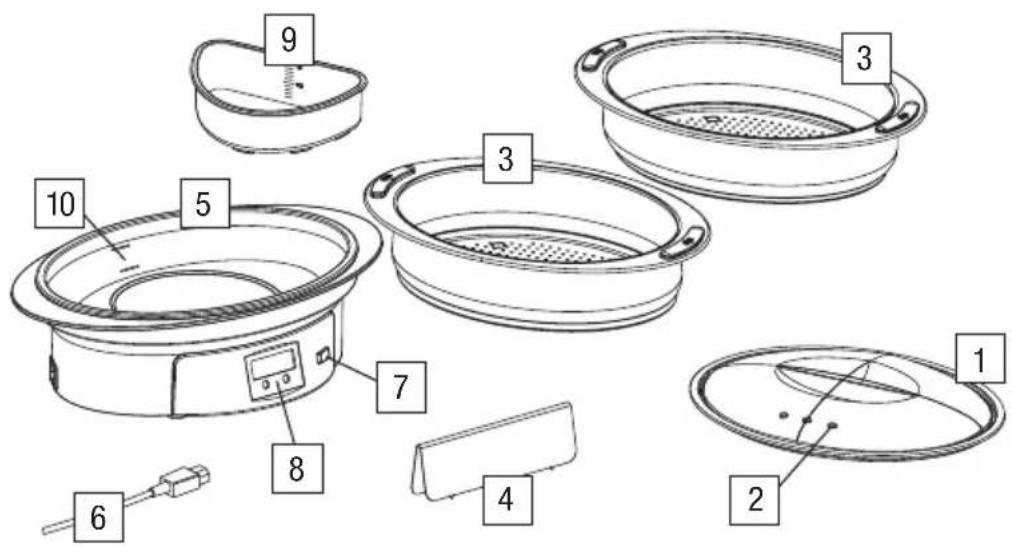
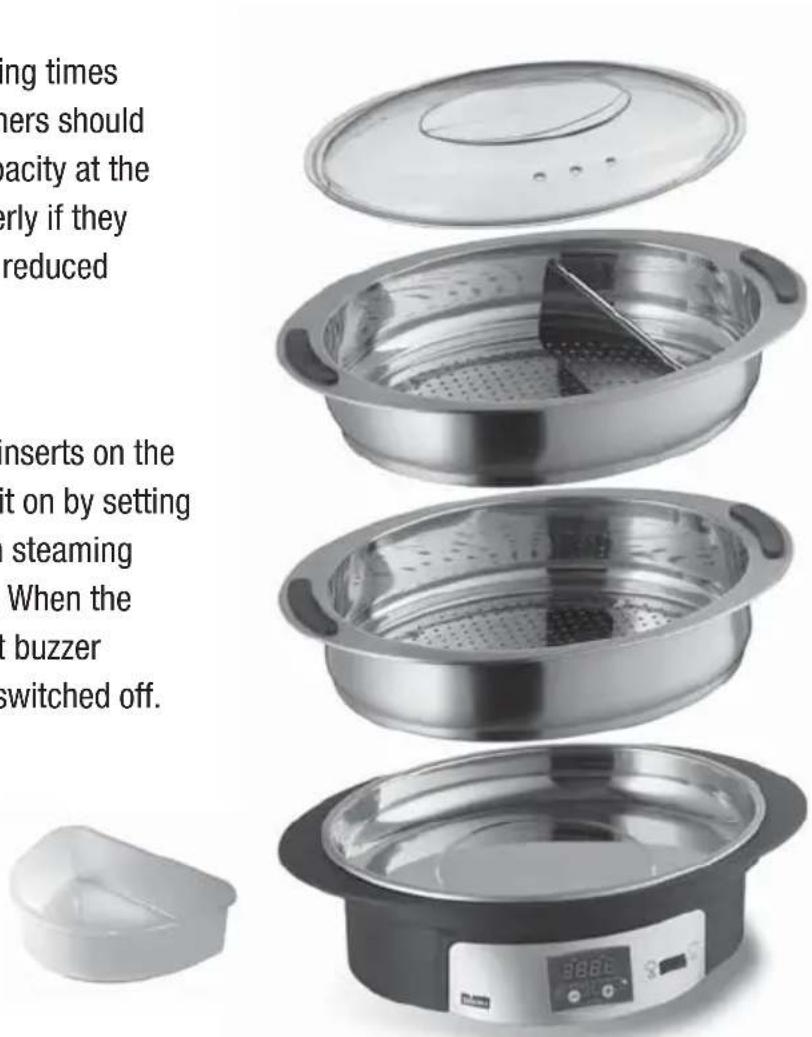
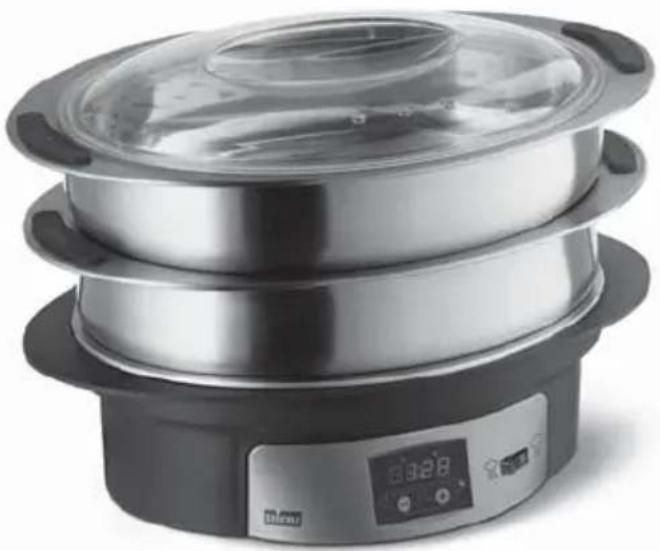
Brief appliance overview
1 Lid
2 Steam outlets
3 Strainer inserts
4 Strainer divider
5 Liquid container
6 Mains cable
7 Full/half power switch
8 Operating panel: timer or programming unit
9 Rice bowl
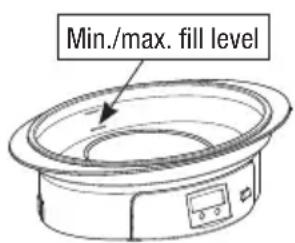
10 Max./min. water level mark
Technical data
Supply voltage: 230 V or 120 V (Art. No. 0102.01/CH or Art. No. 0102.02/Export)
Power rating: max.1700 W
Dimensions: 390 × 260 × 280 (L x W x H)
Weight:
2,85
kg
Cable length: 1,5 m
Material: Plastic / cast aluminium / stainless steel
Certification:
(20
Fuse elements: Thermostat, thermal fuse
Monitoring elements: Acoustic signal in case of low fluid level
Timer function: max. 90 minutes
Programming: max. 36 hours
Warranty:
2
years
Intended use
Persons who are not familiar with steamer operation and children are not permitted to use the appliance. The Stöckli steamer must only be used for the intended use specified in this instruction manual and for food preparation. The use for any other purposes or technical changes made by the user can cause irreparable damage to the appliance and constitutes a breach of the safety instructions. In these cases, we cannot accept liability and any warranty claims shall be excluded.
Before putting into use
The mains voltage must correspond with that specified on the appliance type label. The appliance must not be used under any circumstances, if the mains cable or plug is faulty. Ensure that the cable (as well as any extension cable used) is positioned in such a way that nobody can trip over it. Keep the power cable away from hot surfaces or objects (cf. «Safety first», page 32-33).
Putting into use
Place the appliance on a level, stable and dry surface.
Only use original appliance parts.
The appliance is only suitable for use in dry rooms and must be protected from rain and splash water.
- Wash the appliance parts with warm water before first use. Do not immerse the appliance in water (danger of short-circuit).
■ Ensure that the local mains supply matches that detailed on the type label of the appliance (230 V).
Always ensure that there is enough liquid in the container (between the minimum and maximum mark), before starting operation. 1 litre is sufficient for approximately 30 minutes of steaming.
We recommend switching on an extractor fan or opening a window to extract the vapour.
Steaming in 5 steps
1. Preparation
Prepare the required ingredients in advance. Cut the vegetables into pieces of equal size. Please note that larger pieces take longer to steam than smaller ones.
2. Adding liquid
Water, stock, bouillon or gravity can be used for steaming. Add the liquid, until it reaches the desired fill level between the min. and max. marks (the maximum of 1 litre evaporates in approx. 60 minutes). If the fill level is low, add hot liquid to avoid slowing the steaming process down.
3. Seasoning
The minerals, vitamins and flavouring agents in food are better preserved with steaming. Seasoning is therefore not necessary. If the food is to take on certain tastes or flavours, stock, bouillon or gravy can be added.
4. Loading the strainers
Firmer or larger pieces with longer steaming times should be placed at the bottom. The strainers should only be filled to three quarters of their capacity at the most, as the steam is unable to rise properly if they are too full. Similarly, steaming times are reduced when the strainers are loaded lightly.
5. Steaming
Add the liquid, place one or both strainer inserts on the appliance, close the lid and switch the unit on by setting the desired steaming time (information on steaming times can be found in the recipe booklet). When the preset steaming time has elapsed, a short buzzer sounds and the steamer is automatically switched off.
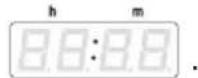
Display overview

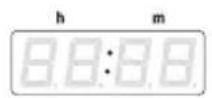
Display overview
Colon lights up: Appliance connected to mains electricity; standby
Dot running light: Steamer in operation (Signal dots)
Dots flash: Countdown to steaming (Signal dots)
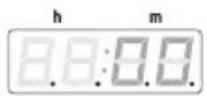
Dots light up: Timer programming mode (Signal dots)
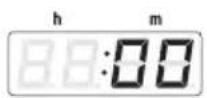
No dots: Number and colon light up Setting the steaming time in programming mode


Switch function
Full/half power switch Half power suitable for warming, for example
Steaming with the Stöckli Steamer program
Functions
The steamer features a programmable
timer with two functions:

aming time programming
(desired steaming time)

er programming
desired end time)
When switched on, the appliance always starts in steaming time programming mode.
Switching on
The steamer is switched on when the mains cable is connected. The timer display shows
Setting the steaming time (max. 90 mins.)
Disconnect and reconnect the appliance from mains power to reset all values before starting.
Example 9 9Vegetables, cooking time: 20 mins.
Enter a value
Repeatedly press the
bottlon, until the display
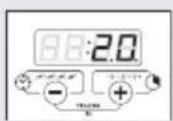
shows the number 20. This represents a steaming time of 20 minutes. Use the button to reduce this value.
Keyboard Press the button briefly to adjust the steaming time in 1 minute intervals. information Press and hold the button to increase the interval. This allows for quick adjustment of the steaming time.
Display Once the steaming time has been entered, no confirmation is necessary.
The running light on the display indicates that the function is active. The steaming process begins.

Disconnect the mains cable to stop steaming.
Programming the timer
Use the timer to set an end time for the appliance to switch off automatically.
Attention:
If a steaming time in excess of 60 mins. at full power is intended, more liquid must be added.

At half power, a steaming time of 90 mins. is possible without the need to add more liquid.
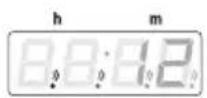
Example 9 The current time is 9.30 AM. The vegetables have a steaming time of 30 mins. and should be ready at 12 noon.
Mode change Press both buttons simultaneously for two seconds.
Four signal dots light up, indicating timer programming mode operation.
If no value is entered, the appliance automatically switches to steaming time mode after approx. 20 seconds. If the dots disappear, switch back to timer programming as described below under «Mode change».
Enter a value Press the button to enter 230
This corresponds to the remaining time of 2 hours and 30 minutes between 9.30 AM and 12 noon.
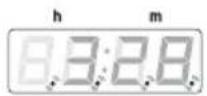
Mode change Press both buttons simultaneously to switch to steaming time mode.
No dots light up.
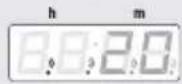
Enter a value Press the button to enter 30
This represents a steaming time of 30 minutes.
Display Once the value has been entered, no confirmation is necessary. After a
few seconds, the display automatically changes to represent active appli
liance mode. The timer function dots flash. The number on the display
starts to count back.
At 11:30 am, the steamer mode switches and steaming starts automatically. The running light appears on the display.
Deleting the To delete the timer programming value.
timer
programming Disconnect the mains cable
Press the button, until the standby display is shown.
Important information
Steaming times
For steaming times, please refer to the relevant chart in the recipe booklet.
Adding more liquid
The cover must not be lifted unnecessarily in order to prevent the liquid evaporating prematurely. As a rule, no liquid must be added, as the steaming time rarely exceeds 60 minutes. Should the liquid evaporate fully during steaming, a buzzer sounds continuously. The heating element is automatically switched off, whilst the timer continues to run. Remove one or both of the strainer inserts and add more liquid.
When steaming is finished
When the steaming time is up, the food can be kept warm at half power for a few minutes. As the food is kept warm for a short time inside the steamer anyway, there is therefore no hurry to open the steamer prematurely.
Ensure that the appliance is switched off before removing the lid. Remove the lid carefully to allow the steam to escape towards the back.
Remove the strainers and place them on a heat- and moisture-proof surface. Place one of the strainers into the upside-down steamer lid to prevent moisture drips.
Care and cleaning
Always disconnect the mains cable before cleaning.
Allow enough time for the appliance and liquid to cool down completely.
Only pour out the remaining liquid in the direction of the arrow; take care not to pour it over the mains cable, the timer or the programming display.

Clean the liquid container with a damp cloth and dry it carefully. Do not submerse the lower part of the appliance in water or put it in the dishwasher. Do not use aggressive, hard or abrasive cleaning agents or objects. If necessary, the case of the lower part of the appliance can be descaled using diluted lemon juice or vinegar.
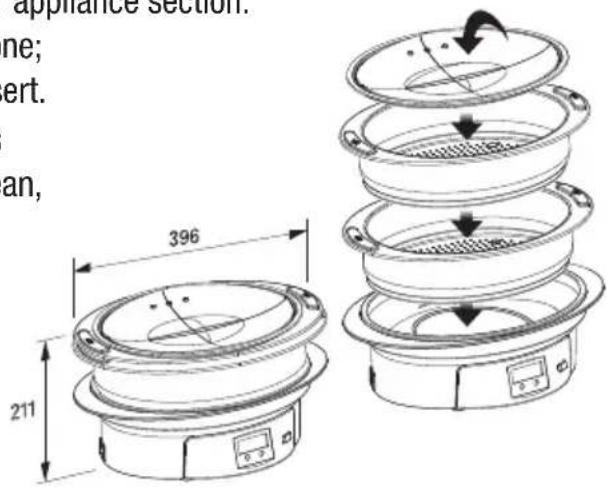
Storage
The different appliance parts can be stored nested together. Simply place the larger strainer insert on the lower appliance section. Place the smaller strainer insert inside the larger one; the mains cable can be stored inside the upper insert. Switch off the appliance and disconnect the mains cable when not in use. Store the appliance in a clean, dry place, well out of the reach of children. 396
Disposal


- Obsolete appliances may be returned to the retail outlet for free expert disposal.
Appliances with dangerous defects must be disposed of immediately so that they can no longer be used.
Appliances must not be disposed of with normal household rubbish (to protect the environment)!
2 JAHRE ANS YEARSGARANTIE
Garantie
We provide a warranty for 24 months from the date of purchase of this electrical article. During this period we take responsibility for all deficiencies resulting from faults in manufacture or material but not for damage caused by the user. This warranty must be sent to us together with the unit if work is to be performed under the terms of the warranty. The warranty is only valid when provided with the date and stamp of the dealer.
Guarantee and repair address for the E.U.:
Hotz Service Center
Im Eschle 5
D-78224 Singen
phone/fax +49 07731885182
mobil +49 (0)172 747 5267
E-Mail: info@hotz-service-center.de
A. & J. Stöckli AG
CH-8754 Netstal
Tel. +41(0)55 645 55 55
Fax +41(0)556455455
E-mail: haushalt@stockli.ch
www.stockliproducts.com