ST88245 - Phone SYLVANIA - Free user manual and instructions
Find the device manual for free ST88245 SYLVANIA in PDF.


| Product type | Cordless telephone |
| Brand | Sylvania |
| Model | ST88245 |
| Frequency | 2.4 GHz |
| Display | 3-line backlit LCD display |
| Battery type | Rechargeable Ni-Cd battery pack 3.6V DC, 600 mAh (model BT-905) |
| Talk time | 7 hours |
| Standby time | 14 days |
| Number memory | 30 caller ID numbers, 10 memory locations, 1 speed dial memory |
| Redial | Up to 32 digits |
| Main features | Call waiting, caller ID, speed dial, page, channel selection, pulse/tone dialing, ringer mute, hearing aid compatible |
| Base power supply | AC adapter AD-0001: input 120V AC 60Hz, output 9V DC 210mA |
| Installation | Desktop or wall-mounted (optional wall mount bracket) |
| Care and cleaning | Clean with a soft cloth dampened with water or mild soap solution. Unplug before cleaning. Do not use solvents or abrasive cleaners. |
| Security | Automatic digital security code (over 262,000 codes), electronic lock when handset is on the base. |
| Replacement parts | Battery pack BT-905, adapter AD-0001, optional headset (part number 91000B) |
| Repairability | 1-year warranty. Do not attempt to repair yourself; contact a qualified technician or Sylvania customer service at 1-800-287-4871. |
| Operating temperature | -10°C to 50°C (14°F to 122°F) |
Frequently Asked Questions - ST88245 SYLVANIA
User questions about ST88245 SYLVANIA
0 question about this device. Answer the ones you know or ask your own.
Ask a new question about this device
Download the instructions for your Phone in PDF format for free! Find your manual ST88245 - SYLVANIA and take your electronic device back in hand. On this page are published all the documents necessary for the use of your device. ST88245 by SYLVANIA.
USER MANUAL ST88245 SYLVANIA
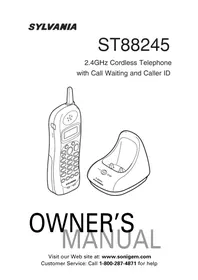
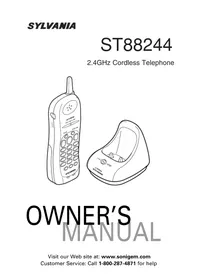
2.4GHz Cordless Telephone with Call Waiting and Caller ID
OWNER'S MANUAL
Visit our Web site at: www.sonigem.com
Customer Service: Call 1-800-287-4871 for help
CONTENTS

Fold out the front cover of this owner's manual to use the handy "controls and functions" page for reference.
Controls and Functions . inside front cover
- Important Safety Instructions .iv
Introduction 1
- Welcome 1
- Features 1
- Important Electrical Considerations 2
Included in Your Package 4
Installing and Adjusting Your Phone........5
Installation 7
- Installing the Handset Battery Pack 9
- Charging the Battery Pack 10
- Cleaning the Battery Contacts 10
Adjusting the Ringer and Volume Controls 11
Using the Page Feature 11
Automatic Digital Code Security 12
Voice Mail Waiting Indicator 12
- Headset Installation 12
Using Your New Phone 13
Making and Receiving Calls 13
- Temporary Tone 13
Call Waiting 14
Using Redial 14
- Selecting a Different Channel 14
-ChainDialing. 14
Memory Dialing 15
- Storing Phone Numbers and Names 15
Steps for Entering Names and Special Characters 16 - Making Calls with Memory Dialing 17
- Editing a Stored Name and/or Phone Number 19
Erasing a Stored Name and Phone Number 20
Speed Dialing 21
- Storing and Editing the Speed Dial. 21
- Making Calls with Speed Dialing. 21
- Deleting the Speed Dial 21
Caller ID 22
Using Caller ID 22
- Choose the Dialing Mode 27
- Setting up Language 27
Troubleshooting 28
Specifications 30
Product Care 31
SYLVANIA Telephone Warranty 32
CONTROLS AND FUNCTIONS
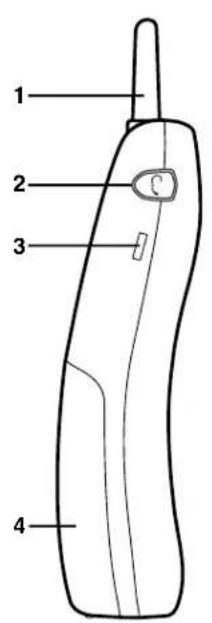
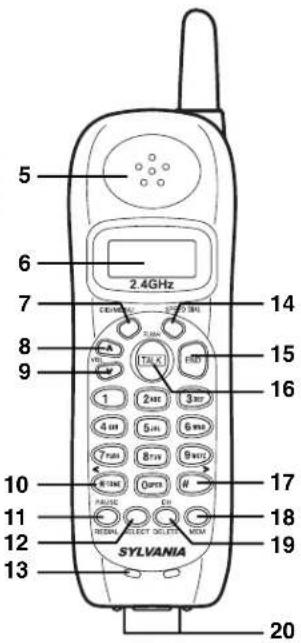
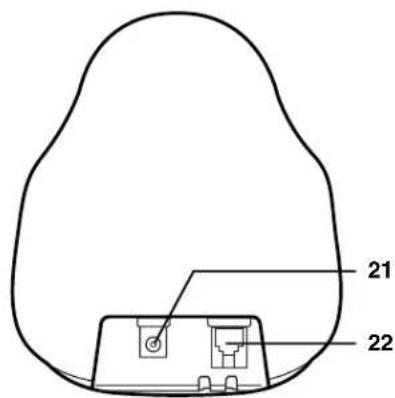
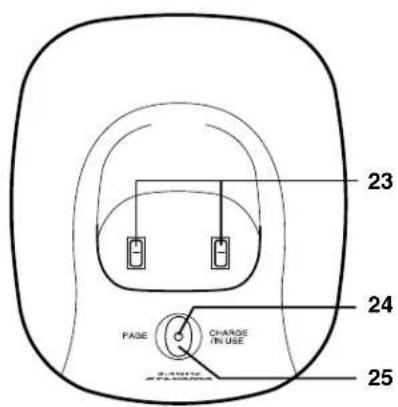
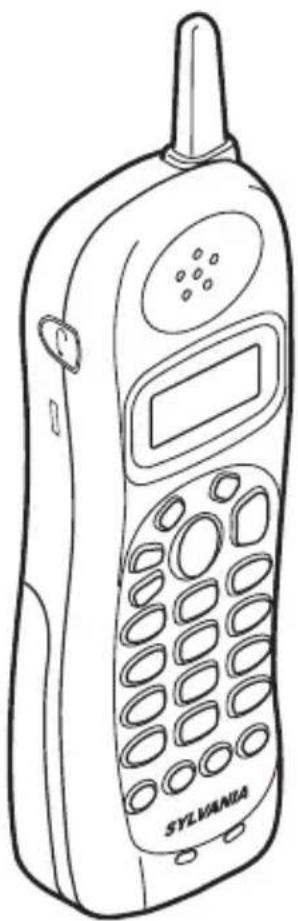
- Handset antenna
- Headset jack
- Beltclip holes
- Handset battery compartment
- Handset earpiece
- LCD display
- CID (Caller ID)/MENU key
- Cursor up)/VOL (Volume) key
- Cursor down)/VOL (Volume) key
- ¥ /TONE/ < (Left cursor) key
11.PAUSE/REDIAL Key - SELECT key
- Handset microphone
- SPEED DIAL key
15.ENDkey - TALK/FLASH key
- # /> (Right cursor) key
- MEM (Memory) key
- CH (Channel)/DELETE key
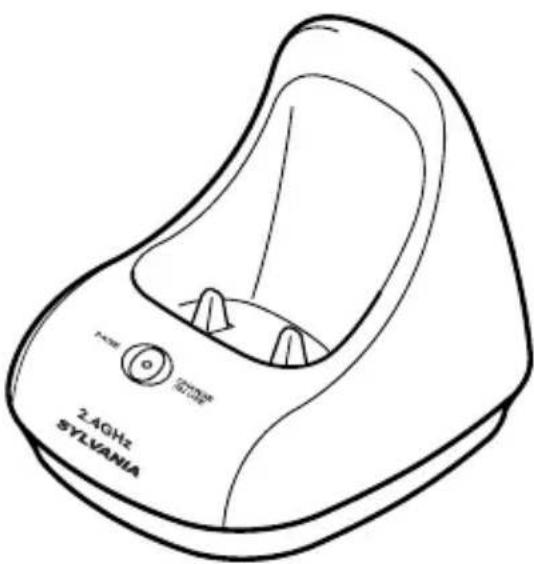
- Battery charge contacts
- DC power input
- Phone line jack
- Base Contacts
- CHARGE/IN USE LED
- PAGE key
IMPORTANT SAFETY INSTRUCTIONS
When using your telephone equipment, these basic safety precautions should always be followed to reduce the risk of fire, electrical shock, and injury to persons:
-
Read and understand all instructions.
-
Follow all warnings and instructions marked on the product.
-
Unplug this product from the wall outlet before cleaning. Use a dry cloth for cleaning without liquid or aerosol cleaners.
-
Do not use this product near water; for example, near a bath tub, wash bowl, kitchen sink or laundry tub, in a wet basement, or near a swimming pool.
-
Do not place this product on an unstable cart, stand, or table. The telephone may fall, causing serious damage to the unit.
-
Slots and openings in the cabinet and the back or bottom are provided for ventilation. To protect the product from overheating, these openings must not be blocked or covered. This product should never be placed near or over a radiator or heat register. This product should not be placed in a built-in installation unless proper ventilation is provided.
-
This product should be operated only from the type of power source indicated on the marking label. If you are not sure of the type of power supply to your home, consult your dealer or local power company.
-
Do not allow anything to rest on the power cord. Do not locate this product where the cord will be damaged by persons walking on it.
-
Do not overload wall outlets and extension cords, as this can result in the risk of fire or electrical shock.
-
Never push objects of any kind into this product through cabinet slots, as they may touch dangerous voltage points or short out parts that could result in a risk of fire or electric shock. Never spill liquid of any kind on the product.
-
To reduce the risk of electric shock, do not disassemble this product. Take it to qualified service personnel when service or repair work is required. Opening or removing covers may expose you to dangerous voltages or other risks. Incorrect reassembly can cause electric shock when the appliance is subsequently used.
-
Unplug this product from the wall outlet and refer servicing to qualified service personnel under the following conditions:
A. When the power supply cord is damaged or frayed.
B. If liquid has been spilled into the product.
C. If the product has been exposed to rain or water.
D. If the product does not operate normally when following the operating instructions. (Adjust only those controls that are covered by the operating instructions. Improper adjustment of other controls may result in damage and will often require extensive repair work by a qualified technician.)
E. If the product has been dropped or the cabinet has been damaged.
F. If the product exhibits a distinct change in performance.
- Do not use the telephone to report a gas leak in the vicinity of the leak.
NOTE: The operation of a microwave oven with the effective range of this phone will generate interference with the phone's operation. This is not dangerous and cannot harm either the phone or the oven or in any way compromise safety of operation of either appliance.
The interference is caused by the overlap of the phone. To eliminate this problem, either stop the microwave oven or call your party back when cooking is complete.
Safety Instructions For Batteries - Handset Battery Pack
Caution:
Use only a SYLVANIA Telephone approved battery pack in the handset of your ST88245 Cordless Telephone. To reduce the risk of fire or injury, always do the following when replacing, discarding or charging batteries. When handling the batteries, be careful not to short the battery with conducting materials such as rings, bracelets, and keys. The battery or conducting material may overheat and cause burns.

CONTAINS NICKEL CADMIUM BATTERY.
MUST BE RECYCLED OR DISPOSED OF PROPERLY.
Ni-Cd
A. Use only the following type and size battery in the cordless phone: Self contained 3-cell Nickel-Cadmium rechargeable battery supply, BT-905 DC 3.6V 600mAh.
B. Do not dispose of the battery pack in a fire. The cell may explode. Check with local codes for possible special disposal instructions.
C. Do not attempt to open or mutilate the battery pack. The chemicals are dangerous and may cause damage to the eyes or skin, and may be toxic if swallowed.
D. Follow the charge instructions outlined in this manual.
Nickel-cadmium cells are used in the battery pack. Please take your used nickel-cadmium battery packs to a store that recycles nickel-cadmium batteries.
INTRODUCTION
WELCOME
Congratulations on your purchase of the SYLVANIA phone ST88245 with Call Waiting and Caller ID. This phone is designed for reliability, long life, and outstanding performance.
FEATURES
2.4GHz Technology
- Caller ID on Call Waiting
3-line Backlit Display
30 Number Caller ID Memory
- Face Up Charging - 10 Memory Dial Locations
32 Digit Redial · Pulse/Tone Dialing
Page 7 Hour Talk Time
Handset Earpiece and Ringer · Hearing Aid Compatible Volume Control Trilingual Language
- Trilingual Language, option
20 Channel Autoscan • Speed Dial
The ST88245 features include Automatic Call Connection. Automatic Call Connection allows you to answer a call by just removing the handset from the base so you don't have to waste time pushing buttons. Automatic Call Completion allows you to hang up by simply returning the handset to the base.
The Clear Digi Sound true compander circuitry virtually eliminates background noise. This innovative technology provides you with the best possible reception during all your conversations.
To protect you against misbilled calls which might result from your phone being activated by other equipment, the ST88245 automatically selects one of approx. 262,000 digital security codes for the handset and base. Also, the Digital Security System feature electronically locks your phone when the handset is on the base.
To get the most from your phone, please read this owner's manual thoroughly. Also, be sure to complete the product registration form and mail it in.
IMPORTANT ELECTRICAL CONSIDERATIONS
Unplug all electrical appliances when you know an electrical storm is approaching. Lightning can pass through your household wiring and damage any device connected to it. This phone is no exception.
Caution: Please do not attempt to unplug any appliance during an electrical storm.
VIC NOTICE
Terminal Equipment
Notice: This equipment meets the applicable Industry Canada Terminal Equipment Technical Specifications. This is confirmed by the registration number. The abbreviation, IC, before the registration number signifies that registration was performed based on a Declaration of Conformity indicating that Industry Canada technical specifications were met. It does not imply that Industry Canada approved the equipment.
Notice: The Ringer Equivalence Number (REN) for this terminal equipment is marked on the equipment itself. The REN assigned to each terminal equipment provides an indication of the maximum number of terminals allowed to be connected to a telephone interface. The termination on an interface may consist of any combination of devices subject only to the requirement that the sum of the Ringer Equivalence Numbers of all the devices does not exceed five.
Radio Equipment
The term "IC:" before the radio certification number only signifies that Industry Canada technical specifications were met.
Operation is subject to the following two conditions: (1) this device may not cause interference, and (2) this device must accept any interference, including interference that may cause undesired operation of the device. "Privacy of communications may not be ensured when using this telephone".
▼More Than One Cordless Telephone
If you want to use more than one cordless telephone in your home, they must operate on different channels. Press the CH/DELETE key to select a channel that provides the clearest communication.
Cordless Telephone Privacy
Cordless telephones are radio devices. Communications between the handset and base of your cordless telephone are accomplished by means of radio waves which are broadcast over the open airways. Because of the inherent physical properties of radio waves, your communications can be received by radio receiving devices other than your own cordless telephone unit. Consequently, any communications using your cordless telephone may not be private.
INCLUDED IN YOUR PACKAGE
- Base
- Handset
- Rechargeable Battery (BT-905)
- AC Adapter (AD-0001)
- Telephone Cord
This Owner's Manual
OPTIONAL ACCESSORIES (NOT INCLUDED)
- Belt Clip
- Bracket
- Telephone Cord (Short)
NOTE: To get the most from your phone, please read this owner's manual thoroughly.
INSTALLING AND ADJUSTING YOUR PHONE
SELECTING A LOCATION
Before choosing a location for your new phone, there are some important guidelines you should consider:
- The location should be close to both a phone jack and continuous power outlet. (A continuous power outlet is an AC outlet which does not have a switch to interrupt its power.)
- Keep the base and handset away from sources of electrical noise such as motors, microwave ovens, or fluorescent lighting.
- The base can be placed on a desk or tabletop or mounted on a standard wall plate.
- You should charge your new phone for 15-20 hours before completing the installation or using the handset.
NOTE: If your home has specially wired alarm equipment connected to the telephone line, be sure that installing the system does not disable your alarm equipment.
If you have questions about what will disable your alarm equipment, contact your telephone company or a qualified installer.

TELEPHONE LINE OUTLETS
There are two types of phone outlets:
Modular Jack
Most phone equipment available now uses modular jacks. Phone cords are fitted with a molded plastic connector which plugs into this type of jack. If you do not have modular phone jacks, contact your local telephone company for information about their installation.
Hardwired Jack
Some equipment is wired directly to a phone jack, and these types of installations require a modular jack converter. This type of installation is not difficult; however, you should contact your local telephone dealer or a telephone supply store for advice about the proper adapter or converter for your particular situation.
CONNECTING THE TELEPHONE CORDS
Consider these safety guidelines before connecting the telephone cords:
Caution!
- Never install telephone wiring during a lightning storm.
- Never touch uninsulated telephone wires or terminals unless the telephone line has been disconnected.
- Use caution when installing or modifying telephone lines.
Caution: Place the power cord so that it does not create a trip hazard or where it could not become chafed and create an electrical hazard or fire.
APPLYING POWER TO THE BASE
This phone requires an AC outlet without a switch to interrupt power, and the included AC adapter. To relieve strain on the DC plug when the phone is placed on a desk or table, wrap the power cord around the strain relief notch on the back of the base.
NOTE: Before using your phone, fully charge the Nickel-Cadmium battery pack for 15-20 hours.
Plug the AC Adapter into a standard 120 V AC wall outlet. Do not use an outlet controlled by a wall switch. Use only the AC Adapter supplied with this phone.
INSTALLATION
▼On A Desk Top
1) Plug one end of the supplied modular cord into the TEL LINE jack on the back of the base.
2) Insert the supplied AC adapter's barrel plug into the DC IN 9V jack on the back of the base and route the adapter's cord through the strain relief slot on the base.
3) Plug the other end of the modular cord into a modular phone line jack.
4) Plug the adapter into a standard AC outlet.
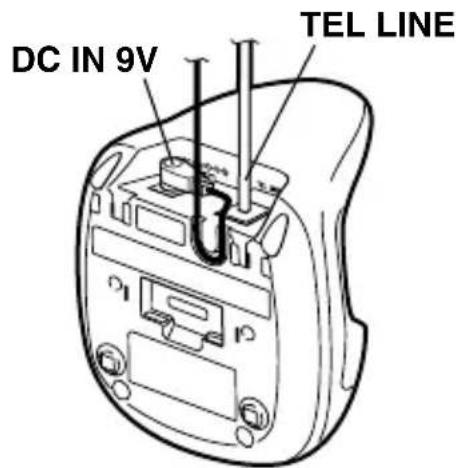
CAUTION: You must use a Class 2 power source that supplies 9V DC and delivers at least 210mA . Its center tip must be set to positive and its plug must fit the phone's DC IN 9V jack. The supplied adapter meets these specifications. Using an adapter that does not meet these specifications could damage the phone or the adapter.
On A Wall Plate or Wall
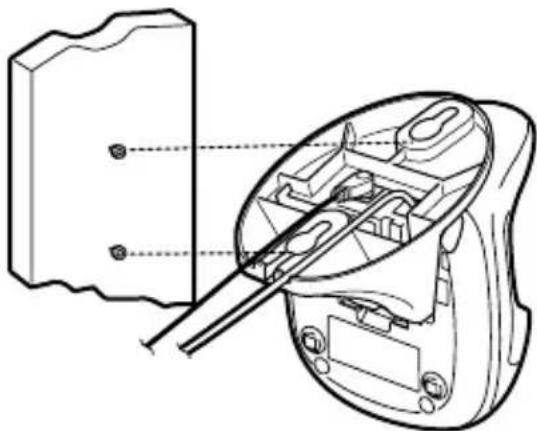
To mount the phone directly on a wall, you need two screws (not supplied) with heads that fit into the keyhole slots on the base.
Drill two holes 3 15/16 inches apart. Thread a screw into each hole, letting the heads extend about 1/8 inch.
1) Insert the two of upper tabs of the optional bracket (not included) into the base's upper tab slots.
Then slide down the bracket so that two of the lower tabs would be inserted into the lower slots.
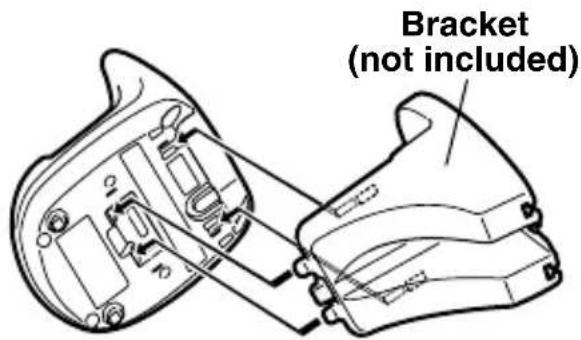
2) Plug one end of the supplied modular cord into the TEL LINE jack on the base's back.
3) Plug the supplied AC adapter's barrel plug into the DC IN 9V jack.
4) Route the adapter and modular cords through the bracket's grooves.
5) For a wall plate, align the bracket's keyhole slots with the wall plate studs and slide the base downward to secure it.
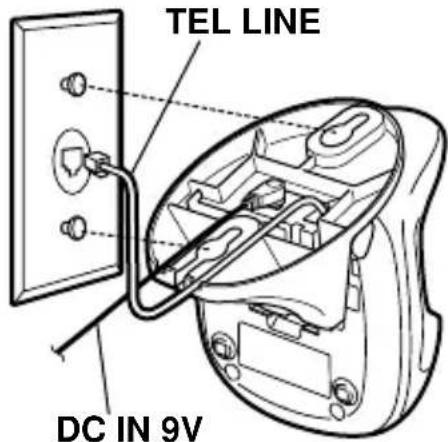
For direct wall mounting, align the bracket's keyhole slots with the mounting screws and slide the base downward to secure it.
6) Plug the adapter into a standard AC outlet. And plug the modular cord's other end into a modular phone line jack.
Installing the Optional Beltclip (not included)
To attach the beltclip
Insert the beltclip into the holes on each side of the handset. Press down until it clicks.
To remove the beltclip
Pull both sides of the beltclip to release the tabs from the holes.
Connecting/Charging the Battery Pack
The phone comes with a rechargeable nickel-cadmium battery pack in the handset, but not connected. Before using your phone, you must connect the battery pack. Then charge it for about 15-20 hours.
INSTALLING THE HANDSET BATTERY PACK
1) Remove the handset battery cover by pressing in on the cover release and sliding it downward.
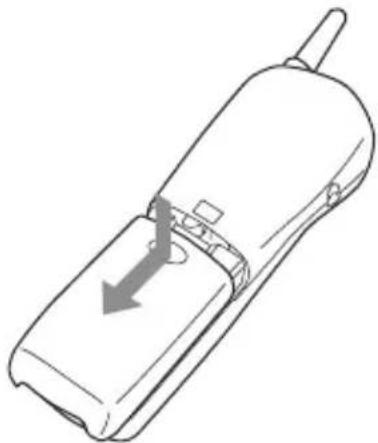
2) Connect the battery pack connector with the correct polarity (black and red wires), then insert the battery pack into the battery compartment.
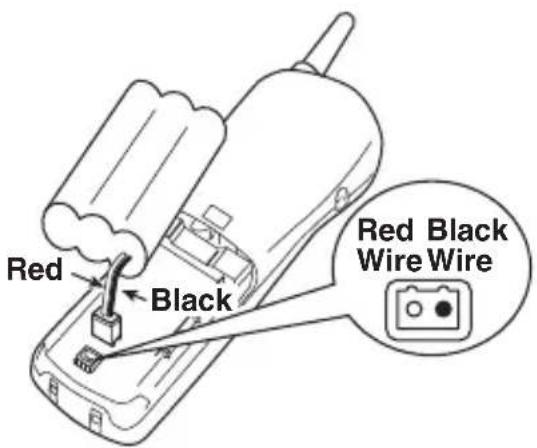
NOTE: The plastic connectors will fit together only one way. Make sure the battery's connector is properly aligned. Use only the supplied battery pack (model BT-905).
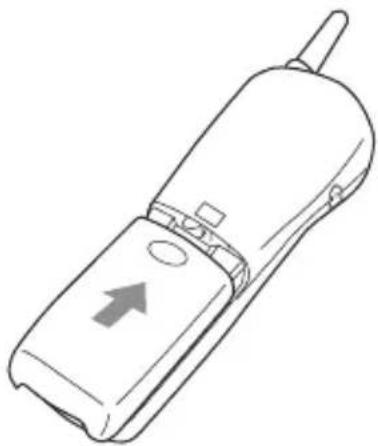
3) Slide the battery cover on until it snaps into place.
CHARGING THE BATTERY PACK
Initial Battery Charging
Before plugging the phone line into your new phone for the first time, fully charge the rechargeable battery pack for 15-20 hours without interruption.
1) Place the handset on the base.
2) Make sure that CHARGE/IN USE LED lights. If the LED doesn't light, check to see that the AC adapter is plugged in and that the handset makes good contact with the base charging contacts.
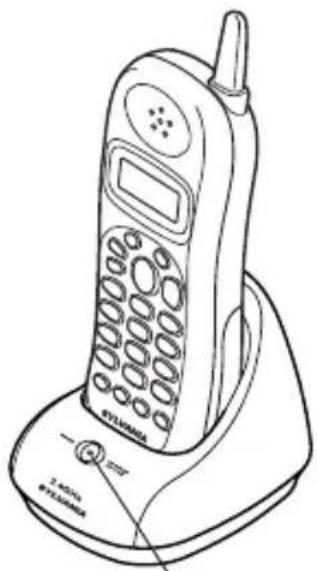
CHARGE/INUSELED
Low Battery Alert
When the battery pack is very low and needs to be charged, the phone is programmed to eliminate functions in order to save power. If the phone is not in use, "Low Battery" appears on the LCD and none of the keys will operate.
Low Battery
If the phone is in use, "Low Battery" flashes and the handset beeps. Complete your conversation as quickly as possible and return the handset to the base unit for charging.
NOTES: Information stored in the phone's memory will be retained for one minute after the battery pack is removed. This includes all setup information, last number dialed, memory dial locations stored, SpeedDial programming, and the CID list. Even when the battery pack is not being used, it will gradually discharge over a long period of time. For optimum performance, be sure to return the handset to the base unit after a telephone call.
CLEANING THE BATTERY CONTACTS
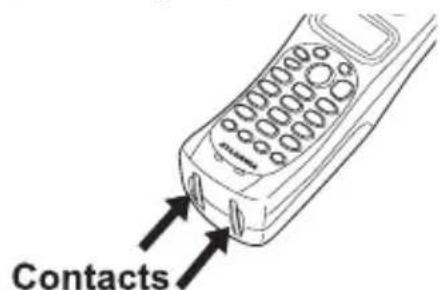
To maintain a good charge, clean all charging contacts on the handset about once a month with a damp cloth. DO NOT use liquids or solvents; you may damage your phone.
ADJUSTING THE RINGER AND VOLUME CONTROLS
Handset Ringer Tone and Volume
Your ST88245 lets you choose from five ringer tone/volume setting, Ring Type A High, Ring Type A Low, Ring Type B High, Ring Type B Low, and Ringer OFF. When the phone is in standby mode, press the A / VOL or V/VOL key on the handset to select the handset ringer tone and volume. As you change the settings, the selection appears on the LCD.
Handset Earpiece Volume
The ST88245 comes with four volume settings for the handset earpiece - Low, Medium, High and Maximum.
During a call, press WOL to increase the earpiece volume, press WOL to decrease the earpiece volume. As you increase or decrease the volume, your selection appears on the LCD.
Talk 0:15 Volume Maximum
When you hang up, the ST88245 keeps the last volume setting selected.
Ringer Mute
You can temporarily mute the ringer tone. When the handset is off the base and the phone is ringing, press END. The ringer tone will return to normal starting with the next incoming call.
USING THE PAGE FEATURE
To locate the handset (while it's off the base)
1) Press PAGE on the base.
2) The handset beeps for 60 seconds.
3) To cancel the page, press any key on the handset or PAGE on the base, or return the handset to the base.
NOTE: Paging is also cancelled when an incoming call is received.
AUTOMATIC DIGITAL CODE SECURITY
The digital security code is an identification code used to connect the handset and the base unit. Normally, setting the code is not necessary. The first time you charge your handset, the security code is automatically set. In the rare situation that you suspect another cordless telephone is using the same security code, you can change the code.
1) Remove the handset from the base unit. Press and hold PAGE on the base.
2) While holding PAGE, place the handset on the base unit. Leave the handset on the base for more than 3 seconds. A new random security code is set.
NOTE: If the handset battery pack is completely discharged or the battery pack is removed, the digital security code will be lost. If this happens, a new security code is set automatically next time the battery pack is charged.
VOICE MAIL WAITING INDICATOR
If you subscribe to voice mail service, you can use your cordless telephone to access your voice mailbox. The CHARGE/IN USE LED on the base of your phone flashes whenever you have messages waiting in your voice mailbox.
Just dial the access number supplied by your voice mail provider to enter your mailbox.
You can program your voice mail access number to a speed dial number. If the voice mail waiting indicator remains on after you have retrieved your messages, press and hold the PAGE key for 5 seconds. This will reset the indicator.
NOTE: You must subscribe to voice mail service from your telephone company in order to use this feature. The voice mail company will provide you with the access number.
HEADSET INSTALLATION
Your phone may be used with an optional headset, Parts # 91000B. To use this feature, insert headset plug into the headset jack. Your phone is ready for hands-free conversations. (Headset may be purchased by calling SYLVANIA Customer Hotline (1-800-287-4871).)
USING YOUR NEW PHONE
MAKING AND RECEIVING CALLS
| Handset On Base | Handset Off Base | |
| To answer a call | Pick up the handset (Automatic Call Connection: ON) or pick up the handset and press TALK/FLASH. (Automatic Call Connection: OFF) | Press TALK/FLASH, any number, \(/TONE/<or/#/>\). (Automatic Call Connection: ON) or press TALK/FLASH. (Automatic Call Connection: OFF) |
| To make a call | 1) Pick up the handset. 2) Press TALK/FLASH. 3) Listen for the dial tone. 4) Dial the number. OR 1) Pick up the handset. 2) Dial the number. 3) Press TALK/FLASH. | 1) Press TALK/FLASH. 2) Listen for the dial tone. 3) Dial the number. OR 1) Dial the number. 2) Press TALK/FLASH. |
| To hang up | Press END, or return the handset to the base (Automatic Call Completion). | |
| To redial | 1) Pick up the handset. 2) Press TALK/FLASH. 3) Listen for the dial tone. 4) Press PAUSE/REDIAL. OR 1) Pick up the handset. 2) Press PAUSE/REDIAL, then press TALK/FLASH. | 1) Press TALK/FLASH. 2) Listen for the dial tone. 3) Press PAUSE/REDIAL. OR Press PAUSE/REDIAL, then press TALK/FLASH. |
NOTE: Refer to page 22 "Setting Up Caller ID Options" to turn on Automatic Call Connection if desired.
TEMPORARY TONE
In pulse dialing mode, you can access bank facilities, telephone answering machines, etc., by pressing the TONE/ key. This will get you into the tone mode and will allow you to input the required tone codes. It will reset automatically to pulse dialing after you end your call.
CALL WAITING
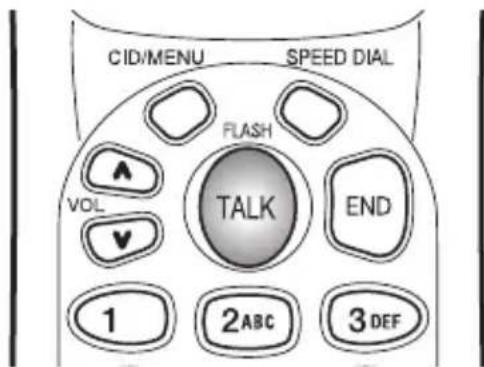
If you have "call waiting" service and a call waiting tone sounds while you are on a call, press TALK/FLASH to accept the waiting call. There is a short pause, then you will hear the new caller. To return to the original caller, press TALK/FLASH again.
USING REDIAL
PAUSE/REDIAL calls the last number dialed. The redialed number can be up to 32 digits long.
SELECTING A DIFFERENT CHANNEL
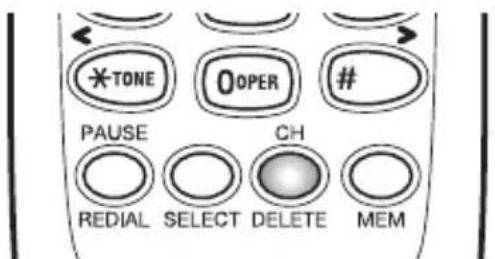
If you encounter interference while using your phone, you can manually change the channel for clearer operation. This function works only when the phone is in use.
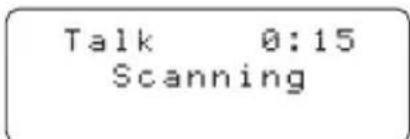
During the course of a conversation, if you hear static or noise which makes it difficult to hear, press CH/DELETE. The following screen appears. The phone then changes to a different channel.
CHAIN DIALING
On certain occasions after dialing a number, you may be requested to enter an access code, such as your account number. You can enter this number into a memory location for later use by doing the following.
1) Store the access code into one of the memory locations (0-9). See "Storing Phone Numbers and Names" on the next page.
2) Dial the party or service main number.
3) When you need to enter the special number, press MEM followed by the memory location (0-9). Then press SELECT.
MEMORY DIALING
STORINGPHONE NUMBERSAND NAMES
Memory Dialing allows you to dial a number using just a few key strokes.
Your ST88245 stores up to 10 names/numbers in the handset.
1) Press MEM then "Select Memory" is displayed.
2) Press A/VOL and V/VOL, or enter a number (0 - 9) to select the memory location where you would like to store the number.
3) Press SELECT twice. The following screen appears and a cursor flashes indicating that the display is ready for the name to be entered.
If this screen appears, the selected memory location is already stored. Then you must either change the entry in this location, clear the entry in this location, or select "Go Back" to choose another location.
SelectMemory 01 02
Store Name
Edit Memory02
Delete Memory02
Go Back
4) To enter a name (up to 13 characters), use the number keys.
- See the "Steps for entering names and special characters" (See page 16).
- Use #/ and × /TONE / < to move the cursor to the desired location.
- Use CH/DELETE to delete characters as needed.
- Press and hold CH/DELETE to delete all the characters.
- If a name is not required, go to step 5.
5) Press SELECT. "Store Number" is displayed. The cursor flashes indicating that the display is ready for the number to be entered.
Store Number
6) Use the number keys, #/> or */TONE/<, to enter the phone number. The phone number cannot exceed 20 digits.
Store Number 8002971023
Use PAUSE/REDIAL to enter a pause in the dialing sequence.
The display shows a "P". Each pause counts as one digit and represents a two second delay of time between the digits as they are sent.
Use CH/DELETE to delete digits as needed.
NOTE: The pause feature is useful for long distance calling, credit card dialing, or sequences that require a pause between digits.
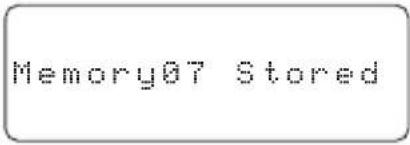
7) Press MEM. The handset beeps and displays the confirmation screen. Memory storage is complete. For example, if you store a name and number into memory location number 7, the display shows "Memory87 Stored". If you store only the number into memory location number 8, the display shows "Memory88". After about 2 seconds, Select Memory screen is displayed.
Repeat steps 2 - 7 to store more numbers.
8) Press END to return to standby mode.
NOTE: You must press a key within 30 seconds or the phone will return to standby. If you return the handset to the base, the phone will return to standby also.
STEPS FOR ENTERING NAMES AND SPECIAL CHARACTERS
Refer to the letters on the number keys to select the desired characters. With each press of a numeric key, the displayed character appears in the following order:
Upper case letters first, lower case letters next, and finally the number corresponding to the key.
| Number of key is pressed | |||||||||
| Keys | 1 | 2 | 3 | 4 | 5 | 6 | 7 | 8 | 9 |
| 1 | 1 | ||||||||
| 2ABC | A | B | C | a | b | c | 2 | ||
| 3DEF | D | E | F | d | e | f | 3 | ||
| 4GHI | G | H | I | g | h | i | 4 | ||
| 5JKL | J | K | L | j | k | l | 5 | ||
| 6MNO | M | N | O | m | n | o | 6 | ||
| 7PQRS | P | Q | R | S | p | q | r | s | 7 |
| 8TUV | T | U | V | t | u | v | 8 | ||
| 9WXYZ | W | X | Y | Z | w | x | y | z | 9 |
| 0OPER | * | # | - | & | ( | ) | (blank) | ∅ | |
If you make a mistake while entering a name:
Use ¥/TONE/< or #/> to move the cursor to the incorrect character. Press CH/DELETE to erase the wrong character, then enter the correct character. To delete all characters, press and hold CH/DELETE.
For example, to enter Bobby:
1) Pick up the handset. Press MEM.
2) Enter a number or press A/VOL, NOL to select a memory location number.
3) Press SELECT twice.
4) Press 2 twice.
5) Press 6 six times.
6) Press 2 five times, then press #/> to move the cursor to the right.
NOTE: If the next character uses the same number key, you must press #/> to move the cursor over. Otherwise the next time you press the number key, it changes the character that was previously set.
7) Press 2 five times.
8) Press 9 seven times.
9) When finished, press SELECT.
To continue to store the telephone number, proceed to step 6 on page 15.
MAKING CALLS WITH MEMORY DIALING
MEMORY DIALING FROM STANDBY MODE
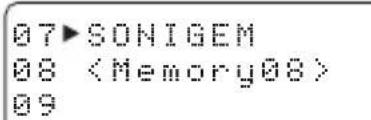
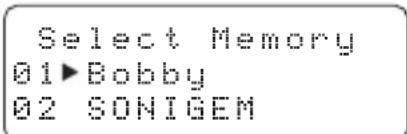
1) Press MEM. The handset displays your programmed memory locations.
2) Press A/VOL and V/VOL, or enter the number (0 - 9) to select the memory location you would like to dial.
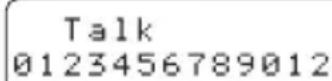
3) Press TALK/FLASH. "Talk" and the volume setting appear on the display. Then the displayed number is dialed.
MEMORY DIALING FROM TALK MODE
1) Press TALK/FLASH.
"Talk" and the volume setting appears.

2) Press MEM.
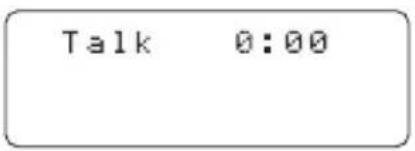
3) Enter a number (0 - 9) to select the memory location of the desired phone number and press SELECT to dial. The selected phone number is displayed. Then the number is dialed.
4) To hang up, press END.
NOTE: If you select a memory location that does not have a stored number, the phone will not dial.
EDITING A STORED NAME AND/OR PHONE NUMBER
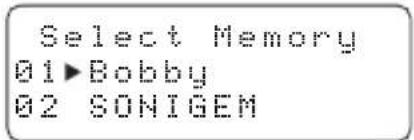
Select Memory 01 Bobby 02 SONIGEM
1) Press MEM, "Select Memory" is displayed.
2) Press A/VOL and V/VOL, or enter a number (0 - 9) to select the memory location you would like to edit.
3) Press SELECT twice. The following screen appears with the memory location number that you have selected on the display.
4) Press A/VOL or V/VOL to select "Edit Memory" then press SELECT. The following screen appears.
Store Name SONIGEM
EditMemory02 DeleteMemory02 GoBack
The cursor flashes indicating that the display is ready for the name to be edited. When a name has not been stored, the cursor appears at the beginning of the second line.
5) Use the number keys, ¥/TONE/<, #/> , or CH/DELETE to edit the name. (See page 15.) To edit only the phone number, skip this step.
6) Press SELECT. The following screen appears. The cursor flashes indicating that the display is ready for the number to be edited.
Store Number 8002971023
7) Use the number key, 串 /TONE/ < ,# / > PAUSE/REDIAL or CH/DELETE to edit the phone number. The phone number cannot exceed 20 digits. (See page 15.) If you don't want to change the phone number, skip this step.
8) Press MEM. A confirmation screen appears. If it is correct, press NOL to select "Yes" and press SELECT. The handset beeps and displays the confirmation screen. The memory storage is complete. For example, if you store a name and number into memory location number 1, the display shows "Memory01 Stored". After about 2 seconds, Select Memory screen is displayed.
9) Press END to return to standby mode.
Replace Memory Yes No
Memory82 Stored
01 Bobby 92 SONIGEM 03 MOM AND D
ERASING A STORED NAME AND PHONE NUMBER
1) Press MEM, "Select Memory" is displayed.
SelectMemory 01Bobby 02SONIGEM
2) Press A/VOL and V/VOL or enter a number (0 - 9) to select the memory location you would like to erase.
Select Memory 01 Bobby 02 SONIGEM
3) Press SELECT twice. The following screen appears with the memory location number that you have selected on the display.
EditMemory02
DeleteMemory02
Go Back
4) Press NOL to move the pointer down to "Delete Memory".
EditMemory02
DeleteMemory02
Go Back
5) Press SELECT. The following confirmation screen appears.
Delete Memory02?
Yes
No
6) Press / VOL to move the pointer to "Yes".
7) Press CH/DELETE. A confirmation tone sounds, and the following screen appears.
Memory02 Deleted
8) After a few seconds the display returns to the Select Memory screen. You may delete the information in another memory location (return to step 2) or press END to return to standby.
01 Bobby
02
03 MOM AND DAD
SPEED DIALING
You can store your most frequently dialed number in the speed dialing location. The speed dialing allows you to dial a number with one key press. (There is no need to press TALK/FLASH. The phone will automatically dial the number stored.)
STORING AND EDITING THE SPEED DIAL
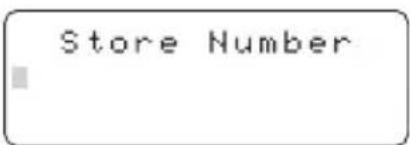
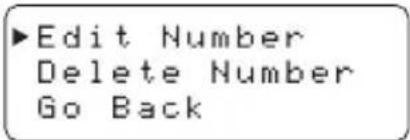
1) Press and hold SPEED DIAL. The following screen appears.
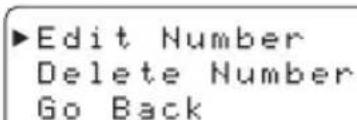
If this screen appears, there is a number already stored. Press NOL or /VOL to select "Edit Number" then press SELECT.
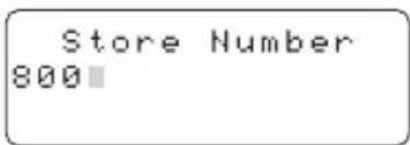
2) Store the number by following step 6 under "Storing phone numbers and names" on page 15.
3) Press SELECT. The handset beeps and displays the confirmation screen. The memory storage is complete.
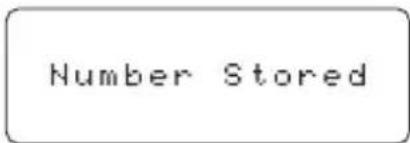
NOTE: Memory location for the Speed Dial is independent from the memory location for Memory dial.
MAKING CALLS WITH SPEED DIALING
In the standby mode, simply press SPEED DIAL. The number stored in the Speed Dial memory location is instantly dialed.
NOTE: If the Speed Dial does not have a stored number, the handset will beep rapidly and the phone will not dial.
DELETING THE SPEED DIAL
1) Press and hold SPEED DIAL. The following screen appears.
2) Press A/VOL or WOL to select "Delete Number".
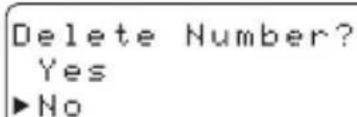
3) Press SELECT. The following confirmation screen appears.
4) Press A/VOL to move the pointer to "Yes".
5) Press SELECT or CH/DELETE. The handset beeps and displays the confirmation screen. After about 2 seconds, the phone returns to standby.
Number Deleted
CALLER ID
USING CALLER ID
You must subscribe to Caller ID from your phone company in order to use this feature.
Setting Up Caller ID Options
There are three Caller ID setup options available: Auto Talk, CIDC0, and Area Code.
Auto Talk allows you to answer the phone without pressing
TALK/FLASH. If the phone rings when Automatic Call Connection is on, simply remove the handset from the cradle and the phone automatically answers the call. If the phone rings when Automatic Call Connection is off, you must press TALK/FLASH to answer the call. This option is useful to help you screen your calls more effectively.
CIDCW (Caller ID on Call Waiting) performs the same as regular Caller ID on a call waiting number. You must subscribe to CIDCW from your phone company in order to use this feature. When a new incoming call arrives during your current telephone call, the caller's phone number is displayed.(The Caller's name will be displayed also, depending on your telephone service.)
Area Code allows you to program your three digit area code number. When reviewing Caller ID messages, you will see only the local seven digit number for calls received from inside your area code. For calls received from outside your local area code, you will see a full ten digit number.
NOTE: If your calling area requires ten digit dialing, do not program this option.
To change your Caller ID options:
1) Press and hold CID/MENU.
The following screen appears.
Auto Talk Off CIDCU On Area Code
2) Use A/VOL or V/VOL to move the cursor to the selection that you would like to change.
- For Auto Talk, press SELECT to toggle between On and Off.
- For CIDCw, press SELECT to toggle between On and Off.
- To change the Area Code, press SELECT and use the number keypad to enter the Area Code, then press SELECT again. (You hear a confirmation tone indicating the area code has been changed.)
NOTE Use the number keys (0-9), or CH/DELETE when programming the Area Code.
3) After you have made your selections, press END and return the handset to the base.
Screening Your Calls
Caller ID allows you to review caller information before you answer your phone. When the phone rings, the display shows the date, time, name, and phone number of the caller. If your Caller ID service is number only, then the name does not appear on the second line.
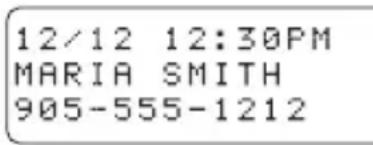
If a name or number is not available, the display will show a message such as Incomplete Data, Private Number, Private Name, Unknown Number, Unknown Name.
NOTES: If you answer a call before the Caller ID message is received (example: before the second ring), the Caller ID message will not appear.
- When the call is received via a telephone company that does not offer Caller ID service, or via a private branch exchange (PBX), the caller's phone number and name do not appear. (This includes international calls.)
- Data errors appear as " ■".
Using CIDCW (Caller ID on Call Waiting)
Caller ID and Call Waiting are two separate services. CIDCW (Caller ID on Call Waiting) performs the same as the regular Caller ID on a call waiting number. You must subscribe to the Caller ID on Call Waiting (CIDCW) service from your telephone company before you can use the feature.
1) When a new incoming call arrives during your current telephone call, you will hear the Call Waiting tone, the conversation will be momentarily muted, and the phone number and name of the caller are displayed.
2) Press TALK/FLASH to accept the incoming call. You will be able to talk with the person that has just called. The person with whom you were talking will be put on hold.
3) To return to the first caller, press TALK/FLASH again.
Reviewing Caller ID Numbers
Your phone stores the most recent 30 numbers in Caller ID memory. If the memory is full, a new call replaces the oldest number. To review your Caller ID numbers, follow the steps below.
1) Press CID/MENU, and the Caller ID summary screen appears. The screen shows the number of new callers and the total number of callers stored in Caller ID memory.
Caller ID New :01 Total:02
2) Press V/VOL to scan through the list. The most recent call appears first with the date, time, call count, name, and phone number. Press VOL to scan back through the list.
12/12 12:30PM 03
MARIA SMITH
905-555-1212
3) Press END to return to standby.
NOTE: The number of calls from the same Caller ID appears next to the received time. Once you read the new message, the number will disappear.
Calling a Caller ID Number
1) Press CID/MENU, and the Caller ID summary screen appears. The screen shows the number of new callers and the total number of callers stored in Caller ID memory.
Caller ID New :01 Total:02
2) Select the number that you would like to dial. Press WOL to scan forward and A/VOL to scan back through the list.
12/12 12:30PM
MARIA SMITH
905-555-1212
NOTE: For long distance dialing, press 1 to add a “1--” to the number on the display. Press 1 again to remove the “1--” from the display. Pressing 3 will set or cancel an area code setting.
3) Press TALK/FLASH and the number automatically dials.
NOTE: You cannot make a call from the Caller ID list if your ST88245 is connected to a private branch exchange (PBX).
You can place a call from Talk Mode. Press the TALK/FLASH key, then press the CID/MENU key. Select the phone number that you want to dial by pressing the A/VOL or V/VOL key. Press the SELECT key.
The displayed phone number will be dialed.
Storing a Caller ID Number Into a Memory Location
1) Press CID/MENU, and the Caller ID summary screen appears. The screen shows the number of new callers and the total number of callers stored in Caller ID memory.
Caller ID
New :01
Total:02
2) Press A/VOL or V/VOL to find the number that you would like to store, then press MEM to store the selection.
12/12 12:30PM
MARIA SMITH
905-555-1212
3) The Select Memory screen appears.
Use the A/VOL or V/VOL keys or enter a number (0-9) to select a blank memory location where you would like to store the number. (If you want to replace an existing
Select Memory
图1
02 SONIGEM
number with the Caller ID number, skip to step 5.)
4) Press SELECT.
A confirmation tone sounds, and the number is programmed.
5) If you choose to replace an existing number with the Caller ID number, press SELECT, and the following screen appears.
6) Use the NOL key to move the pointer to Yes and press SELECT.
A confirmation tone sounds, and the number is programmed.
Replace Memory?
Yes
No
NOTES:
If you select No, the Caller ID screen returns.
- You cannot store a Caller ID message if no phone number appears in the message.
- If no key is pressed for more than 30 seconds, an error tone sounds, and the telephone returns to the standby mode.
- If there is an incoming call or page, memory storage is canceled, and the telephone is set to the incoming call or page.
Deleting a Caller ID Number
To delete a single Caller ID message, follow the steps below.
1) Press CID/MENU, and the Caller ID summary screen appears. The screen shows the number of new callers and the total number of callers stored in Caller ID memory.
Caller ID New :01 Total:02
2) Select the number that you would like to delete. Press WOL to scan forward and A/VOL to scan backwards through the list.
12/12 12:30PM
MARIA SMITH
905-555-1212
3) Press CH/DELETE and the following screen appears.
Delete Message? Yes No
4) Press SELECT or CH/DELETE. A confirmation tone sounds and the Caller ID screen returns with the next message displayed.
Deleting All Caller ID Numbers
To delete all of your Caller ID numbers, follow the steps below.
NOTE: Make sure to first review all Caller ID numbers. The Delete All function will delete all of the Caller ID numbers, even the calls that have not yet been reviewed.
1) Press CID/MENU, and the Caller ID summary screen appears. The screen shows the number of new callers and the total number of callers stored in Caller ID memory.
Caller ID New :01 Total:02
2) Press CH/DELETE, and the following screen appears.
Delete All? Yes No
3) Use the NOL key to move the pointer to Yes, then press SELECT or CH/DELETE.
4) A confirmation tone sounds, and the following screen appears.
Caller ID Total:00
CHOOSE THE DIALING MODE
Most phone systems use tone dialing which sends DTMF tones through the phone lines. However some phone systems still use pulse dialing such as in rural areas. The default setting is tone dialing. Depending on your dialing system, set the mode as follows:
1) Press and hold CID/MENU. The following screen appears.
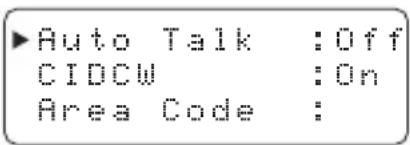
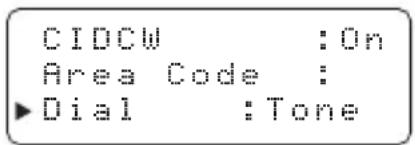
2) Use v / VOL to move the pointer to "Dial".
3) Press SELECT to toggle between "Tone" or "Pulse".
4) After you have made your selections, press END or return the handset to the base.
NOTES:
- If you are not sure of your dialing system, set for tone dialing.
Make a trial call. If the call connects, leave the setting as is, otherwise set for pulse dialing. - If your phone system requires pulse dialing and you need to send the DTMF tones for certain situations during a call, you may switch over to tone dialing. (Refer to "Temporary Tone" on page 13.)
SETTING UP LANGUAGE
Language option can be used to choose the language of your display. You can select either English, French, or Spanish.
1) Press and hold CID/MENU. The following screen appears.
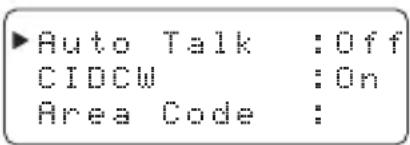
2) Use NOL to move the pointer to "Language".
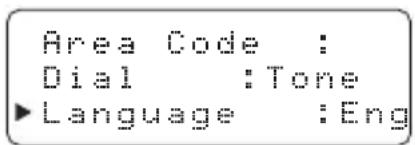
3) Press SELECT to select "Eng" (English), "Fr." (French), or "Esp" (Spanish).
4) After you have made your selections, press END or return the handset to the base.
TROUBLESHOOTING
If your ST88245 Cordless telephone is not performing to your expectations, please try these simple steps. If you are still unable to resolve the problems, please call the SYLVANIA toll free Customer Hotline for assistance: 1-800-287-4871 MONDAY-FRIDAY 8:30 am.-5:00 pm. (EST)
NOTE: Do not attempt to service this unit yourself. All service must be done by a qualified service personnel.
| PROBLEM SUGGESTION | |
| The CHARGE/ IN USE LED won't come on when the handset is placed on the base. | ·Make sure the AC adapter is plugged into the base and wall outlet. ·Make sure the handset is properly seated on the base. ·Make sure the charging contacts on the handset are clean. |
| Conversation interrupted frequently. | ·Change channels. ·Make sure that the handset is not too far from the base. ·Move the base to a different location away from metal objects or appliances. |
| Can't make or receive calls. | ·Check both ends of the base telephone line cord. ·Make sure the AC adapter is plugged into the base and wall outlet. ·Disconnect the AC adapter for a few minutes, then reconnect it. ·Make sure that the handset is not too far from the base unit. ·Change the digital code security. |
| The Caller ID does not display. | ·The handset was picked up before the second ring. ·The call was placed through a switchboard. ·Call your local telephone company to verify your Caller ID service is current. |
| The handset doesn't ring or receive a page. | ·The rechargeable battery may be weak or not fully charged. Charge the battery pack for 15-20 hours. ·The handset may be too far away from the base unit. ·Make sure the AC adapter is plugged into the base unit and wall outlet. ·Place the base unit away from appliances or metal objects. ·Change the digital code security. |
| Severe noise interference. | ·Keep the handset away from microwave ovens, computers, remote control toys, wireless microphones, alarm systems, intercom, room monitors, fluorescent lights and electrical appliances. ·Move the base to another location or turn off the source of interference. |
| Voice Message Indication does not work. | ·Contact your local telephone company to make sure that your telephone receives FSK message signaling. ·Reset the indicator by pressing and holding the PAGE key for 5 seconds. |
SPECIFICATIONS
The phone complies with FCC Parts 15 and 68.
Operating temperature: -10^ to 50^ (+14^ to +122^)
AC Adapter Information
AC Adapter part number: AD-0001
Input Voltage: 120V AC 60Hz
Output Voltage: 9V DC 210mA
Battery Information
Battery part number: BT-905
Capacity: 600mAh, 3.6V
Battery use time (per charge)
From fully charged
Talk mode duration: 7 hours
Standby mode duration: 14 days
NOTE: If the handset is left off of the base, the actual Talk mode duration will be
reduced respective to the amount of time the handset is off the base.
Recharge your phone on a regular basis by returning the handset to the base after each phone call. When the operating time becomes short, even after the battery is recharged, please replace the battery. With normal usage, the battery should last about one year.
Specifications, features, and availability of optional accessories are all subject to change without prior notice.
PRODUCT CARE
A. Avoid putting cordless phones near heating appliances and devices that generate electrical noise (motors, fluorescent lamps).
B. Avoid rough treatment of the phone by placing the handset gently into the base when hanging up. Avoid dropping the handset.
C. Clean your cordless telephone only with a soft cloth slightly dampened with water or mild hand soap. Do not use any type of solvent or abrasive cleaner. Before cleaning, always unplug the phone from the wall outlet.
D. Your cordless phone is not designed to be water resistant. Do not use the handset in the rain, the pool, or the shower. Do not install your base unit outdoors, near a sink, bathtub, or shower. Do not expose to direct sunlight.
Retain the original packaging should you need to ship the phone at a later date.
ADDITIONAL INFORMATION
- Connecting this telephone to a coin operated telephone or party line is prohibited by law.
For immediate answers to all your questions regarding your SYLVANIA phone, call the Consumer Hotline, toll-free at (800) 287-4871 Monday-Friday 8:30 am.-5:00 pm. (EST)
SLYVANIA TELEPHONE WARRANTY
We appreciate your purchase of a SYLVANIA Telephone product. We take pride in the quality of our products and have manufactured your new Telephone unit to exacting quality standards. We feel confident that in normal use, it will provide you with satisfactory performance. However, should you experience difficulty, you are protected under the provisions of this warranty.
SYLVANIA Telephone products are warranted against manufacturing defects in materials and workmanship in normal use for the following period from the date of purchase by the original user, and is conditional upon the unit being installed and used as directed in the instruction manual.
PRODUCT PARTS AND LABOUR
Cordless Telephone 1 Year
Coreded Telephone 1 Year
SYLVANIA's obligation under this warranty shall be limited to the repair, including all necessary parts and the cost of the labour connected therewith, or at our option the exchange of any Telephone product which shows evidence of a manufacturing defect within the warranty period.
Replacement parts, furnished in connection with this warranty shall be warranted for a period equal to the unexpired portion of the original equipment warranty.
CUSTOMER OBLIGATIONS
This warranty applies to the product from the original date of purchase at retail. Therefore, the owner must provide a copy of the original, dated bill of sale. No warranty service will be performed without a bill of sale. Transportation to and from the service depot is the responsibility of the owner.
WARRANTY EXCLUSIONS
This warranty is extended to SYLVANIA Telephone products purchased and used in Canada. This warranty shall not apply to appearance or accessory items including but not limited to: antenna, cabinet, cabinet parts, knobs, batteries, connecting cables, cassette tapes, compact discs. This warranty shall, in addition, not apply to damages due to handling, transportation, unpacking, set-up, installation, customer adjustments that are covered in the instruction book, repair or replacement of parts supplied by other than the SYLVANIA authorized service depot, any malfunction or failure caused by or resulting from abnormal environmental conditions, improper unauthorized service, improper maintenance, modifications or repair by the consumer, abuse, misuse, neglect, accident, fire, flood, or other Acts of God, and incorrect line voltage.
This Telephone product is only warranted to the original retail purchaser. This warranty becomes void in the event of commercial or rental use. This warranty becomes void in the event serial numbers are altered, defaced or removed.
SYLVANIA reserves the right to make changes in design or to make additions to or improvements upon this product without incurring any obligation to install the same on products previously manufactured. The foregoing is in lieu of all other warranties expressed or implied and SYLVANIA neither assumes nor authorizes any person to assume for it any other obligation or liability in connection with the sale or service of this product. In no event shall SYLVANIA or its SYLVANIA dealers be liable for special or consequential damage arising from the use of this product, or for any delay in the performance of this warranty due to cause beyond our control.
The purchaser may have other rights under existing provincial or federal laws, and where any terms of this warranty are prohibited by such laws, they are deemed null and void, but the remainder of the warranty shall remain in effect.
HOW TO OBTAIN SERVICE
Should this product require service, you may obtain specific information on how to obtain service by contacting the SYLVANIA Dealer from whom this product was purchased, or by contacting us directly:
SYLVANIA SERVICE
300 Alden Road
Markham, Ontario
L3R 4C1
PHONE: (905) 940-5089 FAX: (905) 940-2303
1-800-287-4871
ST88245
ACCESSIONS OPTIONNEL (NON INCLUS)
Editor no. Effacer no. Retourner
Mémoriser no. 800
No. méorisé
FAIRE DES APPELS À L'AIDE DE LA COMPOSITION ABRÉGÉE
Editor no. Effacer no. Retourner
PRODUIT PIECES ET MAIN-D'OEUVRE
Telephones sans fil 1 an
OBLIGATIONS DU CLIENT
EXCLUSIONS DE LA GARANTIE
300 Alden Road, Markham, Ontario L3R 4C1
PHONE: (905) 940-5089 FAX: (905) 940-2303
1-800-287-4871

- OWNER'S MANUAL
- CONTENTS
- Introduction 1
- Installing and Adjusting Your Phone........5
- Using Your New Phone 13
- Memory Dialing 15
- Speed Dialing 21
- Caller ID 22
- Troubleshooting 28
- Specifications 30
- Product Care 31
- SYLVANIA Telephone Warranty 32
- CONTROLS AND FUNCTIONS
- IMPORTANT SAFETY INSTRUCTIONS
- Safety Instructions For Batteries - Handset Battery Pack
- Caution:
- Ni-Cd
- INTRODUCTION
- WELCOME
- FEATURES
- IMPORTANT ELECTRICAL CONSIDERATIONS
- VIC NOTICE
- Terminal Equipment
- Radio Equipment
- ▼More Than One Cordless Telephone
- Cordless Telephone Privacy
- INCLUDED IN YOUR PACKAGE
- OPTIONAL ACCESSORIES (NOT INCLUDED)
- INSTALLING AND ADJUSTING YOUR PHONE
- SELECTING A LOCATION
- TELEPHONE LINE OUTLETS
- Modular Jack
- Hardwired Jack
- CONNECTING THE TELEPHONE CORDS
- Caution!
- APPLYING POWER TO THE BASE
- INSTALLATION
- ▼On A Desk Top
- On A Wall Plate or Wall
- Installing the Optional Beltclip (not included)
- To attach the beltclip
- To remove the beltclip
- Connecting/Charging the Battery Pack
- INSTALLING THE HANDSET BATTERY PACK
- CHARGING THE BATTERY PACK
- Initial Battery Charging
- Low Battery Alert
- CLEANING THE BATTERY CONTACTS
- ADJUSTING THE RINGER AND VOLUME CONTROLS
- Handset Ringer Tone and Volume
- Handset Earpiece Volume
- Ringer Mute
- USING THE PAGE FEATURE
- To locate the handset (while it's off the base)
- AUTOMATIC DIGITAL CODE SECURITY
- VOICE MAIL WAITING INDICATOR
- HEADSET INSTALLATION
- USING YOUR NEW PHONE
- MAKING AND RECEIVING CALLS
- TEMPORARY TONE
- CALL WAITING
- USING REDIAL
- SELECTING A DIFFERENT CHANNEL
- CHAIN DIALING
- MEMORY DIALING
- STORINGPHONE NUMBERSAND NAMES
- STEPS FOR ENTERING NAMES AND SPECIAL CHARACTERS
- If you make a mistake while entering a name:
- For example, to enter Bobby:
- MAKING CALLS WITH MEMORY DIALING
- MEMORY DIALING FROM STANDBY MODE
- MEMORY DIALING FROM TALK MODE
- 1) Press TALK/FLASH.
- 2) Press MEM.
- EDITING A STORED NAME AND/OR PHONE NUMBER
- ERASING A STORED NAME AND PHONE NUMBER
- SPEED DIALING
- STORING AND EDITING THE SPEED DIAL
- MAKING CALLS WITH SPEED DIALING
- DELETING THE SPEED DIAL
- CALLER ID
- USING CALLER ID
- Setting Up Caller ID Options
- Screening Your Calls
- Using CIDCW (Caller ID on Call Waiting)
- Reviewing Caller ID Numbers
- Calling a Caller ID Number
- Storing a Caller ID Number Into a Memory Location
- NOTES:
- Deleting a Caller ID Number
- Deleting All Caller ID Numbers
- CHOOSE THE DIALING MODE
- SETTING UP LANGUAGE
- TROUBLESHOOTING
- SPECIFICATIONS
- PRODUCT CARE
- ADDITIONAL INFORMATION
- SLYVANIA TELEPHONE WARRANTY
- PRODUCT PARTS AND LABOUR
- CUSTOMER OBLIGATIONS
- WARRANTY EXCLUSIONS
- HOW TO OBTAIN SERVICE
- ST88245
- ACCESSIONS OPTIONNEL (NON INCLUS)
- FAIRE DES APPELS À L'AIDE DE LA COMPOSITION ABRÉGÉE
- OBLIGATIONS DU CLIENT
- EXCLUSIONS DE LA GARANTIE
Brand : SYLVANIA
Model : ST88245
Category : Phone