LB 6 - Humidifier STEBA - Free user manual and instructions
Find the device manual for free LB 6 STEBA in PDF.
Frequently Asked Questions - LB 6 STEBA
User questions about LB 6 STEBA
0 question about this device. Answer the ones you know or ask your own.
Ask a new question about this device
Download the instructions for your Humidifier in PDF format for free! Find your manual LB 6 - STEBA and take your electronic device back in hand. On this page are published all the documents necessary for the use of your device. LB 6 by STEBA.
USER MANUAL LB 6 STEBA
natural_image
Exterior view of a white TURBO washing machine with a circular vent and control panel (no visible text or symbols on the device body)Luftbefeuchter LB 6
Instructions for use 12
Mode d'emploi 20
This appliance is for private use only and must not be used commercially. Please read the instruction manual carefully and keep it at a safe place. When the appliance is given to another person the instruction manual should be passed to that person, too. Only use the appliance as described in the instruction manual and pay attention to the safety information. No liability for damages or accidents will be accepted, which are caused by not paying attention to the instruction manual.
Safety instructions:
The appliance must only be plugged into a socket and used according the technical data given on the rating label
Only use the appliance when the power cord or the appliance has no damage. Check before each use.
Place the power cord in that way that the appliance can not fall down.
This appliance is not intended for use by persons (including children) with reduced physical, sensory, or mental capacities, or lack of experience and knowledge, unless they have been given supervision or instruction concerning use of the appliance by a person responsible for their safety. Children should be supervised to ensure that they do not play with the appliance. Unplug the appliance after each use or in case of a malfunction. Never pull at the power cord. The power cord must not be torn over edges and it must never be squeezed.
The power cord must not be touched with wet hands.
Never leave the appliance unattended during the use.
The appliance must not be stored outside or in a damp environment.
Never immerse the appliance into water.
The appliance should be switched off when the water tank is empty or when it should not be used. If the appliance is not used for longer time, it should be unplugged and cleaned.
After any malfunction the appliance should not be used anymore, e.g. after is fell down or was damaged in any other way.
The manufacturer takes no responsibility for wrong usage which is caused by ignoring the instruction manual.
Any repairs at the appliance, e.g. exchange a damaged power cord must be done by an authorized service person, to avoid any danger.
The appliance must not be used with an external timer or any remote control.
When any abnormal smell occurs is it important to switch off the appliance and contact the service.
Do not place the opening for the mist against any electrical appliances or sockets. Please make sure there is water in the tank before turning on the humidifier.
Do not touch the water or the parts in the gutter while the humidifier is working or else you would be hurt.
Never touch the energy exchanger with sharp or hard objects.
Do not pour water into the gutter directly.
Do not spray any detergent such as bug or mosquito killer into the fan to prevent damaging the plastic material.
Do not disassemble the humidifier.
- If long time no use, please unplug the appliances. (Do not need to connect to the ground)
- Do not pour the rest water in the gullet with plug in, or it will damage the energy-changeable appliance.
- You can use the appliance for 5-6 hours without stop when the water is full. Do not need to add any water.
- Do not pour water over 40 into the tank, otherwise the color or shape might be changed.
- To make sure the humidifier work well and avoid accidents, please choose carefully the places where you put the humidifier:
a) It should be plain and firm
b) It should be far from heat sources or sunlight
c) It should be far from furniture, walls, curtains and home appliances,
otherwise they may be affected with damp.
d) It should be with a normal temperature5-40, otherwise the humidifier may be destroyed in the cold environment.
- Drain water from the gutter and tank when the temperature is under 0, otherwise the water will be frozen and the units may be destroyed by ice.
Do not let water flow into the main body from airflow outlet. Wipe with dry towel when there is water on the outside of the main body. - Do not put metal, chemical or cleaning mixture into the gutter, otherwise the atomization may not go well.
- Do not move when the gutter is full of water, otherwise the water may flow into the main body which will cause damage to the units.
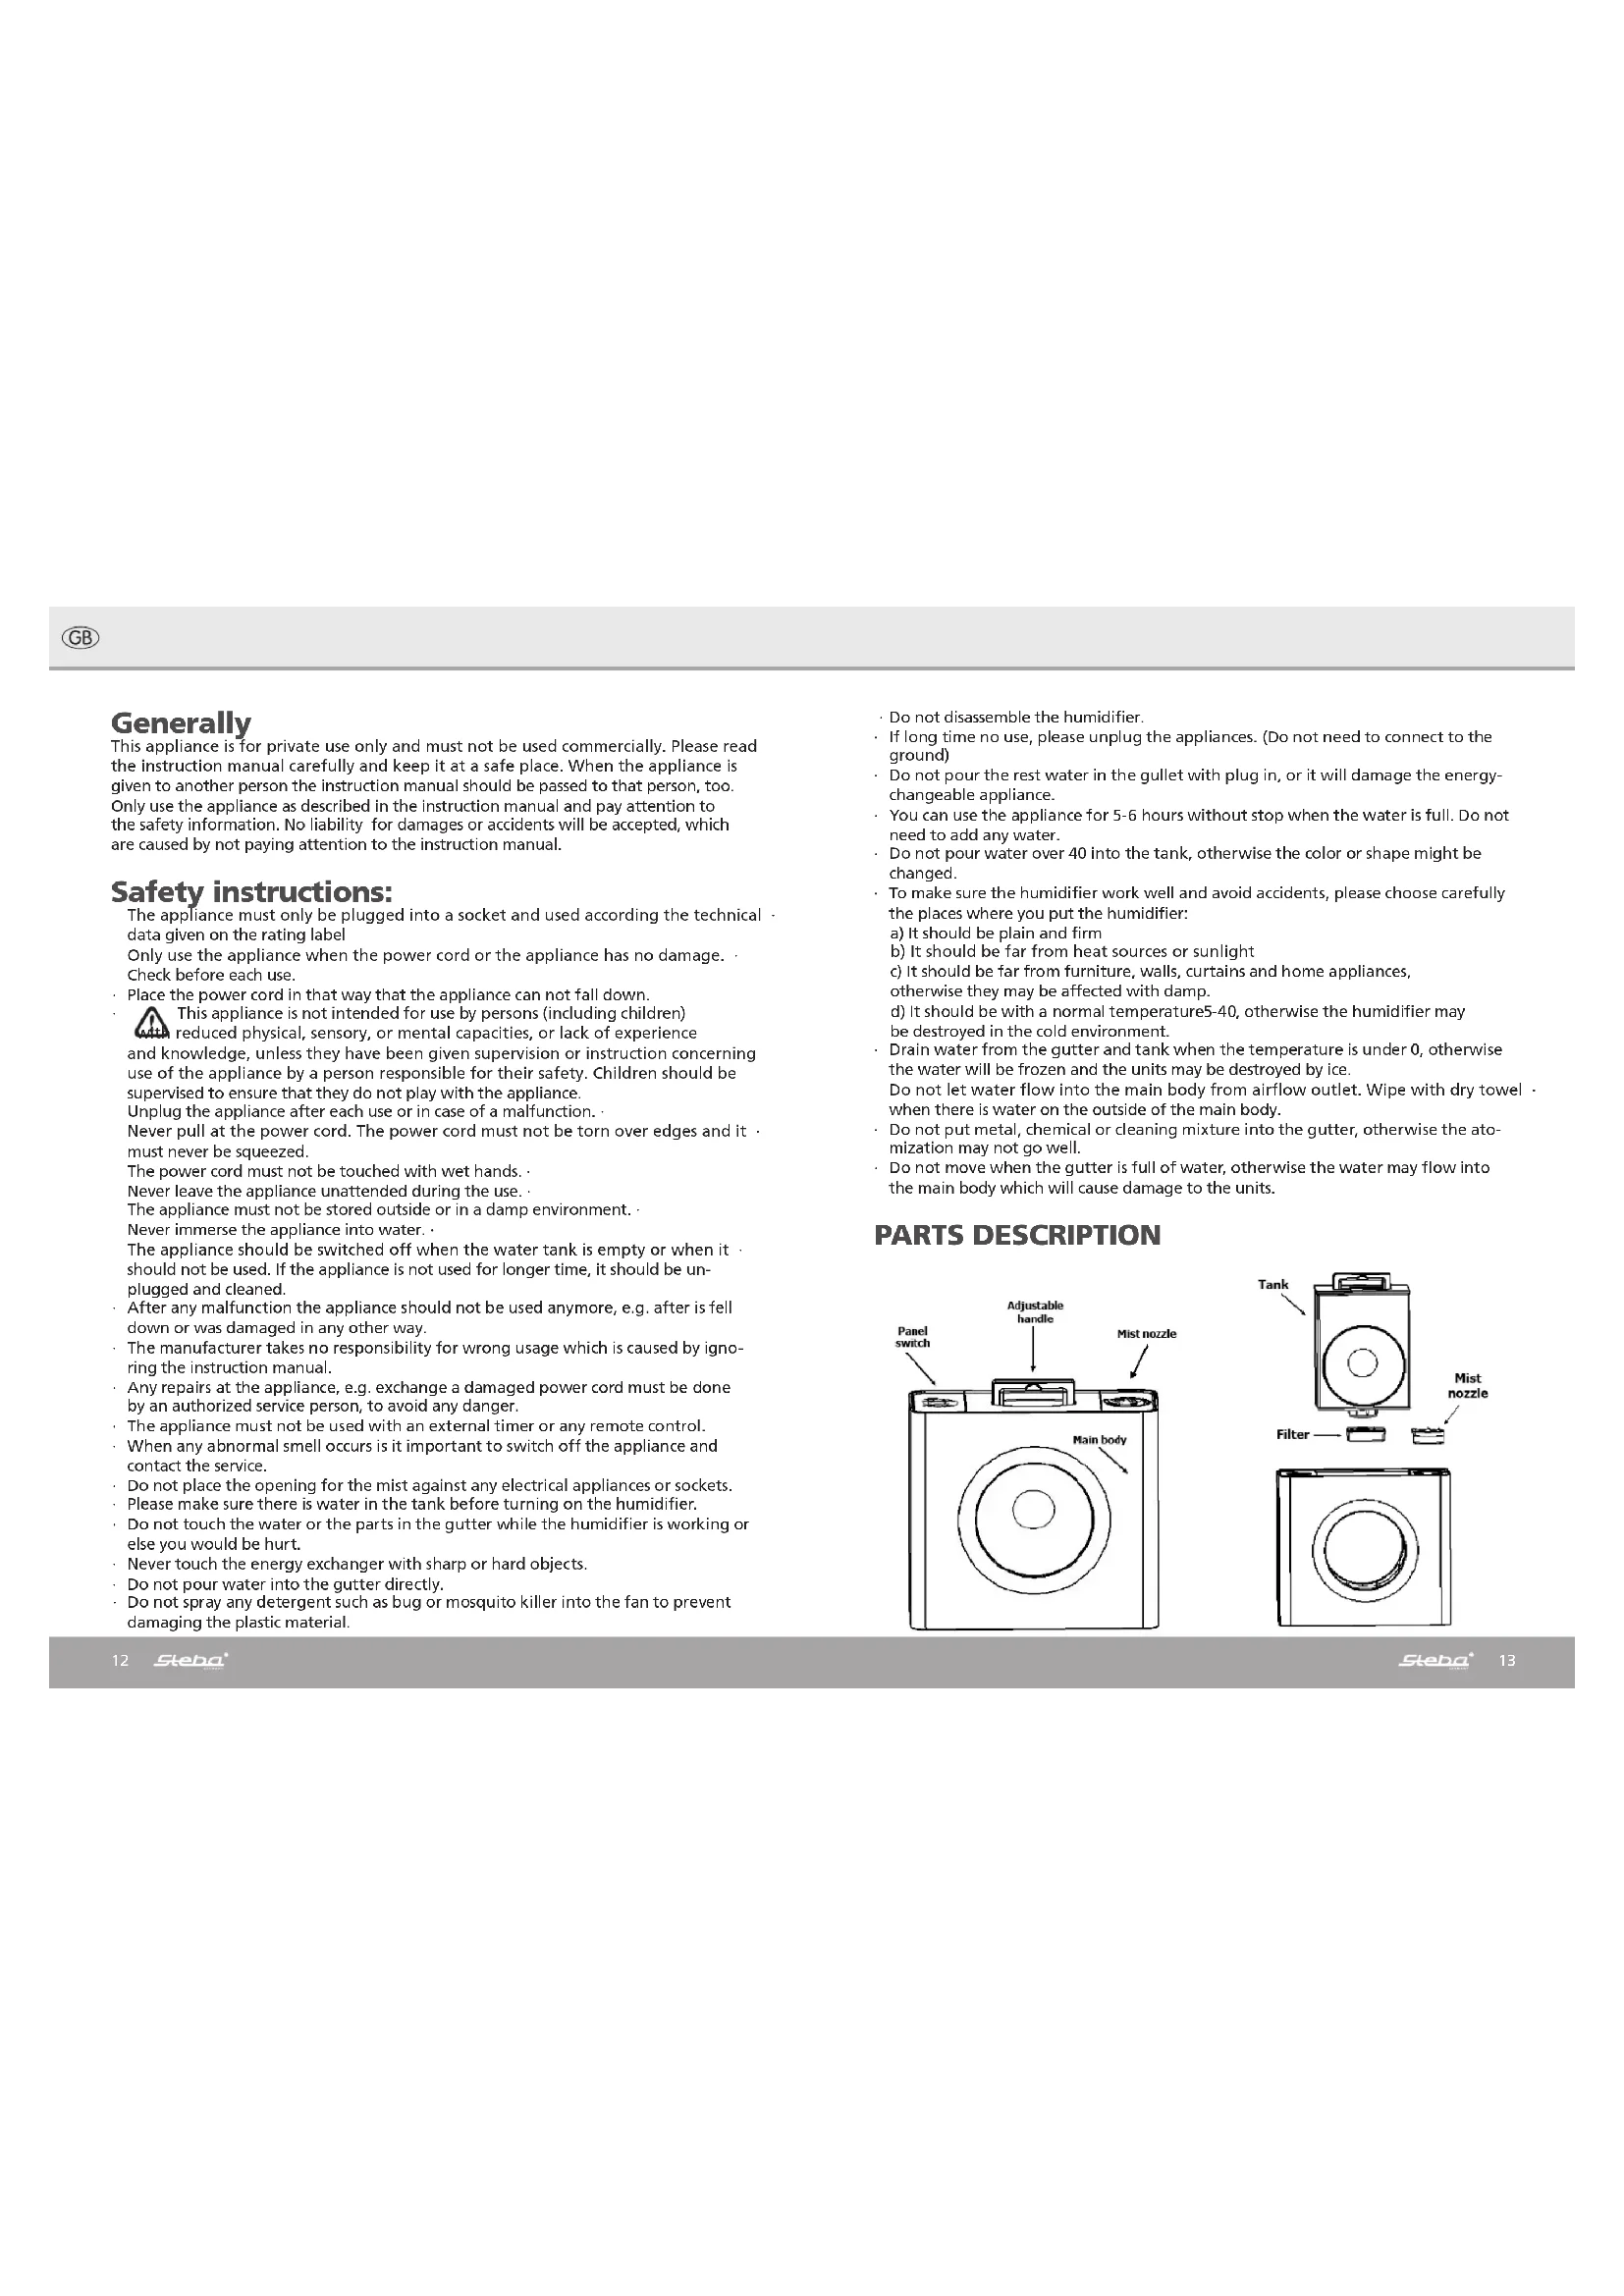
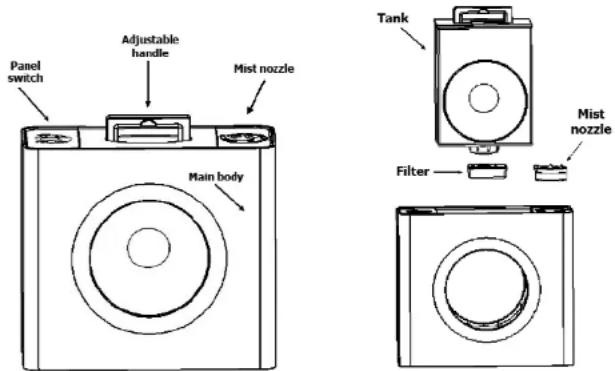
PARTS DESCRIPTION
text_image
Panel switch Adjustable handle Mist nozzle Main body Tank Mist nozzle Filter
text_image
"On / Off" switch ON/OFF Blue = cool mist Red = warm mist "Cool / Warm" mist Switch "Light" Switch "Timer" Display "Humidity" Display "Up (+)" Switch HUM/ SPEED "Down (-)" Switch "Set" Switch Float (Water level switch) Water plug Filter's position Buffer Double mist nozzle for 360° circulation Brush's positionFUNCTIONS
Ultrasonic atomization technology with either cool or warm mist. (The temperature of warm mist is between 40°C to 50°C)
Water softening function: To soften hardness of water in order to prolong the useful life of the product.
Water tank with an expandable handle that is convenient to use.
There are three different modes for mist control.
High humidifying capacity:300ml/h;
Middle humidifying capacity:200ml/h;
Low humidifying capacity:100ml/h.
Integrated with two rotating nozzle that allows users to adjust the direction of the mist.
- The tank is in blue and with lighting effects. The tank would alight once the humidifier has been turned on and would sparkle when there is lack of water. Humidity display: show the indoor humidity in the area.
- Automatic humidity control: User can set the humidity in the room according to their will (from 30% RH – 70%RH). When the indoor temperature reaches the setting, there will be an automatic cut-off.
- Emitting mist continuously: The humidifier could be established for emitting mist continuously while neglecting the humidity in the area.
- Timer: Automatic shut down function, user can set the timer before they go to sleep or before leaving the area. (Available from 1 hour to 12 hours)
- Shut down protection when water-short: The unit will alarm if there is a lack of water. This helps to prevent danger due to the lack of water and protect the humidifier.
- Touch sensor: Control panel is made of a top grade capacitance sensor touch switch.
- An outlet at the bottom of the humidifier, for easy cleaning and the disposal of water remaining in the gutter.
HOW TO USE
Preparation before turning on the humidifier:
Preparation for the filter
-
Take the tank out, and then the filter.
-
For the first time of use, rinsed the filter until the dependencies on the surfaces of the yellow particles are gone.
Note: This filter is an additional item. The operation of the humidifier would not be affected without it.
Adding water to the tank
-
Put the humidifier on a horizontal surface. Take the tank out from the humidifier. Note: Do not add water to the GUTTER directly.
-
Turn the tank upside down. Unscrew the cover anti-clockwise. Fill the tank with clean tap water or distilled water within 5°C to 40°C until water reaches the stated line.
-
Screw the cover on clockwise. Dry water on the outer part of the tank.
-
Put the filter and the tank back. There will be "gurgling" sounds and air bubbles would appear once the tank is placed correctly into the humidifier. Water in the tank would then pass through the filter to be purified, sterilized and softened, which would take 2 to 5 minutes. Once there are no more air bubbles, this indicates that there is sufficient water in the gutter and is now ready for the humidifier to generate mist.
Power on
Connect to power, the buzzer beeps, humidifier enters standby mode. Turning it on by pressing the "On/Off" switch, this regulates to the standard setting.
(Middle humidifying capacity, no timer, 70% RH and lights of the tank being turned on.)
Light
Press the "light" switch in order to switch the light on or off.
Adjusting the temperature of the mist
Press the "cooler/warmer" switch to change the temperature of mist.
Humidity and Timer
Presses "HUM/SPEED" switch to change from humidity setting to timer setting and vice versa. Once it has been changed to the respective mode, the sign would sparkle. Adjust the rate of humidity and timer by pressing the "+" or "-" switch.
1 Humidity setting
1.1 Presses "HUM/SPEED" switch, humidity sign would now sparkle.
1.2 Presses "+" and "-" to adjust the humidity. From the minimum 30% RH to the maximum 70% RH.
1.3 It would be effective right after the humidity has been adjusted.
NOTE: The humidifier would stop emitting mist once it reaches the desired humidity and would only emit mist when the humidity of the area drops to around 5% RH of the set humidity.
1.4 When the humidity sign reaches 70% RH, keep on pressing "+" , the humidifier would switch to the continuous mode, which would be represented by "CO". In this mode, the emitting of mist would not be affected by the humidity in the room and would work continuously.
2 Timer setting
2.1 Presses "HUM/SPEED" switch twice, the timer sign would then sparkle.
2.2 Presses "+" and "-" to adjust the timer. From 0 hour to 12 hours.
2.3 The timer would now start to count down. When it reaches 0 hour, it would stop immediately and enter the standby mode.
2.4 If the timer in set with 0 hour, the humidifier would work continuously. Note: Normal display would be jumping from environment's humidity and timer.
Changing the humidifying capacity.
When there are no special settings, by pressing only "+" or "-" could adjust the humidifying capacity.
* Low capacity: Mist added to air would exceed 100 ml, only the low capacity light would be on.
* Middle capacity: Mist added to air would exceed 200 ml, both the low and middle capacity light would be on.
* High capacity: Mist added to air would exceed 300 ml, all the low, middle and high capacity light would be on.
Water short indicator
1 Once the tank runs out of water, within a few seconds the humidifier would enter the protection mode. The humidifier would then keep on "beeping" for around ten times. Apart from the sparkles at the mist indicator, other signs would be off.
2 In this mode, only "On/Off" switch could be used to switch off the humidifier.
3 Refill the tank and put it back to the humidifier. Wait for around 10 seconds, the humidifier would resume working.
Shut-down
1 Presses "On / Off" switch to turn off the humidifier.
2 If you choose not to unplug the humidifier, all settings except the timer would be saved. Once it has been unplugged, all the settings would reset.
Reminder:
- This ultrasonic humidifier uses a piece of metal diaphragm to vibrate at an ultrasonic frequency creates water droplets that silently exit the humidifier in the form of a cool fog.
- The "gurqling" sound is normal, as water would go through the filter to the gutter.
- The intensity of the mist would be affect by the relative humidity, temperature of the area. It would be harder to generate mist if it is cold and wet.
- The water used should be between 4°C to 50°C and should be clean tap water or distilled water.
MAINTENANCE & WASH
- Please unplug the appliance before washing.
- Wash the water tank every two or three weeks.
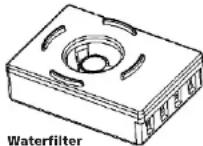
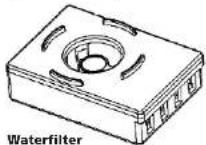
Maintenance for the filter
- Filter is consists of core box, ceramic balls yellow water softening particles and cover.
- The yellow water softening particles reduces the dissolved calcium, magnesium, and to some degree manganese and ferrous iron ion concentration in hard water.
- The water filter should be cleaned every one or two weeks according to water quality. It is better to be cleaned more frequently.
Steps of cleaning:
- Take off the tank, unscrew the cover and take out the tank and the filter.
- Immerse the filter into clean water. Clean the impurities on the non-woven fabric and wash the water filter.
- Fix the water filter.
Please take the water filter out and keep it dry if the appliance is going to be left unused for a long time.
Caution: Do not disassemble water filter. Please replace it every one or two years
Steps of replacement:
-
Take off the tank, unscrew the cover and take out the water filter.
-
Fix new water filter.
Wash for the gullet (once a week)
If there is scale in the gullet, rub it with the brush provided then rinse it with water.
Wash for the outer space of the appliance:
Wash with a soft cloth in warm water below 40°C.
Rub the scale.
Wash the head of sprayer with water directly.
Store for the appliance:
Long time no use, wash up the appliance and dry it, then pack it in the original box and store it in the dry place.
Warnings:
Do not wash it with soapy water. You should wash it with pure water.
When washing the appliance, avoid water from splashing into the inner parts of the appliance or the spare parts otherwise they will be wet and might cause problems.
Do not tear down the appliance.
SUGGESTIONS
Humidifying with tap water or distilled water.
Clean the transducer, tank, and main body every week.
Replace water frequently.
Do not remove the water tank once it has been properly placed unless a refill of water is needed.
Whenever you need to pour away water from the water trough, unscrew at the bottom part of the main body (the outlet) then let the water flow out.
Keep the tank and gutter dry if the humidifier is going to be left unused for a long · time.
Keep all parts of humidifier dry before packing off.
It is forbidden to touch the transducer with hard objects. Clean the transducer with wet cloth. It is better to clean it with salt water.
COMMON PROBLEMS & SOLUTIONS
| Abnormal problems | Cause | Solution |
| Power light is off, no wind and fog | The plug is not in use and the power is off | Put the plug in socket correctly and turn it on |
| Power light is on; wind exists but no fog. | The automatic humidity knob is off, lid of the water level floater is loose. | Make the tank full of water. Turn the knob clockwise. Tight up the lid |
| The odor of the fog | New machine or water is not clean | Open the water tank and place it in the shade for 12 hours. Wash the tank or change the water |
| Fog is little | The energy changeable appliance has scale, water is dirty or long time no change | Wash the energy appli-ance and replace with clean water |
| No fog | There might be too much water in the water trough. | Pour away all the water in the water trough and put the tank back properly. |
| Water is not down | Floater is loose or the inletting water lid is dirty | Tight up the lid of the floater and wash the lid of the knob |
Disposal:
Packaging disposal:
Do not throw away the package materials. Please put it in the recycling bin.

PS

PP

PE
Gift box: Paper, should be put to the old paper collection point. Plastic packaging material and foils should be collected in the special collection containers.
Correct Disposal of this product

This marking indicates that this product should not be disposed with other household wastes throughout the EU. To prevent possible harm to the environment or human health from uncontrolled waste disposal, recycle it responsibly to promote the sustainable reuse of material resources. To return
your used device, please use the return and collection systems or contact the retailer where the product was purchased. They can take this product for environmental safe recycling.
Service and Repair:
If the appliance must be repaired, please get in touch with your trader or with the manufacturer: