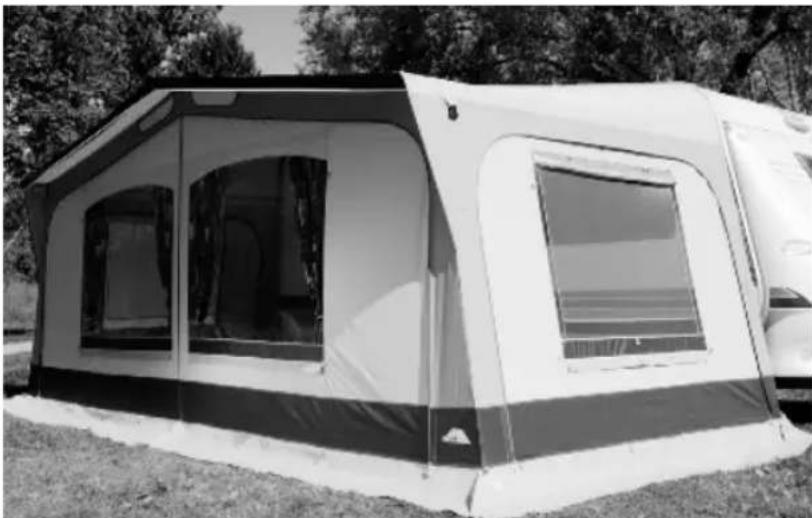
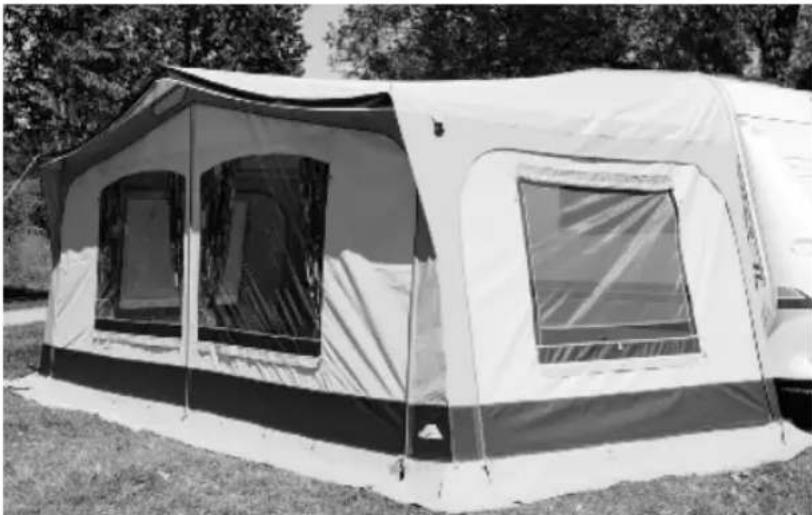
Prinz II - Tent dwt-Zelte - Free user manual and instructions
Find the device manual for free Prinz II dwt-Zelte in PDF.
| Product type | Complete awning for caravan |
| Brand | dwt-Zelte |
| Model | Prinz II |
| Category | Annex tent |
| Approximate dimensions | Length 4 m, depth 2.5 m, height 2 m (adjustable) |
| Estimated weight | Approximately 25 kg |
| Canopy material | Waterproof coated polyester |
| Frame | Steel tubes with screw connections |
| Attachment system | Bead in caravan profile, eyelets or Vario Clip |
| Included accessories | Ground pegs, tension elastics, guy ropes, anti-friction protectors |
| Available options | Storm straps, additional poles |
| Maintenance | Clean with soapy water, dry thoroughly before storage |
| Safety tips | Use guy ropes or storm straps; check tightening regularly |
| Repairability | Spare parts available from dealer; repair kit for canopy |
| User manual | 48 pages, available in several languages |
Frequently Asked Questions - Prinz II dwt-Zelte
User questions about Prinz II dwt-Zelte
0 question about this device. Answer the ones you know or ask your own.
Ask a new question about this device
Download the instructions for your Tent in PDF format for free! Find your manual Prinz II - dwt-Zelte and take your electronic device back in hand. On this page are published all the documents necessary for the use of your device. Prinz II by dwt-Zelte.
USER MANUAL Prinz II dwt-Zelte
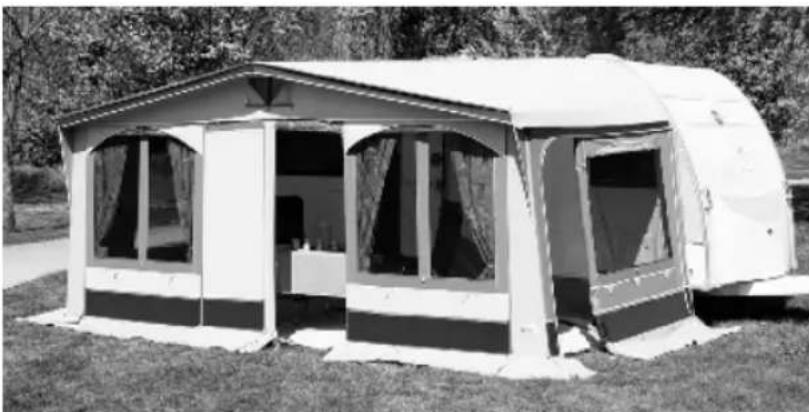
This is how you erect your awning correctly.
Illustrated instructions
Numerous discussions with end-users and visits to campsites prompted us to produce these illustrated instructions.
They are intended to help you put up your awning safely and in a professional manner.
Just a few moves in the right place, and the job's done!
You can help improve the looks of your campsite by putting up your awning properly!

UK
www.dwt-zelte.com
Awnings
Off we go!
Please read the instructions through carefully before you start putting up the awning.
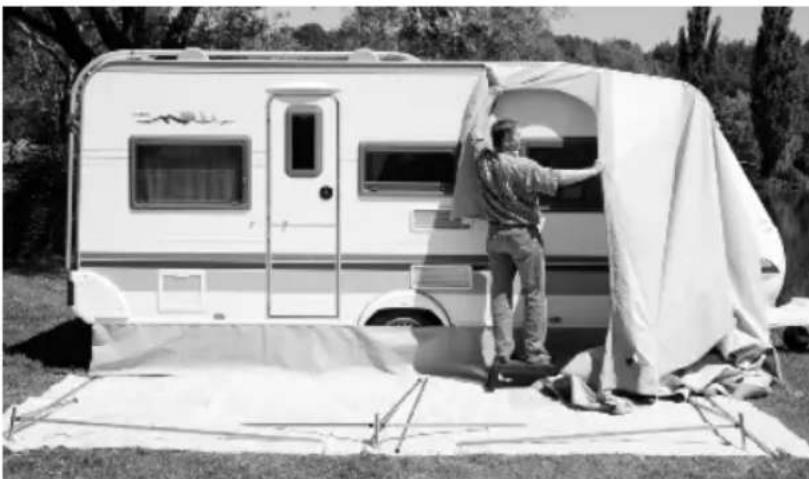
Lay out protective sheeting or tent carpet in front of the caravan.
Fit the frame together, fit the screws or clamps.
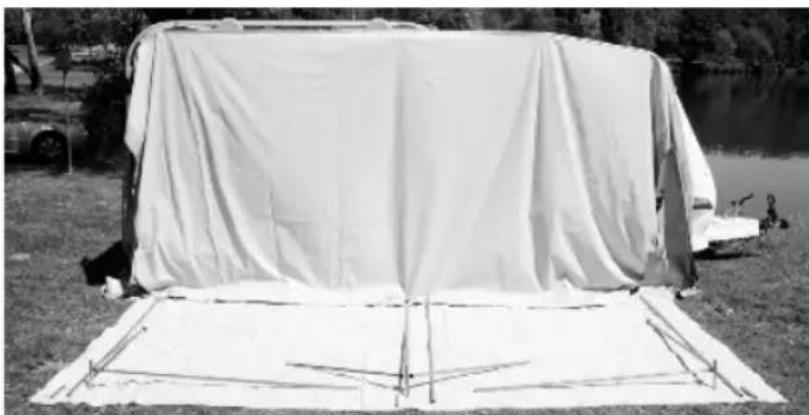
Lay out the corners poles, roof poles and ridge poles on the ground in front of the caravan according to the pole diagram. Do not connect these individual parts yet. You can put additional poles such as extra roof poles, verandah poles or canopy tensioners to one side for the moment. These will be needed later.
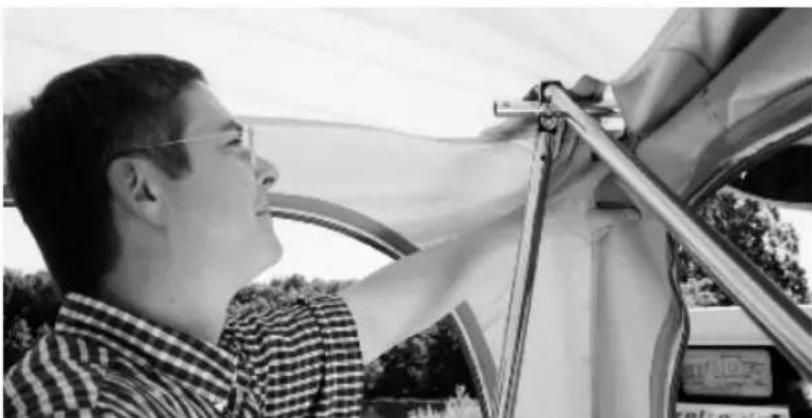
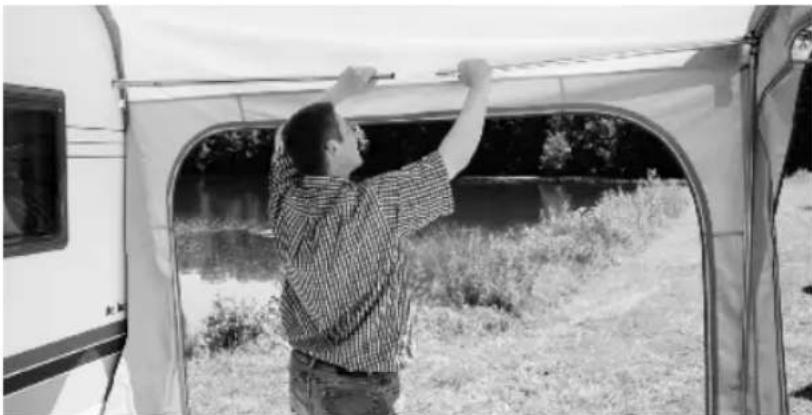
Clean the caravan's awning rail, making sure there are no sharp edges, and feed the roof of the awning in.
For caravans with a sloping front, please use the double wind flap on the right side wall which is stitched on. With the help of the wind flap you can still tighten the sidewall vertically, and attach an annex, according to level of equipment.
Caution
(Refers to all steps of setting up)
Please always tighten the fastening screws or fastening devices so that the individual poles cannot close up again or come away from one another. You will avoid any chance of injury and will stop the caravan being damaged by falling poles.
Important
To avoid any damage occurring to your caravan
-
the screws or other fastening devices for the roof poles should be so adjusted that if they do come loose and fall, the side wall of the caravan is not going to be damaged.
-
connect the roof poles with the brackets by making sure they engage properly over both poles pushed in, and only then, telescope them. In this way you will avoid pulling the front pole out and the rest of the pole falling back and hitting the caravan.

www.dwt-zelte.com
www.dwt-zelte.com
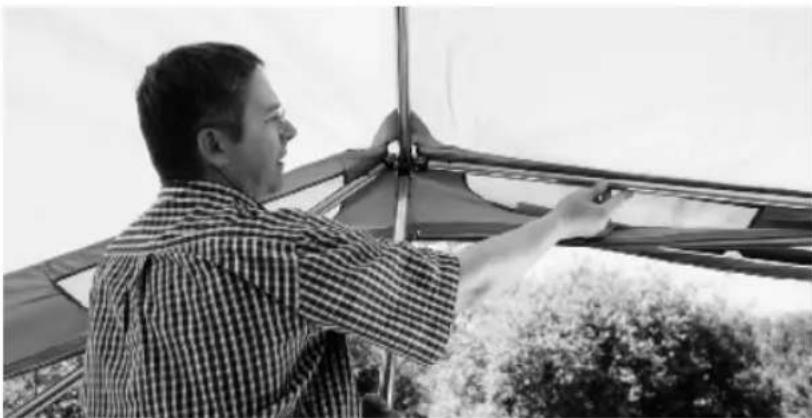
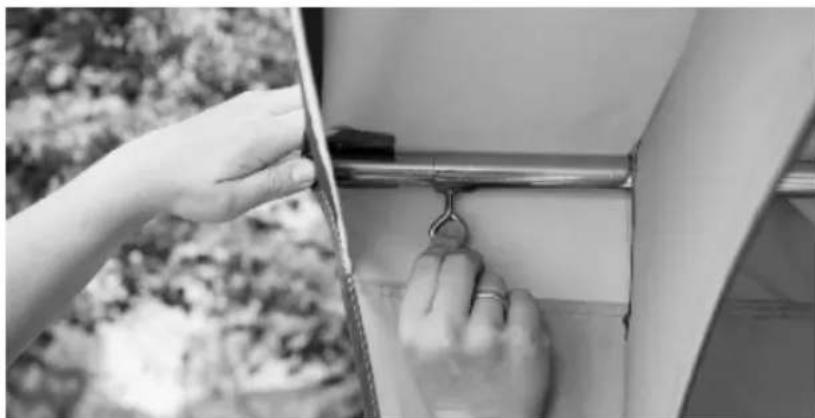
Hang the middle roof pole in the threaded fixing eye or Vario Clip on the caravan and connect this to the centre bracket. Put up the centre bracket and determine the centre height.
While setting up, we recommend that all brackets are secured with a guy-rope to avoid gusts of wind picking up the roof of the awning with its frame.
Put up one side bracket.
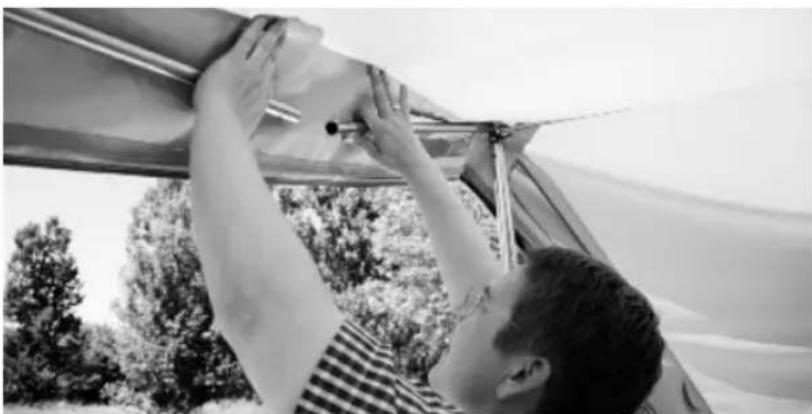
Hang the side roof pole in the threaded fixing eye or Vario Clip on the caravan and connect it to the side bracket. Spread the pole slightly and then tighten the screws completely.
Connect this side bracket with the centre bracket, spread the poles apart slightly and then tighten the screws completely.

Awnings
Repeat the previous three steps with the opposite end of the awning.
Now push the small canopy supports in place, taking care at this point that the side- and centre-brackets are clearly seen through the pole cut-out and that the brackets are not overtensioned forwards.
Note:
- If canopy tensioner poles are also supplied, they are fitted at this point. In the canopy, these poles connect the side supports with those in the centre.
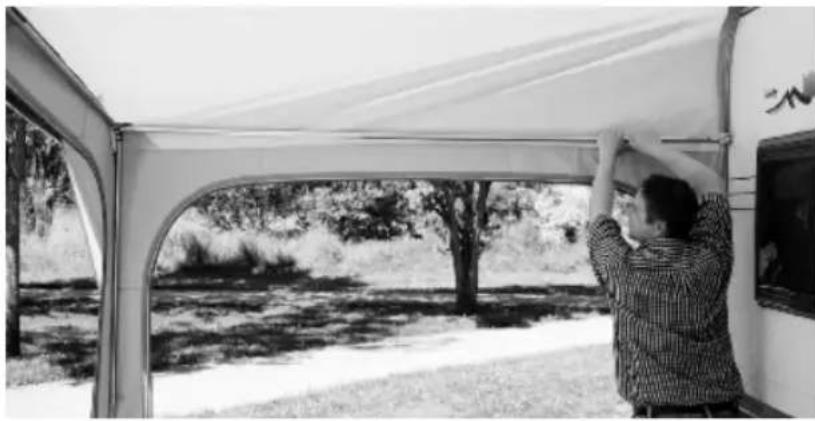
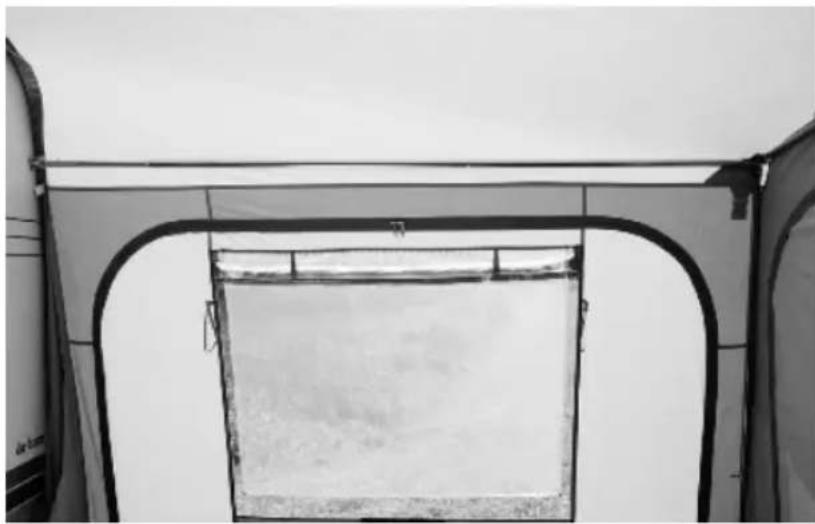
Before taking the next steps, arrange the roof of the awning so that all horizontal seams in the front and side walls are running horizontally.
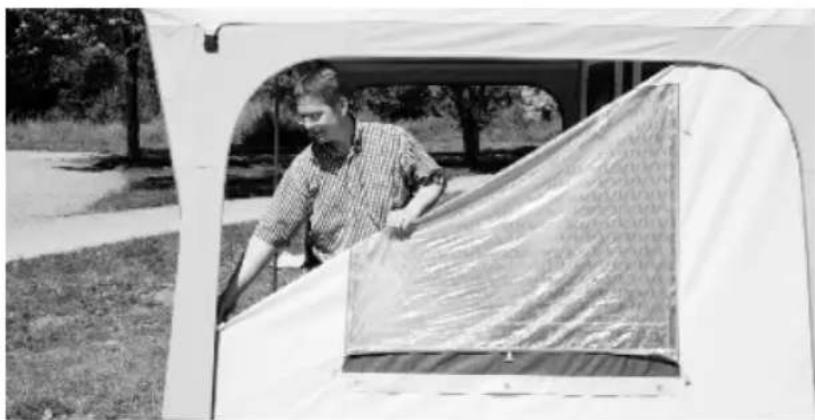
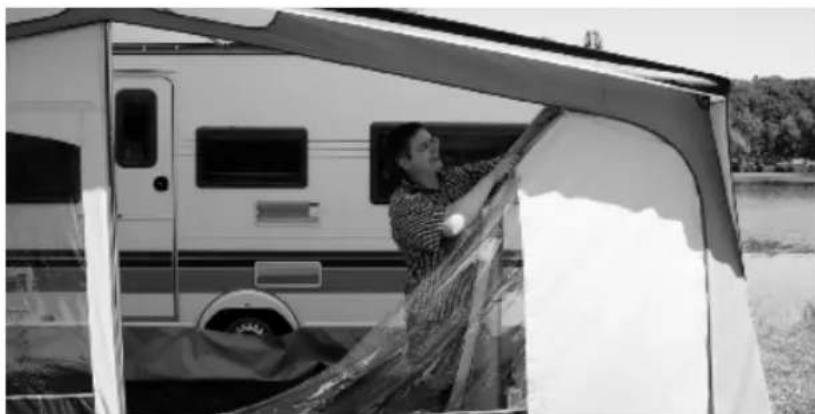
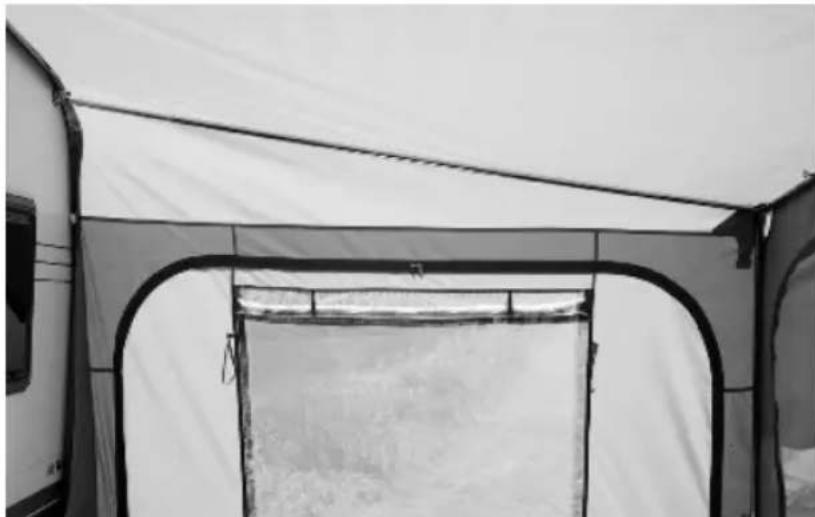
Set the side walls in place.
Set the front wall in place.

www.dwt-zelte.com
Note:
- Correct tensioning of the frame is important to make the tent look right. Please take a little more time over this, and compare the following pictures with the way you have erected your tent.
- Do not tension the roof and ridge poles the first time you telescope them with all your might, but evenly, possibly even several times. The decisive factor is a good seat of the brackets in the corners and in the middle
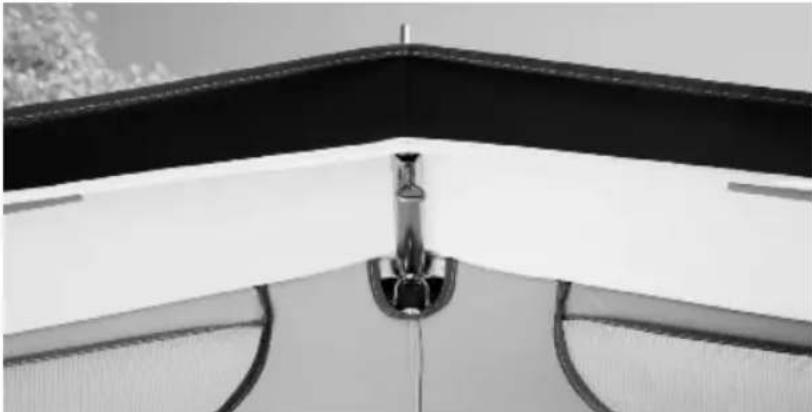
Correct:
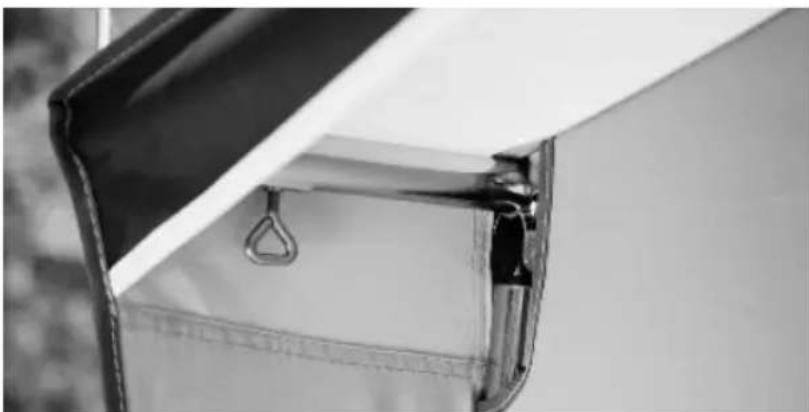
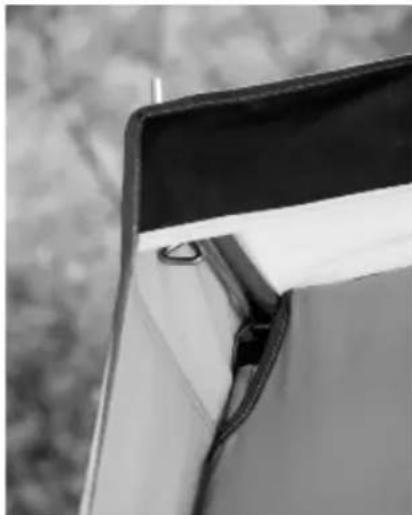
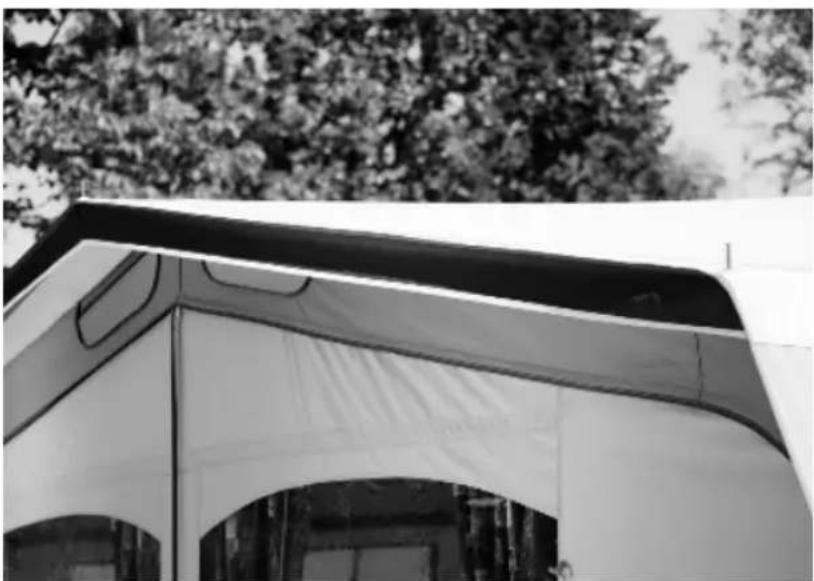
The side bracket is correctly seated in the corner, directly behind the roof seam.
Ridge pole and side roof pole are correctly tensioned.
The canopy support must be telescoped to the correct length.
www.dwt-zelte.com
Correct
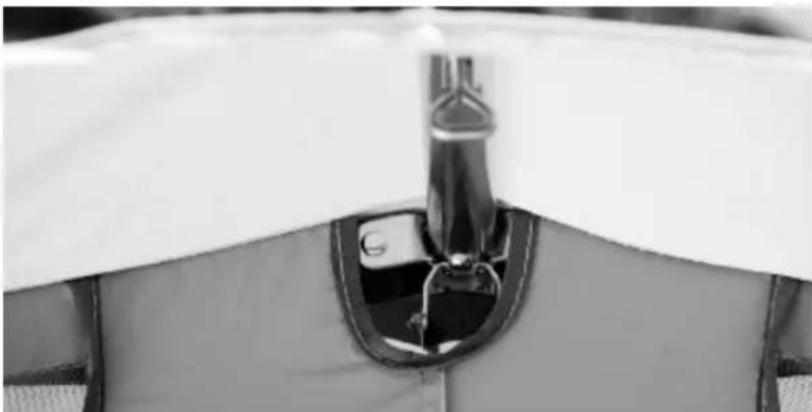
The centre bracket fits properly in the middle of the pole cut-out!
Wrong!
The centre bracket is off-centre in the pole cut-out, it will never be possible to spread the canopy shade properly.
Wrong!
The roof pole is overstrained, or the canopy support must be pulled out further. The roof-seam runs behind the ridge pole. It will never be possible to spread the canopy shade properly.

Awnings
Correct
The side roof poles must run parallel to the side wall seam, so that the roof can be spread cleanly.
Wrong!
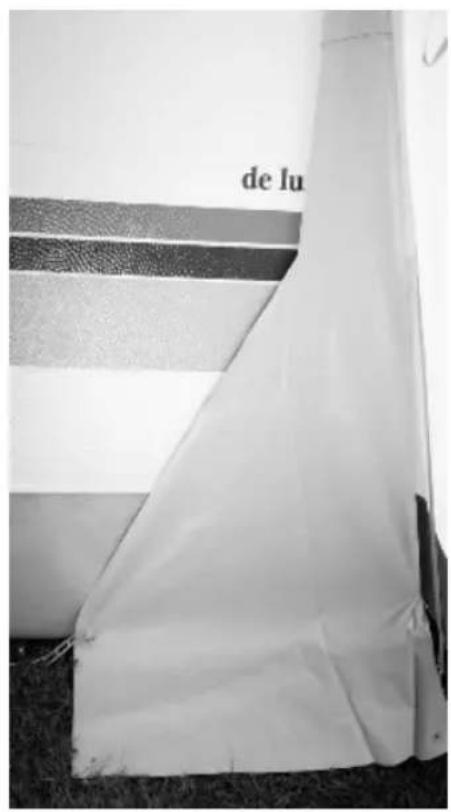
The side roof pole does not run parallel to the side wall seam, and it will not be possible to tension the small wind-flap sewn on to the front wall very tightly like this
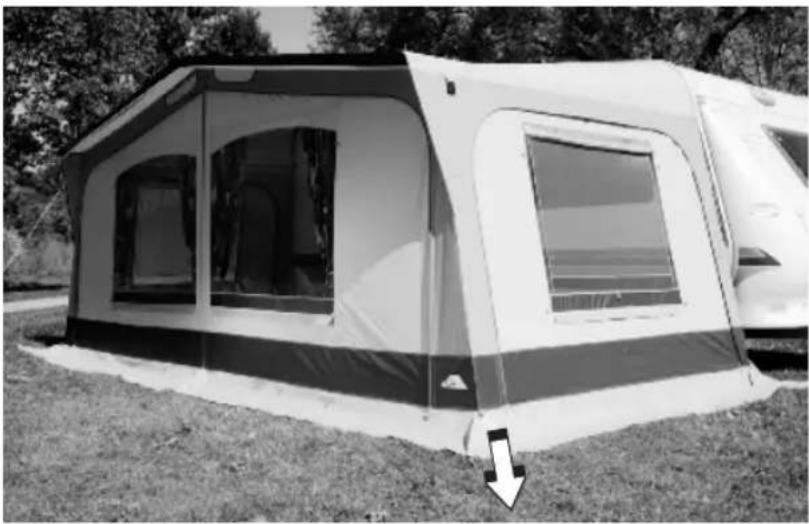
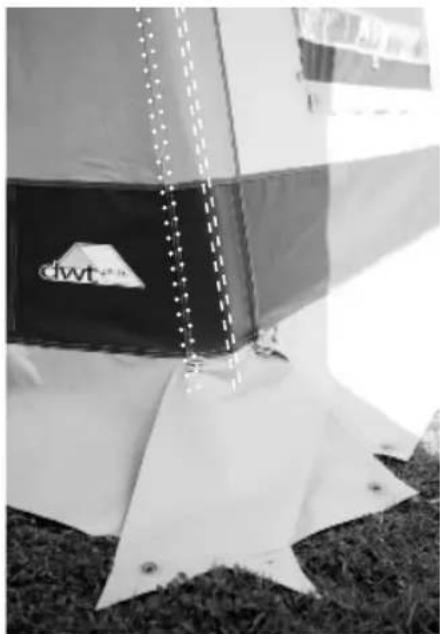
Pull the foot at the corner as shown by the arrow in the picture.
This allows equal tensioning of the front- and side-walls. Repeat the procedure with the corner foot on the other side. Fix this corner with ladder tensioner and tent peg.
Caution
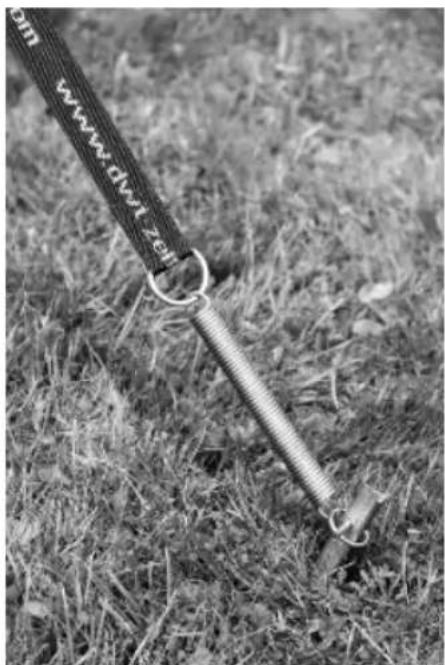
Knock the peg into the ground BEFORE you fit the tensioner over it. This will avoid the possibility of the force of the blows tearing the seam or the loop.
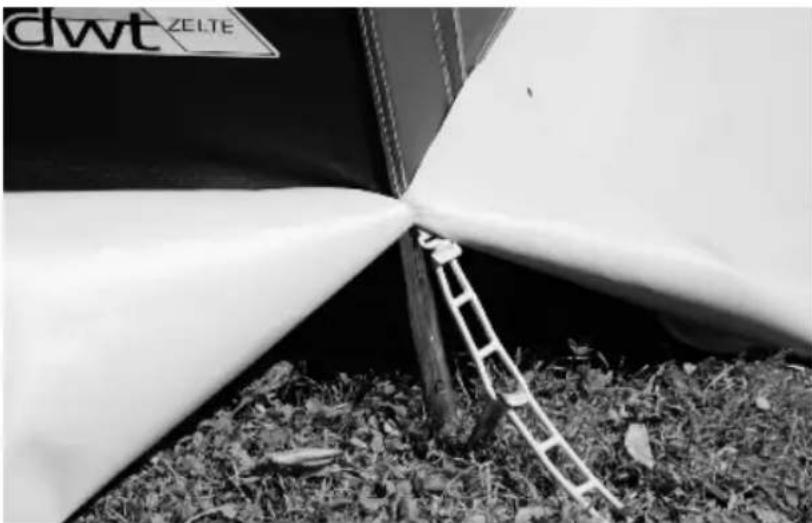
Correct
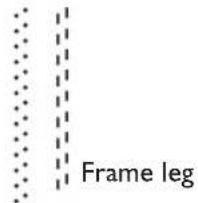
The corner seam is directly above the frame leg. Only like this can the tent be spread almost without wrinkles.
Wrong!
The vertical corner seam is not directly above the frame leg. This makes it impossible to spread the tent smoothly.
Corner seam
Caution
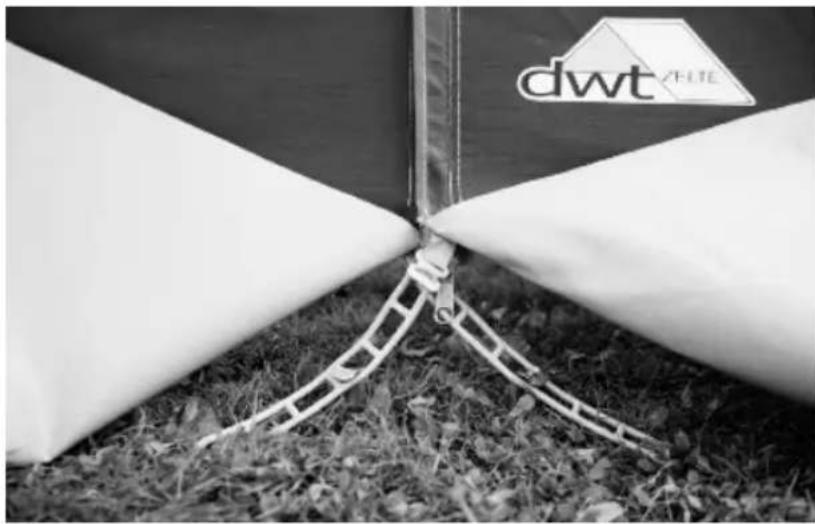
- Should the ladder tensioners or similar systems not be firmly stitched on, now hang these on the hooks in the mud-wall.
- Shut all zip-fasteners before starting to spread the floor.
- Begin spreading the floor at the rear corners of the tent by the caravan.
www.dwt-zelte.com

Awnings
The ends of the zip-fasteners are anchored in crossover form to reduce strain.
The remaining tensioning elements are tightened straight downwards.
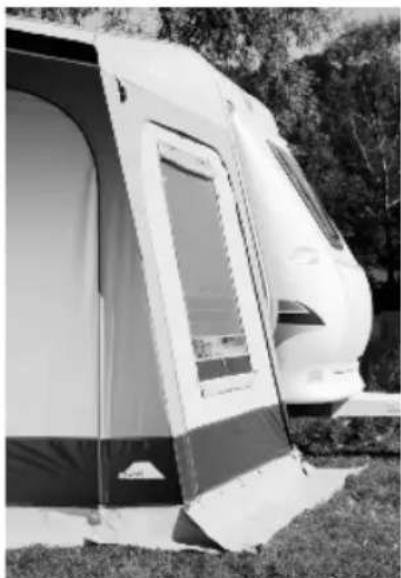
Correct
The front wall: corner to corner in a straight line.
The side walls from front corner to caravan in a straight line, the canopy shade tight.

www.dwt-zelte.com
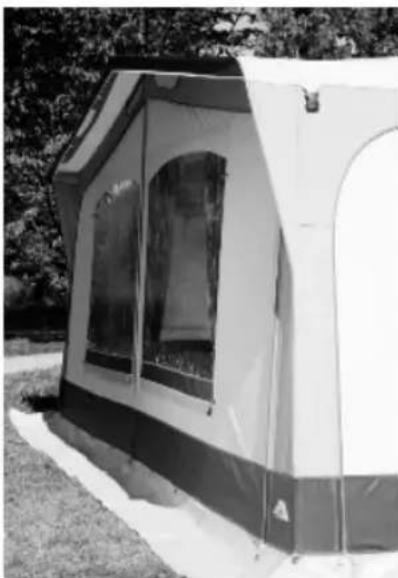
Correct
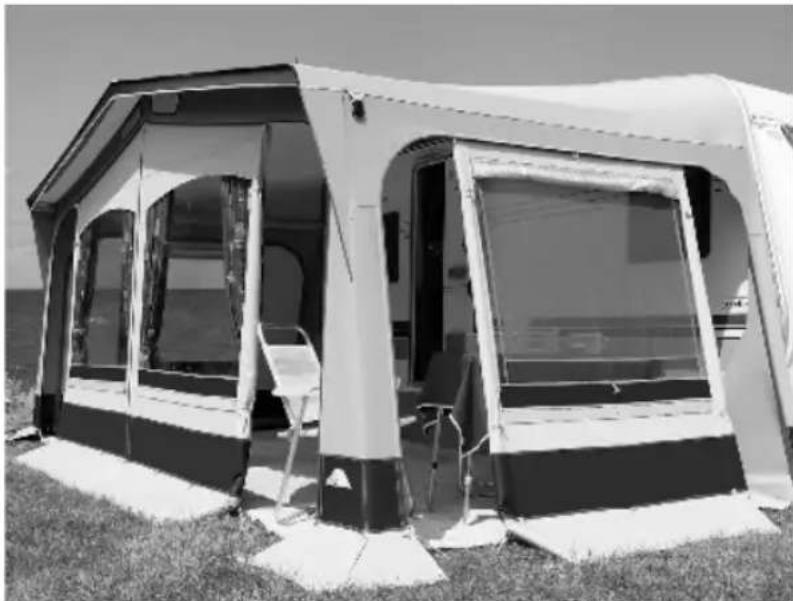
This is how your tent should look if you have followed these instructions. The better and more tightly your tent is erected, the less likely it is to be affected by wind and rain.
Wrong!
Judge for yourself. In this condition, a single gust of wind would be enough to tear seams or if it rains, pools of water will collect on the roof. Once the roofing material is stretched out of shape, it will never go back into shape, and afterwards extra poles won't help either. Don't let it come to that!
www.dwt-zelte.com

Awnings
The curtain rolls are pulled through the loops at a spacing of about 10 cm and fixed to the curtain strip.
Correct
Fit the additional roof poles where there are already wear protectors sewn in.

The wind flaps at bow and stern are anchored into the ground.
www.dwt-zelte.com
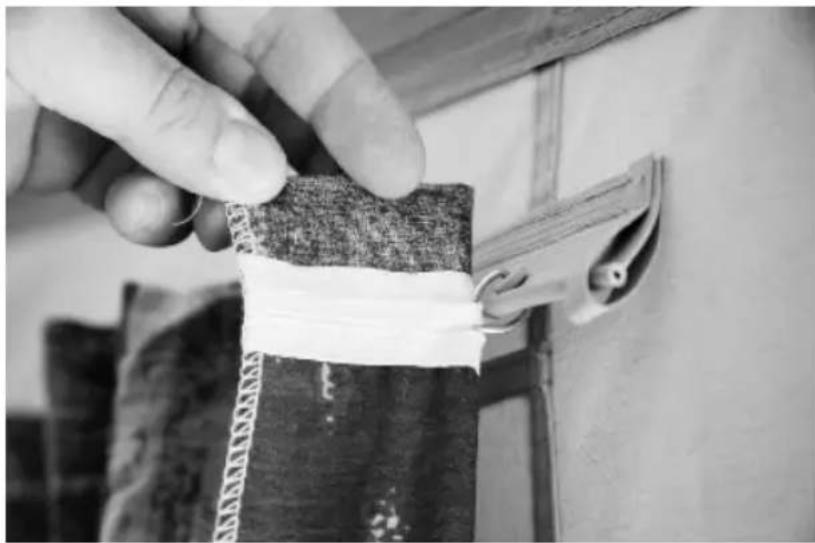
Correct
The wear protector supplied is placed around the pole and the clamp fitted under it. This is to protect the material of the front and side walls from abrasion. Check these fixings on a regular basis and replace the wear protectors as and when necessary.
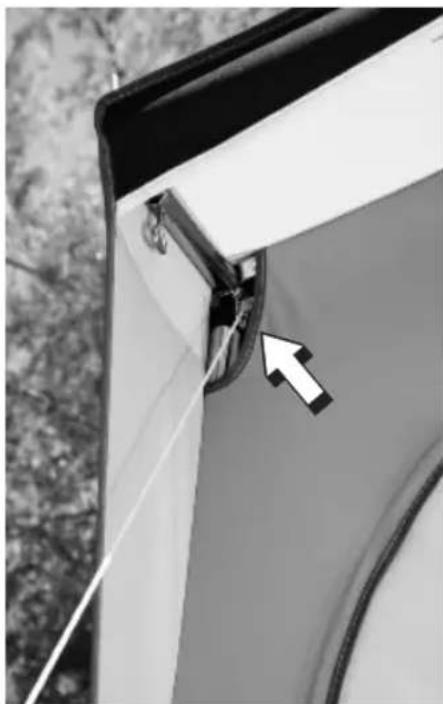
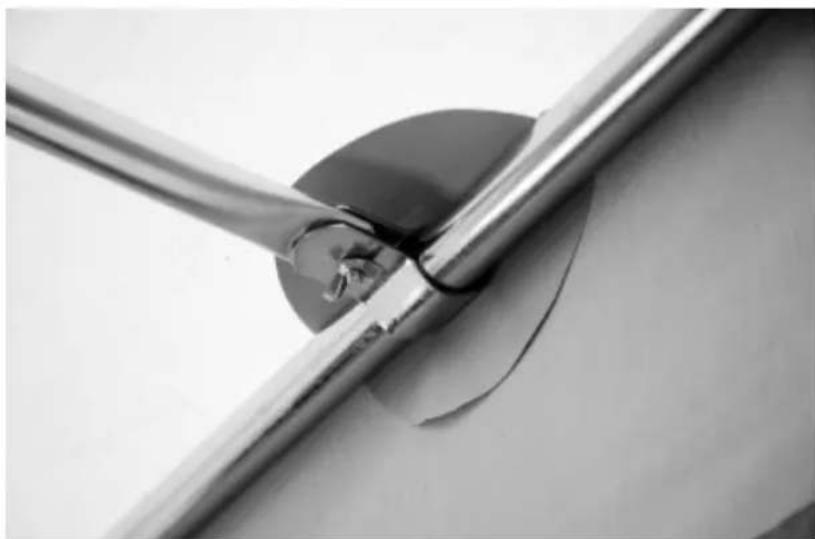
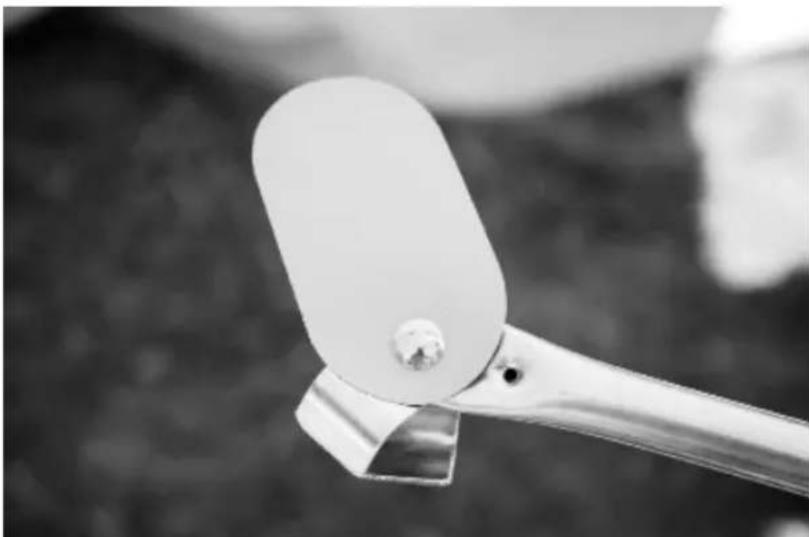
Correct
The guy-ropes lend the tent.
additional stability.
Fix the rope to the frame bracket.
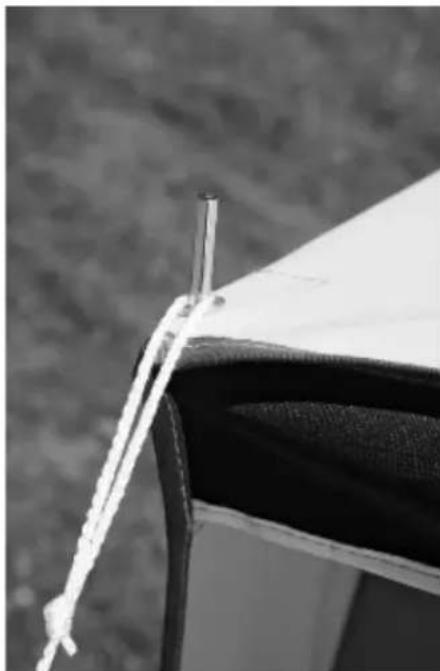
Wrong!
The rope will damage the roof material, and will bend the bracket.
www.dwt-zelte.com

Awnings
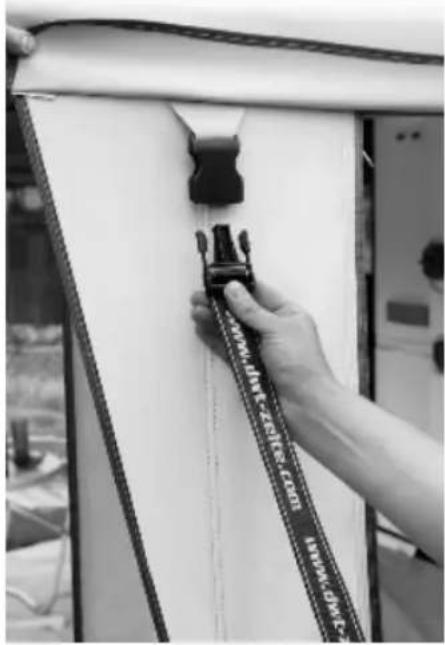
Alternatively check whether your model is also equipped to fit the „Sicherheitsgurt plus“ safety strap.
This by no means replaces the regular ground anchorage, but should be used additionally.