Campo Grande 34P - Tent Vaude - Free user manual and instructions
Find the device manual for free Campo Grande 34P Vaude in PDF.

Frequently Asked Questions - Campo Grande 34P Vaude
User questions about Campo Grande 34P Vaude
0 question about this device. Answer the ones you know or ask your own.
Ask a new question about this device
Download the instructions for your Tent in PDF format for free! Find your manual Campo Grande 34P - Vaude and take your electronic device back in hand. On this page are published all the documents necessary for the use of your device. Campo Grande 34P by Vaude.
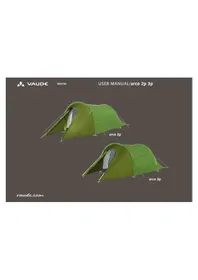
USER MANUAL Campo Grande 34P Vaude
The Spirit of Mountain Sports
VAUDE
vaude.com
052503

VAUDE
052503
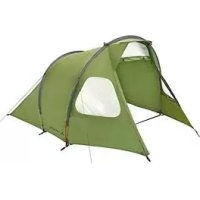
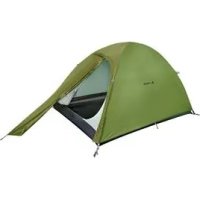
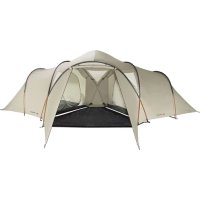
USER MANUAL/Campo family xt 5p
Campo CompaCt xt 2p
Campo Grande xt 3-4p
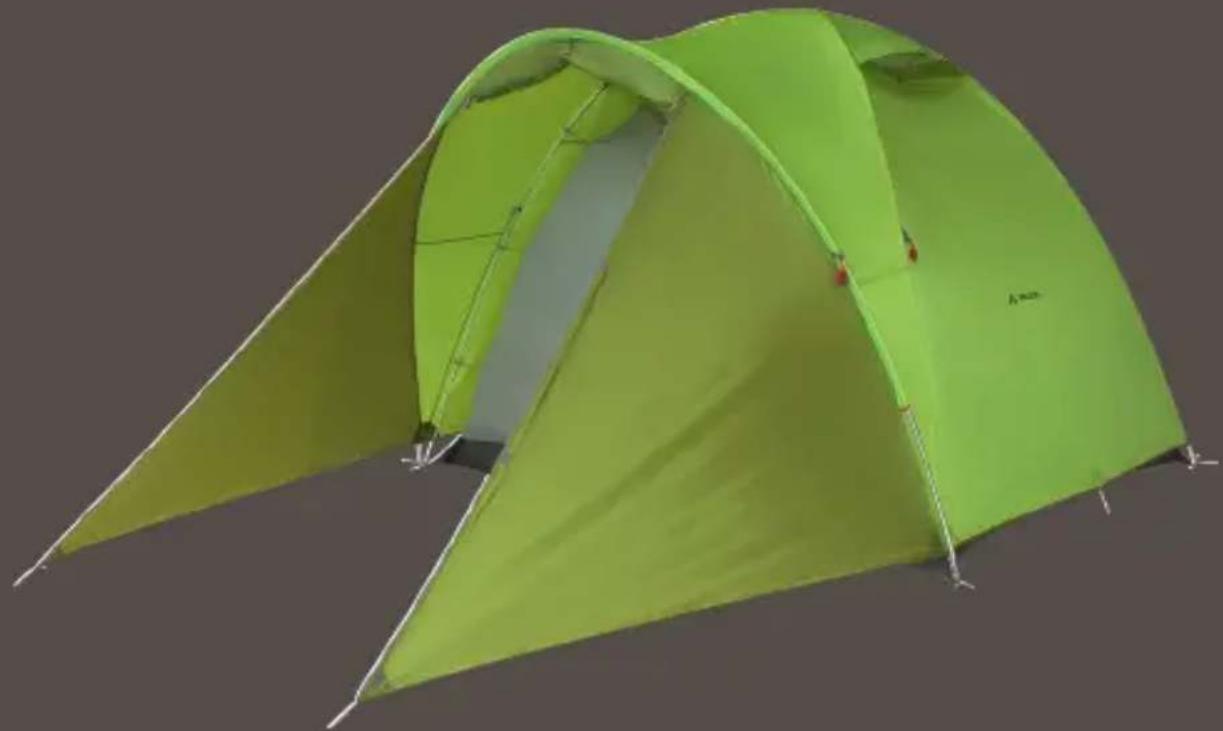
natural_image
Green camping tent with white tarpaulins and a small red label, shown against a neutral gray background (no text or symbols visible)vaude.com
deUtSCH....1
enGLISH....7
franÇaIS....13
ItaLlano....20
eSpaÑoL....26
nederLandS.... 33
Ceština....39
中文....45
featUreS

VentILatlon Hood
By an intake rain-protected adjustable ventilation.

StormCord ColLeCtor
Stormcord tensioner and collector for guylines.
4-WaY-ZIp
Entrance with 4-way zip can be fully opened and removed.

Zipper Seam SeaL
Waterproof taped entrance zip.
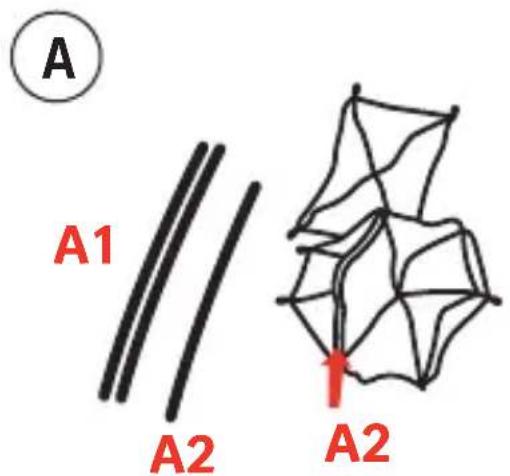
text_image
A A1 A2 A2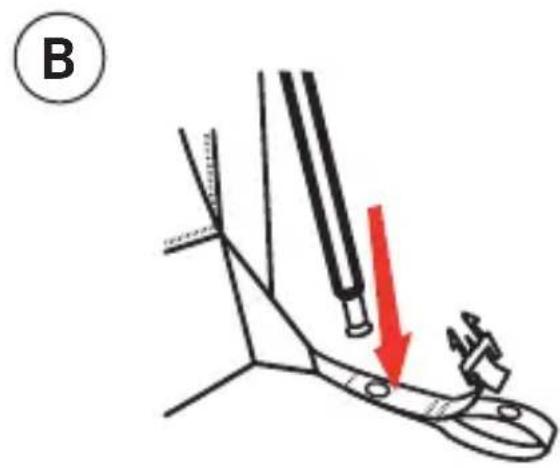
text_image
B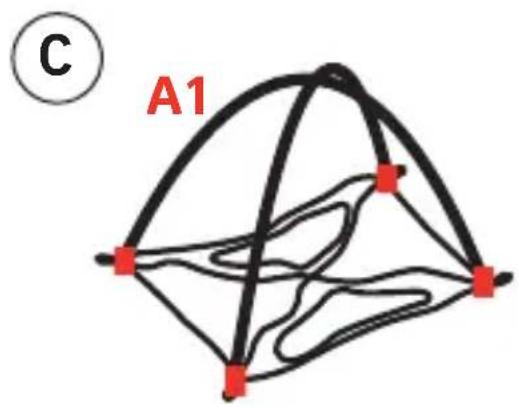
text_image
C A1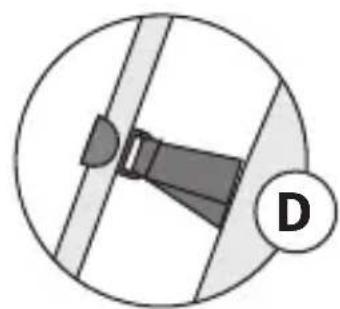
natural_image
Simple line drawing of a seatbelt with a bookmark and label D (no text or symbols on the diagram itself)
text_image
E E1 E2 F
text_image
VV
natural_image
Illustration of a hand holding a coiled spring with a red arrow indicating force direction (no text or symbols)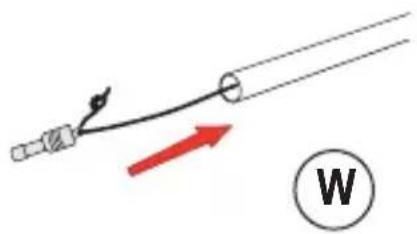
natural_image
Simple diagram showing a tool interacting with a curved line and a circle, with an arrow indicating direction (no text or symbols)
text_image
60° X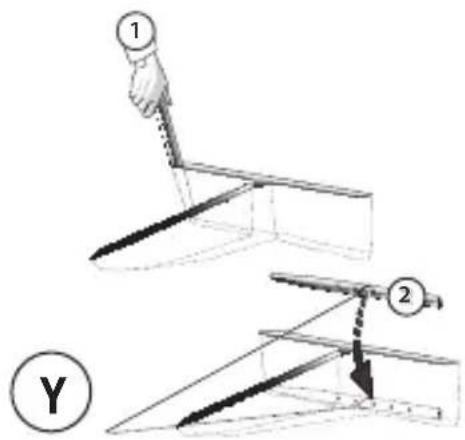
text_image
Diagram illustrating a mechanical device with labeled parts 1 and 2, showing hand positioning and assembly steps.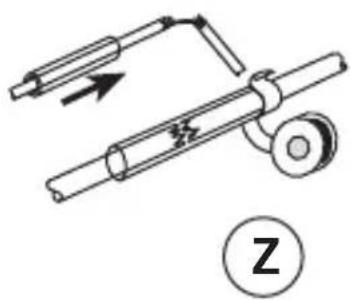
natural_image
Diagram of a mechanical device with a lever and pulley, showing motion direction (no text or symbols)
Weight max: Packing size:
Water column
groundsheet:
Water column fly:
CAMPO COMPACT XT 2P
3.300 g
55 x 22 cm
5.000 mm
3.000 mm
CAMPO GRANDE XT 3-4P 5.650 g 60 x 22 cm
5.000 mm 3.000 mm
CAMPO FAMILY XT 5P
7.200 g
65 x 30 cm
5.000 mm
3.000 mm

text_image
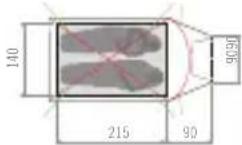
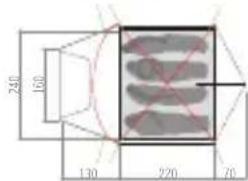
240 160 130 220 70
text_image
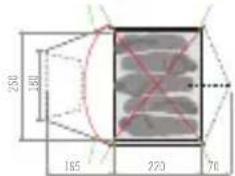
250 180 185 220 70aCHtUnG! für SpÄtereS naCH- SCHLaGen aUfBeWaHren!
eInLeItUnG
SICHerHeItSHInWeISE:
Endless freedom, adventure and summit thrills.
Mountains and nature as far as the eye can see.
Peace and excitement all in one.
That is the Spirit of Mountain Sports.
We here at VAUDE are passionate about mountain sports. This passion can be found in every single one of our VAUDE products.
As a modern family business we take our social and environmental responsibility very seriously: we have been a bluesign member since 2008, one of the most stringent ecological standards in the world. And as the first European outdoor outfitter we are also constantly improving our environmental performance through EMAS certification, the EU's eco-management and audit scheme.
So hope to see you soon up in the mountains... Antje von Dewitz
ENGLISH
CHooSInG YoUr Site:
- Pitch your tent on level ground, in an area protected from wind and not in a hollow, where water can quickly collect when it rains.
- Take into account wind direction when pitching your tent – face the entrance downwind and sheltered if possible.
• Take into account that camping near water sources could lead to condensation build up on your tent and belongings. - Don't pitch your tent in dangerous places. This includes gorges, underneath cliffs or rocks, near glacier-fed rivers, in forests or near fire spots.
- Remove all pointy or sharp objects that could damage the tent floor.
- Use a tent footprint or groundsheet to protect the tent floor.
- If you are planning on camping in one spot for a longer period of time, make sure to pitch in shade or half shade – UV radiation accelerates the aging process of tent fabrics and coatings.
- When camping on snow and in freezing conditions,
dig a pit in front of the tent door or in the vestibule in which cold air can collect.
- Avoid snow build up by regularly clearing snow off the surface of the tent.
- Cooking inside your tent should be avoided whenever possible due to the danger of fire or carbon dioxide poisoning. If you need to make an exception, make sure to ensure sufficient ventilation and keep the stove as far from the tent walls as possible. This might mean having to detach the inner tent and fold it back.
Set Up – General InStrUCtionS:
VAUDE tents are well known for their simple set up. If any step in the process seems difficult, do not use force; take the time to find out what the problem is.
-
Spread out the tent on the ground. (Inner and outer tent are delivered attached to each other.) In windy conditions you should stake out the tent. Use guy lines to anchor it, for example, to a rock, backpack, etc.
-
Sort the poles and assemble the sections by sliding them into each other. Do not whip out the pole sections so they snap together. Make sure that each pole section is fully inserted into the next section; otherwise they may crack or break under pressure. Gently slide the poles through the pole sleeves. Do not pull them through.
-
Erect the tent and make sure that the entrance zip is not under undue tension or strain which could easily damage the zip. Use the releasing lock at the bottom of the entrance.
-
Stakes should be driven in at a 60^ angle away from the tent (x).
-
In the event of strong winds or a storm, it is necessary to additionally secure the tent with the attached storm cords. To adjust the length of the storm cord, push the Stormcord Collector up or down. If the storm cord is not required, wrap the cord around the Stormcord Collector and secure the end on the hook provided for this purpose (V).
-
The VAUDE Y-stakes that come with our tents are very durable and resistant to bending and especially suited for hard ground and grass. For extremely hard ground, we recommend the use of tent pegs or spikes. VAUDE offers special stakes for very soft ground, snow or sand. Hammer them in vertically for soft soil or bury them horizontally to anchor in sand or fresh powder snow (Y).
SettInG Up - "modeL-SpecIfIC":
Please follow these instructions step by step, the order is important.
- Clear the set-up area of all sharp and pointed objects (if possible, use a groundsheet).
- Lay the inner tent out on the ground.
- Lay out the poles and put them together (A): there are 2 longer poles (a1) and one shorter porch pole with an orange end piece (a2).
- Insert the ends of the long pole into the obliquely opposing metal sockets on the inside at the foot of the inner tent corners (B). Use this to put up the poles (C).
ENGLISH
- Connect the hooks inside the tent to the poles (D).
- Throw over the outer tent (E) and secure to the pole crossing point with a tab (E1; Family XT 5P only); then attach the Velcro fasteners to the pole (E2). Do not secure the outer tent to the feet using the buckles yet.
- Insert the shorter pole (A2) into the pole sleeve (A) and push into the external sockets at the foot. Now push the outer tent buckles into the relevant feet (F).
- Anchor the porch and, if necessary, guy ropes.
- Ensure there is sufficient ventilation.
TAKE DOWN - GENERAL INSTRUCTIONS:
- Remove everything from the tent's interior.
• Freestanding tents can be gently shaken out to remove leaves, sand, and other debris. - Turn the tent over with floor facing upward and allow it to dry a bit longer.
- If it's not possible to dry the tent completely before packing it, this should be done within 12 hours to prevent the risk of mold and mildew growth.
-
As in the tent set up, never pull the poles out of the pole sleeves; rather push them through.
-
When storing a tent in its stuff sack, make sure that stakes and poles don't press against the tent fabric and damage it.
- Before taking down your tent, close all zips and roll up the guy lines. That way you won't have to untangle them when it comes time to set the tent up again, and pitching is that much easier.
DISMANTLING - "MODEL-SPECIFIC":
- Pull out the tent pegs and undo the fixings of the poles and let the outer tent collapse.
- Fold up the poles and roll them up with the tent, if possible. Do not force the poles into the storage bag, if it is full.
STORAGE/CARE/REPAIRS:
- As soon as the tent is dry and clean it can be stored in its pack sack in a well-ventilated, cool and dry place. Please do not store the tent near paints, adhesives, oils, plastics, or fuels (gas canisters, etc.).! The gasses emitted from these materials contain plasticizers that can damage your tent over time.
- Zips are always a weak point in a tent's structure. If they get dirty, clean them with a (tooth) brush and lubricate them with graphite (pencil lead), silicon or sewing machine oil. Apply carefully and remove excess oil with a soft cloth.
- Never store your tent when it's wet for a longer period of time. Unpack it as soon as you arrive and dry it out in a well-ventilated place. To do so, separate the inner and outer tents or use the poles to create space between the two.
- Do not whip out tent poles and snap the sections together. This can damage the pole ends as well as the anodization. Check the poles regularly for cracks or other potential damage. Wash the poles and use silicon spray at any sign of corrosion (from salt water, for example)
- VAUDE only uses poles from the renowned manufacturers DAC and Yunan. These tend to become slightly bent with use, helping to reduce fracturing. Please do not attempt to bend these back into shape. Although aluminum is extremely flexible this might damage or even break the poles. Every VAUDE
tent comes with a Pole Doctor or repair sleeve. If a tent pole breaks while out on a trip, simply slide the repair sleeve over the broken section and then use tape to attach it (Z).
- The tent should only be cleaned by hand, never in a washing machine! Use a soft cloth and luke warm water. Detergents or cleaning agents may harm the tent's coating and waterproofing.
Use a brush to rub Nikwax Tech Wash in a 1:4 ratio with water on stubborn stains. Follow up with Nikwax Tent & Gear Solarproof waterproofing, applying generously to the area cleaned.
- When on the road, repair tears in the tent wall with repair tape and seal from the inside with a PU or silicon seam sealer. The seam should however be correctly repaired as soon as possible in order to prevent further tearing. Please contact your retailer to do this.
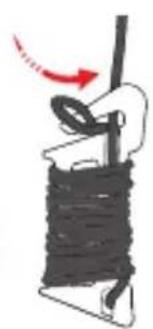
- Tent pole shock cords can be retightened if necessary (elasticity can wear out in very cold conditions or due to aging). To do this first remove the end cap and then untie the knot in the cord. Retie the knot
ENGLISH
further up the cord and replace the cap (W).
teCHnICaL details:
Depending on tent models, VAUDE tents feature the following:
fLY:
CLASSIC 70D POLYESTER 185T PU; 3000 MM WATER COLUMN.
- 70D polyester PU – reliable PU coated polyester backing material.
Inner tent:
70D POLYAMIDE RIPSTOP 185T.
• Abrasion and tear resistant polyamide fabric.
fFloor:
70D POLYAMIDE 190T, PU COATED; WATER COLUMN 5,000 MM.
- Tightly woven polyamide floor with a laminated PU coating; waterproof up to 5,000 mm.
SafetY GUIDELineS:
- Please heed safety guidelines for all appliances used in the tent.
• Always keep exits and throughways as well as vent openings accessible.
• Find out what the rules and regulations are for the campsite you are on and heed fire safety precautions.
- Avoid hazardous materials inside the tent, such as stove or automobile fumes (for example in the Drive Base/Van).
- Wear your shoes around the tent. Stakes and other anchors can be very sharp.
- Do not stake out the guy lines over paths or trails. These can be easily tripped over in the dark.
attention! a ConSerVer poUr Une ConSULTation ULterleUre!
IntrodUCTION
C'est ça, le Spirit of Mountain Sports.
To je Spirit of Mountain Sports.