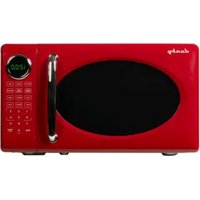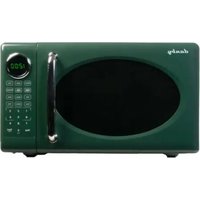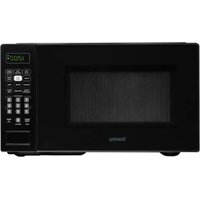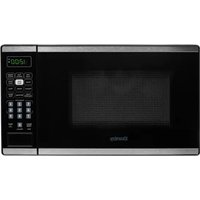
DMW077BLSDD - Microwave Oven DANBY - Free user manual and instructions
Find the device manual for free DMW077BLSDD DANBY in PDF.


User questions about DMW077BLSDD DANBY
0 question about this device. Answer the ones you know or ask your own.
Ask a new question about this device
Download the instructions for your Microwave Oven in PDF format for free! Find your manual DMW077BLSDD - DANBY and take your electronic device back in hand. On this page are published all the documents necessary for the use of your device. DMW077BLSDD by DANBY.
USER MANUAL DMW077BLSDD DANBY
Owner's Use and Care Guide
natural_image
Black-and-white photo of scattered popcorn pieces on a reflective surface (no text or symbols visible)V2.06.10.DM
CONTENTS
MICROWAVE OVEN
Owner's Use and Care Guide 1-13
- Welcome
• Important Safety Information - Installation Guide
- Operation
• Care and Maintenance - Troubleshooting
- Warranty
FOUR À MICRO-ONDES
Read and follow all safety rules and operating instructions before first use of this product.
PRECAUTION:
Welcome to the Danby family. We're proud of our quality products and we believe in dependable service. You'll see it in this easy to use manual and you'll hear it in the friendly voices of our consumer service department.
Tel: 1-800-26-Danby
(1-800-263-2629)
Best of all, you'll experience these values each time you use your microwave. That's important, because your new microwave will be part of your family for a long time.
Write down the model and serial numbers here. They are on a label located on the back of the oven.
Model Number ____
Serial Number
Date Purchased
Staple your receipt to this manual. You will need it to obtain service under warranty.
NEED HELP?
Before you call for service, there are a few things you can do to help us serve you better...
Read this manual: It contains instructions to help you use and maintain your microwave properly.
If you received a damaged oven:
Immediately contact the dealer (or builder) that sold you the oven.
Save time and money:
Check the section titled "Troubleshooting" before calling. This section helps you solve common problems that might occur. If you do need service, you can relax knowing help is only a phone call away.
Tel: 1-800-26- Danby
(1-800-263-2629)
READ ALL SAFETY INFORMATION BEFORE USING
FEDERAL COMMUNICATIONS COMMISSION RADIO FREQUENCY INTERFERENCE STATEMENT (U.S.A. ONLY)
This equipment generates and uses ISM frequencies and if not installed and used properly, that is in strict accordance with the manufacturer's instructions, may cause interference to radio and television reception. It has been type-tested and found to comply with limits for ISM Equipment pursuant to Part 18 of FCC Rules, which are designed to provide reasonable protection against such interference in a residential installation.
However, there is no guarantee that interference will not occur in particular installations. If this equipment does cause interference to radio or television reception, which can be determined by turning the equipment off and on, the user is encouraged to try to correct the interference by one or more of the following:
- Reorient the receiving antenna of radio or television.
- Relocate the microwave oven with respect to the receiver.
- Move the microwave oven away from the receiver.
- Plug the microwave into a different outlet so that microwave and receiver are on different branch circuits.

The Manufacturer is not responsible for any radio or TV interference caused by UNAUTHORIZED MODIFICATION to this microwave oven. It is the responsibility of the user to correct such interference.
PRECAUTIONS TO AVOID POSSIBLE EXPOSURE TO EXCESSIVE MICROWAVE ENERGY
For your safety the information in this manual must be followed to minimize the risk of fire or explosion or to prevent property damage, personal injury or loss of life.
Do Not Attempt to operate this oven with the door open since open-door operation can result in harmful exposure to microwave energy. It is important not to defeat or tamper with the safety interlocks.
Do Not Place any object between the oven front face and the door or allow soil or cleaner residue to accumulate on sealing surfaces.
Do Not Operate the oven if it is damaged. It is particularly important that the oven door close properly and that there is no damage to the:
- door (bent),
- hinges and latches (broken or loosened),
- door seals and sealing surfaces.
The Oven Should Not be adjusted or repaired by anyone except properly qualified service personnel.
SAVE THESE INSTRUCTIONS
IMPORTANT SAFETY INFORMATION
When using electrical appliances, basic safety precautions should be followed, including the following:
WARNING:
To reduce the risk of fire, burns, electric shock, injury to persons or exposure of excessive microwave energy when using your appliance:
SAFETY PRECAUTIONS
- Read and follow the specific "Precautions to Avoid Possible Exposure to Excessive Microwave Energy" on page 2.
- This appliance must be grounded. Connect only to a properly grounded outlet. See “Grounding Instructions” section on page 5.
- Do not operate this appliance if it has a damaged power cord or plug, if it is not working properly, or if it has been damaged or dropped.
- Do not cover or block any openings on the appliance.
- Use this appliance only for its intended use as described in this manual. Do not use corrosive chemicals or vapors in this appliance.
- This microwave oven is specifically designed to heat, dry or cook food, and is not intended for laboratory or industrial use.
- Some products such as whole eggs and sealed containers for example, closed glass jars- may explode and should not be heated in this oven.
- Do not store this appliance outdoors.
- Do not use this product near water-for example, in a wet basement, near a swimming pool or near a sink.
- Keep power cord away from heated surfaces.
- Do not immerse power cord or plug in water.
- See door surface cleaning instructions in the Care and Maintenance section(s) of this manual.
-
This appliance should be serviced only by qualified service personnel. Contact nearest authorized service facility for examination, repair or adjustment.
-
As with any appliance, close supervision is necessarily when used by children.
- Do not overcook food.
- Carefully attend appliance if paper, plastic or other combustible materials are placed inside the oven while cooking.
- Remove wire twist-ties and metal handles from paper or plastic containers before placing them in the oven.
- Do not use the oven for storage purposes. Do not leave paper products, cooking utensils or food in the oven when not in use.
- Do not use the microwave to dry newspapers.
- If materials inside oven should ignite, keep the oven door closed, turn the oven off and disconnect the power at the fuse or circuit breaker panel. If the door is opened, the fire may spread.
To reduce the risk of fire in the oven cavity:
SAVE THESE INSTRUCTIONS
SPECIAL NOTES ABOUT MICROWAVING
ARCING
If you see arcing, press the "STOP/Clear" button and correct the problem.
Arcing is the microwave term for sparks in the oven. Arcing is caused by:
• Metal or foil touching the side of the oven.
- Foil not molded to food (upturned edges act like antennae).
- Metal, such as twist-ties, poultry pins, or gold-rimmed dishes, in the microwave.
• Recycled paper towels containing small metal pieces being used in the microwave.
FOODS
- Only cook popcorn in your microwave oven using a special microwave popcorn accessory dish, unless you use popcorn labeled for use in microwave ovens.
- Some products- such as whole eggs (with shell), sealed containers, and closed jars - will explode and should not be heated in this microwave oven. Heating these products in the microwave oven could result in injury.
- Do not boil eggs in a microwave oven. Pressure will build up inside egg yolk and will cause it to burst, possibly resulting in injury.
- Operating the microwave with no food inside may cause damage to the oven and could start a fire. It increases the heat around the magnetron and can shorten the life of the oven.
- Foods with unbroken outer “skin” such as potatoes, hot dogs, sausages, tomatoes, apples, chicken livers and other giblets, and egg yolks should be pierced to allow steam to escape before cooking.
SAFETY FACT: SUPERHEATED WATER
Microwaved water and other liquids do not always bubble when they reach the boiling point; they can actually get superheated and not bubble at all. Superheated liquid can bubble up when it is moved or when something like a spoon or tea bag is put into it. To prevent this from happening and causing injury, do not heat any liquid for more than 2 minutes per cup. After heating, let the cup stand in the microwave for 30 seconds before moving it or putting anything into it.
- Avoid heating baby food in glass jars, even with the lid off. Make sure all infant food is thoroughly cooked. Stir food to distribute the heat evenly. Be careful to prevent scalding when warming formula. The container may feel cooler than the milk really is. Always test the milk before feeding the baby.
- Spontaneous boiling- Under certain circumstances, liquids may start to boil during or shortly after removal from the microwave oven. To prevent burns from splashing liquid, we recommend the following:
Before removing the container from the oven, allow the container to stand in the oven for 30 to 40 seconds such as soft drink bottles, wine flasks and especially narrow-necked coffee cups. Even if the container is opened, excessive steam can build up and cause it to burst or overflow.
- Don't defrost frozen beverages in narrow-necked bottles (especially carbonated beverages). Even if the container is opened, pressure can build up. This can cause the container to burst, possibly resulting in injury..
- Hot foods and steam can cause burns. Be careful when opening any containers of hot food, including popcorn bags, cooking pouches and boxes. To prevent possible injury, direct steam away from hands and face.
- Do not overcook potatoes. They could dehydrate and catch fire, causing damage to your oven.
- Cook meat and poultry thoroughly- meat to at least an INTERNAL temperature of 160^ (71.1°C), and poultry to at least an INTERNAL temperature of 180^ (82.2°C). Cooking to these temperatures usually protects against food borne illness.
MICROWAVE-SAFE COOKWARE
Make sure all cookware used in your microwave oven is suitable for microwaving. Most glass casserole, cooking dishes, measuring cups, custard cups, pottery or china dinnerware which do not have metallic trim or glaze with a metallic sheen can be used. Some cookware will be labeled “suitable for microwaving”.
- If you use a meat thermometer while cooking, make sure it is safe for use in microwave ovens.
- Do not use recycled paper products. Recycled paper towels, napkins, and waxed paper can contain metal flecks which may cause arcing or ignite. Paper products containing nylon or nylon filament should be avoided, as they may also ignite.
- Not all plastic wrap is suitable for use in microwave ovens. Check the package for proper use.
- Some styrofoam trays (like those that meat is packaged on) have a thin strip of metal embedded in the bottom. When microwaved, the metal can burn the floor of the oven, or ignite a paper towel.
- Cookware may become hot because of heat transferred from the heated food. Pot holders may be needed to handle the cookware.
- "Boilable" cooking pouches and tightly closed plastic bags should be slit, pierced, or vented as directed by package. If they are not, plastic could burst during or immediately after cooking, possibly resulting in injury. Also, plastic storage containers should be at least partially uncovered because they form a tight seal. When cooking with containers tightly covered with plastic wrap, remove covering carefully and direct steam away from hands and face.
- Paper towels, waxed paper, and plastic wrap can be used to cover dishes in order to retain moisture and prevent splattering. Be sure to vent plastic wrap so steam can escape.
How to test for a microwave-safe dish:
1) Place in the oven both the dish you are testing and a glass measuring cup filled with 1 cup of water.
2) Set the measuring cup either in or next to the dish.
3) Microwave 1 minute on high power.
If the dish heats, it should not be used for microwaving. If the dish remains cool and only the water in the cup heats, then the dish is microwave-safe.
- Use foil only as directed in this manual. TV dinners may be microwaved in foil trays less than 3/4" high; remove the top foil cover and return the tray to the box. When using foil in the microwave, keep the foil at least 1 inch away from the sides of the oven.
- Plastic cookware designed for microwave cooking is very useful, but should be used carefully. Even microwave-safe plastic may not be as tolerant of overcooking conditions as are glass and ceramic materials, and may soften or char if subjected to short periods of over-cooking. In longer exposure to over-cooking, the food and cookware could ignite.
Follow these guidelines:
1) Use Microwave-safe plastics only and use them in strict compliance with the cookware manufacturer's recommendations.
2) Do not microwave empty containers.
3) Do not permit children to use plastic cookware without complete supervision.
GROUNDING INSTRUCTIONS
WARNING:
Improper use of the grounding plug can result in a risk of electric shock.
This appliance must be grounded. In the event of an electrical short circuit, grounding reduces the risk of electric shock by providing an escape wire for the electric current. This appliance is equipped with a power cord having a grounding wire with a grounding plug. The plug must be plugged into an outlet that is properly installed and grounded.
Consult a qualified electrician or service technician if the grounding instructions are not completely understood, or if doubt exists as to whether the appliance is properly grounded. If the outlet is a standard 2-prong wall outlet, it is your personal responsibility and obligation to have it replaced with a properly grounded 3-prong wall outlet.
DO NOT under any circumstances cut or remove the third (ground) prong from the power cord.
DO NOT use an adapter plug with this appliance.
DO NOT use an extension cord with this appliance.
If the power cord is too short, have a qualified electrician or service technician install an outlet near the appliance.
For best operation, plug this appliance into its own electrical outlet to prevent flickering of lights, blowing of fuse, or tripping of circuit breaker.
INSTALLATION GUIDE
1) Make sure that all packing materials are removed from the inside of the microwave oven.
2) Check the microwave for any damage, such as misaligned or bent door, damaged door seals and sealing surface, broken or loose door hinges and latches, and dents inside the cavity or on the door. If there is any damage, do not operate the oven but contact a qualified service personnel.
3) This microwave oven must be placed on a flat, stable surface to hold its weight.
4) Do not place the microwave oven where heat, moisture, or high humidity are generated, or near combustible materials.
5) For correct operation, the microwave oven must have sufficient air flow. Allow 20 cm of space above the microwave oven, 10 cm at back and 5 cm at both sides. Do not cover or block any openings on the appliance. Do not remove the feet on which the microwave oven stands.
6) Do not operate the oven without glass tray, roller support, and shafts in their proper positions.
7) Make sure that the power supply cord is undamaged and does not run under the microwave oven or over any hot or sharp surfaces.
8) The socket must be readily accessible so that it can be easily unplugged in an emergency.
SPECIAL CORD SET INSTRUCTIONS

DANGER:
Electric Shock Hazard: Touching some of the internal components can cause serious personal injury or death. Do not disassemble this appliance.

WARNING:
Electric Shock Hazard: Improper grounding can result in electric shock. Do not plug into an outlet until appliance is properly installed and grounded.
OPERATING INSTRUCTIONS
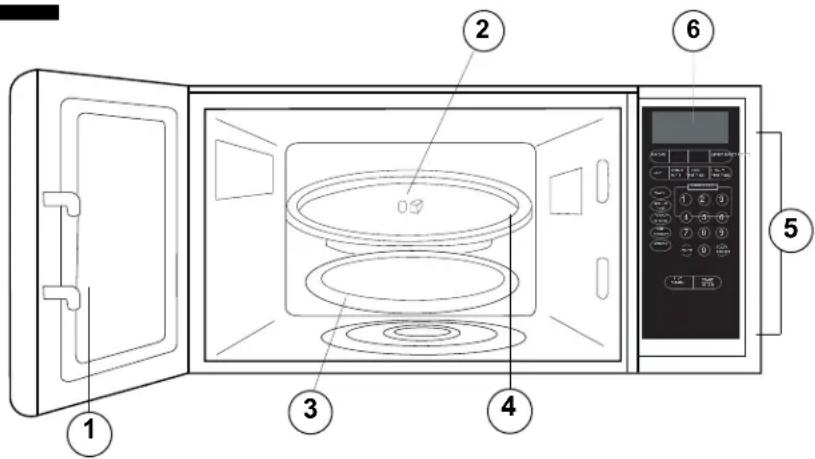
1) Oven Window: Screen allows cooking to be viewed while keeping microwave energy confined in oven.
2) Turntable Shaft
3) Roller Ring
4) Removable Glass Turntable: Turntable and support must be in place when using the oven. The turntable may be removed for cleaning.
5) Control Panel
6) Electronic Display
text_image
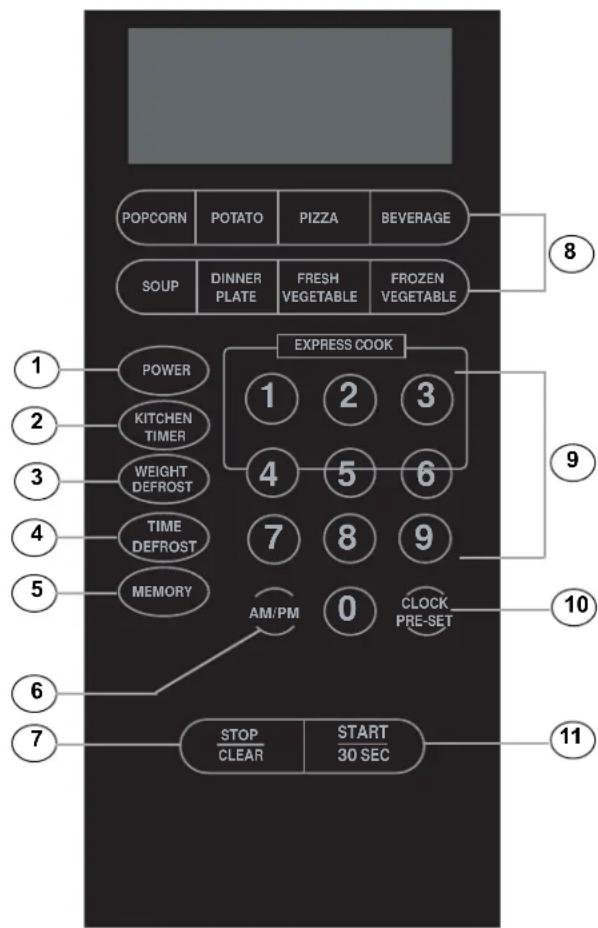
Diagram of a microwave oven with numbered parts for identification and assembly reference.CONTROLS
1) POWER
2) KITCHEN TIMER
3) WEIGHT DEFROST
4) TIME DEFROST
5) MEMORY
6) AM/PM
7) STOP/CLEAR: Clears all previous settings entered before cooking starts. During cooking: Press once to stop oven. Press twice to stop and clear all entries.
8) AUTO MENU: Popcorn, Potato, Pizza, Beverage, Soup, Dinner Plate, Fresh Vegetable, Frozen Vegetable.
9) NUMBER KEYS
10) CLOCK/PRE-SET
11) START/+30SEC.
text_image
POPCORN POTATO PIZZA BEVERAGE SOUP DINNER PLATE FRESH VEGETABLE FROZEN VEGETABLE ① POWER ② KITCHEN TIMER ③ WEIGHT DEFROST ④ TIME DEFROST ⑤ MEMORY ⑥ STOP CLEAR START 30 SEC ⑦ ⑧ ⑨ ⑩ CLOCK PRE-SET ⑪POWER LEVELS
11 power levels are available:
| Level | 10 9 | 8 7 6 5 4 | 3 2 1 0 | ||||||||
| Power | 100% | 90% | 80% | 70% | 60% | 50% | 40% | 30% | 20% | 10% | 0% |
| Display | PL10 | PL9 | PL8 | PL7 | PL6 | PL5 | PL4 | PL3 | PL2 | PL1 | PL0 |
SETTING THE CLOCK
Your microwave clock is a 12-hour system.
When the microwave oven is plugged into an outlet, the oven will display "0:00";
1) Press "CLOCK/PRE-SET", LED will display 00:00 and clock indicator will be illuminated. The hour figures will flash; "0" and ":" will illuminate.
2) Press the number keys and enter the correct time. For example, time is 10:12- press "1, 0, 1, 2" in turn.
3) Press "AM/PM" to choose AM or PM in turn by pressing the AM/PM button until your desired choice is displayed.
4) Press "CLOCK/PRE-SET" to finish setting the clock; the clock indicator will go out and ":" will flash as the clock time displays.
5) If the numbers input are not within the range of 1:00-12:59, the setting will be invalid until valid numbers are entered.
NOTE: In the process of clock setting, if the "STOP/CLEAR" button is pressed or if there is no operation within 1 minute, the oven will revert to the former setting automatically.
SETTING THE KITCHEN TIMER
1) Press "KITCHEN TIMER"; LED will display "00:00", and the first hour figure will flash.
2) Press the number keys and enter the timer time (the maximum cooking time is 99 minutes and 99 seconds).
3) Press "START/+30SEC." to confirm the setting
4) When the kitchen timer time is reached, the clock indicator will go out and the microwave will sound 5 times. If the clock is set the LED will show current time.
NOTE: The kitchen timer is different from the 12-hour clock system and is intended only for use when timing.
SPEEDY COOKING
1) Instant cooking (from waiting state) at 100% power level can be started by selecting a cooking time from 1 to 6 minutes, by pressing the number pads 1 to 6. Press "START/+30SEC." to increase the cooking time; the maximum cooking time is 99 minutes and 99 seconds.
2) Instant cooking at 100% power level for a duration of 30 seconds' cooking time can be started by pressing "START/+30SEC.". Each press on this button will increase cooking time by 30 seconds (to a maximum of 99 minutes, 59 seconds).
NOTE: During microwave cooking and time defrost, time can be added by pressing the "START/30SEC." button.
DEFROST BY WEIGHT
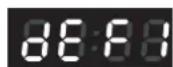
1) Press "WEIGHT DEFROST"; LED will display "dEF1"
2) Press numerical buttons to input weight to be defrosted. Input the weight ranged between 4\~100 Oz.
3) If the weight input is not within 4\~100, the input will be invalid. No "beep" will be sound and the unit will not work until valid numbers are input.
4) Press " START/+30SEC." to start defrosting and the cooking time remained will be displayed.
POPCORN
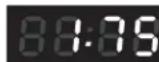
a) Press "POPCORN" repeatedly until the number you wish appears in the display, "1.75", "3.0", "3.5" Oz will display in order. For example, press "POPCORN" once, "1.75" appears.
b) Press " START/+30 SEC." to cook, buzzer will sound five times and then turn back to waiting state.

POTATO
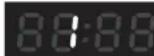
a) Press "POTATO" repeatedly until the number you wish appears in the display, "1", "2", "3" will display in order.
"1"SET : 1 potato (approximate 230 gram) "2"SETS: 2 potatoes (approximate 460 gram) "3"SETS: 3 potatoes (approximate 690 gram) For example, press "POTATO" once, "1" appears.
b) Press " START/+30 SEC. " to cook, buzzer sounds once. When cooking finish, buzzer sounds five times and then turn back to waiting state.
TIME DEFROST
1) Press "TIME DEFROST"; LED will display "dEF2".
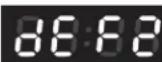
2) Press the number buttons to input defrosting time. The accepted time range is 00:01-99:99; if the time input is not within this range, no "beep" will sound and the microwave will not function until valid numbers are input.
3) The default microwave power is power level 3. If you want to change the power level, press "POWER" once, and the LED will display "PL3"; press the number of the power level you desire.
4) Press "START/+30SEC." to start defrosting and the remaining cooking time will be displayed.
FROZEN VEGETABLES
a) Press "FROZEN VEGETABLE" repeatedly until the number you wish appears in the display, "4.0", "8.0", "16.0" oz will display in order. For example, press "FROZEN VEGETABLE" "4.0" appears.
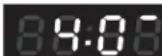
b) Press " START/+30 SEC. " to cook, buzzer sounds once. When cooking finish, buzzer sounds five times and then turn back to waiting state.
BEVERAGES
a) Press "BEVERAGE" repeatedly until the number you wish appears in the display, "1", "2", "3" cup will display in order. One cup is about 120ml. For example, press "BEVERAGE" once, "1" appears.
b) Press " START/+30 SEC. " to cook, buzzer sounds once. When cooking finish, buzzer sounds five times and then turn back to waiting state.
DINNER PLATE
a) Press "DINNER PLATE" repeatedly until the number you wish appears in the display, "9.0", "12.0", "18.0" oz will display in order. For press "DINNER PLATE" once, "9.0" appears
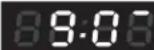
b) Press " START/+30 SEC. " to cook, buzzer sounds once. When cooking finish, buzzer sounds five times and then turn back to waiting state.
PIZZA
a) Press "PIZZA" repeatedly until the number you wish appears in the display, "4.0 ", "8.0 ", "14.0" oz will display in order. For example, press "PIZZA" once, "4.0" appears.
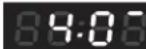
b) Press " START/+30 SEC." to cook, buzzer sounds once. When cooking finish, buzzer sounds five times and then turn back to waiting state.
MEMORY CLOCK
1) Press "0/MEMORY" to choose memory 1-3 procedure. The LED will display 1,2,3.
2) If the procedure has been set, press "START/+30 SEC." to use it. If not, continue to set the procedure. Only one or two stages can be set.
3) After finishing the setting, press "START/ +30 SEC." once to save the procedure and turn back to the waiting states. If press " START/ +30 SEC." again, it will start cooking. Example: to set the following procedure as the second memory, that is memory 2. to cook the food with 80% microwave power for 3 minutes and 20 seconds.
The steps are as follow:
a. In waiting states, press "0/MEMORY" twice, stop pressing until the screen displays "2".
b. Press "TIME COOK" once, then press "3", "2", "0" in order.
c. Press "POWER" once, "PL10" display, then press "8" and "PL8" displays.
d. Press "START/+30 SEC." to save the setting. Buzzer sounds once then turn back to waiting states. If you press "START/+30SEC." again, the procedure will be saved as the memory 2 and operated.
e. If the electricity is not cut off, the procedure will be saved all the time. If it is, the procedure need to reset.
f. If you want to run the saved procedure, in waiting states, press "0/MEMORY" twice, screen displays "2", then press "START/+30SEC." to run.
OPERATING INSTRUCTIONS
SOUP
SOUP:
a) Press "SOUP" repeatedly until the number you wish appears in the display; 1 (about 4.0 oz.), 2 (about 8.0 oz.), 3 (about 12.0 oz.) or 4 (about 16.0 oz.).
b) Press "START/+30SEC." to cook;
FRESH VEGETABLES
a) Press "FRESH VEGETABLE" repeatedly until the number you wish appears in the display; "4.0, 8.0, 16.0" (ounces) will be displayed in turn. For example, press "FRESH VEGETABLE" once; "4.0" appears.
b) Press "START/+30SEC." to cook;
MULTI-STAGE COOKING
At most 2 stages can be set for cooking. In multi-stage cooking, if one stage is defrosting, then defrosting shall be placed at the first stage automatically.
NOTE: Auto cooking cannot work in the multi-stage cooking. Example: if you want to cook with 80% microwave power for 5 minutes + 60% microwave power for 10 minutes. The cooking steps are as following:
1) Press "TIME COOK" once, then press "5", "0", "0" to set the cooking time;
2) Press "POWER" once, then press "8" to select 80% microwave power.
3) Press "TIME COOK" once, then press "1", "0", "0", "0" to set the cooking time;
4) Press "POWER" once, then press "6" to select 60% microwave power.
5) Press "START/ +30 SEC." to start cooking.
INQUIRING FUNCTION
1) In cooking state, press "CLOCK", the LED will display clock for three seconds.
2) In the microwave cooking state, press "POWER" to inquire microwave power level, and the current microwave power will be displayed. After three seconds, the oven will turn back to the previous state. In multi-stage state, the inquiring way can be done by the same way as above.
LOCK FUNCTION FOR CHILDREN
TO LOCK: While the microwave is nonoperational, press and hold "STOP/CLEAR" for three seconds; the microwave will sound a long beep, denoting the entering into the child-safety lock state;
TO UNLOCK: From the locked state, press and hold "STOP/CLEAR" for three seconds; the microwave will sound a long beep, denoting that the microwave is now unlocked.
COOKING END REMINDING FUNCTION
When the cooking is over, the buzzer will sound 5 "beeps" to alert user the cooking is finished.
OTHER SPECIFICATIONS
1) In standby state, if the set clock digital tube displays current time, the icon " : " would flash; otherwise, it shows " 0:00 ".
2) In setting function state, LED displays corresponding setting.
3) In working or pause state, LED displays surplus cooking time.
CARE AND MAINTENANCE
1) Turn off the oven and remove the power plug from the wall socket before cleaning.
2) Keep the inside of the oven clean. When food splatters or spilled liquids adhere to oven walls, wipe with a damp cloth. Mild detergent may be used if the oven gets very dirty. Avoid the use of spray and other harsh cleaners as they may stain, streak or dull the door surface.
3) The outside surfaces should be cleaned with a damp cloth. To prevent damage to the operating parts inside the oven, water should not be allowed to seep into the ventilation openings.
4) Wipe the window on both sides with a damp cloth to remove any spills or spatters.
5) Do not allow the control panel to become wet. Clean with a soft, damp cloth. When cleaning the control panel, leave oven door open to prevent oven from accidentally turning on.
6) If steam accumulates inside or around the outside of the oven door, wipe with a soft cloth. This may occur when the microwave oven is operated under high humidity conditions; this is normal.
7) It is occasionally necessary to remove the glass tray for cleaning. Wash the tray in warm sudsy water or in a dishwasher.
8) The roller ring and oven floor should be cleaned regularly to avoid excessive noise. Simply wipe the bottom surface of the oven with mild detergent. The roller ring may be washed in mild sudsy water or dishwasher. When removing the roller ring from cavity floor for cleaning, be sure to replace in the proper position.
9) Remove odors from your oven by combining a cup of water with the juice and skin of one lemon in a deep bowl, microwave for 5 minutes. Wipe thoroughly and dry with a soft cloth.
10) When it becomes necessary to replace the oven light, please consult a dealer to have it replaced.
11) When cleaning surfaces of door and oven that comes together on closing the door, use only mild, non abrasive soaps or detergents applied with a sponge or soft cloth.
TROUBLESHOOTING
Occasionally, a problem may arise that is minor in nature, and a service call may not be necessary. Use this troubleshooting guide for a possible solution. If the unit continues to operate improperly, call an authorized service depot or Danby's Toll Free Number 1-800-263-2629 for assistance.
| PROBLEM | POSSIBLE CAUSE | SOLUTION |
| Oven will not start | a. Electrical cord for oven is not plugged in.b. Door is open.c. Wrong operation is set. | a. Plug into the outlet.b. Close the door and try again.c. Check instructions. |
| Arcing or sparking | a. Materials to be avoided in microwave oven were used.b. The oven is operated when empty.c. Spilled food remains in the cavity. | a. Use microwave-safe cookware only.b. Do not operate with oven empty.c. Clean cavity with wet towel. |
| Unevenly cooked foods | a. Materials to be avoided in microwave oven were used.b. Food is not defrosted completely.c. Cooking time, power level is not suitable.d. Food is not turned or stirred. | a. Use microwave-safe cookware only.b. Completely defrost food.c. Use correct cooking time, power level.d. Turn or stir food. |
| Overcooked foods | Cooking time, power level is not suitable. | Use correct cooking time, power level. |
| Undercooked foods | a. Materials to be avoided in microwave oven were used.b. Food is not defrosted completely.c. Oven ventilation ports are restricted.d. Cooking time, power level is not suitable. | a. Use microwave-safe cookware only.b. Completely defrost food.c. Check to see that oven ventilation ports are not restricted.d. Use correct cooking time, power level. |
| Improper defrosting | a. Materials to be avoided in microwave oven were used.b. Cooking time, power level is not suitable.c. Food is not turned or stirred. | a. Use microwave-safe cookware only.b. Use correct cooking time, power level.c. Turn or stir food. |
Danby ^® Designer
LIMITED APPLIANCE WARRANTY
This quality product is warranted to be free from manufacturer's defects in material and workmanship, provided that the unit is used under the normal operating conditions intended by the manufacturer.
This warranty is available only to the person to whom the unit was originally sold by Danby Products Limited (Canada) or Danby Products Inc. (U.S.A.) (hereafter "Danby") or by an authorized distributor of Danby, and is non-transferable.
TERMS OF WARRANTY
Plastic parts, are warranted for thirty (30) days only from purchase date, with no extensions provided.
First 18 Months
During the first eighteen (18) months, any functional parts of this product found to be defective, will be repaired or replaced, at warrantor's option, at no charge to the ORIGINAL purchaser.
To obtain Service
It will be the consumer's responsibility to transport the appliance (at their own expense) to the original retailer (point of purchase) or a service depot for repair. Contact your dealer from whom your unit was purchased, or contact your nearest authorized Danby service depot, where service must be performed by a qualified service technician.
If service is performed on the unit by anyone other than an authorized service depot, or the unit is used for commercial application, all obligations of Danby under this warranty shall be void.
Nothing within this warranty shall imply that Danby will be responsible or liable for any spoilage or damage to food or other contents of this appliance, whether due to any defect of the appliance, or its use, whether proper or improper.
EXCLUSIONS
Save as herein provided, Danby, there are no other warranties, conditions, representations or guarantees, express or implied, made or intended by Danby or its authorized distributors and all other warranties, conditions, representations or guarantees, including any warranties, conditions, representations or guarantees under any Sale of Goods Act or like legislation or statute is hereby expressly excluded. Save as herein provided, Danby shall not be responsible for any damages to persons or property, including the unit itself, howsoever caused or any consequential damages arising from the malfunction of the unit and by the purchase of the unit, the purchaser does hereby agree to indemnify and hold harmless Danby from any claim for damages to persons or property caused by the unit.
GENERAL PROVISIONS
No warranty or insurance herein contained or set out shall apply when damage or repair is caused by any of the following:
1) Power failure.
2) Damage in transit or when moving the appliance.
3) Improper power supply such as low voltage, defective house wiring or inadequate fuses.
4) Accident, alteration, abuse or misuse of the appliance such as inadequate air circulation in the room or abnormal operating conditions (extremely high or low room temperature).
5) Use for commercial or industrial purposes (ie. If the appliance is not installed in a domestic residence).
6) Fire, water damage, theft, war, riot, hostility, acts of God such as hurricanes, floods etc.
7) Service calls resulting in customer education.
8) Improper Installation (ie. Building-in of a free standing appliance or using an appliance outdoors that is not approved for outdoor application).
Proof of purchase date will be required for warranty claims; so, please retain bill of sale. In the event warranty service is required, present this document to our AUTHORIZED SERVICE DEPOT.
BIENVENUE
CONSERVEZ CES INSTRUCTIONS!
INFORMATION DE SÉCURITÉ IMPORTANTES
WARNING:
CONSERVEZ CES INSTRUCTIONS!
REMARQUES PARTICULIÈRES CONCERNANT LA CUISSON MICRO-ONDE
FORMATION D'ÉTINCELLES
CONSERVEZ CES INSTRUCTIONS!
REMARQUES PARTICULIÈRES CONCERNANT LA CUISSON MICRO-ONDE
USTENSILES DE CUISSON POUR MICRO-ONDES
text_image
Diagram of a microwave oven with numbered parts for identification and assembly reference.COMMANDES
Danby Products Limited
PO Box 1778, Guelph, Ontario, Canada N1H 6Z9
Telephone: (519) 837-0920 FAX: (519) 837-0449
1-800-263-2629
Danby Products Inc.
PO Box 669, Findlay, Ohio, U.S.A. 45840
Telephone: (419) 425-8627 FAX: (419) 425-8629
04/09
natural_image
Line drawing of a microwave oven with front and back panels (no text or symbols)MICROWAVE OVEN
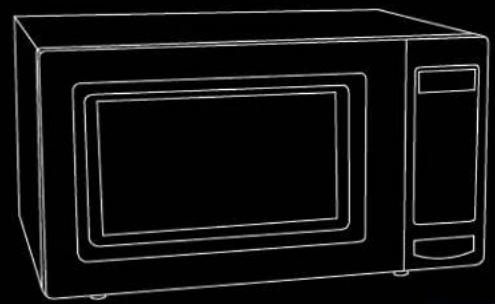
Model•Modèle
DMW077BLSDD
Microwave Oven
The model number can be found on the serial plate located on the back panel of the unit.
All repair parts are available for purchase or special order when you visit your nearest service depot. To request service and/or the location of the service depot nearest you, call the TOLL FREE number.
When requesting service or ordering parts, always provide the following information:
- Product Type
- Model Number
- Part Description
Four à micro-ondes
natural_image
Simple black-and-white icon of a telephone handset inside a circle (no text or symbols)Tel: 1-800-26-Danby
(1-800-263-2629)