
MAG689RVS - Microwave Oven Pelgrim - Free user manual and instructions
Find the device manual for free MAG689RVS Pelgrim in PDF.

| Product type | Combination microwave oven |
| Brand | Pelgrim |
| Model | MAG689RVS |
| Power supply | 220-240 V ~, single-phase, 16 A, cable 3×1.5 mm² |
| Microwave power | 1000 W (10 levels: 100-1000 W) |
| Grill power | 3 levels (low, medium, high) |
| Hot air temperature | 50 °C to 250 °C (in 10 °C steps) |
| Cooking functions | Microwave only, grill only, grill + microwave, grill + hot air, hot air only, hot air + microwave |
| Automatic programs | Defrost (4 modes), Pizza, Pork, Beef, Poultry, Fish, Vegetables (fresh and frozen) |
| Special functions | Reheating and keep warm, express program, timer, child lock, turntable stop |
| Included accessories | Glass turntable, support with drive shaft, wheels, metal rack, 2 side racks (3 insertion levels) |
| Oven capacity | Approx. 40 L (estimate) |
| Dimensions (W × H × D) | 595 × 455 × 560 mm (standard built-in estimate) |
| Net weight | Approx. 35 kg (estimate) |
| Safety | Child lock, automatic stop when door opens, overheating protection |
| Care and cleaning | Clean with damp sponge and mild soap; do not use steam cleaner; grill element can be lowered for cleaning |
| Spare parts and repairability | Turntable, support, rack, side racks available; power cable replaceable by a professional |
| General information | User manual available in several languages (FR, DE, EN, NL); manufacturer: Pelgrim |
Frequently Asked Questions - MAG689RVS Pelgrim
User questions about MAG689RVS Pelgrim
0 question about this device. Answer the ones you know or ask your own.
Ask a new question about this device
Download the instructions for your Microwave Oven in PDF format for free! Find your manual MAG689RVS - Pelgrim and take your electronic device back in hand. On this page are published all the documents necessary for the use of your device. MAG689RVS by Pelgrim.
USER MANUAL MAG689RVS Pelgrim
Manual combi-microwave oven
MAG 689RVS
natural_image
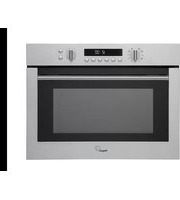
Modern stainless steel oven with digital display and control knobs (no visible text or symbols)
natural_image
Blank white image with a subtle gradient transition from light to dark gray (no text or symbols)BESTEMD VOOR DE GEBRUIKER
Functioneringsprincipe 3
Milieubescherming 3
natural_image
Diagram of a chicken on a plate with directional arrows indicating movement or force, labeled Fig. 01 (no text or symbols on the diagram itself)Waarschuwing:
natural_image
Technical diagram showing a circular component with mounting holes and a mechanical housing assembly (no text or symbols)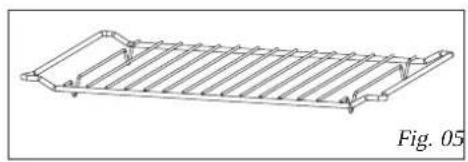
natural_image
Technical line drawing of a metal truss structure (no text or symbols)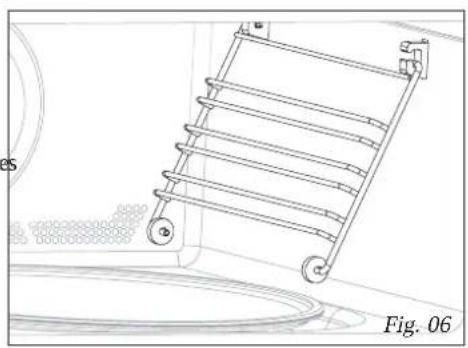
natural_image
Technical line drawing of a mechanical rack system with a circular component and labeled part (no text or symbols on the diagram itself)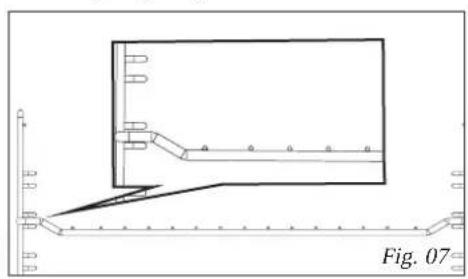
natural_image
Technical diagram showing a structural component with a highlighted section and scale bar, labeled Fig. 07 (no readable text or symbols)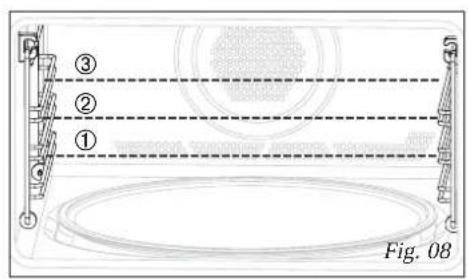
de bediening


natural_image
Technical line drawing of a mechanical assembly with no visible text or symbols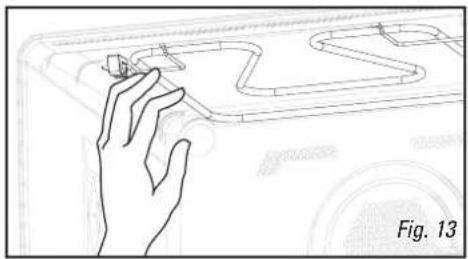
natural_image
Line drawing of a hand interacting with a car interior (no text or symbols)natural_image
Diagram of a roasted chicken on a plate with directional arrows, no text or symbols present
Attention :
natural_image
Technical diagram showing a circular component with mounting holes and an internal mechanical housing, labeled Fig.04 (no text or symbols on the diagram itself)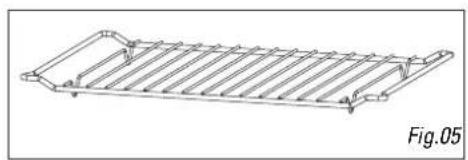
natural_image
Technical line drawing of a rectangular metal grate or rack structure (no text or symbols)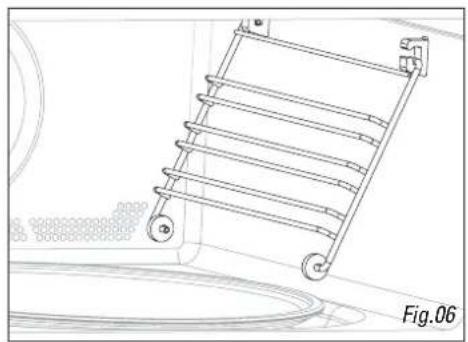
natural_image
Technical line drawing of a rack-mounted device with wheels and a circular base, labeled Fig.06 (no text or symbols on the diagram itself)
natural_image
Technical diagram showing a mechanical assembly with a bracket and mounting points, labeled Fig.07 (no text or symbols on the diagram itself)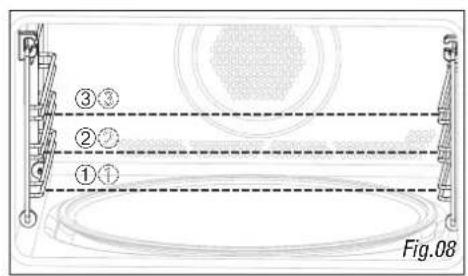
bandeau de commande


Programmation express
natural_image
Technical line drawing of a mechanical assembly or tool with no visible text or symbols
natural_image
Hand interacting with a small object on a device panel (no visible text or symbols)natural_image
Diagram of a chicken on a plate with arrows indicating motion or force, labeled 'Abb. 1' (no text or symbols on the diagram itself)Achtung:
natural_image
Technical diagram showing a circular component with internal components and an exploded view of a mechanical housing (no text or symbols)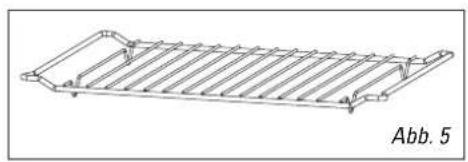
natural_image
Technical line drawing of a metal grate or rack structure (no text or symbols)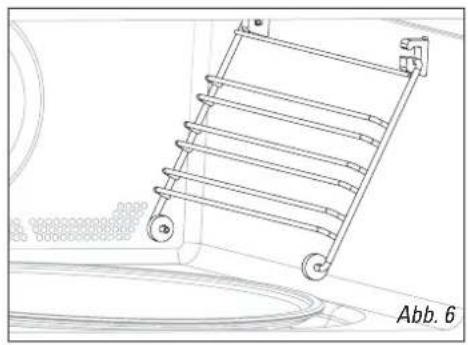
natural_image
Technical line drawing of a ladder-mounted rack with wheels, mounted on a surface (no text or symbols)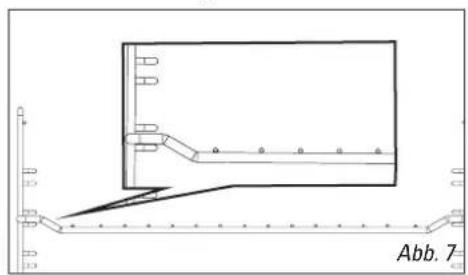
Das Bedienfeld

natural_image
Technical line drawing of a mechanical or electrical component with no visible text or symbols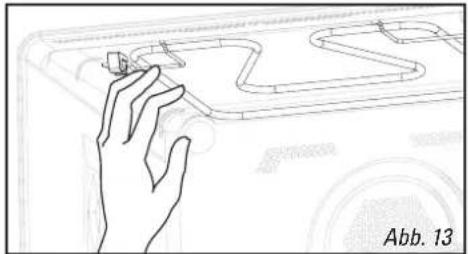
natural_image
Line drawing of a hand touching a car's side panel with no visible text or symbolsOperating principle 84
Environmental protection 84
Safety instructions 85
INSTALLATION
Before connecting 86
Electrical connection 86
Building-in 87
DESCRIPTION
The appliance 88
Accessories 89
The control panel 90
The function selector knob / the display 91
The display 91
USE
How to set / change the time 92
Stop turntable option 92
Programming 93
Using the power levels 93
Microwave function 94
Express programme 94
Heat & Hold function 94
Reheating on 2 levels 95
Automatic cook functions 95
Guide to automatic functions 96
Defrosting 98
The automatic defrost function 99
Grill functions 100
Guide to cooking using the Grill function 100
Grill + Microwave function 101
Guide to cooking using the Grill + Microwave function 101
Fan Grill function 102
Guide to cooking using the Fan Grill function 102
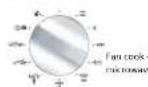
Fan cooking function 103
Guide to cooking using the Fan cooking function 104
Fan cooking + Microwave function 105
Guide to cooking using the Fan cooking + Microwave function ..... 106
Child lock 106
Timer 106
CARE AND CLEANING 107
FAULTS 108
OPERATING PROFICIENCY TESTING 109
You have chosen a Pelgrim combi-microwave oven. Optimum ease of use and simple operation were the most important factors in the development of this product.
The combi-microwave oven combines the characteristics of a microwave oven with those of a traditional oven.
The extensive range of settings available enables you to select the exact method of cooking that you have in mind. The design ensures easy to use controls.
The functions are arranged conveniently on the control panel. The display provides information and helps you choose the settings.
operating principle
The microwaves used for cooking are electromagnetic waves. They are found naturally in our environment as radio-electric waves, light or infra-red radiation.
Their frequency is located in the 2450 MHz band. Their properties:
•They are reflected by metals.
• They can pass through all other materials.
•They are absorbed by molecules of water, fat and sugar.
When food is exposed to microwaves, the molecules are quickly shaken up, which causes heating.
The microwaves penetrate into the food to a depth of around 2.5 cm. If the food is thicker, it will be cooked to its core by heat conduction, as with traditional cooking.
It is important to know that microwaves cause a simple thermal reaction inside the food, and that they are not harmful.
environmental protection
This appliance's packaging material is recyclable. Help recycle it and protect the environment by dropping it off in the municipal receptacles provided for this purpose.

Your appliance also contains a great amount of recyclable material. It is marked with this label to indicate the used appliances that should not be mixed with other waste. This way, the appliance recycling organised by your manufacturer will be done under the best possible conditions, in compliance with European Directive 2002/96/EC on Waste Electrical and Electronic Equipment. Contact your town hall or your retailer for the used appliance collection points closest to your home. We thank you for doing your part to protect the environment.
natural_image
Diagram of a chicken on a plate with directional arrows indicating movement or force, labeled Fig.01 (no text or symbols on the diagram itself)Warning:
Keep this user guide with your appliance. If the appliance is ever sold or transferred to another person, ensure that the new owner receives the user guide. Please become familiar with these recommendations before installing and using your oven. They were written for your safety and the safety of others.
safety instructions
Your appliance is intended exclusively for domestic use for cooking, reheating and defrosting food. The manufacturer declines all responsibility in the event of improper use.
Check that utensils are suitable for use in a microwave oven.
To avoid damage to your appliance, never operate it when empty or without the turntable.
Do not tamper with the holes of the front lock, as this could damage your appliance and result in the need for repair.
The seal and the frame of the door must be inspected regularly to ensure that they are not damaged. If these areas become damaged, stop using the appliance and have it checked by a specialised technician.
When heating food in plastic or paper containers, keep an eye on the oven due to the risk of fire.
When using the microwave and fan cooking + microwave function, you should avoid using metal containers, forks, spoons, knives or metal fasteners or staples for freezer bags.
The contents of bottles or jars for babies must be stirred or shaken and the temperature must be checked before use, in order to avoid burns. Never heat a bottle with the teat (risk of explosion).
Never allow children to use the oven without supervision, except when appropriate instructions have been given so that the child can use the oven safely and understand the dangers of improper use.
Always use oven gloves to remove dishes from the oven. Certain dishes absorb heat from the food and can become very hot.
Liquids or other foods must not be heated in closed containers as they may explode.
You should avoid heating eggs in their shell and whole hard-boiled eggs in a microwave oven as they may explode, even after cooking has finished.
When drinks are heated by microwave, boiling liquid may suddenly spurt even after heating, precautions must therefore be taken when handling the container.
When cooking small quantities (e.g. 1 sausage, 1 croissant, etc.), place a glass of water next to the food.
Cooking for too long can dry out food and burn it. To avoid this type of incident, never use the same cooking time as recommended for a traditional oven.
If smoke appears, stop or unplug the oven and keep the door closed to smother any flames.
before connecting
Warning:
Check that your appliance has not been damaged during transport (damage to door or seal, etc.). If you notice any damage, contact your retailer before using the appliance.
electrical connection
Check that:
- the electrical installation has sufficient voltage.
- the supply cables are in good condition
- the diameter of the wires complies with the installation requirements.
- your equipment has a protection of at least 16 amps.
If in doubt, contact your electrician.
The electrical connections should be made before the appliance is installed in its housing.
Electrical safety must be ensured through proper installation in the housing. During installation and maintenance operations, the appliance must be unplugged from the electrical grid; fuses must be cut off or removed.
The appliance must be connected using a (standardised) feeder cable with 3 conductors of 1.5mm^2 (1 live + 1N + ground) which must be connected to the 220-240 V \~ monophase network using a CEI 60083-standardised 1 live + 1N + ground electrical outlet or one which complies with installation requirements. The protection cable (green-yellow) is connected to the appliance's terminal and must be connected to the appliance's ground.
In order to easily locate the reference information for your appliance, we recommend that you note these data on the "After-Sales Service" page.
If the connection is made with a plug, it must remain accessible after the appliance has been installed.
The oven's neutral (blue cable) must be connected to the network's neutral.
Ensure your electrical installation has a system accessible to the user which can cut off the appliance from the power grid, with a contact opening of at least 3 mm for all the terminals.
If the supply cable is damaged, it must be replaced by the manufacturer, its after-sales service or any other similarly qualified person to avoid any danger.
Warning:
We cannot be held responsible for any accident resulting from an inexistent, defective or incorrect ground lead.
If the oven presents any irregularity, unplug the appliance or remove the relevant fuse at the oven's connection lead-in.
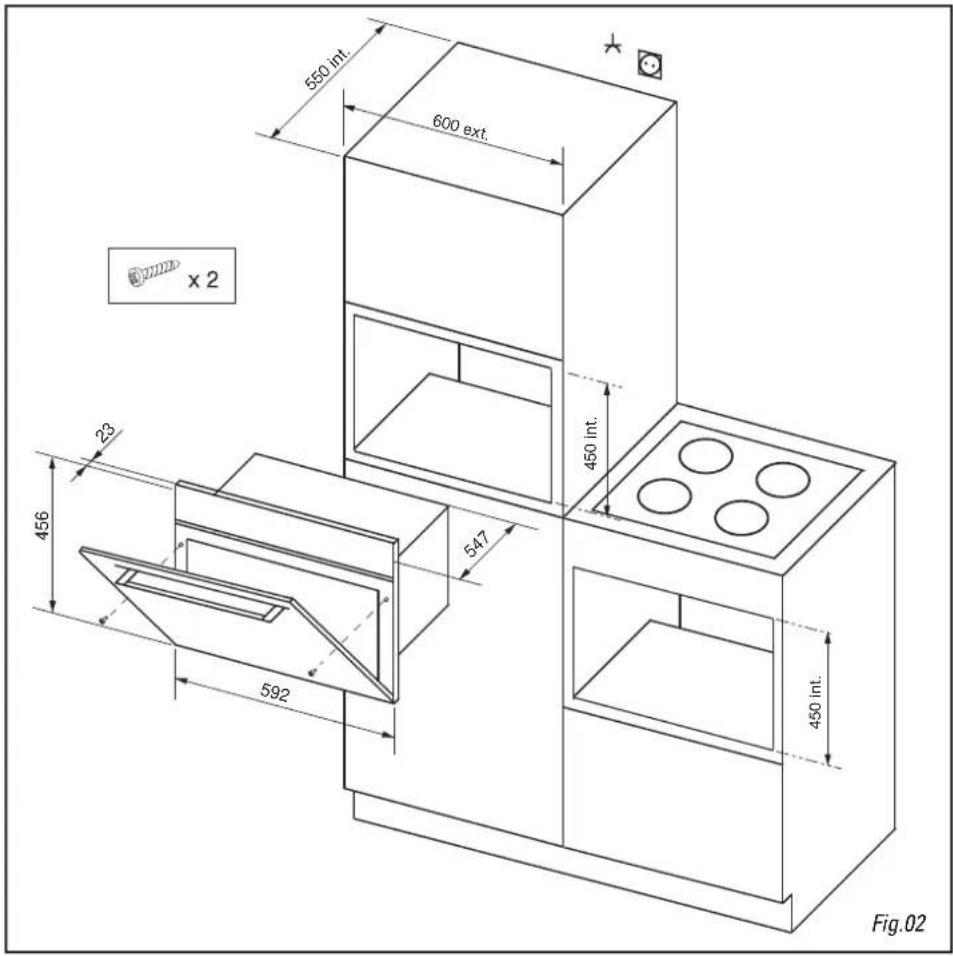
building-in
The appliance may be installed beneath a work surface or in column housing (open or closed) which has the required built-in measurements (Fig.02).
Do not use your appliance immediately (wait 1 or 2 hours) after moving it from a cold to a warm place as condensation may cause a malfunction.
the appliance
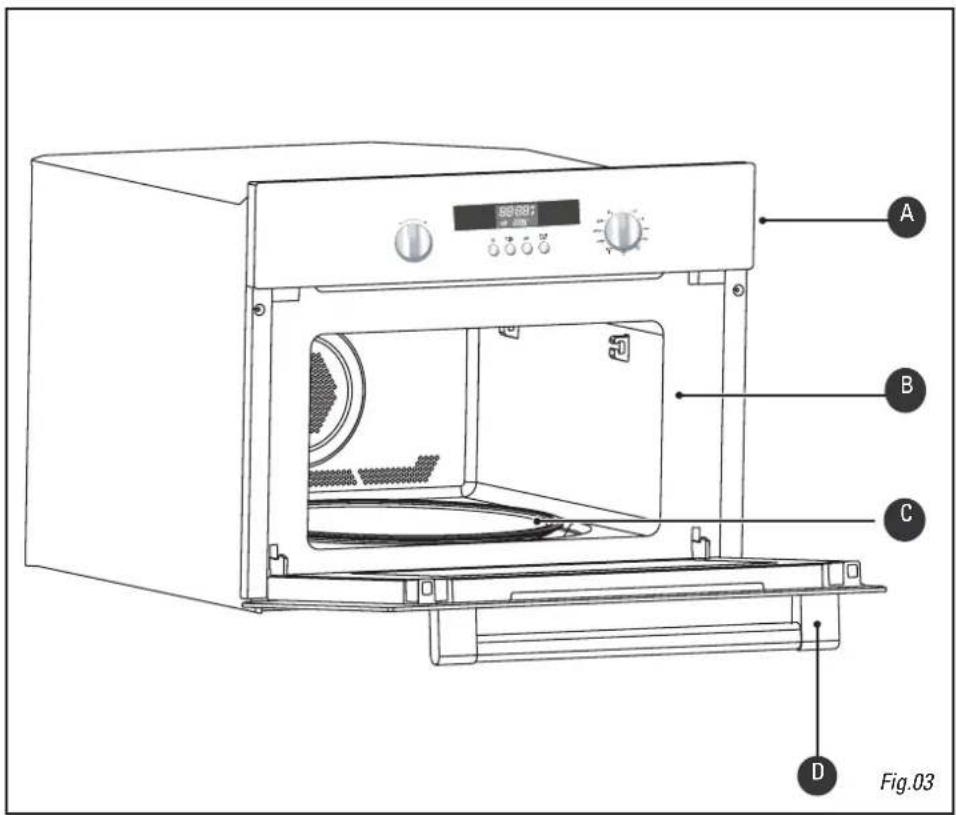
A Control panel
B Cavity
C Turntable
D Door handle
accessories
The turntable: cooks food uniformly with no need for handling.
It revolves in both directions. If it does not revolve, check that all elements are correctly positioned.
Do not attempt to turn it manually, as you may damage the drive system.
It may also be used as a cooking dish.
To remove, grasp it using the access areas provided inside the cavity.
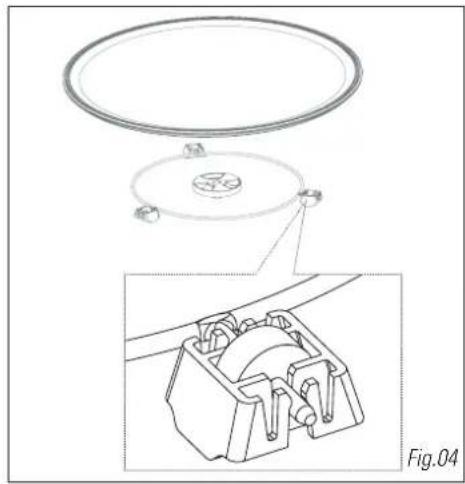
The driver: causes the glass turntable to turn (Fig.04).
The base rollers: Rollers must be positioned in the right direction (Fig.04).
If they are not rotating properly, check for foreign bodies under the rollers.
The grill (Fig.05): may be used to toast, brown or grill. The grill must under no circumstances be used with other metal containers in the microwave, grill + microwave or fan cooking + microwave functions. You may, however, heat food in an aluminium tray by using a plate to separate it from the grill.
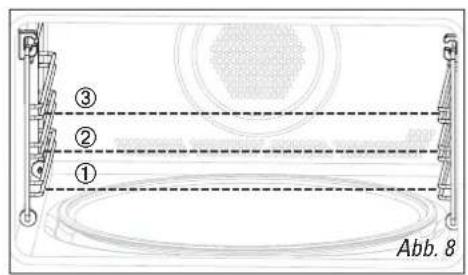
The side grills (Fig.06): 2 shelves with hooks allow you to use the accessories on 3 levels.
The 3 insertion levels are available according to the type of cooking and type of food (Fig.07/08). In the Grill or Grill + Microwave functions you use the grill at the 1st level for thick foods such as roasts, and at the 3rd level for less thick foods such as chops or sausages.
In the Fan cooking or Fan cooking + Microwave functions, you may insert the grill at level 1 or 2 depending on the dish to be cooked.
natural_image
Technical diagram showing a circular component with internal components and an exploded view of a mechanical assembly (no text or symbols)
natural_image
Technical line drawing of a metal grate plate with slots and mounting brackets (no text or symbols)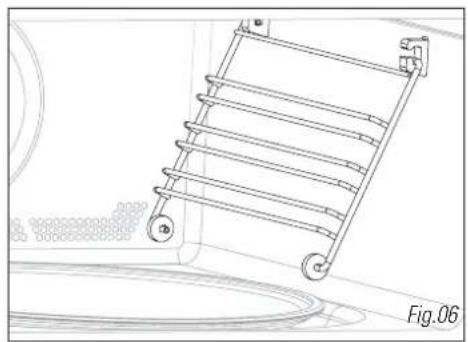
natural_image
Technical line drawing of a ladder mounted on a wall, showing structural components (no text or symbols)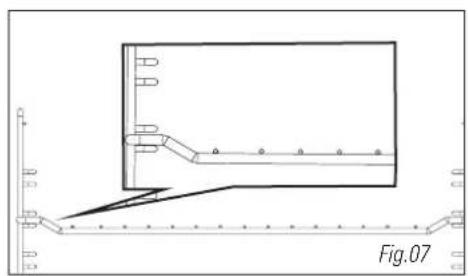
natural_image
Technical diagram showing a mechanical assembly with a bracket and mounting points, labeled Fig.07 (no text or symbols on the diagram itself)
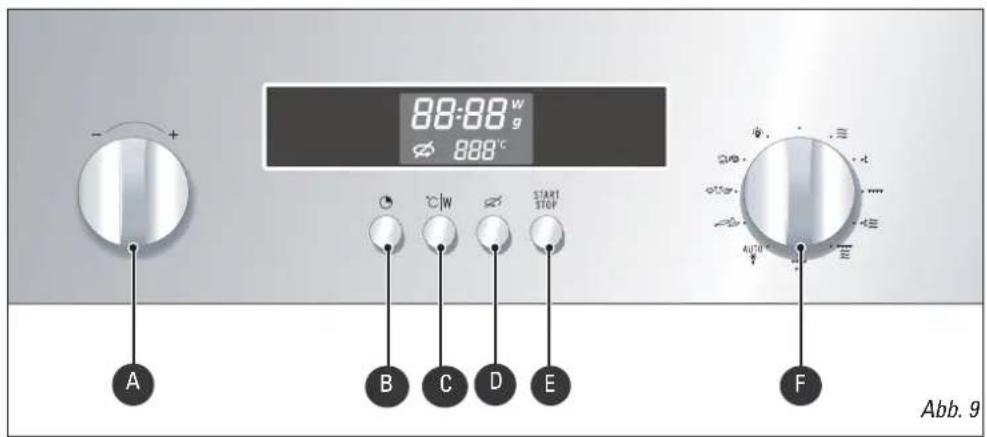
the control panel
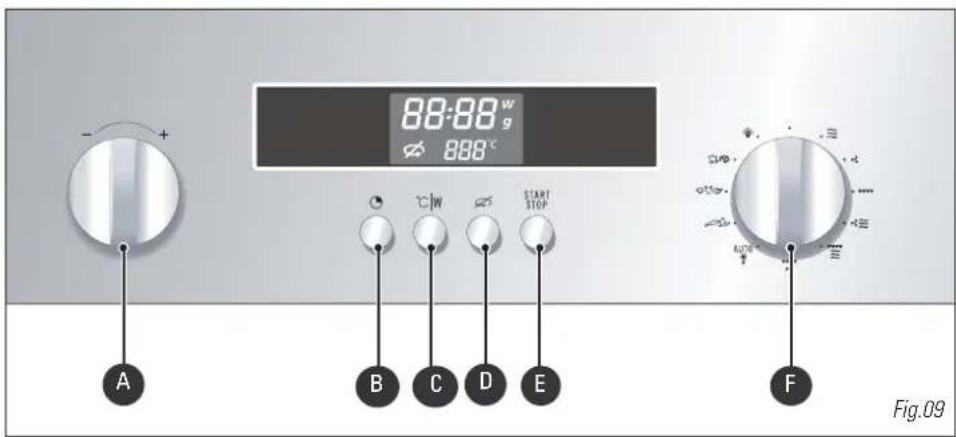


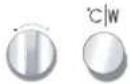
A The - / + selector knob allows you to select the time, the programme length, the power levels, the food category, the food portion's weight, as well as the temperature for a fan cooking programme.
B The CLOCK key allows you to set the time.
C The °C/W key allows you to validate your selections.
D The TURNTABLE STOP key stops the turntable from revolving in order to use platters which require the entire oven space.
E The START/STOP key lets you begin a programme, interrupt or cancel a programme in progress.
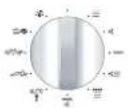
F The FUNCTION/AUTO PROGRAMME selector knob allows you to choose the type of programme, as well as the automatic function and food category.
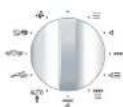
the function / auto programme selector knob

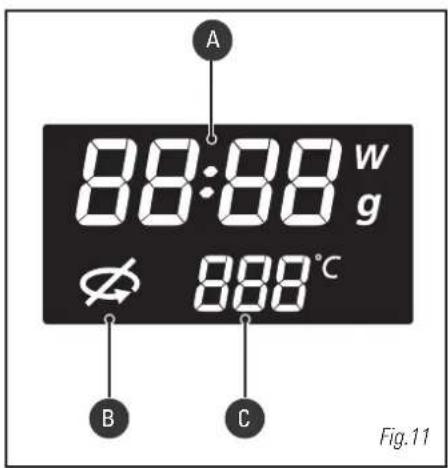
the display
The display guides you in programming the various settings:
A Clocktime
Programme time
Microwave power level (Watts)
Food weight (grams)
B Stop turntable
C Fan Cook temperature
Grill level
Auto programmes
how to set / change the time
After connecting your appliance or after a prolonged power failure, 00:00 flashes in the display.
| To set the clock | Display | |
 | Turn the selector to set the time, ex. 6:30. |  |
 | Confirm by pressing the CLOCK key or START.A beep confirms that your clock is set. |  |
| When there is a time change | Display | |
 | Press the CLOCK key. The time display flashes. |  |
 | Programme the new time (ex. 7:30) by turning the selector. | |
 | Confirm by pressing the CLOCK key or START.A beep confirms that your clock is set to the new time. |  |
Comments: If you do not press the clock key, the time displayed is automatically recorded after one minute.
Your appliance is equipped with a back-up so that during a power failure the time remains displayed for a day.

To dim the display, press the clock key for 5 seconds. Only the backlight will remain lit. Press again for 5 seconds to light the display up again.

stop turntable option
If there is insufficient space for the dish to turn freely inside the oven, set the STOP TURNTABLE function before or during the programme.
Note: it is not possible to stop the turntable during an automatic defrost programme.
To set:

Press the STOP TURNTABLE key, the ∅ symbol lights up and the turntable stops.
To cancel:
To cancel the function, follow the same procedure. It is necessary to turn the container or stir the contents halfway through the programme when the STOP TURNTABLE function is set.
programming
Your appliance is now connected and displays the correct time.
Open the door using the handle. Place the food in the appliance and close the door.
If the door is not closed properly the appliance will not function.


If the door is opened during operation, the programme is not cancelled but simply interrupted. To start the oven again, close the door and press the START key.
If no action is taken within 1 minute after programming, 3 beeps invite you to start up or modify the programme. With no further instruction, after another minute and a reminder beep, the settings are cancelled and the clocktime is displayed again.
Press the START/STOP key with the door closed to interrupt a programme.
Press the START/STOP key for 2 seconds to cancel a programme, or turn the selector to the OFF position.
If you wish to verify your microwave power level, you may press °C/W to check the display.
In order to set a second programme once the first has ended, open the door and shut it again.
Three beeps signal the end of each programme; the clocktime is displayed again.
If the door is left open, the light shuts off after 3 minutes. You may light up your oven by turning the selector knob to the ⚙ position.
In order to evacuate moisture, your appliance is fitted with a delayed ventilation function. Depending on the applied cooking mode (solo / grill / combination), the oven ventilation will continue to operate after the end of the programme. It will switch off automatically.


using the power levels
| Power level Use | |
| 1000 W / 900 W | Rapidly heating drinks, water, dishes containing a lot of liquid. Cooking foods containing a lot of water (soups, sauces, tomatoes, etc.). |
| 800 W / 700 W | Cooking fresh or frozen vegetables. |
| 600 W | Melting chocolate. |
| 500 W | Cooking fish and shellfish. Reheating on 2 levels. Simmering pulses. Heating or cooking delicate egg-based foods. |
| 400 W / 300 W | Simmering dairy products, jams. |
| 200 W | Manual defrosting. Softening butter, ice cream. |
| 100 W | Defrosting pastries containing cream. |
MICROWAVE OUTPUT POWER: 1000 W
microwave function

Programming by power
 | Turn the selector knob to select the microwave function. The maximum power level, 1000W, flashes in the display. | 10:00w |
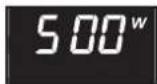
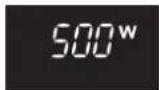
 | Turn the “- / +” selector if you wish to set a lower microwave power level, ex. 500W. Confirm the power level by pressing the °C/W button, the time digits flash in the display. | 5:00w |
 | Turn the “- / +” selector to set the required programme time, ex. 10 minutes. | 00:00 |
 | Confirm by pressing START. The light switches on and the programme starts. | 10:00 |

Comments:
If the door is opened during cooking, the appliance stops and the remaining time flashes in the display. To finish the programme, simply close the door and press START.

The time can be adjusted at any time simply by turning the “-/+” selector.
If you wish to verify your microwave power level, you may press °C/W to check the display.
express programme
| Express Programming | Display | |
 | With the selector at the OFF position, press the START key for one second to set an express programme of 30 seconds. The microwave functions at maximum power level (1000W). The light switches on and the programme starts. | 00:30 |
| [YSZT] | You may set an express programme up to 2 min 30 s. Each time you press START an additional 30 seconds of programme time is added. Press 5 times for a maximum of 2 min 30s.Once the programme has begun, you may modify the programme time by turning the - / + selector knob, up to 2 min 30s. | 02:30 |
heat & hold function
| Heat and hold | Display |
| If you leave your dish in the oven without opening the door at the end of a microwave programme, a heat and hold function starts up after 2 minutes to maintain the temperature of your dish. A triple beep after 15 min announces the end of the heat and hold programme. |
reheating on 2 levels
For best results heating up 2 dishes at the same time, programme the microwave function at the 500 watt setting and place one plate on the turntable and another on the grill at insertion level 3.

Recommendations:
Cover the plates with microwave-safe cling film or another plate turned upside down. The times indicated below are based on heating of refrigerated dishes, or canned goods at room temperature.
| Type of food | Quantity | Time |
| Homogeneous foods such as purees, peas, celery, etc. | 2 x 200 g plates | 4 - 6 min |
| Mixed consistency dish such as cassoulet, stews, ravioli, etc. | 2 x 300 g plates | 6 - 8 min |
automatic cook functions
With the automatic cooking functions, the time and function are programmed automatically according to the type of food and its weight. The following auto cook positions are available with the selector knob.

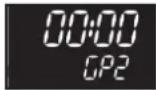
Fresh, ready-made dishes: For fresh, ready-made dishes, select programme setting CC.

Pizza: 2 choices are available for automatic cook programming for pizza, both designed for use with the Pelgrim pizza dish. Setting P1 is for fresh pizza, setting P2 for frozen pizza. Setting 1 proposes a 12 minute programme, which corresponds to the cooktime for a pizza of the size of the pizza dish. You may modify the programme time if you wish. Setting 2, for frozen pizzas, is based on the weight of the pizza. After selecting P2, follow the same procedure as for other types of food, entering the weight of the pizza. The automatically programmed time may not be modified.

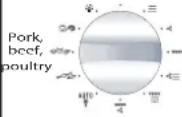
Pork, Beef, Poultry: You have the choice between 3 automatic programmes.
setting FP for fresh pork
setting FB for fresh beef
setting F C for fresh poultry

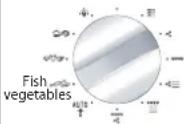
Fish: For fish, select programme setting FF...
Vegetables:
You have the choice between 3 automatic programmes for cooking vegetables.
settings U1 and U2 are to be used for cooking fresh vegetables.
setting U3 is for frozen vegetables (see the AUTOMATIC COOKING GUIDE for details).
Programming the automatic cooking time according to weight
Display

Turn the selector knob to select the type of food you wish to cook, ex. fish.

°C|w

START STOP

Turn the “-/+” selector until F appears in the display. Confirm your choice of programme by pressing the °C/W button. The minimum weight (100g for fish) flashes in the display.
Turn the “- / +” selector to set the weight, ex. 150g. Confirm by pressing START.
The appropriate programme time is automatically calculated. It appears in the display and the programme begins.


guide to automatic functions
Ready-made dishes,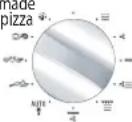  Fresh, ready-made dishes Fresh, ready-made dishes | This function (C) is used for heating refrigerated, ready-made meals (lasagna, potato gratin, cottage pie, fish gratin, etc.) weighing 100 g - 1000 g.The dishes are heated with the microwave function.Remove the product from its packaging and place it in a microwave-safe, heatproof dish of comparable size. For best results, cover with microwave-safe cling film, the special microwave plate cover or another plate turned upside down.Place the dish on the turntable. Let the dish rest a couple of minutes before serving, to ensure even heat distribution. |
Ready-made dishes,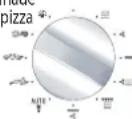  Fresh pizza PP Frozen pizza PP Fresh pizza PP Frozen pizza PP | A special PIZZA DISH designed for use in your PELGRIM microwave oven is available from your Pelgrim appliance dealer (request reference MS124).Select category P1 for cooking and browning fresh pizza in the pizza dish.Select pizza with the auto cook programme, setting 1, and adjust programme time if desired.The pizza is cooked with the microwave and grill function.Always place the pizza dish directly on the turntable.Select category P2 for cooking and browning frozen pizzas weighing 125 g - 650g. For use with the special pizza dish, programming the weight.Always place the pizza dish directly on the turntable. |
Pork, beef, poultry Pork Pork Beef Beef | This function is used for roasts weighing 500 g - 2000 g.Select category FP for cooking and browning pork roasts.Select category FB for cooking and browning beef roasts.Cooking is in the combined microwave + fan and microwave + grill functions.Use a microwave-safe and heatproof dish, preferably made of earthenware (less splashing than with glass).Whenever possible, cook non-barded roasts to avoid grease splashes and smoke. The less thick they are, the better the results.Remove the meat from the refrigerator and leave it at room temperature for 1 hour before placing in the oven.Place the dish on the grill at insertion level 2.After cooking, let the roast sit wrapped in aluminium foil for 10 minutes. This helps the meat fibres to relax and the roast will be more tender. |
guide to automatic functions
 | This function (FF) is used for cooking and browning a whole chicken or chicken pieces (thighs) weighing 500 g - 2000 g.Chicken is cooked using the combined microwave + fan cooking function.Use a microwave-safe and heatproof dish, preferably made of earthenware (less splashing than with glass).Before cooking; pierce the skin to avoid spitting.Rub oil, salt and pepper on the chicken, dust it with spices if desired.Whole chicken: place the dish on the grill at level 1.Chicken thighs: up to 900 g, place the dish on the grill at level 2.When cooked, let the chicken stand for 5 minutes in the oven before serving. |
 Poultry Poultry | |
 | This function (F) is used for cooking fish weighing 100 g - 1000 g.All types of fish are suitable for microwave cooking. Simply ensure that the fish is fresh.The food is cooked using the microwave function.You may cook the fish whole, in slices or in fillets. If cooked whole, for best results score the thickest part.Arrange the fish in a round or oval dish, suitable for the microwave, add 2 to 3 tablespoons of water, lemon juice or white wine and cover with the dish lid or cling film, season when cooked.Place the dish on the turntable.Halfway through the programme, a beep sounds and “Buccines in the display as a reminder to turn the fish over for best results. |
Fish | |
 | This function is used for cooking vegetables weighing 100 g - 1,000 g.The vegetables are cooked with the microwave function.Choose fresh vegetables and add before cooking:- up to 200 g: 2 tablespoons of water- up to 500 g: 1/2 dl of water- up to 1,000 g: 1 dl of waterUse a dish suitable for the volume of vegetables and cover (except when cooking mushrooms).Place the dish on the glass turntable.Halfway through the programme, a beep reminds you to stir the vegetables, and “Buccines in the display. Add shortening and seasoning as desired.After cooking, let the vegetables sit for a few minutes before serving.Select category U1 to cook tougher, more fibrous vegetables:Brussels sprouts, grated white cabbage, sliced carrots, cubed celeriac, etc.Select category U1 to cook softer vegetables that contain more water:Sliced or cubed courgettes, finely sliced leeks, whole sliced potatoes of even size, stripped spinach, fennel, florets of cauliflower or broccoli, etc.Select category U1 to cook frozen vegetables:Sliced carrots, florets of cauliflower or broccoli, Brussels sprouts, finely sliced leeks, sliced or cubed courgettes, stripped spinach. |
 VegetablesFresh U1U2FrozenU3 VegetablesFresh U1U2FrozenU3 |
defrosting
Defrosting frozen foods in your microwave oven saves you considerable time. To defrost food, use the AUTOMATIC DEFROST function AUTO or the MICROWAVE function, power level 200W.
What you need to know:
Small pieces of meat or fish may be cooked immediately after defrosting. Large pieces such as meat roasts or whole fish will remain slightly frozen at the end of the defrost programme. We recommend leaving them to stand for a period at least equal to the defrosting time in order to obtain a uniform temperature.
Food covered with ice crystals will take longer to defrost. In this case, you will need to increase the defrosting time.
Recommendations:
Defrosting time varies according to the type of appliance. It also depends on the shape, size, initial temperature and quality of the food.
Most foods need to be removed from their packaging. Remember to remove metal fasteners from packaging.
Halfway through defrosting, the pieces must be turned, mixed or broken apart if they are frozen together.
If you are defrosting large pieces of meat or fish which prevent the turntable from revolving, use the stop turntable function. In this case, turn the food regularly.
Defrost meat and fish on an upside down saucer on top of another plate so that the juice runs off. If it remains in contact with the food, it will cause it to overheat.
Never refreeze uncooked food.
\* Defrost programme times:
The lengths of the defrost programmes are calculated for foods frozen at -18^ C. They give you an idea of the necessary defrost time, however actual time may vary according to the thickness, shape, size and packaging of the food.
Programming choices:
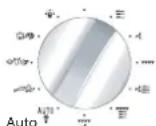
defrost
Auto defrost programmes are available as follows:
d 1 corresponds to 200W, defrost power level
Select d1 if you wish to defrost any food/quantity that is not proposed in d2, d3, or d4. Programme the defrost time you wish.
You may refer to the chart which follows for suggested defrost times.
d 2 defrosting meat, poultry, fish, vegetables
d 3 defrosting bread
d 4 defrosting ready-made dishes
the automatic defrost function

Select the type and amount of food you wish to defrost and the automatic function will programme the appropriate defrosting time.
Automatic defrosting
 | Turn the selector knob to the auto defrost position and d1 appears in the display. | d1 | |
 |  | Turn the -/+ selector knob to select d2 / d3 / d4, ex. d2. Confirm by pressing °C/W. | 100gd2 |
 | For defrost program d1, the time digits flash in the dis-play.For d2 / d3 / d4 defrost programmes, 100 g (the minimum defrosting weight) appears in the display. | 700gd2 | |
 | Turn the -/+ selector knob to set the time (d1) or weight (d2 / d3 / d4), ex. 700g. Confirm by pressing START. | 12:55d2 | |
| The appropriate time is automatically calculated. The programme time appears in the display and the defrost programme begins. | |||

Comments:
Defrosting time is automatically calculated according to the weight of the food. It may vary depending on the initial temperature of the food (times are given for foods frozen at -18^ ).
Halfway through an automatic defrost programme of foods weighing over 350g (with the exception of bread), a beep reminds you to turn the food for better results, and "turn" is displayed. Close the door after turning the food and press START to continue the defrost programme.

Defrosting time cannot be changed when using the automatic defrost function.
To ensure even results, the STOP TURNTABLE function may not be used with the automatic defrost function.
For foods that do not appear in the suggested food categories, use the MICROWAVE function at the 200W power level or d 1. Refer to the indications below for approximate times.
| Food | Quantity | Time | Recommendations |
| Flaky or shortcrust pastry | 400 g | 1 - 3 min | Place on kitchen paper, turn midway |
| Scallops | 500 g | 5 - 7 min | Place on a plate, stir midway |
| Peeled prawns | 100 g | 1 - 2 min | “ “ |
| Whole pink prawns | 200 g | 2 - 4 min | “ “ |
| Langoustine /Gambas (10) | 500 g | 6 - 8 min | “ “ |
| StrawberriesRaspberries/sour cherriesGooseberries / blueberries / blackcurrants | 250 g | 7 - 9 min6 - 8 min5 - 7 min |
grill functions
This function is used for cooking and browning foods such as gratin dishes and meats. It may be used before or after cooking, according to the recipe.
Warning:
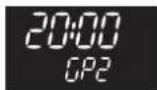
Accessible areas may become hot when the grill is used. Children should be kept away. If the appliance is operating in combined mode, we recommend that children be supervised by adults when using the oven due to the high temperatures. When using the grill, you must protect your hands when taking out dishes and use containers made from heatproof materials such as flameproof glass or china. There are 3 grill levels: low GRILL POWER (GP 1) / medium (GP 2) / high (GP 3). As a rule, you should use GRILL POWER 3 to grill meat and fish and GRILL POWER 1 or 2 with the MICROWAVE + GRILL FUNCTION for gratin dishes and browning more delicate dishes. Insert the grill according to the height of the container or the food.
Programming the GRILL function


Turn the selector knob to select the grill function. GP3 flashes, requesting you choose the desired grill level.
Turn the -/+ selector knob to set a lower grill level, ex. GP2. Confirm by pressing °C/W, the time digits flash in the display.


Turn the - / + selector knob to set the required grilling time, ex. 20 minutes.
Confirm by pressing START, the light switches on and the programme starts.
Display


Comment:
Grilling time may be changed at any time simply by turning the - / + selector.
guide to cooking using the high grill function

Place the food item on the grill and insert at level 3. Turn the food halfway through cooking.
| Food | Quantity | Time |
| Andouillettes, blood sausage, sausages (pierce with a fork) | 4 - 6 units | 22 - 30 min |
| Pork chops | 4 units | 27 - 32 min |
| Lamb cutlets | 4 units | 15 - 17 min |
| Rib roast | 800 g | 23 - 25 min |
| Side bacon | 4 - 6 slices | 18 - 25 min |
the grill & microwave function

This function lets you use the grill + microwave at the same time, which affords rapid cooking. You may combine any one of the three grill levels with any of the microwave levels up to 700W.
Programming the GRILL + MICROWAVE FUNCTION
Display
Turn the selector knob to the GRILL + MICROWAVE function. The power level 500W, flashes in the display, requesting you choose the desired microwave power level.


Turn the - / + selector knob to set a lower microwave power level, ex. 300W. Confirm by pressing °C/W, GP3 flashes, requesting you choose the desired grill level.


Turn the - / + selector knob to set a lower grill level, ex. GP2. Confirm by pressing °C/W, the time digits blink.


Turn the - / + selector knob to set the required combined microwave + grilling time, ex. 20 min.

Confirm by pressing START, the light switches on and the programme starts.

Comment:
The programme time may be changed at any time simply by turning the - / + selector knob. If you wish to verify your microwave power level, you may press °C/W to check the display.
guide to cooking using the grill & microwave function

Use a microwave-safe and heatproof dish, preferably made of earthenware (less splashing than with glass).
Place the food item in a dish on the grill at level 1, turn halfway through cooking.
Cook preferably non-barded roasts to avoid grease splashes and smoke.
Season when cooked, let the meat sit in aluminium foil for 10 minutes. This helps the meat fibres to relax and the roast will be more tender.
| Food Quantity Programming Time | ||
| Shoulder of lamb (boned and tied) 1800 g 200 W + GP3 40 - 45 min | ||
| Ribeye steak 800 g 200 W + GP3 18 - 23 min | ||
| Chicken, guinea fowl 1200 g 500 W + GP3 25 - 27 min | ||
| Turkey roast 800 g 300 W + GP3 27 - 32 min | ||
| Pork roast 1000 g 300 W + GP3 35 - 40 min | ||
| Veal roast 1200 g 300 W + GP2 50 - 55 min |
This function lets you use the Grill function + ventilation at the same time, which produces uniform cooking for thick food items.
The cooking temperature may be adjusted in 10^ C increments from 50^ C to 200^ C.
Programming the fan grill function
 | Turn the selector knob to select the FAN GRILL function. 200° flashes, requesting you choose the desired cooking temperature. | 200°C | ||
 |  | Turn the - / + selector knob to set the cook temperature of your choice, ex. 180°. Confirm by pressing °C/W, the time digits flash in the display. | 00:00180°C | |
 |  | Turn the - / + selector knob to set the required cook time, ex. 40 minutes. Confirm by pressing START, the light switches on and the programme begins. | 40:00180°C | |

Comments:
Cooking time may be changed at any time simply by turning the -/+ selector knob.
You may preheat your microwave oven in the same way you set a fan cook programme.
A beep sounds to indicate that the programmed temperature has been reached.
guide to cooking using the fan grill function

Place the food item in a dish on the grill at insertion level 1.
Turn the food halfway through cooking.
| Food | Quantity | Temperature | Time |
| Beef roast | 1000 g | 190°C | 36 - 38 min |
| Whole chicken | 1200 g | 180°C | 75 - 80 min |
| Pork roast | 1000 g | 170°C | 90 min |
The fan cooking function lets you cook and brown food as in a traditional oven.
Programming the FAN function
Display
 | Turn the selector knob to select the FAN COOKING function. 200° flashes in the display, requesting you choose the desired cooking temperature. | 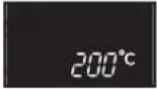 |
 | Turn the - / + selector knob to set the cook temperature of your choice, ex. 180°. Confirm by pressing °C/W, the time digits flash. | 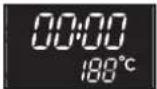 |
 | Turn the - / + selector knob to set the required cook time, ex. 40 minutes. |  |
 | Confirm by pressing START, the light switches on and the programme starts. |
Comments: Cooking tim
Cooking time may be changed at any time simply by turning the -/+ selector knob. You may preheat your microwave oven in the same way you set a fan cook programme. A beep sounds to indicate that the programmed temperature has been reached.
Recommendations: The cooking tempe
Cooking time may be set from 0 to 90 minutes.
It is preferable to programme the minimum time and add more time if necessary; check on the colour of the food.
Always use the grill inserted at level 1 or 2. You will optimize heat distribution and cooking results.
Use heatproof containers.
Protect your hands when removing dishes as they may become very hot.
If you want to defrost food after using one of the fan cooking functions, we recommend that you let the oven cool for around 10 minutes to achieve better results.
guide to cooking using the fan cooking function

* Preheat the oven to the temperature indicated.
| Food Temperature Insertion level Time | |||
| Meat | |||
| Pork roast (1 kg) | 160°C | On the grill at level 2 | 90 min |
| Veal roast (1 kg) | 180°C | On the grill at level 2 | 70 - 75 min |
| Beef roast (1 kg) | 220°C* | On the grill at level 2 | 38 - 40 min |
| Lamb (leg, shoulder 1.5 kg) | 180°C | On the grill at level 2 | 50 - 60 min |
| Poultry (1.2 kg) | 180°C | On the grill at level 1 | 70 - 75 min |
| Large poultry | 180°C | On the grill at level 1 | 112 - 2 hr |
| Rabbit | 230°C | On the grill at level 2 | 40 - 45 min |
| Fish (1.2 kg)whole (snapper, salmon,hake) | 180°C On the grill at level 2 35 - 45 min | ||
| Vegetables | |||
| Potato gratin | 180°C | On the grill at level 2 | 50 - 55 min |
| Lasagna | 180°C | On the grill at level 2 | 40 - 45 min |
| Stuffed tomatoes | 180°C | On the grill at level 2 | 45 - 55 min |
| Pastries | |||
| Sponge cake | 150°C | On the grill at level 2 | 35 - 45 min |
| Genoese | 150°C | On the grill at level 1 | 35 - 45 min |
| Sponge roll | 150°C | On the grill at level 2 | 20 - 25 min |
| Cake | 160°C | On the grill at level 1 | 40 - 50 min |
| Cookies | 180°C | On the grill at level 2 | 18 - 22 min |
| Shortbread | 160°C | On the grill at level 2 | 20 - 25 min |
| Cream | 160°C | On the grill at level 2 | 35 - 45 minbain marie |
| Madeleines | 170°C | On the grill at level 2 | 20 - 30 min |
| Pound cake | 170°C | On the grill at level 2 | 40 - 50 min |
| Cheesecake | 170°C | On the grill at level 1spring form mold,26 cm diameter | 65 - 75 min |
| Kugelhopf | 180°C | On the grill at level 1in a special mold | 45 - 50 min |
| Choux pastry | 180°C | On the grill at level 2 | 35 - 40 mindependingon the size |
| Shortcrust pastry pie | 200°C | On the grill at level 2 | 40 - 45 min |
| Flaky pastry pie | 250°C* | On the grill at level 2 | 30 - 40 min |
| Miscellaneous | |||
| Pâté in a terrine (1 kg) | 190°C | On the grill at level 1 | 112 hr |
| Savoury pie | 170°C | On the grill, level 220 cm mold | 55 - 65 min |
| Closed casserole dish(stews, baeckeoffe) | 160°C | On the grill, level 1 dependingon the dish | 112 - 3 hr |
| Bread (500 g of flour) | 220°C* | On the grill at level 2 | 25 - 30 min |
the fan cooking & microwave function ≈
The fan cooking + microwave function lets you combine the microwave with fan cooking, saving you considerable time. The following microwave power levels are available: 100-200-300-400-500W. The cooking temperature may be adjusted in 10°C increments from 50°C to 250°C. Cooking time may be set from 0 to 90 minutes.
Programming the FAN + microwave function
Turn the selector knob to select the FAN + MW function. 500W flashes in the display, requesting you choose the desired microwave power level.


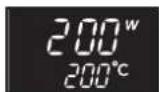
Turn the - / + selector knob to set the microwave power level of your choice, ex. 200W (maximum power for combi cooking is 500W). Confirm by pressing °C/W. 200° flashes, requesting you choose the desired cooking temperature.

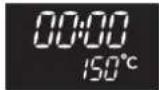
Turn the - / + selector knob to set the cook temperature of your choice, ex. 150°. Confirm by pressing °C/W, the time digits flash in the display.

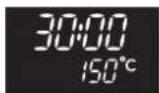
Turn the - / + selector knob to set the required cook time, ex. 30 minutes.

Confirm by pressing START, the light switches on and the programme begins.
Display

Comments:
Cooking time may be changed at any time simply by turning the - / + selector knob.
If you wish to verify your microwave power level, you may press °C/W to check the display.

Recommendations:
When cooking using the fan cooking + microwave function, do not use a metal container.
Cooking on 2 levels:
To cook an 800 g veal roast and potato gratin with 800 g of potatoes at the same time, 55 min at 170°C, microwave power level 300 W. We recommend you place the gratin dish on the turntable and the veal roast on the grill inserted at level 3.

Warning:
Never preheat your oven in the fan cooking + microwave function as this could damage your appliance.
guide to cooking using the fan & microwave function

Use a microwave-safe and heatproof dish, preferably made of earthenware (less splashing than with glass).
Cook preferably non-barded roasts to avoid grease splashes and smoke.
Season when cooked, let the meat sit in aluminium foil for 10 minutes. This helps the meat fibres to relax and the roast will be more tender.
| Food Qty | Programming MW + FAN | Time (min) | Recommendations | |
| Shoulder of lamb on the bone | 1300 g | 200 W + 200°C 32 - 37 | In a dish, | on the grill, level 2 |
| Ribeye steak 800 g 200 | W + 200°C 23 - 28 | In a dish, | on the grill, | level 2 |
| Chicken/guinea fowl | 1200 g 200 | W + 200°C 35 - 40 | In a dish, | on the grill, level 1 |
| Turkey roast 800 g 300 | W + 180°C 32 - 37 | In a dish, | on the grill, | level 2 |
| Pork roast 1200 g 300 | W + 180°C 47 - 52 | In a dish, | on the grill, | level 2 |
| Veal roast 1000 g 300 | W + 180°C 37 - 42 | In a dish, | on the grill, | level 2 |
child lock

You can programme the "CHILD LOCK" feature to block unauthorised use of your microwave oven.
To set:

Press the START/STOP key for 5 seconds with the door open, until the key appears in the display. 2 beeps confirm that your microwave is temporarily locked. No programme is available.

To cancel:

Follow the same procedure: press the START/STOP key for 5 seconds with the door open. The key symbol switches off and clocktime is displayed. The procedure is confirmed by 2 beeps.
timer

You may also programme the "TIMER" function on your microwave oven.
To set the timer:

Set the selector knob to the OFF position.
Turn the + / - selector to set the desired time.
Confirm by pressing START.
The pre-set time will start to count down.
A triple beep announces the end of the programmed time.
To cancel, open the door and press STOP.
We recommend that you clean the oven regularly and remove any food deposits inside and outside the appliance. Use a damp, soapy sponge. If the appliance is not kept clean, its surface may become damaged and this will considerably shorten its lifespan and cause a dangerous situation. If the door or seal are damaged, the oven must not be used until repaired by a qualified person.
Do not clean the appliance with a steam cleaner.
The use of abrasive products, alcohol or solvents is not recommended; They are likely to damage the appliance.
If the oven smells unpleasant or is encrusted with dirt, boil a cup of water with lemon juice for 2 minutes and clean the sides with a little washing-up liquid.
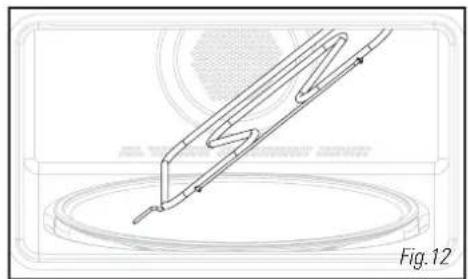
In order to clean the roof of the cavity, tip the grill resistance downwards (Fig.12).
Unhook the grill resistance by pressing on the rod at top left (Fig.13).
The turntable may be removed for easier cleaning. To remove it, grasp it by the access areas provided for this purpose. If you remove the driver, avoid getting any water in the motor axis hole.
Remember to put back the driver, the base rollers and the turntable.
natural_image
Technical line drawing of a mechanical component or tool assembly (no text or symbols visible)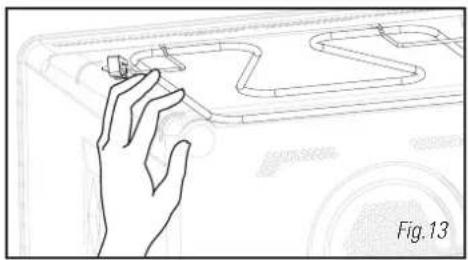
natural_image
Hand interacting with a small object on a vehicle or platform (no visible text or symbols)If you have a query concerning the operation of your appliance, this does not necessarily mean that there is a breakdown. In all events, check the following points:
| You notice that Solution | |
| The time is counting down but the appliance is not functioning (the food is not heated) and “DEMO” flashes in the display. | Demonstration mode has been set. To switch back into operating mode, press the following three keys all at the same time: [IMAGE] |
| The appliance does not switch on. | Check that the appliance is properly connected.Check that the oven door is properly closed.Check that the child lock feature ↗8is not programmed. |
| The appliance continues to make a noise after the programme has finished. | In order to evacuate residual steam, your appliance is equipped with a delayed ventilation feature. According to the cooking mode chosen (solo/grill/combined), the ventilation may continue to function after the end of the programme. |
| The appliance is noisy.The turntable does not revolve properly. | Clean the rollers and the roller area under the turntable.Check that the rollers are correctly positioned. |
| You notice steam on the glass. Wipe off the condensation with a cloth. | |
| The food is not heated in the microwave programme. | Check that the utensils are suitable for fuse with microwave ovens and that the power level is appropriate. |
| Smoke comes off the grill at the start of the programme. | Remove all cooking residues from the heating element before each use. |
| The appliance produces sparks. | Clean the appliance thoroughly: remove grease, cooking particles, etc.Make sure no metal objects are close to the oven walls.Never use metal objects with the grill.Never operate your oven when it is empty. |
Operating proficiency testing according to CEI/EN/NF EN 60705 standards;
The International Electrotechnical Commission, SC.59K, has established a standard relative to comparative performance tests conducted on various microwaves.
We recommend the following for this appliance:
| Test Load | Approx. time | Power selector | Containers/ Recommendations | |
| Egg custard (12.3.1) | 1000 g | 16 - 18 min | 500 W | Pyrex 227On the turntable |
| 750 g | 13 - 15 min | Pyrex 220On the turntable | ||
| Sponge cake (12.3.2) | 475 g 6 | - 7 min 700 W | Pyrex 827On the turntable | |
| Meatloaf (12.3.3) | 900 g 14 | min 700 W | Pyrex 838Cover with cling filmOn the turntable | |
| Defrosting meat (13.3) | 500 g 11 | - 12 min 200 W | On the turntable | |
| Defrosting raspberries (B.2.1) | 250 g 6 | - 7 min 200 W | On a flat plateOn the turntable | |
| Potato gratin (12.3.4) | 1100 g 23 | - 25 min | Low Grill+ 700 W | Pyrex 827On the turntable |
| Chicken (12.3.6) | 1200 g | 24 - 26 min | High Grill+ 500 W | Place on the grillInsert at the 1^st levelfrom the bottomTurn halfway through |
| 35 - 40 min | Fan cooking200°C+ 200 W | In an enamelled earthenware dishPlace on the grill inserted at the 1^st level from the bottom | ||
| Cake (12.3.5) | 700 g 20 | min | Fan cooking220°C+ 200 W | Pyrex 828Place on the grill level 1 |


- BESTEMD VOOR DE GEBRUIKER
- Waarschuwing:
- Attention :
- bandeau de commande
- Achtung:
- Das Bedienfeld
- INSTALLATION
- DESCRIPTION
- USE
- operating principle
- environmental protection
- Warning:
- safety instructions
- before connecting
- electrical connection
- Check that:
- building-in
- accessories
- the display
- how to set / change the time
- stop turntable option
- programming
- microwave function
- Comments:
- reheating on 2 levels
- Recommendations:
- automatic cook functions
- Programming the automatic cooking time according to weight
- defrosting
- What you need to know:
- \* Defrost programme times:
- Programming choices:
- the automatic defrost function
- grill functions
- Comment:
- guide to cooking using the high grill function
- the grill & microwave function
- guide to cooking using the grill & microwave function
- guide to cooking using the fan grill function
- Comments: Cooking tim
- Recommendations: The cooking tempe
- guide to cooking using the fan cooking function
- the fan cooking & microwave function ≈
- guide to cooking using the fan & microwave function
- child lock
- To set:
- To cancel:
- timer
- To set the timer:
Brand : Pelgrim
Model : MAG689RVS
Category : Microwave Oven