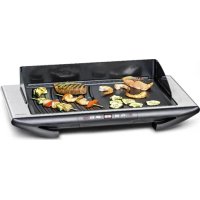
BBQ 2012 E - Barbecue Rommelsbacher - Free user manual and instructions
Find the device manual for free BBQ 2012 E Rommelsbacher in PDF.


| Product Type | Tabletop Electric Barbecue |
| Brand | Rommelsbacher |
| Model | BBQ 2012 E |
| Power Supply | 230 V, 50 Hz, 2000 W (2 x 1000 W) |
| Protection Class | I |
| Total Power | 2000 W |
| Cooking Zones | 2 individually adjustable zones |
| Plate Coating | Triple-layer non-stick |
| Surface Types | Ribbed zone for grilling, flat teppanyaki zone |
| Fat Drainage System | Yes, with removable cup |
| Splash Protection | Yes, removable, 3 pieces |
| Transport Handles | Integrated, molded |
| Cable Storage | Integrated under the unit |
| Residual Heat Indicator | Yes, per zone (yellow LEDs for >60°C) |
| Temperature Settings | 10 positions per zone (keep warm to sear) |
| Cooling Fan | Yes, integrated in control module |
| Safety | Safety switch, safety shutdown, sensor monitoring, 2-hour time limit |
| Cleaning | Removable plate, washable with soapy water; body wipe with damp cloth |
| Included Accessories | Cleaning spatula, grease collection tray, splash protection |
| Maintenance | Do not use abrasives, do not immerse the body or module |
Frequently Asked Questions - BBQ 2012 E Rommelsbacher
User questions about BBQ 2012 E Rommelsbacher
0 question about this device. Answer the ones you know or ask your own.
Ask a new question about this device
Download the instructions for your Barbecue in PDF format for free! Find your manual BBQ 2012 E - Rommelsbacher and take your electronic device back in hand. On this page are published all the documents necessary for the use of your device. BBQ 2012 E by Rommelsbacher.
USER MANUAL BBQ 2012 E Rommelsbacher
Non-stick coated grill plate 27
Individually controllable grilling areas 27
Low-fat grilling. 27
Splash guard/wind shield 27
Recessed grips for carrying 28
Integrated cord wind-up 28
Residual heat indication. 28
Assembling and demounting the splash guard/wind shield 28
Assembling and demounting the appliance.....29
Temperature levels 31
Prior to initial use. 32
Operating the appliance. 32
Prior to grilling 32
Switching the appliance on. 32
Switching the grilling areas on. 33
During grilling 33
Switching the grilling areas off 33
Switching the appliance off. 34
Aftergrilling. 34
Cleaning and maintenance 34
Safety functions 35
Error codes 36
Grilling tips 36
F - Contenu
F
We are pleased you decided in favour of this superior Deluxe electrical table top grill and would like to thank you for your confi dence. Its easy and safe operation will certainly fi ll you with enthusiasm as well. To make sure you can enjoy using this appliance for a long time,
please read through the following notes carefully and observe them. Keep this instruction manual safely.
Hand out all documents to third persons when passing on the appliance. Thank you very much.
Intended use
The electrical table top grill is designed for grilling food with short or medium cooking time (domestic use only). Other uses or modifi cations of the appliance are not intended and harbour considerable risks. For damage arising from not intended use, the manufacturer does not assume liability. The appliance is not designed for commercial use.
Technical data
Only connect the appliance to an isolated ground receptacle installed according to regulations. The rated voltage must comply with the details on the rating label. Only connect to alternating current.
Nominal voltage: 230V 50Hz
Nominal power: 2000 W (2 grilling areas with 1000 W each)
Protection class: I
Scope of supply
Check the scope of supply for completeness as well as the soundness of the product and all components (see product description page 2) immediately after unpacking.
Packing material
Do not simply throw the packing material away but recycle it.
Deliver paper, cardboard and corrugated cardboard packing to collecting facilities. Put also plastic packing material and foils into the intended collecting basins.
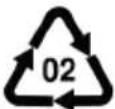
PE-HD

PE-LD

PP

PS
In the examples for the plastic marking PE stands for polyethylene, the code fi gure 02 for PE-HD, 04 for PE-LD, PP for polypropylene, PS for polystyrene.
For your safety

Warning: Read all safety advices and instructions. Non-observation of the safety advices and instructions may cause electric shock, fire and/or bad injuries.
General safety advices:
- Packing material like e. g. foil bags should be kept away from children.
-
Always keep children under 8 away from the product and the power cord.
-
Children from the age of 8 must be supervised when cleaning or maintaining the appliance.
- Children from the age of 8 and persons not having the knowledge or experience in operating the appliance or having handicaps of physical, sensorial or mental nature must not operate the appliance without supervision or instruction by a person, responsible for their safety. Never leave the appliance unat-tended during operation.
- Children should be supervised in order to ensure that they do not play with the appliance.
- Do not at all operate this unit with an external timer or a separate telecontrol system.
- Prior to each use, check the appliance and the accessories for soundness, it must not be operated if it has been dropped or shows visible damage. In these cases, the power supply must be disconnected and the appliance has to be checked by a specialist.
- Pull the mains plug after each use.
- When laying the power cord, make sure that nobody can get entangled or stumble over it so that accidentally pulling the grill down can be avoided.
- Keep the power cord away from hot surfaces, sharp edges and mechanical forces. Check the power cord regularly for damage and deteriorations. Damaged or entangled cords increase the risk of an electric shock.
- For disconnecting the appliance from the mains, only use the plug, never the cord!
- This electrical appliance complies with the relevant safety standards. In case of signs of damage to the appliance or the power cord, unplug the appliance immediately. Repairs may be effected by authorised specialist shops only. Improper repairs may result in considerable dangers for the user.
- Improper use and non-observation of the instruction manual will void warranty.
Safety advices for using the appliance:
- Do not operate the appliance in the vicinity of sources of heat (ovens, gas flames etc.) or in explosive environments where inflammable liquids or gases are located. Ensure an unhindered circulation of air.
- Keep a distance of at least 0.5 m to all sides and 1 m above the appliance
in order to avoid damage through heat or fat splatters and to grant an unobstructed work area.
- Do not store the grill outside or in damp chambers.
- Never leave the appliance unattended during operation.
- Never immerse base, control unit, power cord or plug in water for cleaning.
- Only operate appliance and accessories in dry condition - especially the grill plate and the electric connections must be absolutely dry, clean and free of residues.
- In case you connect and operate the appliance with an extension cord, make sure that ...
... the cord is designed for continuous loading of at least 16 A.
... the cord is connected via a properly installed safety plug with safety connection.
... the cord is completely unwound (when using a cable reel).
Warning - hazard of injury and burns!
Base surfaces, control unit, grill plate, splash guard/wind shield and the food are getting hot during use!
NOTE: For protection, we recommend using grill gloves and cutlery made of heat-resistant plastic or wood!
- When using the grill, the surfaces are getting hot, be aware of hot fat splatters and steam.
- Do not place infl ammable objects like tissues, grill cutlery etc. on the hot grilling surface.
- The appliance must be completely cooled before removing grill plate, splash guard/wind shield and drip pan or before cleaning or moving the appliance.
- Never pour cold water on the grill plate during or shortly after operation. Neither pour infl ammable liquids on the grill plate – the appliance is not suitable for fl ambéing!
- This appliance is not designed for use with charcoal or other fuels!
Features
Non-stick coated grill plate
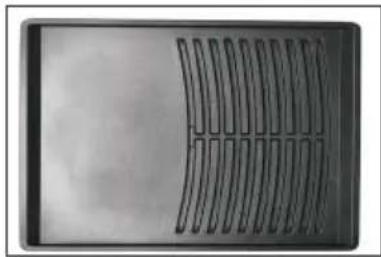
The grill plate has a superior 3-layer non-stick coating. This coating is very easy to clean and features excellent non-stick qualities.
Observe the following notes to maintain the coating's good qualities:
Prior to initial use, pour once some cooking oil on a kitchen tissue and rub the upper side of the plate.
- Never cut on the grill plate with a knife or similar object.
- Do not put aluminium trays, aluminium foil, pans, pots etc. on the grill plate.
- Do not use the grill plate for flambéing food.
- Do neither use cooking or grill cutlery made of metal nor pointed and edgy objects to put the food on the grill, turn it or remove it. Only use cooking and grill cutlery made of heat-resistant plastic or wood.
- Do not use abrasives, oven sprays or hard cleaning aids for cleaning the grill plate (for more information, please refer to "Cleaning and maintenance").
Individually controllable grilling areas
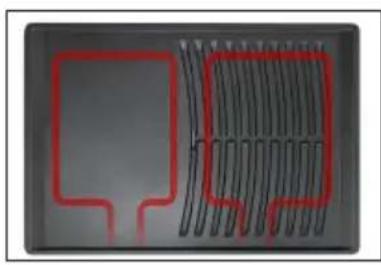
The appliance has two individually controllable grilling areas, thus, you can prepare food with different cooking temperatures at the same time or keep ready food warm.
- ribbed grilling area for typical grill marks. Due to the individually controllable temperature, this area is especially suitable for searing the food.
- flat Teppanyaki surface - perfect for fish, seafood, vegetables, desserts, etc.
Low-fat grilling
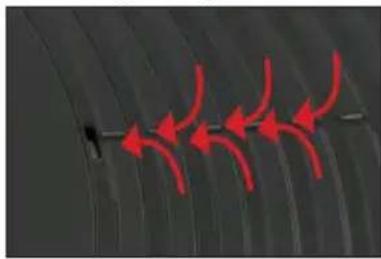
The appliance has a fat outlet in the middle of the grill plate. So, excess fat can drain. Thus, food can be prepared low in fat and healthy. Below the fat outlet there is a removable drip pan collecting the draining fat.

NOTE: Never operate the appliance without drip pan!
Splash guard/wind shield
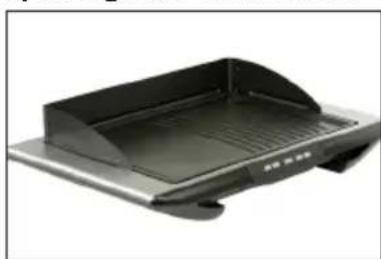
The appliance has a detachable splash guard/wind shield. On the one hand, the splash guard/wind shield prevents the surrounding area from getting soiled by fat splatters; on the other hand it protects the grilling surface against unnecessary cooling by wind.

NOTE: Do not touch the splash guard/wind shield when hot!
Recessed grips for carrying
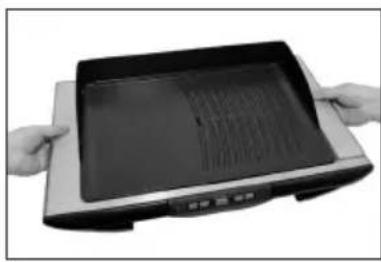
The appliance has two recessed grips for easy and safe transport. The recessed grips are on the right and left underside of the base.

NOTE: Do not carry the appliance when hot!
Integrated cord wind-up
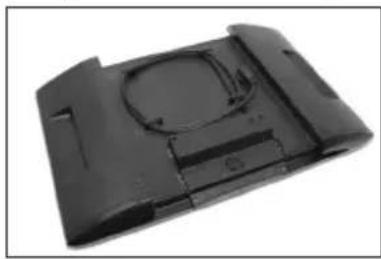
The appliance has a practical cord wind-up on the underside.

NOTE: Prior to operation, before inserting the grill plate or removing the control unit it is necessary to unwind the whole power cord!
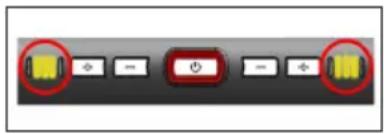
Residual heat indication
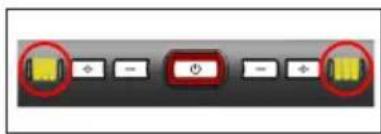
The appliance has a separate residual heat indication for each grilling zone. The indications are active if the appliance is in stand-by mode, i.e. if the appliance is connected to the mains.
If one of the grilling zones measures a temperature >60^ , the LEDs "2 - 4" of the respective temperature display will glow yellow.
Assembling and demounting the splash guard/wind shield

Warning - hazard of injury and burns! Base surfaces, control unit, grill plate, splash guard/ wind shield and food are getting hot during use!
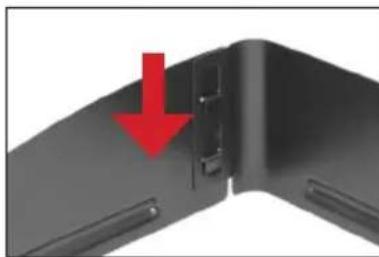
Assembling and demounting the splash guard/wind shield
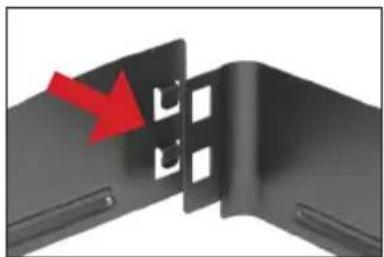
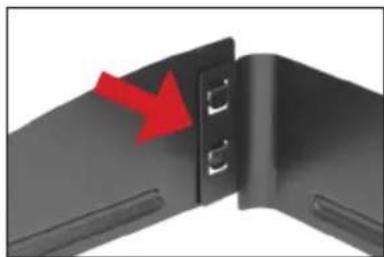
- Take a short side part and position it in the recesses of the longer part. Make sure that the stiffening channel faces outwards and the hooks face inwards.
Now, press the short side part downwards and let it engage. - Repeat this procedure with the second short side part.
- Demount it in reverse order.
Assembling and demounting the appliance

Warning - hazard of injury and burns! Base surfaces, control unit, grill plate, splash guard/ wind shield and food are getting hot during use!

For safe operation it is important that the grill plate is correctly positioned on the base and that especially the electrical connections of the grill plate as well as the control unit are absolutely dry and clean (free of grease)!

Before assembling and demounting the appliance, make sure that it is disconnected from the mains!
Assembling the appliance
- Inserting the drip pan
For inserting the drip pan, take the pan and place it in the intended recess. Make sure that it is positioned correctly!
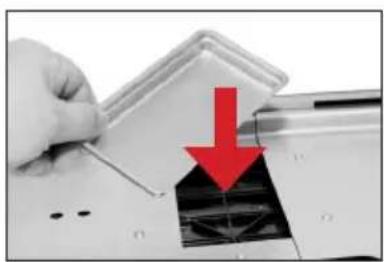
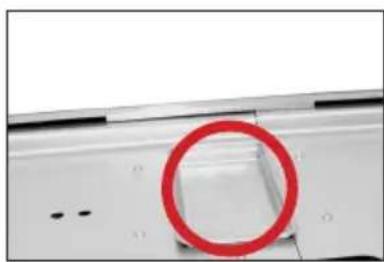
NOTE: Do not operate the grill without drip pan!
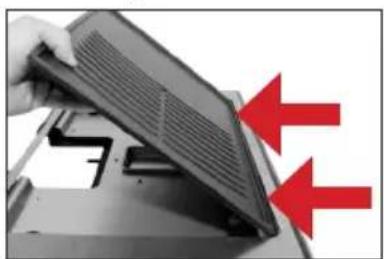
- Inserting the grill plate
Prior to inserting the grill plate, the control unit must be removed. To do so it is necessary to unwind the whole power cord first.
Take the grill plate and place it on the rim of the heat protecting plate. Make sure the electrical connections face towards the recess for the control unit. Lower the grill plate carefully. Make sure that the grill plate feet stand correctly in the intended joints. Make sure that the grill plate is positioned correctly!
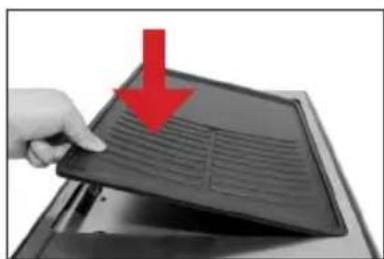
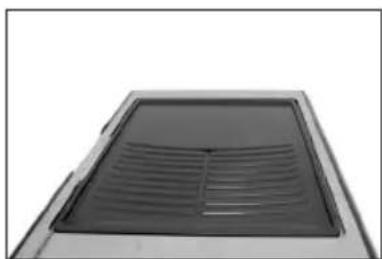
- Inserting the control unit
Place the control unit on the intended slide-in rail of the base. Take the rear side of the appliance with one hand and push the control unit backwards as far as it will go with the other hand. Mind the power cord!
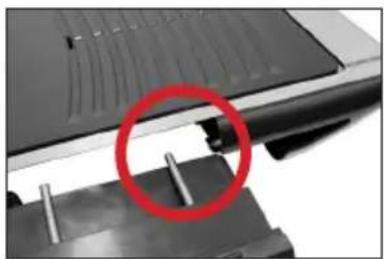
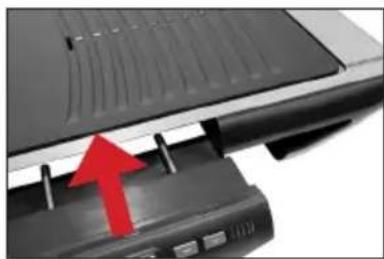
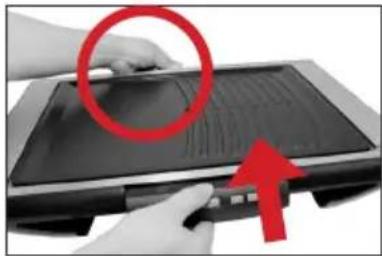
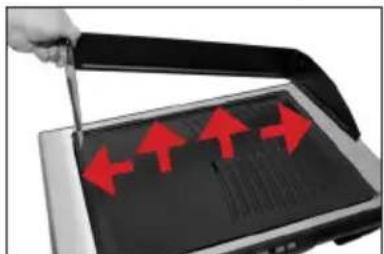
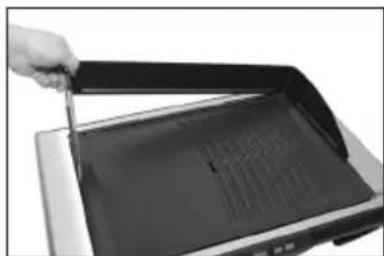
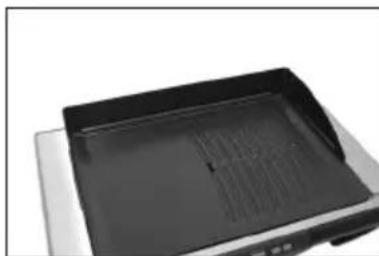
- Attaching the splash guard/wind shield
Insert the assembled splash guard/wind shield at the back in the gap between grill plate and base. Make sure that the splash guard/wind shield is positioned correctly!
Demounting the appliance
First, let the appliance cool down.
- Removing the splash guard/wind shield
Take the splash guard/wind shield and remove it upwards.
- Removing the control unit
Take the control unit as shown below and pull it forwards. Mind the power cord!
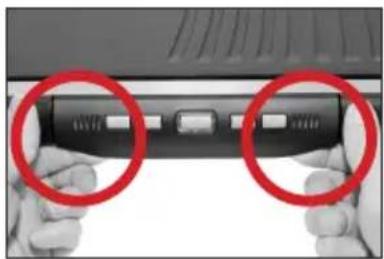
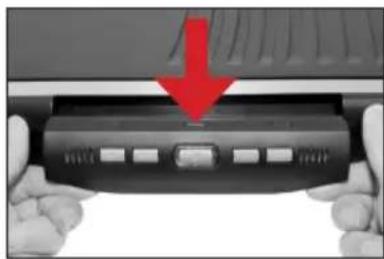
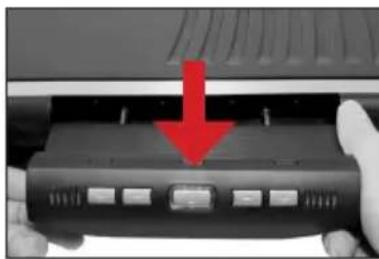
- Removing the grill plate
Grab in the open area at the bottom and lift the gill plate. Remove the grill plate upwards.
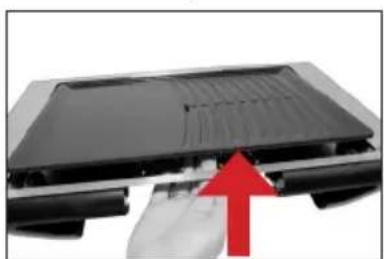
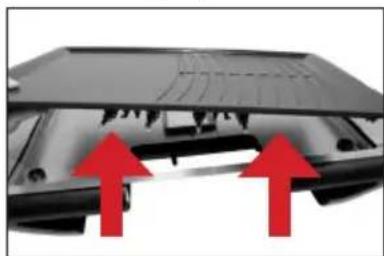
- Removing the drip pan
Take the drip pan and lift it carefully. Make sure that possibly collected fat does not spill!
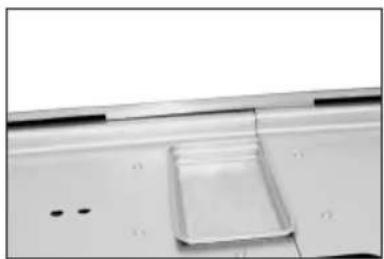
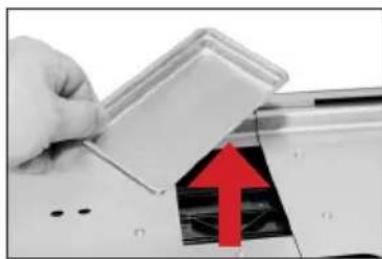
Temperature levels
The temperature can be set separately for each grilling area in 10 levels. The set temperature is shown in terms of colour in the control unit by means of LED pilot lamps.
| left grilling area application right grilling area | area is off OFF | |||||||||||
| OFF grilling | ||||||||||||
| level 1 | keeping-warm | level 1 | ||||||||||
| level 2 level 2 | ||||||||||||
| level 3 | 4 cooking | level 3 | ||||||||||
| level 4 level 4 | ||||||||||||
| level 5 level 5 | ||||||||||||
| level 6 | 7 grilling | level 6 | ||||||||||
| level 7 level 7 | ||||||||||||
| level 8 level 8 | ||||||||||||
| level 9 | searing | level 9 | ||||||||||
| level 10 | ||||||||||||
Preset temperature
- If activating the grilling area with the "+" button, temperature level "6" is chosen.
- If activating the grilling area with the " - " button, temperature level "10" is chosen.
First heating-up period after switching-on
- During the first heating-up period the LED pilot lamps of the temperature indication blink until the set temperature is reached; after that the LED pilot lamps glow permanently.
Increasing the temperature during operation
- The LED pilot lamps of the temperature indication blink again, if the temperature is increased. If the new temperature is reached, the LED-pilot lamps glow permanently.
NOTE: At a later reheating, the LED pilot lamps do not blink!
Prior to initial use
Appliance and accessories
Clean the appliance as well as all accessories prior to initial use (for more information, please refer to "Cleaning and maintenance").
Grill plate
Prior to initial use, pour once some cooking oil on a kitchen tissue and rub the upper side of the grill plate (for more information, please refer to "Non-stick coated grill plate").
Operating the appliance

Warning - hazard of injury and burns! Base surfaces, control unit, grill plate, splash guard/ wind shield and food are getting hot during use!
NOTE: For protection, we recommend using grill gloves and cutlery made of heat-resistant plastic or wood!
Prior to grilling
Make sure that ...
... grill plate and control unit are correctly inserted in the base!
... the drip pan is inserted in the base!
... the grill is placed on a stable and even surface!
... the safety distances to the sides and the top are observed!
... the ventilation slots below the control unit are free!
... the whole power cord is unwound from the wind-up!
... the power cord is laid so that prior, during or after operation nobody can get entangled or stumble over it and that accidentally pulling the grill down is avoided!
NOTE: The appliance has two separately controllable grilling areas, making it possible to prepare food at different temperatures!
Please note that the two grilling areas have to be switched on separately!
Switching the appliance on
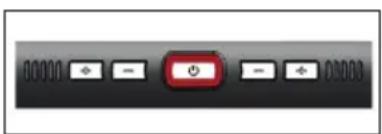
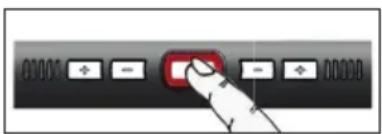
Plug in the mains plug.
Now, the appliance is in stand-by mode.
This is indicated by the blinking LED pilot lamp of the "ON/OFF" button.
NOTE: The LED pilot lamps of the residual heat indication might also glow!
- Press the "ON/OFF" button for at least 1 second.
- Now, the appliance is in starting mode. This is indicated by an audible signal and the permanently glowing LED pilot lamp of the "ON/OFF" button.
NOTE: If no button is pressed within 10 seconds, the electronics switches back to the stand-by mode. There is an audible signal and the LED pilot lamp of the "ON/OFF" button blinks!
Switching the grilling areas on
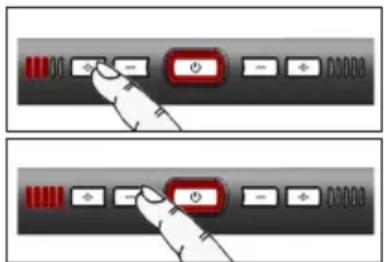
- Choose the grilling area on which you would like to grill.
- By pressing the "+" button, the grilling area starts with temperature level "6".
- By pressing the "-" button, the grilling area starts with temperature level "10".
- By pressing the "+" or "-" button, the temperature can be increased or decreased stepwise any time.
- By permanently pressing the "+" or "-" button, the temperature levels can be changed quickly.
NOTE: Activating a grilling area is indicated by an audible signal!
- At the first heating-up, the LED pilot lamps blink until the set temperature is reached, afterwards the LED pilot lamps glow permanently.
NOTE: At a later reheating, the LED pilot lamps do not blink! - First, heat the appliance up at the desired level until the LED pilot lamps glow permanently before starting to grill.
During grilling
- During grilling, make sure that the fat outlet does not get choked, clean it occasionally if necessary.
- By pressing the "+" or "-" button, the temperature can be increased or decreased stepwise. By permanently pressing the "+" or "-" button, the temperature levels can be changed quickly.
NOTE: The LED pilot lamps blink again if the temperature level is increased and the appliances heats up. If the newly set temperature is reached, the LED pilot lamps glow permanently again!
NOTE: When the temperature inside the control unit rises over a set level, the integrated fan switches on. As soon as the temperature falls below the set value, the fan goes out again. This process may repeat several times!
Switching the grilling areas off
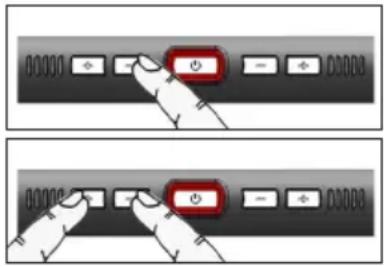
- Press the "-" button until level "0" is reached (all LED of the temperature indication are off).
or
- Press the "+" and the "-" button at the same time for at least 1 second and level "0" is immediately selected (all LED of the temperature indication are off).
- Switch the second grilling area off as described above.
or
- By pressing the "ON/OFF" button for at least 1 second, both grilling areas are switched off at the same time.
- If no grilling area is active any more, the electronics switches to the stand-by mode after 5 seconds.
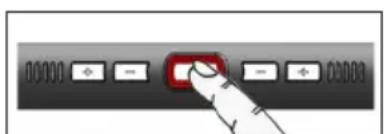
NOTE: Switching back to stand-by mode is acknowledged by an audible signal and the red LED pilot lamp of the "ON/OFF" button blinks!
NOTE: The possibly running fan for cooling the control unit is still in operation!
- The residual heat indications of the two grilling areas glow permanently.
If a temperature blow 60^ is reached, the indications extinguish.
Switching the appliance off
WARNING: Only if the residual heat indications of both grilling areas have extinguished, the appliance may be disconnected from the mains!
- Disconnect the appliance from the mains by pulling the mains plug.
After grilling
- If the appliance has cooled down completely, remove the excess fat of the drip pan (for more information, please refer to "Demounting the appliance").
- Clean the appliance after each use (for more information, please refer to "Cleaning and maintenance").
Cleaning and maintenance

NEVER IMMERSE BASE, CONTROL UNIT, MAINS PLUG AND POWER CORD IN WATER!

Warning - hazard of injury and burns!
Before cleaning base, control unit, grill plate, splash guard/wind shield, drip pan or other parts, let the complete appliance cool down!
Always pull the mains plug before cleaning!
- Cleaning of the grill plate:
- Remove the grill plate of the grill.
-
Remove coarse residues with the enclosed cleaning scraper.
-
Afterwards, use a soft brush and some dishwashing detergent for cleaning and rinse with clear water.
- Soak stubborn residues on the grill plate with warm water with dishwashing detergent.
Wipe dry thoroughly after cleaning.
-
Cleaning base, control unit and power cord:
-
Wipe base, heat protecting plate, control unit and power cord with a damp cloth.
-
Afterwards, wipe dry thoroughly.
-
Cleaning the remaining accessories:
-
Clean splash guards/wind shield, drip pan etc. with a damp cloth and some dishwater.
-
Afterwards wipe all parts dry thoroughly.
-
Do not use a scouring agent or dissolvent!
- Do not use oven sprays for cleaning!
- Never use a steam jet appliance for cleaning the base and the grill plate!
NOTE: Prior to the next use, the grill plate and the electrical connection must be completely dry.
Safety functions
Temperature sensor control
If the temperature sensor measures an abnormal value (tolerable temperature range: -10^ - 260^) , the display will show an error code.
Temperature control
This function will be active, if the temperature sensor of the respective grilling area does not measure an increase of at least 10^ within 3 minutes after setting a higher temperature level.
Safety switch-off
The safety switch-off will be active, if one or more buttons are applied permanently for more than 20 seconds. The function cuts the power supply. The temperature indication shows an error code.
Operating time limitation
The operating time limitation will switch the appliance automatically off if no button has been applied for a period of two hours. The operating time limitation works independently of the set temperature. After an automatic switch-off, the appliance can be put into operation and the max. operating time will be active again.
Cooling system
The control unit has a fan for cooling the electronics. The fan switches on and off dependent on the temperature inside the control unit. If a temperature >85^ inside the control unit is measured, the power supply will be cut and there will be an error code in the temperature indication.
Safety switch
The control unit has a safety switch on the rear side. The switch is activated by a contact pin positioned on the base. The switch ensures that the appliance can only be operated if assembled correctly.
Error codes
The appliance's electronics recognises malfunctions and shows them as error codes simultaneously in the two temperature indications. The error codes are indicated visually by the LED glowing yellow and red in rotation and acoustically by a periodic signal tone for 90 seconds or by a permanent signal tone at error code "sensor control".
At all errors, the electronics must be reset manually by pulling the mains plug.
| Error code Cause | of error | Left temperature indication | Right temperature indication | |||||||
| Sensor control | The temperature sensor of a grilling area provides an undefined signal. Self-help: Let the appliance cool down. | |||||||||
| Temperature control | The temperature increase of a grilling area is <10 °C after 3 minutes. Self-help: Let the appliance cool down, clean the grill plate's contacts. | |||||||||
| Safety switch-off | A button is applied permanently >20 seconds. Self-help: Check the buttons for mobility, clean them if necessary. | |||||||||
| Electronics error | The electronic control has an error. Self-help: Electronics is faulty, please contact the customer service. | |||||||||
| Excess temperature control | The temperature in the control unit is too high (>85 °C). Self-help: Check if the fan works and if there is enough circulation below the control unit. Let the appliance cool down. | |||||||||
Grilling tips
NOTE: Grilling periods and temperature settings depend heavily on the thickness of the food and especially on your own preferences. Therefore, recommended settings are only reference values!
- Season the meat before grilling, salt it afterwards, otherwise, too much juice will be lost.
Sausages are slit before grilling so that they will not burst.
For being prepared on the open grill, meat should be cut in even slices with a thickness of 2 - 3 cm. - Meat tastes especially good if it is marinated for some time before being grilled.
If possible, the food should be taken out of the refrigerator 12 hour in advance. Then, it will be grilled more quickly and evenly. - Frozen food should be completely defrosted before grilling.
- Choose the side dishes according to your personal taste and let your imagination run free. Delicate sauces, herbed butter, fried vegetables, fresh salads, potatoes en papillote and garlic bread taste especially good with barbecued food.
Introduction

- F - Contenu
- F
- Intended use
- Technical data
- Scope of supply
- Packing material
- For your safety
- General safety advices:
- Safety advices for using the appliance:
- Warning - hazard of injury and burns!
- Base surfaces, control unit, grill plate, splash guard/wind shield and the food are getting hot during use!
- Features
- Non-stick coated grill plate
- Individually controllable grilling areas
- Low-fat grilling
- Splash guard/wind shield
- Recessed grips for carrying
- Integrated cord wind-up
- Residual heat indication
- Assembling and demounting the splash guard/wind shield
- Assembling and demounting the appliance
- Assembling the appliance
- - Inserting the drip pan
- - Inserting the grill plate
- - Inserting the control unit
- - Attaching the splash guard/wind shield
- Demounting the appliance
- - Removing the splash guard/wind shield
- - Removing the control unit
- - Removing the grill plate
- - Removing the drip pan
- Temperature levels
- Preset temperature
- First heating-up period after switching-on
- Increasing the temperature during operation
- Prior to initial use
- Appliance and accessories
- Grill plate
- Operating the appliance
- Prior to grilling
- Switching the appliance on
- Switching the grilling areas on
- During grilling
- Switching the grilling areas off
- or
- Switching the appliance off
- After grilling
- Cleaning and maintenance
- NEVER IMMERSE BASE, CONTROL UNIT, MAINS PLUG AND POWER CORD IN WATER!
- Safety functions
- Temperature sensor control
- Temperature control
- Safety switch-off
- Operating time limitation
- Cooling system
- Safety switch
- Error codes
- Grilling tips
- Introduction
Brand : Rommelsbacher
Model : BBQ 2012 E
Category : Barbecue