USER MANUAL Forzaspira C 115 POLTI
MANUEL D'INSTRUCTIONS
MANUAL DE INSTRUÇÕES

natural_image
Black-and-white photo of a vacuum cleaner with attached power plug (no visible text or symbols)
natural_image
Close-up of a black mechanical component with a connector, no visible text or symbols
natural_image
Close-up of a mechanical component with directional arrows indicating movement (no text or symbols)
natural_image
Close-up of a mechanical component with a labeled 'CLICK' button (no readable text or symbols beyond the label)
natural_image
Close-up of a black mechanical component with a curved arrow indicating rotation (no text or symbols)
natural_image
Close-up of a hand using a tool to clean or install an electrical outlet (no visible text or symbols)
natural_image
Close-up of a hand holding a pen, with a small diagram and number 4 in the corner (no readable text or symbols)
natural_image
Simple illustration of a cylindrical device with a curved handle and a curved base, no text or symbols present.
natural_image
Close-up of a mechanical component with no visible text or symbols
natural_image
Close-up of a mechanical component with a dashed oval highlight and number 12 (no readable text or symbols)

natural_image
Two black curved objects with a small arrow pointing to one, no text or symbols present.
natural_image
Close-up of a hand pressing down on a dark mechanical component (no visible text or symbols)
natural_image
Close-up of a circular mechanical component with a curved arrow indicating rotation or direction (no text or symbols)

natural_image
Close-up of a person's legs and feet in a dimly lit room, no visible text or symbols
natural_image
Close-up of a black mechanical component with a circular badge labeled '17' (no visible text or symbols on the object itself)
natural_image
Close-up of a mechanical component with a dark handle and circular label (13) in the corner, no readable text or symbols.
natural_image
Close-up of a circular object with concentric rings and a curved arrow indicating rotation (no text or symbols)
OPTIONAL
PAEU0279

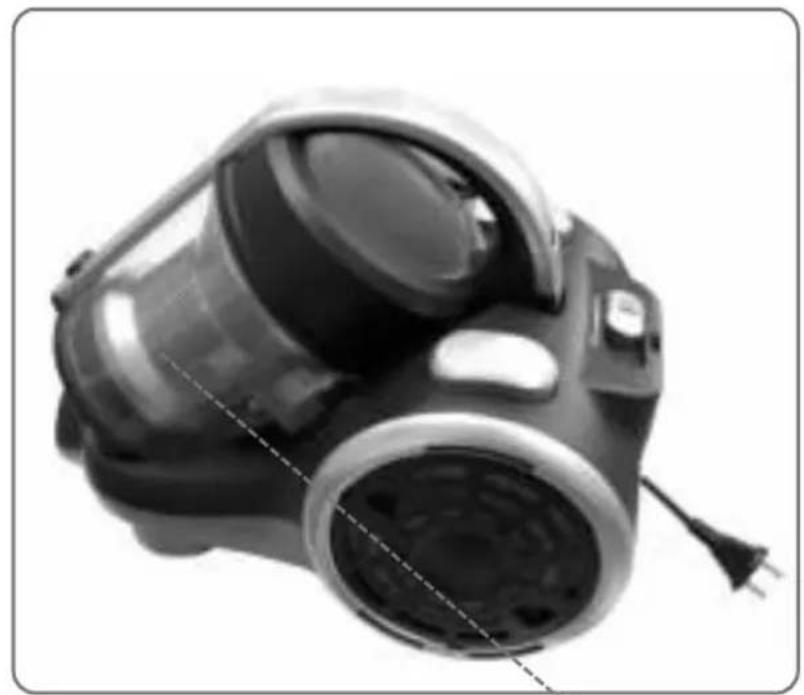
FILTRO HEPA
HEPA FILTER
FILTRE HEPA
FILTRO HEPA
HEPA-FILTER
FILTRO HEPA
PAEU0280

FILTRO SECCHIO
CONTAINER FILTER
FILTRE SEAU
FILTRO DE CUBO
BEHÄLTERFILTER
FILTRO DO DEPÓSITO
The optional accessories are on sale at all the best domestic appliance retailers, an Authorised Polti Service Centre or online at www.polti.com.
natural_image
Simple black silhouette of a briefcase with handle (no text or symbols)
ACCESSORI PER TUTTE LE ESIGENZE
natural_image
Simple line drawing of a computer mouse with a coiled cable above it (no text or symbols)
REGISTRA IL TUO PRODOTTO www.polti.com
2. CONNESSIONE ACCESSORI
natural_image
Simple black silhouette of a briefcase with handle (no text or symbols)
ACCESSORIES FOR ALL NEEDS
Visiting our site www.polti.com or any of the top household appliance stores, you will find a vast range of accessories to enhance the performance and convenience of your appliance and make cleaning your home even simpler.
To check compatibility with your appliance, look for the PAEUXXXX/ code next to each accessory listed on Page 3. If the code of the accessory you want to buy is not included in this manual, please contact our Customer Services department for more information.

natural_image
Simple line drawing of a computer mouse with a coiled cable above it (no text or symbols)
REGISTER YOUR PRODUCT www.polti.com
Visit our website www.polti.com or call our Customer Services department to register your product.
You can get useful recommendations on using the products, and updates on innovations, as well as finding all the accessories that make the family of Polti products even more valuable for looking after your home.
To register your product, in addition to your personal information, you must enter the serial number (SN) which you will find on the silver label, located on the box and underneath the appliance. To save time and have your serial number to hand, write it in the space provided on the back cover of this manual.

Do you want to know more? Visit our official channel: www.youtube.com/poltispa. We will show you the effectiveness of the natural and ecological power of steam in cleaning and ironing operations.
Register on the channel so you are always up-to-date on our video content!
IMPORTANT PRECAUTIONS FOR USE

WARNING! BEFORE USING THE APPLIANCE, CAREFULLY READ ALL THE INSTRUCTIONS AND WARNINGS IN THIS MANUAL, AND ON THE APPLIANCE ITSELF.
Polti S.p.A. declines all liability for any accident deriving from any improper use of this appliance.
Correct use of the product is only as detailed in this instruction manual.
Any use which does not comply with these instructions will invalidate the warranty.
- Never disassemble or carry out maintenance on the appliance apart from that indicated in this manual. In the event of a fault or malfunction, do not try and repair the appliance yourself. In the event of a heavy knock, fall, damage or fall into water, the appliance may not longer be safe to use. Incorrect use or a lack of respect for the instructions herein may lead to serious accidents. Always contact Authorised Service Centres.
- This appliance can be used by children over 8 years old, by people with reduced physical, sensory or mental abilities or by inexperienced persons only where they are instructed in advance on its safe use and only if informed of the dangers related to the product. Children must not play with the appliance. The cleaning and maintenance of the appliance may not be done by children without the supervision of an adult. Keep the appliance and the power cable out of the reach of children under 8 years of age.
- Keep all the parts of the packaging out of the reach of children; they are not toys. Keep the plastic bag out of the reach of children: danger of suffocation.
- This appliance is destined exclusively for indoor domestic use. In order to reduce the risk of accidents, including: fires, elec-
trocution, personal injury and scalding, both during use and during preparation, maintenance and storage, always take the fundamental precautions listed in this manual.
RISKS CONNECTED TO THE POWER SUPPLY - ELECTROCUTION
- The earthing system and highly sensitive residual-current circuit breaker, complete with magnetothermic cut-out for your domestic system, guarantee safe use of electrical appliances.
Therefore, for your own safety, check that the electrical system to which the appliance is connected complies with current laws.
- Do not connect the appliance to the mains if the voltage does not correspond with that of the domestic electrical circuit in use.
- Do not overload the sockets with adaptors and/or transformers. Only connect the product to a single socket with current that is compatible with the supplied plug.
- Electrical extension leads that are unsuitable for the power rating or which are not compliant with law may overheat and possibly lead to short-circuiting, fire, power outage or damage to the equipment. Only use certified extensions, suitable for the power rating, that support at least 10A.
- To remove the plug from the socket, do not pull the power cable, but hold the plug itself to avoid damage to the plug and the cable.
- Always unplug the appliance if it is not in use and before any preparation, maintenance or cleaning operation.
- The appliance must not be left unattended if plugged in to the mains.
- Fully unwind the cable from the cable winder before connecting the appliance to the mains and before use. Always use the product with the cable completely unwound.
- Do not pull or jerk the cable or expose it to tensions (twisting, crushing or stretching). Keep the cable away from hot and/or sharp surfaces and elements. Avoid crushing the cables in doors and windows. Do not pull the cable tight around cor-
ners. Avoid treading on the cable. Do not pass over the cable with the appliance. Do not wind the power cable around the appliance, especially if the appliance is hot.
- Do not substitute the plug on the power cable.
- If the power cable is damaged, it must be replaced by the manufacturer or its service agent in order to avoid all possible hazards. Do not turn on and use the product if the power cable is damaged.
- Do not touch or use the appliance barefoot and/or with wet body or feet.
- Do not use the appliance near containers full of water, e.g. sinks, baths and swimming pools.
- Do not immerse the appliance, including the power cable and plug, in water or other liquids.
RISKS DURING USE OF THE PRODUCT - INJURIES/SCALDING
- The product should not be used in areas where there is a danger of explosions or in the presence of toxic substances.
- Do not vacuum liquid substances or damp dirt.
- Do not vacuum onto toxic substances, acids, solvents, detergents or corrosive substances. The handling and removal of dangerous substances must be carried out according to the indications of the manufacturers of these substances.
- Do not vacuum onto explosive powders or liquids, hydrocarbons, open flames and or extremely hot objects.
- Keep all body parts away from the vacuum intake and from any moving parts.
- Do not use the vacuum function on people and/or animals.
- Re-wind the cable when the appliance is not in use.
- Do not position the product near sources of heat such as fireplaces, stoves and ovens.
- Do not obstruct the openings and grills on the product.
- During use, keep the product in a horizontal position on stable surfaces.
CORRECT USE OF THE PRODUCT
This appliance is intended for internal home use as a vacuum of dry material, in accordance with the descriptions and instructions contained in this manual. Please read these instructions carefully and keep them. If this manual is lost, it can be consulted and/or downloaded from the website www.polti.com.
Only vacuum domestic dirt.
Do not use on debris or chalk, cement or residues from building sites or brick laying.
Do not use on earth and sand/soil, etc.
Do not use on ash, soot and combustion residues (fireplaces, barbecues, etc.).
Do not use on printer, photocopier or fax toner and ink powder.
Do not vacuum pointed, sharp or stiff objects. The appliance only functions correctly with the collector inserted, and complete with all its parts.
Correct use of the product is only as detailed in this instruction manual. Any other use may damage the appliance and invalidate the warranty.
Polti S.p.A. reserves the right to change equipment or accessory specification without prior notice.
Pursuant to European Directive 2012/19/EU, regarding electric and electronic appliances, this appliance must not be disposed of with domestic waste, but sent to an official collection facility. This appliance complies with EU Directive 2011/65/EU
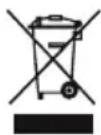
The crossed-out bin symbol on the appliance indicates that, at the end of its useful lifespan, the product must be disposed of separately from other waste. Therefore, at the end of its life, the user must handover the appliance to an appropriate collection centre for electric and electronic waste. Proper separate waste collection to facilitate the subsequent recycling, treatment and environmentally compatible disposal of the appliance helps to prevent negative effects on the environment and human health, and promotes recycling of the materials the product is made of. Unlawful disposal by the owner involves the application of the administrative sanctions envisaged by current legislation.
1. PREPARATION OF THE APPLIANCE
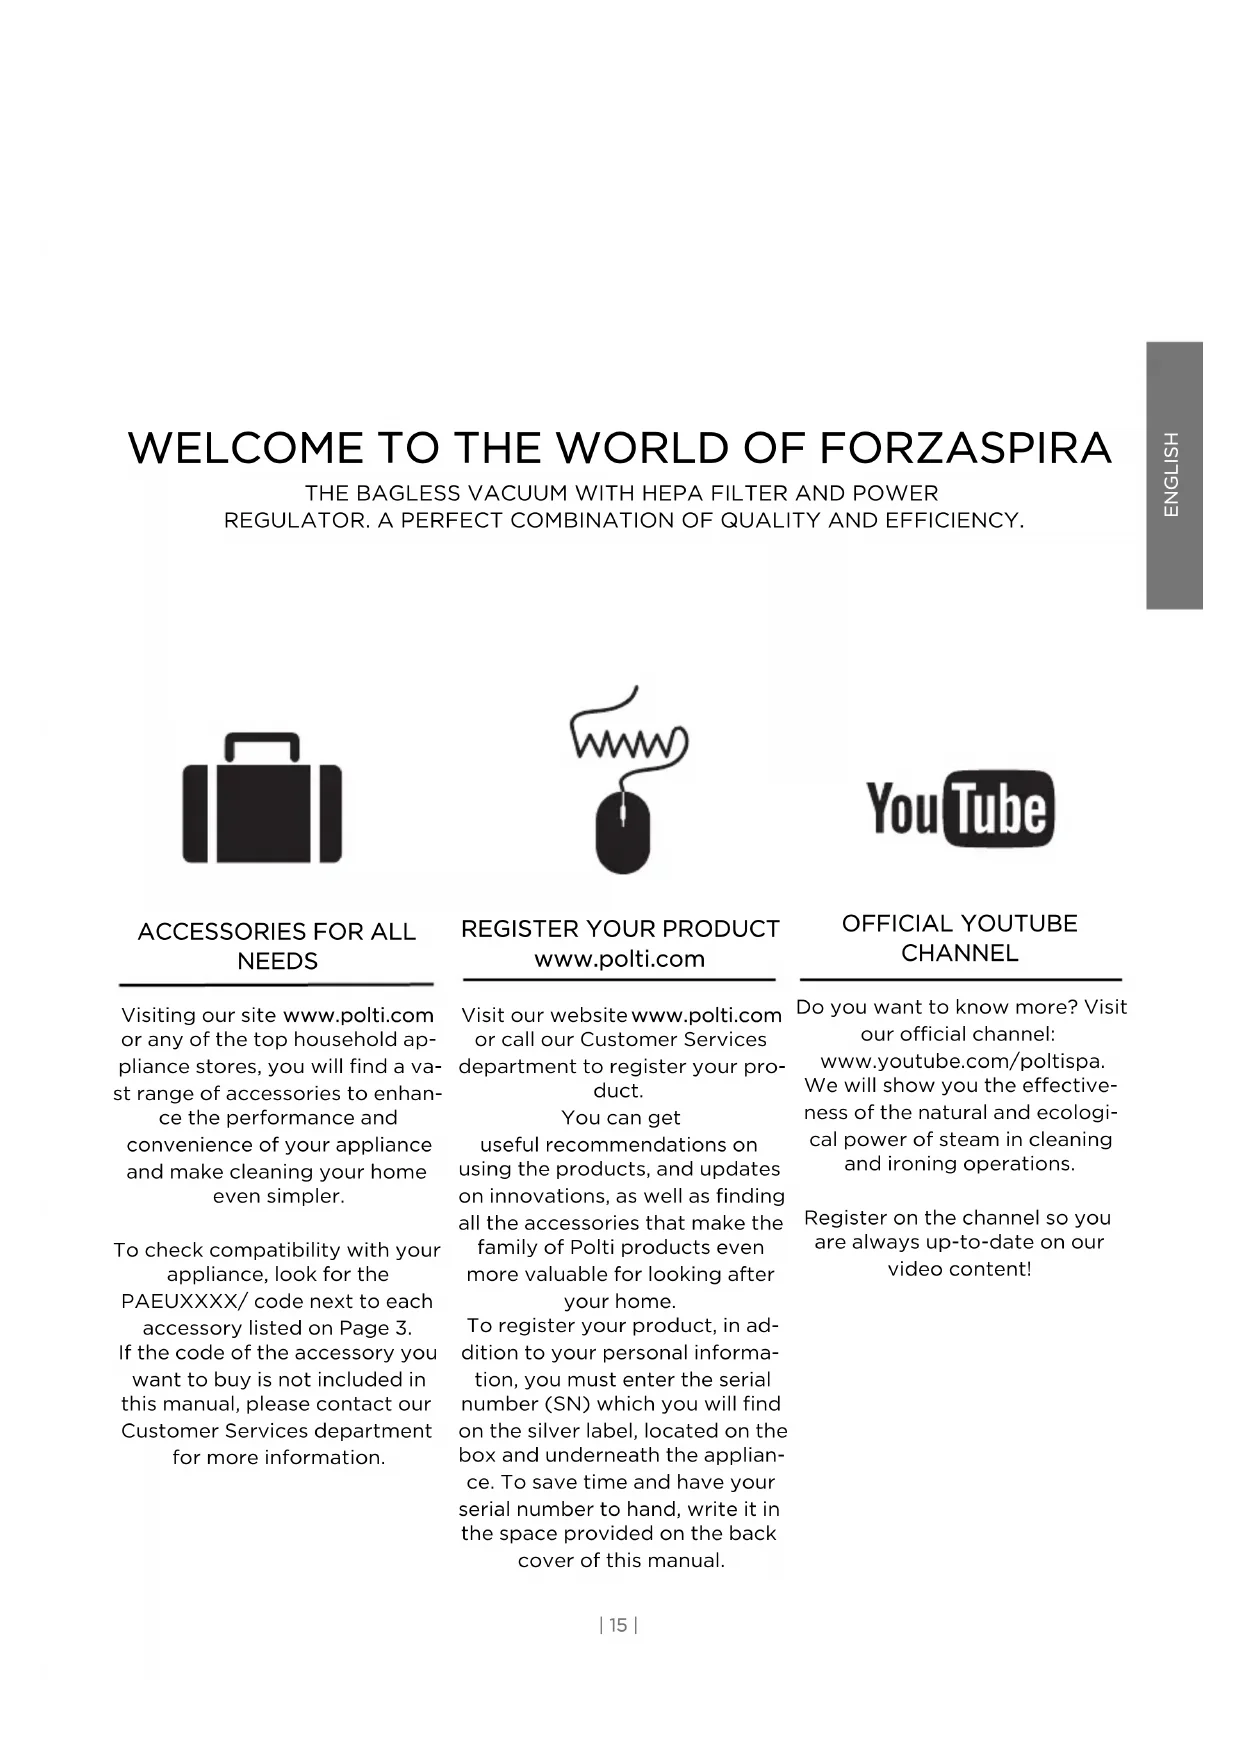
1.1 Remove the appliance from the packaging, checking that the product is whole and that all the parts are there.
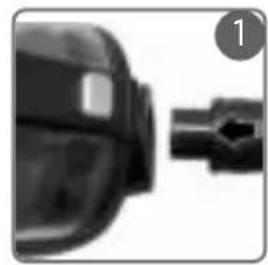
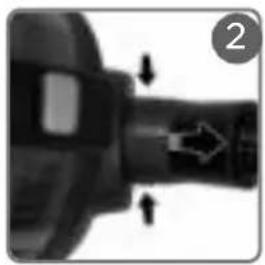
1.2 Insert the suction opening of the flexible tube into the connector (1). To disconnect it from the appliance press the keys and pull the flexible hose (2).
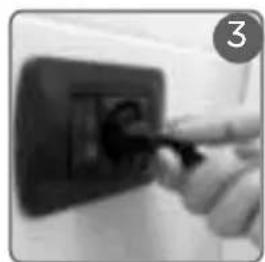
1.3 Unwind the power supply cable and insert the plug into a suitable power socket (3).
2. CONNECTION OF ACCESSORIES
All the accessories can be connected directly to the flexible hose or to the telescopic tube. Just connect them together.
3. CLEANING HARD FLOORS
3.1 Make sure that chapter 1 has been completed.
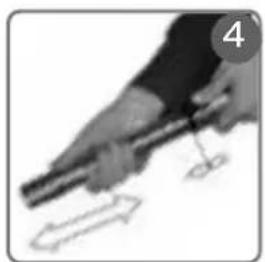
3.2 Connect the telescopic tube to the flexible hose and the floor brush to the telescopic tube. The length of the telescopic tube can be adjusted. Press the button to extend it or shorten it at will (4).
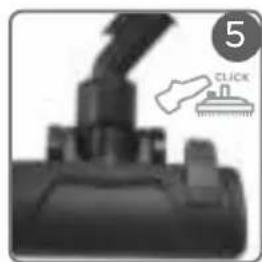
3.3 Move the selector located on the brush, pressing it with a foot, to the bristles-extended position (5).
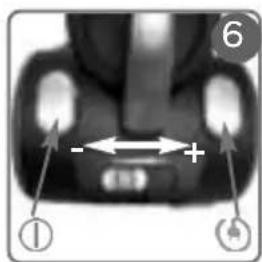
3.4 Press the (6) switch. The appliance will start to operate.
You can adjust the suction power with the cursor(6).
3.5 To end suction, press the (6) switch again.
4. CLEANING DELICATE FLOORS
4.1 Make sure that chapter 1 has been completed.
4.2 Connect the telescopic tube to the flexible hose and the parquet brush to the telescopic tube.
The length of the telescopic tube can be adjusted. Press the button to extend it or shorten it at will (4).
4.3 Press the (6) switch. The appliance will start to operate.
You can adjust the suction power with the cursor(6).
4.4 To end suction, press the (6) switch again.
5. CLEANING CARPETS AND RUGS
5.1 Make sure that chapter 1 has been completed.
5.2 Connect the telescopic tube to the flexible
hose and the floor brush to the telescopic tube. The length of the telescopic tube can be adjusted. Press the button to extend it or shorten it at will (4).
5.3 Move the selector located on the brush, pressing it with a foot, to the no-bristles position (5).
5.4 Press the (6) switch. The appliance will start to operate.
You can adjust the suction power with the cursor(6).
5.5 To end suction, press the (6) switch again.
6. CLEANING UPHOLSTERY
(mattresses, sofas, car interiors, etc.)
6.1 Make sure that chapter 1 has been completed.
6.2 Connect the suction nozzle to the flexible hose and pass over the surfaces.
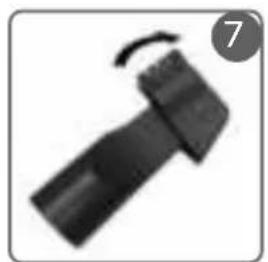
Use the 2in1 lance for thorough vacuum cleaning of hard-to-reach spots such as skirting-boards and folds in sofas, armchairs, upholstered furniture and car upholstery. The bristles of the 2in1 lance can be used by turning them 90° (7).
6.3 Press the (6) switch. The appliance will start to operate.
You can adjust the suction power with the cursor(6).
6.4 To end suction, press the (6) switch again.
With the manual cursor on the handle of the flexible hose, it is possible to intervene promptly in case of accidental suction (i.e. curtains), reducing the suction power (8).
7. EMPTYING AND CLEANING THE DUST CONTAINER
7.1 Switch off the appliance using the Ⓐ(6) switch. Disconnect the power supply cable from the mains.
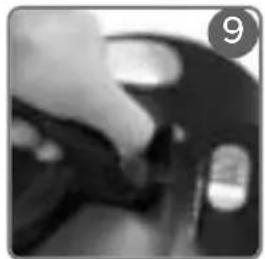
7.2 Unhook the dust container from the vacuum cleaner by opening the cover and pressing the dust container release button (9).
7.3 Remove the dust container lifting it by the handle.
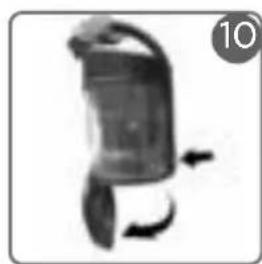
7.4 Press the button located on the container in order to open the container and remove the dirt collected (10).
ATTENTION: since by operating the button the lower base of the reservoir opens, it is recommended that this operation be done over a waste bin.
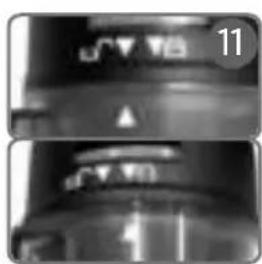
7.5 Remove the handle by turning it anticlockwise compared to the container, aligning the two reference arrows (11).
7.6 Remove the container filter and pull out the filter unit and remove any remaining dirt.
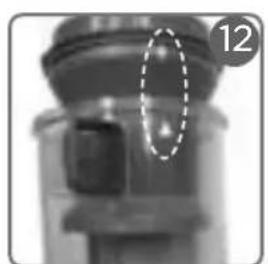
7.7 Replace the filter unit in the container, making sure that the two arrows are aligned (12).
7.8 Replace the air filter.
7.9 Reassemble the handle on the container turning it clockwise, making sure to align the two arrows (11).
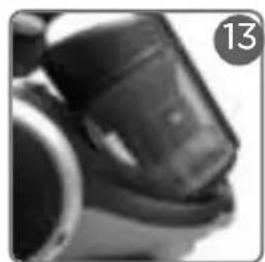
7.10 Reposition the dust container on the appliance by repeating the steps described previously in the opposite order (13).
We recommend to clean the container after each use.
WARNING: Do not use the appliance without the dust container complete with filter.
WARNING: Never exceed the “MAX” level shown on the dust container, otherwise the filters will clog reducing the suction power of the appliance.
8. GENERAL MAINTENANCE
Ensure that the appliance is switched off and disconnected from the mains.
To clean the outside of the appliance, only use a damp cloth and tap water.
Do not use detergents of any type.
8.1 CLEANING THE DUST CONTAINER
- Pull out the dirt container and remove the container filter and the filter unit, as described in the chapter 4.
- Rinse all the components under running water and let them dry.
- Replace everything repeating the steps described previously in the reverse order.
ATTENTION: Check all components of the dust collector are dry, before put them in order.
We recommend to clean the container after each use.
8.2 REMOVING AND CLEANING THE HEPA FILTER
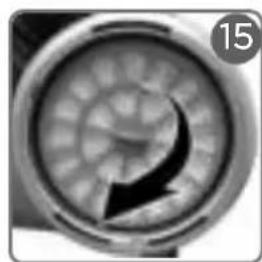
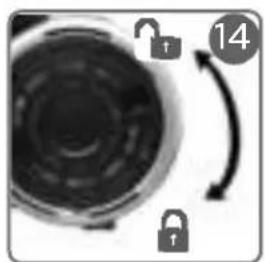
- Turn the grill anti-clockwise (14) and remove
the filter (15).
- Rinse the HEPA filter using running water only and shake gently to remove any excess dirt or water residue; before replacing the filter in the appliance, leave to dry naturally away from direct light and heat for at least 24 hours. The filters should be fully cleaned approximately twice per year.
WARNING: Check the filters during cleaning. Replace the filters when visibly damaged.
WARNING: Do not clean the filters with the brush as they can be damaged, reducing their filtering capacity. Do not use detergents, do not rub the filter, and do not wash it in a dishwasher.
9. STORAGE
9.1 Turn off the appliance and disconnect from the mains electricity.
9.2 Press the cable-winder button (6) to activate the automatic winding guiding it gently back into the appliance.
9.3 The hose and flexible hose can be housed on the body of the appliance, sliding the universal brush into the parking system on the appliance (16).
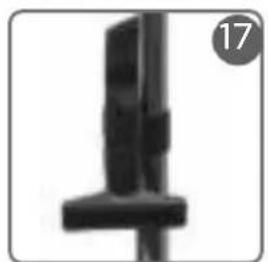
9.4 The small nozzle and the 2in1 lance can be attached to the telescopic tube using the accessory holder. Attach the single ring to the telescopic tube and insert the accessories in the 2 other rings (17).
- TROUBLESHOOTING
| PROBLEM CAUSE SOLUTION | | |
| The vacuum cleaner does not turn on. | No power. Check that the appliance is connected to the power as indicated in Chapter 1. |
| The vacuum has no/reduced suction. | Flexible hose/telescopic tube clogged.Dust-collector over full.Dust tank not inserted correctly.The suction can be adjusted on MIN. | Clean the tubes.Empty the dust collector.Insert the dust collector correctly.Increase the adjustment of the suction. |
| During suction from the appliance, dust comes out. | Dust collector not inserted correctly.Dust-collector over full.Flexible hose not inserted correctly. | Insert the dust collector correctly.Empty the dust collector.Insert the flexible tube correctly. |
| Should the problems persist, contact an Authorised Polti Service Centre (see www.polti.com for the up-to-date list) or Customer Services. |
WARRANTY
This appliance is for domestic use only and is guaranteed for two years from the date of purchase against any defects present at the time the goods are handed over; the date of purchase must be proven via a proof of purchase document valid for tax purposes and issued by the seller.
For repairs, the appliance must be accompanied by proof of purchase.
This warranty does not affect the consumer rights deriving from European Directive 99/44/EC as regards some aspects of sale and warranty of consumer goods, rights which the consumer should uphold with respect to the seller.
This warranty is valid in the countries which adhere to European Directive 99/44/EC. For other countries, local regulations on warranties apply.
WHAT THE WARRANTY COVERS
During the warranty, Polti guarantees free repair of a product with a manufacturing or factory defect and, therefore, the client is not liable to pay for any work or materials.
In case of irreparable defects, Polti may replace the product free of charge.
To avail of the warranty, the customer should visit one of the Polti Authorised Service Centres with proof of purchase from the seller valid for tax purposes and bearing the date of purchase of the product. Without proof of purchase and the relative date of purchase, the work will be charged for. Store the proof of purchase document safely for the whole duration of the warranty.
WHAT THE WARRANTY DOES NOT COVER
- Any fault or damage not deriving from a manufacturing defect.
- Any fault due to improper use or use other than that indicated in the instruction booklet, an integral part of the product sales contract.
- Any defect resulting from force majeure (fires, short circuits) or caused by third parties (tampering).
- Damage caused by the use of non-original Polti parts, and repairs or modifications performed by staff or service centres not authorised by Polti.
- Damage caused by the customer.
- Parts (filter, brush, hose, battery, etc.) damaged by use (consumable goods) or normal wear and tear.
- Any damage caused by limescale.
- Defects resulting from lack of maintenance/cleaning according to the manufacturer's instructions.
- Assembly of non-original Polti accessories or those that have been modified or which are not suitable for the appliance.
Inappropriate use and/or use not compliant with the instructions for use and any other warnings or indications contained in this manual invalidates the warranty.
Polti takes no responsibility for any direct or indirect damage to people, objects or animals caused by non-compliance with the instructions indicated in this instruction booklet, regarding warnings for use and product maintenance.
To see the up-to-date list of the Polti Authorised Service Centres, visit the website www.polti.com.
BIENVENUE DANS LE MONDE
DE FORZASPIRA
L'ASPIRATEUR SANS SAC AVEC FILTRE EPA ET RÉGLAGE DE LA PUISSANCE QUI ALLIE PARFAITEMENT QUALITÉ ET EFFICACITÉ.

natural_image
Simple black silhouette of a briefcase with handle and clasp (no text or symbols)
DES ACCESSOIRES POUR TOUS LES BESOINS
natural_image
Simple line drawing of a computer mouse with a coiled cable above it (no text or symbols)
ENREGISTREZ VOTRE PRODUIT www.polti.com
UTILISATION CORRECTE DU PRODUIT
natural_image
Simple black silhouette of a briefcase with handle and straps (no text or symbols)
ACCESORIOS PARA TODAS LAS NECESIDADES
natural_image
Simple line drawing of a computer mouse with a coiled cable above it (no text or symbols)
REGISTRE SU PRODUCTO www.polti.com
USO CORRECTO DEL PRODUCTO
natural_image
Simple black silhouette of a briefcase with handle (no text or symbols)
ZUBEHOER FUER ALLE
BEDUERFNISSE
natural_image
Simple line drawing of a computer mouse with a coiled cable above it (no text or symbols)
REGISTRIEREN SIE IHR
PRODUKT www.polti.com
natural_image
Simple black silhouette of a briefcase with handle (no text or symbols)
ACESSÓ RIOS PARA TODAS AS NECESSIDADES
natural_image
Simple line drawing of a computer mouse with a coiled cable above it (no text or symbols)
REGISTE O SEU PRODUTO www.polti.com
22070 Bulgarograsso (CO) - Italy
www.polti.com
Follow us: