
HC 2555 - Lawn mower Carmen - Free user manual and instructions
Find the device manual for free HC 2555 Carmen in PDF.
| Product type | Hair clipper |
| Brand | Carmen |
| Model | HC 2555 |
| Designation | Carmen Precise |
| Cutting lengths (small foot) | 4 to 22 mm (13 steps) |
| Cutting lengths (large foot) | 24 to 42 mm (13 steps) |
| Power supply | Mains (adapter) and rechargeable Ni-Cd battery |
| Battery life | Approximately 60 minutes |
| Battery type | Nickel-cadmium (rechargeable) |
| Cutting head | Detachable, stainless steel blades |
| Cutting feet | 2 detachable and adjustable feet |
| Included accessories | Oil, cleaning brush, hair comb, mustache comb, scissors |
| Cleaning | Brush and damp cloth; do not immerse |
| Maintenance | Oil the blade before each use |
| Safety | Do not use near water; unplug before cleaning |
| Warranty | 2 years |
| Intended use | Hair cutting only |
| Manufacturer | Glen Dimplex Benelux BV (Carmen) |
| Country of origin | Not specified |
Frequently Asked Questions - HC 2555 Carmen
User questions about HC 2555 Carmen
0 question about this device. Answer the ones you know or ask your own.
Ask a new question about this device
Download the instructions for your Lawn mower in PDF format for free! Find your manual HC 2555 - Carmen and take your electronic device back in hand. On this page are published all the documents necessary for the use of your device. HC 2555 by Carmen.
USER MANUAL HC 2555 Carmen
text_image
for men CARLENE FORUM CARLENE FORUMPRECISE

text_image
CARAMEN® FOR men PRECISE model HC2555natural_image
Mechanical assembly diagram showing a tool interacting with a mechanical component (no text or symbols visible)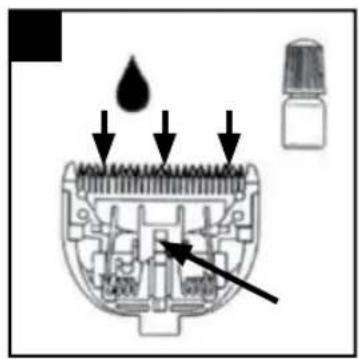
text_image
Diagram of a hairbrush with water droplet and labeled parts, including a magnified view of the component.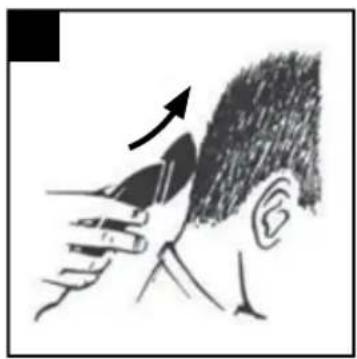
natural_image
Illustration of a person receiving hair styling with a brush (no text or symbols)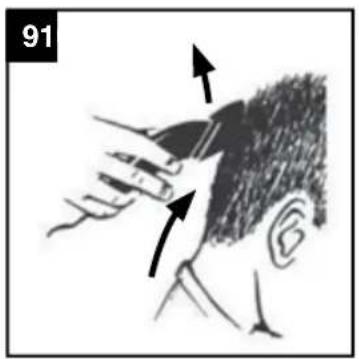
text_image
91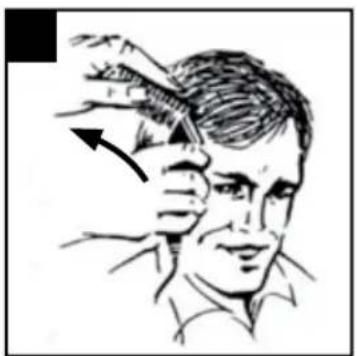
natural_image
Black-and-white line drawing of a person's face with an arrow pointing to the nose (no text or symbols)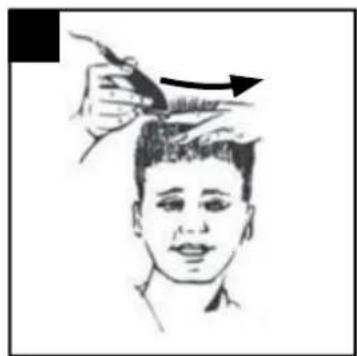
natural_image
Illustration of a person receiving hair styling with a tool, no text or symbols present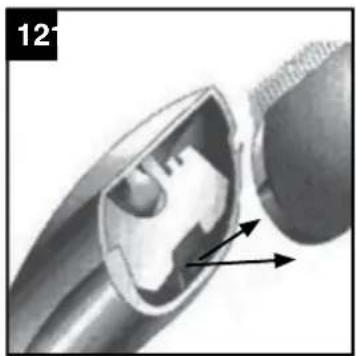
natural_image
Cross-sectional view of a mechanical component with internal cavity and directional arrows (no text or symbols)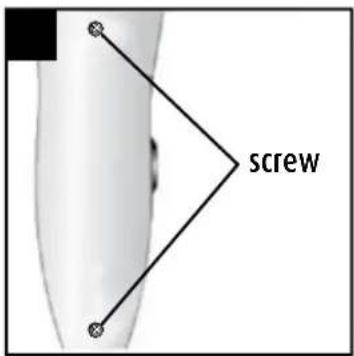
text_image
screw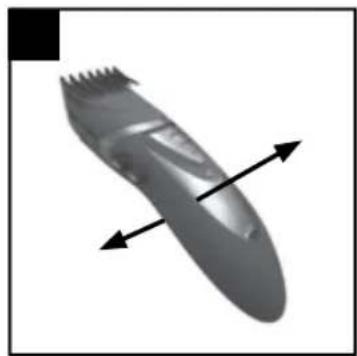
natural_image
Close-up of a hairbrush with black arrows pointing to the blade (no text or symbols)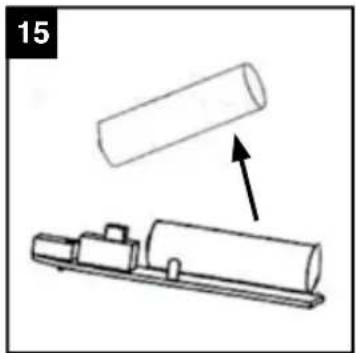
natural_image
Diagram showing a cylindrical object being placed on a mechanical component, with an arrow indicating direction (no text or symbols present)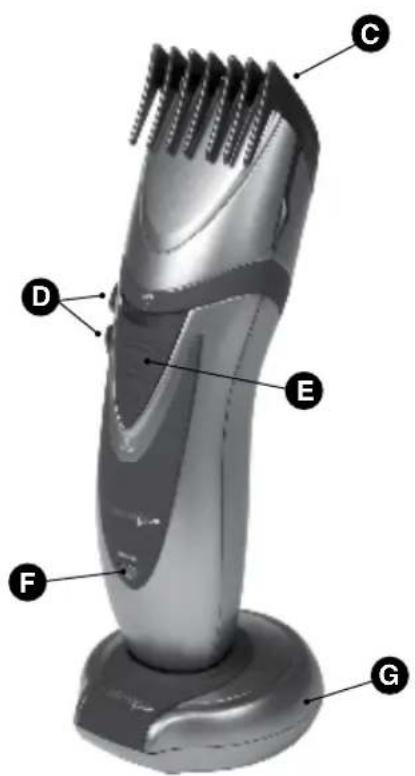
text_image
Labeled diagram of a hairbrush with six numbered parts for identification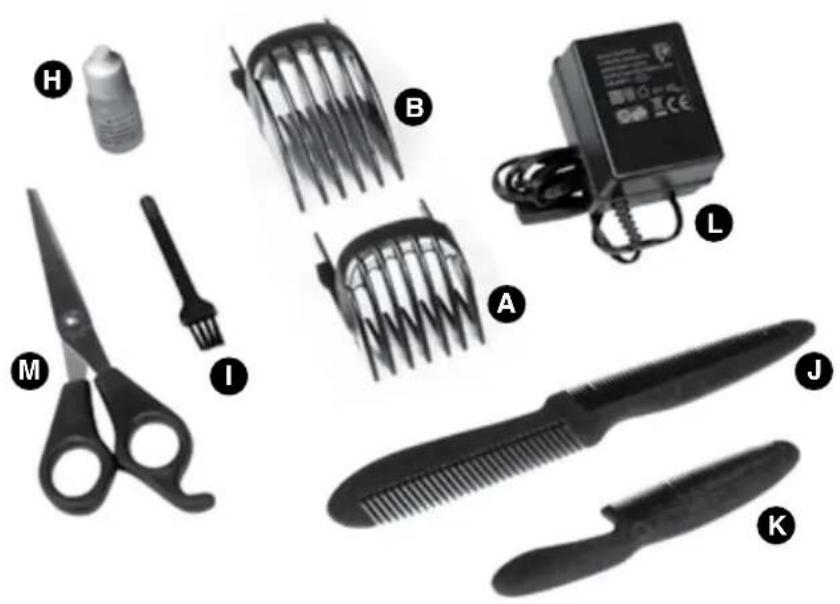
natural_image
Collection of hair styling tools including scissors, hair blows, and a digital camera (no text or symbols visible)> Instructions for use
Thank you for purchasing the Carmen Precise.
Please read these instructions carefully before using the product and keep them in a safe place for future reference.
The product
Name: Carmen Precise
Model: HC2555
> Part of the appliance
A Small attachment comb, detachable, adjustable for hair lengths of 4 to 22mm
B Large attachment comb, detachable, adjustable for hair lengths of 24 to 42 mm
C Blade set, detachable
D Cutting length control button, with locking for attachment comb when switching on
E Switch
F Charge indicator
G Charging base
H Oil for the blade set
1 Cleaning brush
J Hairstyling comb
K Moustache comb
L Adaptor
M Scissors
> For your safety
The instructions include safety guidelines and other information important for the proper functioning of the appliance. Please read the instructions carefully and keep them in a safe place. If the appliance changes hands, be sure to give the instructions to the new owner. It is in your own interest to follow all safety guidelines.


> Safety instructions
Warning - risk of electrical shock:
- Check the equipment, plug-in transformer and mains cable each time before use. If damaged then replaced by a qualified electrician.
- Only plug into an AC socket.
- Note the rated voltage.
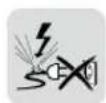
- Disconnect the plug-in transformer from the socket before carrying out any cleaning/maintenance.
- Do not use the equipment near a bath/shower, or over a wash basin containing water.
- Keep the equipment out of the reach of children.
- The equipment is only intended for cutting hair. Any other use will constitute use for an unintended purpose.
- Do not expose the equipment to temperatures below 0 °C and above +40 °C for prolonged periods. Avoid direct exposure to sunlight for prolonged periods.
- Only specialists are allowed to do reparations. Improperly reparations can cause considerable danger!
- There is always risk of injury when using electrical appliances improperly!
- To prevent unintentional misuse, keep the appliance stored away in a safe place.
Operating Instructions
- Plug in the adaptor into the equipment socket. (Fig. 1a).
- Plug in the adaptor transformer into the wall socket (Fig 1b).
- Switch the equipment on with the On/Off switch (Fig. 2a) and switch off after use (Fig. 2b).
- Note: If the equipment does not work in mains operation when the battery is fully discharged, switch equipment off and change battery for 5 minutes. Switch on again and use with mains connection.
Charging battery
- Plug in the adaptor.
- Plug in the plug-in transformer into the wall socket (Fig. 1c).
- Switch the equipment off with the On/Off switch (Fig. 2b).
The equipment only charges when it is switched off. During charging the charge indicator lights up.
- Only recharge when performance of the machine noticeably drops.
- When the battery is fully charged the equipment can be used approx. 60 minutes.
Cutting with attachment combs
The equipment can be used with or without attachment combs depending on the hair cut you want.
The attachment combs give the following cutting lengths:
Setting Hair length in mm
| 1 | 4 | 24 |
| 2 | 6 | 26 |
| 3 | 7 | 27 |
| 4 | 9 | 29 |
| 5 | 10 | 30 |
| 6 | 12 | 32 |
| 7 | 13 | 33 |
| 8 | 15 | 35 |
| 9 | 16 | 36 |
| 10 | 18 | 38 |
| 11 | 19 | 39 |
| 12 | 21 | 41 |
| 13 | 22 | 42 |
Fixing attachment comb
- Press the attachment control button (D) to position "1" for snap on or off attachment comb.
- Grasp the required attachment comb by the side guide brackets (Fig 3a) and carefully place it in the notch in the equipment until it snaps into place (Fig 4).
- Set the required hair length by pressing the button (D) to adjust the attachment comb up & down.
- Adjustment is carried out at the side of the equipment by pressing the cutting length control button.
- The attachment comb will be locked automatically when the equipment is switch on.
Removing attachment comb
- Move the control Button (D) to position"1"
- Grasp the attachment comb by the two side guide brackets and pull it out of the equipment (Fig. 3b). And push button D at the same time.
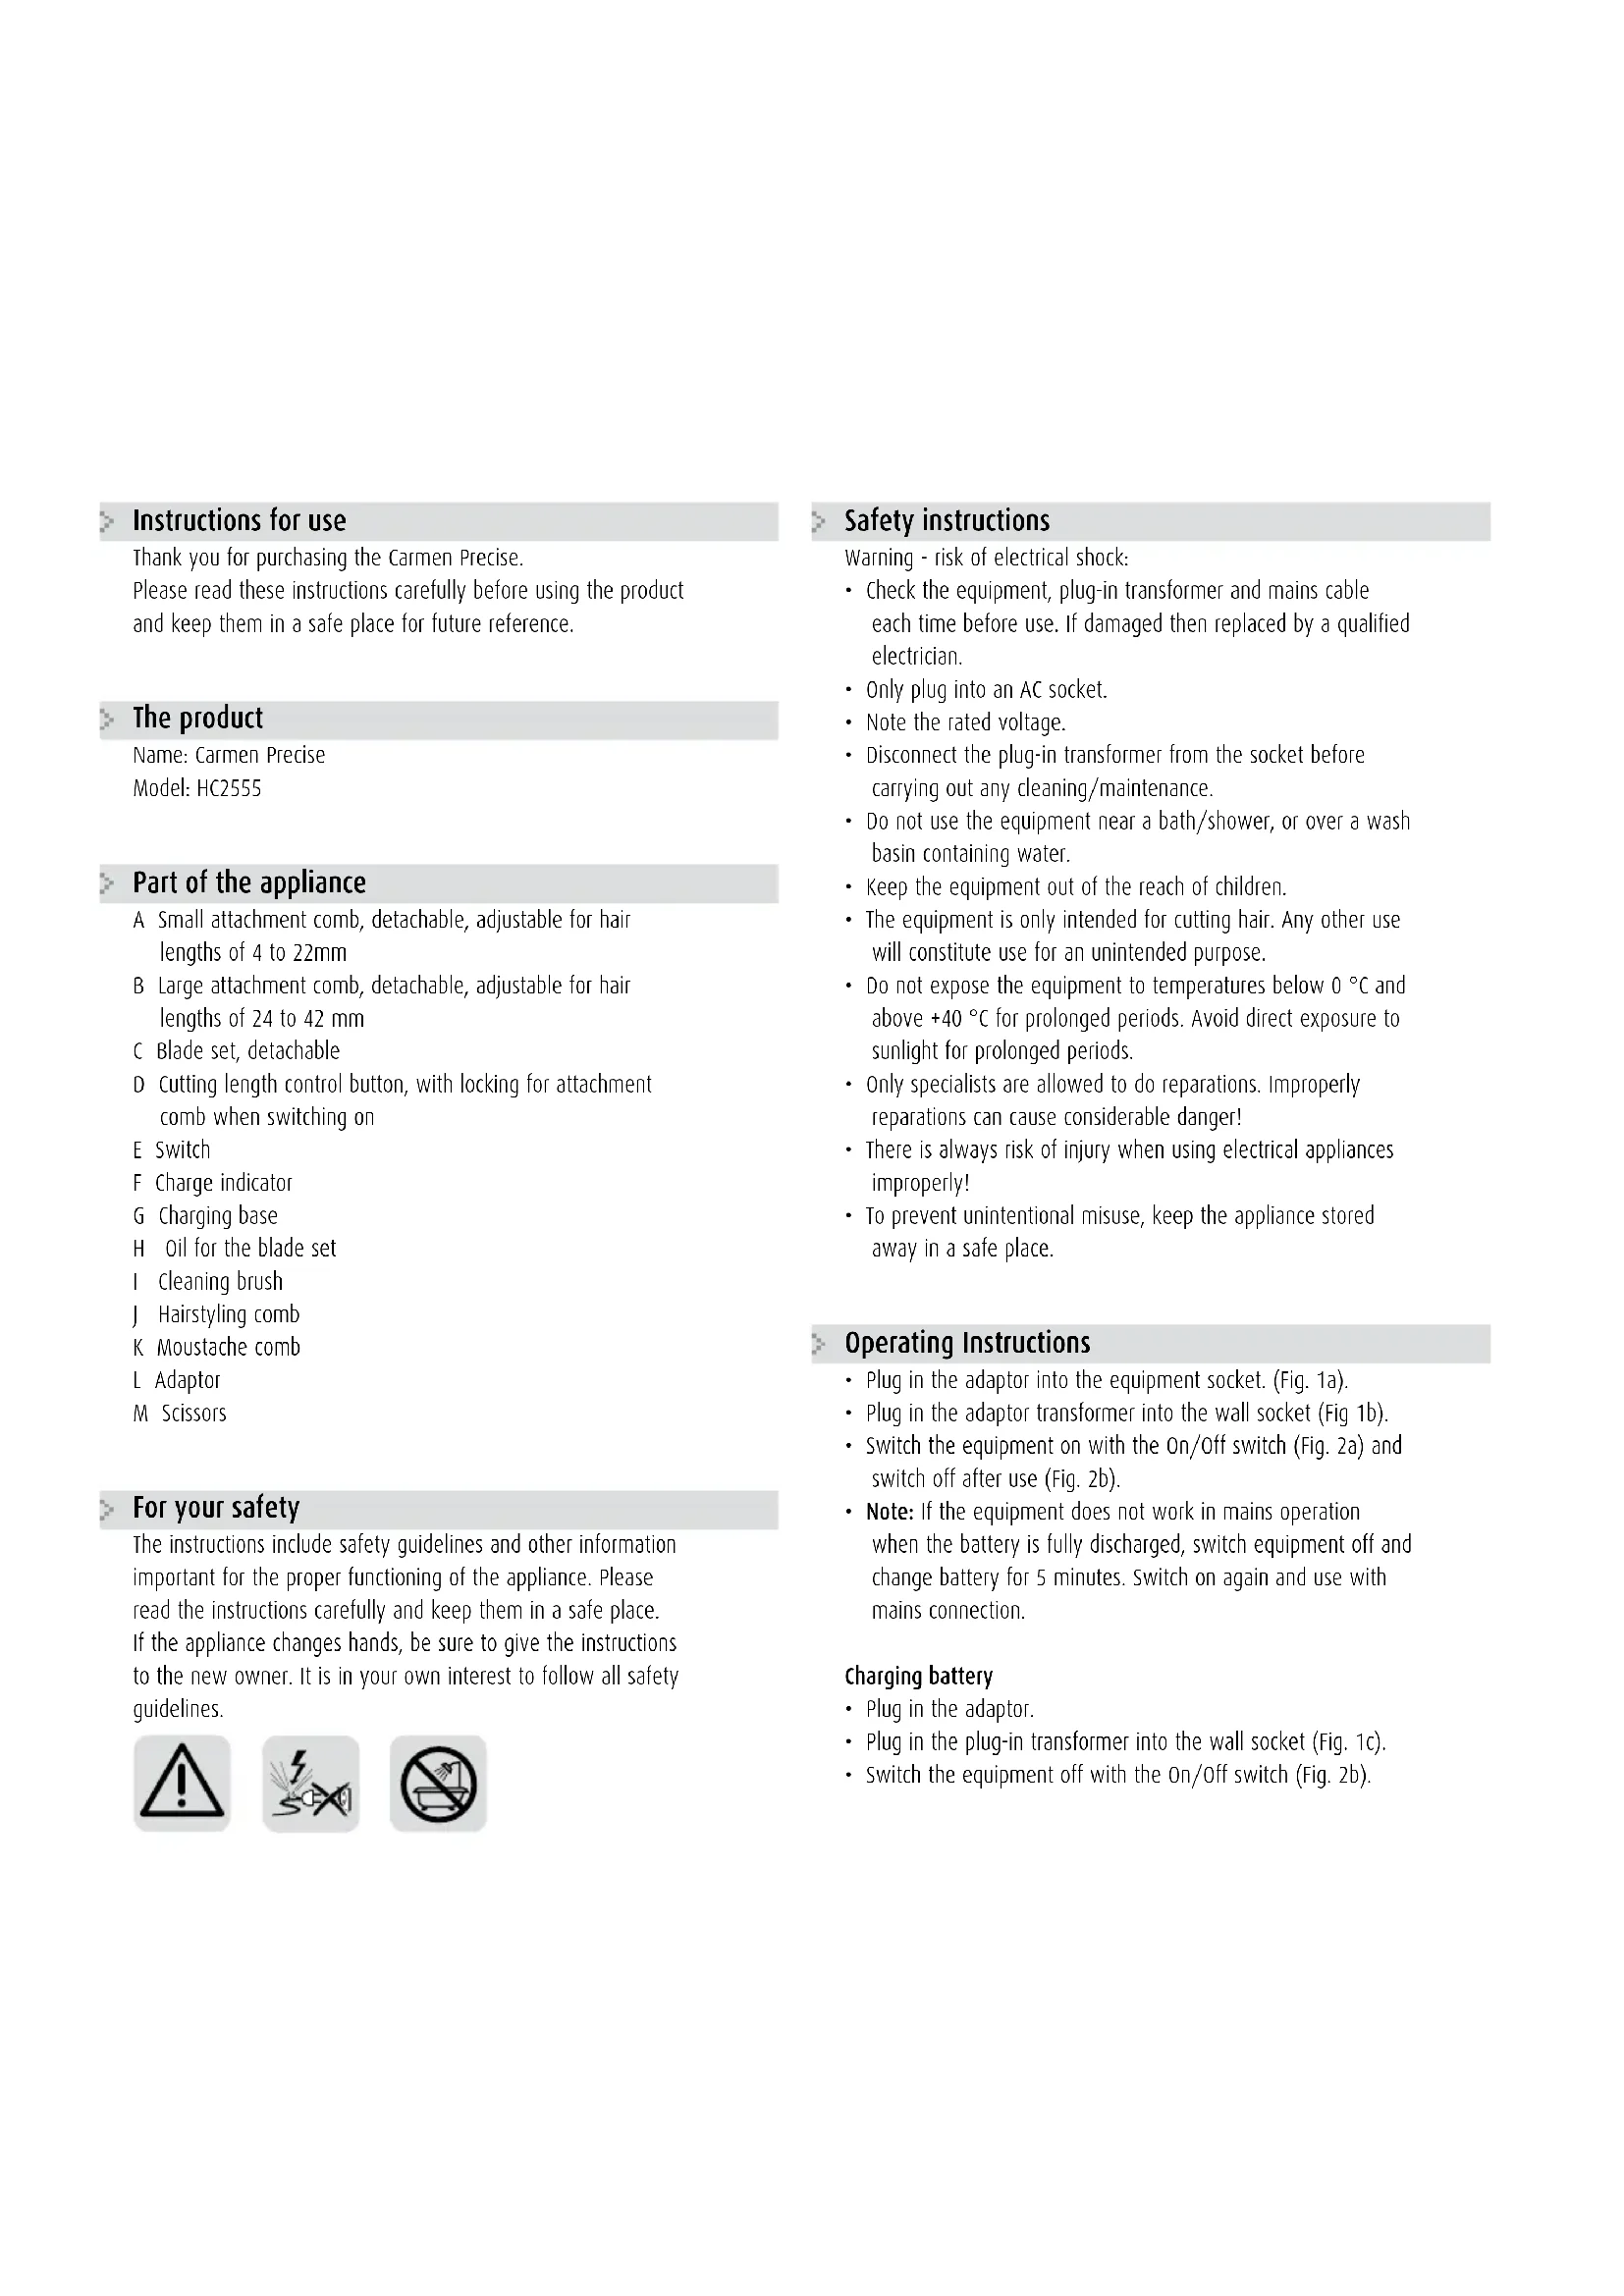
Stainless Steel Blade
This hair clipper comes with a stainless steel blade. The blade is already oiled. The oil may have run out of the blade during transport. We therefore advise you to apply a drop of oil before using the hair clipper. We also recommend you to add a drop of oil to the hair clipper before each use. If the blade feels hot or does not run smoothly, a drop of oil should be applied to the blade.
Remark:
Provided oil is only for preservation of the cutting blade if the hair clipper is not in use for a month. Then add a drop.
Tips for a successful styling.
- Make sure you choose the correct attachment comb and setting.
- Make sure that the equipment is clean and the battery is charged.
- Hold the equipment in such a way that the flat side of the attachment comb is pointing towards the head and guide it slowly but steadily through the hair (Fig 8).
- As a general rule, start at the sides or on the neck and cut towards the middle of the head (Fig 9). Then cut the hair on the forehead towards the middle.
- Cut hair more than 40 mm long with a hairstyling comb (Fig.10). or hold it between your fingers (Fig.11).
- Stop cutting from time to time, comb the hair out and check the result so far.
- Regularly shake and blow hair out of the equipment. If you have collected a lot of hair in the attachment comb, take it out clean it and blow it clear.
- Clean the equipment after each use (Fig. 5/6).
Changing the blade set
- Switch the equipment off with the On/Off switch (Fig. 2b).
- The blade set can be removed by pressing down and away in the direction of the arrow on the housing (Fig. 6a).
- To reuse, place the blade set with the hook engaged into the slot in the housing and press down into the housing until it snaps into place (Fig. 6b).
> Cleaning and maintenance
- Do not immerse the equipment in water.
• After each use, pull out the attachment comb (Fig. 5) and remove any remaining hair from the blade set and the housing opening with the cleaning brush (Fig. 6). - Only wipe the equipment with a soft cloth which may be slightly damp. Do not use solvents or scouring agents.
- You should oil the blade before use (fig. 7).
- It is important to add a drop of oil if you do not use the clipper for a month (Fig.7).
- If, despite regular cleaning, the cutting performance drops, the blade set should be changed.
- After use and cleaning of the equipment, the attachment comb also acts as a blade guard.
> Environment and Disposal
This equipment contains a rechargeable nickel-cadmium battery. In the interest of the environment please do not dispose of with the household rubbish at the end of its useful life.
Disposal of battery
- Please dispose of the equipment at the end of its useful life in an environmentally friendly manner.
- Pull the plug-in transformer out of the wall socket and turn the equipment on so that the battery is fully discharged.
- Remove blade set and remove the screw from the bottom housing (Fig.13). Pull apart the two halves of the housing (Fig. 14).
-
Remove the circuit board.
-
Cut the connection plate between battery and circuit board and then remove the battery.
• Take the battery to a suitable collection site. - Do not connect to the mains again with the battery removed.
> Guarantee
The guarantee covers this product for a period of 2 years, beginning on the date of original purchase. Use of the guarantee does not result in extension of the guarantee period. The guarantee covers manufacturing faults and material faults in original parts. Normal wear (for example foil, floating trimmer and blade block) and tear and damage resulting from inappropriate use are not covered by the guarantee.
If your product requires repair, you should contact an authorised service dealer.
Never dispose of your appliance with the regular household waste. Follow the waste disposal regulations for your locality or return your appliance to the retailer. Retain the retailer's receipt as proof of purchase.
Carmen has a policy of continuous improvement in product quality and design. Carmen therefore reserves the right to change the specifications of its products at any time.