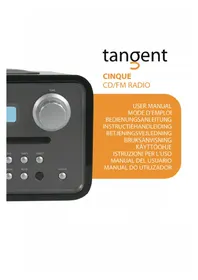
Cinque DAB - Hi-fi system TANGENT - Free user manual and instructions
Find the device manual for free Cinque DAB TANGENT in PDF.



| Product type | Hi-fi system with radio alarm clock |
| Brand | Tangent |
| Model | Cinque DAB |
| Dimensions (W x H x D) | 210 x 129 x 200 mm (with feet) |
| Weight | 3.80 kg (with adapter) |
| Power supply | 12 V DC (mains adapter included) |
| Radio bands | FM RDS 87.5-108 MHz, AM 422-1620 kHz |
| Compatible disc formats | Audio CD, CD-R, MP3, WMA |
| Speaker | 3" dynamic full-range speaker (7.6 cm) |
| Output power | 5 W RMS |
| Connections | 3.5 mm headphone output, 3.5 mm AUX input, 3.5 mm line output, FM antenna (F connector) |
| Antenna | FM telescopic antenna included, connector for external AM antenna |
| Main functions | FM/AM radio with RDS, CD player, AUX input, alarm, sleep timer, snooze, equalizer (bass, treble, loudness) |
| Display | Backlit LCD screen |
| Remote control | Provided with navigation and numeric keys |
| Sound settings | Bass, Treble, Loudness (adjustable via menu) |
| Radio presets | 12 presets (FM and AM) |
| Cleaning and maintenance | Use a soft, dry cloth; do not use harsh detergents; unplug before cleaning |
| Safety | Do not open the casing; do not expose to moisture, extreme heat or vibrations; leave at least 20 cm free space at the rear |
| Repairability | Repairs reserved for qualified technician; no spare parts available in the manual |
Frequently Asked Questions - Cinque DAB TANGENT
User questions about Cinque DAB TANGENT
0 question about this device. Answer the ones you know or ask your own.
Ask a new question about this device
Download the instructions for your Hi-fi system in PDF format for free! Find your manual Cinque DAB - TANGENT and take your electronic device back in hand. On this page are published all the documents necessary for the use of your device. Cinque DAB by TANGENT.
USER MANUAL Cinque DAB TANGENT
tangent
CINQUE CD/FM RADIO
USER MANUAL MODE D'EMPLOI BEDIENUNGSANLEITUNG INSTRUCTIEHANDLEIDING BETJENINGSVEJLEDNING BRUKSANVISNING KÄYTTÖOHJE ISTRUZIONI PER L'USO MANUAL DEL USUARIO MANUAL DO UTILIZADOR
UK USER MANUAL 5
F MODE D'EMPLOI 23
Connecting the radio 12
FM mode 12
Scanning for station in FM mode 12
RDS 13
Saving a station to a preset. 13
AM mode 13
Scanning for station in AM mode 13
Saving a station to a preset. 13
AUX mode 13
CD mode 14
The settings menu 14
Time and Date 14
Alarm 15
Sleep 15
Snooze 15
Bass 15
Treble 15
Loudness 16
Disc time 16
Software version 16
Sysem reset 16
Snooze and mute 16
Sleep timer 17
Setting the alarm 18
Notes regarding playback of discs 20
Specifications 21
Important information
Congratulations on your new radio. Please read this manual carefully to avoid malfunction and damage to the clock radio and to ensure that the radio will be a source of great pleasure to you for a very long time.
- Do not expose the clock radio to direct sunlight, high humidity, dirt, heavy vibration or extreme temperatures.
- Place the unit on a solid and plane surface.
- Make sure that there is sufficient ventilation around the clock radio. Do not place the unit on a soft surface such as a carpet. Make sure that there is a clearance of 20 cm behind the unit.
- Do not open the cabinet. Only qualified technicians are allowed clean the internal parts.
- Make sure that liquid and foreign matter cannot penetrate the unit.
- If service or repair is required, this must be carried out by qualified technicians.
- Unplug the unit in the following cases:
A. The mains plug or the mains cable is defective.
B. Foreign matter or liquid has penetrated the radio.
C. The unit cannot be operated properly.
D. The unit has fallen down or the cabinet has been damaged.
-
Store this instruction manual carefully for future reference.
-
Use a duster or a slightly damp, soft and non-fluffy rag to clean the radio.
-
Do not use corrosive or strong cleaning agents. Make sure that no moisture penetrates the radio during cleaning. Unplug the unit before cleaning.
-
Check that the mains voltage indicated on the back of the clock radio corresponds to the mains voltage that the unit is connected to.
-
Unplug the unit if the clock radio is not to be used for a long time.
Disclaimer
Despite extensive efforts we cannot guarantee that the technical data indicated are correct, complete and updated. We reserve the right to make technical changes without notice.
Front panel
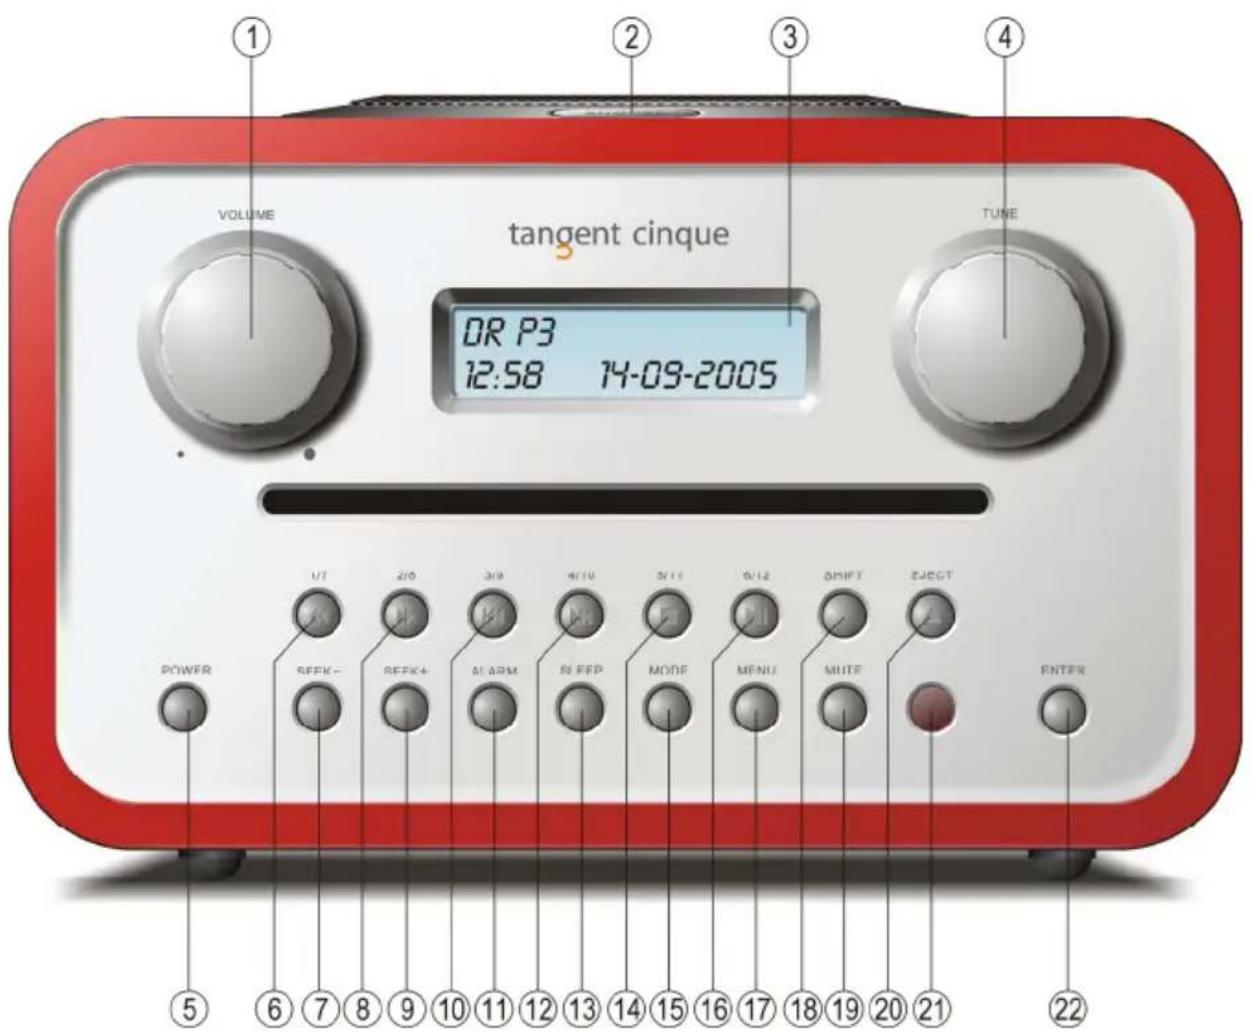
- VOLUME: Turn the volume knob to the right to increase the volume or to the left to decrease the volume of the speakers. This knob will also control the volume of headphones when connected.
- SNOOZE: (On top of the clock radio) Press this button during an alarm to delay the alarm 5 and 22 minutes. (The snooze time can be adjusted in the menu)
When the unit is in standby, press this button to light up the display for 10 seconds. When the unit is on the SNOOZE button works as a MUTE button.
- LCD DISPLAY: Liquid Crystal Display. The display shows information such as the radio station name, date and time, etc.
- TUNE: Turn the tune knob to the right or to the left to change the frequency range in FM and AM.
In CD mode te button works as previous and next button.
- POWER: Press this button to turn the unit on and set it into standby
- 1/6/FAST REVERSE: Selects the station saved at the current number. If pressed in combination with the SHIFT button (18) the largest of the two numbers at the button is selected. If the button is pressed for more than two seconds, a station will be saved at
the current number.
Press and hold the button in CD mode to go fast reverse on the disc playing.
-
SEEK-: Press this button to auto seek down in frequency in FM and AM mode.
-
2/8/FAST FORWARD: Selects the station saved at the current number. If pressed in combination with the SHIFT button (18) the largest of the two numbers at the button is selected. If the button is pressed for more than two seconds, a station will be saved at the current number.
Press and hold the button in CD mode to go fast forward on the disc playing.
-
SEEK+: Press this button to auto seek up in frequency in FM and AM mode.
-
3/9/PREV: Selects the station saved at the current number. If pressed in combination with the SHIFT button (18) the largest of the two numbers at the button is selected. If the button is pressed for more than two seconds, a station will be saved at the current number.
Press the button in CD mode to select the previous track on the disc playing.
-
ALARM: This button sets the alarm function on and off. Press and hold the button to set the alarm time and source.
-
4/10/NEXT: Selects the station saved at the current number. If pressed in combination with the SHIFT button (18) the largest of the two numbers at the button is selected. If the button is pressed for more than two seconds, a station will be saved at the current number.
Press the button in CD mode to select the next track on the disc playing.
-
SLEEP: This button sets the sleep timer. When the sleep timer is activated the Tangent Cinque will turn off after 15, 30, 45, 60, 75 or 90 minutes.
-
5/11/STOP: Selects the station saved at the current number. If pressed in combination with the SHIFT button (18) the largest of the two numbers at the button is selected. If the button is pressed for more than two seconds, a station will be saved at the current number.
Press the button in CD mode to stop playback of the loaded disc.
-
MODE: This button changes between FM, AM, CD and AUX mode.
-
6/12/PLAY/PAUSE: Selects the station saved at the current number. If pressed in combination with the SHIFT button (18) the largest of the two numbers at the button is selected. If the button is pressed for more than two seconds, a station will be saved at the current number.
Press the button in CD mode to start playback of the disc loaded. If pressed during playback the disc playing is temporarily stopped. Press it again to resume playback.
-
MENU: Press this button to enter and exit the settings menu.
-
SHIFT: Activates the double function on the digit buttons. Press the button once in combination with one of the digit buttons and the largest of the two numbers at the digit button will be selected. When the Shift button is pressed the text "sh" will flash in the top left corner of the display.
-
MUTE: Press this button once to mute the sound. Press it again and the sound will reappear.
-
EJECT: Ejects the disc loaded into the unit.
-
IR RECEIVER: For receiving remote codes from the included remote control.
- ENTER: This button confirms your choice when setting the alarm or making adjustments in the settings menu.
Rear panel
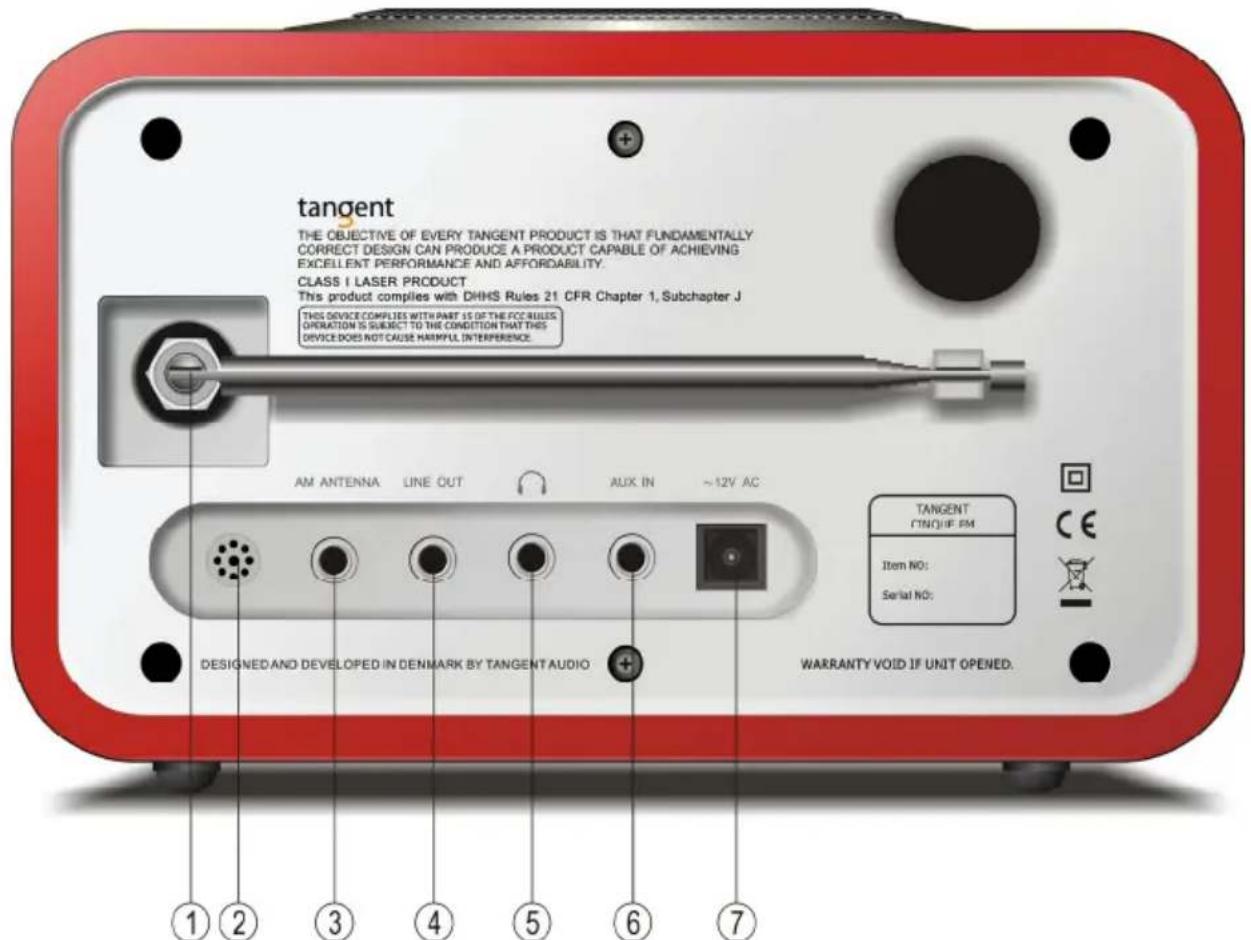
- ANTENNA: The Tangent Cinque comes with a telescopic antenna. To improve FM or DAB reception, adjust the antenna for the best reception.
- BUZZER: The Buzzer is used for the alarm when you want to be woken to a buzz instead of music.
- AM ANTENNA: For connecting an AM antenna. An antenna is required to receive AM on the Tangent Cinque.
- LINE OUTPUT: The Tangent Cinque can be used as a separate tuner by connecting it to an amplifier or a receiver.
- HEADPHONE: Connect a separate headset to this connector to listen to Tangent Cinque with a headset. Inserting a headset will turn off the main speaker
- AUX INPUT: Connect a stereo or mono audio source to this input. (Like a MP3 player or a cell phone)
- POWER INPUT: Use this input to connect the included Tangent Cinque power supply.
Remote control
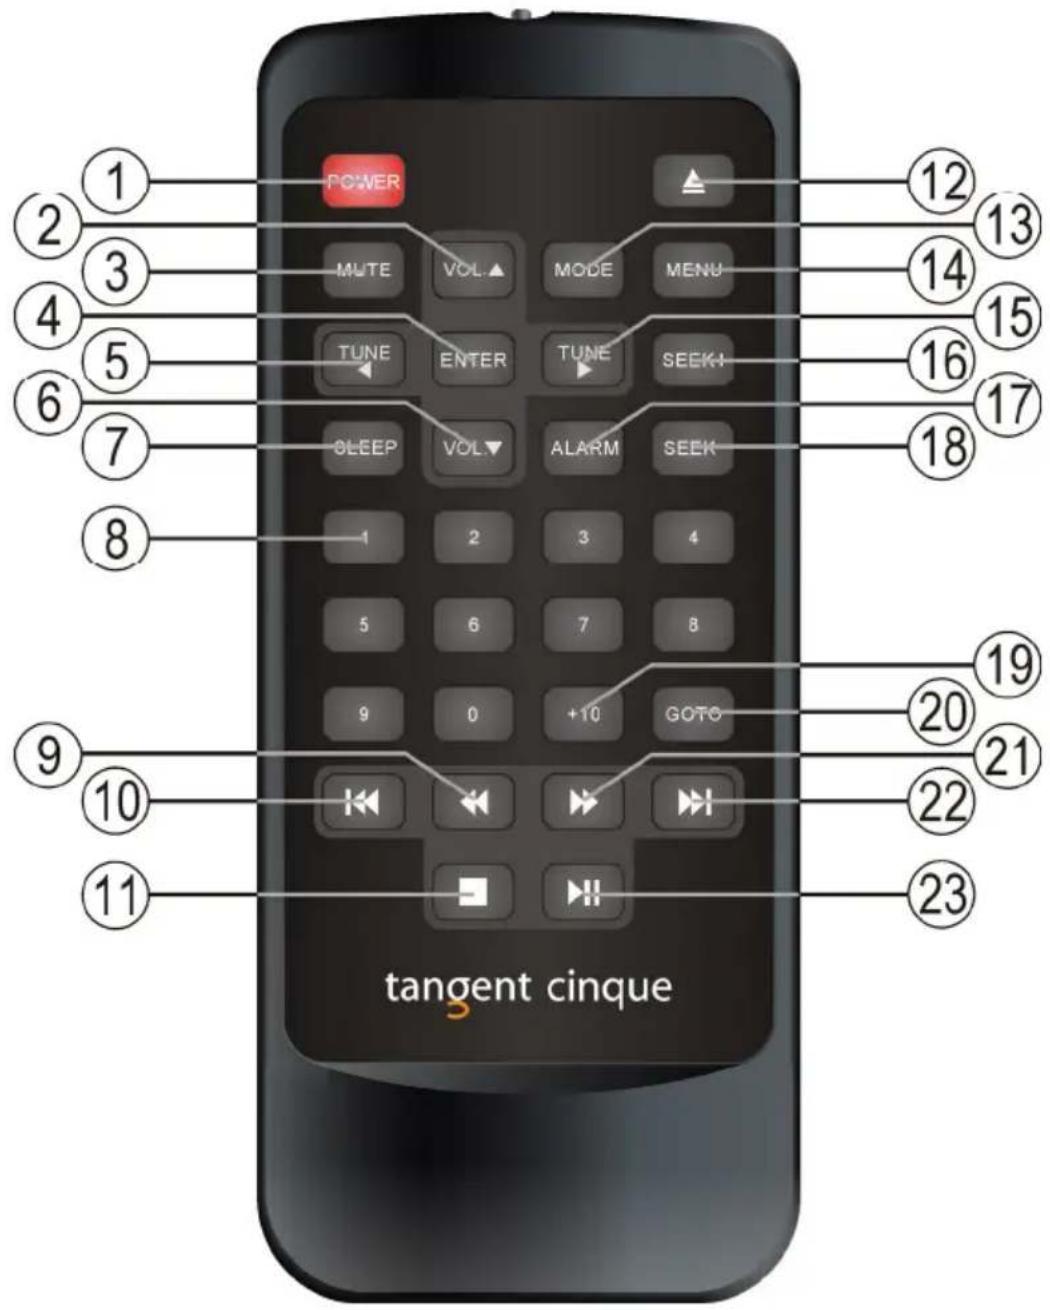
- POWER: Press this button to turn the unit on and set it into standby
- VOLUME UP: Press this button to increase the volume. This button will also control the volume of headphones when connected.
- MUTE: Press this button once to mute the sound. Press it again and the sound will reappear.
- ENTER: This button confirms your choice when setting the alarm or making adjustments in the settings menu.
-
TUNE LEFT: Press this button to lower the frequency in FM and AM mode.
-
VOLUME DOWN: Press this button to decrease the volume. This button will also control the volume of headphones when connected.
- SLEEP: This button sets the sleep timer. When the sleep timer is activated the Tangent Cinque will turn off after 15, 30, 45, 60, 75 or 90 minutes.
- 0-9 DIGITS: Selects the station saved or the track at the current number. If pressed in combination with the +10 button (19) numbers larger than 9 can be selected. If the buttons are pressed for more than two seconds, a station will be saved at the current number.
- FAST REVERSE: Press and hold the button in CD mode to go fast reverse on the disc playing.
- PREVIOUS: Press the button in CD mode to select the previous track on the disc playing.
- STOP: Press the button in CD mode to stop playback of the loaded disc.
- EJECT: Ejects the disc loaded into the unit.
- MODE: This button changes between FM, AM, CD and AUX mode.
- MENU: Press this button to enter and exit the settings menu.
- TUNE RIGHT: Press this button to higher the frequency in FM and AM mode.
- SEEK+: Press this button to auto seek up in frequency in FM and AM mode.
- ALARM: This button sets the alarm function on and off. Press and hold the button to set the alarm time and source.
- SEEK-: Press this button to auto seek down in frequency in FM and AM mode
- +10: Use this button in combination with one of the 0-9 digit buttons to select tracks or presets higher than 9.
- GOTO: Press this button in combination with the 0-9 digit buttons to go directly to a track on the disc. Ex.: if you would like to play track number 62, press GOTO, 0, 6 and 2.
- FAST FORWARD: Press and hold the button in CD mode to go fast forward on the disc playing.
- NEXT: Press the button in CD mode to select the next track on the disc playing.
- PLAY/PAUSE: Press the button in CD mode to start playback of the disc loaded. If pressed during playback the disc playing is temporarily stopped. Press it again to resume playback.
Using the radio
Connecting the radio
Place the radio on a plain surface. Connect the included adaptor to the radio.
Check that all other connections have been made correctly before inserting the mains plug into the wall socket. Check that the mains voltage is correct according to the voltage stated on the adaptor before turning on the power.
The Tangent Cinque will go into standby and is ready for use.
Turn the unit on by pressing the power button on the front panel. The display will show the message below.
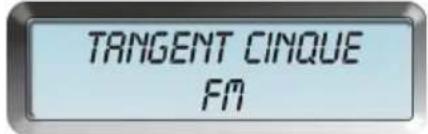
When the radio is in standby, you can see what mode the radio will start up in, when it is turned on next time. The radio will display either FM and the time or AM and the time. The display will not be as brightly illuminated in standby mode, as when the unit is turned on.

FM mode
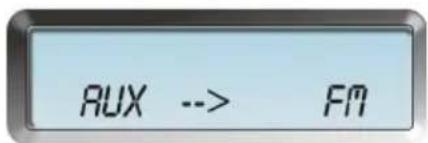
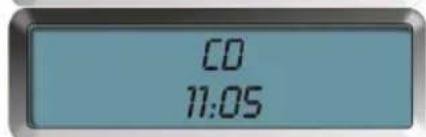
When the radio is on, select FM mode by pressing the MODE button until the message below appears in the display.
Scanning for station in FM mode
To scan for stations in FM mode, press the SEEK+ or SEEK- buttons to scan either up or down in frequencies. The radio will then search for the first coming available station, and stop when it has found that.
It is also possible to tune manually by pressing the TUNE LEFT or TUNE RIGHT buttons or turning the TUNE button on the front panel. Turn the TUNE button on the front panel clockwise to tune up in frequency and counter clockwise to tune down in frequency.
RDS
This radio features RDS (Radio Data System) on FM. This will give you the possibility to see which station you are listing to and get information from the station on the display. The RDA information will automatically be displayed in the LCD display whenever it is available.
Note: Please notice that these information are not available on all station.
Saving a station to a preset.
If you want to save a channel under one of the 12 presets, you must press down the button with the number concerned for two seconds. When the channel has been saved and you wish to listen to that channel, press the button with the number that you have saved the channel under. The procedure is the same for both FM and AM.
Channels that have not been saved can be selected or retuned by means of the TUNE knob on the front panel.
AM mode
When the radio is on, select AM mode by pressing the MODE button until the message below appears in the display.

Scanning for station in AM mode
To scan for stations in AM mode, press the SEEK+ or SEEK- buttons to scan either up or down in frequencies. The radio will then search for the first coming available station, and stop when it has found that.
It is also possible to tune manually by pressing the TUNE LEFT or TUNE RIGHT buttons or turning the TUNE button on the front panel. Turn the TUNE button on the front panel clockwise to tune up in frequency and counter clockwise to tune down in frequency.
Saving a station to a preset.
If you want to save a channel under one of the 12 presets, you must press down the button with the number concerned for two seconds. When the channel has been saved and you wish to listen to that channel, press the button with the number that you have saved the channel under. The procedure is the same for both FM and AM.
Channels that have not been saved can be selected or retuned by means of the TUNE knob on the front panel.
AUX mode
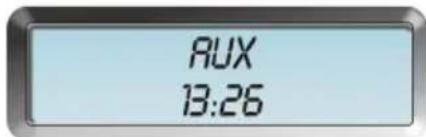
The unit has an auxiliary stereo input. This input can be used to connect an external CD player or similar to. To select the auxiliary input, press the MODE button. Press the MODE again to change back to listen to radio.
CD mode
This radio can also play several different types of discs including MP3 and WMA discs. When the radio is on, select CD mode by pressing the MODE button until the message below appears in the display.
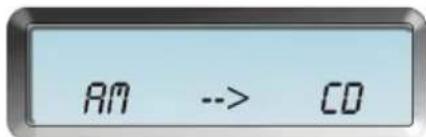
To start playback, simply load a disc into the slot in disc drive on the front of the radio. The radio will start playback automatically when it has detected the disc.
You can always stop the disc from playing by pressing the STOP button.
If you would like to pause the disc from playing, simply press the PLAY/PAUSE button.
Press the PLAY/PAUSE button once again to resume playback.
If you would like to listen to a different track on the disc loaded in the radio you can press the I<< (PREV.) or >>I (NEXT) buttons on the front or remote. Then you will step the next or previous track.
Note: The TUNE button on the front panel, has the same function in CD mode as the I<< and >>I button.
You can also punch in the number of the preferred track directly, by using the 0-9 and +10 buttons on the remote. If you use the GOTO function on the remote, you must remember to punch in 3 digits always. That means if you would like to go directly to track 57 on the disc in the radio, then press GOTO, 0, 5 and 7.
The settings menu
This radio features a settings menu where it is possible to set up different features like sound and playback mode. Enter the settings menu by pressing the menu button. Choose the menu point you would like to adjust by turning the TUNE button and select be pressing ENTER. Make all adjustment in the settings menu by turning the TUNE button and confirm each choice by pressing ENTER.
The settings menu features the following options:
Time and Date
This radio features a clock for alarm purposes. To enter the Time and Date settings menu press the ENTER button. The display will show similar information as the picture below.
You will see that the first number on the display will start to flash. This is the hour setting. Set it by turning the TUNE button and confirm by pressing ENTER. The minut setting will now start to flash. Set it by turning the TUNE button and confirm by pressing ENTER. The day setting in the date and then the month and the hour setting will flash afterwoods. Use the same procedure to set the date and confirm be pressing ENTER
TIME SET
09:27 04-10-2007
Alarm
This function gives the possibility of setting the alarm. Please see the part "Setting the alarm" below for further information.
<ALARM SET>
Sleep
This function gives the possibility to make the radio turn off by it self after some time. Please see the part "Sleep timer" below for further information.
<SLEEP SET>
Snooze
This function gives the possibility of changing the snooze time. Please see the part "Snooze and mute" below for further information.
<SNOOZE SET>
Bass
This radio features a built in equalizer. Here you can adjust the bass level of the built in speaker and on the headphone output with +/- 3dB. Adjust by turn the TUNE button and confirm be pressing ENTER.
<BRSS SET>
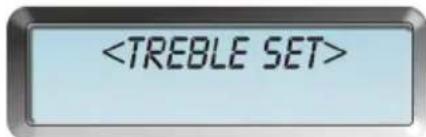
Treble
This radio features a built in equalizer. Here you can adjust the treble level of the built in speaker and on the headphone output with +/- 3dB. Adjust by turn the TUNE button and confirm be pressing ENTER.
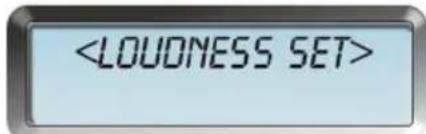
Loudness
This radio features a built in equalizer. Here you can set loudness on and off for the built in speaker and on the headphone output. Adjust by turn the TUNE button and confirm be pressing ENTER.
Disc time
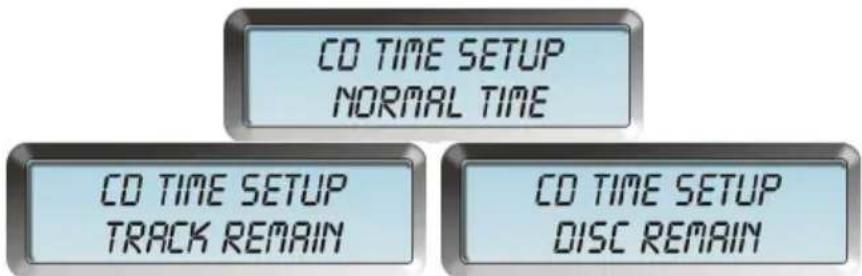
Here you can adjust the way the playback time of a disc id shown on the display. Adjust by turning the TUNE button on the front and confirm by pressing ENTER. You have the following options:
Normal Time: The display will show the elapsed time of the current track playing. Track Remain: The display will show the remaining time of the current track playing. Disc Remain: The display will show the remaining time of the current disc playing.
Software version
Here you can see the current software version in the radio.

Sysem reset
This function makes it possible to set all setting back to factory defaults. Please notice that once you have pressed ENTER to this menu setting, all alarm, tuner and time settings will be deleted.

Snooze and mute
The SNOOZE button works as MUTE button when the radio is on.
If you press the SNOOZE button after an alarm has been activated, the alarm will be delayed for between 1 and 10 minutes.
When the snooze function is active, the display will show a flashing "Z" in the upper right corner.
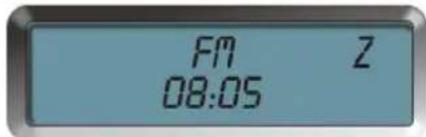
To adjust the snooze time, press the MENU button to enter the settings menu. Turn the TUNE button on the front panel until the display shows
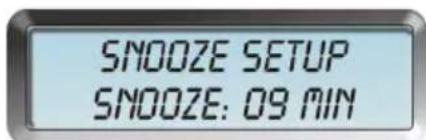
Turn the TUNE button to adjust and confirm by pressing ENTER. Exit the settings menu by pressing the MENU button again.
Note: If the SNOOZE button is pressed during standby, the display will be illuminated for 10 seconds, so it is possible to check the time in darkness.
Sleep timer
The radio has a sleep timer function. This makes the radio able to turn off by it self. To activate the sleep function press and hold the SLEEP button for 2 seconds, set the sleep function on or off by turning the TUNE button, and confirm with ENTER. Then choose how long there should go before the radio turns off by turning the TUNE button. Choose between 15 minutes, 30 minutes, 45 minutes, 60 minutes, 75 minutes and 90 minutes. Confirm your choice with ENTER.
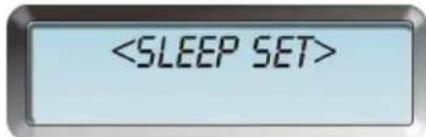
When the sleep timer is activated. The display will show a "s" on the right side.
To set the sleep timer off again, simply press the SLEEP once again.
If the POWER button is pressed, the radio will go into standby and the sleep timer function will be cancelled
It is also possible cancelling the sleep function by choosing off in the sleep timer menu, the same way as the sleep timer was set on.
Setting the alarm
Before setting the alarm, the internal clock must be set. Please see the part "Time and Date" above for reference.
To set the alarm, press and hold the ALARM button for 2 seconds to access the alarm time set mode. In the alarm time set mode, use the TUNE knob to change values in alarm time and alarm type, and confirm the choice by pressing the ENTER button.
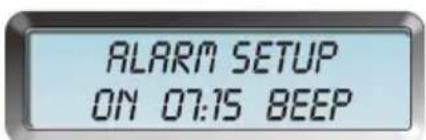
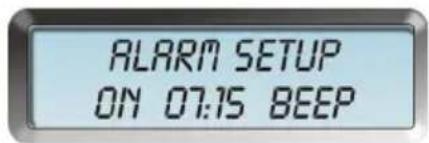
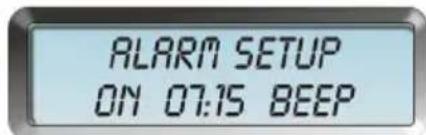
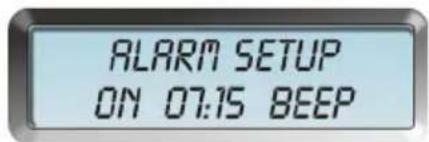
When in the alarm time set mode the display will show the current time in the upper center of the display. The lower center of the display will show the alarm time. The lower left corner of the display will show if the alarm is ON or OFF. The lower right corner of the display will show the alarm type.
The on/off indicator in the lower left corner will start to flash, select on of off by turning the TUNE button and press enter to confirm.
Now the hour indicator of the alarm time will start to flash. Adjust the hour of the alarm time by turning the TUNE knob and confirm by pressing ENTER.
Now the minute indicator of the alarm time will start to flash. Adjust the minute of the alarm time by turning the TUNE knob and confirm by pressing ENTER.
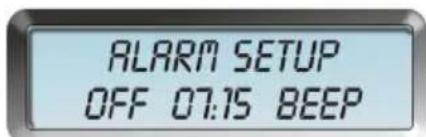
The alarm type indicator in the lower right corner will start to flash. Adjust the alarm type by turning the TUNE knob and confirm by pressing ENTER.

The finally the alarm volume needs to be set. Adjust the volume of the alarm by turning the TUNE knob and confirm by pressing ENTER.
The alarm is now set, and the radio must be turned off, in order for the alarm to work. When the alarm is on, the display will show a note in the right side of the screen.

To set the alarm off before it has been activated, enter the alarm time set mode and choose OFF. Confirm by pressing ENTER 5 times, or simply press the ALARM button once.
To set the alarm off after it has been activated, press the POWER button.
Note:
The alarm time will be remembered to the next day.
The volume of the alarm will be the same as when the radio was set into standby.
Notes regarding playback of discs
- Not all discs can be played on the Tangent Cinque. The unit supports Audio CD, CD-r, MP3 discs and WMA discs.
- Not all CD-r discs can be played on the Tangent Cinque.
If the discs used are not of a proper quality, playback cannot be guaratied.
If the quality of the CD writer is not OK, playback can not be guaranteed.
If the disc is scratches playback cannot be guaratied. - Never use discs with labels glued on to them. This can seriously damage the slot in loader.
- Discs containing many tracks (i.e. MP3 or WMA discs) can use more time to load then an ordinary CD.
- The soundquality on disc may vary. MP3 and WMA discs are normally not of the same soundquality as an ordinary disc.
- Never try to clean the CD player you self by using a “cleaning disc” Always let profissional technicians handle the maintenance of the CD player
- Never try to load a disc that has been bended or has cracks.
- Always have the Tangent Cinque on a stable surface before using it.
- Never move the Tangent Cinque during playback.
- Never try to load more than one CD at the time.
- Never load discs that are not ordinary 120mm standard sized round discs.
Specifications
Band: FM / AM
Frequency Range: FM-RDS 87,5 MHz \~ 108,0 MHz
AM 422 KHz \~ 1620KHz
Compatible formats: CD, CD-r, MP3 & WMA
Speaker: Full range dynamic speaker (3")
System Output: 5 Watt RMS
Connections: 3,5mm jack for stereo analog audio headphone output
3,5mm jack for stereo analog audio AUX input
3,5mm jack for stereo analog audio Line output
12 V DC input
Antenna: F-connector for FM antenna input
FM telescope antenna included
Power: DC 12 V
Dimensions (WxHxD): 210 x 129 x 200mm (Including feet)
Weight: 3,80Kg (Power supply and radio)
F - MODE D'EMPLOI
Sommaire
Informations importantes 24
Façade 25
Panneau arrière 28
Télécommande 29

Mode FM
Balayage de stations en mode AM
Régler l'alarme

Naar stations scannen in FM modus 69
RDS 70
Naar stations scannen in AM modus 70
FM modus
Naar stations scannen in FM modus
Naar stations scannen in AM modus
Skanning efter stationer i tilstanden FM
Drej knappen TUNE for at justere og bekræft ved at trykke på ENTER. Forlad indstillingsmenuen ved at trykke på knappen MENU igen.
ALARM SETUP OFF 07:15 BEEP
Antenne: F-connector for FM antenna input
FM teleskopantenne inkluderet
Strøm: DC 12 V
Dimensioner (BxHxD):210 x 129 x 200mm (Inklusiv fødder)
FM läget
Ställa in alarmet
FM-tila
Modalità FM
Modo FM
Configurar la alarma
Modo FM
DESIGN AND ENGINEERING
THE OBJECTIVE OF EVERY TANGENT PRODUCT IS THAT FUNDAMENTALLY CORRECT DESIGN CAN PRODUCE A PRODUCT CAPABLE OF ACHIEVING EXCELLENT PERFORMANCE AND AFFORDABILITY.
www.tangent-audio.com

- tangent
- UK USER MANUAL 5
- F MODE D'EMPLOI 23
- Important information
- Disclaimer
- Remote control
- Using the radio
- Connecting the radio
- FM mode
- Scanning for station in FM mode
- RDS
- Saving a station to a preset.
- AM mode
- Scanning for station in AM mode
- AUX mode
- CD mode
- The settings menu
- Time and Date
- Alarm
- Sleep
- Snooze
- Bass
- Treble
- Loudness
- Disc time
- Software version
- Sysem reset
- Snooze and mute
- Sleep timer
- Setting the alarm
- Notes regarding playback of discs
- Specifications
- F - MODE D'EMPLOI
- Sommaire
- Mode FM
- Balayage de stations en mode AM
- Régler l'alarme
- FM modus
- Naar stations scannen in FM modus
- Naar stations scannen in AM modus
- Skanning efter stationer i tilstanden FM
- FM läget
- Ställa in alarmet
- FM-tila
- Modalità FM
- Modo FM
- Configurar la alarma
Brand : TANGENT
Model : Cinque DAB
Category : Hi-fi system