JET19 - Microwave Oven ACP - Free user manual and instructions
Find the device manual for free JET19 ACP in PDF.
| Product type | Professional microwave oven (commercial use) |
| Brand and model | ACP JET19 |
| Capacity (approximate) | Approximately 0.7 m³ (interior cavity) |
| Dimensions (W x H x D) | 550 x 400 x 500 mm (estimate) |
| Weight | Approximately 35 kg |
| Power supply | 208-240 V, 50/60 Hz, dedicated circuit |
| Microwave power | 1900 W (60 Hz model) / 1400 W (50 Hz model) |
| Convection temperature range | 65 °C to 250 °C (150 °F to 475 °F) |
| Cooking modes | Microwave only, convection only, combination (combi) |
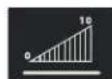
| Programming types | 1-touch (10 memories) or 2-touch (100 memories), up to 4 stages per program |
| Maximum timer | 20 minutes (1400 W model) or 16 minutes (1900 W model) per stage |
| Display | LCD screen, temperature, time, MW power, stage |
| Special functions | Preheat, staged cooking, program transfer via USB key, self-diagnosis |
| User options | Simple/double touch programming, door reset, beep volume, cooking end, manual entry, temperature warnings, °F/°C scale, filter cleaning reminder, microwave-only mode |
| Safety | Grounding required, automatic shut-off after 2 hours of inactivity, door lock, error codes |
| Maintenance and cleaning | Frequent cavity cleaning, removable magnetic filter, grease tray, use of recommended ACP products (CL10, SH10) |
| USB key | Transfer programs to/from oven, standard USB format |
| Supplied accessories | Grid, grease tray, magnetic filter, (warning label) |
| Installation dimensions | Top clearance: 5.1 cm (N. America) or 17.8 cm (international); rear: 6.5 cm; sides: 3 cm |
| Service and warranty | Contact ACP ComServ: 866-426-2621 (US/Canada) or +1 319-368-8120 (other) |
Frequently Asked Questions - JET19 ACP
User questions about JET19 ACP
0 question about this device. Answer the ones you know or ask your own.
Ask a new question about this device
Download the instructions for your Microwave Oven in PDF format for free! Find your manual JET19 - ACP and take your electronic device back in hand. On this page are published all the documents necessary for the use of your device. JET19 by ACP.
USER MANUAL JET19 ACP
natural_image
Line drawing of a rectangular kitchen appliance with a side panel and front door (no text or symbols)Commercial Combination Oven (Microwave and Convection)
Keep these instructions for future reference. If the equipment changes ownership, be sure this manual accompanies equipment.
Contents
Model Identification 2
Grounding Instructions 3
Installation 3
Display and Features 4
Programming....7
Convection Cooking 8
Combination Cooking (microwave and convection)....9
Microwave Cooking (microwave only).....10
User Options 11
USB Flash Drive Operating Instructions . 12
User Maintenance 13
Service Codes....13
Care and Cleaning 14
Before Calling Service....15
Model Identification
When contacting ACP, provide product information. Product information is located on oven serial plate.
Record the following information:
Model Number:
Serial or S/N Number:
Date of installation:
Dealer's name and address:
Any questions or to locate an authorized ACP servicer, call ACP ComServ Service Support.
– Inside the U.S.A. or Canada, call toll-free at 866-426-2621.
- Outside the U.S.A. and Canada, call 319-368-8120.
– Email: Commercialservice@acpsolutions.com.
Warranty service must be performed by an authorized ACP servicer. ACP also recommends contacting an authorized ACP servicer, or ACP ComServ Service Support if service is required after warranty expires.
Unpacking Oven
- Inspect oven for damage such as dents in door or inside oven cavity.
- Report any dents or breakage to source of purchase immediately. Do not attempt to use oven if damaged.
- Remove all materials from oven interior.
- If oven has been stored in extremely cold area, wait a few hours before connecting power.
Radio Interference
Microwave operation may cause interference to radio, television, or a similar oven. Reduce or eliminate interference by doing the following:
- Clean door and sealing surfaces of oven according to instructions in Care and Cleaning section.
- Place radio, television, etc. as far as possible from oven.
- Use a properly installed antenna on radio, television, etc. to obtain stronger signal reception.
Oven Placement
- Do not install oven next to or above source of heat, such as pizza oven or deep fat fryer. This could cause microwave oven to operate improperly and could shorten life of electrical parts.
- Do not block or obstruct oven filter. Allow access for cleaning.
• Install oven on level countertop surface. - If provided, place warning label in a conspicuous place close to microwave oven.
- Outlet should be located so that plug is accessible when oven is in place.
Oven Clearances

A—For North American (UL/CSA) models, allow at least 2" (5.1 cm) of clearance around top of oven. For International (50 Hz) models, allow at least 7" (17.8 cm) of clearance around top of oven. Proper air flow around oven cools electrical components. With restricted air flow, oven may not operate properly and life of electrical parts is reduced.
B—Allow at least 2 9/16" (6.5 cm) between air discharge on back of oven and back wall.
C—Allow at least 1 1/4" (3 cm) of clearance around sides of oven.

WARNING
To avoid risk of electrical shock or death, this oven must be grounded and plug must not be altered.


Earthing Instructions Oven MUST be grounded.
Grounding reduces risk of electric shock by providing an escape wire for the electric current if an electrical short occurs. This oven is equipped with a cord having a grounding wire with a grounding plug. The plug must be plugged into an outlet that is properly installed and grounded.
Consult a qualified electrician or servicer if grounding instructions are not completely understood, or if doubt exists as to whether the oven is properly grounded.
Do not use an extension cord. If the product power cord is too short, have a qualified electrician install a three-slot receptacle. This oven should be plugged into a separate circuit with the electrical rating as provided in product specifications. When the combination oven is on a circuit with other equipment, an increase in cooking times may be required and fuses can be blown.
External Equipotential
Earthing Terminal (export only) Equipment has secondary earthing terminal. Terminal provides external earthing connection used in addition to earthing prong on plug. Located on outside of oven back, terminal is marked with symbol shown below.

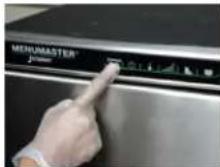
Display and Features
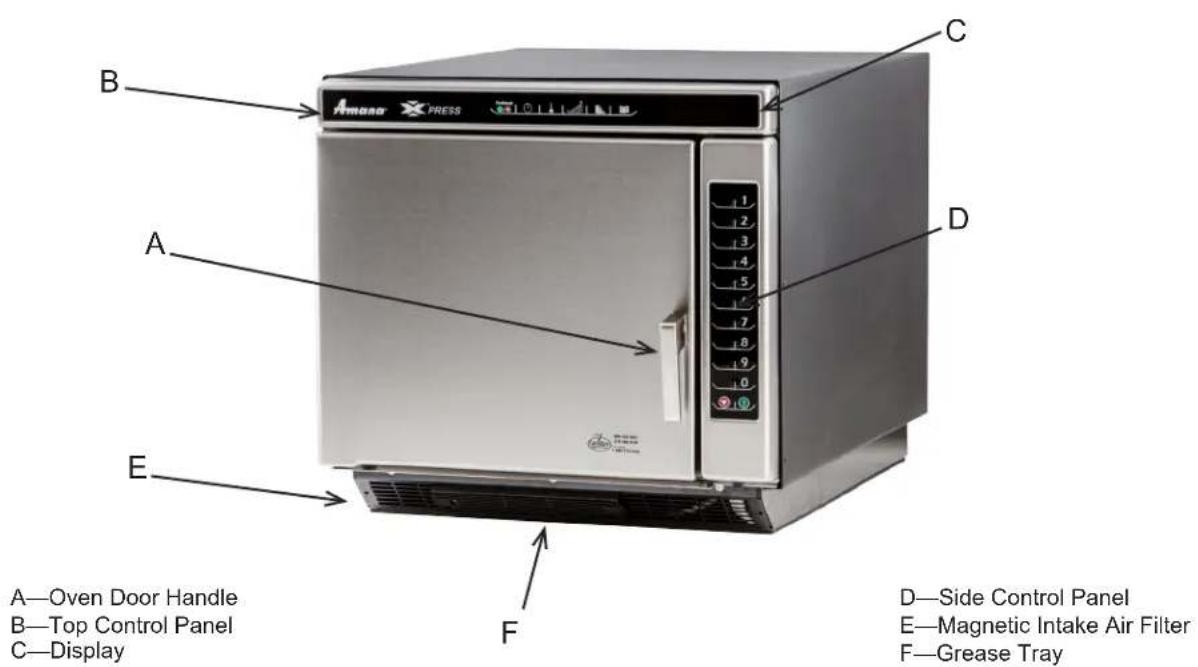
Oven Features
Standby shows in display after oven door has been opened and closed, or after turning oven OFF with the Preheat On/Off pad.
Standby Or Press Preheat
Oven Preheating 475°F or 250°C
Oven Preheating and set temperature shows in display after pressing Preheat On/Off pad. (example of 475°F shown)
Ready and set temperature displays after pressing Preheat On/Off pad. Ready indicates the oven is up to temperature. (example of 475°F shown)
Ready 475°F or 250°C
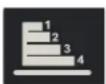
Indicates oven is in a preprogrammed cooking program
Item-05 Stage:1 01:23 475°F MW:50%
Cooking information shows in display after pressing a single (or double) digit pad while in Ready Mode.
Time left in cooking program
Cooking temperature 475^ or 250^
Percentage of microwave power
Indicates oven is in a manual cooking program
Manual Stage:1 00:15 475°F MW:100%
Time left in cooking condition
Cooking temperature 475^ or 250^
Indicates percentage of microwave power
Oven indicates it's in a Microwave Only mode prior to selection
Item-05 Stage:1 01:23 MW:50%
Cooking information shows in display after pressing a single (or double) digit pad while in Ready Mode.
Time left in cooking program
Percentage of microwave power

Cooking Display

Start pad
The Start pad is used to begin a manual time entry cooking cycle.

Stop/Reset pad
The Stop/Reset pad stops a cooking sequence in progress,
clears out any remaining time, and also ends a programming or user option cycle. When the Stop/Reset pad is used to end a programming or option change, the changes are discarded.
Temperature warnings
The combination oven has two distinct temperature warnings. Warnings sound with a three beep signal when a programmed pad is pressed. Warnings are:
• A warning when the preheat temperature does not match the preprogrammed temperature of a cooking condition.
- A warning when the actual oven cavity temperature is not to preheat temperature, such as when the oven is first started.
To override the warning and begin a cooking cycle, press the Start pad. To turn off warnings, see User Options section.
DISPLAYS DESCRIPTION
| OVEN PREHEATING 475°F | Oven Preheating 475°F or 250°C displays when oven is turned on and is warming up to the selected preheat temperature. Oven Preheating also flashes when a cooking condition can be started or programmed. |
| READY 475°F | Ready 475°F or 250°C displays when oven has reached preheat temperature and is ready to cook. Ready also flashes when a cooking condition can be started or programmed.Note: Oven will shutdown after two hours of inactivity. |
| 00:00 | Displays cooking time. If stage cooking is programmed, total cooking time is displayed |
| MW 50% | MW 50% displays the current microwave power level. 100% is the highest setting, and 0% is lowest (no microwave energy used). |
| ITEM-05 | ITEM-05 displays the single or double digit entry of a programmed cooking condition when using a programmed pad. |
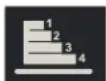
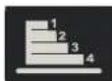
| STAGE 1 | Stage 1 displays the stage number (1 through 4) the oven is at in the cooking condition |
| STANDBY | STANDBY displays when oven is turned off, and also after the oven is plugged in, the door is opened, and then shut. |
| Programming Display | |
| DISPLAYS DESCRIPTION | |
| Enter Program to Add/Review: | Displays when oven is in programming mode for single digit or double digit memory. |
| STAGE 1 | Displays stage number during cooking or when programming a specific cooking stage. Stage number (1 through 4) indicates the stage that is being used. |
| USB Display | |
| DISPLAYS DESCRIPTION | |
| USB | Displays when keypad 5 is pressed and held and transfer to or from USB flash drive is ready |
Programming Pads
Oven is shipped from the factory for single digit programming. To change the oven default to double digit programming, see User Option section. To program the amount of time, power level, or temperature setting for a pad:
-
Oven must be ON.
-
Press Preheat On/Off pad.
- Oven Preheating 475°F or 250°C shows in display with Oven Preheating flashing.

-
Oven reaches preheat temperature.
-
Ready 475°F or 250°C shows in display with Ready flashing. Press Program Save pad.
- Programming mode begins.
- Enter Program to Add/Review: shows in display.

- Press pad to be programmed or reprogrammed.
- Display will change to review all settings for the pad.
- The pad number that is being programmed displays beside the word ITEM.
- Press Time Entry pad to program amount of cooking time.
- Enter desired cooking time by using numeric key pads.
- The total microwave cooking time (all stages combined) is 20 minutes.

- Press Temp Entry pad to program the cooking temperature.
- Enter desired convection temperature by using numeric pads.
Press Power Level pad to program level of microwave power.
- For a lower microwave power, press pads 1 (for 10% ) through 9 (for 90% ). 0 turns off the microwave power and cooking is by convection only.

- Press any numeric key pad twice to set power level back to 100%.
-
Press Program Save pad to save the program changes.
-
To discard changes, press Stop/Reset pad.

Programming Multiple Stages
Stage cooking allows consecutive cooking cycles without interruption.
Up to four different cooking cycles can be programmed into a memory pad.
To use stage cooking:
- Follow steps 1 through 6 above.
- Press Stage pad.
- This will begin programming for the next cooking stage.
- Display indicates stage to be programmed.
- Enter cook time, temp and power level as in steps 4. 5 and 6.
- To enter another cooking stage for that pad, press Stage pad again.
- Up to four different stages can be programmed.
-
Press Program Save pad to save the program and changes.
-
To discard changes, press Stop/Reset pad before pressing Program Save pad.

Programming
Preheat Setting
The convection temperature setting can be set between 150^ F to 475^ F ( 65^ C to 250^ C). It is recommended to set the preheat setting to the most commonly used temperature for that oven. The factory default preheat setting is 475^ F ( 250^ C).
To program the preheat setting:
- Turn oven on to set preheat.
- Press Program Save pad.
- Press Temp Entry pad.
- Enter desired temperature by using the numeric key pads.
- Temperature must be entered in 5°F (5°C) increments. If not, the temperature will automatically change to the nearest 5°F (5°C).
- Preheat temperature is changed.
What is stage cooking?
Stage cooking enables
several different cooking cycles, or stages, to be used consecutively without repeated input from the user. Stage cooking can be set to defrost food initially, then cook it, and then keep the food warm until serving time.
Example of Stage Cooking Conditions
| Stage 1 | Stage 2 | Stage 3 | Stage 4 | |
| Temp | 450°F | 450°F | 450°F | 450°F |
| Power | 100% | 30% | 0 | 50% |
| Time | 2.30 | 1.30 | 1.30 | 1.00 |

CAUTION
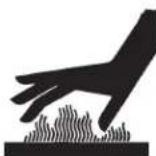
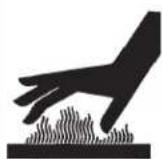
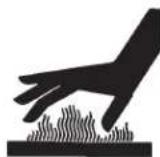
To avoid risk of burns, handle utensils, rack, and door with care. Allow oven, utensils, and rack to cool before cleaning. Oven, utensils, and rack, become hot during operation.
To operate the oven for convection cooking only, you can use preprogrammed pads or manual time entry. The following instructions are for convection cooking only. For combination cooking, see that section.
Convection Cooking
Convection cooking utilizes both a convection element and fan to evenly distribute heated air throughout the oven cavity. By circulating air, no hot or cold spots occur, creating a consistent temperature envelope around the food. These consistent temperatures cook food evenly and reduces cooking time. Oven will always operate in convection mode.
Convection Cooking with Programmed Pads
-
Press Preheat On/Off pad to start the oven.
-
Oven begins a preheat cycle.
-
Oven Preheating 475°F (250°C) shows in display.
• To change preheat temperature, see Programming. -
Oven reaches preheat temperature.
- Ready 475°F (250°C) displays.
-
Press selected pad, preprogrammed to 0% microwave.
-
If using single digit programming, press pad and oven begins automatically.
-
For double digit programming, press pads in proper sequence and oven begins automatically.
-
Cooking cycle begins
- Preprogrammed cooking program, total cooking time, cooking temperature, percentage of microwave power, and stage are all displayed.
-
Oven finishes cooking sequence
-
An end of cycle beep signals the end of the cooking cycle.
• Done shows in display. -
Oven interior and cooking dish will be hot.
-
Press Preheat On/Off pad to shut off oven.

Convection Cooking Using Manual Cooking Operation
-
Press Preheat On/Off pad to start the oven.
-
Oven begins a preheat cycle.
-
Oven Preheating 475°F (250°C) shows in display.
• To change preheat temperature, see Programming. -
Oven reaches preheat temperature.
- Ready 475°F (250°C) displays.
- Place food in the oven.
- Press Time Entry pad.
- Enter desired cooking time by using the numeric keypad.
- Press Temp Entry pad if cooking temperature differs from preheat temperature.
- Enter the new temperature.
- Press Power Level pad.
- Press pad 0 (for 0%) microwave. 0 turns off the microwave power and cooking is by convection only.
- If stage cooking is desired, press Stage pad and repeat steps 4, 5, and 6.
- Up to 4 different stages can be programmed.
- Press the Start pad to begin the cooking cycle.


CAUTION
To avoid risk of burns, handle utensils, rack, and door with care. Allow oven, utensils, and rack to cool before cleaning. Oven, utensils, and rack, become hot during operation.
To operate the oven for combination cooking, you can use preprogrammed pads or manual time entry. The following instructions are for combination cooking only. For convection only cooking, see that section.
Combination Cooking With Preprogrammed Pads
-
Press Preheat On/Off pad to start the oven.
-
Oven begins a preheat cycle.
-
Oven Preheating 475°F (250°C) shows in display.
• To change preheat temperature, see Programming. -
Oven reaches preheat temperature.
- Ready 475°F (250°C) displays.
-
Press selected pad.
-
If using single digit programming, press pad and oven begins automatically.
-
For double digit programming, press pads in proper sequence and oven begins automatically.
-
Cooking cycle begins
- Preprogrammed cooking program, total cooking time, cooking temperature, percentage of microwave power, and stage are all displayed.
-
Oven finishes cooking sequence
-
An end of cycle beep signals the end of the cooking cycle.
• Done shows in display. -
Oven interior and cooking dish will be hot.
-
Press Preheat On/Off pad to shut off oven.

Combination Cooking Using Manual Cooking
Operation
-
Press Preheat On/Off pad to start the oven.
-
Oven begins a preheat cycle.
-
Oven Preheating 475°F (250°C) shows in display.
• To change preheat temperature, see Programming. -
Oven reaches preheat temperature.
- Ready 475°F (250°C) displays.
- Press Time Entry pad.
- Enter desired cooking time by using the numeric keypad.
- Press Temp Entry pad if cooking temperature differs from preheat temperature.
- Enter the new temperature.
-
Press Power Level pad.
-
For a lower microwave power, press pads 1 (for 10% ) through 9 (for 90% ). 0 turns off the microwave power and cooking is by convection only.
-
Press numeric key pad for desired level. Press any numeric key pad twice to set power level back to 100%.
-
If stage cooking is desired, press Stage pad and repeat steps 4, 5, and 6.
- Up to 4 different stages can be programmed.
- Press the Start pad to begin the cooking cycle.


Combination
Cooking
The combination mode uses both the speed of microwave energy and browning of convection cooking to yield fast, high quality food.
- Microwave cooking uses high frequency energy waves to heat the food. When cooking, microwave energy causes food molecules to move rapidly. This rapid movement between the food molecules creates heat, which cooks the food. POWER displays when oven is generating microwave energy for the current cycle.
- Convection cooking uses the selected oven temperature to bake and brown foods. The circulating air surrounds food in an envelope of evenly heated air.
- Oven will maintain a minimum convection temperature of 150°F (65°C) to ensure drier air and more even cooking.

CAUTION
To avoid risk of burns, handle utensils, rack, and door with care. Allow oven, utensils, and rack to cool before cleaning. Oven, utensils, and rack, become hot during operation.
To operate the oven for microwave cooking, you can use preprogrammed pads or manual time entry. The following instructions are for microwave cooking only. For convection only or combination cooking, see that section.
Note: Microwave Only option must be enabled from Options Settings on User Options page 11.
Microwave Cooking With Preprogrammed Pads
- Place food inside oven and close door.
-
Press selected pad.
-
If using single digit programming, press pad and oven begins automatically.
-
For double digit programming, press pads in proper sequence and oven begins automatically.
-
Cooking cycle begins
- Preprogrammed cooking program, total cooking time, cooking temperature, percentage of microwave power, and stage are all displayed.
-
Oven finishes cooking sequence
-
An end of cycle beep signals the end of the cooking cycle.
- Done shows in display.
Microwave Cooking Using Manual Cooking Operation

- Place food inside oven and close door.
- Press Time Entry pad.
- Enter desired cooking time by using the numeric keypad.
-
Press Power Level pad
-
For a lower microwave power, press pads 1 (for 10% ) through 9 (for 90% ).
- Press numeric key pad for desired level. Press any numeric key pad twice to set power level back to 100%.

- If stage cooking is desired, press Stage pad and repeat steps 2, and 3.
- Up to 4 different stages can be programmed.
- Press the Start pad to begin the cooking cycle.

HIDDEN PAD


flowchart
graph LR
    A["Preheat"] --> B["TIME ENTRY"]
    B --> C["POWER LEVEL"]
    C --> D["PROGRAM SAVE"]
    E["ON/OFF"] --> F["TEMP ENTRY"]
    F --> G["STAGE"]
Changing user options
Options such as single or double digit programming, beep volume, and maximum cooking time can be changed to suit individual preferences.
Didn't like an option?
Factory settings are marked in bold. To change the oven back to the factory setting, simply select the option that is marked in bold.

My changes weren't saved.
In order for any changes to be saved, the Program
Save pad must be pressed after selecting an option. Pressing the Stop/Reset pad will not save
To change options oven STANDBY must display:
- Press hidden pad.
- Pad is unmarked and located to the direct left of Preheat On/Off pad. - Nothing will be displayed when hidden pad is pressed.
- Press Program Save pad.
- The first user option will display. Oven is now in options mode.
- Press number pad that controls option to be changed.
• See table below for options.
- Current option will display.
- Press numeric pad again to change the option.
• Each time pad is pressed, option will change.
- Match code displayed with code for desired option.
• To change additional options, repeat steps 3 and 4.
- Changes take affect after pad is pressed. Press Program Save to save.
- Press Stop/Reset pad to return to STANDBY, or open and close oven door.
Numbered Pads Display Options (Factory Settings in Bold)
| 1Double Digit Entry | DisabledEnabled | Allows 10 (0-9) preprogrammed pads.Allows 100 (00-99) preprogrammed pads. |
| 2Manual Time Entry | DisabledEnabled | Manual time entry/cooking not allowed.Manual time entry/cooking allowed. |
| 3Reset on Door Open | DisabledEnabled | Opening oven door does not reset oven back to ready mode.Opening oven door resets the oven back to ready mode. |
| 4Keybeep | Keybeep ONKeybeep OFF | Keys beep when pressed (keybeep on).Keys do not beep when pressed (keybeep off). |
| 5Keybeep Volume | OFFLOWMEDIUMHIGH | Keybeep volume OFF.Keybeep volume LOW.Keybeep volume MEDIUM.Keybeep volume HIGH. |
| 6End of Cook Signal | Solid Beep3 Second Beep4 Beeps Once4 Beeps Repeating | Food done signal is a continuous beep until reset by user.Food done signal is a three second beep.Food done signal is four beeps, continuously.Food done signal is four beeps, four times. |
| 7Keypad Active | 15 SECONDS30 SECONDS60 SECONDS120 SECONDSALWAYS | Keypad time entry window is 15 seconds.Keypad time entry window is 30 seconds.Keypad time entry window is one minute.Keypad time entry window is two minutes.Keypad time entry window is always active. |
| 8Preheat Warnings | DisabledProgram Warning OnlyPreheat Warning OnlyBoth | Both temperature warnings off.Warning only when preheat temperature does not match preprogrammed temperature.Warning only when actual oven cavity temperature is not to preheat temperature.Both temperature warnings on. |
| TEMP PADTemperature Scale | FAHRENHEITCELSIUS | Temperatures are displayed in °F for 60 Hz models.Temperatures are displayed in °C for 50 Hz models. |
| STAGE PADCLEAN FILTERMessage Frequency | DisabledWeeklyMonthlyQuarterly | Oven will not display Clean Filter.Oven will display Clean Filter every seven (7) days.Oven will display Clean Filter every thirty (30) days.Oven will display Clean Filter every ninety (90) days. |
| POWER LEVEL PADMICROWAVE ONLY | DisabledEnabled | Oven will not operate in microwave only mode.Oven will operate in microwave only mode. |
USB Flash Drive Operating Instructions
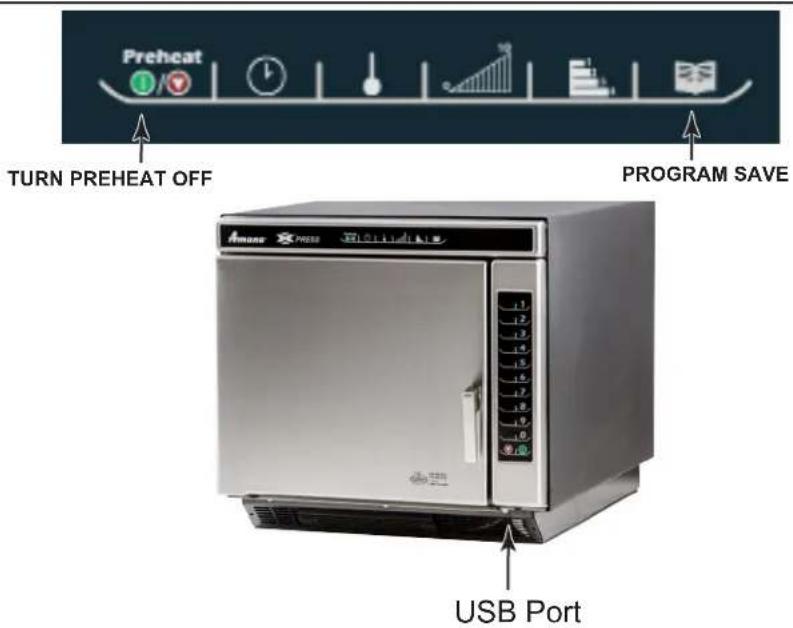
To program the oven using the USB Flash Drive:
Oven must be in Standby mode (Preheat must be OFF)
Note: A standard USB flash drive is compatible with oven.
- Remove protective cover from bottom of vertical keypad.
- Insert the USB Flash Drive into the slot located below the vertical keypad.
- Open the oven door.
- Press and hold the 5 pad until USb appears in the display.
- To transfer programming FROM the USB flash drive to the oven, press the 1 pad. "USb TO OVEN" will appear in display.
OR
To transfer programming TO the USB flash drive from the oven, press the 2 pad. "OVEN TO USb" will appear in display.
-
Press START pad, on vertical keypad to begin transfer.
-
Oven displays "LOADING" in the display for approximately 10 seconds.
-
When the transfer is complete the display will beep and display "Done" and number of programs saved.
-
Press any pad to clear the display or shut the door and the display will read "READY".
Error Codes:
- NO USb: Remove flash drive from USB and reinsert flash drive into USB and retry.
- RESET OVEN: Unplug oven from outlet and plug in oven and retry transfer.
Service codes
During operation, the oven may display a service code. If this should occur:
- Unplug oven and leave unplugged for approximately one minute. Plug oven in and see if code reappears.
- If code does not reappear, continue normal use with the oven.
- If service code reappears, write down the service code displayed and contact the nearest authorized ACP Servicer.
- Do not use oven until contacting the ACP Servicer.
ERROR!
Error Code: 2
(example)
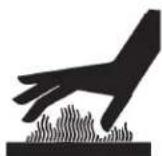
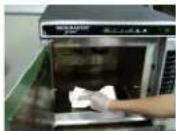
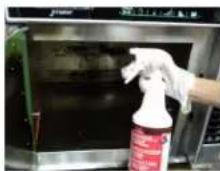
Care and Cleaning
Clean oven frequently to maximize oven life, performance, and efficiency. A dirty oven cooks inefficiently because moisture, spills, and grease absorb convection and microwave energy.

WARNING
To avoid electrical shock which can cause severe personal injury or death, unplug power cord or open circuit breaker to oven before cleaning oven.

CAUTION
To prevent burns, handle utensils, rack, and door with care. Allow oven, utensils, rack to cool before cleaning. Oven, utensils, and rack, become hot during operation.
FOR A NEW OVEN: before using it the first time, spray damp towel with ACP Oven Shield and wipe all interior surfaces. Do not remove Oven Shield Oven Protectant (Item# SH10). Turn oven on and pre-heat to start cooking.
I. Daily Cleaning Recommendations:
Recommended Cleaning Supplies: damp towel, plastic scouring pad, ACP Oven Cleaner (Item # CL10) and ACP Oven Shield Oven Protectant (Item# SH10). Avoid spraying caustic cleaners or those containing ammonia, phosphates, chlorine, sodium or potassium hydroxide (lye) directly on oven surfaces.
1. Shut oven off
Press the Preheat On/Off pad. Allow oven to cool down to 200°F (95°C) or lower (approximately 10-15 minutes with the door open and 45-60 minutes with the door closed).
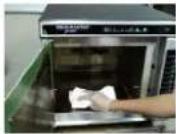
4. Clean and Wipe Oven Interior
Clean the oven using a composite scouring pad. Wipe the oven interior using a damp clean towel, rinse towel and wring dry. Repeat 2-3 times to remove remaining oven cleaner and particles from the oven. If needed, repeat steps 3 and 4.
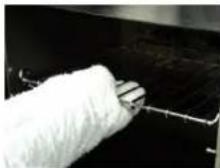
2. Remove rack and
accessories. Wash with warm soapy water and allow to air dry while cleaning oven interior. Clean pizza stone by using a plastic scraper and a damp cloth only.
5. Spray Oven Shield:
When oven is clean, spray cavity with SH10 Oven Shield and wipe all interior surfaces. Place rack back in oven. Do not remove Oven Shield.
3. Spray Oven Interior.
Remove baked on particles using a plastic scraper. Wear gloves and safety glasses. Spray oven door, sides and floor with CL10 Oven Cleaner. Allow to soak for 2-5 minutes.
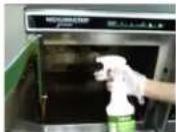
6. Clean Oven Exterior:
Clean exterior door and other surfaces with clean cloth, sponge or composite pad, and warm soapy water.
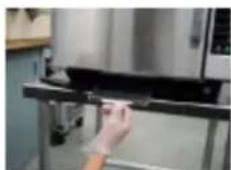
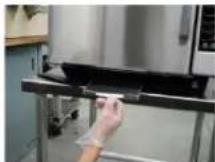
II. Weekly, Monthly or Quarterly Cleaning: Clean Air Filter and Grease Tray
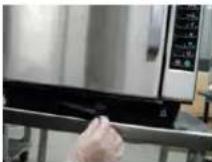
Filter and grease tray is located below oven door.
Filter is magnetic, remove filter for cleaning and wipe surrounding louvers.
Wash filter using a sponge or composite pad and warm soapy water.
Pull grease tray out, drain grease and clean using a sponge or composite pad and warm soapy water.
Rinse and dry thoroughly.
Note:
- Remove food from oven at end of cycle.
- Wear protective rubber gloves when cleaning oven.
- Remove baked on particles using a plastic scraper.
- Avoid spraying caustic cleaners or those containing ammonia, phosphates, chlorine, sodium or potassium hydroxide (lye) directly on oven surfaces.
- Use only accessories that are both high temperature oven-safe and microwave-safe in the oven.
- DO NOT use a water-pressure type cleaning system.
• DO NOT cook foods contained in plastic wrap. - DO NOT use metal foil in the oven. You may use drip tray accessory (DR10) to line oven.
- Metal pans with no more than 1 inch deep are acceptable. Assure pans do not contact oven or door surfaces during cooking.
Any questions please refer to MSDS of oven cleaner or contact ACP, Inc. ComServ at 866-426-2621.

WARNING
To avoid electrical shock which can cause severe personal injury or death, do not remove outer case at any time. Only an authorized servicer should remove outer case.
PROBLEM Possible Cause
| Oven does not operate. | Confirm oven is plugged into dedicated circuit. Confirm oven is on grounded circuit. (Contact electrician to confirm) Check fuse or circuit breaker. |
| Oven operates intermittently or HOT shows in display. | Check air filter and discharge areas for obstructions. |
| If oven does not accept entries when pad is pressed. | Make sure oven is on and preheated. Open and close oven door. Press pad again. |
| If oven malfunctions or shows: ERROR! Error Code: 1 (example) | Oven control is equipped with a self-diagnostic system. Self-diagnostic system alerts you if there is an error or problem. When electronic control signals a problem, follow steps listed below. 1. Record number shown. (example of Error Code: 1 shown) 2. Unplug oven, wait for 1 minute, and plug in oven. · Disconnecting electrical supply may eliminate service code. If failure continues, contact an authorized servicer. |
| Oven fan turns on while oven is not preheating or cooking. | Normal operation. |
natural_image
Line drawing of a server rack unit with a vertical door and internal cooling element (no text or symbols)Four combiné commercial (micro-ondes et convection)
Commercialservice@acpsolutions.com.
natural_image
Isometric line drawing of a cabinet or enclosure with labeled components A, B, and C (no text or symbols beyond labels)Example of Stage Cooking Conditions
| Stage 1 | Stage 2 | Stage 3 | Stage 4 | |
| Temp | 450°F | 450°F | 450°F | 450°F |
| Power | 100% | 30% | 0 | 50% |
| Time | 2:30 | 1:30 | 1:30 | 1:00 |


MISE EN GARDE
natural_image
Two-panel image showing a gloved hand cleaning a black surface with a spray bottle, and another holding a red bottle (no visible text or symbols)natural_image
Two-panel photo showing a person cleaning a stainless steel kitchen appliance with a cloth (no visible text or symbols)natural_image
Close-up of a hand pressing down on a stainless steel kitchen appliance (no visible text or symbols)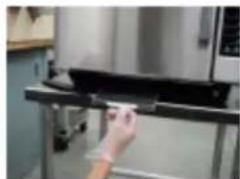
natural_image
Person using a handheld tool to press or install a stainless steel appliance (no visible text or symbols)natural_image
Line drawing of a rectangular industrial or server unit with a side panel and internal structure (no text or symbols)natural_image
Isometric diagram of a cabinet with labeled components A, B, and C, showing internal structure and airflow direction (no text or symbols beyond labels)Standby Or Press Preheat
Oven Preheating 475°F or 250°C
natural_image
Two-panel photo showing a hand cleaning a kitchen appliance with a cloth (no visible text or symbols)natural_image
Close-up of a white spool pulling a thin wire against a dark background (no text or symbols visible)natural_image
Person cleaning a kitchen appliance with a spray bottle (no visible text or symbols)natural_image
Close-up of a hand holding a black object next to a stainless steel kitchen appliance (no visible text or symbols)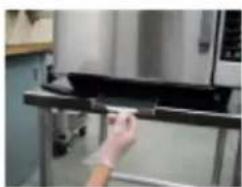
natural_image
Person using a tool on a metal frame with a stainless steel appliance (no visible text or symbols)natural_image
Line drawing of a server rack unit with a door and ventilation slots (no text or symbols)Commercialservice@acpsolutions.com.
natural_image
Isometric diagram of a microwave oven with labeled components A, B, and C (no text or symbols beyond labels)Standby Or Press Preheat
Oven Preheating 475°F or 250°C
Item-05 Stage:1 01:23 475°F MW:50%
Item-05 Stage:1 01:23 MW:50%
natural_image
Close-up of a hand holding a white, knotted object against a dark background (no visible text or symbols)natural_image
Person cleaning a stainless steel oven with a spray bottle (no visible text or symbols)natural_image
Close-up of a hand pressing down on a stainless steel kitchen appliance (no visible text or symbols)