
BIG 300 - Telephone ITT - Free user manual and instructions
Find the device manual for free BIG 300 ITT in PDF.
| Product type | Corded telephone with caller ID |
| Brand | ITT |
| Model | BIG 300 |
| Power supply | 3 AA (LR6) batteries in the base |
| Display | LCD screen with adjustable contrast (5 levels) |
| Main functions | Caller ID, directory of 10 direct memory numbers (M1, M2, M3 + 0-9), music on hold, auto redial, pre-dialing, VIP memories, calculator |
| Ringer | Multiple ringtone melodies (normal and VIP), adjustable volume (4 levels) |
| Comfort functions | Hands-free (HF), music on hold, programmable 'Do Not Disturb' function |
| Time settings | Programmable date and time, alarm (3 possible alarms) |
| Line parameters | Adjustable flash time (90 to 1000 ms), Tone/Pulse mode, illegal selection prevention, local and long distance prefix, IP setting (auto or manual) |
| Call memory | View incoming and outgoing calls with date/time, individual or total deletion |
| Maintenance and cleaning | Disconnect the telephone cord before opening the battery compartment. Clean with a soft, dry cloth. Avoid liquids. |
| Safety | Do not use near water. Unplug during storms. Use only recommended batteries. |
| Spare parts and repairability | Contact ITT after-sales service for spare parts. No user repairs. |
| General information | Corded telephone with digital dial, compatible with standard analog lines. |
Frequently Asked Questions - BIG 300 ITT
User questions about BIG 300 ITT
0 question about this device. Answer the ones you know or ask your own.
Ask a new question about this device
Download the instructions for your Telephone in PDF format for free! Find your manual BIG 300 - ITT and take your electronic device back in hand. On this page are published all the documents necessary for the use of your device. BIG 300 by ITT.
USER MANUAL BIG 300 ITT
Thank you for purchasing this new Caller ID phone. To ensure trouble-free operation,
please read these instructions carefully before beginning installation.
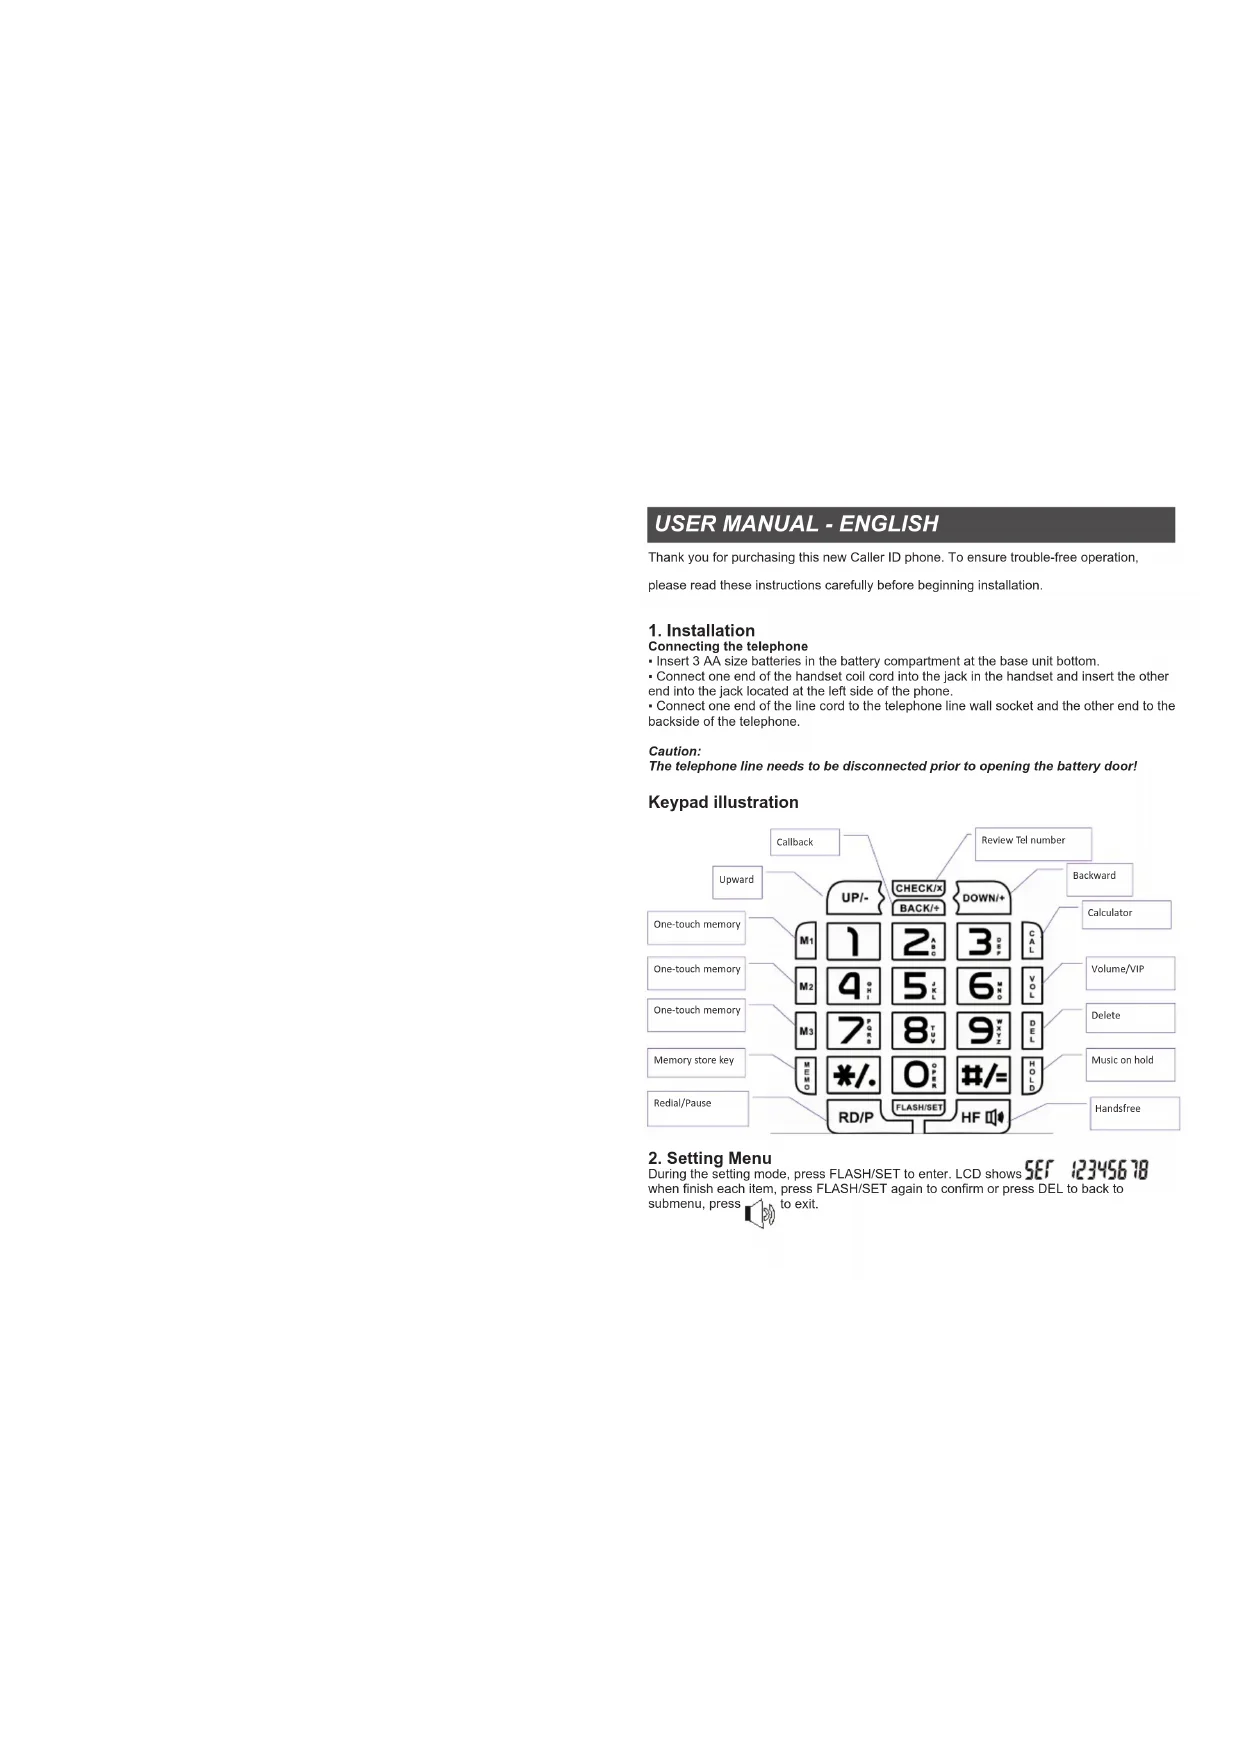
1. Installation
Connecting the telephone
- Insert 3 AA size batteries in the battery compartment at the base unit bottom.
- Connect one end of the handset coil cord into the jack in the handset and insert the other end into the jack located at the left side of the phone.
- Connect one end of the line cord to the telephone line wall socket and the other end to the backside of the telephone.
Caution:
The telephone line needs to be disconnected prior to opening the battery door!
Keypad illustration
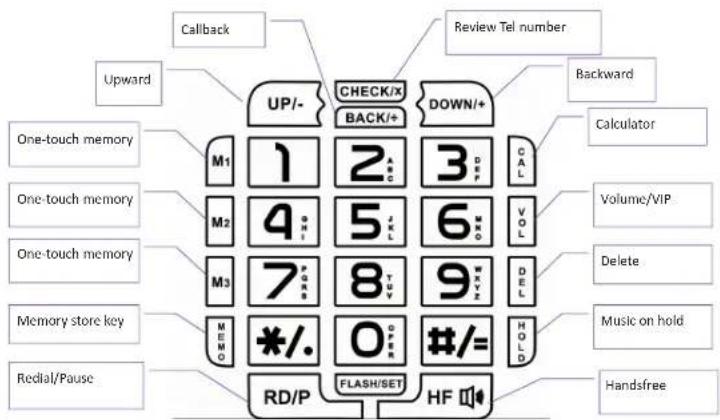
flowchart
graph TD
    A["Upward"] --> B["UP/-"]
    C["One-touch memory"] --> D["M1"]
    E["One-touch memory"] --> F["M2"]
    G["One-touch memory"] --> H["M3"]
    I["Memory store key"] --> J["MEMO"]
    K["Redial/Pause"] --> L["RD/P"]
    M["Check/x"] --> N["BACK/+"]
    O["DOWN/+"] --> P["CAL"]
    Q["CALLOR"] --> R["Volume/VIP"]
    S["Delete"] --> T["Music on hold"]
    U["Handfree"] --> V["Handsfree"]
    W["Review Tel number"] --> X["Backward"]
    Y["Callback"] --> Z["UP/-"]
    AA["UP/-"] --> AB["CHECK/x"]
    AC["UP/-"] --> AD["DOWN/+"]
2. Setting Menu
During the setting mode, press FLASH/SET to enter. LCD shows SET 123450 id when finish each item, press FLASH/SET again to confirm or press DEL to back to submenu, press 160 to exit.

2.1 SET DATE/TIME:
When LCD displays press to external calendar setting, then LCD display: 1-DATE 2-CL.
- Press "1" directly to set the date, LCD will display, "d 2009 01-01", "09 01-01" is twink-ing, input numbers of year, month and date directly. Press DEL to back to submenu.
- Press "2" directly set the time, LCD will display CL 00-00, 00-00 is twinkling, input numbers of hour and minute directly.
- Press "FLASH/SET" to confirm, and then press to exit.
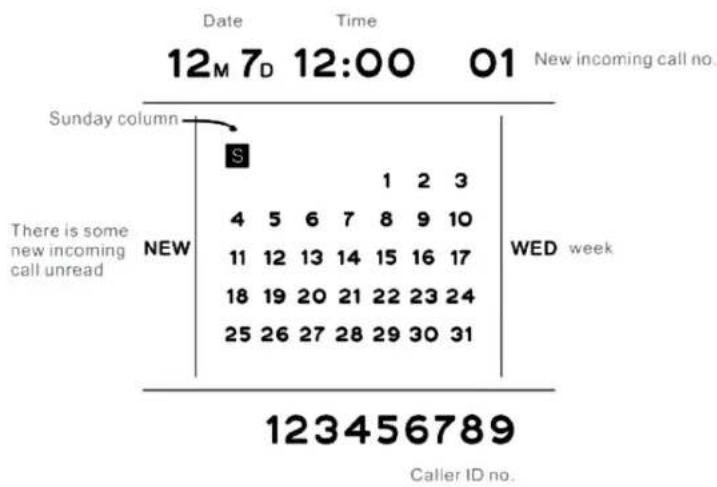
LCD display illustration:
line
| Time | Date | Time | Call ID | | :--- | :--- | :--- | :--- | | 01 | 12M 7D | 12:00 | 01 New incoming call no. | | 1 | 4 | 5 | 6 | | 2 | 7 | 8 | 9 | | 3 | 10 | 11 | 12 | | 4 | 15 | 16 | 17 | | 5 | 21 | 22 | 23 | | 6 | 28 | 29 | 30 | | 7 | | | 31 | | 8 | | | | | 9 | | | | | 10 | | | | | 11 | | | | | 12 | | | | | 13 | | | | | 14 | | | | | 15 | | | | | 16 | | | | | 17 | | | | | 18 | | | | | 19 | | | | | 20 | | | | | 21 | | | | | 22 | | | | | 23 | | | | | 24 | | | | | 25 | | | | | 26 | | | | | 27 | | | | | 28 | | | | | 29 | | | | | 30 | | | | | 31 | | | | The chart is a summary table with 'Sunday column' as the primary data point. The table includes the date and time of the day, and the letter 'S' in the table represents the 'Sunday column'. The 'NEW' label indicates the new incoming call unread. The 'WED week' label indicates the Wednesday week.2.2 SET RINGER/RINGER VOLUME ADJUSTABLE:
When LCD displays press "2" to enter ringer/ringer volume setting. Then LCD will display
- Press "1" to select normal ringer melody, LCD displays and press "UP" or "DOWN" to set the desired melody.
- Press "2" to select VIP ringer melody, LCD displays r In9 UIP 01 and press "UP" or "DOWN" to set the desired melody.
- Press "3" to adjust the 4 level ringer volumes. LCD displays r In9 UOL 04 to choose your desired volume by using "UP"/ "DOWN" buttons. (1 is the lowest and 4 is the highest, the default is 4)
- During each step, press "FLASH/SET" to confirm, and then press 📋 to exit.
2.3 SET THE ALARM CLOCK:
When LCD displays press "t" to enter alarm clock setting. Then LCD will display AL 1-2-3, is blinking. indicates there are 3 sets alarm time can be setted. The first alarm time is one-time alarm, the second and the third alarm time is daily alarm.
1 Press "1" to enter the first alarm time setting, LCD shows ALAr OFF, OFF is twinkling. Directly input the alarm time. 2 Press "2" to enter the second alarm time setting. LCD shows dRYAL 1 OFF OFF is twinkling, directly input the alarm time.
3 Press "3" to enter the third alarm time setting. LCD shows OFF is twinkling, directly input the alarm time. During each step, press "FLASH/SET" to confirm and 10 to exit.
Remark: The first alarm time is only available for one time. The second and third alarm time can work all the time if this unit is not out of power. During the alarm clock rings, press any key to end its ringing.
2.4 SET DO-NOT- Disturb
This function allows the unit not ring during the do not disturb time, except the VIP calling. When LCD displays SET 12345678 Press "4" to enter do-not-disturb time setting. Then LCD will display OFF_r 00-00 . is twinkling , input time directly. Remark: the first 00 means hour and the second 00 means minutes. During each step, press "FLASH/SET" to confirm and ▪ to exit.
2.5 SET Flash/P-T /illegal dialing prevention
When LCD displays Press 3 to enter Flash time/P-T/ Anti-parallel
setting. Then LCD will display 1-F 2-PR 3-d
1 Press "1" to enter flash time setting, LCD shows (the default value is 600ms). 600 is twinkling, press "UP" or "DOWN" to set the desired time. There are 8 choices: 90, 95, 100, 120, 180, 300, 600 and 1000ms.
2 Press "2" to enter P-T switch mode and the LCD prompt P r r onE. The .default setting is TONE. r onE is twinkling, press "UP" or "DOWN" to toggle from TONE to PULSE.
3 Press "3" to enter illegal dialing prevention setting. LCD shows OFF is twinkling, then press "UP" or "DOWN" to toggle from OFF to ON.
During each step, press "FLASH/SET" to confirm and 📋 to exit.
2.6 SET Local area code/ Out area code
When LCD displays press 6 to ent al local area code and out area
code setting. Then LCD will display 1-Lo[2-ol
-
Press "1" to enter local area code setting. LCD shows LOC ____ "____" is twinkling, Input numbers directly. There are 8 digits number can be stored.
-
Press "2" to enter out area code setting.LCD prompts OUT OFF, OFF is twinkling, directly to input number to activate this function while its default setting is OFF. There are 8 digits number can be stored.
-
During each step, press "FLASH/SET" to confirm and to exit.
2.7 LCD brightness adjustable
When LCD displays Press 7 to enable LCD contrast setting. Then LCD will display "LCD Con 4", "4" is twinkling, press "UP+" or "DOWN-" to adjust the LCD brightness (Total 5 levels). 1 is the darkest and 5 is the brightest. The default value is 4.
Press "FLASH/SET" to save the setting and to exit.
Remark: When LCD display becomes weaker, please change the batteries by new ones.
2.8 SET IP
When LCD displays Press 8 to enable IP setting.
Then LCD will display 1-RU 2-3-IP
1 Press "1" to enter the auto-IP code setting, an ICD with blinking. Press "UP+" or "DOWN-" to choose the desired IP number and press SET to confirm. The following numbers for selection: IP1, IP2, 17909, 17908, 193, 17911, 17921, 17931, 17951, 17991, 068, 96300, 96333, 196, 190, 17969, 197.
2 Press "2" to enter setting the IP number manually. LCD displays IP1CodE directly input the new IP number and press DEL to modify, press "FLASH/SET" finally to save.
3 Press "3" to enter the second Manual IP setting, setting procedure please refer to the first one.
Press "FLASH/SET" to save the setting and to exit.
3. On-hook Operation
3.1 Reviewing the incoming calls
At On-hook status or off-hook status, press "UP+" or "DOWN-" to review all the incoming call numbers, press "#" key for 3 seconds also can go into the incoming inquiry state.
3.2 Call back
When viewing incoming or outgoing calls, find the desired number, press "BACK/÷" to call back directly. Holding "BACK/÷" key for 3 seconds phone will auto-add 0 before the number you want to call back.
3.3 Reviewing the outgoing calls
At On-hook status or off-hook status, press "CHECK/*" to review the outgoing calls, using "UP+" or "DOWN-" to backward or upward review the number, date and time of outgoing calls. When on-hook state, pressing "*" for 3 seconds also can go into the outgoing inquiry state.
3.4 Pre-dialing function
At on-hook state, you can input the calling number directly (edit the mistake with the DEL key), then press BACK/÷ or 150 key to dial out.
3.5 DEL function
During the setting model, using DEL key to exit. In pre-dialing, use DEL key to delete the wrong numbers. During the review of incoming, outgoing & stored numbers, use DEL key to delete the certain number. If hold DEL key for 3 seconds, all the incoming & outgoing calls will be deleted.
3.6 VIP number setting
When review incoming call, press VOL/VIP key one time, the LCD LOCK icon will light on which means this phone number is kept as VIP number. This phone number can't be deleted, unless disable its VIP status.
If you want to disable the phone number's VIP status, find the VIP number press VOL/VIP key one time, then the LCD VIP icon will be off which means this number become normal phone number now. Then it can be deleted manually.
3.7 3 one-touch memory
How to store? - In on-hook mode, input the desired number, then hold "M1, M2 or M3" button for 3
seconds until the LCD display "SAVE", after a few seconds the phone will come back to stand-by mode.
How to dial out? – Press 📋 or pick up handset to hear a dialing tone, and then press "M1, M2 or M3" which stored the phone number you want to dial out.
3.8 10 two-touch memory
How to store? - In on-hook mode, input the desired number, then hold "MEMO" button for 3 seconds until the LCD display "TRUE - ", "is twinkling, then press the number key (from digit 0 to 9) where your desired number will be stored in. Wait for a few seconds, the phone will exit to stand-by mode.
How to dial out? - In on-hook mode, press "MEMO", LCD will display "LoRd" is twinkling, and then press the key which stored the phone number you want to dial out. Then it will dial out automatically.
4. Off-hook operation:
4.1 Music on hold
"HOLD" allow you to interrupt a conversation without hanging up when it happens an important or private circumstances occur on your side and you don't want the other end to hear through the telephone. You can press this button and the other end will hear a melody. After you finish the conversation with the third party, press this button again or "button" button to continue your phone call.
4.2 AUTO REDIAL
When press "UP+/DOWN-" choose viewing incoming or outgoing calls, find the desired phone number and then press BACK to call it back. If the line is busy, when in busy tone, press BACK again, the phone will automatically redial the calling numbers every 9-10 seconds till getting through with ringer.
3.8 - 10 Memorie two-touch
3.7 - 3 Mémoire directe "One-Touch"
3.8 - 10 Mémoires directes "two-touch"
LCD-scherm illustraties:
line
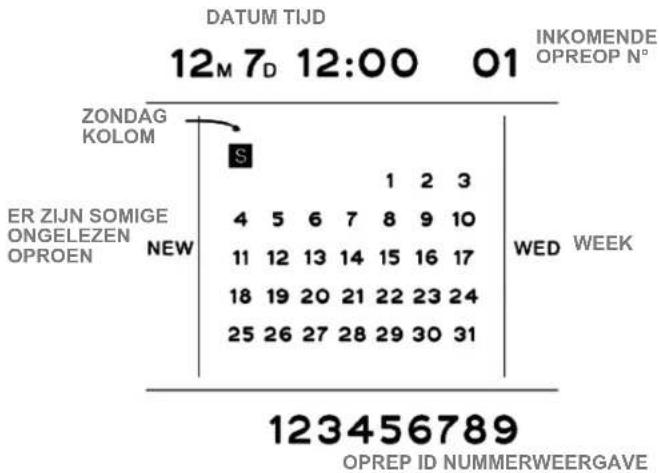
DATUM TIJD 12M 7D 12:00 01 INKOMENDE OPREOP N° | Date | Event | Value | | :--- | :--- | :--- | | 12:00 | ZONDAG KOLOM | S | | 12:00 | ER ZIJN SOMIGE ONGELEZEN OPROEN NEW | 4 5 6 7 8 9 10 11 12 13 14 15 16 17 18 19 20 21 22 23 24 25 26 27 28 29 30 31 | WED WEEK | | 01 | OPREP ID NUMMERWEERGAVE | 123456789 |2.2 BELSIGNAAL INSTELLING/BEELSIGNAAL VOLUME VERSTELBAARHEID:
3.8 - 10 two-touch geheugen
DECLARATION OF CONFORMITY
W e TOP TRONIC MONACO s.a.r.l.
of 20, Blvd Princesse Charlotte - MC 98000 Monaco
declare under sole responsibility that the product
M o d . BIG 300 PROFESSIONAL
Description Corded phone
is in conformity with the essential requirements of the following specifications:
SAFETY EN 60950-1: 2006 + A11: 2009 + A1:2010 + A12: 2011
E M C EN 55022:2006 + A1: 2007 EN 55024: 2010
Following the provisions of Low Voltage Directive 2006/95EC and EMC R&TTE Directive 1999/5/EC on the approximation of the laws of the Member States relating to electromagnetic compatibility.
The product is marked with CE marking and Notify Body number CE 1313


This product complies with the European Directive for the Restriction of its Substances (RoHS) 2002/95/EC

natural_image
Symbol of a trash bin crossed with no text or labels, accompanied by a black rectangular block below (no readable text or symbols)
CE ^1313

www.ttmonaco.com


- Installation
- Connecting the telephone
- Caution:
- Setting Menu
- SET DATE/TIME:
- SET RINGER/RINGER VOLUME ADJUSTABLE:
- SET THE ALARM CLOCK:
- SET DO-NOT- Disturb
- SET Flash/P-T /illegal dialing prevention
- SET Local area code/ Out area code
- LCD brightness adjustable
- SET IP
- On-hook Operation
- Reviewing the incoming calls
- Call back
- Reviewing the outgoing calls
- Pre-dialing function
- DEL function
- VIP number setting
- 3 one-touch memory
- 10 two-touch memory
- Off-hook operation:
- Music on hold
- AUTO REDIAL
- - 10 Memorie two-touch
- - 3 Mémoire directe "One-Touch"
- - 10 Mémoires directes "two-touch"
- BELSIGNAAL INSTELLING/BEELSIGNAAL VOLUME VERSTELBAARHEID:
- - 10 two-touch geheugen
- DECLARATION OF CONFORMITY
Brand : ITT
Model : BIG 300
Category : Telephone