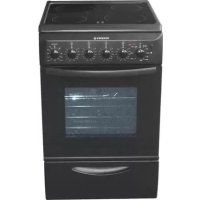
RCG6920RB - Cooker ROSIERES - Free user manual and instructions
Find the device manual for free RCG6920RB ROSIERES in PDF.
Download the instructions for your Cooker in PDF format for free! Find your manual RCG6920RB - ROSIERES and take your electronic device back in hand. On this page are published all the documents necessary for the use of your device. RCG6920RB by ROSIERES.
USER MANUAL RCG6920RB ROSIERES
Environment The Appliance Should Be Placed
Electrical Connection
Conversion For Different Gas Types
General Appearance And Definition Of The Appliance
Use Of Cooktop Electrical Plates
Oven Suggestions For Cooking
Catalytic Self - Cleaning Oven
1. GENERAL WARNINGS Thank you for choosing one of our products. To get the most out of
your cookerwe recommend thatyou:
Read the notes in this manual carefully: they contain important
instructions onhowto install, use andservice thiscookerin safety
Keep this booklet ina safe place foreasy,future reference.
In the case of the sale or transfer of the appliance, this manual should
be given together with the appliance in order to guarantee the proper
transfer of the information on installation/usage of the appliance and
the relative warnings .
All accessible parts are hot when the appliance is in operation, take
care to not touch these elements. When the cooker is first switched on
it may give off acrid smelling fumes this smoke is harmless we
suggest to operatethe cookersfor 2 hours while empty.
1.1. SYMBOLS USED IN THIS USER MANUAL For easier comprehension, the symbols below are used in this user
Information for Environment Protection
Thisappliancecomplieswiththe EU E.E.C directives.
1.2. DECLARATION OF COMPLIANCE All parts of this appliance that may come into contact with foodstuffs
comply with the provisions of EEC Directive 89/109. The appliance
complies with European Directives 73/23/EEC, 89/336/EEC and
90/396/EEC, replaced by 2006/EC, 2004/108/EC and 2003/55/EC,
and subsequent amendments. The appliance also complies with
93/68 GeneralDirectives and subsequent amendments.
The cooker must be used only for the purpose for which it was
designed: it must only be used for cooking food.Any other use, e.g. as
a form of heating, is improper use of the cooker and is therefore
The manufacturers cannot be held responsible for any damage
causedby improper, incorrect or unreasonable use.
When using any electrical appliance you must follow a few basic
rules. If the appliance breaks down or develops a fault switch it off,
disconnect it from mains, do nottouch it, callthe authorised Service.
This appliance is not intended for use by persons (including children)
with reduced physical, sensory or mental capabilities, or lack of
experience and knowledge, unless they have been given supervision
or instruction concerning use of the appliance by a person responsible
Children should be supervised to ensurethat they do not play with the
An oven by its very nature becomes very hot. Especially the glass of
the oven door. Do not allow children to go near the oven when it is hot,
especially when thegrill is on.
Alwaysusegloves to removefood from the oven.
Always keep your appliance clean, for safety and health reasons. Fat
and food residues may cause fire.
Do not insert your hand between oven and the upper lid hinges. Keep
Make sure that all the knobs are in the OFF position when the
appliance isnot in use.
Theoven draweris tostore empty trays orto keep food warm.
Do not put flammable, explosive or cleaning materials like nylon
bags, paper, cloths, etc,intothe drawer.
Useonlyheat resistant pots and pans . Donotuse flammable
It is dangerous tomodifyor toattempt to modifythe propertiesof
Particular attention is necessary when you are frying: do notleave the
appliance unattended.
Theappliance isheavy. Takecare when moving.
The emission of hot air is normal while the appliance is working. Do
not close the ventson the oven.
Some spillage on the appliance may occur, when placing food on or
into the appliance or when removing food with excess fat or water.
Clean such residues immediately after cooking, in order to prevent
unpleasant smells and possiblefires.
Either reduce the flame or shut down the burners, before removing
Heat and humidity are produced in the area where
appliances which burn gaseous fuels are used. Special attention must
be paid for correct aeration of the environment: if natura ventilation is
inexistent or insufficient, an extractor fan must be installed. If in doubt,
pleaseapply to a Service for advice.
When using any electrical appliance you must follow a few basic
*It is not generally a good idea to use adapters, multiple sockets for
severalplugs and cableextension.
*Do not pull the power cable to remove the plug from the socket.
*Do not touch the oven with wetor damp hands orfeet.
*Ifthe maincable isdamaged itmustbe replacedpromptly:
*Whenreplacing the cable,follow the instructions given below:
*Cable replacement must be carried out by qualified technicians. Use
only an approved service centre for repairs end ensure that only
originalparts are used.
*When necessary, remove the power cable and replace it with one of
the H05RR-F, H05VVF, and H05V2V2-F type. The cable have the
capacity for the electrical current required bythe product.
Check theflexible gas connection pipe periodically.
The gas inlet hose must be kept away from the hot parts of the oven
and must not come into contact with the oven. You can move the gas
inlet connector to the left or to the right of the oven. After such a
modification, checkfor possiblegas leakagewith a soapysolution.
After attaching the gas pipe to the connector, anchor it firmly with a
clamp. Particular attention must be paid for gas leakage: check with a
Do not leave theappliance unattended before it has cooled down.
All lids, enamelled or glass surfaces can be disassembled for easy
If your appliance has a top lid, it is designed for either protecting the
cook top against dust when it is not functioning or to prevent against oil
spillage duringcooking.
Do not use the lid forother purposes.
(For models withglass lid)The glass lid can break if it is
exposed an excessive heat. Always check that the burners are off
beforeclosingthe lid.
•Do not use deformed or unbalanced pans.
Clean the grill and thefatcollectingtray carefully before initial usage.
•When using cleaning sprays, do not spray on heaters or on the
Make sure that oven shelvesare correctlyplaced.
Light the burner before placing the pan on top for quicker ignition.
Check theburnerfor a normalflame.
Do not cover oven parts with aluminium foil.
1.4. USEFUL TIPS If the above instructions are not adhered to, the
manufacturer cannot guarantee the safety of the cooker.14 GB
2. INSTALLATION Installation have to be made byqualified personnel.The manufacturer
have no obligation to carry this out. If the assistance of the
manufacturer is required to rectify faults arising from incorrect
installation, this assistanceis not covered bythe guarantee.
The installation instructions for professionally qualified personnel
must be followed. Incorrect installation may cause harm or injury to
people, animals or belongings. The manufacturer cannot be held
responsibleforsuch harm or injury.
Care must be taken regarding where the appliance is
placed! It can only be installed inacontinuously ventilated room.
Electrical connections must always be disconnected before any
repair,installation ormodification.
•Before positioning your appliance, check the properties of the energy
supply (gas type, gas pressure) and make sure that your appliance is
regulated accordingly.
•This appliance must not be connected to the exhaust system of any
equipmentrunningon otherfuel.
•The appliance must not be installed near flammable materials (e.g.
furniture, curtains,etc.)
•This grill(s) should be constructed so that it cannot be closed from
either side andpositioned preferably nearthe floor. Grill(s) must not be
placed across the channels through which combustion gases and
exhausted fumes pass.
f it is impossible to install grilled air vents in the room where the
appliance is installed, the air needed can also be supplied from an
adjacent room providing it is not a bedroom or a room where an air
currentcould cause danger
2.1. ENVIRONMENT THE APPLIANCE SHOULD BE PLACED
•The appliance must not be placed on abase
There must be sufficient natural air ventilation in the room for gas
combustion forthe appliance tofunction correctly.
Theair flow should enterthroughgrilled air vents in theouter walls.
2.3. FEET ADJUSTMENT
2.2. POSITIONING This appliance is of the "X" type and it has been designed on the
presumption that the adjacent work tops will be no higher than the
Yourappliance has adjustablefeet at the lowercornersof its chassis.
•The maximum heightof cooker will be868mm by fixing the adjustable
front feet and rear wheels to the4thhole.
•The feet can beadjusted individually with theaid of a wrench to
guarantee thatthe ovenis perfectlybalanced andlevelled, so thatany
liquidsin the pans ishorizontal .
•Rear wheelsshouldbe fixed to the 2nd hole (pictureA1),standard
height.Thus, standard height willbe 850 mm.
Air grills must have a cross section of 100 cm² for the passage of air
and for appliances with a flame safety device. For appliances with no
flame safety device, this cross section should be 200 cm². (Single or
multiple grills can be used)
Combustion gases from cooking appliances must be released
directly out of doors or via a hood connected to a chimney or flue
If it is impossible to install a hood, an electric extraction fan should be
fitted ina wall or a window opening out ofdoors (Figure 2)
Emission of Combustion Gases
•Extractor fans should have a capacity of replacing kitchen air 3- 5
times per hour.15 GB
2.4. ELECTRICAL CONNECTION Cookers can be presented with or without enrgy cable. Cable
connection should be done by Autorited service according to
following instructions.
•For the directconnection tothe fixed wiring, it'snessessary to provide
means for disconnection from the supply mains having a contact
separation in all poles that provide full disconnection under
overvoltage category III conditions, in accordance with the wiring
The electrical connection must be made according to the standards
and regulations in force. Before making the electrical connection,
Is the capacity of the electrical connections and safety fuses in the
building sufficient to cope with the load of the appliance? (Check with
the adhesive info label)
Does the electricity supply line have an earth connection conforming
with the standards in force? A proper earth connection must exist in
your home. If there is not a proper earth connection at your home,
pleaseapply toan authorizedtechnicianto deal with this problem.
Is the socket or the multi-pole switch at a easily reachable point after
the installation of the appliance?
A plug conforming to standards should be connected to the mains
cable and the cableshould be inserted into a safesocket.
A multi-pole switch must be used between the appliance and the
electricity line if a direct electrical connection to the appliance is
required. (It must comply with standards and be appropriate for the
The green-yellow ground cable must not be interrupted by a switch.
The brown phase cable (from the “L" coded connector of the oven)
must always beconnectedto the phaselineof the mains.
The power line must be positioned so that it is not exposed to
temperatures higher than 50° C.
When the power cable must be changed, a cable with a cross section
appropriate to the indicated power must be used. The green-yellow
ground cable should be approximately 2 cm longer than phase and
Check the heaters by switching them on for 3 minutes, after having
completed theconnection.
•The manufacturer will not accept responsibility for damages
arising due tonon-compliance withthesafety standards.
2.5. COOKERS WITH ENERGY CABLE
•Connection is exclusively envisaged undertensions of 220-240V Between phasesorbetween phasesandneutral.
Ground cable (Green-Yellow)
2.6. GAS CONNECTION The gas must be connected to the appliance according to standard
and the provisions in force.
•When the appliance left the factory, it was regulated for the gas type
stated on the adhesive info label near the gas inlet at the back of the
Make sure that you are using the gas stated on the label. If it is a
different type of gas, follow the instructions in the chapter on
conversion to different gas types'.
•Make sure that gas supply pressure is that given in the gas type
category table ( in order to achieve
maximum efficiency and lowest consumption. If the gas pressure is
different, a proper gas regulator should be used on the gas inlet. The
use of a gas regulator complying with the standards for LPG is
Last 3 pages in this user manual)
•If the gas connection is in a position where it can be switched on and
off when required, a flexible pipe complying withthe standards in force
can be used.The flexible pipemust befirmly fixedwith a clamp.
•The flexiblepipecanbe connected asfollows:
•Since the flexible pipe will be placed behind the oven, it should be
exposed totemperatures no higher than30ºCat any point.
•The length should be no longer than 150 cm.
•It must not be exposed to steam.
•No folding, bending or tensionis allowed.
•It shouldbe protected againstsharp orpiercing objects.
•It must be accessible in order to allow for periodicinspection.
•The flexible pipe must be checked as follows to guard against wear
•Check that there are no cracks, cuts or burned spots on or at the ends
•The material must maintain its flexibility . Excessive rigidity is not
•There mustbe no rustonthe clamps.
•It shouldbe replaced in any case after no more than 5 years'usage.
Connection with a Solid or Flexible Metal Pipe
The gas supply can be connected by a proper flexible stainless steel
pipe according to the safety standards in force. In this case, there will
be no further need to move the appliance. The gas inlet connector of
the appliance isGc½.
Connection with a Flexible Non-metallic Pipe
Check all connections for leaks with a soapy substance
after the installation is completed. Do not use a flame
for to check gas leaks.
RIGHT FLEXIBLE GAS PIPE LINEELECTRICAL CABLE WRONG FLEXIBLE GAS PIPE LINEELECTRICAL CABLE •The eventual replacement of the supplying cord must be carried on
ELECTRICAL CABLE by the After Sales Service or by on agreed
engineer, with a cord whose characteristics must be similar to the
Ratings/Supply Cable Sections:For the cookers below written adjustment have to be done by qualified
Follow the steps given below to convert the appliance from the factory
set up to that for a different gas type.
Cookers are adjusted NG and connection type
is cylindric (1). For hose type NG connection,
hose adapter (2) can be fixed to cylindrical
For LPG connection, LPG hoseadapter (3) can
from gas type category table
(last 3 pages in this user manual) according to
Adjustmentsand changing injectors
Remove burner capsand burners.
Remove injectors by using a 7 mm wrench, then screw on the correct
Follow the above steps in the reverse order
after completing the assembly of the new
without safety devices and with safety devices and button
•Turn the burner control knob to the small flame position and remove
•If conversion from natural gas to LPG is required, turn clockwise the
by-pass screw of the gas valves with a screw driver to their final
•If conversion from LPG to natural gas is required, turn anti-clockwise
the by-pass screw of the gas valves with a screw driver till a smaller
flame of¼size is obtained.
•After completing the adjustment,insert the knobs again.
•Check the adjustment by turning the burner control knob quickly from
maximum to minimum position. If the flame does not go out, it means
that theadjustmentis correct.
•For safety devices, idle flame setting can be done with screw on valve
body. If there is ignition on the knob for idle flame setting cooktop,
toplid and panel must be removed.
2.7. CONVERSION FOR DIFFERENT GAS TYPES
2.9. GENERAL APPEARANCE AND DEFINITION OF THE APPLIANCE This User Manual has been drawn up as a guide for several
models. Some of the properties mentioned in this manual may not
exist in your appliance.
2.8. DIMENSIONS OF THE APPLIANCE Height (mm)
Bolt Foot By-pass screw for the burner without safety
•Remove rear cover (Figure3)
•Remove adapter.(Figure4)injector
Remove injectors by using a 7 mm wrench, then screw on the correct
Follow the above steps in the reverse order after completing the
assembly of the new injector
from gas type category table (last 3 pages in this
user manual) accordingto the gas to be used. (Figure5)
•Burner Gap is 4.5 + 0.3 mm for NG and LPG (Figure 6)
•For thermostat valve idle frame setting cooktop, top lid and panel
16 GBburner has not ignited after 15 sec. release the button and open the
compartment door and/or wait at least 1min. before attempting again.
For other models the gas isignited by meansofthe controlknobs.
Make sure that the gas is actually burning after this
step! If there is no flame, repeat the procedure
After ignition, adjust the flame tothe sizerequired.
Hold a flame (a match or a lit taper or a hand-operated gas lighter),
towait1 minute betweentwoignition tentative.
Press and turn the knob of the burner you want to ignite as far as the
large flame symbol. Ifthe burner does notcatch fire at the first attempt,
try again pressing the knob a little longer. When the burner is lit, adjust
the flame to the required level.
If the burner does not light after several attempts, check the correct
positionofthe burner anditscap.
Turn the knob clockwise to the “ position in order to close the gas
flow. If the burner accidentally stops burning, wait at least one minute
beforeattempting to relightit.
Some cookers have a flame safety device (see the picture above,
safety device F). If the flame goes out, the gas supply is automatically
3. USE OF COOKTOP BURNERS The knobs which control the burners are positioned on the control
When the knob is turned so that the 'dot' symbol faces towards
the panel, it is in the Off position and the gas valve is closed and
the flame will go out.
Press the burner knob and turn it to the left till the 'dot' symbol
faces towardsthe large flame symbol.
The flameis on full at this position.
Inthisposition,the gas valveis completely open.
The flame can be decreased by turning the knob so that the 'dot'
symbol faces towards the small flame symbol. The valve will be
partiallyopen and the burner will then beon low.
A B C D E F Ignition of theBurners
The burnermust beignitedbefore apanis placed over it.
For models with automatic ignition, the 'spark' button must be
Press theknob controlling the burner you want to ignite and thenturnit
left to the big flame symbol. Press the ignition button. On models with
ignition-thru knobs, press and turn the knob controlling the burner you
want to ignite as far as the star symbol; the electrode will be
automatically activated. All the electrodes will be activated
automatically and the burner to which gas is supplied (that relative to
the knob pressed) will ignite.
The button must not be kept pressed down for more than 15 sec. If the
The outer surface of the flame is hotter than the inner part.The tips of
the flames must touch the bottom of the pan. Flames extending
outsidethepancause unnecessarygasconsumption.
Gas burners, unlike the electrical hot plates, do not need flat
bottomed pans. Flames touching the base of the pan conduct the heat
Although there is no need for special pans for gas burners, pans
made of thinner material conduct the heat faster than those in thicker
Some parts of the food may be heated while others remain cold due
to the uneven distribution of heat under the pan. Therefore,
continuous stirring of the food being cooked is necessary in the case
of thin-bottomed pans. Heat is more effectively and evenly distributed
with thick-based pans.
Use of very small pans is not recommended. Wider, low-sided pans
are more suitable for more effective and quicker cooking than small,
You cannot shorten cooking time by using a small pan over a large
burner. You will only waste gas in this way. However, a pan with a lid
will save energy.Turn the knob to the position for the required temperature of the hot
plate. The indicator light of the hot plate will come on and the hot plate
When cooking is completed, turn the knob to the position. Do not
leave the hot plate turned on without a pan on it. The diameter and the
base of the pan you use is critical. The maximum diameter of the pan
base is14cm and the baseshould be flat.
Leave the hot plate to heat up for 5 minutes before placing a pan on it
the first time you use it. This will allow the heat resistant coating of the
plate toharden dueto burning.
Use a wet cloth and detergent for cleaning the hot plates. Do not
remove food residues from the hot plates with a knife or any other
Turn on the hot plate for a few moments to dry it after cleaning.
However, it must never be left onfor more than a few moments without
18 GB Suitability of Cooking Pans
Keep inmind that larger pans have largerheatingsurfaces.
This will help them to cook the food faster than pans with smaller
Always use pan sizes proportionate to the amount of the food to be
cooked. In order to prevent splashing, do not use very small pans,
especially for foods with excess liquid. If you use excessively large
pans for quick cooked foods, sausages and liquids will stick and
residues will remain attached to the panafter being emptied.
Closed pans and baking trays or oulds are suggested for cooking
sweets. Splashed sugar and juices from an open pan may stick to the
cookersurfaceand willbe difficultto remove.
Cooking at low temperature
Cooking at low temperature
Cooking, Roasting, Boiling
Cooking, Roasting, Boiling
Cooking, Roasting, Boiling
This is especially important for pans used for roasting or pressurized
cooking athigh temperature.
Do not leave burners unattended without a pan or with an empty pan
Check the suitability of cooking pans with respect to the following
They should beheavy.
They should completely cover the burner surface; they may be a little
biggerbutno smaller.
Base surfaces should be completely flat and fit well on the cooking
For the best use of the electric hotplates and to minimize energy
consumption, only pans with smooth flat bases should be used. The
size of the pan should be as close as possible to the diameter of the
hotplate, and never smaller. The base of the pan should be dry and
spillage should be avoided. Empty pans must not be left on the plates,
and theplates should not be leftswitchedonwithout apan.
Grilling gives food a rich brown colour quickly. Depending on the
quantity of the food, you can switch the grill on to different positions.
Almostallfoodcan be cooked under the grill except for very lean game
Meat and fish that is going to be grilled should first be lightly doused
Place a fat collecting tray beneath during grilling. Put some water into
the tray to prevent unpleasant smells and to prevent the fat catching
Grilling is usually preferred for cooking pieces of meat, for example
steaks, which are not too thick, different sized meat parts, cleaved
hunted birds, fish, some vegetables (e.g. courgettes, aubergines,
tomatoes, etc.) together with meat and fish products on spits.
Oil thefish lightly before putting it directlyunder the grill.
Add salt on meat after cooking, salt fish into the cleavage before
The distance from the grill will depend on the thickness of the meat or
fish. If the distance is correctly judged, the outer parts will not be burnt
and theinside will not remain raw.
Prevent unpleasant odours and smoke caused by dripping fats and
saucesby pouring 1-2 glassof water intothe fat-collecting tray.
You can also use the grill for toasting, toasted bread or sandwiches,
for example, and also to cook certain fruits (bananas, grapefruit or
pineapple slices, apples etc.). However, fruit must not come into
contact withthe heating elements.
Never cover oven inner walls or the bottom with
aluminium foil. Accumulated heat can damage the oven
enamel and your meal.
While the oven functions are running, top lid of the
cooktop must be open position.
4.1. GRILLING Oven FunctionPosition
Lower and upper heating element
Lower heating element
Upper heating element
Grill heater and fan
Lower heating element and fan
Upper heating element and fan
Upper heating element, lower heating element and fan
Turn spit and grill heater
Unless otherwise suggested, preheat the oven for at least 10 minutes
before use. Do not open the oven door when cooking cakes otherwise
they will not rise (cakes or dishes with yeast and soufflés). The blast of
cold air which will enter the oven will prevent rising. You can check
whether cakes are properly cooked by inserting a rod into the dough. If
the rod comes out dry when you pull it out, it means that the cake is
properly cooked. Do not check in this way until at least three quarters
ofthe cooking time haselapsed.
If the surface of the food is cooked well but it is still raw or partly raw
inside,it must be cooked longerat alower temperature.
On the other hand, if the surface of the food is too dry, it should be
cooked at a higher temperature for a shorter time.
Pleasekeep in mind the following tips
The minimum quantity of meat to be cooked in the oven is 1 kg.
Otherwise, themeat will betoo dry.
If you require well done meat, use less fat. If meat has a little fat, there
is no need to use oil. If one side of the meat is fatty, place this side up.
The melted fat will sufficiently grease the part below. Red meats
shouldbe taken outof the fridge at least 1 hour before thecooking.
Otherwise the meat may become tough due to the temperature
difference. Do not use salt before cooking, especially when grilling
meat. Salt will draw the blood and juices out of the meat which will
consequently prevent the roasting of theupper surface ofthemeat.
Addsalt to roast meat only after half of the cooking time has elapsed.
Place the meat toberoasted in a wide, shallowpan.
Deep sided containers / pans act as a shield against the heat. Meat
can be placed in the oven in a heat resistant pan or directly onto the
grill. Insert a fat / gravy collecting tray beneath the grill. Sauces must
be added at the beginning if the food is cooked for a short time, while it
would be better to add sauces in the last half hour if the food is cooked
4.6. COOKING MEATS Small fish can be cooked at the maximum temperature from start to
finish. Medium sized fish must be cooked at the maximum
temperature atthe beginning and then the temperature mustbe slowly
reduced. Larger fish must be cooked at lower temperatures from start
to finish. Check the cut at the bottom of fish to understand whether it is
cooked properly. In order to understand whether the fish properly
grilled or not, check the cleavage at the bottom of the fish. The colour
(for grilled fish) should be an even matt white. This is not the case for
4.3. ELECTRIC OVEN SUGGESTIONS FOR COOKING TraditionalCooking
Convection Cooking (with Fan)
Heat is generated from the upper and lower heaters. Generally, the
middle shelf position is preferable for cooking. However, if the top or
bottom surface of the food must be cooked more, place it on the upper
The food is cooked by evenly distributed preheated air blown into the
oven by the help of the fan located on theinside back wallof the oven.
It is possible to cook several dishes simultaneously on different
shelves thanks to the evenly distributedheatinside the oven.
This type of oven is also very useful for defrosting frozen food. It can
also be used for sterilizing canned food, preparing fruit syrups, and
dehydrating fruits and mushrooms.
hermostat setting atmaximum
reheating time15 (20 ifpossible)
ositionof the tray in either one of thetwo lowest position
( C)The oven temperature and heater can be
selected by turning the oven adjustment
knob tothe desired temperaturelevel.
The oven thermostat range is: 140-
Some cookers have flame safety device
on burners. If the flame goes out, the gas
supplyis automatically cut off.
•The cooker is equipped with a metal turnspit, two forks and a hook
used to support the spit.
•Instruction for use:
-Remove all accessoriesfrom the oven;
-put the deep pan onthe bottom of theoven or on the lowest bench;
-stick the turnspit through the meat,centered between the two forks;
-Fix the turnspit into the drive hole located in the bottom wall, then
the support hook in the drive located at the top front of the oven cavity
and around the edge ofthe turnspit
•Preheating is not necessary withthe turnspit.
•Cooking Time Recommended inturnspitPosition
4.8. COOKING TURN SPIT Cooking time (min)
Gas Oven Electric oven
4.10. USING THE END OF COOKING TIMER This control enables to set the desired
cooking time (max. 90 min.) the oven will
automatically switch off at the end of the
The timer will count down from the set
time return to the “O” position and switch
For normal use of oven set the timer to
To set the oven ensure the timer is not on
To set the cooking time, turn dial one
complete revolution and then position
the index to the required time. When the
time has lapsed, the signal will ring for a
WARNING : the first operation to carry out after the oven has been installed or following the interruption of power supply
(this is recognizable the display pulsating and showing ) is setting the correct time. This is achieved as follows
• Press and hold the TIMER and END buttons ( and )
• Set time with buttons
• Release all buttons
ATTENTION the oven only operates if set on manual function or preset time.
N.B.: on some models the symbols are replaced by + and - .
•Sounds an alarm at the end of the
•To check how long is left to run
FUNCTION HOW TO ACTIVA HOW TO SWITCH IT OFF WHAT IT DOES WHAT IT IS FOR
•Allows to use the oven as alarm clock (could be activated either with
operating the oven or with out operating the oven)
•Release all the buttons
•For cooking the desired recipes•Turn the oven function
selector to position“O”
•Enables you to operate the oven.
•At the end of the cooking set time, the oven will switch off automatically
and an audible alarm will ring.
•When the time is elapsed
the oven will switch off
automatically. Should you
wish to stop cooking earlier
either turn the function
selector to 0, or set time to
•It allows to preset the cooking
time required for the recipe
•To check how long is left to run
•To alter/change the preset time
press TIMER and buttons
•This function is typically used with “cooking time” function. For example
if the dish has to be cooked for 45 minutes and needs to be ready by
12:30, simply select the required function, set the cooking time to 45
minutes and the end of cooking time to 12:30.
•Cooking will start automa-tically at 11:45 (12:30 minus 45 mins) and will
continue until the preset end of cooking time, when the oven will switch
itself off automatically
If the END of cooking is Selected without setting the length of cooking
time, the oven will start cooking Immediately and it will Stop at the END of
•At the time set, the oven
will switch off. To switch off
manually, turn the oven
function selector to position
•Enables you to set the end of
function with the oven
function with the oven
to set the time at which
you wish the oven to
•Release the buttons
function with the oven
Setting the correct time:
•When the set time as
elapsed an audible alarm
is activated (this alarm will
stop on its own, however
immediately by pressing
TYPE OF THE FOOD Traditional
N O T E S CAKES AND DESSERTS Dough with stirred egg
Inside the closed oven on
dishes 8 pieces on a tray
British style roast beef
1) Cooking times do not include pre heating. Preheating the oven for about 10 minutes is advisable especially for cakes, pizzas and breads.
2) Indicates tray positions for cooking several dishes simultaneously.
3) All cooking operations must be carried out with oven door closed.
FOOD TYPES QUANTITY COOKING ON GRILL COOKING TIMES
This appliance is marked according to the European
directive 2002/96/EC on Waste Electrical and
Electronic Equipment (WEEE).
•By ensuring this product is disposed of correctly, you will help prevent
potential negative consequences for the environment and human
health, which could otherwise be caused by inappropriate waste
handling of this product.
•The symbol on the product indicates that this product may not be
treated as household waste. Instead it shall be handed over to the
applicable collection point for the recycling of electrical and electronic
•Disposal must be carried out in accordance with local environmental
regulationsforwaste disposal.
•For more detailed information about treatment, recovery and
recycling of this product, please contact your local city office, your
household waste disposal service or the shop where you purchased
After positioning the appliance, packaging materials
must be correctly disposed of for safety and
environmental purposes.
Before disposing of old equipment, cut the power
cable in order to rendertheequipment unusable.
If the oven is not working, before calling the service centre we
You should check that the oven is properly plugged into the power
Check the following:
Are the holesof the burner clogged?
Is the pressure regulatorworkingproperly?
If you areusing a pipe, isthere any gasin the pipe?Is the valve open?
If you detect something abnormal with the gas valves, contact a
qualified electricianor an authorised service centre for assistance.
Please check the following:
Hasagas valve been left open?
Is the gas pipe in the correct position and ingood condition?
If you suspect a gas leak, donot use a flameto check
Are theoven controlknobs at the correct position?
Has the correct temperature been selected ?
It is advisable to clean the oven after each use. If fat which splashes
during the cooking of meat is not cleaned, it will cause an unpleasant
smell and smoke the next time you use the oven. (See the Cleaning
and Maintenance chapter)
The light might be faulty. To change the bulb, please see the relative
If you have checked the above and the oven still does not work
properly, contactthenearestauthorized service for assistance
Model and Production Number (PNC or ENR).
Gas inputis abnormal
Thereis asmell of gaswhere the appliance is placed
The ovendoes notheat up
The cooking timeis too long
Smoke comesfrom the oven
The ovenlight does not come on
5. CLEANING AND MAINTENANCE Beforeall cleaningand maintenance :
Disconnect mains voltage.
Shut off the gas valve for your own safety. If the oven is adjusted to
naturalgas, shut offthe natural gas valve.
If theoven ishot, waittill ithascooled down.
Never use a steam or high pressure spray to cleantheappliance.
Never use steam or a vaporizer for cleaning.
Never use abrasive cleaners, wire wool or sharp objects to clean the
Clean enamelled surfaces with warm, soapy water or with suitable
brand products. On no account use abrasive powders that may
damage surfaces and ruin the appearance ofthecooker.
It isvery importanttocleanthe oveneach time itisused.
Usedetergents and abrasive metal pads for the stainless steelgrills.
The glass surfaces such as the top, the oven door and the warming
compartment door must becleanedwhen they are cold.
Damage caused by failure to respect this rule is not covered by the
You can clean burners and burner caps with hot water and detergent.
Also the gas channels of the burners can be cleaned by a brush. Make
sure that burners are dry before replacing them in their seats. Check
correctpositioning of the burner.
especially for cakes, pizzas and breads.
Periodically clean the ignition electrodes of automatic ignition ovens.
This will prevent ignition problems.Check frequently that
the gaschannels ofburnersarenotblockedby food residues,etc.
Wipe the top lid with a dry cloth in order to prevent harmful effects of
water,oil and steamgenerated by the cooked food.
Do not use abrasive products, metal cleaning pads, sharp objects,
rough cloths, or chemical products and detergents that can
permanently damage the catalytic lining.
It is a good idea to use deep roasting trays for fatty foods such as
joints of meat etc. and to put a tray underneath the grill to catch surplus
For thorough cleaning of the oven door, it is advisable to remove the
Open the door completely, turn the two feet on the hinge arms 180º.
Close the door partly by a 30º. Remove the door by slightly lifting the it
For replacing the door, follow the steps above in the reverse order.
Cleaning of OvenDoor
To Replace the inside light
•Switch offthemains power supplyand unscrew bulb.
Replace with an identical bulb that can withstand very high
Special self-cleaning panels covered in a micro-porous coating are
available on some of our models. If they are fitted, the oven no longer
needsto becleanedbyhand.
Thelining must be porous forself-cleaning to be effective.
Excessive splattering of fat may block the pores and therefore hinder
self-cleaning. This self-cleaning capacity may be restored by
switching on the empty oven tomaximum for about 10-20minutes.
If the walls of the oven are so thickly coated in grease that the
catalytic lining is no longer effective, remove surplus grease with a soft
cloth or sponge soaked in hot water. All catalytic linings currently on
the market have a working life about 300 hours.They should therefore
be replaced after about 300hours.Ø mm
mbar (3B/P) G30/31 - 50 mbar (3B/P)
25GB The manufacturer will not be responsible for any inaccuracy resulting from printing or transcript errors contained in this brochure. We reserve the right
to carry out modifications to products as required, including the interests of con sumption, without prejudice to the characteri stics relating to safety or