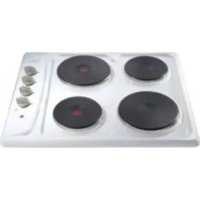
HCE550WH - Cooker CDA - Free user manual and instructions
Find the device manual for free HCE550WH CDA in PDF.


User questions about HCE550WH CDA
0 question about this device. Answer the ones you know or ask your own.
Ask a new question about this device
Download the instructions for your Cooker in PDF format for free! Find your manual HCE550WH - CDA and take your electronic device back in hand. On this page are published all the documents necessary for the use of your device. HCE550WH by CDA.
USER MANUAL HCE550WH CDA
ELECTRIC BUILT-IN HOB
Operating instructions for: Installation - Maintenance - Use

Before leaving the factory this appliance was checked and prepared by expert and specialized personnel in order to give the best functioning results. Any repairs or adjustment which might be necessary is to be carried out with the utmost care and attention. For this reason we reccomend you always contact the dealer where the
appliance was sold or our nearest Customer Service Centre, specifying the type of problem and the model of your appliance.
Do not forget that the original spare parts are only to be found at our Customer Service Centres. Do not leave the packing unguarded for, both children safety and environment.
The symbol on the product or on its packaging indicates that this product may not be treated as household waste. Instead it shall be handed over to the applicable collection point for the recycling of electrical and electronic equipment. By ensuring this product is disposed of correctly, you will help prevent potential negative consequences for the environment and human health, which could otherwise be caused by inappropriate waste handling of this product. For more detailed information about recycling of this product, please contact your local city office, your household waste disposal service or the shop where you purchased the product.
FR
Instructions for use:
Operation of the top with the electric plates page 14
Operation of pyroceram tops page 14
Operation of the grill top page 15
- Maintenance and cleaning page 15
Instructions for installation
- Electrical connection page 16
- Instructions for building in the units page 17-18
PT
ADVERTÉNCIAS GERAIS
Instruções de uso:
Thank you for choosing our product. This appliance is easy to use; read this handbook carefully before installing and using it, however. You will find the correct indications for the best installation, use and maintenance of the product.
- Very important: keep this instruction booklet with the appliance in case you pass it on to someone else.
- This appliance is designed for non professional use by private individuals at home. It must be used by conscious adults, do not allow children to play with it. The front accessible parts of the equipment could overheat during use.
- Supervise children and non self-sufficient people when it is being used so that they do not touch hot surfaces and are not near the appliance while it is in use.
- The product installation, must be performed by competent and qualified installers who are aware of the installation regulations in force.
- Before maintenance or cleaning disconnect the appliance from the mains and wait for it to cool down.
- Switch off the heating element before removing the pots.
- The power cable must not be replaced by user. Please contact qualified personnel to replace apparatus cable.
- Refrain from placing on the heating surfaces any pots whose bottom is unsteady or warped, so as to avoid possible accidents due to overflowing of liquids.
-
Should the pyroceram top be even lightly cracked, immediately cut off the mains.
-
Never put aluminium sheets, plastic containers, or other perishable material, on heated tops. Never use the pyroceram top as a support base for other objects.
- When using a crystal cover, only close it when the heating surfaces are well cooled. Use the cover as a protection of the top, and never for other purposes.
- Before opening lid, eliminate all overflowing liquid.
- Do not use steam jets for cleaning purposes.
- Always apply to the authorized Technical Assistance Centre for repairing work, and always ask for genuine spare parts. Remember that repair work done by amateurs could bring serious damages to the equipment.
This appliance complies with EEC Specification:
- 73 / 23 + 93 / 68 (low voltage equipment)
- 89/336 (electromagnetic compatibility)
- 89/109 (components coming in contact with foodstuffs)
-2002/96(WEEE)
In the control area of the equipment are fitted all the devices and the knobs for using the single heating element.
Operation of the top with the electric plates
The electric tops can either be of the standard type, or of the rapid type. These last feature a red mark at their centre. According to your needs, the tops can be adjusted by turning the knobs either closckwise, or anticlockwise on 6 position besides the 0 position (off).
The positions marked by the higher numerical index match the maximum output of heat (see table). When using rapid tops, a thermostat automatically reduces the power when the selected temperature is reached, and the top operates intermittently to reach a constant cooking temperature.
The pilot light set in the control area signals that the electric plates are switched on.
Advice on the use of cooking tops
To spare energy and to have a longer life of the electric tops, we advise using pots with flat bottom and with a diameter not lesser than the diameter of the tops.
Care must be taken that fluids do not spill on the electric plates.
Never leave the tops on without pots on them or with empty pots, and never use the tops to heat the place. Switch on the plates after having set the pots on them.
Once switches off, the plates remain warm for a while.
Operation of pyroceram tops
Pyroceram tops feature two heating elements controlled by special knobs which have a numerical index.
The regulation of these tops is continuous, and to a higher numerical index corresponds a longer time of insertion of the heating element, hence, a higher degree of heat. Set the knob on zero position to switch off the heating element.
Besides the main pilot light, two pilot lights are set on the control panel to signal when the heating area has cooled down (approx. 50^ ).
Operation of the grill top
These tops feature a heating element controlled by a special knob which has a numerical index. The adjustment of these tops is continuous, and to a higher numerical index corresponds a longer time of insertion of the heating element.
Set the knob on zero position to switch off the top. Besides the main pilot light, a pilot lights is set on the control panel to signal when the surface of the top has reached not dangerous values (approx. 50^ ).
| Reheating | Cooking | Roasting-frying | |
| Normal and fast electric hot plates | 1 2 | 3 4 | 5 6 |
| Pyroceram tops Grill | 1 | 2 | 3 |
Maintenance and cleaning
Do not use steam jets for cleaning purposes.
Cut off the mains to the equipment before carrying out any work. We advise using lukewarm water and detergents to clean enameled elements. Never use abrasive products. Rinse with water the stainless steel elements and dry using a soft cloth. Use sponges or a moist cloth to clean the tops, and remember that water in excess can damage the electric elements. Clean the hard stains using non abrasive detergents, or special products that can be found on the market, or warm vinegar. Clean the electric tops using a moist cloth, then lightly oil the top when it is still warm.
Clean the crystal surfaces after they have cooled down using a plastic scraper, and complete the cleaning using non-abrasive products that can be found on the market.
Apply to skilled personnel when the equipment shows anomalies during its use.
Below we give the instructions for qualified installers so that the installation, setting and maintenance operations are performed correctly and according to the regulations in force.
Electrical connection
The appliances are provided with a three-pole feeding cable and work with alternate current and single-phase voltage indicated on the "rating plate of the product "report at the end of the instruction manual and on the product. The grounding conductor of the cable is marked with the colours yellow/green.
The connection to the electricity supply must be made by a qualified person and following the regulations in force. When the appliance is to be installed above a built-in oven, the two appliances must be connected separately, to make it easier to take the appliances out and for electrical safety.
Connection of the supply cable to the mains
Connect a plug sized for the load indicated on the rating plate to the cable and connect it to a suitable socket. Avoid the use of reductions, two-way switches or adapters to avoid overheating or burning. For direct connection to the mains there must be an omnipolar switch with minimum opening between the contacts of 3mm sized for the load and corresponding to the standards in force between the appliance and the mains.
The yellow/green earth wire must not be interrupted by this switch. The brown phase wire must be connected to the supply mains phase. The supply cable must be so positioned that no point can reach a temperature 50^ C higher than ambient temperature.
Before making the electrical connection check that the domestic system and the limiter valve can take the appliance load (see rating plate).
Also check that the supply system has an effective earth connection and corresponds to the standards in force and that the plug (or omnipolar switch) can be reached easily when the appliance is installed.
The manufacturer refuses all responsibility if the standards in force are not respected.
Instructions for building in the units
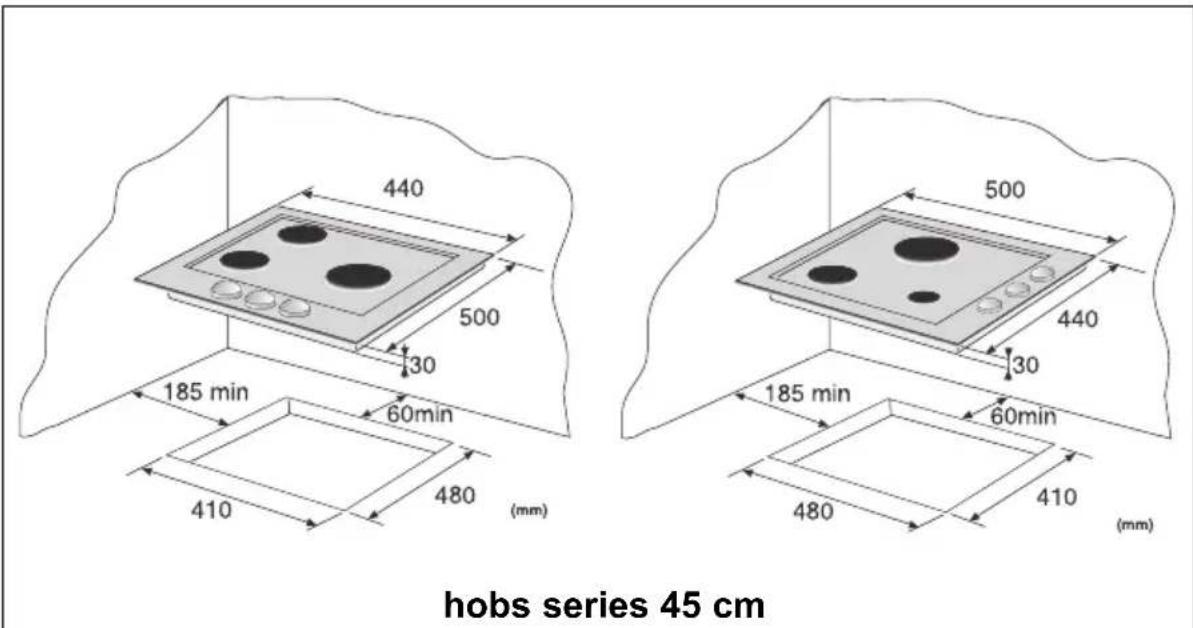
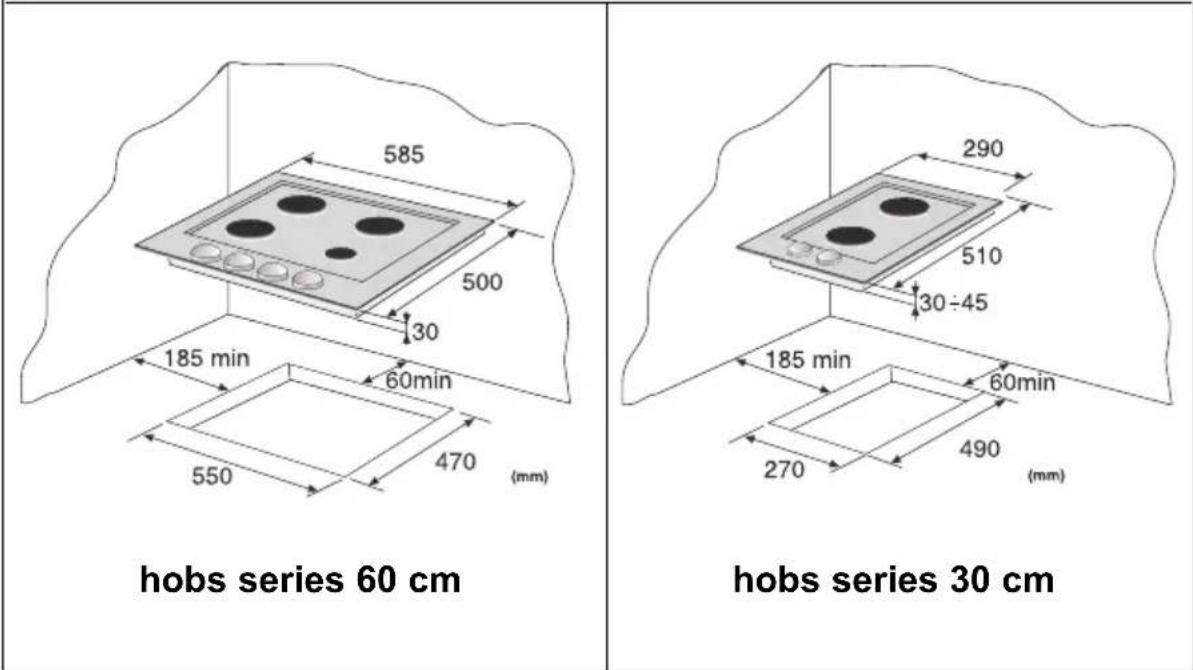
It can be built into all units whose walls withstand a temperature 65^ higher than room temperature (EN 60335 - 2 - 6).
Avoid installing the appliance near inflammable materials (e.g. curtains, cloths, etc.).
The appliances are designed to be inserted in units with a minimum depth of 550~mm .
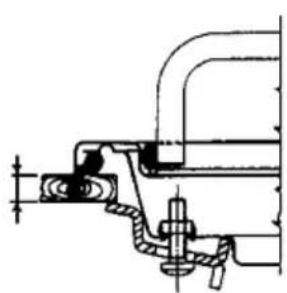
- Position the special sealed gasket (provided) on the edge of the hob making sure that the ends meet without one lying on top of the other.
- Put the hob in the unit opening making sure that it is centred.
- Fasten the hob to the unit with the fastening brackets. The traction of the screws will be enough to cut the sealing gasket so that the excess can easily be removed.
8mm
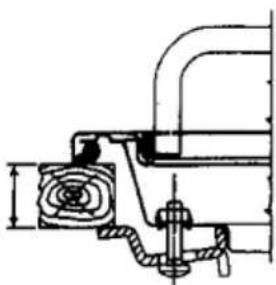
20mm
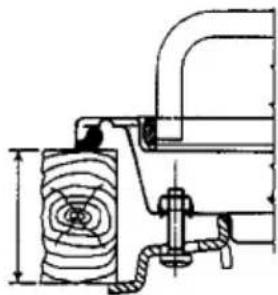
40mm
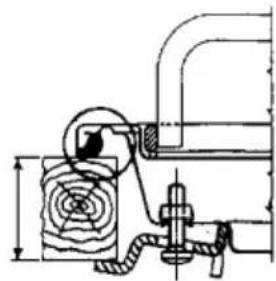
30mm
Warnings
If there is a hanging unit over the cooking hob it must be at least 600~mm away from it.
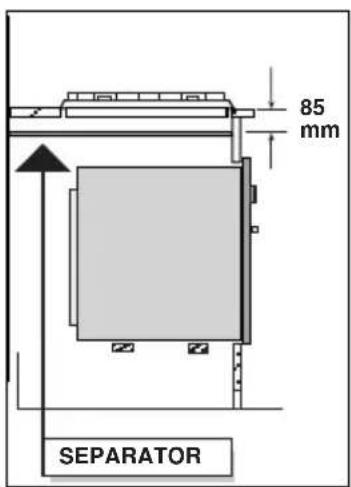
In order to avoid excessive overheating, even if there is no oven below, it is necessary to provide a separating space having at least the size of the embedment hole.
Cher Client,
Rating plate of the product