
DECT2250G - Phone PHILIPS - Free user manual and instructions
Find the device manual for free DECT2250G PHILIPS in PDF.
| Product Type | DECT Cordless Phone |
| Brand | Philips |
| Model | DECT2250G |
| Technology | DECT (Digital Enhanced Cordless Telecommunications) |
| Base Power Supply | 120 V AC, 60 Hz, output 9 V DC, 500 mA |
| Charger Power Supply | 120 V AC, 60 Hz, output 9 V DC, 150 mA |
| Battery Type | 2 rechargeable AAA NiMH batteries, 1.2 V, 650 mAh |
| Phonebook Capacity | Up to 30 contacts (name: 8 characters, number: 20 digits) |
| Received Call List | 20 entries with caller ID |
| Dialed Call List | Last 5 dialed numbers |
| Main Features | Speakerphone, intercom, 3-way conferencing, keypad lock, silent mode, mute, volume control, ringer settings (melody and volume), backlight, message waiting indicator, handset locator |
| Number of Registrable Handsets | Up to 4 |
| Display | Backlit display (can be activated) |
| Hearing Aid Compatibility | Yes (HAC) |
| Safety | Auto power-off, overload protection, safety instructions (do not expose to water, do not open, etc.) |
| Maintenance | Clean with a damp cloth after unplugging |
| Supplied Accessories | Base, handset, charger, power adapters, rechargeable batteries, telephone line cord |
| General Information | Complies with FCC and Industry Canada standards; indoor use only; do not use near water |
Frequently Asked Questions - DECT2250G PHILIPS
User questions about DECT2250G PHILIPS
0 question about this device. Answer the ones you know or ask your own.
Ask a new question about this device
Download the instructions for your Phone in PDF format for free! Find your manual DECT2250G - PHILIPS and take your electronic device back in hand. On this page are published all the documents necessary for the use of your device. DECT2250G by PHILIPS.
USER MANUAL DECT2250G PHILIPS
User manual DECT2250
Charge the handset(s) for 24 hours before use.

IMPORTANT SAFETY INSTRUCTIONS 2
I ENVIRONMENT AND SAFETY 3
2 SETTING UP YOUR PHONE 4
INSTALLING YOUR DECT 2250
SELECT YOUR LANGUAGE 4
REGISTERING YOUR HANDSET 4
3 ABOUT YOUR PHONE 5
YOUR HANDSET. 5
1 ICONS ON YOUR HANDSET DISPLAY 5
4 MAKING CALLS. 6
MAKING A CALL 6
Preparatory Dialing (Pre-Dial) 6
Redialling. 6
Off-hook redialling. 6
Phonebook dialling 6
ENDING A CALL 7
ANSWERING A CALL 7
HANDS FREE CALLS 7
ADJUSTING THE VOLUME 7
MUTING A CALL 7
5 USING YOUR PHONEBOOK 7
VIEWING THE PHONEBOOK RECORDS 7
STORING A NAME AND D NUMBER 8
EDITING PHONEBOOK RECORDS 8
DELETING PHONEBOOK RECORDS 8
DELETING THE ENTIRE PHONEBOOK 8
6CALL RECORDS 9
FINDING OUT WHO CALLED YOU (CALL LIST)
Checking your call records 9
Calling back from a call record 9
Saving the call records to your phonebook 9
9
9
FINDING OUT WHOM YOU HAVE CALLED (DIAL LIST) 9
Checking your dialed records 9
Saving the dial records to your phonebook 10
Deletingadial record 10
Deleting the entire dial list 10
7 PERSONALIZING YOUR PHONE 10
PERSONALIZING YOUR PHONE'S DISPLAY 10
Giving your phone a name. 10
Setting your phone's language 10
Turning the backlight on/off 11
PERSONALIZING YOUR SOUNDS 11
Selecting your handset's ring melody 11
Selecting your handset's ring volume 11
Turning the key tone on/off 11
9 SYSTEM 12
REGISTERING A HANDSET 12
UN-REGISTERING A HANDSET 12
RESETTING 12
10 ADDITIONAL FEATURES 13
KEY LOCK. 13
Locking the keypad 13
Unlocking the keypad. 13
SHORTCUT FOR TURNING HANDSET RINGER ON/OFF 13
MESSAGE WAITING INDICATION (MWI) 13
FINDING A HANDSET 13
11 USING MULTI-HANDSETS 14
CALLING SOMEONE IN THE HOUSE 14
CALLING SOMEONE IN THE HOUSEWHILE YOU ARE TALKING ON THE PHONE 14
TRANSFERRING YOUR CALL TO ANOTHER HANDSET. 14
MAKING A 3-WAY CONFERENCE CALL 14
Important Safety Instructions
Some of the following information may not apply to your particular product; however, when using telephone equipment, basic safety precautions should always be followed to reduce the risk of fire, electric shock and injury to persons, including the following:
I. Read and understand all instructions.
2. Follow all warnings and instructions marked on the product.
3. Unplug this product from the wall outlet before cleaning. Do not use liquid cleaners or aerosol cleaners. Use a damp cloth for cleaning.
4. Telephones should not be used while you are in a bathtub, shower or pool. Immersion of the telephone or handset in water could cause an electrical shock.
5. Slots and openings in the cabinet back or bottom are provided for ventilation, to protect it from overheating. These openings must not be blocked or covered. The openings should never be blocked by placing the product on the bed, sofa, rug, or other similar surface. This product should not be placed in a built-in installation unless proper ventilation is provided.
6. This product should be operated only from the type of power source indicated on the marking label. If you are not sure of the type of power supply to your home, consult your dealer or local power company.
7. Do not allow anything to rest on the power cord. Do not locate this product where the cord will be abused by persons walking on it.
8. Do not overload wall outlets and extension cords as this can result in the risk of fire or electric shock.
9. Never push objects of any kind into this product through cabinet slots as they may touch dangerous voltage points or short out parts that could result in a risk of fire or electric shock. Never spill liquid of any kind on the product.
10. To reduce the risk of electric shock, do not disassemble this product, but take it to a qualified service personnel when service or repair work is required. Opening or removing covers may expose you to dangerous voltages or other risks. Incorrect reassembly can cause electric shock when the appliance is subsequently used.
II. Do not expose the product to extreme temperatures such as areas near a hot radiator or stove or in a hot car.
12. Do not place lighted candles, cigarettes, cigars, etc., on the telephone.
13. Never touch uninsulated telephone wires or terminals unless the telephone line has been disconnected at the network interface.
14. Never install or modify telephone wiring during a lightning storm.
15. Never install telephone jacks in wet locations unless the jack is specifically designed for wet locations.
16. Use caution when installing or modifying telephone lines to prevent electrical shock and/or fire.
17. Unplug this product from the wall outlet and refer servicing to quali ed service personnel under the following conditions:
A. When the power supply cord or plug is damaged or frayed.
B. If the product has been exposed to rain or water.
C. If the product does not operate normally by following the operating instructions.
D. If the product's cabinet has been damaged.
E. If the product exhibits a distinct change in performance.
-
Avoid using a telephone (other than a cordless type) during an electrical storm. There may be a remote risk of electric shock from lightning.
-
Do not use the telephone to report a gas leak in the vicinity of the leak.
-
Do not place this product on an unstable cart, stand or table.
The product may fall, causing serious damage to the product. IF YOUR PRODUCT UTILIZES BATTERIES, THE FOLLOWING ADDITIONAL PRECAUTIONS SHOULD BE OBSERVED:
- Use only the type and size of battery(ies) specified in the user manual.
- Do not dispose of the battery(ies) in fire. They may explode. Check with local codes for possible special disposal instructions.
- Do not open or mutilate the battery(ies). Released electrolyte is corrosive and may cause damage to the eyes or skin. It may be toxic if swallowed.
- Exercise care in handling battery(ies) in order not to short out the battery(ies) with conducting materials such as rings, bracelets, and keys. The battery(ies) or conductor may overheat and cause burns.
- Do not attempt to recharge the battery(ies) provided with or identify for use with this product that are not intended to be charged. The battery(ies) may leak corrosive electrolyte or explode.
- Do not attempt to rejuvenate the battery(ies) provided with or identify for use with this product by heating them. Sudden release of the battery(ies) electrolyte may occur causing burns or irritation to eyes or skin.
- When replacing battery(ies), all batteries should be replaced at the same time. Mixing fresh and discharged batteries could increase internal cell pressure and rupture the discharged battery(ies). (Applies to products employing more than one separately replaceable primary battery.)
- When inserting battery(ies) into this product, the proper polarity or direction must be observed. Reverse insertion of battery(ies) can cause charging, and that may result in leakage or explosion.
- Remove battery(ies) from this product if storing over 30 days because the battery(ies) could leak and damage the product.
- Discard "dead" battery(ies) as soon as possible since "dead" batteries are more likely to leak in a product.
- Do not store this product, or the battery(ies) provided with or identify for use with this product, in high-temperature areas.
Batteries that are stored in a freezer or refrigerator for the purpose of extending shelf life should be protected from condensation during storage and defrosting. Batteries should be stabilized at room temperature prior to use after cold storage.
- If your product uses rechargeable battery(ies), charge the battery(ies) only in accordance with the instructions and limitation specified in the User Manual.
SAVE THESE INSTRUCTIONS
Telephone Products
01-14 Printed in China
1 Environment and safety
Safety information : This telephone is not designed for making emergency telephone calls when the power fails. An alternative should be made available for access to emergency calling.
Power requirements : The product requires an electrical supply of 120 volts, single phase alternating current, excluding IT installations defi ned in standard UL 60950.
Battery requirements : The handset requires power source of two rechargeable NiMH batteries, size AAA 1.2V 650mAh (HR11/45).
WARNING! The electrical network is classified as dangerous according to criteria in the standard UL 60950. The only way to power down this product is by unplugging the power supply from the electrical outlet. Ensure the electrical outlet is located close to the apparatus and is always easily accessible.
Telephone connection : The voltage on the network is classified as TNV-3 (Telecommunication Network Voltages, as defi ned in the standard UL 60950). Following a power cut, the call in progress is lost.
CAUTION: Users should ensure for their own protection that the electrical ground connections of the power utility, telephone lines and internal metallic water pipe system, if present, are connected together. This precaution may be particularly important in rural areas.
Environmental care : Please remember to observe the local regulations regarding the disposal of your packaging materials, exhausted batteries and old phone and where possible promote their recycling.
Because the phone works by sending radio signals between the base unit and the handset, wearers of hearing aids may experience interference in the form of a humming noise.
We advise that this phone should not be used near intensive care medical equipment, nor by persons with pacemakers. Your phone can interfere with electrical equipment such as answering machines, TV and radio sets, clock radios and computers if placed too close. It is recommended that you position the base unit at least one meter from such appliances.

CAUTION
Use only the mains adapter supplied with this telephone. Incorrect adapter polarity or voltage can seriously damage the unit.
Base adapter
Charger adapter
Input: 120 VAC 60 Hz
Input: 120 VAC 60 Hz
Output: 9 VDC 500 mA (DECT 225xx)
Output: 9 VDC 150 mA
Output: 9 VDC 300 mA (DECT 221xx)

CAUTION
RISK OF EXPLOSION IF BATTERY IS REPLACED BY AN INCORRECT TYPE. Never use nonrechargeable batteries; use recommended type supplied with this telephone. NiMH batteries must be disposed of in accordance with the applicable waste disposal regulations.
FCC CERTIFICATION NUMBER IS LOCATED ON THE CABINET BOTTOM
The term "IC :" before the certification number signifies that Industry Canada technical specifications were met. This certifi cation means that the equipment meets certain radio communications and operational requirements.
2 Setting up your phone
Installing your DECT 2250
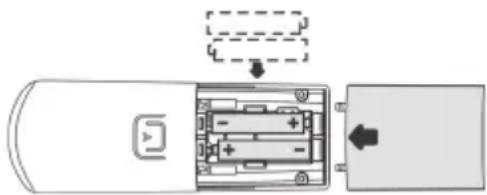
- Place 2 rechargeable NiMH AAA batteries (included), in correct polarities, into the battery compartment on the handset. Note : the warranty shall not apply to the batteries and any other components within lifetime and wear.
- Slide the battery door firmly into place.
- Place the handset on the base unit or the charger and let the batteries continuously charge for 24hours before using. A beep indicates that the handset is properly placed on the base unit or the charger. The handset may take some time to power up and it may get warm during the initial charge. This is normal.
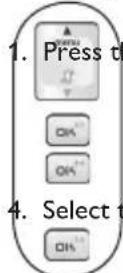
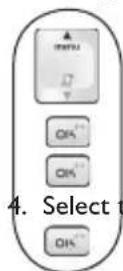
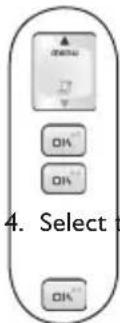
Select the language
- Press twice the MENU key. LANGUAGE appears on the screen.
- Press the OK key. The current language is shown on the screen.
- Select the desired language.
- Press the OK key to confirm.
If you need to change the language again, see description on page 10.
Registering your handset
You will need to register your handset if it shows NOT REG in the display or if you wish to un-register from its original base and register the handset to a different base unit. You can register up to 4 handsets to your DECT 221 base station and DECT 225 base station.
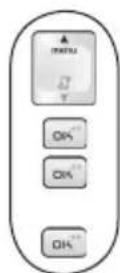
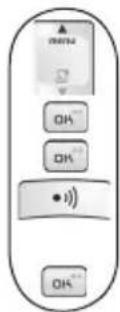
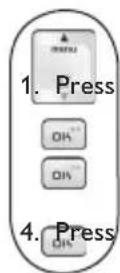
To register your handset:
- Press the MENU key.
- Select S E T I N S and press the OK key.
- Select RERand press the OK key.
- Before OK key is pressed when REGISTER is selected, press and hold the PAGING key on the base for 4 seconds until a registration tone is emitted (DECT 225 only). The base is now in the registration mode. (If the base is full and cannot take on any more handset, it will emit a reject tone instead (DECT 225 only) and you will not be able to register any more handset. See Section 8 - Un-registering a handset - to delete a currently registered handset.)
- Press the OK key while REGISTER is selected. During the registration period, you will see SEARCHING on the handset.
You will hear a confirmation tone if the registration is successful. The handset label and the handset number will be displayed. If the registration is not successful, the previously unregistered handset will display NOT REG again and the previously registered handset will connect back to its original base again. Follow the procedure and try again.
3 About your phone

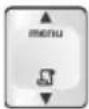
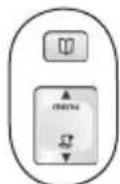
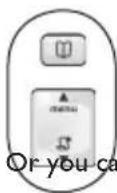
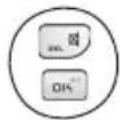
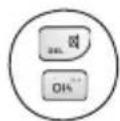
Phonebook Key
Use to access phonebook. Use to save Caller ID info or dialed number into phonebook.

Star & Ringer off Key Use to turn the ringer on/off.

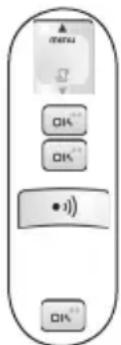
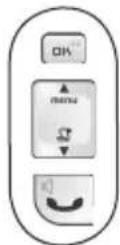
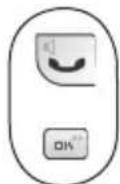
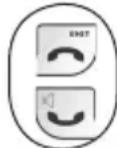
Talk & Loudspeaker Key Use to make and receive calls. Use to turn the loudspeaker on/off.

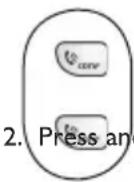
Intercom & Conference Key Use to make intercom calls. Use to set up 3-way conference.
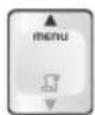
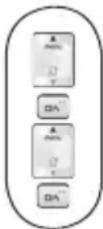
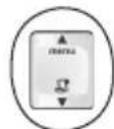
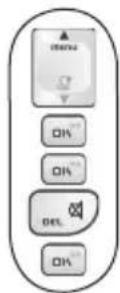
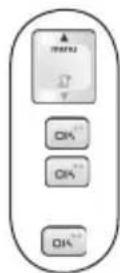
Menu & Scroll up Key
Use to enter menus.
Use to scroll up items.
Use to increase earpiece volume during a call.

Caller ID & Scroll down Key Use to enter call list. Use to scroll down items. Use to reduce earpiece volume during a call.

OK & Redial Key Use to select menu. Use to switch between call details. Use to enter dial list.

End & Exit Key Use to end a call. Use to exit menus.

Pound, Key lock & Pause Key Use to enter a pause. Use to lock the keypad.

Flash/Format Key Use to send flash signal to acce operator services when on line. Use to change the format of the Caller ID viewed.

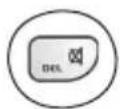
Mute & Delete Key Use to mute/unmute a call. Use to delete digits and records.
Icons on your handset display

Displays the current battery level. It scrolls during charging.

The phone is in use. It blinks during ringing.

There is a new message on your voice mailbox.

The call is muted.

There is a new Caller ID record or Caller ID records are being reviewed.

Phonebook records are being reviewed.

Handsfree loudspeaker is turned on.

The ringer is turned off.

The handset is linked to the base.

There are more digits on the right.

There are more digits on the left.

More menu options are available upward.

More menu options are available downward.
4 Making calls
Making a call

1.
Presskey and wait for the dial tone. TALK
- Dial the number you want to call. The number appears on the display and is dialed.
Preparatory Dialing (Pre-Dial)
With pre-dial, you can see and edit the number you are calling on the display before dialing.

number you want to call. The number appears on the display.
2.
Presskey.
the
TALK
Redialling
Your phone records the last 5 numbers you have dialed. Only the first 20 digits of each number are stored.
To redial one of the last 5 dialed numbers,
- Press the REDIAL key. The most recently dialed number appears.
- Press the UP / DOWN key to choose the number you want to dial.
- Press the TALK key.
Off-hook redialing
With off-hook redialing, you can redial the last number dialed.
1.
Press
the
TALK key.
2.
Press
the
REDIAL key.
Phonebook dialing
1.
Press
key thenter phonebookHONEBOOK
- Press the UP / DOWN key to search for the record that you would like to dial. Or you can use the number keys to jump directly to the record starting with the corresponding letters of that key.
Note: Press the OK key to switch between the name and number of the record.

3.
Press
the
TALK key.
Ending a call

Press the END key or place the handset on the base unit or charger.
Answering a call

Press the TALK key to answer the call.
Handsfree call

Press the LOUDSPEAKER key during a call.
Adjusting the volume
Press the UP / DOWN key to adjust the earpiece or loudspeaker volume.
Muting a call
Press the MUTE key.
5 Using your phonebook
You can use your phonebook to manage your contacts. If you have more than one handset, each handset has its own phonebook.
Viewing the phonebook records
Your phonebook can store up to 30 records. Each record can store a name up to 8 characters and a number up to 20 digits.
- Press the PHONEBOOK key.
- Press the UP / DOWN key to scroll through the records.
Or you can use the number keys to jump directly to the record starting with the corresponding letters of that key.
Storing a name and number
- Press the MENU key.
- Select Phone and press the OK key.
-
Select d^Td and press the OK key.
-
Use the number keys to enter a name.
-
Press the OK key to confirm the name.
-
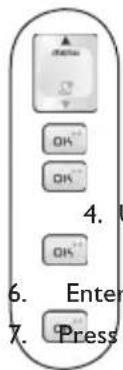
Enter 7. Press
the phone number.
the OK key to save the number.
Editing phonebook records
-
Press the MENU key.
-
Select Phone and press the OK key.
-
Select [ & T & T u & T & T ] and press the OK key.
-
Press the UP / DOWN key to search for the record that you would like to edit or use the number keys to jump directly to the record starting with the corresponding letters of that key.
-
Press the OK key to select the record and edit the name.
- Press the OK key to confirm name change and edit the number.
- Press the OK key to confirm number change.
Deleting phonebook records

-
Press the MENU key.
-
Select PHONE OK and press the OK key.
-
Select and press the OK key.
-
Search
-
Press the OK key to select the record.
- Press the OK key repeatedly to view the rest of the record information until you are prompted to confirm deleting it.
- Press the OK key to confirm.
Deleting the entire phonebook
Instead of deleting the records one by one, you have this option to delete the entire phonebook.
-
Press the MENU key.
-
Select Phone and press the OK key.
- Select and press the OK key.
- Press the OK key again to confirm the action.
6 Call records
Call List
If you have subscribed to caller ID service, your phone automatically stores the last 20 incoming calls.
Checking your call records
- Press the Caller ID key. The caller name of the most recent call record is displayed. the OK key to view the number.
- Press the OK key again to see the date / time when the call was received.
Calling back from a call record

are viewing a call record, you can return the call, provided that it contains a valid phone by pressing the TALK key.
Saving the call records to your phonebook
After selection of the call record that you would like to save,

-
Press the PHONEBOOK key.
-
Edit the caller's name if necessary, or enter a name if caller's name is not available.
OK key to save the name. - Edit the number if necessary.
OK key.
Deleting a call record
While you are viewing the call record that you would like to delete,
- Press the DELETE key.
- Press the OK key to confirm.
Deleting the entire call list
While you are viewing any call record,
- Press and hold the DELETE key until you are prompted to confirm the action.
- Press the OK key.
Dial list
Checking your dialed records
The OK key. The last number dialed is displayed.
2. Press the UP / DOWN key to scroll through the last 5 dialed numbers.
- Press the OK key repeatedly to view the details of this dial record.
Saving the dial records to your phonebook
While you are viewing a dial record that you would like to save,
1.
Press
the
PHONEBOOK key.
-
Enter a name for this dial record.
-
Press the OK key to save the name.
-
Edit the number if necessary.
5.
Press
the
OK key.
Deleting a dial record
While you are viewing a dial record that you would like to delete,
1.
Press
the
DELETE key.
2.
Press
the
OK key to confirm.
Deleting the entire dial list
While you are viewing any dial record,
- Press and hold the DELETE key until you are prompted to confirm the action.
2.
Press
the
OK key.
7 Personalizing your phone
Personalizing your phone's display
Giving your phone a name
- Press the MENU key.
- Select SETTINs and press the OK key.
- Select H5 NAME and press the OK key. The current handset name is displayed.
- Edit the handset name. Press DELETE key if you want to delete the current name and use the number keys to enter a new name.
- Press the OK key to confirm.
Setting your phone's language

- Press the MENU key twice.
- LANGUAGE shown on the screen, press the OK key. The current language is displayed.
- Select the desired language.
- Press the OK key to confirm.
Turning the backlight on/off
-
Press the MENU key.
-
Select SETTINNS and press the OK key.
- Select R K L T and press the OK key. The current setting is displayed.
- Select ON or OFF.
- Press the OK key to confirm.
Personalizing your sounds
Selecting your handset's ringing melody
: MENU key.
- Select RINGER and press the OK key.
-
Select M and press the OK key. The current melody is displayed and played.
-
Select the desired melody.
-
Press the OK key to confirm.
Selecting your handset's ringing volume
-
Press the MENU key.
-
Select RING and press the OK key.
-
Select volumene and press the OK key. The current level is displayed and played.
-
Select the desired volume level.
-
Press the OK key to confirm your selection.
Turning the key tone on/off
Key tones are tones that your phone makes each time you press a key on the handset.
-
Press the MENU key.
-
Select STTINSS and press the OK key.
-
Select Key TONE and press the OK key. The current setting is displayed.
-
Select or
-
Press the OK key to confirm.
8 System
Registering a handset
- Press the MENU key.
- Select S_1, S_2, S_3 and press the OK key.
- Select REGISTER and press the OK key
- Before pressing OK key, press and hold the PAGING key on the base for 4 seconds. A registration tone will be emitted (DECT 225 only).
- Press OK key while selecting RE GISTER
Un-registering a handset
-
Press the MENU key.
-
Select [T] and press the OK key.
-
Select and press the OK key.
-
Select the handset you would like to un-register and press the OK key.
Resetting
You can reset the display, sounds, and other settings of your phone.
the MENU key.
- Select SETTINNS and press the OK key.
-
Select RS T and press the OK key.
-
Press the OK key again to confirm.
9 Additional features
Key lock
Locking the keypad

Press and hold the KEY LOCK key. L [[[] appears on the display.
Unlocking the keypad

Press and hold the OK key.
Shortcut for turning handset ringer on/off
You can use this shortcut to turn on/off the handset ringer.
Press and hold the RINGER OFF key.
Message waiting indication (MWI)
If you have subscribed to the voicemail service from your local service provider turns on when you have a new message in your mailbox. After having listened to all the new messages will turn off.

You can also turn it off by pressing the EXIT key for 2 seconds during standby.
Finding a handset
Press the PAGING key on the base.
10 Using multi-handsets
Note: You need at least 2 handsets to carry out the functions in this section.
Internal Call
To make an intercom call:

-
Press the INTERCOM key and wait for the internal dialling tone.
-
Press the number of the handset that you want to call.
To answer the external call:
1.
Press
the
END key to end the intercom call.
2.
Press
the
TALK key to answer the external call.
To exit the intercom call:

Press the END key or place handset on cradle.
Internal call while you are talking on the phone
While you are on an external call, you can put the external call on hold and call another handset registered on the same base station.
To make an inquiry call during an external call:
1.
Press
the
INTERCOM key.
- Press the handset number that you want to call.
- Wait for the other handset to answer your call.
Transferring your call to another handset
During an external call,
- Press the INTERCOM key.
-
Press the handset number that you want to call.
-
Wait for the other handset to answer your call.
-
When the other handset has answered your call, press the END key or place the handset on cradle. The external call is transferred.
Making a 3-way conference call
You can invite another handset to join a call with the external line.
During an external call,

1.
Press
the
INTERCOM key.
- Press the handset number that you want to call.
- Wait for the other handset to answer your call.
- When the other handset has answered your call, press and hold the CONFERENCE key. You are now in a conference call.
During the conference call,
-
Press the CONFERENCE key to put the external line on hold and talk to the other handset in private.
-
Press and hold the CONFERENCE key to re-establish the conference call.
Equipment Approval Information
Your telephone equipment is approved for connection to the Public Switched Telephone Network and is in compliance with parts 15 and 68, FCC Rules and Regulations and the Technical Requirements for Telephone Terminal Equipment published by ACTA.
Notificatior to the local telephone company
On the bottom of this equipment is a label indicating, among other information, the US number and Ringer Equivalence Number (REN) for the equipment. You must, upon request, provide this information to your telephone company.
The REN is useful in determining the number of devices you may connect to your telephone line and still have all of these devices ring when your telephone number is called. In most (but not all) areas, the sum of the RENs of all devices connected to one line should not exceed 5. To be certain of the number of devices you may connect to your line as determined by the REN, you should contact your local telephone company.
A plug and jack used to connect this equipment to the premises wiring and telephone network must comply with the applicable FCC Part 68 rules and requirements adopted by the ACTA. A compliant telephone cord and modular plug is provided with this product. It is designed to be connected to a compatible modular jack that is also compliant. See installation instructions for details.
Notes
- This equipment may not be used on coin service provided by the telephone company.
- Party lines are subject to state tariffs, and therefore, you may not be able to use your own telephone equipment if you are on a party line. Check with your local telephone company.
- Notice must be given to the telephone company upon permanent disconnection of your telephone from your line.
- If your home has specially wired alarm equipment connected to the telephone line, ensure the installation of this product does not disable your alarm equipment. If you have questions about what will disable alarm equipment, consult your telephone company or a qualified installer.
Rights of the Phone Company
Should your equipment cause trouble on your line which may harm the telephone network, the telephone company shall, where practicable, notify you that temporary discontinuance of service may be required. Where prior notice is not practicable and the circumstances warrant such action, the telephone company may temporarily discontinue service immediately. In case of such temporary discontinuance, the telephone company must:
(1) promptly notify you of such temporary discontinuance; (2) afford you the opportunity to correct the situation; and (3) inform you of your right to bring a complaint to the Commission pursuant to procedures set forth in Subpart E of Part 68, FCC Rules and Regulations.
The telephone company may make changes in its communications facilities, equipment, operations or procedures where such action is required in the operation of its business and not inconsistent with FCC Rules and Regulations. If these changes are expected to affect the use or performance of your telephone equipment, the telephone company must give you adequate notice, in writing, to allow you to maintain uninterrupted service.
Interference Information
This device complies with Part 15 of the FCC Rules. Operation is subject to the following two conditions: (1) This device may not cause harmful interference; and (2) This device must accept any interference received, including interference that may cause undesired operation.
This equipment has been tested and found to comply with the limits for a Class B digital device, pursuant to Part 15 of the FCC Rules. These limits are designed to provide reasonable protection against harmful interference in a residential installation.
This equipment generates, uses, and can radiate radio frequency energy and, if not installed and used in accordance with the instructions, may cause harmful interference to radio communications. However, there is no guarantee that interference will not occur in a particular installation.
If this equipment does cause harmful interference to radio or television reception, which can be determined by turning the equipment off and on, the user is encouraged to try to correct the interference by one or more of the following measures:
- Reorient or relocate the receiving antenna (that is, the antenna for radio or television that is "receiving" the interference).
- Reorient or relocate and increase the separation between the telecommunications equipment and receiving antenna.
- Connect the telecommunications equipment into an outlet on a circuit different from that to which the receiving antenna is connected.
If these measures do not eliminate the interference, please consult your dealer or an experienced radio/television technician for additional suggestions. Also, the Federal Communications Commission has prepared a helpful booklet, "How To Identify and Resolve Radio/TV Interference Problems." This booklet is available from the U.S. Government Printing Office, Washington, D.C. 20402. Please specify stock number 004-000-00345-4 when ordering copies.
Noise
Electrical pulse noise is present at one time or another. This is most intense during electrical storms. Certain kinds of electrical equipment, such as light dimmers, fluorescent bulbs, motors, fans, etc., also generate pulse noise. Because radio frequencies are susceptible to this, you may on occasion hear pulse noise through the receiver. This is usually only a minor annoyance and should not be interpreted as a defect of the unit.
FCC RF Radiation Exposure Statement
This equipment complies with FCC RF radiation exposure limits set forth for an uncontrolled environment. This equipment should be installed and operated with a minimum distance of 20 centimeters between the radiator and your body. This transmitter must not be co-located or operating in conjunction with any other antenna or transmitter.
For hand held operation, this phone has been tested and meets the FCC RF exposure guidelines. Use of other accessories may not ensure compliance with FCC RF exposure guidelines.
Hearing Aid Compatibility (HAC)
This telephone system meets FCC and Industry Canada standards for Hearing Aid Compatibility.
Privacy
Privacy of communications may not be ensured when using this telephone.
Additional Information
I.C. Notice
Terminal Equipment
NOTICE: This equipment meets the applicable Industry Canada Terminal Equipment Technical Specifi cations. This is confirmed by the registration number.The abbreviation, IC, before the registration number signifies that registration was performed based on a Declaration of Conformity indicating that Industry Canada technical specifi cations were met. It does not imply that Industry Canada approved the equipment.
NOTICE: The Ringer Equivalence Number (REN) for this terminal equipment is marked on the equipment itself. The REN assigned to each terminal equipment provides an indication of the maximum number of terminals allowed to be connected to a telephone interface. The termination on an interface may consist of any combination of devices subject only to the requirement that the sum of the Ringer Equivalence Numbers of all the devices does not exceed fi ve.
Radio Equipment
The term "IC:" before the radio certification number only signifies that Industry Canada technical specifications were met. Operation is subject to the following two conditions: (1) this device may not cause interference, and (2) this device must accept any interference, including interference that may cause undesired operation of the device.
Do not attempt to repair or modify this equipment
Repairs to certifi ed equipment should be made by an authorized maintenance facility designated by the supplier. Any repairs or alterations made by the user to the equipment may render the equipment void in product warranty and compliance. This could also void the user's authority to operate the equipment.
Service Centers
USA
Philips Consumer Electronics
P.O.Box 671539
Marietta, GA 30006-0026
Phone: 1-888-PHILIPS (744-5477)
Phone: 1-800-363-7278 (English)
Phone: 1-800-661-6162 (Francais)
CANADA
Philips - Consumer Service Division
4977 Levy Street
Ville St. Lurent,
Quebec H4R 2N9
Phone: 1-800-363-7278 (English)
Phone: 1-800-661-6162 (Francais)
TABLE DES MATIÈRES
CONSIGNES DE SECURITE IMPORTANTES 20
I ENVIRONNEMENT ET SECURITE 21
2 INSTALLATION DUTTELPHONE 22
INSTALLER VOTRE DECT 2250 22
SELECTIONNER LA LANGUE 22
ENREGISTREMENT DU COMBINÉ 22
3 FONCTIONS DUTÉLÉPHONE 23
ICONES AFFICHÉES À L'ÉCRAN DU COMBINED 23
4 FAIRE DES APPELS 24
FAIRE UN APPEL 24
Precomposition 24
Recomposition 24
FCC RF Radiation Exposure Statement
Philips Consumer Electronics
P.O.Box 671539
Marietta, GA 30006-0026
Telephone: 1-888-PHILIPS (744-5477)
Some of the following information may not apply to your particular product; however, when using telephone equipment, basic safety precautions should always be followed to reduce the risk of fire, electric shock and injury to persons, including the following:
SAVE THESE INSTRUCTIONS
Philips Consumer Electronics
Home communication
All rights reserved
Printed in China
www.philips.com


3111 285 25781

- User manual DECT2250
- Important Safety Instructions
- The product may fall, causing serious damage to the product. IF YOUR PRODUCT UTILIZES BATTERIES, THE FOLLOWING ADDITIONAL PRECAUTIONS SHOULD BE OBSERVED:
- SAVE THESE INSTRUCTIONS
- Environment and safety
- CAUTION
- Base adapter
- Charger adapter
- FCC CERTIFICATION NUMBER IS LOCATED ON THE CABINET BOTTOM
- Setting up your phone
- Installing your DECT 2250
- Select the language
- Registering your handset
- About your phone
- Phonebook Key
- Icons on your handset display
- Making calls
- Making a call
- Preparatory Dialing (Pre-Dial)
- Redialling
- Off-hook redialing
- Phonebook dialing
- Ending a call
- Answering a call
- Handsfree call
- Adjusting the volume
- Muting a call
- Using your phonebook
- Viewing the phonebook records
- Storing a name and number
- Editing phonebook records
- Deleting phonebook records
- Deleting the entire phonebook
- Call records
- Call List
- Checking your call records
- Calling back from a call record
- Saving the call records to your phonebook
- Deleting a call record
- Deleting the entire call list
- Dial list
- Checking your dialed records
- Saving the dial records to your phonebook
- Deleting a dial record
- Deleting the entire dial list
- Personalizing your phone
- Personalizing your phone's display
- Giving your phone a name
- Setting your phone's language
- Turning the backlight on/off
- Personalizing your sounds
- Selecting your handset's ringing melody
- Selecting your handset's ringing volume
- Turning the key tone on/off
- System
- Registering a handset
- Un-registering a handset
- Resetting
- Additional features
- Key lock
- Shortcut for turning handset ringer on/off
- Message waiting indication (MWI)
- Finding a handset
- Using multi-handsets
- Internal Call
- Internal call while you are talking on the phone
- Transferring your call to another handset
- Making a 3-way conference call
- Equipment Approval Information
- Notificatior to the local telephone company
- Notes
- Rights of the Phone Company
- Interference Information
- Noise
- FCC RF Radiation Exposure Statement
- Hearing Aid Compatibility (HAC)
- Privacy
- Additional Information
- I.C. Notice
- Terminal Equipment
- Radio Equipment
- Do not attempt to repair or modify this equipment
- Service Centers
- USA
- CANADA
- TABLE DES MATIÈRES
Brand : PHILIPS
Model : DECT2250G
Category : Phone