KSB1570OB - Blender KITCHENAID - Free user manual and instructions
Find the device manual for free KSB1570OB KITCHENAID in PDF.
Download the instructions for your Blender in PDF format for free! Find your manual KSB1570OB - KITCHENAID and take your electronic device back in hand. On this page are published all the documents necessary for the use of your device. KSB1570OB by KITCHENAID.
USER MANUAL KSB1570OB KITCHENAID
Welcome to the World of KitchenAid
We’re committed to helping you
create a lifetime of delicious meals for
family and friends. To help ensure the
longevity and performance of your
appliance, keep this guide handy. It will
empower you with the best way to
use and care for your product. Your
satisfaction is our #1 goal. Remember
to register your product online at
www.kitchenaid.com or by
mail using the attached
Product Registration Card.
Join us in the kitchen at www.kitchenaid.com.
Scan with your mobile device for recipes, tips, and more.
Store Name _________________________________________________________________________
Always keep a copy of the itemized sales receipt showing the date of purchase of your
Blender. Proof of purchase will assure you of in-warranty service. Before you use your
Blender, please ll out and mail your product registration card packed with the unit, or
register on-line at www.kitchenaid.com. This card will enable us to contact you in the unlikely
event of a product safety notication and assist us in complying with the provisions of the
Consumer Product Safety Act. This card does not verify your warranty. Please complete the
following for your personal records:
BLENDER SAFETY Important safeguards 4
Electrical requirements 5
PARTS AND FEATURES Parts and accessories 6
ASSEMBLING THE BLENDER Preparing the Blender for use 6
Using the Blender pitcher ingredient cup, and Soft Start blending feature 11
TIPS FOR GREAT RESULTS Quick tips 12
CARE AND CLEANING Cleaning the Blender 13
TROUBLESHOOTING Blender does not operate when a setting is selected 14
Blender stops while blending 14
Table of ConTenTs W10575361A_Final.indd 3 4/2/13 4:20 PM4
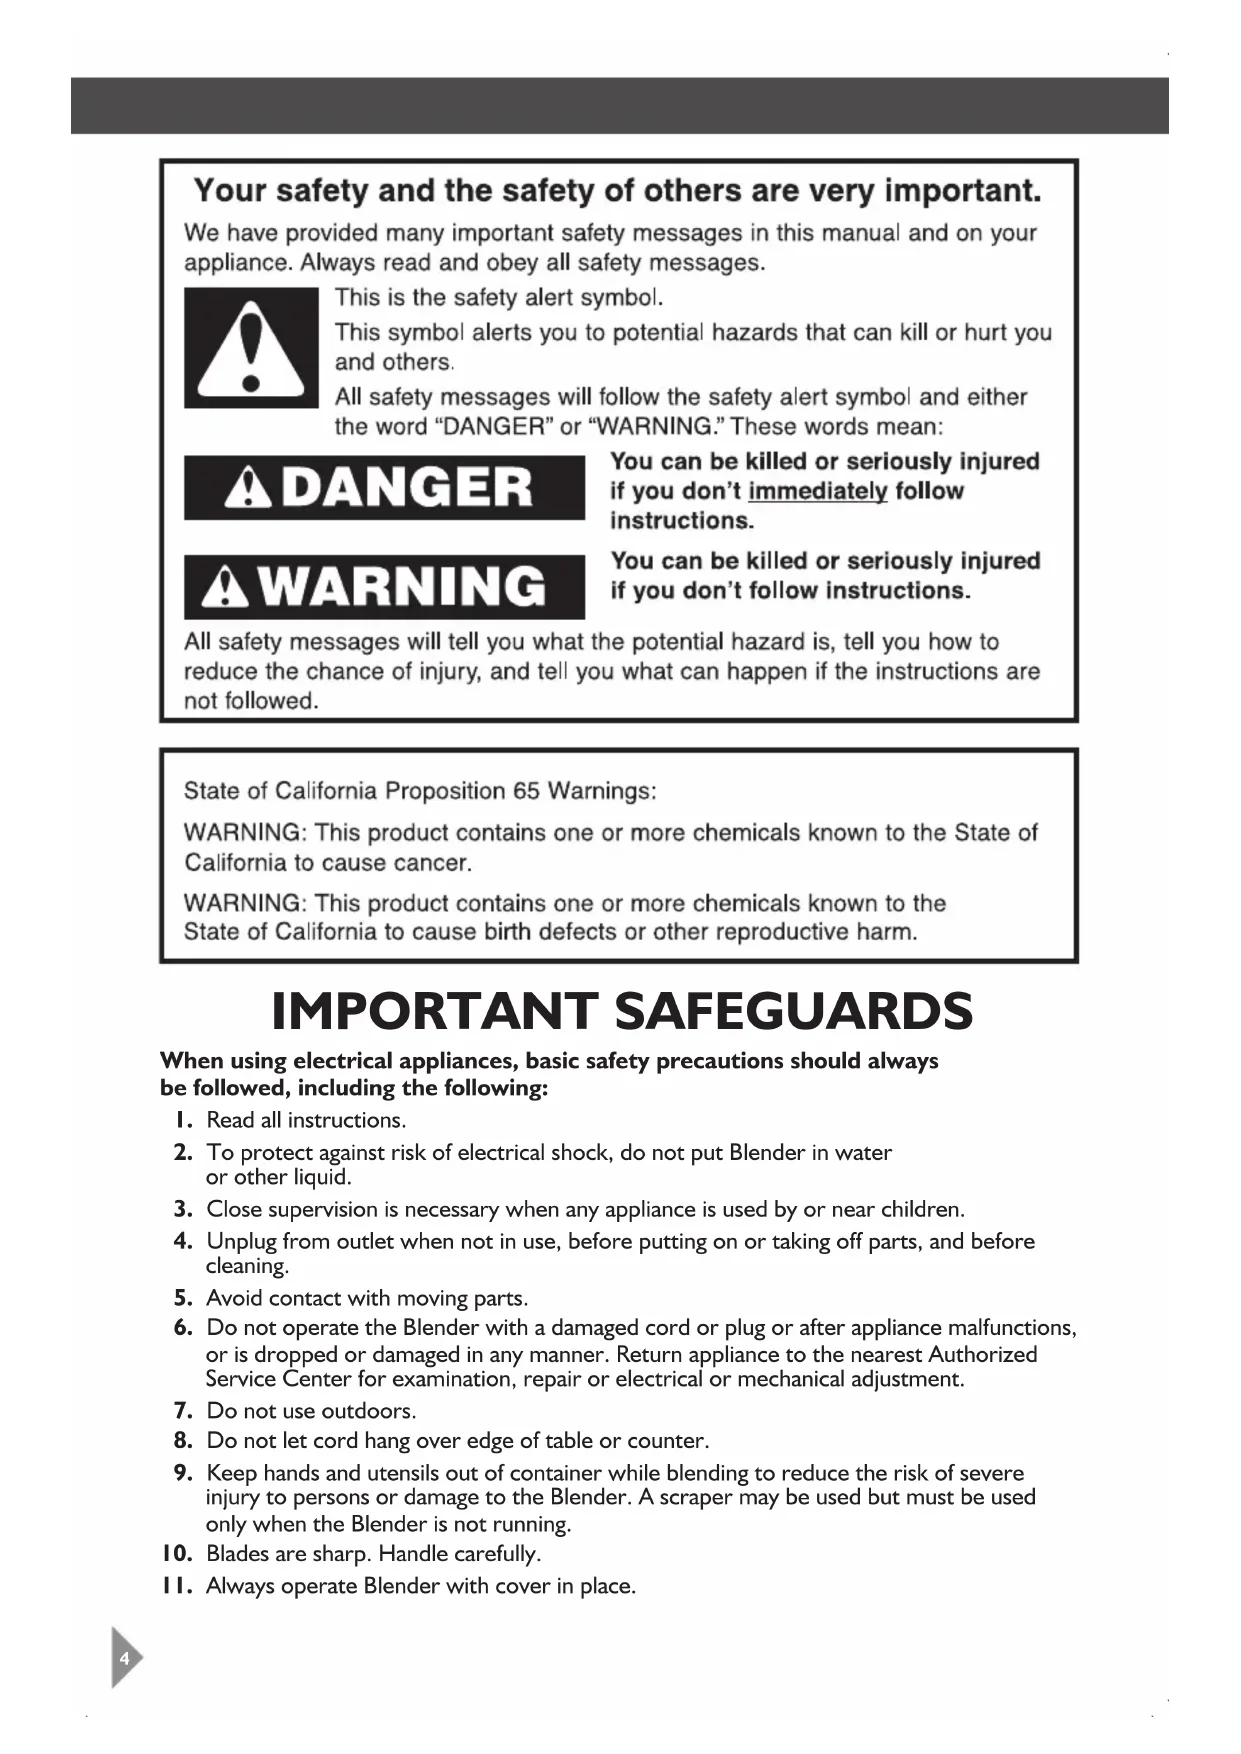
BLENDER SAFETYBLENDER SAFETY IMPORTANT SAFEGUARDS When using electrical appliances, basic safety precautions should always
be followed, including the following:
1. Read all instructions.
2. To protect against risk of electrical shock, do not put Blender in water
3. Close supervision is necessary when any appliance is used by or near children.
4. Unplug from outlet when not in use, before putting on or taking off parts, and before
5. Avoid contact with moving parts.
6. Do not operate the Blender with a damaged cord or plug or after appliance malfunctions,
or is dropped or damaged in any manner. Return appliance to the nearest Authorized
Service Center for examination, repair or electrical or mechanical adjustment.
7. Do not use outdoors.
8. Do not let cord hang over edge of table or counter.
9. Keep hands and utensils out of container while blending to reduce the risk of severe
injury to persons or damage to the Blender. A scraper may be used but must be used
only when the Blender is not running.
10. Blades are sharp. Handle carefully.
11. Always operate Blender with cover in place.
W10575361A_Final.indd 4 4/2/13 4:20 PM5
BLENDER SAFETYBLENDER SAFETY Electrical requirements
12. The use of attachments, including canning jars, not recommended by KitchenAid
may cause a risk of injury to persons.
13. When blending hot liquids, remove center piece of two-piece cover.
14. Flashing light indicates ready to operate - avoid any contact with blades or
15. This product is designed for household use only.
SAVE ThESE INSTRUCTIONS Voltage: 120 Volts A.C. only
NOTE: If the plug does not fit in the outlet,
contact a qualified electrician. Do not modify
the plug in any way. Do not use an adapter.
Do not use an extension cord. If the power
supply cord is too short, have a qualified
electrician or serviceman install an outlet
near the appliance. W10575361A_Final.indd 5 4/2/13 4:20 PM6
ASSEMBLING THE BLENDERPARTS AND FEATURES Parts and accessories
Preparing the Blender for use
Align the pitcher tabs with the slots on
the base. The pitcher handle may be on
the right or left side of the blender base.
Before using your Blender for the first time,
wipe Blender base with a warm damp cloth,
then wipe clean with a damp cloth. Dry with
a soft cloth. Wash pitcher, lid, and ingredient
cup in warm, sudsy water (see “Care and
Cleaning” section). Rinse parts and wipe dry.
Rotate pitcher clockwise, approximately
1/8 turn until pitcher clicks into place.
Adjust the length of the Blender power
NOTE: When properly positioned, pitcher
will rest completely on Blender base. If not,
repeat steps 1 and 2.
IMPORTANT: When moving your blender,
always support/lift from the blender base.
Base may become disengaged from jar if
carried by jar handle only.
Before removing the pitcher from the
base, always press POWER to stop the
flashing lights and unplug the power
Before using the Blender, plug into a
grounded 3-prong outlet, and press
POWER. The Power indicator light will
light will flash when ready. Then press
desired speed button for continuous
operation at that speed. The indicator
light by the selected speed will stay
lit. You may change settings without
stopping by pressing a new speed
Put ingredients in pitcher and firmly
off. Unplug Blender before removing
While the Blender Power indicator light is
- Do not interfere with blade movement.
- Do not remove pitcher lid.
Before operating the Blender, make sure
the pitcher is properly locked onto the
NOTE: The Blender will operate only
when pressing the POWER button (Power
LED will flash) before selecting the desired
IMPORTANT: If blending hot foods or liquids, do not fill to the top of the pitcher, and
operate only on speed 1. Remove center cap and place towel over lid.
The Blender has five speeds: 1 (being the
lowest) and 5 (being the highest). It also
features Ice and Pulse. W10575361A_Final.indd 8 4/2/13 4:20 PM9
OPERATING THE BLENDER OPERATING THE BLENDER Crushing ice
When the timed function is finished,
Blender will stop. Press POWER to turn
off. Unplug Blender before removing the
indicator light will stay lit.
Before operating the Blender, make sure
the pitcher is properly positioned on
Put ingredients into the pitcher and
firmly place lid. Use up to 1 tray of
Your Blender offers an Ice feature. When selected, the Blender will automatically pulse for
30 seconds at staggered intervals at the optimal speed for crushing ice or other ingredients.
TIP: Process up to a full standard ice cube tray or 12-14 standard ice cubes at a time.
Occasional stirring with a spatula will be helpful only when Blender is off. The Ice feature
has been optimized to crush and chop ice without adding any liquid ingredients. W10575361A_Final.indd 9 4/2/13 4:20 PM10
OPERATING THE BLENDER OPERATING THE BLENDER
PULSE button for the desired amount of
off. Unplug Blender before removing
Before operating the Blender, make sure
the pitcher is properly positioned on
Your Blender offers a Pulse function.
Put ingredients into the pitcher and
• The Blender pitcher ingredient cup can
be used to measure and add ingredients.
Remove cup and add ingredients at speeds
1, 2, or 3. When operating at higher
speeds with a full pitcher or with hot
contents, stop the Blender and then add
• The Soft Start blending feature
automatically starts the Blender at a lower
speed to draw ingredients into the blades,
then quickly increases to the selected
speed for optimal performance. The Soft
Start blending feature only works when a
speed is selected and does not work with
the Pulse or Ice features.
IMPORTANT: If blending hot foods or
liquids, remove the center ingredient cup,
and place a towel over the lid. Operate
only on speed 1. Do not use Pulse or Ice
feature for hot liquids.
Blended ice drink Ice, 5
Chopped fruits Pulse, 2
Chopped vegetables Pulse, 2
Cream cheese-based spread. . . . . . . . . . . . 1
Crushed/chopped ice Ice
Fluffy gelatin for pie/desserts 5
Frozen chopped fruit
(defrost slightly until it
can be probed with a
Frozen yogurt-based drink 5
frozen concentrate 1, 3
Fruit-based drink (thin) Ice, 5
Fruit-based drink (thick) Ice, 1
Ice milk-based drink Ice, 5
Pureed fruit/Baby food 4
Pureed meat/Baby food meat 4
Pureed vegetables/Baby food
Sherbet-based drink 1, 5
cottage cheese 1, 3
Sweet crumb topping Pulse, 2
Vegetable-based main dish sauce 1
• If you’re making beverages using ice,
start with ICE, then finish with Speed 5 in
order to produce a smoother texture.
• Ice directly from the freezer will crush
better than partially melted ice for snow.
• Smaller ice cubes can be chopped or
crushed faster than large ones.
• For many ingredient mixtures, start
the blending process at speed 1 to
thoroughly combine the ingredients. Then
increase to a higher speed, as desired.
• If desired, remove center ingredient cup
of pitcher lid to add liquids or ice cubes
while the Blender is operating at speeds 1,
• Stop the Blender before using utensils
in the pitcher. Use a rubber spatula to mix
ingredients only when the Blender is off.
Never use any utensil, including spatulas,
in the pitcher while the motor is running.
• Cool hot foods, if possible, before
blending. Begin blending warm foods
at speed 1. Increase to higher speeds, one
at a time, if necessary.
• When blending hot foods or liquids, do not
fill the blender pitcher to the top. Secure
the lid, remove the center ingredient cup,
and place a towel over the lid. Operate
only on speed 1. Do not place bare hand
on pitcher lid when processing hot foods
Dissolve flavored gelatin: Pour boiling
water into the pitcher; add gelatin. Remove
center ingredient cup, and place a towel
over the lid. Blend at speed 1 until gelatin is
dissolved, about 10 to 30 seconds. Add other
Make cookie, cracker or bread crumbs:
Break cookies, crackers, or bread into pieces
about 4 cm in diameter. Place in pitcher. In
Pulse mode, cover and blend at speed 2,
pulsing a few times, about 3 seconds each
time, until reaching desired consistency.
Make a finer crumbs for pie and dessert
crusts: Break cookies, crackers, or bread
into pieces about 4 cm in diameter and place
in the pitcher. Pulse in shorts bursts until
reaching desired consistency, about 20 to
Chop fruits and vegetables: Put 2 cups
(475 mL) of fruit or vegetable chunks in
pitcher. Use short runs of speed 1 until reaching
desired consistency.
Puree fruits: Place 2 cups (475 mL) canned
or cooked fruit in pitcher. Add 2 to 4
tablespoons (30 to 60 mL) fruit juice or
water per cup (240 mL) of fruit. Cover and
blend at speed 4 about 5 to 10 seconds.
Puree vegetables: Place 2 cups (475 mL)
canned or cooked vegetables in pitcher. Add
2 to 4 tablespoons (30 to 60 ml) broth,
water, or milk per cup (240 mL) of
vegetables. Cover and blend at speed 4
about 10 to 20 seconds.
Puree meats: Place cooked, cubed, tender
meat in pitcher. Add 3 to 4 tablespoons
(45 to 60 mL) broth, water, or milk per
cup (240 mL) of meat. Cover and blend on
speed 1 for10 seconds. Stop the Blender and
scrape sides of pitcher. Cover and blend on
speed 4 for 10 to 20 seconds longer.
Take lumps out of gravy: If sauce or
gravy becomes lumpy, place in the pitcher.
Cover and blend at speed 3 until smooth,
about 5 to 10 seconds.
Combine flour and liquid for thickening:
Place flour and liquid in pitcher. Cover and
blend at speed 1 until smooth, about 5 to
Prepare white sauce: Place milk, flour, and
salt, if desired, in pitcher. Cover, and blend
at speed 1 until well-mixed, about 5 to
10 seconds. Pour into saucepan and cook
Make smoothies: Place liquids and frozen
ingredients in pitcher first, then add other
ingredients on top. Cover and blend on
Ice for 10 to 15 seconds, then speed 5 for
10 to 15 seconds, as desired.
TIPS FOR GREAT RESULTS CARE AND CLEANING W10575361A_Final.indd 12 4/2/13 4:20 PM13
TIPS FOR GREAT RESULTS TIPS FOR GREAT RESULTS Cleaning the Blender
The Blender pitcher can be easily cleaned while still attached to the base, or individually.
• Clean the Blender thoroughly after every use.
• Do not immerse the Blender base or cord in water.
• Do not use abrasive cleansers or scouring pads.
To clean the Blender base, Clean
Touch pad, cord, lids, and ingredient
cup: Wipe with a warm, damp cloth;
wipe clean with a damp cloth, and dry
To clean the pitcher while attached
to the base: Keep the pitcher on the
Blender base, fill half full with warm
(not hot) water, and add 1 or 2 drops
of dishwashing liquid. Put the lid on
the pitcher, press the speed 1 setting,
and run the Blender for 5 to
10 seconds. Remove the pitcher and
rinse with warm water.
To clean pitcher individually: Wash
pitcher in dishwasher on the top or
bottom rack, flipped upside down. Or
handwash with soapy water, rinse and
CARE AND CLEANING Prepare pancake or waffle batter from
mix: Place mix and other ingredients in
pitcher. Cover and blend at speed 3 until
well-mixed, 10 to 20 seconds. Stop the
Blender and scrape sides of the pitcher
Grate cheese: Cut very cold cheese into
1.5 cm cubes. Place up to 1/2 cup (120 mL)
cheese in the pitcher. Cover, and blend at
speed 5 about 5 to 10 seconds. For hard
cheeses, such as Parmesan, bring to room
temperature, then blend at speed 5 for
IMPORTANT: Hand wash the lid and
ingredient cup for best results. W10575361A_Final.indd 13 4/2/13 4:20 PM14
TROUBLESHOOTING Blender does not operate when a setting is selected
All indicator lights are flashing alternately.
The Blender may be jammed. If it is
jammed, the Blender will stop running to
avoid damage to the motor. Press POWER
to reset the Blender and unplug the power
cord. Remove the pitcher assembly from
the base and with a scraper, free the blades
by breaking-up or removing the contents at
the bottom of the pitcher.
No indicator lights are lit.
Check to see if the Blender is plugged into
a grounded 3-prong outlet. If it is, press
POWER, then unplug the Blender. Plug
it back in to the same outlet, and Press
POWER. If the Blender still does not work,
check the fuse or circuit breaker on the
electrical circuit the Blender is connected
to and make sure the circuit is closed.
All indicator lights are flashing
The Blender may be overloaded. If the
Blender becomes overloaded when blending
heavy ingredients, it will automatically shut
off to avoid damage to the motor. Press
POWER to reset the Blender and unplug the
power cord. Remove the pitcher assembly
from the base and divide contents into
smaller batches. Adding liquid to the pitcher
may also reduce the load on the Blender.
If the problem cannot be fixed with the steps provided in this section, then contact an
authorized service center (see “Service and warranty” section).
Blender stops while blending
WARRANTY One indicator light is flashing alternately.
If the Blender is plugged in, but will not start
and one light is flashing alternately from all
the other indicator lights, the Blender may
have a stuck key. Press POWER to turn off
the Blender, then unplug the Blender. Plug
the Blender back in and press POWER to
turn back on to reset the stuck key.
All indicator lights are flashing at the
If Blender is plugged in, but nothing happens
when POWER is pressed, and all indicator
lights are flashing, the motor rotor may
be locked. Press POWER, then unplug the
Blender. Plug it back in, then press POWER
and select the desired speed.
IMPORTANT: The Blender will not operate at any speed unless the Power button
W10575361A_Final.indd 14 4/2/13 4:20 PM15
TROUBLESHOOTING WARRANTY KitchenAid
Blender Warranty for the 50 United States, the
District of Columbia, Puerto Rico, and Canada
This warranty extends to the purchaser and any succeeding owner for Blender operated in
the 50 United States, the District of Columbia, Puerto Rico, and Canada.
Length of Warranty: One Year Full Warranty from date of purchase.
KitchenAid Will Pay Hassle-Free Replacement of your Blender.
for Your Choice of: See the next page for details on how to arrange for service,
or call the Customer eXperience Center toll-free at
OR The replacement parts and repair labor costs to correct
defects in materials and workmanship. Service must be
provided by an Authorized KitchenAid Service Center.
KitchenAid Will A. Repairs when Blender is used in other than
Not Pay for: normal single family home use.
B. Damage resulting from accident, alteration, misuse
C. Any shipping or handling costs to deliver your Blender
to an Authorized Service Center.
D. Replacement parts or repair labor costs for Blender
operated outside the 50 United States,
District of Columbia, Puerto Rico, and Canada.
DISCLAIMER OF IMPLIED WARRANTIES; LIMITATION OF REMEDIES IMPLIED WARRANTIES, INCLUDING TO THE EXTENT APPLICABLE WARRANTIES OF MERCHANTABILITY OR FITNESS FOR A PARTICULAR PURPOSE, ARE EXCLUDED TO THE EXTENT LEGALLY PERMISSIBLE. ANY IMPLIED WARRANTIES THAT MAY BE IMPOSED BY LAW ARE LIMITED TO ONE YEAR, OR THE SHORTEST PERIOD ALLOWED BY LAW. SOME STATES AND PROVINCES DO NOT ALLOW LIMITATIONS OR EXCLUSIONS ON HOW LONG AN IMPLIED WARRANTY OF MERCHANTABILITY OR FITNESS LASTS, SO THE ABOVE LIMITATIONS OR EXCLUSIONS MAY NOT APPLY TO YOU.
IF THIS PRODUCT FAILS TO WORK AS WARRANTED, CUSTOMER’S SOLE AND EXCLUSIVE REMEDY SHALL BE REPAIR OR REPLACEMENT ACCORDING TO THE TERMS OF THIS LIMITED WARRANTY. KITCHENAID AND KITCHENAID CANADA DO NOT ASSUME ANY RESPONSIBILITY FOR INCIDENTAL OR CONSEQUENTIAL DAMAGES. This warranty gives you specic legal rights and you may also have other rights
which vary from state to state or province to province.
W10575361A_Final.indd 15 4/2/13 4:20 PM16
WARRANTY Arranging for Service after the Warranty Expires, or
Ordering Accessories and Replacement Parts
In the United States and Puerto Rico:
For service information, or to order
accessories or replacement parts, call toll-
free at 1-800-541-6390 or write to:
Customer eXperience Center,
KitchenAid Portable Appliances,
P.O. Box 218, St. Joseph, MI 49085-0218
Outside the United States
Consult your local KitchenAid dealer or the
store where you purchased the Blender for
information on how to obtain service.
For service information in Canada:
Call toll-free 1-800-807-6777.
50 United States, District of Columbia, and Puerto Rico
We’re so condent the quality of our
products meets the exacting standards of
KitchenAid that, if your Blender should
fail within the rst year of ownership,
KitchenAid will arrange to deliver an
identical or comparable replacement to
your door free of charge and arrange to
have your original Blender returned to us.
Your replacement unit will also be covered
by our one year limited warranty. Please
follow these instructions to receive this
If your Blender should fail within the rst
year of ownership, simply call our
toll-free Customer eXperience Center at
1-800-541-6390 Monday through Friday.
Please have your original sales receipt
available when you call. Proof of purchase
will be required to initiate the claim. Give
the consultant your complete shipping
address. (No P.O. Box numbers, please.)
When you receive your replacement
Blender, use the carton and packing
materials to pack up your original Blender. In
the carton, include your name and address
on a sheet of paper along with a copy of the
proof of purchase (register receipt, credit
Hassle-Free Replacement Warranty – Canada
We’re so condent the quality of our
products meets the exacting standards of
brand that, if your Blender
should fail within the rst year of ownership,
KitchenAid Canada will replace your
Blender with an identical or comparable
replacement. Your replacement unit will
also be covered by our one year limited
warranty. Please follow these instructions to
receive this quality service.
If your Blender should fail within the rst
year of ownership, take the Blender or
ship collect to an Authorized KitchenAid
Service Centre. In the carton include
your name and complete shipping address
along with a copy of the proof of purchase
(register receipt, credit card slip, etc.).
Your replacement Blender will be returned
prepaid and insured. If you are unable to
obtain satisfactory service in this manner call
our toll-free Customer eXperience Centre
®/™ © 2013 KitchenAid. All rights reserved. Used under license in Canada. W10575361A_Final.indd 16 4/2/13 4:20 PM17
1-800-541-6390 ou écrire à :
Customer Satisfaction Center,
KitchenAid Portable Appliances,
P.O. Box 218, St. Joseph, MI 49085-0218
acquisition, KitchenAid Canada remplacera
1-800-541-6390 o escriba a:
Customer eXperience Center,
KitchenAid Portable Appliances,
P.O. Box 218, St. Joseph, MI 49085-0218
®/™ © 2013 KitchenAid. All rights reserved. Used under license in Canada.