MiniVac FC6141 - Vacuum Cleaner PHILIPS - Free user manual and instructions
Find the device manual for free MiniVac FC6141 PHILIPS in PDF.
Download the instructions for your Vacuum Cleaner in PDF format for free! Find your manual MiniVac FC6141 - PHILIPS and take your electronic device back in hand. On this page are published all the documents necessary for the use of your device. MiniVac FC6141 by PHILIPS.
USER MANUAL MiniVac FC6141 PHILIPS
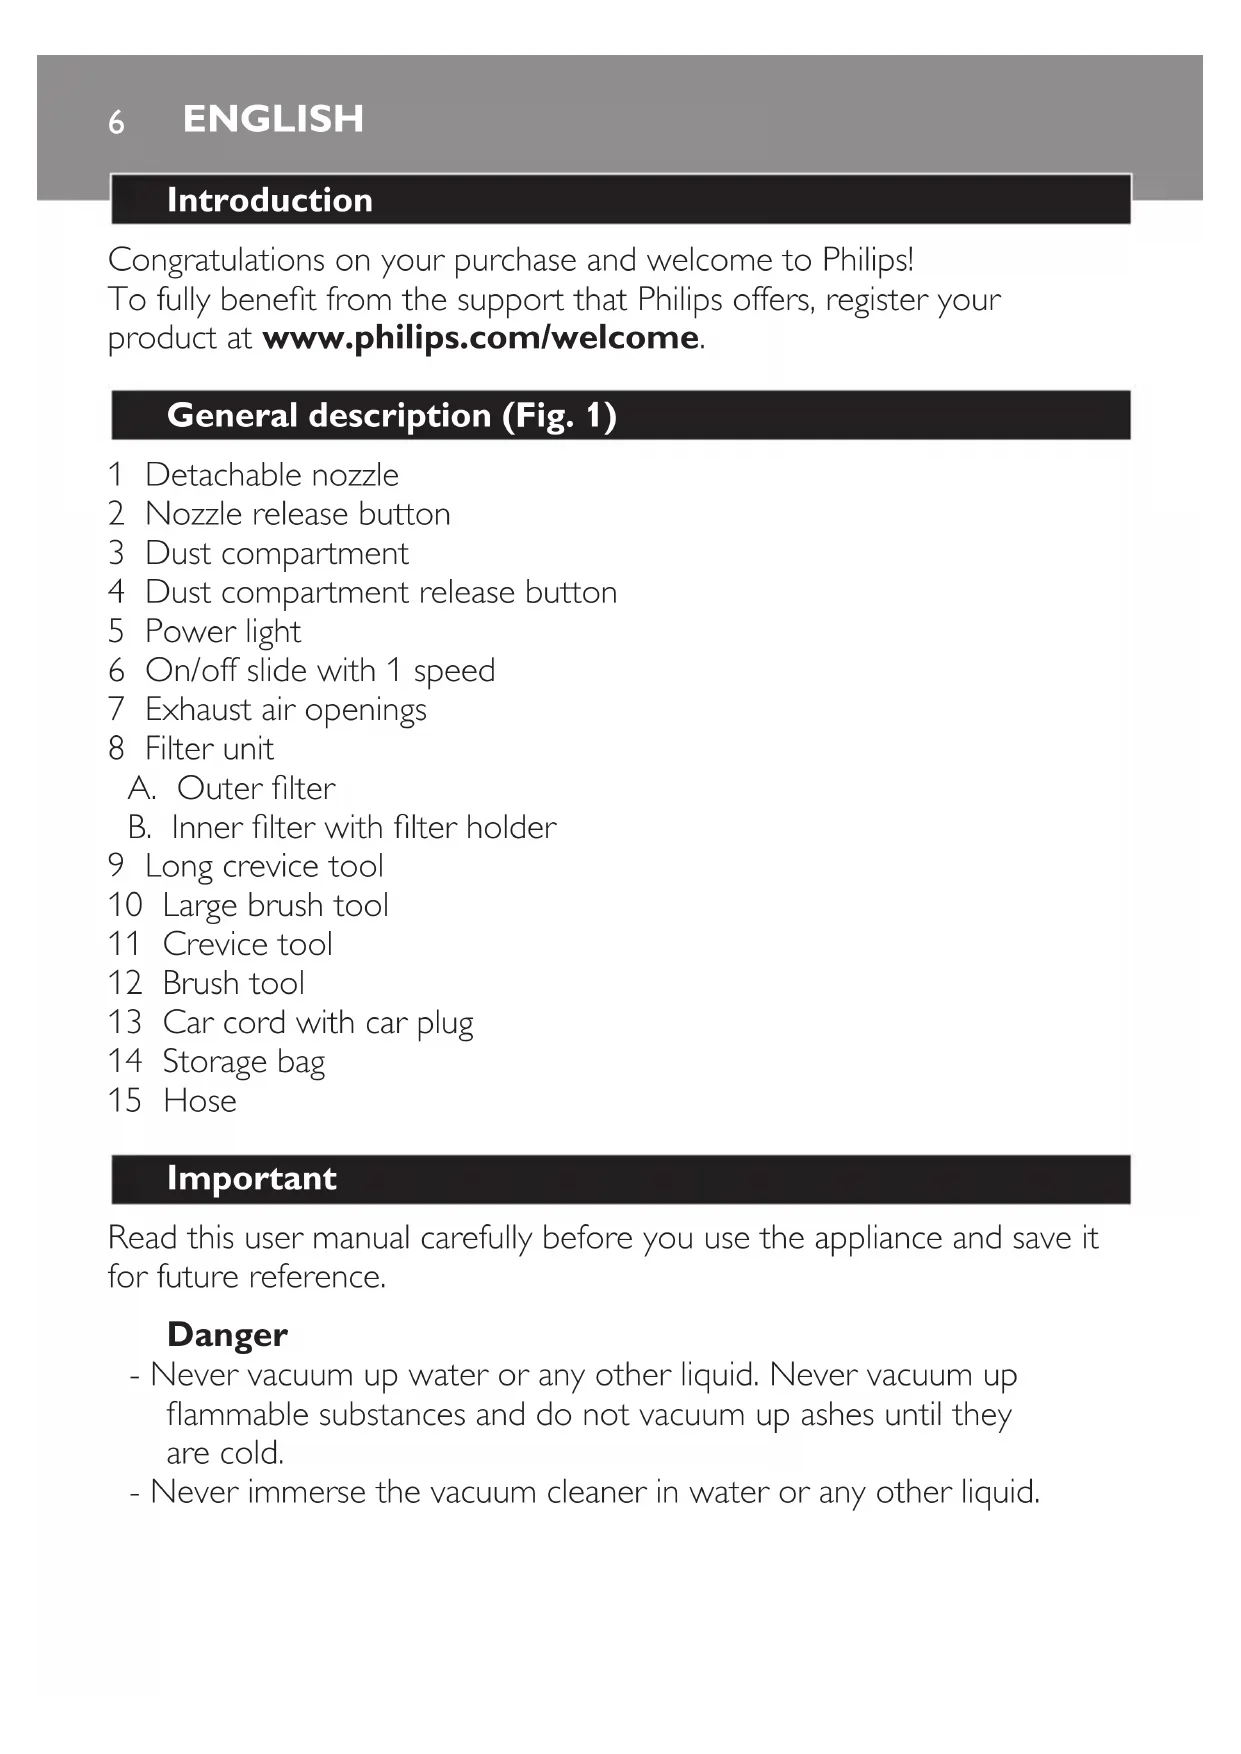
Introduction Congratulations on your purchase and welcome to Philips! To fully benet from the support that Philips offers, register your product at www.philips.com/welcome. General description (Fig. 1) 1 Detachable nozzle 2 Nozzle release button 3 Dust compartment 4 Dust compartment release button 5 Power light 6 On/off slide with 1 speed 7 Exhaust air openings 8 Filter unit A. Outer lter B. Inner lter with lter holder 9 Long crevice tool 10 Large brush tool 11 Crevice tool 12 Brush tool 13 Car cord with car plug 14 Storage bag 15 Hose Important Read this user manual carefully before you use the appliance and save it for future reference. Danger - Never vacuum up water or any other liquid. Never vacuum up ammable substances and do not vacuum up ashes until they are cold. - Never immerse the vacuum cleaner in water or any other liquid. ENGLISHWarning - Do not use the vacuum cleaner if it is damaged. - This appliance is not intended for use by persons (including children) with reduced physical, sensory or mental capabilities, or lack of experience and knowledge, unless they have been given supervision or instruction concerning use of the appliance by a person responsible for their safety. - Keep the appliance and its cord out of the reach of children. - The plug must be removed from the socket-outlet before cleaning or maintaining the appliance. Caution - Always switch off the vacuum cleaner after use. - Never block the exhaust air openings during vacuuming. - Always use the vacuum cleaner with the lter unit assembled. Electromagnetic elds (EMF) This Philips appliance complies with all applicable standards and regulations regarding exposure to electromagnetic elds. Using the appliance 1 Push the on/off slide forwards to switch on the appliance (Fig. 2). 2 Push the on/off slide backwards to switch off the appliance (Fig. 3). Accessories The appliance comes with the following accessories: - a small and large brush tool to clean delicate surfaces; - a long and short crevice tool to vacuum corners or narrow gaps; - a car cord with car plug for unlimited runtime; - a hose for extended reach; - a storage bag to store the appliance in your car. 1 Take the accessory you want to use and attach the accessory to the nozzle of the appliance (Fig. 4). ENGLISH 7Hose This appliance comes with a hose and tube for extended reach during vacuum cleaning. 1 Insert the appliance end of the hose into the nozzle of the appliance (Fig. 5). 2 Attach the brush tool or the crevice tool to the attachment end of the hose for extended reach during vacuum cleaning (Fig. 6). Cleaning Never immerse the vacuum cleaner in water or any other liquid. 1 Clean the outside of the appliance with a damp cloth. Emptying and cleaning the dust compartment Make sure you empty and clean the dust compartment regularly. Quick cleaning To empty the dust compartment quickly: 1 Press the nozzle release button (1) and take the detachable nozzle off the appliance (2). Then shake the contents of the dust compartment out into a dustbin (Fig. 7). Thorough cleaning 1 Hold the appliance over a dustbin, press the dust compartment release button (1) and remove the dust compartment (2) (Fig. 8). 2 Removethelterunitfromthedustcompartmentandemptythe dust compartment by shaking it with your free hand (Fig. 9). 3 If necessary, clean the dust compartment with a damp cloth and cleanthelterunit(seesection‘Cleaningthelterunit’). 4 To reattach the dust compartment, align the slot on the dust compartment with the projection on the appliance. First attach the bottom of the dust compartment (1). Then push the top of the dust compartment towards the appliance (2) until it locks into place (‘click’)(Fig.10). ENGLISH8Cleaning the lter unit Make sure you clean the lter unit regularly. 1 Turntheouterlteranticlockwise(1)andremoveitfromthelter holder (2) (Fig. 11). Leave the inner lter attached to the lter holder. 2 Cleantheinnerlterandtheouterlterwithabrushorwitha normal vacuum cleaner if they are very dirty. Note: If necessary , you can clean the inner lter and the outer lter in cold or lukewarm water. Dry the inner and outer lter thoroughly before you use the lter unit again. 3 Placetheouterlterbackontothelterholder(1)andturnit clockwisetoattachit(2).Putthelterunitbackintothedust compartment. (Fig. 12) Storage 1 You can store the vacuum cleaner and the accessories in the storage bag. (Fig. 13) Replacement We advise you to replace the inner lter after a prolonged period of use or if you can no longer clean it properly. Replacing the inner lter 1 Removethelterunitfromthedustcompartment.Turntheouter lteranticlockwise(1)andremoveitfromthelterholder (2). (Fig. 14) 2 Gentlyturntheinnerlteranticlockwise(1)andremoveitfrom thelterholder(2).Placeanewinnerlteronthelterholder(1) and turn it clockwise to attach it (2). (Fig. 15) 3 Pushthetipoftheinnerlterinwards.Placetheouterlteronthe lterholder(1)andturnitclockwisetoattachit(2).(Fig.16) 4 Putthelterunitbackintothedustcompartment(Fig.17). ENGLISH 9Ordering accessories To buy accessories or spare parts (such as lters and additional nozzles), visit www.shop.philips.com/service or go to your Philips dealer. You can also contact the Philips Consumer Care Centre in your country (see the worldwide guarantee leaet for contact details). Warranty and support If you need information or support, please visit www.philips.com/ support or read the international warranty leaet. Recycling - Do not throw away the product with the normal household waste at the end of its life, but hand it in at an ofcial collection point for recycling. By doing this, you help to preserve the environment. - Follow your country’s rules for the separate collection of electrical and electronic products. Correct disposal helps prevent negative consequences for the environment and human health. Troubleshooting This chapter summarises the most common problems you could encounter with the appliance. If you are unable to solve the problem with the information below, visit www.philips.com/support for a list of frequently asked questions or contact the Consumer Care Centre in your country. Problem Solution The appliance does not work. Check the capacity of the car battery and check the car cord connection. If the appliance still does not work, take the appliance to your dealer or a service centre authorised by Philips for examination. ENGLISH10Problem Solution The vacuum cleaner does not vacuum properly. The dust compartment may not be attached properly to the appliance. Attach the dust compartment properly to the appliance. The dust compartment may be full. Empty the dust compartment. The lter unit may be clogged. Clean the inner lter and the outer lter (see chapter ‘Cleaning’). Dust escapes from the vacuum cleaner. The dust compartment may be full. Empty the dust compartment. The dust compartment may not be attached properly to the appliance. Attach the dust compartment properly to the appliance. Perhaps the lter unit is not placed properly in the dust compartment. Place the lter unit properly in the dust compartment. The vacuum cleaner does not work properly when the hose, the brush tool or the crevice tool is attached. Check if the hose, the brush head or the crevice tool is blocked. If this is the case, remove the obstruction. The dust compartment may be full. Empty the dust compartment. The lter unit may be clogged. Clean the inner lter and the outer lter (see chapter ‘Cleaning’). ENGLISH 1112 Introducción Enhorabuena por la compra de este producto y bienvenido a Philips. Para sacar el mayor partido de la asistencia que Philips le ofrece, registre su producto en www.philips.com/welcome. Descripción general (g. 1) 1 Boquilla desmontable 2 Botón de liberación de la boquilla 3 Compartimento para el polvo 4 Botón de liberación del compartimento para el polvo 5 Piloto de encendido 6 Botón de encendido/apagado con 1 velocidad 7 Aberturas de salida de aire 8 Unidad de ltrado A. Filtro exterior B. Filtro interior con portaltro 9 Boquilla estrecha larga 10 Cepillo grande 11 Boquilla estrecha 12 Cepillo pequeño 13 Cable con clavija para coche 14 Bolsa 15 Manguera Importante Antes de usar el aparato, lea atentamente este manual de usuario y consérvelo por si necesitara consultarlo en el futuro. Peligro - No aspire nunca agua ni ningún otro líquido. No aspire nunca sustancias inamables ni cenizas hasta que éstas estén frías. - No sumerja nunca el aspirador en agua u otros líquidos. ESPAÑOLAdvertencia - No utilice el aspirador si está dañado. - Este aparato no debe ser usado por personas (adultos o niños) con su capacidad física, psíquica o sensorial reducida, ni por quienes no tengan los conocimientos y la experiencia necesarios, a menos que sean supervisados o instruidos acerca del uso del aparato por una persona responsable de su seguridad. - Mantenga el aparato y el cable fuera del alcance de los niños. - El enchufe debe retirarse de la toma antes de la limpieza o mantenimiento del aparato. Precaución - Apague siempre el aspirador después de usarlo.