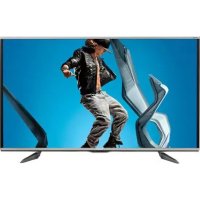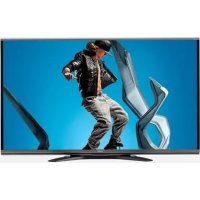
LC60SQ15U - Téléviseur SHARP - Free user manual and instructions
Find the device manual for free LC60SQ15U SHARP in PDF.
Download the instructions for your Téléviseur in PDF format for free! Find your manual LC60SQ15U - SHARP and take your electronic device back in hand. On this page are published all the documents necessary for the use of your device. LC60SQ15U by SHARP.
USER MANUAL LC60SQ15U SHARP
TINS-G069WJZZ14P01-MX-NSTINS-G069WJZZ OPERATION MANUAL MODE D'EMPLOI MANUAL DE OPERACIÓN ENGLISHFRANÇAISESPAÑOL LC-80UQ17U LC-70UQ17U LC-60UQ17U LC-70TQ15U LC-60TQ15U LC-70SQ17U LC-60SQ17U LC-70SQ15U LC-60SQ15U LC-70SQ10U LC-60SQ10U (for UQ17U, TQ15U, SQ17U, SQ15U, SQ10U and LE657U models)
LC-70EQ10U LC-60EQ10U LC-80LE650U LC-70LE650U LC-60LE650U LC-90LE657U (Except for LC-90LE6570)(for UQ17U models)1 IMPORTANT:To aid reporting in case of loss or theft, please record the TV's model and serial numbers in the space provided. The numbers are located at the rear and left side of the TV.Model No.:Serial No.:
WARNING: TO REDUCE THE RISK OF FIRE OR ELECTRIC SHOCK, DO NOT EXPOSE THIS PRODUCT TO RAIN OR MOISTURE. CAUTIONRISK OF ELECTRIC SHOCK DO NOT OPENCAUTION: TO REDUCE THE RISK OF ELECTRIC SHOCK,DO NOT REMOVE COVER (OR BACK).NO USER-SERVICEABLE PARTS INSIDE.REFER SERVICING TO QUALIFIED SERVICEPERSONNEL.CAUTION: TO PREVENT ELECTRIC SHOCK, MATCH WIDE BLADE OF PLUG TO WIDE SLOT, FULLY INSERT.WARNING: FCC Regulations state that any unauthorized changes or modifications to this equipment not expressly approved by the manufacturer could void the user's authority to operate this equipment. CAUTION: This product satisfies FCC regulations when shielded cables and connectors are used to connect the unit to other equipment. To prevent electromagnetic interference with electric appliances such as radios and televisions, use shielded cables and connectors for connections.The lightning flash with arrow-head symbol, within an equilateral triangle, is intended to alert the user to the presence of uninsulated "dangerous voltage" within the product's enclosure that may be of sufficient magnitude to constitute a risk of electric shock to persons.The exclamation point within a triangle is intended to alert the user to the presence of important operating and maintenance (servicing) instructions in the literature accompanying the product.DECLARATION OF CONFORMITY:SHARP LIQUID CRYSTAL TELEVISION, MODEL LC-80UQ17U/LC-70UQ17U/LC-60UQ17U/ LC-70TQ15U/LC-60TQ15U/LC-70SQ17U/LC-60SQ17U/LC-70SQ15U/LC-60SQ15U/LC-70SQ10U/ LC-60SQ10U/LC-70EQ10U/LC-60EQ10U/LC-80LE650U/LC-70LE650U/LC-60LE650U/LC-90LE657U This device complies with Part 15 of the FCC Rules. Operation is subject to the following two conditions:(1) This device may not cause harmful interference, and (2) this device must accept any interference received, including interference that may cause undesired operation.RESPONSIBLE PARTY: SHARP ELECTRONICS CORPORATION Sharp Plaza, Mahwah, New Jersey 07495-1163 TEL: 1-800-BE-SHARPFor Business Customers: URL http://www.sharpusa.com
IMPORTANT INFORMATION INFORMATION:
This equipment has been tested and found to comply with the limits for a Class B digital device,
pursuant to Part 15 of the FCC Rules. These limits are designed to provide reasonable protection
against harmful interference in a residential installation. This equipment generates, uses and can
radiate radio frequency energy and, if not installed and used in accordance with the instructions, may
cause harmful interference to radio communications. However, there is no guarantee that interference
will not occur in a particular installation. If this equipment does cause harmful interference to radio
or television reception, which can be determined by turning the equipment off and on, the user is
encouraged to try to correct the interference by one or more of the following measures:
Reorient or relocate the receiving antenna.
Increase the separation between the equipment and receiver.
Connect the equipment into an outlet on a circuit different from that to which the receiver is connected.
Consult the dealer or an experienced radio/TV technician for help.
FCC Compliance Statement
This device complies with part 15 of the FCC Rules. Operation is subject to the following two conditions:
(1) This device may not cause harmful interference, and (2) this device must accept any interference
received, including interference that may cause undesired operation.
For product available in the USA/Canada market, only channel 1–11 can be operated. Selection of
other channels is not possible. This device is going to be operated in 5.15–5.25GHz frequency range,
it is restricted in indoor environment only.
Important: Any changes or modifications not expressly approved by the party responsible for
compliance could void the user’s authority to operate the equipment.
FCC Radiation Exposure Statement: This equipment complies with FCC radiation exposure limits set
forth for an uncontrolled environment. This equipment should be installed and operated with minimum
distance 20cm between the radiator & your body.
Industry Canada Statement
This Class B digital apparatus complies with CAN ICES-003(B)/NMB-3(B)
For product available in the USA/Canada market, only channel 1–11 can be operated. Selection of
other channels is not possible.
The device could automatically discontinue transmission in case of absence of information to transmit,
or operational failure.
Note that this is not intended to prohibit transmission of control or signaling information or the use of
repetitive codes where required by the technology.
Important: Any changes or modifications not expressly approved by the party responsible for
compliance could void the user’s authority to operate the equipment.
IC Radiation Exposure Statement: This device complies with IC RSS-210 rules; Operation is subject
to the following two conditions:
(1) This device may not cause harmful interference, and (2) this device must accept interference
recieved, including interference that may cause undesired operation.
This product contains a CR Coin Lithium Battery which contains Perchlorate Material – special
handling may apply, California residents,
See www.dtsc.ca.gov/hazardouswaste/perchlorate/
"Note to CATV system installer: This reminder is provided to call the CATV system installer's attention
to Article 820 of the National Electrical Code that provides guidelines for proper grounding and, in
particular, specifies that the cable ground shall be connected to the grounding system of the building,
as close to the point of cable entry as practical."
This product qualifies for ENERGY STAR when "Home" is selected for "TV Location".
Setting "TV Location" to "Home" allows the TV to achieve an energy-saving status for household use.
Thank you for your purchase of the Sharp Liquid Crystal Television. To ensure safety and many
years of trouble-free operation of your product, please read the Important Safety Instructions
carefully before using this product.
IMPORTANT SAFETY INSTRUCTIONS DEAR SHARP CUSTOMER IMPORTANT SAFETY INSTRUCTIONS
• Outdoor Antenna Grounding — If an outside
antenna is connected to the television
equipment, be sure the antenna system is
grounded so as to provide some protection
against voltage surges and built-up static
Article 810 of the National Electrical Code,
ANSI/NFPA 70, provides information with
regard to proper grounding of the mast and
supporting structure, grounding of the lead-
in wire to an antenna discharge unit, size of
grounding conductors, location of antenna-
discharge unit, connection to grounding
electrodes, and requirements for the
grounding electrode.
(NEC SECTION 810-20)
• Water and Moisture — Do not use this product near water - for example, near a bath tub, wash bowl,
kitchen sink, or laundry tub; in a wet basement; or near a swimming pool; and the like.
• Stand — Do not place the product on an unstable cart, stand, tripod or table. Placing the product on an
unstable base can cause the product to fall, resulting in serious personal injuries as well as damage to the
product. Use only a cart, stand, tripod, bracket or table recommended by the manufacturer or sold with
the product. When mounting the product on a wall, be sure to follow the manufacturer's instructions. Use
only the mounting hardware recommended by the manufacturer.
• Selecting the location — Select a place with no direct sunlight and good ventilation.
• Ventilation — The vents and other openings in the cabinet are designed for ventilation. Do not cover
or block these vents and openings since insufficient ventilation can cause overheating and/or shorten
the life of the product. Do not place the product on a bed, sofa, rug or other similar surface, since they
can block ventilation openings. This product is not designed for built-in installation; do not place the
product in an enclosed place such as a bookcase or rack, unless proper ventilation is provided or the
manufacturer's instructions are followed.
• The front panel used in this product is made of glass. Therefore, it can break when the product is dropped
or applied with impact. Be careful not to be injured by broken glass pieces in case the panel breaks.
• Heat — The product should be situated away from heat sources such as radiators, heat registers,
stoves, or other products (including amplifiers) that produce heat.
• The Liquid Crystal panel is a very high technology product with 2,073,600 pixels, giving you fine picture
details.Occasionally, a few non-active pixels may appear on the screen as a fixed point of blue, green or
red. Please note that this does not affect the performance of your product.
• Lightning — For added protection for this television equipment during a lightning storm, or when it is
left unattended and unused for long periods of time, unplug it from the wall outlet and disconnect the
antenna. This will prevent damage to the equipment due to lightning and power-line surges.
• Power Lines — An outside antenna system should not be located in the vicinity of overhead power
lines or other electric light or power circuits, or where it can fall into such power lines or circuits. When
installing an outside antenna system, extreme care should be taken to keep from touching such power
lines or circuits as contact with them might be fatal.
• To prevent fire, never place any type of candle or flames on the top or near the TV set.
• To prevent fire or shock hazard, do not place the AC cord under the TV set or other heavy items.
Electricity is used to perform many useful functions, but it can also cause personal injuries and
property damage if improperly handled. This product has been engineered and manufactured with
the highest priority on safety. However, improper use can result in electric shock and/or fire. In order
to prevent potential danger, please observe the following instructions when installing, operating
and cleaning the product. To ensure your safety and prolong the service life of your Liquid Crystal
Television, please read the following precautions carefully before using the product.
1) Read these instructions.
2) Keep these instructions.
3) Heed all warnings.
4) Follow all instructions.
5) Do not use this apparatus near water.
6) Clean only with dry cloth.
7) Do not block any ventilation openings. Install in accordance with the manufacturer's instructions.
8) Do not install near any heat sources such as radiators, heat registers, stoves, or other apparatus
(including amplifiers) that produce heat.
Do not defeat the safety purpose of the polarized or grounding-type plug. A polarized plug has two
blades with one wider than the other. A grounding type plug has two blades and a third grounding
prong. The wide blade or the third prong are provided for your safety. If the provided plug does not fit
into your outlet, consult an electrician for replacement of the obsolete outlet.
10) Protect the power cord from being walked on or pinched particularly at plugs, convenience
receptacles, and the point where they exit from the apparatus.
11) Only use attachments/accessories specified by the manufacturer.
12) Use only with the cart, stand, tripod, bracket, or table specified by the manufacturer,
or sold with the apparatus. When a cart is used, use caution when moving the cart/
apparatus combination to avoid injury from tip-over.
13) Unplug this apparatus during lightning storms or when unused for long periods of
14) Refer all servicing to qualified service personnel. Servicing is required when the apparatus has
been damaged in any way, such as power-supply cord or plug is damaged, liquid has been
spilled or objects have fallen into the apparatus, the apparatus has been exposed to rain or
moisture, does not operate normally, or has been dropped.
Additional Safety Information
Power Sources—This product should be operated only from the type of power source indicated
on the marking label. If you are not sure of the type of power supply to your home, consult your
product dealer or local power company. For products intended to operate from battery power, or
other sources, refer to the operating instructions.
16) Overloading—Do not overload wall outlets, extension cords, or integral convenience receptacles
as this can result in a risk of fire or electric shock.
17) Object and Liquid Entry—Never push objects of any kind into this product through openings as
they may touch dangerous voltage points or short-out parts that could result in a fire or electric
shock. Never spill liquid of any kind on the product.
18) Damage Requiring Service—Unplug this product from the wall outlet and refer servicing to
qualified service personnel under the following conditions:
a) When the AC cord or plug is damaged,
b) If liquid has been spilled, or objects have fallen into the product,
c) If the product has been exposed to rain or water,
If the product does not operate normally by following the operating instructions.
Adjust only those controls that are covered by the operating instructions as an improper adjustment
of other controls may result in damage and will often require extensive work by a qualified technician
to restore the product to its normal operation,
e) If the product has been dropped or damaged in any way, and
f ) When the product exhibits a distinct change in performance - this indicates a need for
19) Replacement Parts—When replacement parts are required, be sure the service technician has
used replacement parts specified by the manufacturer or have the same characteristics as the
original part. Unauthorized substitutions may result in fire, electric shock, or other hazards.
20) Safety Check—Upon completion of any service or repairs to this product, ask the service
technician to perform safety checks to determine that the product is in proper operating
21) Wall or ceiling mounting—When mounting the product on a wall or ceiling, be sure to install the
product according to the method recommended by the manufacturer.3
IMPORTANT SAFETY INSTRUCTIONS Caring for the cabinet
• Use a soft cloth (cotton, flannel, etc.) and gently wipe the surface of the cabinet.
• Using a chemical cloth (wet/dry sheet type cloth, etc.) may deform the components of the main unit cabinet
• Wiping with a hard cloth or using strong force may scratch the surface of the cabinet.
• If the cabinet is very dirty, wipe with a soft cloth (cotton, flannel, etc.) soaked in neutral detergent diluted
with water and thoroughly wrung out, and then wipe with a soft dry cloth.
• Avoid using benzene, thinner, and other solvents, as these may deform the cabinet and cause the paint
• Do not apply insecticides or other volatile liquids.
Also, do not allow the cabinet to remain in contact with rubber or vinyl products for a long period of time.
Plasticizers inside the plastic may cause the cabinet to deform and cause the paint to peel off.
Caring for the front panel
• Turn off the main power and unplug the AC cord from the wall outlet before handling.
• Gently wipe the surface of the front panel with a soft cloth (cotton, flannel, etc.).
To protect the front panel, do not use a dirty cloth, liquid cleaners, or a chemical
cloth (wet/dry sheet type cloth, etc.). This may damage the surface of the front
• Wiping with a hard cloth or using strong force may scratch the surface of the front
• Use a soft damp cloth to gently wipe the front panel when it is really dirty.(It may scratch the surface of
the front panel when wiped strongly.)
• If the front panel is dusty, use an anti-static brush, which is commercially available, to clean it.
• To avoid scratching the frame or screen, please use a soft, lint free cloth for cleaning. Approved cleaning
cloths are available directly from Sharp in single (00Z-LCD-CLOTH) or triple (00Z-LCD-CLOTH-3) packs.
Call 1-800-BE-SHARP for ordering, or VISIT http://www.sharpusa.com/SharpDirect.
PROPER TELEVISION PLACEMENT MATTERS
• Do not display a still picture for a long time, as this could cause an afterimage to remain.
• To prevent fire or shock hazard, do not expose this product to dripping or splashing.No
objects filled with liquids, such as vases, should be placed on the product.
• Do not insert foreign objects into the product. Inserting objects in the air vents or other
openings may result in fire or electric shock. Exercise special caution when using the
product around children. Precautions when transporting the TV • When transporting the TV, never carry it by holding or otherwise putting
pressure onto the display. Be sure to always carry the TV by two people
(90/80 inch models: three people) holding it with two hands.
THE CONSUMER ELECTRONICS INDUSTRY CARES
• Manufacturers, retailers and the rest of the consumer electronics industry are
committed to making home entertainment safe and enjoyable.
• As you enjoy your television, please note that all televisions – new and old- must
be supported on proper stands or installed according to the manufacturer’s
recommendations. Televisions that are inappropriately situated on dressers,
bookcases, shelves, desks, speakers, chests, carts, etc., may fall over, resulting
• ALWAYS follow the manufacturer’s recommendations for the safe installation of
• ALWAYS read and follow all instructions for proper use of your television.
• NEVER allow children to climb on or play on the television or the furniture on
which the television is placed.
• NEVER place the television on furniture that can easily be used as steps, such
as a chest of drawers.
• ALWAYS install the television where it cannot be pushed, pulled over or
• ALWAYS route cords and cables connected to the television so that they
cannot be tripped over, pulled or grabbed.
WALL OR CEILING MOUNT YOUR TELEVISION
• ALWAYS contact your retailer about professional installation if you have any
doubts about your ability to safely mount your television.
• ALWAYS use a mount that has been recommended by the television
manufacturer and has a safety certification by an independent laboratory (such
• ALWAYS follow all instructions supplied by the television and mount
• ALWAYS make sure that the wall or ceiling where you are mounting the
television is appropriate.
Some mounts are not designed to be mounted to walls and ceilings with steel
studs or cinder block construction. If you are unsure, contact a professional
• Televisions can be heavy. A minimum of two people is required for a wall or
ceiling mount installation.
MOVING AN OLDER TELEVISION TO A NEW PLACE IN YOUR HOME
• Many new television buyers move their older CRT televisions into a secondary
room after the purchase of a flat-panel television. Special care should be made
in the placement of older CRT televisions.
• ALWAYS place your older CRT television on furniture that is sturdy and
appropriate for its size and weight.
• NEVER place your older CRT television on a dresser where children may be
tempted to use the drawers to climb.
• ALWAYS make sure your older CRT television does not hang over the edge of
3D Glasses (for the UQ17U, TQ15U, SQ17U, SQ15U and LE657U models)
Prevention of accidental ingestion
• Keep the accessory out of the reach of small children. Small children can accidentally swallow these
– If a child accidentally swallows any of these parts, seek immediate medical attention.
• Do not disassemble or modify the 3D Glasses except when recycling the batteries. Do not modify the 3D Glasses.
Handling the 3D Glasses
• Do not drop, exert pressure on, or step on the 3D Glasses. Doing so may damage the glass section,
which may result in the risk of injury.
• Be careful not to trap your finger in the hinge section of the 3D Glasses. Doing so may result in injury.
– Pay special attention when children are using this product.
Caution for lithium battery
• Batteries must not be exposed to excessive heat such as direct sunlight or fire.
• Replace only with the same or equivalent type of battery. The battery may explode if improperly replaced.
• Take care not to reverse the battery poles (+ and –) when loading the battery. Follow the correct
procedure when loading the battery. Loading the battery incorrectly may damage the battery or cause it
to leak battery fluid, which could result in a fire, injury or damage.
Using the 3D Glasses
• Use of the 3D Glasses should be limited to a maximum of 3 hours, and in any case no more than one
• Use only the 3D Glasses recommended for this TV.
• Use the 3D Glasses only for the specified purpose.
• Do not move around while wearing the 3D Glasses. The surrounding area may appear dark, which may
result in falling or other accidents that may cause injury.
Caring for the 3D Glasses
• Use only the cloth provided with the 3D Glasses to clean the lenses. Remove dust and soil from the
cloth. Any dust or other soiling on the cloth may result in scratches. Do not use solvents such as
benzene or thinners as doing so may cause the coating to peel off.
• When cleaning the 3D Glasses, take care not to allow water or other fluids to come into contact with the
• Always store the 3D Glasses in the case provided when not in use.
• When storing the 3D Glasses, avoid very humid or hot locations.
• If you experience dizziness, nausea, or other discomfort while viewing 3D images, discontinue use and
• Do not use the 3D Glasses if they are cracked or broken.
Notes on Radio Wave Certification in the U.S.A. and Canada
This device complies with part 15 of the FCC Rules. Operation is subject to the following two conditions:
(1) This device may not cause harmful interference, and (2) this device must accept any interference received, including
interference that may cause undesired operation.
"This transmitter must not be co-located or operated in conjunction with any other anntenna or transmitter."
FCC/INDUSTRY CANADA NOTICE This device complies with Part 15 of FCC Rules and Industry Canada license-exempt RSS standard(s). Operation is
subject to the following two conditions: (1) this device may not cause interference, and (2) this device must accept any
interference, including interference that may cause undesired operation of this device.
This equipment complies with FCC/IC radiation exposure limits set forth for an uncontrolled environment and meets
the FCC radio frequency (RF) Exposure Guidelines in Supplement C to OET65 and RSS-102 of the IC radio frequency
(RF) Exprosure rules. This equipment has very low levels of RF energy that are deemed to comply without testing of
specific absorption ratio (SAR).
FCC CAUTION Changes or modifications not expressly approved by Hosiden responsible for compliance could void the user's
authority to operate the equipment.
Note: This equipment has been tested and found to comply with the limits for a Class B digital device, pursuant to
Part 15 of the FCC Rules. These limits are designed to provide reasonable protection against harmful interference in
a residential installation. This equipment generates, uses and can radiate radio frequency energy and, if not installed
and used in accordance with the instructions, may cause harmful interference to radio communications. However,
there is no guarantee that interference will not occur in a particular installation. If this equipment does cause harmful
interference to radio or television reception, which can be determined by turning the equipment off and on, the user is
encouraged to try to correct the interference by one or more of the following measures:
— Reorient or relocate the receiving antenna.
— Increase the separation between the equipment and receiver.
— Connect the equipment into an outlet on a circuit different from that to which the receiver is connected.
— Consult the dealer or an experienced radio/TV technician for help.
This Class B digital apparatus complies with Canadian ICES-003
Le présent appareil est conforme aux la prtie 15 des règles de la FCC et CNR d'Industrie Canada applicables aux
INFORMATIONS IMPORTANTES INFORMATION:
ENGLISH Supplied Accessories Make sure the following accessories are provided with the product. NOTE • Always use the AC cord supplied with the TV.• The illustrations above are for explanation purposes and may vary slightly from the actual accessories. 1 Remote control unit (x1) 2 "AAA " size battery (x2) 3 AC cord (x1)(for the 80 inch models) 4 Stand unit (x1)(for the UQ17U models) 5 Stand unit (x1)(for the TQ15U models) 6 Stand unit (x1)(for the SQ17U, SQ15U, SQ10U, and EQ10U models) 7 Stand unit (x1)(for the LE650U models) 8 Stand unit (x1)(for the LE657U models) 9 3D Glasses (x2)(for the UQ17U and SQ17U models)
Q Setup Guide(this publication) Optional Accessories The listed optional accessories are available for the Liquid Crystal Television. Please purchase them at your nearest shop.• Additional optional accessories may be available in the near future. When purchasing, please read the newest catalogue for compatibility and check the availability.
FRANÇAIS Accessoires fournis Vérifiez si les accessoires suivants sont fournis avec l'appareil.REMARQUE• Utilisez toujours le cordon secteur fourni avec le téléviseur.• Les illustrations de ce mode d'emploi sont présentées à titre explicatif et peuvent être légèrement différentes des accessoires réels. 1 Télécommande (x1) 2 Pile format « AAA » (x2) 3 Cordon secteur (x1)(pour les modèles de 80 pouces) 4 Ensemble du socle (x1)(pour les modèles de UQ17U) 5 Ensemble du socle (x1)(pour les modèles de TQ15U) 6 Ensemble du socle (x1)(pour les modèles de SQ17U, SQ15U, SQ10U et EQ10U) 7 Ensemble du socle (x1)(pour les modèles de LE650U) 8 Ensemble du socle (x1)(pour les modèles de LE657U) 9 3D Glasses (x2)(pour les modèles de UQ17U et SQ17U)
90/80 inch only Building the Work TableBefore attaching the stand to the TV, build a work table on which to rest the TV.• To build the table, use the cushioning materials used in the packaging.• Of the cushioning materials used, TOP-C is also used during stand unit assembly. Be sure to assemble the stand unit before building the work table. 1 Insert each of the cushioning materials in the respective directions shown in the figure.• Insert TOP-L and TOP-R into the left and right sides of the case respectively.• Insert TOP-C to fit between the lines on the other side of the case. 2 The case is equipped with push-in tabs to hold the cushioning materials in place. Push in the tabs (2 for each location) to secure the cushioning materials in the case. 3 After you have built the work table, spread a blanket or similar soft cloth over the table and then lay the TV display down on the covered table before attaching the stand to the TV.• Do not use a small table for this. • Refer to the operation manual for information on attaching the stand.
Attaching the Stand/Fixation du socle/Colocación del soporte
ENGLISH Q LC-80UQ17U/LC-70UQ17U/ LC-60UQ17U• Before attaching (or detaching) the stand, unplug the AC cord.• Before performing work spread cushioning over the base area to lay the TV on. This will prevent it from being damaged.CAUTION• Be sure to follow the instructions. Incorrect installation of the stand may result in the TV falling over. 1 Confirm that there are 12 screws (8 long screws and 4 short screws) supplied with the stand unit. 2
1 Engage the tabs of the stand unit with the stand holes to attach the stand unit to the stand.
2 Use the supplied 8 screws to fix in place the stand unit and the stand. • After you fix these components in place, check that the components do not wobble and are not loose and that all screws have been tightened firmly. 3
1 Insert the stand into the openings on the bottom of the TV.• Make sure that the stand is firmly inserted into the TV. Improper installation may result in tilting of the TV set.
2 Insert and tighten the 4 screws into the 4 holes on the rear of the TV. 1 Confirmez que 12 vis (8 vis longues et 4 vis courtes) sont fournies avec le socle. 2
2 • Long screws• Vis longues• Cojín blandoFront XXXXXXXXXXFront XXXXXXXXXX Back XXXXXXXXXX Back XXXXXXXXXX 3
ENGLISH Q LC-70TQ15U/LC-60TQ15U• Before attaching (or detaching) the stand, unplug the AC cord.• Before performing work spread cushioning over the base area to lay the TV on. This will prevent it from being damaged.CAUTION• Be sure to follow the instructions. Incorrect installation of the stand may result in the TV falling over. 1 Confirm that there are 9 screws (4 long screws, 4 middle screws and 1 short screw) supplied with the stand unit. 2 Attach the supporting post for the stand unit onto the base as shown below.• The supporting post attaches to the base at an offcentered location on the base. Be sure to attach the supporting post in the direction indicated below and attach the stand to the TV with the wider side of the base facing forward. 3 Insert the stand into the openings on the rear of the TV.• Make sure that the stand is fi rmly inserted into the TV. Improper installation may result in tilting of the TV set. 4 Insert and tighten the 4 screws into the 4 holes on the rear of the stand unit. 5
Insert the stand cover.
Insert the screw to secure the stand cover. 1 Confirm that there are 9 screws (4 long screws, 4 middle screws and 1 short screw) supplied with the stand unit. 2 Attach the supporting post for the stand unit onto the base as shown below.• The supporting post attaches to the base at an offcentered location on the base. Be sure to attach the supporting post in the direction indicated below and attach the stand to the TV with the wider side of the base facing forward. 3 Insert the stand into the openings on the rear of the TV.• Make sure that the stand is fi rmly inserted into the TV. Improper installation may result in tilting of the TV set. 4 Insert and tighten the 4 screws into the 4 holes on the rear of the stand unit. 5
Insert the stand cover.
Insert the screw to secure the stand cover.
ENGLISH Q LC-70SQ17U/LC-70SQ15U/ LC-70SQ10U/LC-70EQ10U/ LC-60SQ17U/LC-60SQ15U/ LC-60SQ10U/LC-60EQ10U• Before attaching (or detaching) the stand, unplug the AC cord.• Before performing work spread cushioning over the base area to lay the TV on. This will prevent it from being damaged.CAUTION• Be sure to follow the instructions. Incorrect installation of the stand may result in the TV falling over. 1 Confirm that there are 12 screws (8 long screws and 4 short screws) supplied with the stand unit. 2
1 Set the post for the stand unit onto the polystyrene foam.
2 Attach the base to the post.
3 Insert and tighten the 8 screws into the 8 holes on the bottom of the base.• Hold the stand unit securely with one hand, and then tighten the screws. 3
1 Insert the stand into the openings on the bottom of the TV.• Make sure that the stand is firmly inserted into the TV. Improper installation may result in tilting of the TV set.
2 Insert and tighten the 4 screws into the 4 holes on the rear of the TV. 1 Confirmez que 12 vis (8 vis longues et 4 vis courtes) sont fournies avec le socle. 2
ENGLISH Q LC-80LE650U/LC-70LE650U/ LC-60LE650U• Before attaching (or detaching) the stand, unplug the AC cord.• Before performing work spread cushioning over the base area to lay the TV on. This will prevent it from being damaged.CAUTION• Be sure to follow the instructions. Incorrect installation of the stand may result in the TV falling over. NOTE • Refer to pages 15 and 19 for the instructions on the installation of the 80 inch models. 1 Confirm that there are 12 screws (8 long screws and 4 short screws) supplied with the stand unit. 2
1 Set the post for the stand unit onto the polystyrene foam.
2 Attach the base to the post.
1 Set the post for the stand unit onto the polystyrene foam.
2 Attach the base to the post.
3 Insert and tighten the 8 screws into the 8 holes on the bottom of the base.• Hold the stand unit securely with one hand, and then tighten the screws. 4 Build the work table. (See page 15.) 5
1 Insert the stand into the openings on the bottom of the TV.• Make sure that the stand is firmly inserted into the TV. Improper installation may result in tilting of the TV set.
2 Insert and tighten the 4 screws into the 4 holes on the rear of the TV. FRANÇAIS
ENGLISH Q LC-90LE657U• Before attaching (or detaching) the stand, unplug the AC cord.• Before performing work spread cushioning over the base area to lay the TV on. This will prevent it from being damaged.CAUTION• Be sure to follow the instructions. Incorrect installation of the stand may result in the TV falling over. 1 Confirm that there are 12 screws (8 long screws and 4 short screws) supplied with the stand unit. 2
1 Set the post for the stand unit onto the polystyrene foam.
2 Attach the base to the post.
3 Insert and tighten the 8 screws into the 8 holes on the bottom of the base.• Hold the stand unit securely with one hand, and then tighten the screws. 3
1 Insert the stand into the openings on the bottom of the TV.• Make sure that the stand is fi rmly inserted into the TV. Improper installation may result in tilting of the TV set.
2 Insert and tighten the 4 screws into the 4 holes on the rear of the TV. 1 Confirmez que 12 vis (8 vis longues et 4 vis courtes) sont fournies avec le socle. 2
AC power supply/XXXX/XXXX ENGLISH AC connection
1 Attach your antenna to the back of the television. (See page 22.) 2 Connect the AC plug for the television into the AC outlet.• Place the TV close to the AC outlet, and keep the power plug within reach.
Q LC-80LE650U/LC-90LE657U/LC-80UQ17U NOTE • *1: Be sure to use the clamp to prevent the AC cord from being unplugged.
Q LC-70UQ17U/LC-60UQ17U/ LC-70TQ15U/LC-60TQ15U/ LC-70SQ17U/LC-60SQ17U/ LC-70SQ15U/LC-60SQ15U/ LC-70SQ10U/LC-60SQ10U/ LC-70EQ10U/LC-60EQ10U/ LC-70LE650U/LC-60LE650U• Bundle the cords properly with the cable tie.• When bundling the cords, use the AC cord holder mounted on the TV. Relocate from A
Remote Control Unit/Télécommande/Control Remoto
ENGLISH Installing Batteries in the
Remote Control Unit If the remote control fails to operate TV functions, replace the batteries in the remote control unit. 1
Open the battery cover.
Insert two "AAA" size batteries
(supplied with the product). • Place the batteries with their terminals corresponding to the ( e ) and ( f
) indications in the battery compartment. 3
Close the battery cover. CAUTIONImproper use of batteries can result in chemical leakage or explosion. Be sure to follow the instructions below.• Do not mix batteries of different types. Different types of batteries have different characteristics.• Do not mix old and new batteries. Mixing old and new batteries can shorten the life of new batteries or cause chemical leakage in old batteries.• Remove batteries as soon as they are worn out. Chemicals that leak from batteries that come in contact with skin can cause a rash. If you find any chemical leakage, wipe thoroughly with a cloth.• The batteries supplied with this product may have a shorter life expectancy due to storage conditions.• If you will not be using the remote control unit for an extended period of time, remove batteries from it.
Using the Remote Control Unit Use the remote control unit by pointing it towards the remote control sensor on the TV. Objects between the remote control unit and the remote control sensor may prevent proper operation.
Q Cautions regarding the remote
control unit • Do not expose the remote control unit to shock. In addition, do not expose the remote control unit to liquids, and do not place it in an area with high humidity.• Do not install or place the remote control unit under direct sunlight. The heat may cause deformation of the remote control unit.• The remote control unit may not work properly if the remote control sensor on the TV is under direct sunlight or strong lighting. In such cases, change the angle of the lighting or the TV, or operate the remote control unit closer to the remote control sensor. IMPORTANT: IF THE UNIT DOES NOT POWER ON - UNPLUG THE TELEVISION FROM THE OUTLET AND REPEAT THE INSTALLATION STEPS.IF YOU STILL ENCOUNTER NO POWER, PLEASE CONTACT US AT 1-800-BE-SHARP.
FRANÇAIS Mise en place des piles dans la
ENGLISH Antennas To enjoy a clearer picture, use an outdoor antenna. The following is a brief explanation of the types of connections that are used for a coaxial cable. If your outdoor antenna uses a 75-ohm coaxial cable with an F-type connector, plug it into the antenna terminal at the rear of the TV set. For connecting the antenna cable to the TV, use commercially available cables.Connecting Antenna Cable• Connect the antenna cable to the TV using one of the methods in the illustration as shown (
Separate VHF/UHF antenna* A 75-ohm system is generally a round cable with F-type connector that can easily be attached to a terminal without tools.* A 300-ohm system is a flat "twin-lead" cable that can be attached to a 75-ohm terminal through a 300/75-ohm adapter.NOTICE F-type connector should be finger-tightened only.When connecting the RF cable to the TV set, do not tighten F-type connector with tools.If tools are used, it may cause damage to your TV set. (The breaking of internal circuit, etc.)
Q Connecting to audio equipment
Q Conexión a un equipo de audio • Optical fiber cable• Câble à fibre optique• Cable de fibra óptica• Ø3.5 mm stereo minijack to RCA audio cable• Câble audio avec mini-prise stéréo ø 3,5 mm vers RCA • Cable de audio con miniconector estéreo de 3,5 mm ø a RCA• Terminal on the TV• Prise sur le téléviseur• Terminal del televisor• Terminal on external equipment• Prise sur appareil externe• Terminal del equipo externo• Cable• Câble• CableDIGITAL AUDIO INPUTOPTICALANALOG AUDIO IN• Pages• Pages• Páginas 26
ENGLISH Types of Connection
For connecting the TV to external equipment, use commercially available
• The illustrations of the terminals are for explanation purposes and may vary slightly from the
Q Connecting to video equipment or PC Image quality differs depending on the terminal used. To enjoy clearer images, check
the output terminals of your external equipment and use its appropriate terminals for
higher quality images.
Q Connecting to audio equipment
FRANÇAIS Types de connexions
1 When using an HDMI cable (HDMI IN 1, 2, 3 or 4):*1 (EQ/LE650U/LE657U series) Use HDMI IN 1 to connect ARC-compatible equipment.
(UQ/TQ/SQ series) Use HDMI IN 3 to connect ARC-compatible equipment. • The HDMI (High Definition Multimedia Interface) terminal is an audio-video interface that enables a connection for audio and video signals using a single cable. The HDMI IN terminal supports high-resolution video input.• To enjoy 1080p display capability, connect your external equipment using an HDMI-certified cable or a component cable and set the equipment to 1080p output.• Supported Audio format: Linear PCM, Dolby Digital, DTS, sampling rate 32/44.1/48kHz.• When you connect ARC-compatible equipment, use HDMI IN 1.
2 When using a DVI-HDMI conversion cable (HDMI IN 2):• When using a DVI-HDMI conversion cable, you should make an analog audio connection. In this case, in addition to connecting a DVI-HDMI conversion cable to the HDMI IN 2 terminal, connect a Ø 3.5 mm stereo minijack cable to the AUDIO IN terminal and set "Audio Select" to "HDMI+Analog".
FRANÇAIS Vous pouvez raccorder différents types d'appareil externe à votre téléviseur. Pour regarder des images d'une source externe,
3 When using a Component cable (COMPONENT IN):• To enjoy 1080p display capability, connect your external equipment using an HDMI-certified cable or a component cable and set the equipment to 1080p output. Connecting a VCR, Game Console, Camcorder or Cable/Satellite Set-top Box
When connecting an AV amplifier for a surround system
• Letting the TV output the audio to an AV amplifier:
*1 (EQ/LE650U/LE657U series) Use HDMI IN 1 to connect ARC-compatible equipment.
(UQ/TQ/SQ series) Use HDMI IN 3 to connect ARC-compatible equipment.
*2 If the equipment to be connected is not compatible with the ARC, connect an optical
• If the image is not in sync with the audio, check the settings of the connected surround
When connecting an audio amplifier
It is possible to output audio through the DIGITAL AUDIO OUT terminal.
• In this case, set "Audio Setup" to "PCM" or "Bitstream". (Refer to built-in operation manual.)
FRANÇAIS Raccordement d'un système ambiophonique/un système audio
DVI OUTAUDIO• DVI-HDMI conversion cable• Câble de conversion DVI-HDMI• Cable de conversión DVI-HDMI• Ø 3.5 mm stereo minijack cable • Câble avec mini-prise stéréo ø 3,5 mm • Cable con miniconector estéreo de 3,5 mm ø 9 • Ø 3.5 mm stereo minijack cable• Câble avec mini-prise stéréo ø 3,5 mm• Cable con miniconector estéreo de 3,5 mm øRGBAUDIO • Analog RGB cable (D-sub 15-pin cable or VGA cable) • Câble RVB analogique (D-sub 15 broches ou câble VGA) • Cable RGB analógico (D-sub de 15 contactos o cable VGA)
ENGLISH Connecting a PC Refer to built-in operation manual for a list of PC signals compatible with the TV.
7 When using an HDMI cable (HDMI IN 1, 2, 3 or 4): • Depending on the board, only video signals may be output. In this case, in addition to connecting an HDMI- certified cable to the HDMI IN 2 terminal, connect a Ø 3.5 mm stereo minijack cable to the AUDIO IN terminal and set "Audio Select" to "HDMI+Analog". (Refer to built-in operation manual.)• The HDMI IN terminals only support digital signal.
8 When using a DVI-HDMI conversion cable (HDMI IN 2): • When using a DVI-HDMI conversion cable, you should make an analog audio connection. In this case, in addition to connecting a DVI-HDMI conversion cable to the HDMI IN 2 terminal, connect a Ø 3.5 mm stereo minijack cable to the AUDIO IN terminal and set "Audio Select" to "HDMI+Analog". (Refer to built-in operation manual.)
9 When using an analog RGB cable (PC IN):• When using an analog RGB cable, input the audio signal to the AUDIO IN terminal of PC IN. • When connecting a PC to the PC IN, set "Audio Select" to "Video+Audio". (Refer to built-in operation manual.)
FRANÇAIS Raccordement d'un ordinateur Reportez-vous à la page @@ pour la liste des signaux d'ordinateur compatibles avec le téléviseur.
Watching TV/Pour regarder la télévision/Para ver TV ENGLISH Initial Installation
When you turn on the TV for the first
time, it will automatically memorize
the broadcasting channels available in
the region where you live. Perform the
following steps before you press POWER
on the remote control unit.
Insert the batteries into the remote
Connect the antenna cable to the TV.
Plug in the AC cord to the AC outlet.
Language (Language setting)
Select from among 3 languages: English,
to select the desired
language listed on the screen, and
then press ENTER. LanguageLocation & TimeTV LocationAntenna & Cable/STBAir/CableEnglishEspañolFrançaisCH SearchSmart TVCompleted Location & Time
Make settings for the country, area and
time zone where you use the TV.
to select "United States",
to select the time zone
where you are using the TV, and then
to select the Daylight
Savings Time, and then press ENTER.
Select "Home" or "Store" for the location
where you plan to install the TV. This
product qualifies for ENERGY STAR*1 in
Home mode default setting.
Press ENTER to enter the setting.
FRANÇAIS Initial Installation
When you turn on the TV for the first
time, it will automatically memorize
the broadcasting channels available in
the region where you live. Perform the
following steps before you press POWER
on the remote control unit.
Insert the batteries into the remote
Connect the antenna cable to the TV.
Plug in the AC cord to the AC outlet.
Language (Language setting)
Select from among 3 languages: English,
to select the desired
language listed on the screen, and
then press ENTER. LanguageLocation & TimeTV LocationAntenna & Cable/STBAir/CableEnglishEspañolFrançaisCH SearchSmart TVCompleted Location & Time
Make settings for the country, area and
time zone where you use the TV.
to select "United States",
to select the time zone
where you are using the TV, and then
to select the Daylight
Savings Time, and then press ENTER.
Select "Home" or "Store" for the location
where you plan to install the TV. This
product qualifies for ENERGY STAR*1 in
Home mode default setting.
Press ENTER to enter the setting.
ESPAÑOL Initial Installation
When you turn on the TV for the first
time, it will automatically memorize
the broadcasting channels available in
the region where you live. Perform the
following steps before you press POWER
on the remote control unit.
Insert the batteries into the remote
Connect the antenna cable to the TV.
Plug in the AC cord to the AC outlet.
Language (Language setting)
Select from among 3 languages: English,
to select the desired
language listed on the screen, and
then press ENTER. LanguageLocation & TimeTV LocationAntenna & Cable/STBAir/CableEnglishEspañolFrançaisCH SearchSmart TVCompleted Location & Time
Make settings for the country, area and
time zone where you use the TV.
to select "United States",
to select the time zone
where you are using the TV, and then
to select the Daylight
Savings Time, and then press ENTER.
Select "Home" or "Store" for the location
where you plan to install the TV. This
product qualifies for ENERGY STAR*1 in
Home mode default setting.
Press ENTER to enter the setting.31
ENGLISH Antenna & Cable/STB Select the type of connection you will use
to select "Antenna &
Cable" or "Set-top box", and then
Air/Cable (Antenna setting)
Make sure what kind of connection is
made with your TV when selecting "Air" or
to select "Air" or "Cable".
Press ENTER to enter the setting.
CH Search (Channel search)
Channel auto search makes the TV look
for all channels viewable in the set area.
When "Air" is selected in Antenna
to select "Start", and then
Smart TV When you connect to the Internet on the
TV, select the desired connection method
and follow the instructions shown on the
to select "Yes", and then
to select "Wired" or
The settings confirmation screen is
displayed. Confirm the information
displayed on the screen, and then
Examples of the settings
OK Language : EnglishLocation & Time : United States/EST/AutoTV Location : HomeAntenna & Cable/STB : Antenna & CableAir/Cable : AirSearch Result : Digital 4ch Analog 7chNetwork Connection : Not completedPress the INPUT button,then the right arrow d,to see the list of channels found.
ESPAÑOL Antenna & Cable/STB Select the type of connection you will use
to select "Antenna &
Cable" or "Set-top box", and then
Air/Cable (Antenna setting)
Make sure what kind of connection is
made with your TV when selecting "Air" or
to select "Air" or "Cable".
Press ENTER to enter the setting.
CH Search (Channel search)
Channel auto search makes the TV look
for all channels viewable in the set area.
When "Air" is selected in Antenna
to select "Start", and then
Smart TV When you connect to the Internet on the
TV, select the desired connection method
and follow the instructions shown on the
to select "Yes", and then
to select "Wired" or
The settings confirmation screen is
displayed. Confirm the information
displayed on the screen, and then
Examples of the settings
OK Language : EnglishLocation & Time : United States/EST/AutoTV Location : HomeAntenna & Cable/STB : Antenna & CableAir/Cable : AirSearch Result : Digital 4ch Analog 7chNetwork Connection : Not completedPress the INPUT button,then the right arrow d,to see the list of channels found.32
Viewing the Built-in Operation Manual/XXXXXX/XXXXXX ENGLISH Viewing the Built-in Operation Manual Press MANUAL on the remote control unit to display operation information on the screen.To search for an item from the table of contents, and to search for a particular term and to find troubleshooting information, press MANUAL while watching the TV and then select the applicable item from the manual cover page that appears. 1 Press MANUAL while watching the TV.This displays the e-manual screen. 2 When you select contents, its page will be displayed. 3 You can turn over the page one by one for these arrow marks. NOTE • To change the language of the manual, select "MENU" > "Easy Setup" > "Language" to change the language.• You can also display the e-manual by selecting "Information" > "Manual" from the menu screen.
FRANÇAIS Viewing the Built-in Operation Manual Press MANUAL on the remote control unit to display operation information on the screen.To search for an item from the table of contents, and to search for a particular term and to find troubleshooting information, press MANUAL while watching the TV and then select the applicable item from the manual cover page that appears. 1 Press MANUAL while watching the TV.This displays the e-manual screen. 2 When you select contents, its page will be displayed. 3 You can turn over the page one by one for these arrow marks. NOTE • To change the language of the manual, select "MENU" > "Easy Setup" > "Language" to change the language.• You can also display the e-manual by selecting "Information" > "Manual" from the menu screen.
ESPAÑOL Viewing the Built-in Operation Manual Press MANUAL on the remote control unit to display operation information on the screen.To search for an item from the table of contents, and to search for a particular term and to find troubleshooting information, press MANUAL while watching the TV and then select the applicable item from the manual cover page that appears. 1 Press MANUAL while watching the TV.This displays the e-manual screen. 2 When you select contents, its page will be displayed. 3 You can turn over the page one by one for these arrow marks. NOTE • To change the language of the manual, select "MENU" > "Easy Setup" > "Language" to change the language.• You can also display the e-manual by selecting "Information" > "Manual" from the menu screen.
• Has the power been turned on? Page 20.
• Are batteries inserted with polarity (
• Is connection to other components correct?
• Is connection to other components correct?
• Has the power been turned on? Page 20.
• Are batteries inserted with polarity (
• Is connection to other components correct?
• Is connection to other components correct?
• Has the power been turned on? Page 20.
• Are batteries inserted with polarity (
• Is connection to other components correct?
• Is connection to other components correct?
For location of the nearest Sharp Authorized Service, or to obtain product literature, accessories, supplies, or
customer assistance, please call 1-800-BE-SHARP.
LIMITED WARRANTY CONSUMER LIMITED WARRANTY SHARP ELECTRONICS CORPORATION warrants to the first consumer purchaser that this Sharp brand Liquid Crystal Display product
(the “Product”), when shipped in its original container, will be free from defective workmanship and materials, and agrees that it will,
at its option, either repair the defect or replace the defective Product or part thereof with a new or remanufactured equivalent at no charge to the purchaser for parts or labor for the period(s) set forth below. This warranty does not apply to any appearance items of the Product or if the serial number or model number affixed to the Product has
been removed, defaced, changed, altered or tampered with. This warranty does not cover installation or signal reception problems. This
limited warranty will not apply if the Product has been or is being used in a commercial setting or application; this warranty is meant solely
for the non-commercial, household use of the Product by consumers in their home or residence. If you intend to or already use this Product
for commercial purposes or in a commercial setting, there are warranties available to cover your use of this Product, the terms of which may vary. Please contact 1-888-GO-SHARP for further information. In order to enforce your rights under this limited warranty, you should follow the steps set forth below. You must be able to provide proof of purchase to the servicer, which proof must include the date of purchase. To the extent permitted by applicable state law, the warranties set forth are in lieu of, and exclusive of, all other warranties, express or implied. Specifically ALL OTHER WARRANTIES OTHER THAN THOSE SET FORTH ABOVE ARE EXCLUDED, ALL EXPRESS AND IMPLIED WARRANTIES INCLUDING THE WARRANTIES OF MERCHANTABILITY, FITNESS FOR USE, AND FITNESS FOR A PARTICULAR PURPOSE ARE SPECIFICALLY EXCLUDED. IF, UNDER APPLICABLE STATE LAW, IMPLIED WARRANTIES MAY NOT VALIDLY BE DISCLAIMED OR EXCLUDED, THE DURATION OF SUCH IMPLIED WARRANTIES IS LIMITED TO THE PERIOD(S) FROM THE DATE OF PURCHASE SET FORTH BELOW. THIS WARRANTY GIVES YOU SPECIFIC LEGAL RIGHTS. YOU MAY ALSO HAVE OTHER RIGHTS WHICH VARY FROM STATE TO STATE. The warranties given herein shall be the sole and exclusive warranties granted by Sharp and shall be the sole and exclusive remedy available to
the purchaser and only for the time periods set forth herein. No other representations or promises made by anyone are permitted. Correction of
defects, in the manner and for the period of time described herein, shall constitute complete fulfillment of all liabilities and responsibilities of Sharp to
the purchaser with respect to the Product, and shall constitute full satisfaction of all claims, whether based on contract, negligence, strict liability or otherwise. Sharp does not warrant nor shall Sharp be liable, or in any way responsible, for Products which have been subject to abuse (including, but not limited to, improper voltage), accident, misuse, negligence, lack of
reasonable care, alteration, modification, tampering, misuse, improper operation or maintenance or any damages or defects in the Product which
were caused by repairs or attempted repairs performed by anyone other than a Sharp authorized servicer. Nor shall Sharp be liable or in any way
responsible for any incidental or consequential economic or property damage. Some states do not allow limits on warranties or on remedies for breach in certain transactions; in such states, the limits herein may not apply.THIS LIMITED WARRANTY IS VALID ONLY IN THE FIFTY (50) UNITED STATES, THE DISTRICT OF COLUMBIA AND PUERTO RICO.Model Specific SectionYour Product Model Number & Description: LC-80LE650U/LC-70LE650U/LC-60LE650ULCD Color Television(Be sure to have this information available when you need service for your Product.)Warranty Period for this Product: One (1) year parts and labor from the date of purchase.Additional Exclusions fromWarranty Coverage (if any): I n order for the Product to be serviced, the Product must be readily available to the servicer, free and clear of any complex or non-standard installation, mounting or other encumbrance which would unreasonably interfere with servicing the Product. The Servicer will remount the Product after service, provided that such remounting is not into a complex or non-standard installation. Any additional labor and materials required to remove and/or reinstall a Product above and beyond the foregoing are not covered by this warranty, may result in additional charges and are the responsibility of the consumer.Image Retention resulting from a fixed image being displayed for long periods of time is not covered by this Limited Warranty (see Operation Manual on how to prevent this). Where to Obtain Service: From a Sharp Authorized Servicer located in the United States. To find the location of the nearest Sharp Authorized Servicer, please call Sharp toll free at 1-800-BE-SHARP. What to do to Obtain Service: Contact your Sharp Authorized Servicer to obtain in home service for this product. The Servicer will come to your location and if necessary remove the unit for repair at the Servicer’s facility and return the set to you once completed. Be sure to have Proof of Purchase available. TO OBTAIN PRODUCT INFORMATION OR PURCHASE ACCESSORIES AND EXTENDED WARRANTIES, CALL
1-800-BE-SHARP OR VISIT www.sharpusa.com
IMPORTANT : Please read this operation manual before
starting operating the equipment.
IMPORTANT : Veuillez lire ce mode d’emploi avant de