
Sport Onyx Balance - Heart rate monitor SIGMA - Free user manual and instructions
Find the device manual for free Sport Onyx Balance SIGMA in PDF.

| Product Type | Heart Rate Monitor |
| Brand | Sigma |
| Model | Sport Onyx Balance |
| Measurement Accuracy | ECG (Electrocardiogram) |
| Transmission | Digital coded wireless |
| Display | LCD with backlight |
| Main Functions | Heart rate, stopwatch, calories, average HR, time, FAT/FIT/OWN zones, zone alarm |
| Training Zones | Fatburner (55-70% HR max), Fitness (70-80% HR max), Individual |
| User Settings | Gender, date of birth, weight (kg or lb) |
| Power (watch) | 1 CR2032 battery |
| Power (chest strap) | 1 CR2032 battery |
| Battery Life (estimated) | Approximately 1 year (normal use) |
| Water Resistance | Up to 10 meters |
| Operating Temperature | 0°C to 55°C |
| Dimensions (watch, estimated) | Approx. 50 x 40 x 15 mm |
| Weight (watch with battery, estimated) | Approx. 50 g |
| Package Contents | Heart rate monitor, chest strap with transmitter, handlebar mount, O-ring, battery key, manual |
| Care and Cleaning | Clean the strap and electrodes with a damp cloth; do not use abrasive products |
| Battery Replacement | Use a CR2032 battery; open the compartment with the provided key |
| Safety | Consult a doctor before any training, especially if you have cardiovascular conditions |
| Warranty | In accordance with legal requirements; batteries excluded |
| Manufacturer | SIGMA Elektro GmbH |
Frequently Asked Questions - Sport Onyx Balance SIGMA
User questions about Sport Onyx Balance SIGMA
0 question about this device. Answer the ones you know or ask your own.
Ask a new question about this device
Download the instructions for your Heart rate monitor in PDF format for free! Find your manual Sport Onyx Balance - SIGMA and take your electronic device back in hand. On this page are published all the documents necessary for the use of your device. Sport Onyx Balance by SIGMA.
USER MANUAL Sport Onyx Balance SIGMA
natural_image
Red heart symbol with sound waves, no text or symbols presentHEART RATE

natural_image
Black double-headed object with symmetrical arms and two rectangular cutouts (no text or symbols visible)ONYX BALANCE
DEUTSCH
ITALIANO
ENGLISH
ESPAÑOL
FRANÇAIS
NEDERLANDS
natural_image
Simple line drawing of a symmetrical object with a red rectangular outline and internal lines (no text or symbols)2.3 ANLEGEN DES BRUSTGURTES / LENKERHALTERUNG
natural_image
Diagram of a mechanical component with red arrows indicating motion or force direction (no text or symbols)
Aktivmodus

1. FAT (Fatburner Zone):
2. FIT (Fitness Zone):
70-80 % der HF max.
natural_image
Black plastic object with rounded edges and a small hole, no visible text or symbols-
Foreword and package contents 23
-
Basic operating principle 24
2.1 Menu summary 24
2.2 Key occupancy 25
2.3 Attaching the chest belt/ Fastening the handlebar holder 26
- Settings before the first training
→ The settings menu 27
3.1 USER (user settings) 29
3.2 ZONE (zone settings) 30
3.3 TIME (time settings) 31
3.4 DATE (date settings) 31
3.5 TONE (zone alarm tone settings) 31
-
Training with the ONYX BALANCE 32
-
Further information 35
5.1 Information on heart rate 35
5.2 FAQ 38
5.3 Troubleshooting 39
5.4 Changing the battery, watertightness and warranty 40
1. FOREWORD AND PACKAGE CONTENTS
Congratulations on choosing a heart rate monitor from SIGMA SPORT®. Your new ONYX BALANCE will be a faithful companion for sport and leisure for many years to come.
The ONYX BALANCE is a technically demanding measuring device. In order to learn and apply the varied functions of your new heart rate monitor, please read this user manual carefully.
SIGMA SPORT® wishes you a lot of fun using your ONYX BALANCE.
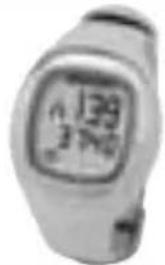
Heart rate monitor ONYX BALANCE
→ ECG-accurate
→ Manufactured based on medical standards
Chest belt with digitally coded radio transmission.


Handlebar holder to use the ONYX BALANCE on the bike with an O ring.

2. BASIC OPERATING PRINCIPLE
2.1 MENU SUMMARY
The main menu
Press any button for 3 seconds to get into the main menu of your ONYX BALANCE. The main menu is divided into the following areas:
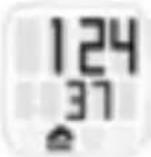
→ "Training time"

→ "Calories"

→ "Average HR"

→ "Time".

The symbol on the bottom screen indicates where you are in the main menu.
Use the bottom button to change between the individual main functions.


The settings menu
Open the settings menu by holding down the bottom button in the main menu.
The settings menu is divided into:
→ "USER" (user settings)
→ "ZONE" (zone settings)
→ "TIME" (time settings)
Change between these settings by pressing the bottom button.
Top button:
→ Start / stop the stopwatch
→ Reset the stopwatch (hold down)
→ Open and confirm the settings"
Pressing both buttons simultaneously:
→ Activate the light function
→ Put the clock into sleep mode (hold down)
Bottom button:
→ Change between functions
→ Open the settings menu (hold down)
→ Change the value in the settings menu
natural_image
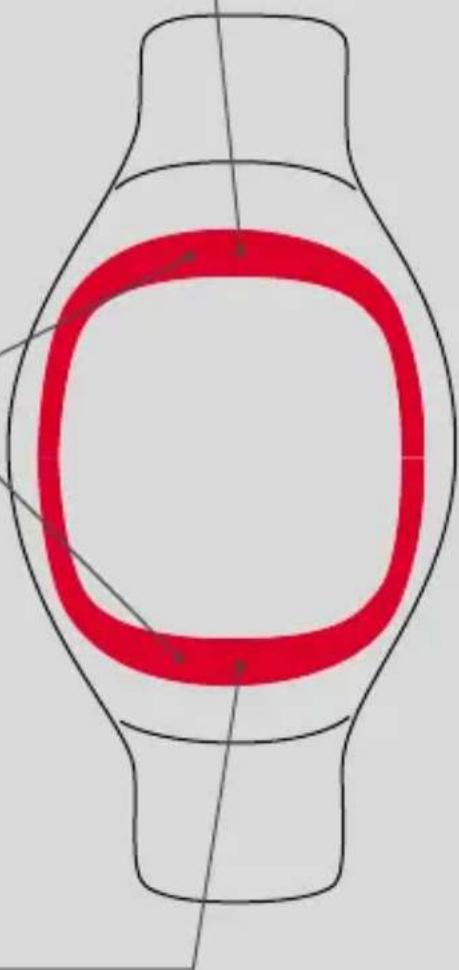
Simple line drawing of a symmetrical object with a red rectangular outline and internal lines (no text or symbols)2.3 ATTACHING THE CHEST BELT / HANDLEBAR HOLDER
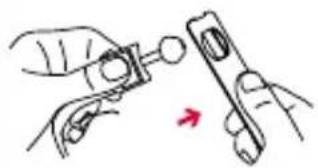 | Connect the transmitter with the elastic belt. |
 | Use the adjusting mechanism to individually adapt the length of the belt.Ensure that you set the length of the belt so that it sits well but is not too tight. |
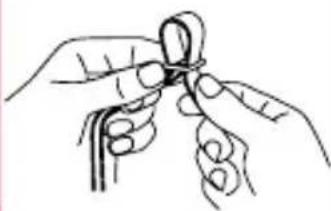
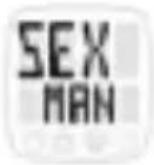
 | Place the belt such that for men the transmitter is below the chest muscles and for women below the breasts.The SIGMA logo must always be readable from the front. |
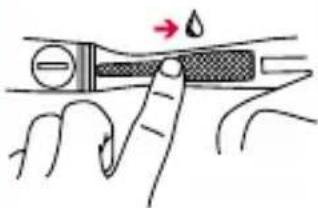 | Lift the belt slightly from the skin. Dampen the ribbed zones (electrodes) on the rear of the transmitter with salvia or cardio gel. |
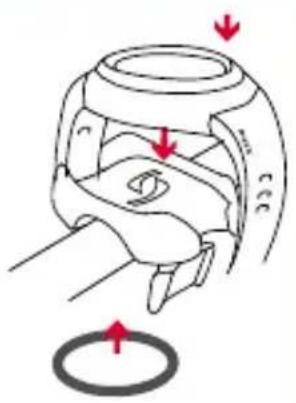
2.3 ATTACHING THE CHEST BELT / HANDLEBAR HOLDER
Assemble the handlebar holder. Then fix the handlebar holder with the O ring and close the wristband.
natural_image
Diagram of a mechanical component with red arrows indicating motion or force direction (no text or symbols)3. SETTINGS BEFORE THE FIRST TRAINING → THE SETTINGS MENU
Before the first training session enter your personal settings. To do this, press the top or bottom button for 3 seconds to go from sleep mode to active mode.

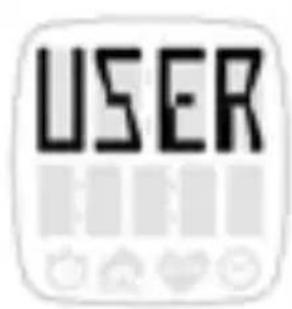
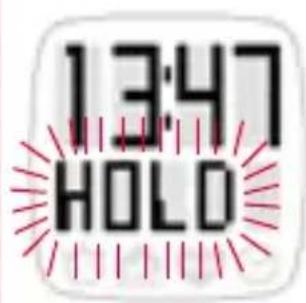
Now press the bottom button for about 3 sec. in active mode. The screen first displays "SET OPEN" and then "USER". You are now in the settings menu.

3. SETTINGS BEFORE THE FIRST TRAINING → THE SETTINGS MENU
USER
ZONE
TIME
DATE
TONE
SET
OK
The settings menu is divided into "USER" (user settings), "ZONE" (zone settings), "TIME" (time settings), "DATE" (date settings) and "TONE" (zone alarm tone settings).
Change between these settings by pressing the bottom button.
Open any settings menu by pressing the top button.
Each menu now shows different values that can be set. Change or increase any value by pressing the bottom button. To lower any given setting, you must continue to increase it until the numbers exceed the maximum values and start from the minimum values again.
Confirm each setting with the top button.
3. SETTINGS BEFORE THE FIRST TRAINING → THE SETTINGS MENU
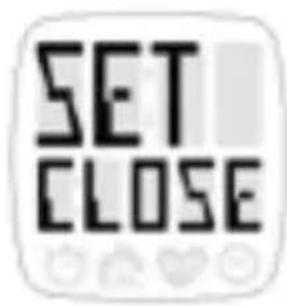
Once you have carried out your settings and have gone back to the settings menu, press the bottom button for about 3 seconds. The screen first displays "SET CLOSE" and then active mode.
3.1 USER (User settings)
In the "USER" menu enter in succession your gender, date of birth and weight (in kg or Engl. Pounds (lb)). Change each setting value by pressing the bottom button. Use the top button to confirm each setting and to change to the next setting value.
Maximum heart rate
Your maximum heart rate is calculated on the basis of the user settings (USER). The calculated HR max. is the basis for setting the upper and lower limits of your chosen training zone. The training zone is selected and set in the "ZONE" menu (zone settings).
3.2 ZONE (Zone settings)
ZONE
In the “ZONE” settings menu, you can select one of the following training zones depending on your primary objectives by pressing the bottom button.
ZONE FAT
1. FAT (Fatburner Zone): approx. 55–70 % of the max. HR
Aimed at: Training for beginners or those starting again. Primarily for the metabolism
You can find more information on this in Chapter 5.1 "Information on heart rate".
ZONE FIT
2. FIT (Fitness Zone): 70-80% of the max. HR
Aimed at: Fitness at advanced level Training for basic aerobic endurance to strengthen the heart circulation system.
You can find more information on this in Chapter 5.1 "Information on heart rate".
ZONE OWN
3. OWN (Individual Zone):
The ONYX BALANCE also gives you the possibility to set your own training zone. To do this, in the "ZONE OWN" menu heading change the lower limit (LOW) and the upper limit (HIGH) using the bottom button.
3.3 TIME (Time settings)
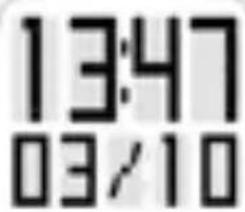
In the "TIME" settings menu, the time mode (12 / 24 h) and the current time can be set. Increase or lower the setting value using the bottom button. Change between the values to be set using the top button.
3.4 DATE (Date settings)
In the “DATE” settings menu, the current year, month and day can be set one after the other. In addition it is possible to set whether the date is displayed in the Anglo-American format (MM / DD) or the European date format (DD / MM).

3.5 TONE (Zone alarm tone settings)
In the "TONE" settings menu, you are able to activate /deactivate the zone alarm tones. Zone alarm tones always occur if you go below the lower limit or above the upper limit of your training zone.
4. TRAINING WITH THE ONYX BALANCE
Your ONYX BALANCE is equipped with a digital coded chest belt that enables you to have fault-free training in a group. Its innovative technology means that you can be sure that your data is transmitted from the chest belt to your ONYX BALANCE as digital packages without loss.

Active mode
Press any button for 2 seconds to activate the watch.

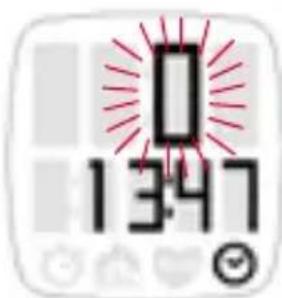
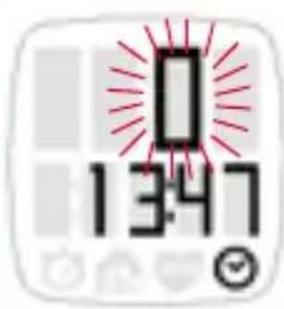
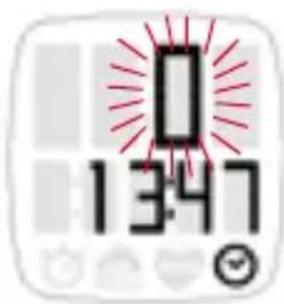
Synchronisation between watch and chest belt
In active mode, the watch is automatically synchronised with the attached chest belt in a few seconds. A flashing zero appears on the screen until synchronisation has finished.
4. TRAINING WITH THE ONYX BALANCE
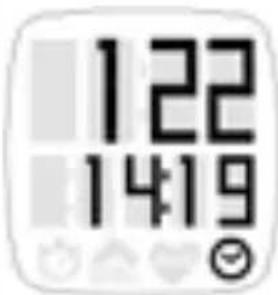
Your current pulse value now appears on the pulse display.
As well as displaying your current pulse value, the following information is also displayed during training:
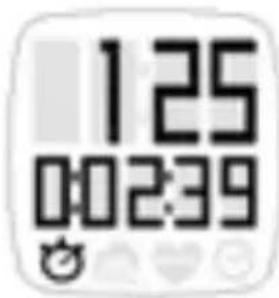
Stopwatch / Training time
Activate the stopwatch when you start training by pressing the top button. To pause the stopwatch, press the top button again.
Note: Calories and the average HR are only calculated when the stopwatch is running.
Reset the stopwatch to 00:00:00 by holding down the top button. This also sets the calories and average HR back to "O".
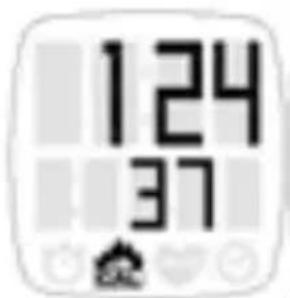
Kcal
This shows how many calories have been burnt. Please note that the calorie calculation does not start until you reach a pulse of 100 beats per minute (bpm), as the calculation is too inaccurate at a lower pulse rate.
4. TRAINING WITH THE ONYX BALANCE
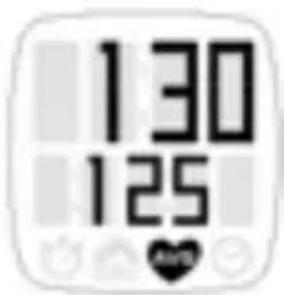
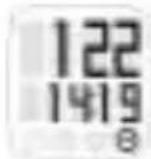
AVG (Average)
The average heart rate of the current training unit is shown under this menu heading.
Time
Here you can display the current time during training.
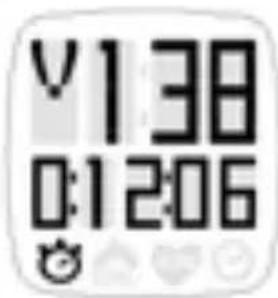
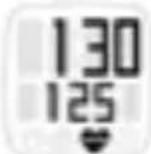
Upper and lower limit of the training zone
The arrows next to the current pulse reading always appear when you go over or under the set training zone. An arrow pointing down signals that the pulse rate is too high and should be lowered accordingly.

An arrow pointing up signals that the current pulse is too low and should be increased accordingly.
When you go over or under the current pulse value, a signal beeps. This signal can be activated or deactivated in the "TONE" settings menu.
4. TRAINING WITH THE ONYX BALANCE
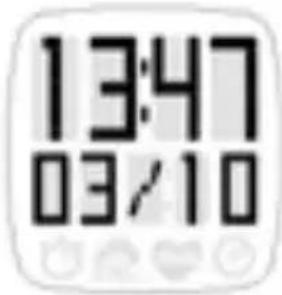
Sleep mode
The ONYX BALANCE switches itself off automatically after 5 minutes, as long as no training is undertaken. Alternatively, you can return your watch to sleep mode manually at any time.
Press the top and bottom buttons simultaneously for at least 3 seconds. Your ONYX BALANCE is once again in sleep mode and can be worn as an everyday watch.
5. FURTHER INFORMATION
5.1 INFORMATION ON HEART RATE
The heart rate (HR) is stated in beats per minute (bpm).
Maximum heart rate
The maximum heart rate (HR max.) is the maximum possible rate at which your heart beats when exploiting your physical performance completely. Your personal HR max. varies with your age, gender, ability to perform, performance related to your type of sport and your physical fitness. The best way to find out your personal HR max. is to take a stamina test.
5.1 INFORMATION ON HEART RATE
We recommend undertaking this test with a doctor and repeating it regularly.
The HR max. is approximated automatically in the ONYX BALANCE using the following mathematical equation:
Men:
210 - "half age" - (0.11 x personal weight in kg) + 4
Women:
210 - "half age" - (0.11 x personal weight in kg)
The right training pulse
The training zone is the range in which the heart rate should move during effective and targeted training. In your ONYX BALANCE you can choose between the Fatburner Zone (FAT) and the Fitness Zone (FIT) depending on your personal objectives. In addition, you are able to determine your own zone limits (OWN) by manually setting the upper and lower limits of your watch. You can find more information about this in Chapter 3.1 “USER” (user settings).
1. FAT (Fatburner Zone):
approx. 55–70 % of the max. HR
Aimed at: Training for beginners or those starting again. When training at a lower intensity and therefore for a longer period, in percentage terms more fat that carbohydrates are used to provide energy. People who primarily want to reduce their weight and burn fat should therefore train in this range. A training time of 45-90 min. is recommended.
5.1 INFORMATION ON HEART RATE
Beginners, who have not done any sport for a long time, should also start with training at this intensity level first. This significantly reduces the risk of over-exertion and the associated health risks.
2. FIT (Fitness Zone):
70-80 % of the max. HR
Aimed at: Advanced level fitness
You train much more intensively in the fitness zone. In this zone, a higher proportion of the immediately available carbohydrates are used as a source of energy. Training in this intensity strengthens the heart circulation system and basic aerobic stamina.
3. OWN (Individual Zone):
The ONYX BALANCE also gives you the possibility to set your own training zone. To do this, in the “ZONE OWN” menu heading change the lower limit (LOW) and the upper limit (HIGH) using the bottom button.
Note:
Please always note that general plans can never address personal needs! Therefore really ideal training can only be designed by a well educated trainer who knows the sportsperson personally.
Frequently asked questions and service
What happens if I remove the chest belt during training?
The watch will no longer pick up a signal, the screen will indicate "O". If the stopwatch is not running, the ONYX BALANCE goes into sleep mode after a short time.
Do SIGMA heart rate monitors switch off completely?
No – in sleep mode only the time and date are displayed so you can use the heart rate monitor as a normal watch. In this state the ONYX BALANCE uses only very little power.
Why does the display react slowly or turn to a black colour?
The operating temperature may be too high or low. Your heart rate monitor is designed for temperatures between 0^ C and 55^ C.
What should I do if the screen display is weak?
A weak display may be due to weak batteries. You should change them as quickly as possible - battery type CR 2032 (Item No. 00342)
5.3 TROUBLESHOOTING
No signal was found. Please ensure you have attached your chest belt correctly. Switch the watch off and on again to restart synchronisation.
During synchronisation two or more chest belts with the same frequency were found close by. Move away and press any button.
Important information
If no heart rate is shown on the display, this may be due to the following reasons:
→ The chest belt is not attached properly.
→ The sensors (electrodes) on the heart rate monitor are dirty or dry.
→ There is interference from electrical sources.
(e.g. high voltage lines, railways etc.)
→ The transmitter battery (CR 2032) is dead (Item no. 00342).
Before starting to train, please consult your doctor - particularly if you have cardio-vascular problems.
5.4 CHANGING THE BATTERY AND WARRANTY
natural_image
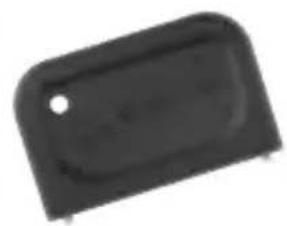
Black plastic object with rounded edges and a small hole, no visible text or symbolsChanging the battery
Battery CR 2032 (item no. 00342) is used in the heart rate monitor and chest belt.
The ONYX BALANCE comes with a battery compartment. Open the battery compartment with its key, change the battery and close the battery compartment again.
The chest belt also has a battery compartment, meaning that users can very easily change the battery themselves.
Waterproofing
The ONYX BALANCE is waterproof down to 10 m.
Do not press any buttons under water.
Warranty
We are liable to our contractual partner for faults as defined by law. Batteries are excluded from the warranty. If you need to use the warranty please contact the dealer where you bought the heart rate monitor or send the monitor with proof of purchase and all accessories with adequate postage to:
5.4 CHANGING THE BATTERY AND WARRANTY
SIGMA Elektro GmbH
If your warranty claim is justified we will send you a replacement
unit. You only have the right to the current model at the time.
The manufacturer reserves the right to make technical changes.

natural_image
Simple line drawing of a symmetrical object with a red rectangular outline and diagonal lines, no text or symbols present.2.3 MISE EN PLACE DE LA SANGLE THORACIqUE / DU SUPPORT SUR LE GUIDON
natural_image
Diagram of a mechanical component with red arrows indicating motion or force direction (no text or symbols)3. REGLAGES AVANT LE PREMIER ENTRAÎNEMENT → MENU DE REGLAGE

Mode Actif
5. AUTRES INFORMATIONS
5.1 INFORMATIONS SUR LA FREQUENCE CARDIAQUE
natural_image
Black plastic object with rounded corners and a small hole, no visible text or symbols
natural_image
Diagram of a mechanical component with red arrows indicating motion or force direction (no text or symbols)
2. FIT (Zona fitness): 70-80 % della FC max.
Modalità attiva

2. FIT (Zona fitness):
natural_image
Black plastic object with rounded corners and a small hole, no visible text or symbolsnatural_image
Diagram of a symmetrical red rectangular shape with internal concentric rings, no text or symbols presentnatural_image
Diagram of a mechanical component with red arrows indicating motion or force direction (no text or symbols)3. AJUSTES PREVIOS AL PRIMER ENTRENAMIENTO → EL MENÚ DE AJUSTES
Modo activo

5. MÁS INFORMACIÓN
natural_image
Black plastic object with rounded corners and a small hole, no visible text or symbolsCambio de pilas
natural_image
Simple line drawing of a symmetrical object with a red rectangular outline and internal lines (no text or symbols)2.3 OMDOEN VAN DE BORSTRIEM / MONTAGE VAN DE STUURBEVESTIGING
natural_image
Diagram of a mechanical component with red arrows indicating motion or force direction (no text or symbols)3. INSTELLINGEN VÓÓR DE EERSTE TRAINING → HET INSTELLINGSMENU

Actieve modus
5. VERDERE INFORMATIE
5.1 WETENSWAARDIGHEDEN OVER DE HARTFREQUENTIE
natural_image
Black plastic object with rounded corners and a small hole, no visible text or symbolsBatterij vervangen
You can find the CE Declaration under: www.sigmasport.com
GB Batteries may not be disposed of in household waste (Germany Battery Law - BattG).
US Please hand in the batteries at a nominated hand-over point for disposal.
Asia, Australia, South America, Africa
10F, No.192, Zhonggong 2 ^nd Rd.,
Xitun Dist., Taichung City 407, Taiwan

- ONYX BALANCE
- ANLEGEN DES BRUSTGURTES / LENKERHALTERUNG
- Aktivmodus
- FAT (Fatburner Zone):
- FIT (Fitness Zone):
- 70-80 % der HF max.
- FOREWORD AND PACKAGE CONTENTS
- Heart rate monitor ONYX BALANCE
- BASIC OPERATING PRINCIPLE
- MENU SUMMARY
- The main menu
- The settings menu
- Top button:
- Pressing both buttons simultaneously:
- Bottom button:
- ATTACHING THE CHEST BELT / HANDLEBAR HOLDER
- SETTINGS BEFORE THE FIRST TRAINING → THE SETTINGS MENU
- USER (User settings)
- Maximum heart rate
- ZONE (Zone settings)
- FAT (Fatburner Zone): approx. 55–70 % of the max. HR
- FIT (Fitness Zone): 70-80% of the max. HR
- OWN (Individual Zone):
- TIME (Time settings)
- DATE (Date settings)
- TONE (Zone alarm tone settings)
- TRAINING WITH THE ONYX BALANCE
- Active mode
- Synchronisation between watch and chest belt
- Stopwatch / Training time
- Kcal
- AVG (Average)
- Time
- Upper and lower limit of the training zone
- Sleep mode
- FURTHER INFORMATION
- INFORMATION ON HEART RATE
- The right training pulse
- 70-80 % of the max. HR
- Note:
- Frequently asked questions and service
- TROUBLESHOOTING
- Important information
- CHANGING THE BATTERY AND WARRANTY
- Changing the battery
- Waterproofing
- Warranty
- MISE EN PLACE DE LA SANGLE THORACIqUE / DU SUPPORT SUR LE GUIDON
- REGLAGES AVANT LE PREMIER ENTRAÎNEMENT → MENU DE REGLAGE
- Mode Actif
- AUTRES INFORMATIONS
- INFORMATIONS SUR LA FREQUENCE CARDIAQUE
- FIT (Zona fitness): 70-80 % della FC max.
- Modalità attiva
- FIT (Zona fitness):
- AJUSTES PREVIOS AL PRIMER ENTRENAMIENTO → EL MENÚ DE AJUSTES
- Modo activo
- MÁS INFORMACIÓN
- Cambio de pilas
- OMDOEN VAN DE BORSTRIEM / MONTAGE VAN DE STUURBEVESTIGING
- INSTELLINGEN VÓÓR DE EERSTE TRAINING → HET INSTELLINGSMENU
- Actieve modus
- VERDERE INFORMATIE
- WETENSWAARDIGHEDEN OVER DE HARTFREQUENTIE
- Batterij vervangen
- You can find the CE Declaration under: www.sigmasport.com
Brand : SIGMA
Model : Sport Onyx Balance
Category : Heart rate monitor