LC32LE450U - Téléviseur SHARP - Free user manual and instructions
Find the device manual for free LC32LE450U SHARP in PDF.
Download the instructions for your Téléviseur in PDF format for free! Find your manual LC32LE450U - SHARP and take your electronic device back in hand. On this page are published all the documents necessary for the use of your device. LC32LE450U by SHARP.
USER MANUAL LC32LE450U SHARP
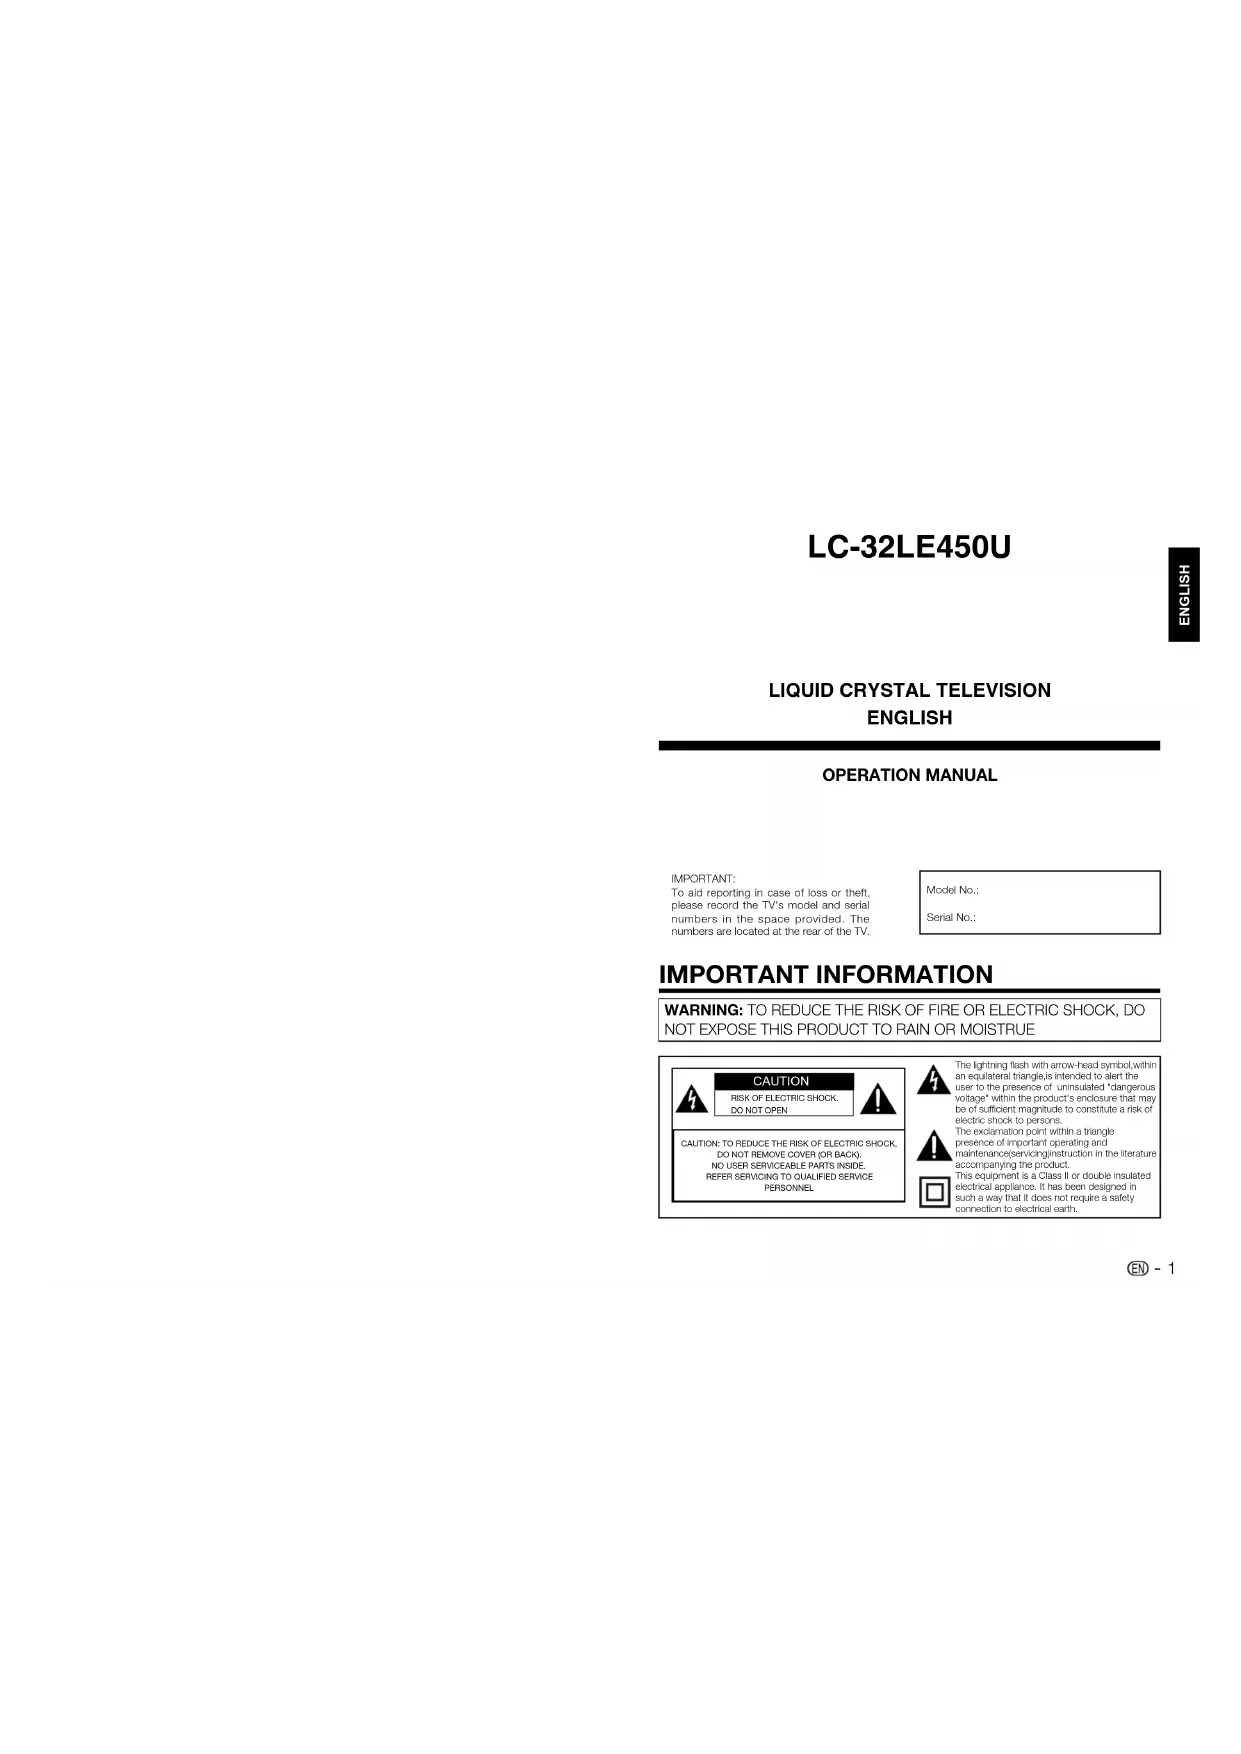
ENGLISH LC-32LE450U IMPORTANT INFORMATION LIQUID CRYSTAL TELEVISION ENGLISH WARNING: TO REDUCE THE RISK OF FIRE OR ELECTRIC SHOCK, DO NOT EXPOSE THIS PRODUCT TO RAIN OR MOISTRUE OPERATION MANUAL IMPORTANT:To aid reporting in case of loss or theft, please record the TV's model and serial numbers in the space provided. The numbers are located at the rear of the TV.The lightning flash with arrow-head symbol,within an equilateral triangle,is intended to alert the user to the presence of uninsulated "dangerous voltage" within the product's enclosure that may be of sufficient magnitude to constitute a risk of electric shock to persons.The exclamation point within a triangle presence of important operating and maintenance(servicing)instruction in the literature accompanying the product.This equipment is a Class II or double insulated electrical appliance. It has been designed in such a way that it does not require a safety connection to electrical earth. Model No.: Serial No.:CAUTION: TO REDUCE THE RISK OF ELECTRIC SHOCK, DO NOT REMOVE COVER (OR BACK). NO USER SERVICEABLE PARTS INSIDE. REFER SERVICING TO QUALIFIED SERVICE PERSONNELCAUTIONRISK OF ELECTRIC SHOCK.DO NOT OPEN2
IMPORTANT INFORMATION TRADEMARKS CAUTION: TO PREVENT ELECTRIC SHOCK, MATCH WIDE BLADE OF PLUG TO WIDE SLOT,
WARNING: FCC Regulations state that any unauthorized changes or modifications to this
equipment not expressly approved by the manufacturer could void the user’s authority to operate
This product satisfies FCC Regulations when shielded cables and connectors are used to connect
the unit to other equipment. To prevent electromagnetic intereference with electric appliances such
as radios and televistions, use shielded cables and connectors for connections.
DECLARATION OF CONFORMITY:
SHARP LIQUID CRYSTAL TELEVISION, MODEL LC-32LE450U This device complies with Part
15 of the FCC Rules. Operation is subject to the following two conditions: (1) This device may not
cause harmful interference, and (2) this device must accept any interference received, including
interference that may cause undesired operation. RESPONSIBLE PARTY:
SHARP ELECTRONICS CORPORATION Sharp Plaza, Mahwah, New Jersey 07495-1163
TEL: 1-800-BE-SHARP For Business Customers: URL http://www.sharpusa.com INFORMATION: This equipment has been tested and found to comply with the limits for a Class B digital device,
pursuant to Part 15 of the FCC Rules. These limits are designed to provide reasonable protection
against harmful interference in a residential installation. This equipment generates, uses and can
radiate radio frequency energy and, if not installed and used in accordance with the instructions,
may cause harmful interference to radio communications. However, there is no guarantee
that interference will not occur in a particular installation. If this equipment does cause harmful
interference to radio or television reception, which can be determined by turning the equipment off
and on, the user is encouraged to try to correct the interference by one or more of the following
— Reorient or relocate the receiving antenna.
— Increase the separation between the equipment and receiver.
— Connect the equipment into an outlet on a circuit different from that to which the receiver is
— Consult the dealer or an experienced radio/TV technician for help.
Note to CATV system installer: This reminder is provided to call the CATV system installer’s attention
to Article 820 of the National Electrical Code that provides guidelines for proper grounding and, in
particular, specifies that the cable ground shall be connected to the grounding system of the building,
as close to the point of cable entry as practical.
HDMI, the HDMI logo, and High-Definition Multimedia Interface are trademarks or
registered trademarks of HDMI Licensing LLC in the United States and other countries.
Manufactured under license from Dolby Laboratories. Dolby and the double-D symbol
are trademarks of Dolby Laboratories.
DEAR SHARP CUSTOMER IMPORTANT SAFETY INSTRUCTIONS Thank you for your purchase of the Sharp Liquid Crystal Television. To ensure safety and many
years of trouble-free operation of your product, please read the Important Safety Instructions
carefully before using this product.
1) Read these instructions.
2) Keep these instructions.
3) Heed all warnings.
4) Follow all instructions.
5) Do not use this apparatus near water.
6) Clean only with dry cloth.
7) Do not block any ventilation openings. Install in accordance with the manufacturer’s
8) Do not install near any heat sources such as radiators, heat registers, stoves, or other
apparatus (including amplifiers) that produce heat.
9) Protect the power cord from being walked on or pinched particularly at plugs, convenience
receptacles, and the point where they exit from the apparatus.
10) Only use attachments/accessories specified by the manufacturer.
11) Use only with the cart, stand, tripod, bracket, or table specified by the manufacturer, or
sold with the apparatus. When a cart is used, use caution when moving the cart/apparatus
combination to avoid injury from tip-over.
12) Unplug this apparatus during lightning storms or when unused for long periods of time.
13) Refer all servicing to qualified service personnel. Servicing is required when
the apparatus has been damaged in any way, such as power-supply cord
or plug is damaged, liquid has been spilled or objects have fallen into the
apparatus, the apparatus has been exposed to rain or moisture, does not
operate normally, or has been dropped.
14) WARNING: To reduce the risk of fire or electric shock, do not expose this apparatus to rain
15) Where the MAINS plug or an appliance coupler is used as the disconnect device, the
disconnect device shall remain readily operable.
16) The apparatus shall not be exposed to dripping or splashing and that no objects filled with
liquids, suchas vases, shall be placed on the apparatus.
Additional Safety Information
17) Power Sources—This product should be operated only from the type of power source
indicated on the marking label. If you are not sure of the type of power supply to your home,
consult your product dealer or local power company. For products intended to operate from battery
power, or other sources, refer to the operating instructions.
18) Overloading—Do not overload wall outlets, extension cords, or integral convenience receptacles
as this can result in a risk of fire or electric shock.
19) Object and Liquid Entry—Never push objects of any kind into this product through openings as
they may touch dangerous voltage points or short-out parts that could result in a fire or electric
shock. Never spill liquid of any kind on the product.
20) Damage Requiring Service—Unplug this product from the wall outlet and refer servicing to
qualified service personnel under the following conditions:
a) When the AC cord or plug is damaged,
b) If liquid has been spilled, or objects have fallen into the product,
c) If the product has been exposed to rain or water,
d) If the product does not operate normally by following the operating instructions. Adjust only those
controls that are covered by the operating instructions as an improper adjustment of other
controls may result in damage and will often require extensive work by a qualified technician to
restore the product to its normal operation,
e) If the product has been dropped or damaged in any way, and
f ) When the product exhibits a distinct change in performance - this indicates a need for service.4
IMPORTANT SAFETY INSTRUCTIONS
21) Replacement Parts—When replacement parts are required, be sure the service technician
has used replacement parts specified by the manufacturer or have the same characteristics as
the original part. Unauthorized substitutions may result in fire, electric shock, or other hazards.
22) Safety Check—Upon completion of any service or repairs to this product, ask the service
technician to perform safety checks to determine that the product is in proper operating
23) Wall or ceiling mounting—Use a wall mount bracket that has been listed by an independent
laboratory (such as UL, CSA, ETL).
tThese servicing instructions are for use by qualified service personnel only. To reduce the risk of
electric shock do not perform any servicing other than that contained in the operating instructions
unless you are qualified to do so.
t4UBUFNFOUJOEJDBUJOHUIBUXIFOUIFNBJOTQMVHPSBQQMJBODFDPVQMFSTIBMMSFNBJOSFBEJMZ
device shall remain readily operable.
t8IFSFBOBMMQPMF."*/448*5$)JTVTFEBTUIFEJTDPOOFDUEFWJDFUIFMPDBUJPOPOUIF
apparatus and the function of the switch shall be described, and the switch shall remain readily
t8BUFSBOE.PJTUVSF%POPUVTFUIJTQSPEVDUOFBSXBUFSGPSFYBNQMFOFBSBCBUIUVCXBTI
bowl, kitchen sink, or laundry tub; in a wet basement; or near a swimming pool; and the like.
t4UBOE%POPUQMBDFUIFQSPEVDUPOBOVOTUBCMFDBSUTUBOEUSJQPEPSUBCMF1MBDJOHUIF
product on an unstable base can cause the product to fall, resulting in serious personal injuries
as well as damage to the product. Use only a cart, stand, tripod, bracket or table recommended
by the manufacturer or sold with the product. When mounting the product on a wall, be sure to
follow the manufacturer’s instructions. Use only the mounting hardware recommended by the
t4FMFDUJOHUIFMPDBUJPO4FMFDUBQMBDFXJUIOPEJSFDUTVOMJHIUBOEHPPEWFOUJMBUJPO
t7FOUJMBUJPO5IFWFOUTBOEPUIFSPQFOJOHTJOUIFDBCJOFUBSFEFTJHOFEGPSWFOUJMBUJPO%POPU
cover or block these vents and openings since insufficient ventilation can cause overheating
and/or shorten the life of the product. Do not place the product on a bed, sofa, rug or other
similar surface, since they can block ventilation openings. This product is not designed for built-
in installation; do not place the product in an enclosed place such as a bookcase or rack, unless
proper ventilation is provided or the manufacturer’s instructions are followed.
t5IF-JRVJE$SZTUBMQBOFMVTFEJOUIJTQSPEVDUJTNBEFPGHMBTT5IFSFGPSFJUDBOCSFBLXIFOUIF
product is dropped or applied with impact. Be careful not to be injured by broken glass pieces
in case the panel breaks.
ANTENNA LEAD IN WIRE GROUND CLAMP NEC — NATIONAL ELECTRICAL CODE GROUNDING CONDUCTORS
(NEC SECTION 810-20)
tOutdoor Antenna Grounding — If an outside antenna
is connected to the television equipment, be sure the
antenna system is grounded so as to provide some
protection against voltage surges and built-up static
charges. Article 810 of the National Electrical Code,
ANSI/NFPA 70, provides information with regard to
proper grounding of the mast and supporting
structure, grounding of the lead-in wire to an antenna
discharge unit, size of grounding conductors, location
of antenna-discharge unit, connection to grounding
electrodes, and requirements for the grounding
registers, stoves, or other products (including amplifiers) that produce heat.
t5IF-JRVJE$SZTUBMQBOFMJTBWFSZIJHIUFDIOPMPHZQSPEVDUXJUIQJYFMT-$-&6
giving you fine picture details. Occasionally, a few non-active pixels may appear on the screen
as a fixed point of blue, green or red. Please note that this does not affect the performance of your
t-JHIUOJOH'PSBEEFEQSPUFDUJPOGPSUIJTUFMFWJTJPOFRVJQNFOUEVSJOHBMJHIUOJOHTUPSNPSXIFO
it is left unattended and unused for long periods of time, unplug it from the wall outlet and
disconnect the antenna. This will prevent damage to the equipment due to lightning and power-
t1PXFS-JOFT"OPVUTJEFBOUFOOBTZTUFNTIPVMEOPUCFMPDBUFEJOUIFWJDJOJUZPGPWFSIFBE
power lines or other electric light or power circuits, or where it can fall into such power lines or
circuits. When installing an outside antenna system, extreme care should be taken to keep from
touching such power lines or circuits as contact with them might be fatal.
t5PQSFWFOUGJSFOFWFSQMBDFBOZUZQFPGDBOEMFPSGMBNFTPOUIFUPQPSOFBSUIF57TFU
No objects filled with liquids, such as vases, should be placed
t%POPUJOTFSUGPSFJHOPCKFDUTJOUPUIFQSPEVDU*OTFSUJOHPCKFDUTJOUIFBJS
vents or other openings may result in fire or electric shock. Exercise special
caution when using the product around children.
Precautions when transporting the TV
t8IFOUSBOTQPSUJOHUIF57OFWFSDBSSZJUCZIPMEJOHPSPUIFSXJTFQVUUJOHQSFTTVSFPOUPUIF
display. Be sure to always carry the TV by two people holding it with two hands — one hand on
each side of the TV.
Caring for the Cabinet
t6TFBTPGUDMPUIDPUUPOGMBOOFMFUDBOEHFOUMZXJQFUIFTVSGBDFPGUIFDBCJOFU
t6TJOHBDIFNJDBMDMPUIXFUESZTIFFUUZQFDMPUIFUDNBZEFGPSNUIFDPNQPOFOUTPGUIFNBJO
unit cabinet or cause cracking.
t8JQJOHXJUIBIBSEDMPUIPSVTJOHTUSPOHGPSDFNBZTDSBUDIUIFTVSGBDFPGUIFDBCJOFU
t*GUIFDBCJOFUJTWFSZEJSUZXJQFXJUIBTPGUDMPUIDPUUPOGMBOOFMFUDTPBLFEJOOFVUSBMEFUFSHFOU
diluted with water and thoroughly wrung out, and then wipe with a soft dry cloth.
t5IFDBCJOFUJTQSJNBSJMZNBEFPGQMBTUJD"WPJEVTJOHCFO[FOFUIJOOFSBOEPUIFSTPMWFOUTBT
these may deform the cabinet and cause the paint to peel off.
t%POPUBQQMZJOTFDUJDJEFTPSPUIFSWPMBUJMFMJRVJET"MTPEPOPUBMMPXUIFDBCJOFUUPSFNBJOJO
contact with rubber or vinyl products for a long period of time. Plasticizers inside the plastic may
cause the cabinet to deform and cause the paint to peel off.
Caring for the Liquid Crystal panel
t5VSOPGGUIFNBJOQPXFSBOEVOQMVHUIF"$DPSEGSPNUIFXBMMPVUMFUCFGPSFIBOEMJOH
t(FOUMZXJQFUIFTVSGBDFPGUIFEJTQMBZQBOFMXJUIBTPGUDMPUIDPUUPOGMBOOFMFUD5PQSPUFDU
the display panel, do not use a dirty cloth, liquid cleaners, or a chemical cloth (wet/ dry sheet type
cloth, etc.). This may damage the surface of the display panel.
t8JQJOHXJUIBIBSEDMPUIPSVTJOHTUSPOHGPSDFNBZTDSBUDIUIFTVSGBDFPG
(It may scratch the surface of the display panel when wiped strongly.)
t*GUIFEJTQMBZQBOFMJTEVTUZVTFBOBOUJTUBUJDCSVTIXIJDIJTDPNNFSDJBMMZ
available, to clean it.
t5PBWPJETDSBUDIJOHUIFGSBNFPSTDSFFOQMFBTFVTFBTPGUMJOUGSFFDMPUIGPSDMFBOJOH"QQSPWFE
cleaning cloths are available directly from Sharp in single (00Z-LCD-CLOTH) or triple (00Z-LCD-
Make sure the following accessories are provided with the product.
t "MXBZTVTFUIF"$DPSETVQQMJFEXJUIUIF57
Attaching/Detaching the Stand
1. Put the TV face down on a safe surface that is covered by a soft and smooth cloth.
2. Adjust the TV stand and stand cover to the bottom of the TV and fasten the screws by using a cross-
head screwdriver (Not supplied).
t %POPUQVTIUPPIBSEPSQVUFYDFTTJWFQSFTTVSFUPUIFTUBOEOFDLUPBWPJEUIFEBNBHFT
when you turn the TV for the most comfortable viewing angle.
Stand +Stand cover (×1)
1. Attach your antenna to the back of the
television. (See page 10.)
2. Connect the AC plug for the television into the
t1MBDFUIF57DMPTFUPUIF"$PVUMFUBOELFFQ
the power plug within reach.
3. When turning on the TV for the first time,
press POWER on the television.
4. Insert the batteries into the remote control
Cautions regarding the remote control unit
t %POPUFYQPTFUIFSFNPUFDPOUSPMVOJUUP
shock. In addition, do not expose the remote
control unit to liquids, and do not place in an
area with high humidity.
t %POPUJOTUBMMPSQMBDFUIFSFNPUFDPOUSPM
unit under direct sunlight. The heat may cause
deformation of the remote control unit.
t 5IFSFNPUFDPOUSPMVOJUNBZOPUXPSL
properly if the remote control sensor on the
TV is under direct sunlight or strong lighting.
In such cases, change the angle of the
lighting or the TV, or operate the remote
control unit closer to the remote control
Use the remote control unit by pointing it towards the remote control sensor on the TV. Objects between
the remote control unit and the remote control sensor may prevent proper operation.
If the POWER indicator light on the television still does not turn off, press POWER on the remote control
to turn the power on.
IF THE UNIT DOES NOT POWER ON - UNPLUG THE TELEVISION FROM THE OUTLET AND REPEAT THE INSTALLATION STEPS.
IF YOU STILL ENCOUNTER NO POWER, PLEASE CONTACT US AT 1-800-BE-SHARP. 17´ (5 m) Remote control sensor * The angle is 17 when the stand is attached. 30º
To enjoy a clearer picture, use an outdoor antenna. The following is a brief explanation of the types of
connections that are used for a coaxial cable. If your outdoor antenna uses a 75-ohm coaxial cable with
an F-type connector, plug it into the antenna terminal at the rear of the TV set.
1. A 75-ohm system is generally a round cable
with F-type connector that can easily be
attached to a terminal without tools
(Commercially available).
2. A 300-ohm system is a flat “twin-lead” cable
that can be attached to a 75-ohm terminal
through a 300/75-ohm adapter (Commercially
When connecting the RF cable to the TV set, do
not tighten F-type connector with tools. If tools
are used, it may cause damage to your TV set.
(The breaking of internal circuit, etc.)
t Connect the antenna cable to the TV using one of the methods in the illustration as
*OTUBMMJOH#BUUFSJFTJOUIF3FNPUF$POUSPM6OJU If the remote control fails to operate TV functions, replace the batteries in the remote control unit.
1 Open the battery cover. 3 Close the battery cover.
2 Insert two “AAA” size batteries (supplied with
t1MBDFUIFCBUUFSJFTXJUIUIFJSUFSNJOBMT
corresponding to the (+) and (-)
indications in the battery compartment.
CAUTION Improper use of batteries can result in chemical leakage or explosion. Be sure to follow the
t%POPUNJYCBUUFSJFTPGEJGGFSFOUUZQFT%JGGFSFOUUZQFTPGCBUUFSJFTIBWFEJGGFSFOUDIBSBDUFSJTUJDT
batteries or cause chemical leakage in old batteries.
t3FNPWFCBUUFSJFTBTTPPOBTUIFZBSFXPSOPVU$IFNJDBMTUIBUMFBLGSPNCBUUFSJFTDPNFJO
contact with skin can cause a rash. If you find any chemical leakage, wipe thoroughly with a cloth.
Supplied Accessories7
Attaching/Detaching the Stand 7
Quick Installation Tips 8
Using the Remote Control Unit9
Connecting Antenna 10
Remote Control Unit 14
Introduction to Connections 15
Experiencing HD Images15
Types of Connection 15
Displaying an External Equipment Image Display15
$POOFDUJOHUP&YUFSOBM&RVJQNFOU16
Connecting a Blu-ray Disc/DVD Player or HD Cable/Satellite Set-top Box 16
Connecting a Game Console,VCR,Camcorder or Cable/Satellite Set-top Box 17
Connecting an Audio Amplifier 18
Connecting an AV Amplifier18
Turning On/Off the Power 20
Connecting a USB Memory Device/USB Hard Drive 36
Calling for Service 41
Dimensional Drawings
t5IFEJNFOTJPOBMESBXJOHTGPSUIF-$%57TFUBSFTIPXOPOUIFJOTJEFCBDLDPWFS
*1: See pages 16, 17, 18 and 19 for external equipment connection.
Selects preset favorite channels in four different
categories. While watching, you can toggle the
selected channels by pressing A, B, C and D.
The every key of the favorite can select the
13. AV MODE: Select an adjusted picture settings:
Standard (Energy star), DYNAMIC, MOVIE,
NATUARAL, Sports and USER. (See page 23.)
18. DISPLAY: Display the current channel (or
input source) information on the screen.
19. FREEZE: Set the still image. Press again to
25. SLEEP: Allows you to set a time when the TV
automatically switches to standby. This display
will disappear after a few seconds, and the
sleep timer automatically starts counting down.
26. CC: Display captions during closed-caption
t 8IFOVTJOHUIFSFNPUFDPOUSPMVOJUQPJOUJUBU
1. INPUT: Select a TV input source.
2. 0–9: Set the channel.
3. ENT: Jumps to a channel after selecting with
4. '-"4)#"$, Press to switch to the
previously tuned channel or external input
mode. Press again to switch back to the
currently tuned channel or external input
%JTQMBZJOHBO&YUFSOBM&RVJQNFOU*NBHF%JTQMBZ
&YQFSJFODJOH)%*NBHFT An HDTV without an HD source is just an ordinary TV.
To enjoy HD images on the TV, you should get HD programming from the following:
t0WFSUIFBJSCSPBEDBTUJOHWJB)%RVBMJUZBOUFOOB
Image quality differs depending on the terminal used. To enjoy clearer images, check the output terminals
of your external equipment and use its appropriate terminals for higher quality images. For connecting the
TV to external equipment, use commercially available cables.
t5IFJMMVTUSBUJPOTPGUIFUFSNJOBMTBSFGPSFYQMBOBUJPOQVSQPTFTBOENBZWBSZTMJHIUMZGSPNUIFBDUVBM
To view external source images, select the input source by pressing INPUT on the remote control unit or
to select the input source.
t:PVDBOBMTPTFMFDUUIFJOQVUTPVSDFCZ
pressing INPUT. Each time INPUT is
$POOFDUJOHUP&YUFSOBM&RVJQNFOU
$POOFDUJOHB#MVSBZ%JTD%7%1MBZFSPS)%$BCMF4BUFMMJUF4FUUPQ#PY You can connect many types of external equipment to your TV. To view external source images, select
the input source from INPUT on the remote control unit or on the TV. (See pages 15 and 22.)For
connecting the TV to external equipment, use commercially available cables.
When using HDMI cable (INPUT 1 or 2):
The HDMI (High Definition Multimedia Interface) terminal is an audio-video interface that enables a
connection for audio and video signals using a single cable. The HDMI terminal supports
high-resolution video input.
t5PFOKPZQEJTQMBZDBQBCJMJUZDPOOFDUZPVSFYUFSOBMFRVJQNFOUVTJOHBO)%.*DFSUJGJFEDBCMFPSB
component cable and set the equipment to 1080p output.
addition to connecting a DVI-HDMI conversion cable to the HDMI 1/DVI IN terminal, connect a
$POOFDUJOHUP&YUFSOBM&RVJQNFOU
component cable and set the equipment to 1080p output.
$POOFDUJOHUP&YUFSOBM&RVJQNFOU Connecting an Audio Amplifier
8IFOVTJOHDPBYJBMDBCMF
It is possible to output audio through the DIGITAL AUDIO terminal. PCM audio outputs from the terminal. DIGITALAUDIO OUTPUTDIGITAL AUDIO INPUTCOAXIAL Coaxial cable NOTE
t%JHJUBM"VEJPPVUQVUJTOPUBWBJMBCMFXIFOVTJOHBO)%.*JOQVU
t6TJOHBOBMPHBVEJPDPOOFDUJPOCZIFBEQIPOFKBDLXIFODPOOFDUJOHUPTPVOECBSPSFYUFSOBMTQFBLFS
Connecting an AV Amplifier
$POOFDUJOHUP&YUFSOBM&RVJQNFOU Connecting a PC Refer to page 39 for a list of PC signals compatible with the TV.
in addition to connecting a DVI-HDMI conversion cable to the INPUT 1(HDMI) terminal, connect a
Watching TV Turning On/Off the Power
Press POWER on the TV, or POWER on the remote control
unit to turn the power on.
t 108&3JOEJDBUPS1PXFSPO(SFFO1PXFSPGGSFE
Press POWER on the TV, or POWER on the remote control
unit again to turn the power off.
t 5IF57FOUFSTTUBOECZBOEUIFJNBHFPOUIFTDSFFO
be sure to remove the AC cord from the AC outlet.
t4NBMMBNPVOUPGFMFDUSJDQPXFSJTTUJMMDPOTVNFEFWFOXIFO
the TV is turned off.
t *GUIFSFJTOPTJHOBMJOQVUGPSNJOVUFTUIFQPXFSXJMMUVSO
to standby mode automatically.
When you turn on the TV for the first time, the EZ Setup will guide you through the setup process.
Perform the following steps before you press
POWER on the remote control unit.
1. Insert the batteries into the remote control
unit. (See page 11.)
2. Connect the antenna cable to the TV. (See
3. Plug in the AC cord to the AC outlet. (See
to select the desired language
listed on the screen, and then press ENTER or
2. TV Location Setting
Select "Home" or "Store" for the location where
you plan to install the TV. This product qualifes for
ENERGY STAR in Home mode default setting.
to select “Home” or “Store”
to select the current local time zone.
to continue to the next
During channel searching
t *GZPVQSFTTEXIT, TV will exit EZ Setup.
t *GZPVTLJQUIJTTUFQUIFDIBOOFMTFBSDIDBOCF
performed in the Setup Menu. (See page 31.)
After setting complete, the screen will show "Status:
Scan Complete", press ENTER or
EZ Setup.The TV will then switch to the first channe
4. Air/Cable (Antenna setting)
t .BLFTVSFXIBULJOEPGDPOOFDUJPOJTNBEF
with your TV when selecting “Air” or “Cable”.
to select “Air” or “Cable” and
5. Start Channel Scan
Channel auto search makes the TV look for all
channels viewable in the set area.
t 8IFOi"JSwPSi$BCMFwJTTFMFDUFEJO5VOFSTFUUJOH
to select "Scan", and then press
to start auto seach.
t"VUPQSPHSBNNJOHNBZUBLFNJOVUFTUP
complete. Please wait until you see the Auto
programming complete message.
Watching TV NOTE NOTE EZ Setup Time Zone
Please select your time zone:
ENTER EXIT Next Exit SelectBack
Please select your tuner mode:
ENTER EXIT Next Exit SelectBack EZ Setup Channel ScanFirst, please connect Cable or Air.Start Channel Scan now? If you skip this step, the Channel Scancould be performed in Setup menu later. Scan Skip Scan
ENTER EXIT Next Exit SelectBack EZ Setup Channel ScanFirst, please connect Cable or Air.Start Channel Scan now? If you skip this step, the Channel Scancould be performed in Setup menu later.Analog Channel Found: 5Digital Channel Found: 6Status: Scan Complete Scan Skip Scan
ENTER EXIT Next Exit SelectBack
SLEEP Allows you to set a time when the TV automatically
switches to standby. Press SLEEP.
t 5IFSFNBJOJOHUJNFEJTQMBZTXIFOUIFTMFFQ
switches as shown below.
lights red) when the remaining time reaches
Press '-"4)#"$, to switch to the previously
tuned channel or input.
t 1SFTT'-"4)#"$, again to switch back to
the currently tuned channel or input.
You can change channels by pressing
t 8IFOTFMFDUJOHBEJHJUDIBOOFMOVNCFSJUJT
not necessary to press 0 before the number.
You can change the volume by pressing
VOL + / - on the TV or on the remote control unit.
t 5PJODSFBTFUIFWPMVNFQSFTTVOL +.
2. Press INPUT again to select the input source.
ABCD ENTER The surround function produces Surround
effect from the speakers. Each time you press
SURROUND, the mode changes between On
t ON: Makes it possible to enjoy nature,realistic
t Off: Outputs the normal sound.
Allows you to capture and freeze a moving image
that you are watching.Press FREEZE.
t "NPWJOHJNBHFJTDBQUVSFE
t 1SFTTFREEZE again to cancel the function.
AV MODE gives you several viewing options
to choose from to best match the surrounding
environment of the TV, which can vary due to
factors like room brightness, type of program
watched or the type of image input from
externalequipment.Press AV MODE. Current AV MODE displays.
t 1SFTTAV MODE again before the mode
displayed on the screen disappears.
Press to select the current auido language
This function allows you to program up to 10
favorite channels, in 4 different categories. By
setting the favorite channels in advance, you can
select your favorite channel easily.
To register your favorite channel
1. Firs select the channel you want to add to the
favorite channel list, example channle A2.
2. Press one of the FAVORITE CH buttons ("#
4. Press ENTER to add this channel to the
favorite channel list A.
5. Set other favorite channels the same way.
To delete your favorite channel
1. Press one of the FAVORITE CH buttons ("#
(Favorite Channel Setting)
to select the channel you want to
3. Press ENTER to remove the channel from the
favorite channel list.
To watch your favorite channel
1. Press one of the FAVORITE CH buttons ("#
to select the channel you want to
3. Press EXIT to exit the menu.
Your TV is equipped with an internal Closed
Caption decoder. It allows you to view
conversations, narration and sound effects as
subtitles on your TV.
Closed Captions are available on some TV
programs and on some VHS home video tapes at
the discretion of the program provider.
Digital Closed Caption service is a new caption
service available only on digital TV programs
(also at the discretion of the service provider). It
is a more flexible system than the original Closed
Caption system, because it allows for a variety
of caption sizes and font styles. When the Digital
Closed Caption service is in use, it will be indicated
by the appearance of a 3-letter abbreviation that
also indicates the language of the Digital Closed
Captions: ENG (English), SPA (Spanish), FRA
(French) or other language codes.
Not all programs and VHS videotapes offer closed
In the Closed Caption system, there can be
more than one caption service provided. Each
is identified by its own number. The “CC1” to
“CC4” services display subtitles of TV programs
Favorite List A ENTER Add/Delete Select
Closed Captions (CC)24
t $MPTFE$BQUJPOTBWBJMBCJMJUZBOEDPOUFOU
depends on the broadcaster. Closed Caption
are available when the ClosedCaption icon is
displayed on screen.
t $MPTFE$BQUJPOTBOE%JHJUBM$BQUJPOTBWBJMBCJMJUZ
and content depends on the broadcaster.
Closed Caption areavailable when the Closed
Caption icon is displayed on screen.
superimposed over the program's picture.
In the Closed Caption system, there can be
more than one caption service provided. Each
is identified by its own number. The “CC1” to
“CC4” services display subtitles of TV programs
superimposed over the program's picture.
In the Closed Caption system, the “TEXT1” to
“TEXT4” services display text that is unrelated to
the program being viewed (e.g., weather or news).
These services are also superimposed over the
program currently being viewed.
t5IJTXJMMEJTQMBZUIFDVSSFOU$MPTFE$BQUJPO
information. Press CC to turn the Closed
Suitable for viewing
This mode is useful for 1.78:1
DVDs. When viewing 1.85:1
DVDs, Stretch mode will still
show very thin black bands
at the top and bottom of the
Suitable for stretching 4:3
programs to fill the screen.
Suitable for viewing
anamorphic DVDs in full
Normal: Keeps the origial aspect ratio in a full screen display.
&YQBOE Suitable for stretching 4:3 programs to fill the screen.
Stretch: This mode is useful for 1.78:1 DVDs. When viewing 1.85:1 DVDs, Stretch mode will still show
very thin black bands at the top and bottom of the screen.
No Overscan (720p only): You can select "No Overscan" only when receiving a 720p signal.
Zoom: Suitable for viewing wide-screen 2.35:1 aspect-ratio programs in full screen.
screen, Please change view mode to correct this.
Detects the resolution
displays an image with
pixels on the screen.
Detects the resolution
displays an image with
pixels on the screen.
Signal Type Page 31
Channel Scan Page 31
Channel Skip Page 31
Channel Edit Page 31
Input Labels Page 31
Closed Caption Page 31
Channel Block Page 33
to select a specific adjustment item,
to set functions or change
to select the desired item,
to set functions or change
Adjust the item while referring to the guide
t 0QFSBUJPOTWBSZEFQFOEJOHPOUIFGVODUJPOPS
item. Refer to the guide display corresponding
to the menu setting screen for button operations.
3. Press MENU to exit.
t 5IJTJOEJDBUFTUIFCVUUPOTUIBUDBOCFPQFSBUFE
depending on the menu setting screen.
t 5IFPQFSBUJPOTGPSTPNFTFMFDUFEJUFNTNBZCF
displayed in the operational guide bar at the
bottom of the screen.
B Item displayed in gray
his indicates that the item cannot be selected.
There are various reasons why the items cannot
be selected, but the main reasons are as
—Nothing is connected to the selected input
—The function is not compatible with the
t5IJTJOEJDBUFTUIBUUIFJUFNDBOCFTFMFDUFE
Item displayed in yellow.
t1SFTTENTER to go to the adjustment screen for
t .FOVPQUJPOTEJGGFSJOUIFTFMFDUFEJOQVUNPEFT
but the operating procedures are the same.
t 5IFTDSFFOTJOUIFPQFSBUJPONBOVBMBSFGPS
explanation purposes (some are enlarged, others
cropped) and may vary slightly from the actual
t 5IFPSEFSPGFYQMBOBUJPOTGPSFBDINFOVJUFNJO
e following pages is not necessarily in accordance
with the alignment of the items on the screen.
Using the remote control
Use the following buttons on the remote control to
Press to select a desired item on the
screen or adjust a selected item.
ENTER: Press to go to the next step or complete
RETURN: Press to return to the previous step.
Using the control panel of the main unit
You can also operate the menu with the control
panel of the main unit.
Button operations on the control panel correspond
to the ones on the remote control as shown below.
: MENU on the remote
control or EXIT on the
remote control while OSD
Adjusts the picture to your preference with the
following picture settings.
&YBNQMF PictureSoundSetupParental ControlLanguage
to select "Picture" and press
to select a specific adjustment item
to select the desired
Brightness for less brightness
Contrast for less contrast for more contrast
AV Mode (Changing Pic.Quality)
The audio and video settings can be changed to
suit the program or input content being watched.
Select from the following AV modes.
Standard(Energy star), DYNAMIC, MOVIE,
NATURAL, Sports and USER.
t 4UBOEBSE&OFSHZ4UBSJTUIFEFGBVMUTFUUJOH
if you select some other options, the power
consumption may change.
t 5IFTFMFDUBCMFJUFNTWBSZEFQFOEJOHPOUIF
for details of AV MODE settings.
Active Backlight is “On”.
t #BDLMJHIUDPOUSPMJTPOMZBWBJMBCMFXIFOCPUIUIF
OPC and Active Backlight is set to "Off".
This TV provides various advanced functions for
optimizing the picture quality.
OPC Automatically adjusts the brightness of the screen.
Off: The brightness is fixed at the value set in
t 8IFOTFUUP0OUIF0QUJDBM1JDUVSF
Control (OPC) senses the surrounding light and
automatically adjusts the backlight brightness.
Make sure nothing obstructs the OPC sensor,
which could affect its ability to sense
"DUJWF#BDLMJHIU Automatically adjusts the brightness of the
backlight according to the content of the incoming
signal. This option optimizes the picture quality
and decreases power consumption.
On: Automatically adjusts the backlight.
power consumption may exceed the requirements
of the Energy Star® qualification.
the power down when there is no signal received.
On: The power will automatically shut down if
there is no signal for 15 minutes.
Off: This function does not work.
You can adjust the sound quality to your
preference with the following settings.
&YBNQMF PictureSoundSetupParental ControlLanguage
to select "Sound" and press
to select a specific adjustment item
to set functions or change
to select the desired
The five-band equalizer allows you to adjust the
audio frequency settings. You can select one of
the five preset options or create a custom preset.
Allows you to choose a specific
Displays the different
graphic equalizer names set for each sound
preset option. Choose a band and make
adjustments. When making adjustments, the
Equalizer option automatically changes to User.
to select the desired frequency
to adjust the level. When
you have finished adjusting the levels, press
Select a desired level for
viewing a clearer video image.
tThis feature is only available in ATV, AV and
Automatically adjusts the image contrast according
(for Analog PC Input Mode Only)
is only available when the input
source is PC and your TV is receiving acomputer
signal. Select "Auto Adjust" for adjusting the
settings automatically.
t #FTVSFUPDPOOFDUUIF1$UPUIF57BOETXJUDI
it on before starting "Auto Adjust".
Ordinarily you can easily adjust the picture as
necessary to change image position using
"Auto Adjust". In some cases, however, manual
adjustment is needed to optimize the image.
Centers the image by moving it to
Centers the image by moving it up
Adjust when characters have low
contrast or when the image flickers.
Adjust when the image flickers with
t 5IFEFGBVMUDVSTPSQPTJUJPONBZOPUCFJOUIF
center, because the screen position variable
ranges may be asymmetrical.
t 5IFTDSFFOQPTJUJPOWBSJBCMFSBOHFTEFQFOEPO
the View Mode or the signal type. The ranges
can be seen on the position-setting screen.
Reset Picture Settings
For resetting all picture adjustment items to the
to select "OK" to confirm to
decrease audio from the right speaker,
decrease audio from the left speaker,
Makes it possible to enjoy natural, realistic
Outputs the normal sound.
Choose to turn on or off the TV internal speaker.
The audio output signals will not be turned off
enven though the TV speaker is off. The default
This option controls the manner in which the
sound comes through your speakers. Options
available vary according to the input selected.
Note: The Analog TV Sound option is only available
for analog channels.
(available for regular TV viewing only): This
option plays the sound in mono only. Use this
setting when receiving broadcasts with weak
This option splits the incoming stereo
audio signal into left and right channels. Most
TV programs and recorded materials have
stereo audio. The word “Stereo” appears in the
Channel Banner when you tune to a program
that is broadcast in stereo.
Second Audio Program (SAP):
plays the program’s audio in a second language,
if available. The letters “SAP” appear in the
channel banner when you tune to a program that
is broadcast with SAP information. SAP audio
is broadcast in mono only. SAP is also used to
broadcast a program’s audio with descriptions
of the video for the visually impaired.
Digital Audio Output
You can output digital audio to an AV amplifier
or similar device whose DIGITAL AUDIO INPUT
terminal is connected to the DIGITAL AUDIO OUTPUT terminal on the TV. Please select an
audio output format compatible with the audio
format of the program you are watching and the
On-Screen Display Menu
equipment connected.
The digital audio output terminal outputs
audio signal in PCM form. If your digital audio
system does not support
The digital audio output terminal
outputs audio signal in Dolby Digital form. It
reproduces sound from surround program of
Default Audio Language
choose the language you prefer for dialog on
digital channels. If the preferred language is not
broadcasted with the program, then the TV plays
the default audio for the program (usually English
in the US). There are 3 available default languages
(English, French, Spanish).
NOTE The Default Audio Language option is only
available for digital channels.
Current Audio Language
Choose from the list of languages available for the
program you’re watching. The language chosen
becomes your preferred language for all digital
channels until you turn the TV off. If the language
chosen is not being broadcasted with a program,
the TV plays the default language for the program
(usually English in the US).
NOTE The Current Audio Language option is only
available for digital channels.
On-Screen Display Menu
to select "Setup" and press
to select a specific adjustment item
to set functions or change
to select the desired
If Initial Installation does not memorize all the
channels in your region, follow the instructions
below to manually memorize the channels.
Make sure what kind of connection
is made with your TV when selecting "Air" or
Channel auto search makes the
TV look for all channels viewable in the set area.
t4FF&;4FUVQPOQBHFTUPGPSTFUUJOH
connection made with your TV and try channel
t*GZPVQSFTTUIFENTER key after channel search
finish, channel search is re-start.
You can hide channels in the
Channel List. Then, when you press the CH+ or
CH- button, the TV will skip the hidden channels.
You can still tune to these hidden channels by
pressing the number of the channel on the numeric
The Channel Edit function allows
you to add or change a channel label, only for
analog channels.You cannot change the name on
You can hide video inputs in the Input List. This
option allows you to remove the inputs from the
Input List so you do not encounter them when
pressing INPUT repeatedly.
You can add a label to a video input source to
make it easier to identify.
This function allows you to adjust the closed
caption screen appearance to suit your preference.
You can adjust 8 items:
This option allows you to choose the way closed
captioning information appears on the screen.
No captioning information displayed.
Chooses this option if you want
This option allows the closed
captioning to display (when available) whenever
the TV’s sound is muted. The captioning
information is not displayed when the sound is
used for displaying caption information, when
available. If you are unsure of the differences
among the modes, you may prefer to leave the
closed captioned mode set to CC1, which displays
complete text of the program in the primary
language in your area.
Off /CC1/CC2/CC3/CC4/TEXT1/TEXT2/
If available, this allows you to select a closed
caption service mode (1-6) for digital channels.
This function allows you to adjust the closed
caption screen appearance to suit your preference.
On mode allows you to set the options below. You
Set to "As Broadcaster" or
"Custom" mode. If Custom mode is selected,
user can modify the detail styles described
below. The setting result will be shown
immediately on the bottom of the submenu OSD.
Note: This feature is only available in TV, AV and
Selects this option to choose
a caption display size according to your
own preference. Select "Default", “Small”,
“Standard”, or “Large”.
Select a character design for
the digital closed caption text. A font is a
complete assortment of letters, numbers,
punctuation marks, etc. in a given design. You
can choose from a variety of fonts: "Default /
Digital CC Background Color
the color of the area behind the digital closed
Digital CC Background Opacity:
appearance of the area behind the digital closed
: Sets the color of the digital
closed caption text.
- Sets the appearance of
the digital closed caption text.
You can set the correct Time Zone for your area.
Eastern / Atlantic / Newfoundland / Hawaii /
Alaska / Pacific / Mountain / Central
This option allows you set the following time items:
Auto Synchronization
: choose On to acquire
the time automatically from digital channels.
When this item is set to Off, Date and Time can
: Select Auto to set the daylight
saving time for your area automatically.
the date, press Enter to confirm. (Note: using
the same way to set the time below)
: Lets you set the time manually.
: Select Once/Daily/Off.
: Allows you to set the time you
want the TV to turn itself on.
: Select Once/Daily/Off.
: Allows you to set the time you
want the TV to turn itself off.
Set the TV to turn off after a given amount of time:
90min./120min./180min./24180min..
This option allows you to see the system
information including SW Version and Model No..
This option resets all settings (except parental
control settings) to the factory defaults. When
you select this option, a confirmation box opens,
The first time you enter the Parental Control
menu, you must set a password in order to adjust
other parental control settings. To enter a V-Chip
Password, follow these steps:
1. Selelct "Change Password", press ENTER or
to enter the Change Password screen.
2. Use the number buttons to enter the four-digit
number for your password.
3. Re-enter the same code to confirm the
On-Screen Display Menu
NOTE The password must be entered before the TV
will continue with Parental settings next time.
The super password is 2458, If you forget
your password, enter it to override any existing
$IBOOFM#MPDL To block a specific channel, follow these steps:
enter the next screen with channnel list on.
to select the channel you wish to
3. Press ENTER to place a lock icon (
box to block that channel. When you tune to
that channel, you will need to enter a password
to view the channel programming.
#VUUPO#MPDL This option allows you to block (disable) or unblock
(enable) the TV panel buttons. The remote control
still tunes to any channel. If you are using this to
keep children from changing channels, be sure
to remove access to any remote that is capable
of operating the TV while you have the TV panel
button blocked. To block the TV panel buttons,
select Parental Control > Button Block, and press
to choose the On option. To enable these
buttons again, return to this menu and choose the
V-CHIP is an electronic filtering device built into
your TV. This tool gives parents a great degree
of control over broadcasts accessed by their
children. It allows parents to select programs
judged suitable for child viewing while blocking
ones judged not suitable. It does so automatically
once you activate the V-CHIP feature in your TV.
"V-Chip" and "Rating Enable" will not be selectable
from the menu if you do not first configure your
t 5IF64IBTUXPSBUJOHTZTUFNTGPSWJFXJOH
content: TV Parental Guidelines and movie
t 5IF571BSFOUBM(VJEFMJOFTXPSLJODPOKVODUJPO
with the V-CHIP to help parents screen out
inappropriate television shows from their
t .PWJFSBUJOHTBSFVTFEGPSPSJHJOBMNPWJFTSBUFE
by the Motion Picture Association of America
(MPAA) as watched on cable TV and not edited
for television. The V-CHIP can also be set to
block MPAA-rated movies.
t 5IFTFUUJOHBVUPNBUJDBMMZFOUFST#MPDLGPSBOZ
ratings below your selection.
t *G3BUJOH&OBCMFJTOPUTFUUP0OUIF
configuration settings will not work.
Used to enable or disable the parental control
function. This function will not be selectable from
U.S. V-Chip TV Ratings (TV Parental
You can automatically block all
program ratings above a specified age-based
A D L S V FV Allowed Rating
to adjust the item to your desired
position and press ENTER to confirm. "
indicates the item is blocked. Press MENU to exit.
Directed to older children.
Parental Guidance suggested.
Parents strongly cautioned.
Mature audience only.
When setting an individual content-based
to access blocked content items
from the currently selected age-based rating34
to select an individual item, and
then press ENTER to block or unblock it ( "
is removed). Repeat the same steps for the
3. Press MENU to exit after all individual content
rating items are set.
Sexually suggestive dialog.
U.S. V-Chip Movie Ratings (MPAA)
to adjust the item to your desired
position and press ENTER to confirm. "
indicates the item is blocked. Press MENU to exit.
PG Parental guidance suggested
Unsuitable for children under 13
R Restricted, under 17 requires companying
parent or adult guardian
No one under 17 admitted
X Mature audience only
t 5IF57SBUJOHTZTUFNTJO$BOBEBBSFCBTFEPO
the Canadian Radio-Television and
Telecommunications Commission (CRTC) policy
on violence in television programming.
t 8IJMFWJPMFODFJTUIFNPTUJNQPSUBOUDPOUFOU
element to be rated, the structure developed
takes into consideration other program content
like language, nudity, sexuality and mature
t 8IFOTFUUJOHUIF7$)*1POUIF$BOBEJBO
system you can choose either the Canadian
English Ratings or the Canadian French Ratings.
Canadian English Ratings
to adjust the item to your desired
position and press ENTER to confirm. "
indicates the item is blocked. Press MENU to exit.
C: Children: Intended for younger children under
the of 8 years. Pays careful attention to themes
that could threaten their sense of security and
C8+: Children over 8 years old: Contains
no portrayal of violence as the preferred,
acceptable, or only way to resolve conflict;
nor encourage children to imitate dangerous
acts which they may see on the screen.
G:General: Considered acceptable for all age
groups.Appropriate viewing for the entire family,
contains very little violence, physical, verbal or
PG: Parental Guidance: Intended for a general
audience, but may not be suitable for younger
children (under the age of 8) because it could
contain controversial themes or issues.
14+: Over 14 years: Could contain themes where
violence is one of the dominant elements
of the storyline, but it must be integral to the
development of plot or character. Language
usage could be profane and nudity present
within the context of the theme.
18+: Adults: Intended for viewers 18 years and
older and might contain depictions of violence,
which while related to the development
of plot, character or themes, are intended for
adult viewing. Could contain graphic language
and portrayals of sex and nudity.
Canadian French Ratings
to adjust the item to your desired
position and press ENTER to confirm. "
indicates the item is blocked. Press MENU to exit.
General: All ages and children, contains
minimal direct violence, but maybe integrated
into the plot in a humorous or unrealistic
General but inadvisable for young children:
May be viewed by a wide public audience, but
could contain scenes disturbing to children
under 8 who cannot distinguish between
imaginary and real situations. Recommended
for viewing with parent.
Over 13 years: Could contain
scenes of frequent violent scenes and therefore
recommended for viewing with parent.
Over 16 years: Could contain frequent
violent scenes and intense violence.
Over 18 years: Only for adult viewing.
Could contain frequent violent scenes and
6O3BUFE&YFNQU3BUJOHT The Unrated/Exempt Ratings option lets you
decide if programs that the V-Chip recognizes
as unrated or exempt can be viewed. Unrated
TV programs may include news, sports, political,
religious, local and weather programs, emergency
bulletins, public announcements, and programs
without ratings. The Exempt option applies to both
On-Screen Display Menu
US and Canadian unrated programs and Canadian
to toggle between View and Block.
View: All unrated programs are available.
#MPDL All unrated programs are not available.
Allows you to select the downloadable rating level.
In the event that a new rating system is provided
by the broadcaster, the new rating options would
appear within this menu.
Reset Downloadable Data
Allows you to reset the downloadable rating data,
*OQVU#MPDL Allows you to block the input. When you tune to
that input, you will need to enter a password to
This option allows you to unlock all locked
channels. Press ENTER or
to select "OK", press ENTER to confirm.
Allows you to select the OSD menu language from
English, Spanish, or French.36
Enjoying Photo/Music Playback
You can connect the TV to a USB memory device,
USB hard drive to enjoy viewing pictures, listening to
hard drive, the TV may not be able to recognize
t*UNBZUBLFUJNFUPSFBEUIFSFDPSEFEEBUBJGUIF
USB memory device/USB hard drive contains
many files or folders.
t0OMZTVQQQPSU'"5GPSNBUBOEVOQBSUJUJPOFE
$POOFDUJOHB64#.FNPSZ
%FWJDF64#)BSE%SJWF Insert the USB memory device with recorded
photos, or music into the USB terminal on the TV.
USB Memory, USB card reader (Mass
Storage class), USB hard drive
64#%FWJDF$PNQBUJCJMJUZ
1.Press INPUT to select USB from the input list or
64# direct button to enter it.
or file folder, press ENTER and use the following
Select to display the thumbnail of the
folders/files, only available for photo folders/files.
Slideshow: Select to start photo slideshow. The
menu line is grayed-out if there is no photo file in
the root of the current USB device.
Play Music: Select to playback the music. The
menu line is grayed-out if there is no music file in
the root of the current U disk.
Return: Select to return to the previous menu. Media Browser Media SettingsENTER EXIT Enter EXIT Select
Select to display Photo Settings
Slideshow Interval: Select the Slideshow
Interval: 5 Seconds, 10 Seconds, 20 Seconds.
Slideshow Effect: Select the Slideshow Effect.
Slideshow Repeat: Select the options: Off/On.
Music Play Mode: Select the options: Once,
Music Play Repeat: Select the options: Off/On.
Music Auto Play: Select the options: Off/On.
If select On, when you enter USB and there are
music files, it will play music automatically.
Enter this directory.
When selecting a photo thumbnail:
When selecting a music file: Play
Return Return to the previous process.
20.) If the indicator on the TV is still red, press POWER on the TV.
t&YUFSOBMJOnVFODFTTVDIBTMJHIUOJOHTUBUJDFMFDUSJDJUZNBZDBVTF
improper operation. In this case, operate the unit after first turning off the
power of the TV or unplugging the AC cord and re-plugging it after 1 or 2
tThe TV sometimes makes
t5IJTJTOPUBNBMGVODUJPO5IJTIBQQFOTXIFOUIFDBCJOFUTMJHIUMZFYQBOET
and contracts according to change in temperature. This does not affect
the TV’s performance.
If you forgot the password number, reset the secret number by following the procedures below:
2. Select “Parental Control”,press “ENTER”
3. Press number 2458
4. Select “Change Password”,press “ENTER”
CLEARING THE MASTER PASSWORD
keep it in a safe place.
CATV 1-135ch (non-scrambled channel only)
1-135ch (non-scrambled channel only)
HDMI 2 HDMI in with HDCP USB Photo/Music mode, Software update
Headphone Headphone out
Composite Composite in with L/R audio
Component Component (Audio shared with composite)
PC IN ANALOG RGB (PC) in (15-pin mini D-sub female
connector), Audio in (Ø 3.5 mm stereo jack)
AUDIO PC/DVI Audio in (Ø 3.5 mm jack)
ANT/CABLE/SAT 75Ω Unbalance, F Type x 1 for Analog (VHF/UHF/CATV)
OSD language English/French/Spanish
Power Requirement AC 120V~60Hz
ON MODE POWER 38W Power Consumption 62W (Less than 1W Standby with AC 120V)
TV + stand 18.3 lbs./8.3 kg
TV only 15.9 lbs./7.2 kg
Vesa Size and Screw Size 100mm X 100 mm, M4 Screws
Operating temperature +32°F to +104°F (0°C to +40°C)
*1 Emergency alert messages via Cable are unreceivable. t "TQBSUPGQPMJDZPGDPOUJOVPVTJNQSPWFNFOU4)"31SFTFSWFTUIFSJHIUUPNBLFEFTJHOBOETQFDJGJDBUJPODIBOHFT
for product improvement without prior notice. The performance specification figures indicated are nominal values of production units. There may be some deviations from these values in individual units. t 0O.PEF1PXFS$POTVNQUJPOJTNFBTVSFEBDDPSEJOHUP&OFSHZ4UBSQSPHSBNSFRVJSFNFOUTGPSUFMFWJTJPOT
"QQFOEJY Cautions regarding use in high and low temperature environments
t8IFOUIFVOJUJTVTFEJOBMPXUFNQFSBUVSFTQBDFFHSPPNPGmDFUIFQJDUVSFNBZMFBWFUSBJMTPSBQQFBS
slightly delayed. This is not a malfunction, and the unit will recover when the temperature returns to normal.
t%POPUMFBWFUIFVOJUJOBIPUPSDPMEMPDBUJPO"MTPEPOPUMFBWFUIFVOJUJOBMPDBUJPOFYQPTFEUP
direct sunlight or near a heater, as this may cause the cabinet to deform and the Liquid Crystal panel to
malfunction. Storage temperature: -4°F to +140°F (-20°C to +60°C)
Some images may not be displayed in the appropriate aspect ratio depending on the resource from PC.
PC Compatibility Chart
"QQFOEJY PC Resolution
It is necessary to set the PC correctly to display XGA and WXGA signal.40
"QQFOEJY Legal notices
This device complies with Part 15 of the FCC Rules. Operation of this product is subject to the following
(1) this device may not cause harmful interference, and
(2) this device must accept any interference received, including interference that may cause undesired
This equipment has been tested and found to comply within the limits for a class B digital device,
pursuant to Part 15 of the FCC Rules. These limits are designed to provide reasonable protection against
harmful interference in a residential installation. This equipment generates, uses, and can radiate radio
frequency energy and, if not installed and used in accordance with the instructions, may cause harmful
interference to radio communications. However, there is no guarantee that interference will not occur in
a particular installation. If this equipment does cause harmful interference to radio or television reception,
which can be determined by turning the equipment off and on, the user is encouraged to try to correct
the interference by one or more of the following measures:
t3FPSJFOUPSSFMPDBUFUIFSFDFJWJOHBOUFOOB
Changes or modifications not expressly approved by the party responsible for compliance with the FCC Rules could void the user’s authority to operate this equipment.
Connections to this device must be made with shielded cables with metallic RF/EMI connector hoods to
maintain compliance with FCC Rules and Regulations.
LIMITED WARRANTY For location of the nearest Sharp Authorized Service, or to obtain product literature, accessories, supplies,
or customer assistance, please call 1-800-BE-SHARP.
Model Specific Section
Your Product Model Number & Description:
Warranty Period for this Product:
"EEJUJPOBM&YDMVTJPOTGSPN Warranty Coverage (if any):
What to do to Obtain Service:
LC-32LE450U LED Color Television (Be sure to have this
information and Proof of Purchase available when you need
service for your Product.)
One (1) year parts and labor from date of purchase.
Image Retention resulting from a fixed image being displayed for
long periods oftime is not covered by this Limited Warranty (see
Operation Manual on how to prevent this).
Service is provided by a Sharp Authorized Service Center in the
United States. To find the location of the nearest Sharp Authorized
Service Center, call Sharp toll free at 1-800-BE-SHARP. Sharp will
provide instructions on service options available for your Product.
If it is deemed the Product is to be shipped for servicing, be sure
it is insured and packaged securely. Please use two persons to
carry the Product, transport it in original packaging or packaging
that provides comparable protection of the Product, and ensure
that the Product is covered to avoid scratches and damage.
Sharp shall not be responsible for lost, stolen or misdirected mail
or for damage to the product incurred during shipping.
For Products that are deemed in home service, a servicer will
come to your location. If necessary, the servicer may remove the
unit for repair at the service facility and return it once completed.
In home service is not available in all areas and Sharp may, at our
option, elect to provide transportation of the Product to and from
an Authorized Service Center in those areas.
CONSUMER LIMITED WARRANTY SHARP ELECTRONICS CORPORATION warrants to the first consumer purchaser that this Sharp brand Liquid Crystal
Display product (the “Product”), when shipped in its original container, will be free from defective workmanship and materials,
and agrees that it will, at its option, either repair the defect or replace the defective Product or part thereof with a new or
remanufactured equivalent at no charge to the purchaser for parts or labor for the period(s) set forth below.
This warranty does not apply to any appearance items of the Product or if the serial number or model number affixed to the
Prodct has been removed, defaced, changed, altered or tampered with. This warranty does not cover installation or signal
reception problems. This limited warranty will not apply if the Product has been or is being used in a commercial setting
or application; this warranty is meant solely for the non-commercial, household use of the Product by consumers in their
home or residence. If you intend to or already use this Product for commercial purposes or in a commercial setting, there are
warranties available to cover your use of this Product, the terms of which may vary. Please contact 1-800-BE-SHARP for
further information.
In order to enforce your rights under this limited warranty, you should follow the steps set forth below. You must be able to
provide proof of purchase to the servicer, which proof must include the date of purchase.
To the extent permitted by applicable state law, the warranties set forth are in lieu of, and exclusive of, all other warranties,
express or implied. Specifically ALL OTHER WARRANTIES OTHER THAN THOSE SET FORTH ABOVE ARE EXCLUDED,
ALL EXPRESS AND IMPLIED WARRANTIES INCLUDING THE WARRANTIES OF MERCHANTABILITY, FITNESS FOR USE, AND FITNESS FOR A PARTICULAR PURPOSE ARE SPECIFICALLY EXCLUDED. IF, UNDER APPLICABLE STATE LAW, IMPLIED WARRANTIES MAY NOT VALIDLY BE DISCLAIMED OR EXCLUDED, THE DURATION OF SUCH IMPLIED WARRANTIES IS LIMITED TO THE PERIOD(S) FROM THE DATE OF PURCHASE SET FORTH BELOW. THIS WARRANTY GIVES YOU SPECIFIC LEGAL RIGHTS. YOU MAY ALSO HAVE OTHER RIGHTS WHICH VARY FROM STATE TO STATE.
The warranties given herein shall be the sole and exclusive warranties granted by Sharp and shall be the sole and exclusive
remedy available to the purchaser and only for the time periods set forth herein. No other representations or promises made
by anyone are permitted. Correction of defects, in the manner and for the period of time described herein, shall constitute
complete fulfillment of all liabilities an responsibilities of Sharp to the purchaser with respect to the Product, and shall
constitute full satisfaction of all claims, whether based on contract, negligence, strict liability or otherwise. Sharp does not
warrant nor shall Sharp be liable, or in any way responsible, for Products which have been subject to abuse (including, but
not limited to, improper voltage), accident, misuse, negligence, lack of reasonable care, alteration, modificaton, tampering,
misuse, improper operation or maintenance or any damages or defects in the Product which were caused by repairs or
attempted repairs performed by anyone other than a Sharp authorized servicer. Nor shall Sharp be liable or in any way
responsible for any incidental or consequential economic or property damage. Some states do not allow limits on warranties
or on remedies for breach in certain transactions; in such states, the limits herein may not apply.
5)*4-*.*5&%8"33"/5:*47"-*%0/-:*/5)&'*'5:6/*5&%45"5&45)&%*453*$50'$0-6.#*"
t -FTIBVUQBSMFVSTOFQFVWFOUQBTÐUSF
t-FTJMMVTUSBUJPOTEFTDPOOFYJPOTTPOUEPOOÏFTËUJUSFJOEJDBUJGFUQFVWFOUWBSJFSMÏHÒSFNFOUQBSSBQQPSU
t 4JWPVTOFDPNQUF[QBTVUJMJTFSMFUÏMÏWJTFVSQFOEBOUVOF
t 1PVSBVHNFOUFSMFWPMVNFBQQVZF[TVSMF
Standard (Energy star) (Standard (Energy star)),
Second Audio Program (SAP) (Seconde
and Telecommunications Commission
t-FTQJMFTTPOUFMMFTJOTÏSÏFTEBOTMFCPOTFOT WPJSQBHF
t-FTQJMFTTPOUFMMFTVTÏFT 3FNQMBDF[MFTQJMFTQBSEFTOFVWFT
t6UJMJTF[WPVTMBUÏMÏDPNNBOEFTPVTVOÏDMBJSBHFGMVPSFTDFOUPVGPSU
$PVMFVSTCJ[BSSFT
ACL Taille 32” Class (31
t1BSBFWJUBSSBZBSFMNBSDPPMBQBOUBMMBVUJMJDFVOQB×PTVBWFZTJOQFMVTBTQBSBMBMJNQJF[B-PTQB×PT
t /PFYQPOHBFMDPOUSPMSFNPUPBJNQBDUPT
Connecting a Game Console,VCR,Camcorder or Cable/Satellite Set-top Box 17
Connecting an Audio Amplifier 18
Connecting an AV Amplifier18
Standard (Energy Star) (ESTÁNDAR(Energy
FMFHJSFOUSFVOBWBSJFEBEEFGVFOUFT%FGBVMU
#MPDLCMPRVFBSQBSBMBTDMBTJGJDBDJPOFT
inferiores a su selección.
t 4J3BUJOH&OBCMF"DUJWBSOJWFMFTOPFTUÈFO
0O"DUJWBEPMBTDPOGJHVSBDJPOFTEFMPT
Radio-Television and Telecommunications
MBGBNJMJBDPOUJFOFNVZQPDBWJPMFODJBGÓTJDB
bloqueado. Presione MENU (MENÚ) para salir.
G: General: All ages and children, contains
minimal direct violence, but maybe integrated
into the plot in a humorous or unrealistic
8ans+: General but inadvisable for young children:
May be viewed by a wide public audience, but
could contain scenes disturbing to children
under 8 who cannot distinguish between
imaginary and real situations. Recommended
for viewing with parent.
13ans+: Over 13 years: Could contain
scenes of frequent violent scenes and therefore
recommended for viewing with parent.
16ans+: Over 16 years: Could contain frequent
violent scenes and intense violence.
18ans+: Over 18 years: Only for adult viewing.
Could contain frequent violent scenes and
SHARP CORPORATION Printed in China