SG4311SB - Digital photo frame Hanns.G - Free user manual and instructions
Find the device manual for free SG4311SB Hanns.G in PDF.

User questions about SG4311SB Hanns.G
0 question about this device. Answer the ones you know or ask your own.
Ask a new question about this device
Download the instructions for your Digital photo frame in PDF format for free! Find your manual SG4311SB - Hanns.G and take your electronic device back in hand. On this page are published all the documents necessary for the use of your device. SG4311SB by Hanns.G.
USER MANUAL SG4311SB Hanns.G
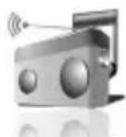
Congratulations on your purchase of this Photo Alarm Clock.
This advanced Photo Alarm Clock functions like a typical alarm clock with the advanced features of a digital photo album and music player in one.
Adaptor Source: CWT:CAP005051 XX (XX=US,EU,UK,CN)
Set the Wallpaper
The Photo Alarm Clock features seven preset wallpapers. On the main display, press or to select the wallpaper.
Selections are as follows:
- Birthday: Displays a party scene.
- Sports: Displays a sporty scene.
Normal Digital: Displays a normal scene with a digital clock. - Holiday Analog: Displays a holiday scene with an analog clock. The holiday scene changes depending on the month or season of the year. For example, Christmas scene is displayed during December 1 to December 25.
- Smart Clock: The scene automatically switches to a day wallpaper when the time is 6:00 (6:00 AM) and to a night wallpaper when the time is 18:00 (6:00 PM).
- User Mode: Displays a user-defined photo or the preset people scene.
Calendar: Displays a basic calendar wallpaper.

Date / Clock Time
Set the Date and Time
- Press to display the main menu.
- Press or to select Date / Clock Time, and press to accept option.
-
Adjust the Date and Time.
-
Press or to increase / decrease value.
- Press to go to the next field.

Alarm Time
Set the Alarm
- Press to display the main menu.
- Press or to select Alarm Time menu.
-
Adjust the Alarm Time.
-
Press or to adjust the time earlier or later.
- Press to go to the next field.
Using the Snooze Key
Press the Snooze key to reset the alarm and will sound again after
3 minutes.
Note: Pressing the Snooze key does not turn the alarm off. Use the Alarm Switch to turn off the alarm.
Turn ON / OFF the Alarm
The Alarm Switch is located at the rear of the Photo Alarm Clock.
- Set to OFF position to turn off the Alarm.
- Set to ON position to enable the Alarm function.

Setup
- Press to display the main menu.
- Press or to select Setup, then press
-
Press or then to select options to adjust. Options are:
-
Alarm Tone: Select the alarm sound of your choice: Alarm 1, Alarm 2, Alarm 3, User (user-defined music file), or FM Radio.
- Language: Set the on screen display (OSD) language.
- Clock Mode: Set the clock to 12-hour or 24-hour mode.
- Auto Lighting: Set auto lighting to ON or OFF.
Note: When the backlight turns off, use the Snooze key to turn backlight
- Low
- Medium
- High
-
Off
-
Reset: To restore the factory default settings.
-
Press for adjust setting.
- Press to apply setting and close submenu.

Sleep
Use the Sleep menu to turn the LCD display OFF after a specified time.
Set the Sleep Timer
- Press to display the main menu.
- Press or to select Sleep, and press to accept option.
- Press or to select option.
Options are:
- Off: The display is always enabled.
10 minutes
30 minutes
- 60 minutes
90 minutes
Wake Up the Clock
Press any key to wake up the Photo Alarm Clock.

Photo
Run Photo Slideshow
- Plug a USB device into the USB port of the Photo Alarm Clock.
The main menu will display. - Select Photo then press Go run Photo Slideshow.
Configure Slideshow
- Press display Photo submenu.
- Press or to select submenu option.
Options are:
- Selected as Clock Wallpaper: Select YES to set the current photo as the User Mode Wallpaper.
- Interval Time: Select slideshow interval time (5 sec., 10 sec., 30 sec., 1 min., and Off).
Volume: Set the volume (0-10). -
Exit: To stop and exit the slideshow.
-
Press then or to adjust the setting of the selected option.
- Press to close the submenu.
Note:
- Supports JPEG/BMP 1.6 megapixels.
- A few pictures might not be shown correctly on the screen if the file format is not generated based on JPEG standard.
- You can only set the User Mode wallpaper from a saved image in the USB device.

Music
Play Music
- Plug a USB device into the USB port of the Photo Alarm Clock.
The main menu will display. - Select Music then press to play Music.
- Press or to play the previous or next file.
Configure Music
- Press Qo display Music submenu.
- Press or to select submenu option.
Options are:
- Selected as Alarm Tone: Select YES to set the current music as the Alarm Tone.
Volume: Set the volume (0-10). -
Exit: To stop and exit Music.
-
Press then or adjust the setting of the selected option.
- Press to close the submenu.
Note:
- Supports MP3 8-320 kbps / WAV 32-384 kbps.
- You can only set an MP3 or WAV file as the alarm tone from a saved file in the USB device.
FM Radio
- Press to display the main menu.
- Press or to select FM Radio, then press
Set Favorite Channel
The Photo Alarm Clock supports up to 25 channels to be saved as Favorites.
- Press or to select Favorite.
- Press to display the submenu.
- Press or to select Search, then press
- To auto search for channels, press and hold or for 1.5 seconds. Press repeatedly to set the channel manually.
- Press twice to save as favorite.
Use the FM Radio
- To listen to a favorite channel press or
- Press to display FM Radio submenu.
Options are:
Volume: Set the volume (0-10).
- Search: To search for channels.
- Exit: To stop and exit FM Radio.
- Press then or t8 adjust the setting of the selected option.
- Press to close the submenu.
despertador tradicional com as