
WeatherMan - Digital photo frame INTENSO - Free user manual and instructions
Find the device manual for free WeatherMan INTENSO in PDF.
| Product type | Digital photo frame with weather station |
| Brand | Intenso |
| Model | WeatherMan |
| Screen size | 7 inches (178 mm diagonal) |
| Resolution | 800 × 600 pixels |
| Supported image format | JPEG (up to 8000 × 8000 pixels) |
| Power supply | 5V 2A DC power adapter (input 100-240V AC) |
| USB port | USB 2.0 host |
| Memory card support | SD, MMC, MS |
| Remote control | Yes (batteries included) |
| Outdoor sensor | 433 MHz transmitter, range 25 m (batteries included) |
| Weather display | Indoor/outdoor temperature and humidity |
| Calendar and clock | Yes |
| Dimensions | 158 × 190 × 80 mm |
| Weight | 484 g |
| Operating temperature | 0°C to +45°C (unit), -20°C to +50°C (outdoor sensor) |
| Storage temperature | -20°C to +60°C |
| Screen maintenance | Soft, dry cloth, specific LCD screen products |
| Safety | Do not open the casing, avoid water and humidity |
| Repairability | Leave to a specialist, do not repair yourself |
Frequently Asked Questions - WeatherMan INTENSO
User questions about WeatherMan INTENSO
0 question about this device. Answer the ones you know or ask your own.
Ask a new question about this device
Download the instructions for your Digital photo frame in PDF format for free! Find your manual WeatherMan - INTENSO and take your electronic device back in hand. On this page are published all the documents necessary for the use of your device. WeatherMan by INTENSO.
USER MANUAL WeatherMan INTENSO
A comprehensive instruction with a description of all settings can be found on our homepage: www.intenso.de
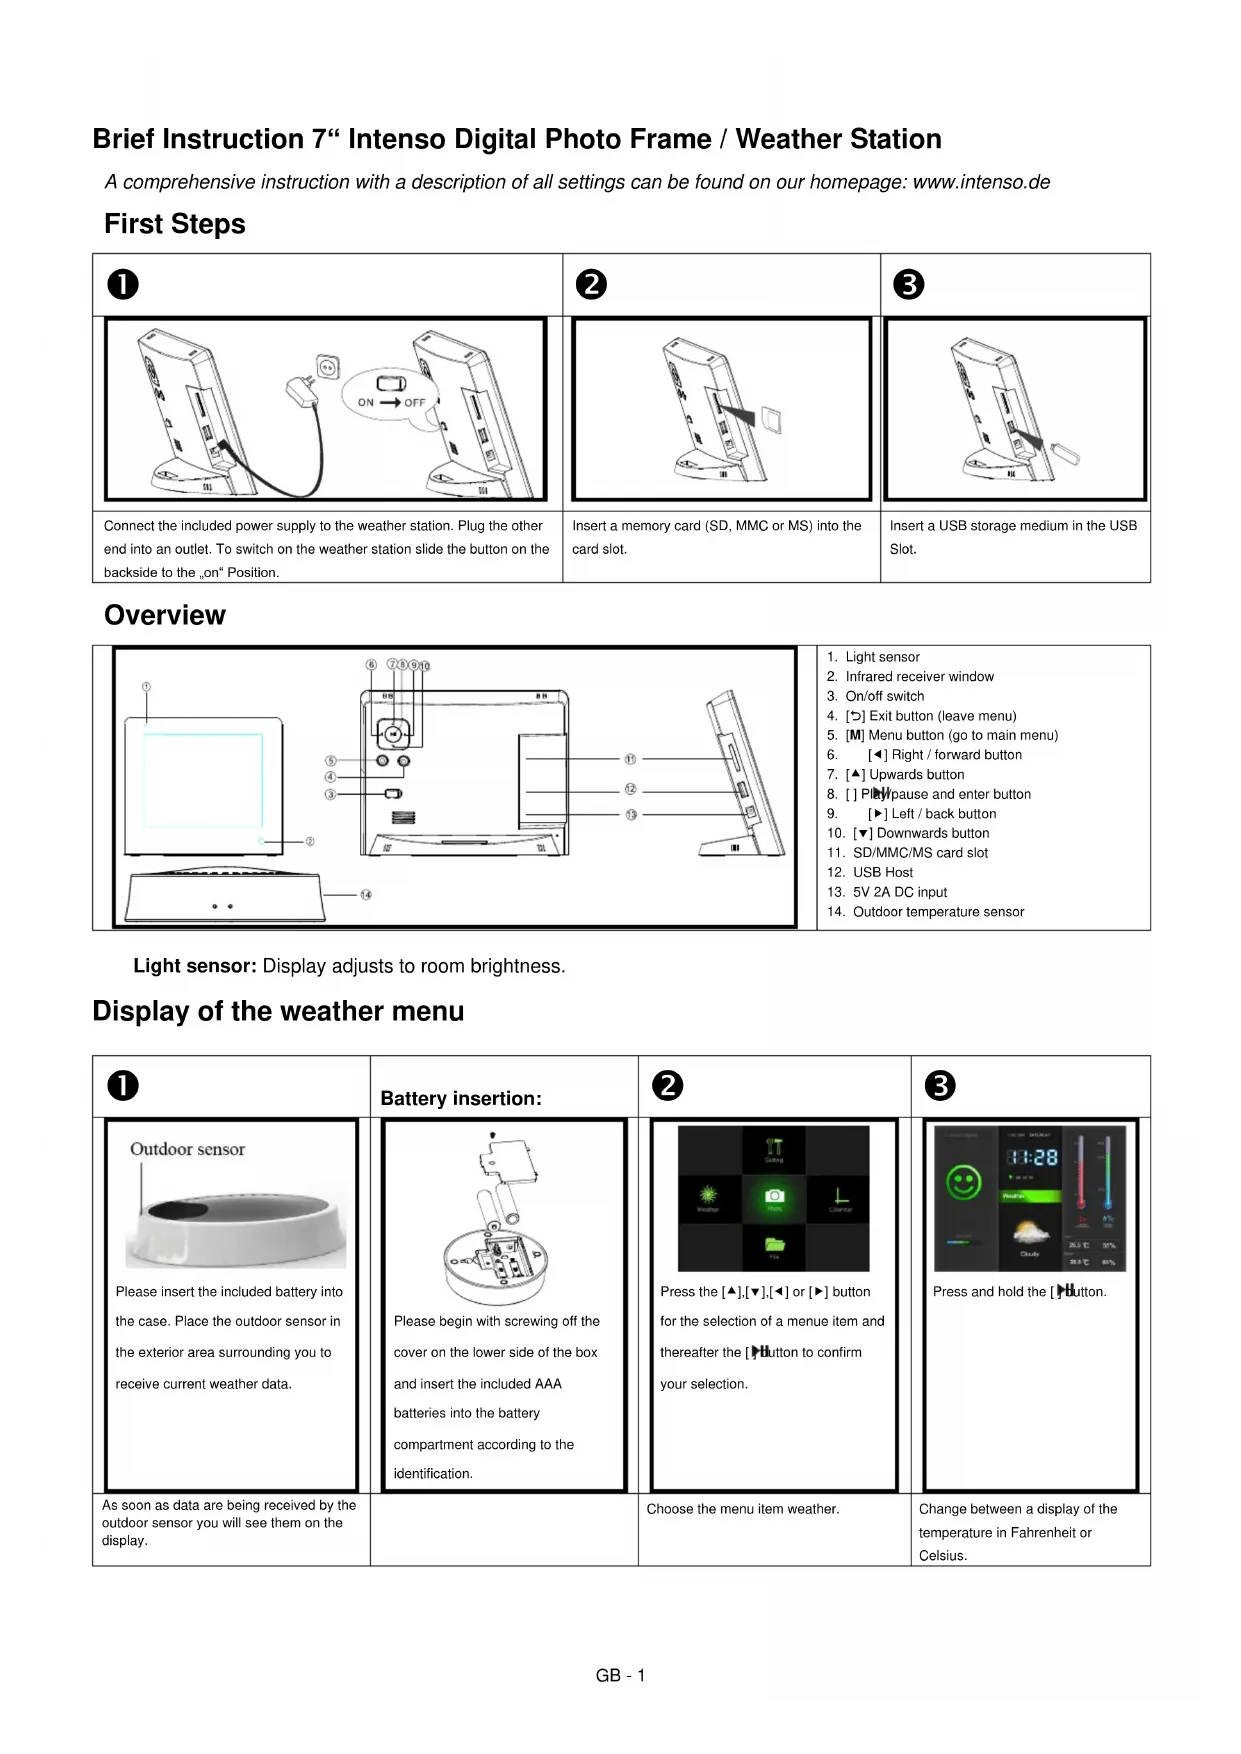
First Steps
0
Connect the included power supply to the weather station. Plug the other end into an outlet. To switch on the weather station slide the button on the backside to the on" Position.

2
Insert a memory card (SD, MMC or MS) into the card slot.
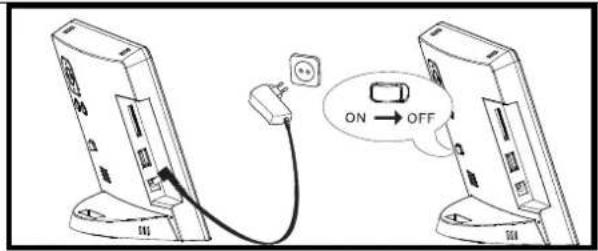
3
Insert a USB storage medium in the USB Slot.
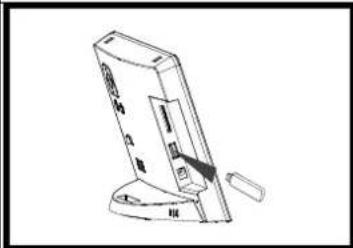
Overview
- Light sensor
- Infrared receiver window
- On/off switch
- [B] Exit button (leave menu)
- [M] Menu button (go to main menu)
- [Right / forward button]
- [▲] Upwards button
- [] PIPwpause and enter button
- [▶] Left / back button
- [▼] Downwards button
- SD/MMC/MS card slot
- USB Host
- 5V 2A DC input
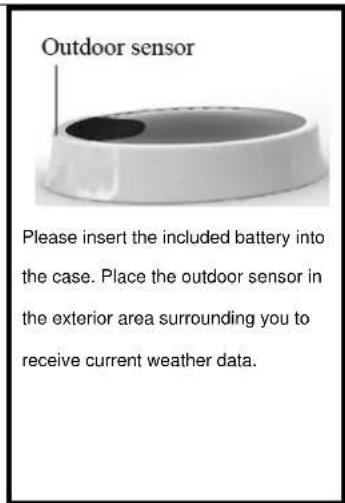
- Outdoor temperature sensor
Light sensor: Display adjusts to room brightness.
Display of the weather menu
0
As soon as data are being received by the outdoor sensor you will see them on the display.
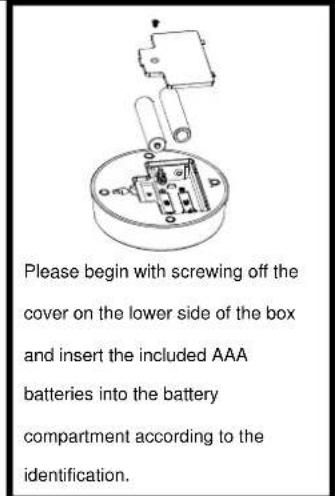
Battery insertion:
2
Choose the menu item weather.
3
Change between a display of the temperature in Fahrenheit or Celsius.
Display of photos
| 1 | 2 | 3 | |
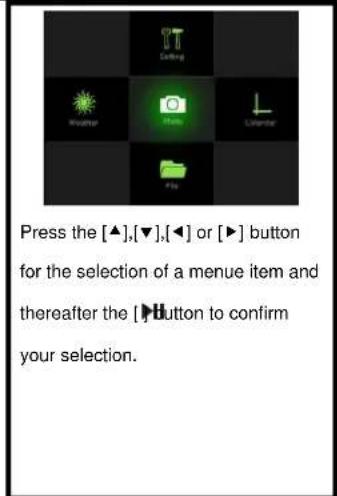
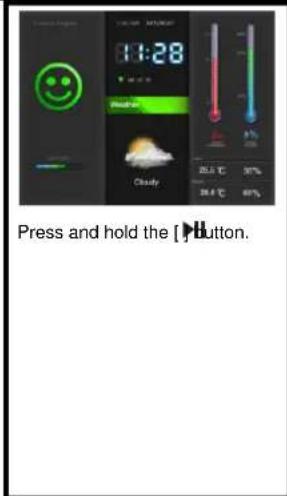
| Press the [▲],[▼],[[or]按钮 to select a menu item and thereafter the [Button to confirm your selection. | Press the [▲],[▼],[[or] button to select an image and thereafter the [Button to confirm your selection. | Press and hold the [Button. Thereafter you may choose an image by pressing the [or] button. Start a slide show by pressing the [Button. | |
| Choose the menu item photo. | Choose the desired image. | Start a slide show or view the images individually. |
Display of calendar and time
| 1 | 2 | ||
| Press the [▲],[▼],[◇] or [►] button to select a menu item and thereafter the [►] button to confirm your selection. | Press the [▲],[▼],[◇] or [►] button to go forward or backward in the calendar. | ||
| Choose the menu item calendar. |
Remote control
| 1 | L | Displaying time and calendar. |
| 2 | Displaying temperature data. | |
| 3 | Selection of setup menu. | |
| 4 | Stopping the alarm. | |
| 5 | F°/C° | Displaying temperature in Fahrenheit or Celsius. |
| 6 | Rotating photo. | |
| 7 | ▲ | Moves the cursor upwards in the menu. |
| 8 | Moves the cursor to the left in the menu. | |
| 9 | Switching on / off of weather station. | |
| 10 | Selection of the data files. | |
| 11 | Selection of the photo preview menu. | |
| 12 | Selection of the main menu. | |
| 13 | Zooming in of a photo. | |
| 14 | Returning to the previous menu item. | |
| 15 | OK | Confirming the selection. Start or pause of the slide show. |
| 16 | Moves the cursor to the right in the menu. | |
| 17 | Moves the cursor downwards in the menu. |
PRODUCT SPECIFICATIONS
| Display | Digital TFT LCD Display Size: 7 inch (178mm visible diagonal) Display mode: 4:3 Resolution: \( {800}^{ * }{600} \) Pixel |
| Power supply | Input: 100~240V AC, 50/60Hz Output: 5V 2A DC |
| USB port | USB Host 2.0 & USB Device 2.0 Supports USB memory media |
| Supported memory cards | \( {\mathrm{{SD}}}^{\mathrm{{TM}}} \) (Secure Digital Card),MMC \( {}^{\mathrm{{TM}}} \) (MultiMedia Card),MS \( {}^{\mathrm{{TM}}} \) (Memory Stick) |
| Supported image format | JPEG, maximum resolution:8000*8000 Pixel |
| Storage temperature | -20°C ~ +60°C at a humidity of <90%; Sensor: -20°C ~ +70°C at a humidity of <95% |
| Operating temperature | \( {0}^{ \circ }\mathrm{C} \sim + {45}^{ \circ }\mathrm{C} \) at a humidity of \( < {80}\% \) ; Sensor: \( - {20}^{ \circ }\mathrm{C} \sim + {50}^{ \circ }\mathrm{C} \) at a humidity of \( < {90}\% \) |
| Dimensions | 158*190*80 mm |
| Weight | 484 gr |
| Weather station | Indoor / outdoor temperature and humidity |
| Outdoor sensor | 433 MHZ sender, reach up to 25 m outdoors |
| Accessories | Remote control (incl. battery), power supply, brief instruction, outdoor sensor (incl. battery) |
CARE AND MAINTENANCE
Care
- In order to prevent danger from electric current do neither remove screws nor the case of the weather station.
- Do not operate this device near water. Do not expose the device to rain and moisture. Do not put any objects which store water or other fluids near the device.
- Do not install the picture near heaters, ovens or other heat issuing devices.
- Do not open the case. Do not try to repair the device yourself but have it repaired by qualified personnel only.
- Avoid using the device on sandy areas.
Fully insert the power supply plug into the opening of the Intenso weather station. This will prevent electrostatic charge. - Correctly and safely connect all ports.
- Do not push onto the display. Protect the display from direct sunlight.
- The picture frame only plays compatible data formats.
Images may be protected by the rights of third persons. The play back without licence may infringe copyrights. - When in operation, do not touch the Intenso weather station with metal objects.
- Avoid operating the device on pillows, sofas or other objects which support the development of heat as there is danger of overheating of the device.
- Do not remove memory cards during read operation. This may cause system crash or data loss.
- Do not switch off the device during an ongoing slide show.
Do not wrap up the device directly after longer use. Ensure sufficient enough cooling. Otherwise, there is danger of overheating. - In order to ensure a better service, changes of the operating instructions may be necessary.
Maintenance of the device
The device must be switched off.
Never spray or apply a fluid directly onto the display or case.
Cleaning the displays / case / frame
Carefully wipe the case, frame and LCD display with a soft cloth free from lint and chemicals. Only use cleaning agents which are specifically designed for LCD displays.
Disposal of electrical waste
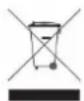
Devices marked with this symbol are subject to the EG Directive 2002/96/EG.
All electrical appliances and old appliances must be disposed off separately from the household waste and are to be returned to the state authorities designed for that purpose.
By correctly disposing of electrical old appliances environmental damage may be prevented.
YTo6bH36eKaTb HmNylbcOB TOka, He ydaIaIIte Hn BHTbI, HN KopIyc.
He nIb3yte IaHbI np6op B6n3n BO. He IaIaBaeIe np6op BnaHHIO DOxJn Hn BlaXHOCTn. He CTabIte B6n3n np6oPa IIpeMTe, KOTOpBe HAKaJIINBaHT BoHy APyHe BNbI KHKOCTeN.
He yctahabbaire daHHyio foTopamky b6h3n ortonneHH, neey nn pyrx np60p8n 3nyaiox tenno.
He otKpbbaTe KOpNc. He nIbTaTecb pemOnTHpOBaBtpnHbOp camn. PpeOCTaBBte 30 npoPeccnoHaAM.
H36eaiTe HcnoB3OBAHnHa MeCTax C neckOM.
BCTabBe BnKny IIN NOKIOUeHH 6IOKA IIHTAHN B OTBepCTHe MTeOCTaHcH NHTEHC OJIHOCTbHO. ToIbKO TAK MOKHO H36eKaTb 3NEKTPoCTaTHueCKOrO 3apda.
BbHnHnE BcE HIOCoeHNHeHH npabNtBHO HnH
He hadaabHbAaTe Ha dncnne. 3aunauTae nncnnei or cnbhbx coIHeuBx lyuei.
ΦOTOPAMKA BOCHPOH3BOJNT TOJIBKO COBMECTMbte pO pMaTbI.
ΦotorpaΦH Moryt 6bTb 3aHHeHb IpaAMn TpebNx Iu. BocnpoH3BeHc Hc foTOrpaΦH 6e3 IuHcH3Hm MoKcT 6bTb HApUHeHcM abTopcKx npa.
He npHKacaiTecb K MCTCOCTAHIN HHTECBO BPOBmpa60tbyMetaJIHueCKHMnPpMcTaMn.
H36eaihe HcnoIb30aBHHn Ha IIOuHKax, DuaHax IIpyHX IpEaMeTAX 6bItA, KOtOpble IIOUepKHBaOT pa3BHTHe TEIIHa, TAK KAK cyueCTByer OAnchoCTb HepepeBAHn np6opa.
He 3BnkeKaTe KapTb NAMrTH BO Bpemr YteHn Kapt. 3To MoKer npHBecrN K C6oR M BCHTeMe H NOTepaHaHHbx.