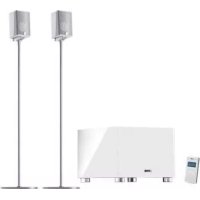
DM 20 - Home Theater System CANTON - Free user manual and instructions
Find the device manual for free DM 20 CANTON in PDF.



| Product type | Home cinema system (active center speaker with receiver) |
| Brand | Canton |
| Model | DM 20 |
| Power supply | Mains 100-240 V~, 50/60 Hz |
| Maximum power | 200 W |
| Approximate dimensions (W × H × D) | 430 × 80 × 300 mm |
| Approximate weight | 5.5 kg |
| Main functions | Virtual Surround 360°, FM RDS tuner, acoustic settings (tone control, bass expand, room compensation), multiroom (Zone 2) |
| Connections | Optical digital inputs (×2), coaxial (×2), analog line inputs (×2, one phono-compatible), subwoofer output, preamplifier output (Pre Out 2.1/5.1), Zone 2/Line output, FM antenna |
| Remote control | Universal, programmable, with LCD display and radio frequency (RF) + infrared (IR) link |
| Built-in tuner | FM (UKW) with RDS, 50 presets |
| Safety | Do not open the case, avoid moisture and heat sources, respect the voltage, disconnect before moving, do not cover the device, keep at least 5 cm from walls, do not expose to water or rain |
| Maintenance and cleaning | Use a dry cloth, no chemicals; in case of condensation, wait at least 2 hours before turning on |
| Batteries | 3 LR03 AAA 1.5 V batteries supplied (non-rechargeable) |
| Operating temperature | +10°C to +40°C |
| Installation environment | Flat, dry surface, away from windows and heat sources; maximum load on the speaker: 80 kg (for TV) |
Frequently Asked Questions - DM 20 CANTON
User questions about DM 20 CANTON
0 question about this device. Answer the ones you know or ask your own.
Ask a new question about this device
Download the instructions for your Home Theater System in PDF format for free! Find your manual DM 20 - CANTON and take your electronic device back in hand. On this page are published all the documents necessary for the use of your device. DM 20 by CANTON.
USER MANUAL DM 20 CANTON
CANTON®
German loudspeaker tradition
German loudspeaker tradition
The addresses of Canton's international distributors can be found at:
natural_image
Exterior view of a black industrial air conditioner unit (no visible text or symbols)2
natural_image
Coiled black cable with multiple connectors, no visible text or symbols3
4
natural_image
Coiled black cable with connectors and connectors, no visible text or symbols5
natural_image
Black cable with metallic connector, no visible text or symbols6
natural_image
Coiled transparent cable with black connectors and a central connector (no text or symbols visible)natural_image
Modern computer monitor mounted on a stand with a black-and-white rack beside it (no visible text or symbols)

Please read these instructions carefully and retain them so that you can refer to them again in future.
Canton does not accept liability for any damages resulting from the non-observance of the following points.
Select a base that is as level as possible for your DM System. Make sure the location is dry and clean and away from windows with direct sunlight, heat sources, vibrations, moisture and extreme cold. When setting it up on a smooth surface you should use the rubber feet supplied.
Never open the cabinet. If you come across any problems or defects contact your dealer or a qualified technician.
In order to avoid damaging your DM System it should only be used with the voltage specified on the nameplate.
In order to avoid the risk of fire or electric shocks the DM System should not be subjected to rain or high humidity ( >80% ). The equipment complies with the current EMV regulations at an ambient temperature of +10^+40^ .
Do not apply force to the operating elements, connections or cables. To move the DM System to another location first unplug the mains cable and then disconnect it from other devices. Always pull on the plugs rather than the cable. Never touch the mains cable with wet hands.
In order to prevent the DM System from overheating it should be set up at a minimum distance of 5 cm from any walls or pieces of furniture. Avoid any heat accumulation and never cover your DM System with curtains, tablecloths etc.
Do not site your DM System close to heat sources or open flames (e.g. candles).
Do not put anything on top of the cabinet of the DM System or in front of the bass reflex opening, in particular no containers filled with liquids. Movement and vibration can lead to objects being damaged.
Do not insert any objects or parts of the body into the opening of the cabinet as live components inside the cabinet may be touched and damaged. This could lead to short circuits, electric shock or fire.
If the sound reproduction is marred by distortions such as unnatural knocking, throbbing or high frequency clicking the volume should be turned down immediately.
Do not use any chemical solutions to clean the device. Use a dry, clean cloth.
Extreme changes in temperature can cause condensation to form inside the DM System. Do not use the device until the moisture has evaporated (at least 2 hours).
The remote control batteries must be disposed of at a proper battery recycling centre. Batteries should be kept out of reach of children. Batteries must be inserted the right way up. Only use the batteries specified for use with this system (LR03 AAA 1.5V) or rechargeable batteries. The batteries supplied are not rechargeable and may therefore not be recharged.
Access to the mains plug should be kept clear at all times so that the device can be unplugged in case of emergency. For your own safety please unplug the DM System from the mains if it is likely to be unused for a long period or in the event of thunderstorms or potential flooding.
The user is responsible for making sure that the device is correctly set up and correctly connected to the mains. Canton does not accept any liability for damages or accidents caused by improper set up or connection.
Warning: Listening to music at high volume, in particular over a long period of time, can damage your hearing.
Dear Customer,
Welcome to the Canton family and thank you for the confidence you have shown in us with the purchase of this system. You have selected a high quality loudspeaker system, which shows that you have high standards regarding sound quality and workmanship.
Please read through these instructions carefully before setting up and connecting your DM System. They are designed to help you to get the most out of your system. The Canton distribution network covers over 40 countries. If you have any questions our team of experienced distributors along with the authorised dealers will be happy to help you.
We hope that you get many long hours of pleasure and satisfaction from your DM System. The Canton team
System description
The virtual surround system of the DM Series creates a rich and full sound field that is normally only possible with 5.1 Systems. To achieve this sound quality the individual channels of a multi-channel recording are put through a special frequency-specific process and mixed onto two channels, which then creates the impression of surround sound in the room. The result is outstanding listening pleasure for minimum installation costs. The systems have an integrated, RDS-enabled FM Tuner and adaptive remote control, which can be used to control a second listening zone (Multiroom).
Package contents DM 90.2
The Digital Movie System DM 90.2 is supplied with the following components:
1) An active Center Surround loudspeaker with integrated audio receiver (including RDS-enabled FM Tuner).
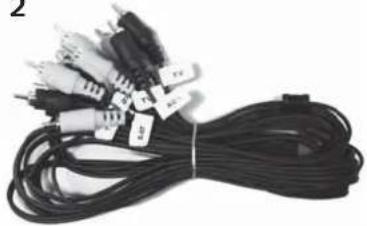
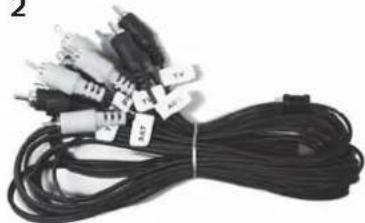
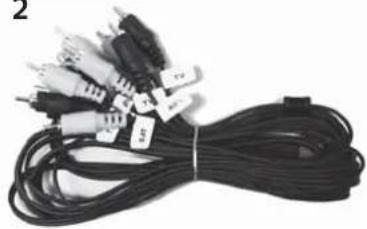
2) A cable set for connecting 3 digital and 2 analog sources.
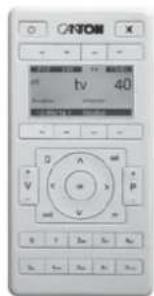
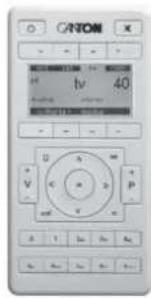
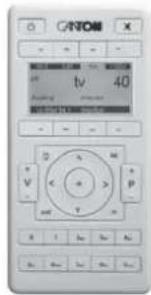
3) An easy-to-use remote control with display panel.
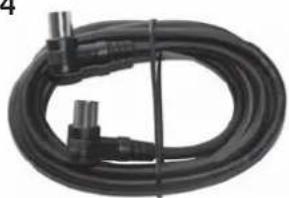
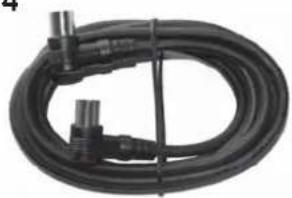
4) A coaxial cable for connection to a broadband cable network.
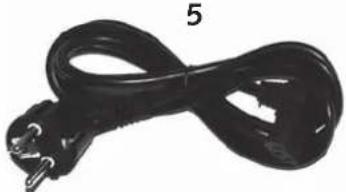
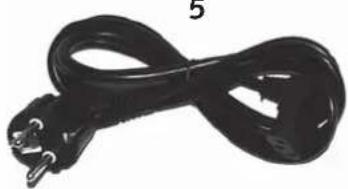
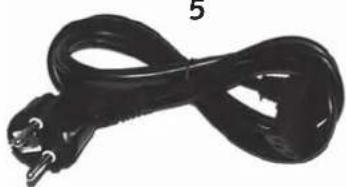
5) A power cable for connection to the mains power supply.
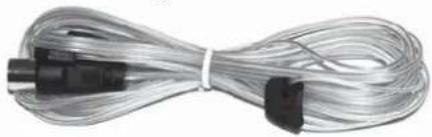
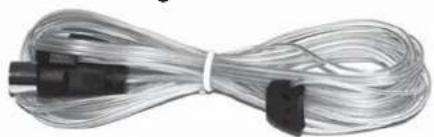
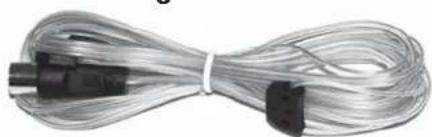
6) An aerial for VHF reception.
- Three batteries (LR03 AAA 1.5V) for the remote control
1

natural_image
Exterior view of a black Siemens air conditioner unit (no visible text or symbols on body)2
natural_image
Coiled black cable with multiple connectors (no visible text or symbols)3
4

natural_image
Coiled black cable with connectors and connectors, no visible text or symbols5
natural_image
Black electrical plug with three leads, no visible text or symbols6
natural_image
Coiled transparent cable with black connectors and a central connector (no text or symbols visible)Positioning the DM System
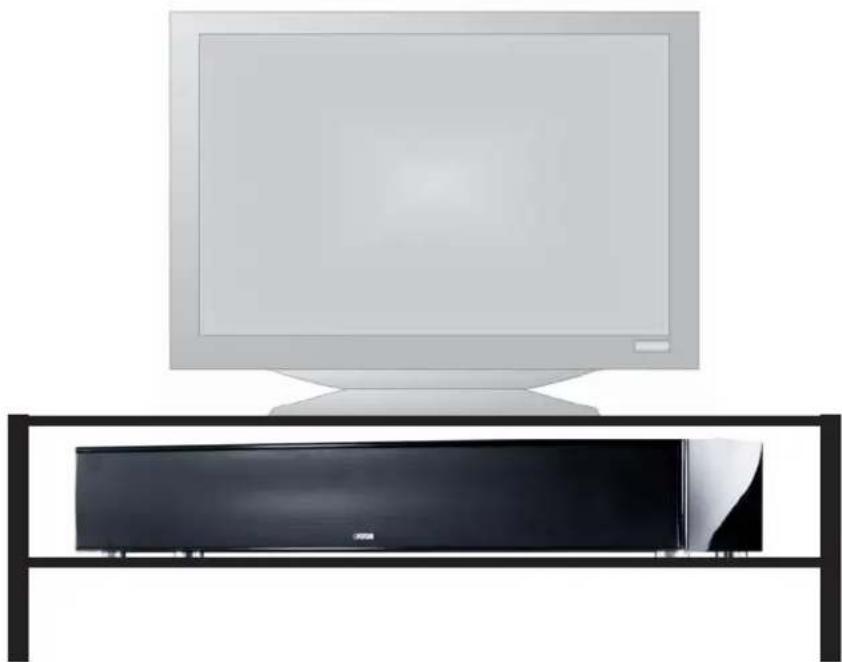
The Center Surround loudspeaker DM 90.2 should be positioned above or below the television. A flat screen TV may be placed directly on top of the DM 90.2. If using a tube TV that may be deeper than the DM System you must be careful to ensure that it is securely placed on the DM 90.2 and is not able to wobble.
Warning: The DM 90.2 can only tolerate weights of up to 80 kg.
natural_image
Modern flat-screen TV set mounted on a black stand, no visible text or symbolsRear view of the DM 90.2
![PRE OUT 2.1/5.1 mode preamplifier – output Port only for software updates FM RADIO ANTENNA DIGITAL INPUTS OPT 1 OPT 2 COAX 1 LINE 1 ANALOG INPUTS LINE 2 / PHONO SUB [MONO] PRE ZONE 2 / LINE 2.1 MODE = FRONT L+R 5.1 MODE = SURROUND L+R ANALOG OUTPUTS Operation indicator (red = standby, green = on) IR receiver Power switch Screw for earth connection CANTON DIGITAL MOVIE RIGHT OPERATION LEFT CAUTION BEFORE OPENING PULL MANGE PLUGT ACHTUNG VOR DEM DETIHN MEDESTERIOR ZONION I ATTENTION WANT-OBTURE DERIVATOR LACENTATION SECTION 100-240V~ 50-60Hz max 200W FM aerial connection Digital inputs (optical) for e.g. SAT, DVD ... Digital inputs (coaxial) for e.g. SAT, DVD ... Subwoofer – output Analog inputs for TV, VCR, record player ... Power cable socket](/content/2026/02/355567/images/bc4a31d9173ddd368d414e93bffabc0db6dc9453db87b7deb51affd546239b92.jpg)
Connecting the DM 90.2
There is no need to connect up the individual "loudspeakers" with the DM 90.2 as all the wiring is internal.
Connecting the source devices
The Canton DM System offer a wide range of connection options for almost all popular source devices, such as DVD players, video recorders, satellite receivers, multi-media consoles (Playstation®, X-Box®, ...) etc. The audio connections for your source devices need to be connected to the corresponding ports on the back of the DM 90.2. Source devices that have a digital output for Dolby Digital and DTS Bitstream should be connected digitally to the DM System. This ensures full Dolby Digital and DTS sound quality.
The video signal connections are made directly between the source devices and the image display device. The image source to be used is selected directly from the menu of the image display device.
In order to use the integrated FM Tuner of the DM System you need to connect the aerial supplied to the appropriate socket on the DM 90.2. Better reception will be achieved if the aerial is extended. For optimal reception we recommend connection to a broadband cable network or a roof-mounted aerial using the coaxial cable supplied.
Before you can start using the DM 90.2 for sound reproduction you need to go through the initial installation process and assign the inputs to the source devices. You will be asked to do this automatically when you first switch on the device (see page 12).
The Line 2 / Phono input allows you to connect either a line-level audio source (up to 2V) or a record player (up to 5mV). This can be done by selecting the relevant set up in the system menu.
The Pre (2.1/5.1 Mode) output allows you to connect, for example, active wireless loudspeakers. According to the set up selected in the System Menu (Factory Set / Gerätenamen) the output will be through the front channels in 2.1 Mode or the surround loudspeakers in 4.1 Mode.
The Zone 2 /Line output has a number of output options, which can be selected in the System Menu of the remote control:
- Zone 2 with individually adjustable volume for connection to an active Multiroom or wireless loudspeaker system.
- Line with fixed volume for connection to a recording device, etc ...
Warning: In order to play 5.1 multi-channel recordings (Dolby Digital or DTS) via the ZONE 2/LINE OUT the "dynamic" setting in the System Menu should be set to "comp". For normal playback we recommend that you use the "full" setting (see page 40).
In order to use Dolby Digital/DTS signals (Bitstream) via Zone 2 you need to select Zone 1 (Main listening zone) as the input.
The Sub output allows an active subwoofer to be connected. This needs to be activated in the System Menu (see page 17). If the Sub output is activated the internal subwoofer of the DM System goes through the high pass filter while the external subwoofer goes through the low pass filter at 80Hz.
Remote control
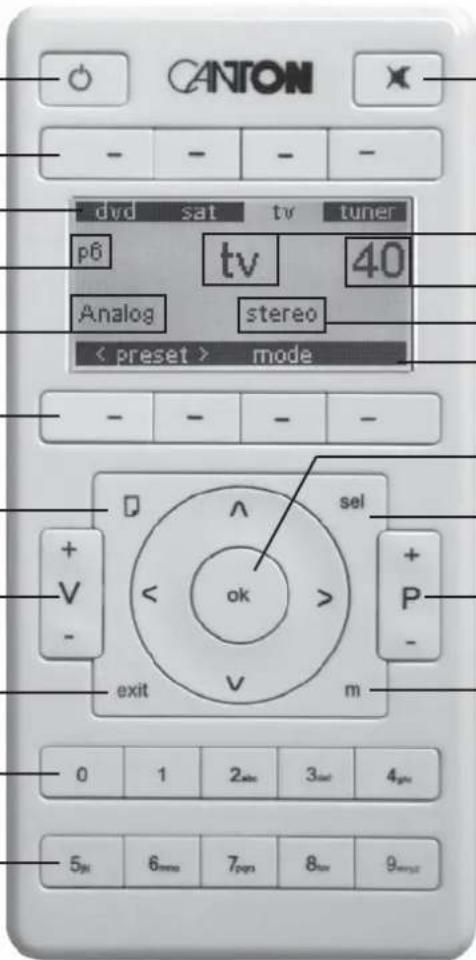
On/Standby key
Mute key
Function keys, menu-dependent functions
Sources selected using the function keys
Personal settings (
Decoder mode
Function keys, menu-dependent functions
Scroll key
Volume keys
Exit key
Number keys
Number keys
Setting up the remote control
Insert the batteries supplied into the remote control. Be careful to insert them the correct way up according to the polarity markings (+/-).
Using the remote control
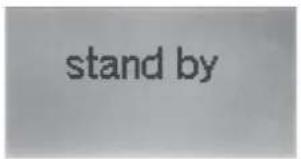
When all devices are connected to each other and the power has been switched on the Canton DM goes into Standby mode. Press any key to activate the remote control. If the remote control is not used for longer than 30 seconds it goes into idle mode. Press any key to reactivate it.
Note: When the device is turned on for the first time it starts the initial installation process automatically (see page 36).
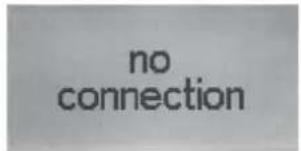
If the display shows "keine Verbindung" then there is no radio connection between the remote control and the DM System. Check that the DM System is switched on and connected to the mains power supply or reduce the distance between the remote control and the DM System.
Operating the DM System
Press to start the DM System.
If you want to turn the DM System off again press again. The DM System will go back into Standby mode.

Note: If the DM System is disconnected from the mains power supply when it is still switched on it will automatically go back into an active state when it is reconnected to the mains power supply (e.g. via a master or slave multiple socket lead).
Initial installation
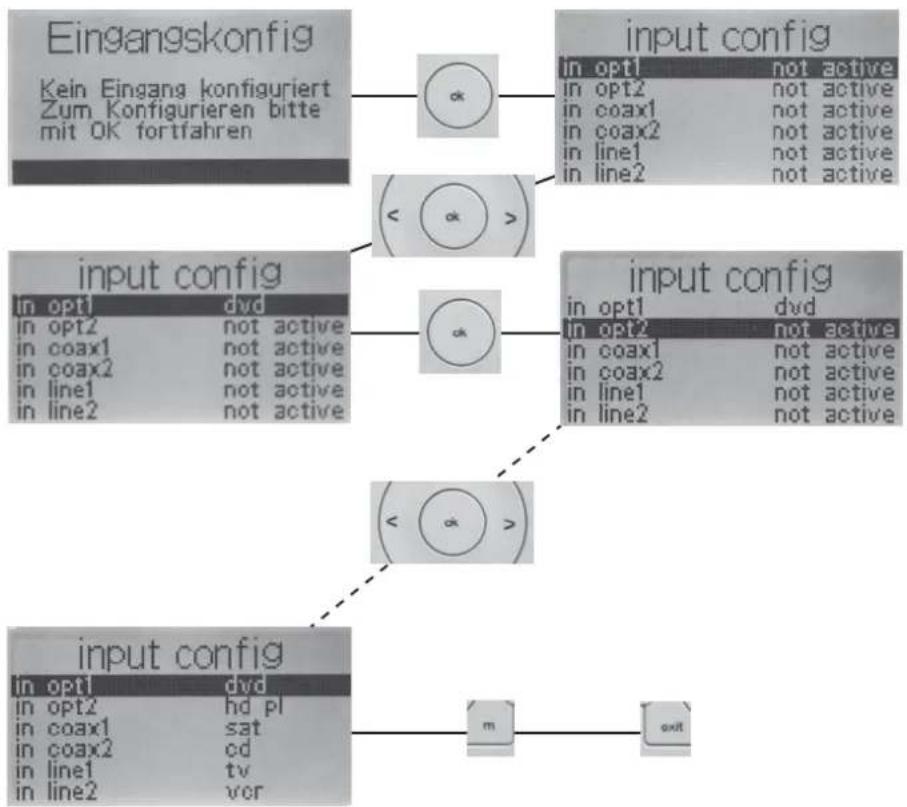
Before you can use the DM 90.2 you need to assign the inputs to the connected source devices. You will be asked to do this when you first switch the device on.
To get to the input configuration press ok.
Use the "<" and ">" arrow keys to choose names for the connected devices. You must confirm these by pressing "OK".
To exit the input config menu press m to save all the entries. Then press exit to end the initial installation and return to the main menu.
Warning: The arrow keys ∧ and ∨ may not be used when assigning the inputs.
Inputs that are defined as "not active" are not shown in the main menu.
flowchart
graph TD
    A["Eingangskonfig\nKein Eingang konfiguriert\nZum Konfigurieren bitte\mit OK fortfahren"] --> B["ok"]
    B --> C["input config\nin opt1 not active\nin opt2 not active\nin coax1 not active\nin coax2 not active\nin line1 not active\nin line2 not active"]
    B --> D["< ok >"]
    D --> E["input config\nin opt1 dvd\nin opt2 not active\nin coax1 not active\nin coax2 not active\nin line1 not active\nin line2 not active"]
    D --> F["ok"]
    F --> G["input config\nin opt1 dvd\nin opt2 not active\nin coax1 not active\nin coax2 not active\nin line1 not active\nin line2 not active"]
    F --> H["< ok >"]
    H --> I["input config\nin opt1 dvd\nin opt2 hd pl\nin coax1 sat\nin coax2 cd\nin line1 tv\nin line2 vor"]
    I --> J["m exit"]
Main menu
The remote control supplied has 8 function keys that can be used in different ways for different operating modes. The upper and lower sections of the display show the functions of each key.
The sources can be selected using the (upper) function keys lying directly above them. If you have more than 3 sources you can use to scroll on to the next page and back.
The Volume (V+/-) can be used to adjust the volume of the DM System in all menus (even when controlling IR devices) over 100 levels from 0 to 99.
Mute turns the volume off or on.
With
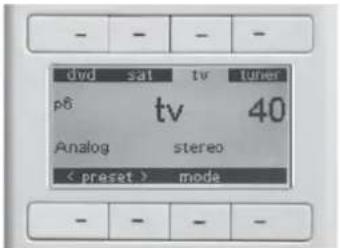
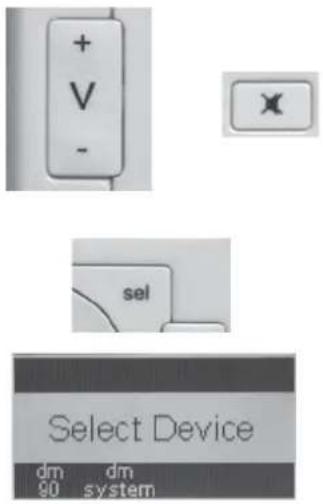
With mode you select whether the playback should be in one of the two stereo or surround modes. In addition to the "conventional" Stereo mode the DM System also offers a Wide mode with virtually extended stereo base.
In order to allow for the different recording philosophies that are present in music recordings we have implemented two surround modes. Use "surround 2", above all in cases of poor intelligibility (e.g. if the voice reproduction is unusually flat and incomprehensible).
The system automatically adjusts to the appropriate decoder mode according to the input signal.
The following decoder modes are possible:
| Analog | Stereo | Analog |
| Surround | Virtual Dolby PLII | |
| PCM (digital) | Stereo PCM | |
| Surround | Virtual Dolby PLII | |
| Dolby 2.0 | Stereo Dolby Digital 2.0 | |
| Surround | Virtual Dolby Digital 2.0 PLII | |
| Dolby 5.1 | Stereo Dolby Digital | |
| Surround | Virtual Dolby Digital | |
| DTS | Stereo | |
| Surround |
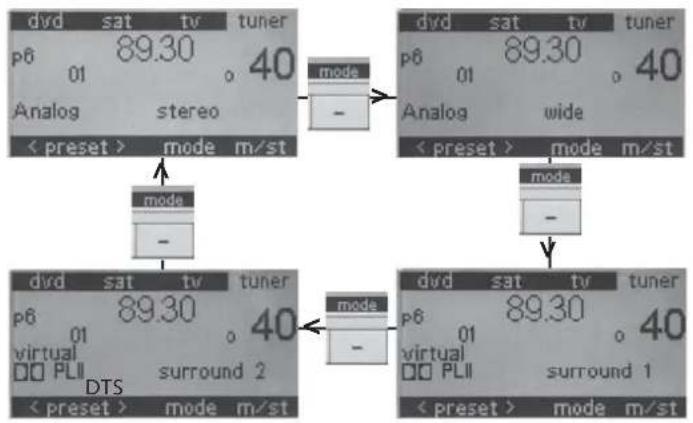
flowchart
graph TD
    A["Analog"] --> B["mode"]
    B --> C["mac"]
    C --> D["mac"]
    D --> E["mac"]
    E --> F["mac"]
    F --> G["mac"]
    G --> H["mac"]
    H --> I["mac"]
    I --> J["mac"]
    J --> K["mac"]
    K --> L["mac"]
    L --> M["mac"]
    M --> N["mac"]
    N --> O["mac"]
    O --> P["mac"]
    P --> Q["mac"]
    Q --> R["mac"]
    R --> S["mac"]
    S --> T["mac"]
    T --> U["mac"]
    U --> V["mac"]
    V --> W["mac"]
    W --> X["mac"]
    X --> Y["mac"]
    Y --> Z["mac"]
    Z --> AA["mac"]
    AA --> AB["mac"]
    AB --> AC["mac"]
    AC --> AD["mac"]
    AD --> AE["mac"]
    AE --> AF["mac"]
    AF --> AG["mac"]
    AG --> AH["mac"]
    AH --> AI["mac"]
    AI --> AJ["mac"]
    AJ --> AK["mac"]
    AK --> AL["mac"]
    AL --> AM["mac"]
    AM --> AN["mac"]
    AN --> AO["mac"]
    AO --> AP["mac"]
    AP --> AQ["mac"]
    AQ --> AR["mac"]
    AR --> AS["mac"]
    AS --> AT["mac"]
    AT --> AU["mac"]
    AU --> AV["mac"]
    AV --> AW["mac"]
    AW --> AX["mac"]
    AX --> AY["mac"]
Tuner
The Canton DM 90.2 has an integrated FM Tuner (VHF) with RDS function. This can be selected using the function keys (radio) in the main menu of the remote control. There you can make the following adjustments:
The automatic search is activated by pressing and holding (>2 sec.) the "<" or ">" arrow keys (to search backwards or forwards). During the search process the word "Seek" will appear in the display. The DM System stops automatically at every station with a sufficiently strong signal. The manual search is controlled by pressing on the "<" or "> " keys. This function can be used to fine-tune a radio station or to search manually for stations with a weaker signal.
Reduction of hissing in stereo reproduction
The DM System automatically uses stereo or mono reproduction depending on the strength of the signal. If you find a stereo reproduction has too much hissing you can use the lmst function key to change it to mono reproduction and reduce the hissing.


Stereo

Mono
Saving a radio station
To save a radio station in a programme slot press ok and the programme slot number will start to flash. Use arrow keys ∧ and ∨ to select from among 50 programme slots. Alternatively you can use the number keys to enter the programme slot number directly. After 5 seconds with no keys pressed the radio station will be saved in the programme slot shown on the display and the programme slot number will stop flashing.
Note: The station name, transmitted via RDS, (e.g. HR 1, BR 2, SWR 3, ...) will only appear upon selecting a saved radio station if the name appeared on the display at the point of pressing the OK key (the starting point of the saving process).
Selecting a saved radio station
Use the arrow keys ∧ and ∨ to select a programme slot. Alternatively you can use the number keys to enter the programme slot number directly.
Optional settings of the DM System
Once your DM System is successfully connected and operational you have the option of setting various parameters. If you want to make any adjustments to the settings of the DM System just turn it on and press and hold m (longer than 3 sec.). To exit the Settings Menu press m again or use exit .
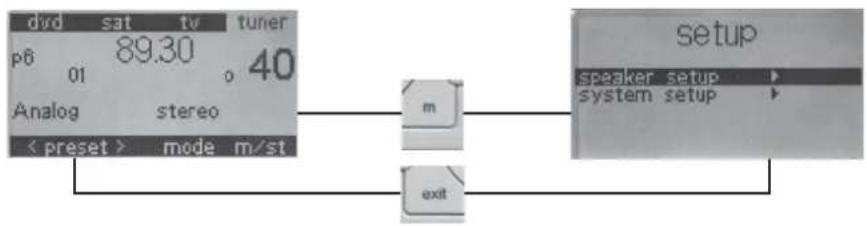
flowchart
graph TD
    A["Analog"] --> B["mode m/st"]
    C["setup"] --> D["system setup"]
    B --> E["exit"]
    D --> E
    style A fill:#f9f,stroke:#333
    style C fill:#ccf,stroke:#333
    style B fill:#cfc,stroke:#333
    style D fill:#fcc,stroke:#333
Note: Basically you can use exit to exit the Settings Menu from almost all sub-menus. m will just take you back one menu level.
Settings Menu
In the Settings Menu you can choose between the "Loudspeaker Menu" and the "System Menu". On the next page you will find an overview of the menus. A more detailed description can be found on the website www.canton.de.
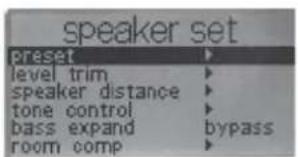
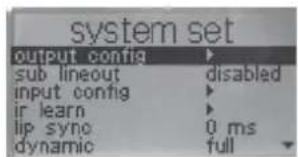
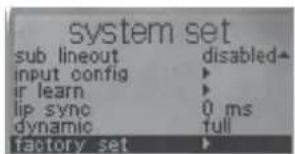
Loudspeaker Menu
In the Loudspeaker Menu the following parameters can be set to adjust the DM System to the room:
Personal values To save all settings set in the loudspeaker menu up to 6 memory cells (
Volume adjustment To adjust the volume level of the individual channels (front left and right, subwoofer, ...)
Distance To balance out different distances between the loudspeakers and the listening spot
Sound To adjust the treble and bass sounds to the room and according to personal taste
Bass expand For the automatic volume-dependent adjustment of the bass volume level
Room adjust Various parametric equalisers are available to balance out ambient factors
System Menu
In the System Menu the following parameters can be set:
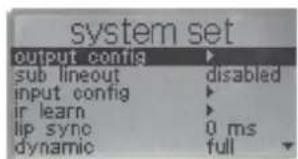
Output config To set the parameters for the Zone 2 /Line output
Sub output To activate or deactivate the subwoofer output
Input config To activate and name the 6 signal inputs (see the chapter "Initial installation")
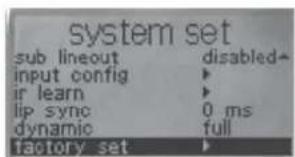
IR programming To programme various remote operations (DVD player, TV, ..., see the chapter "Learn Menu")
Lip sync To synchronise the sound with time-delayed TV images
Dynamics To adjust the signal compression in the playback of multi-channel signals
Factory Set The following parameters can be set using Factory Set:
Switch-on volume To limit the maximum switch-on volume
Max. volume To establish the maximum volume possible
Device name To select the device configuration (2.1 Mode or 5.1 Mode ...)
Language To select German or English
Line 2 config To select Line Level Input or Phono Level Input
Factory setting To return the DM System to the factory setting it was supplied with
Firmware To display the software versions (DM, tuner and remote control)
Contrast To adjust the contrast settings of the display
Learn Menu
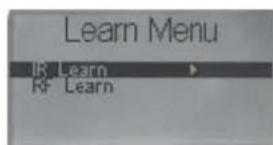
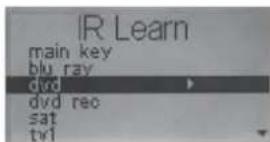
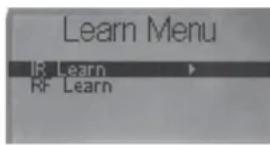
Pressing 📄 and 📋 at the same time brings you to the "Learn Menu", where you can lern infrared-controlled devices and register other DM Systems.
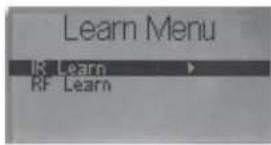
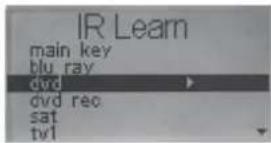
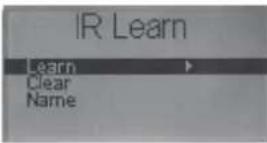
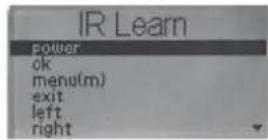
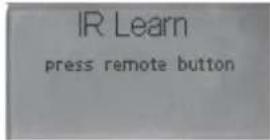
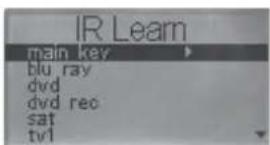
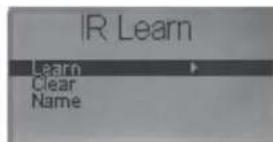
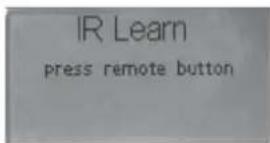
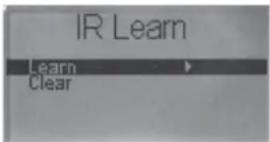
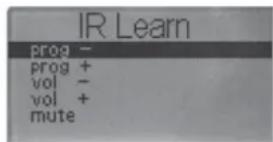
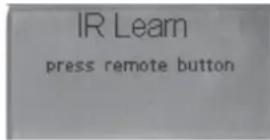
Once you have selected the source with the function to be programmed and confirmed your selection using ok you will see the message "press remote button". Position the original remote control (e.g. from your DVD player) opposite the one from your DM System (approx. 5 cm distance). On the original remote control briefly press the key with the function to be programmed and wait until the process has been confirmed on the display.
If the programming has been successful you will see the message "Programming successful".
Repeat the process until all desired functions have been transferred. Press ☐ to return to the previous menu.

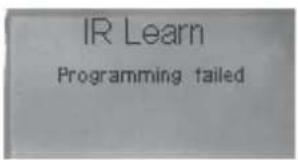
If the transfer of the remote control data is unsuccessful the message "Programming failed" will appear for approx. 5 seconds. After that the previous menu will be displayed and you can either repeat the programming or abort the process.
Deleting source devices
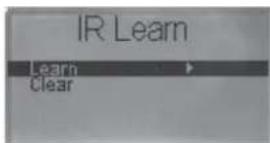
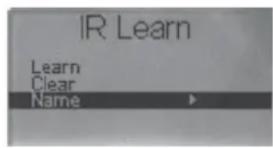
In order to totally delete a programmed device use the "Clear" function. After pressing this function you will be asked if you really want to delete the device. Confirm this by pressing the "yes" function key. To abort the process press "no". The remote control will then return to the Device Selection Menu. Use → to enter the "Learn Menu". To leave programming mode press → again.
Renaming the source devices
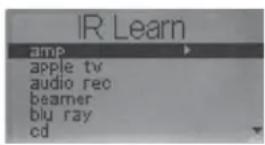
If you want to rename a source device you can select a description from a comprehensive list of pre-programmed device names. Follow the steps described above.
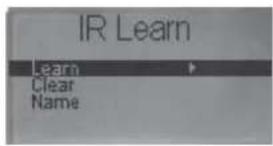
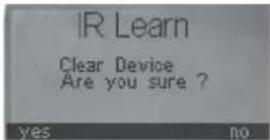
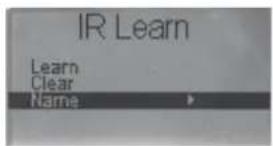
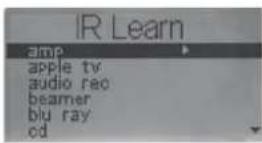
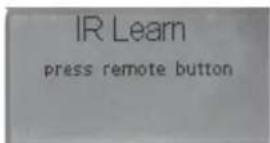
Programming the main keys
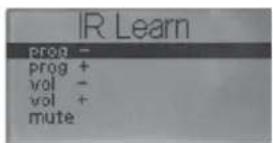
The DM System has 5 main keys (Programme +/-, Volume +/- and Mute), which can be allocated to the IR codes of other infrared-controlled devices. Follow the steps shown above.
Warning: The Volume +/- and Mute keys can only be used for infrared-controlled devices if no DM System has been registered. The volume control of the DM System will take priority over all other IR devices.
Register your remote control with a DM System
To register the remote control on a (further) DM System open the Programme Menu by pressing exit and m simultaneously. Select "RF Learn" and confirm this with ok. Select "new device" to register a DM System on the remote control. After confirmation you will be asked to connect the DM System to be programmed to the mains power supply and to switch it on. Before doing this you should ensure that the DM System had been disconnected from the mains power supply for at least 1 minute. The remote control will now try to connect with the newly activated DM System. A successful connection will be shown in the display as "Installation successful", while failure will bring the message "Installation failed". If the connection has failed you should identify the problem (device not switched on, distance too great, DM System not disconnected from the mains power supply for long enough, etc) and start the process again. After successful installation you must enter a name for the DM System. If you enter a name (e.g. DM 90) more than once the remote control will automatically allocate it a subscript (e.g. DM90.1, DM 90.2 ...). You can then exit the "RF-Learn" menu by pressing exit twice.
If you wish to overwrite an existing DM System, instead of selecting "new device" you should select the system you wish to replace and confirm your selection with ok. Select the "Learn" function to proceed. Confirm the overwriting with the "yes" function key or abort the process with "no". Continue as previously described under "new device".
De-register your remote control from a DM System
To de-register your remote control from a DM System open the Programme Menu by pressing the exit and m simultaneously, select "RF Learn" and confirm with ok. Select the system you wish to "delete" and confirm your selection with ok. Select and confirm the "Clear" function to continue. Complete the de-registration process by pressing the "yes" function key or abort the process with "no".
Troubleshooting and Optimisation
Remote control (abbreviation: RC)
Description of problem Possible cause(s) Solution
The RC display is blank 1. The RC is in idle mode 1. Press any key to activate the RC
-
The batteries are missing or wrongly inserted 2. Insert the batteries correctly (+/-)
-
The batteries are "empty" 3. Insert new batteries correctly (+/-) or charge rechargeable batteries
| The RC keeps showing “Welcome CANTON”, “Good bye CANTON” or “please wait” insert correctly2. The DM System processor has crashed 2. Switch the DM System off at the mains for min. 30 minutes then switch it back on | 1. The RC processor has crashed | 1. Remove a battery from the RC for min. 30 minutes then re- |
| The RC shows “no connection”then turn it back on and / or remove a battery from the RC for min. 30 minutes then re-insert correctly43 (Register your Remote Control with a DM System) | 1. The DM System is not ready2. The distance between the DM System and the RC is too great3. The DM System processor or the RC processor has crashed4. The RC is not registered with the DM System | 1. Connect the DM System to the mains power supply and / or switch it “ON”2. Reduce the distance to less than 10 m3. Turn the DM System off at the mains for min. 30 minutes4. Register the DM System following the instructions on page |
| Display on the RC is hard to read xx” is displayed and use “<” or “>” to adjust the contrast. Press “exit” to close the window | 1. Poor contrast setting | 1. Press the “0” and “4” keys simultaneously until “kontrast |
| The display is in the “wrong” language (German and English are the 2 options)language (display)=> language) select the desired language | 1. The display language of the RC has been switched2. The language of the DM System has been switched | 1. Press the “5” and “9” keys simultaneously until “language” is displayed and use the function keys to select the desired2. In the “System Menu” (m => System Menu => factory set |
| The RC jumps from IR mode into DM System mode batteries | 1. The batteries are almost “empty” | 1. Insert new batteries correctly (+/-) or charge rechargeable |
| In IR mode commands are carried out 2x | 1. When programming the code the key on the original RC was pressed for too long2. The key on the DM – RC was pressed for too long | 1. When programming the function only press the key on the original RC for a (very) short time2. Only press the key on the DM – RC for a very short time |
| IR device is not operating (correctly)original RC of the IR deviceprogramminghappen that codes cannot be programmed. Unfortunately this problem has no solution | 1. The device has not been correctly programmed2. The distance between the RCs was too great / too short3. The code of the original RC cannot be programmed | 1. Repeat the programming process for the Canton RC with the2. Ensure a distance of approx. 5 cm between the RCs when3. Due to the wide range of devices on the market it can |
DM System – Functions
| No inputs except "radio" can be selectedInstructions on page 36!keys and / or the "exit" key were used (m => System Menu =>Eingangskonfig) and only use the correct keys (see page 36) | 1. No inputs have been registered in the "input config" menu (e.g. initial installation was terminated with "exit")2. During the configuration process the "up" or "down" arrow (m => System Menu =>Eingangskonfig) and only use the | 1. Register the relevant inputs in the "input config" menu (m => System Setup => input config). Follow the exact2. Register the relevant inputs in the "Eingangskonfig" menu |
| DM System does not recognise Dolby Digital or DTS data stream or Coax 1 /2source device (referring to the instructions given for the source device) | 1. The source is only connected to the analog port (Line 1 or 2)2. The wrong settings have been selected on the source device | 1. Connect a digital output from the source device to Opt 1 / 22. Select "Bitstream" or "Raw" as the data format on the |
| No signal from Zone2 / Line - Output under "Output Config" (m => System Setup => Output Config => Input) select "zone 1" as the input and on the main screen select the desired source as input(m => System Setup => Output Config => Volume) | 1. There should be a multi-channel signal from Zone2 / Line2. The volume for Zone2 is set too low | 1. Set "dynamic" (m => System Setup => Dynamic) to „comp“,2. Increase the volume for Zone2 – output under "Volume" |
| RC only displays "surround" instead of "surround 1" and "surround 2" | 1. The DM System has been set to 4.1 or 5.1 mode | 1. Set the system to 2.1 mode under "system preset" (m => System Setup => factory setup => System Preset) |
| Distorted radio reception away from metal surfaces2. Poor geographical locationpage 39 | 1. Poor aerial position2. Use a roof-mounted aerial or a broadband cable connection3. The station has not been properly set | 1. Arrange the extended (!) aerial as openly as possibly, well3. Tune the station manually, following the instructions on |
| A set radio station is no longer available once the system has been switched off and on again (display back on 87.50) | 1. The station was not allocated a programme slot Slot 1 | 1. Simply press the "OK" key to save a station in Programme |
| Sound and image are not (lip)synched sync) so that the image and sound are synchronised (simultaneous) | 1. Long processing times in the TV delay the image | 1. Delay the sound in "lip sync" (m => System Menu => lip |
DM System -> Volume
| No (music) playback screen2. The volume is set low or on mute 2. Use Volume + (V+) to increase the volume3. The wrong input has been selected 3. Select the input that is connected to the relevant source4. The signal (data stream) from the source has not been recognised by the DM System audio format during playback (referring to the instructions of the source device)5. Wrong settling of Linc2 / Phono input when using a 5. Set Line 2 / Phono – Input "line2 config" to "phono" (m record player =>System Setup => factory set => line2 config) | 1. The DM System is switched off or in Standby mode | 1. Switch the DM System on so that the RC displays the main |
| Volume will not go above a certain value (<=99) | 1. The "max volume" is set to the maximum possible value max volume) to the desired value (max. 99) | 1. Set the volume limiter (m => System Setup => factory set => |
| DM System is quieter when switched on than when switched off | 1. The "start volume" is set to a value that is lower than the volume set before switching off not higher than "max volume") | 1. Set the "start volume" (m => System Setup => factory set => start volume) to the desired value (max. 99 but |
| The balance is wrong (location is not central)or the listening spot is not central Level Trim) to set the correct distance distances | 1. The volume adjustment of the satellite speakers is wrongly set speaker Setup => Speaker Distance) to set the correct | 1. In the Loudspeaker Menu use (m => Speaker Setup => |
DM System – Sound
| In Surround Mode there is little or no surround sound | 1. The Play Mode is set on “stereo” or “wide”2. The listening spot is not central enoughLevel Trim) to set the correct volume levels and(m => Speaker Setup => Speaker Distance) to set the correct distances to the listening spot3. The source only supplies a 2-channel signal requires a multi-channel data stream. In this case the RC displays “virtual Dolby Digital” or “virtual DTS”. All other displays (e.g. “Virtual Dolby PLII) mean that it is not a multi-channel data stream, which leads to less of a surround sound | 1. Set Play Modes to “surround 1” or “surround 2”2. In the Loudspeaker Menu use (m => Speaker Setup => | |
| 3. To achieve optimal sound in the room the DM System | |||
| impression | 4. The DM System is set to 4.1/5.1 mode“System Preset” (m => System Setup => factory setup => | 4. Set the system to a 2.1 Mode with virtual surround-mode at | |
| System Preset) | |||
| In Surround Mode the voices are hard to understand between the right and left channels2. The DM System is in 5.1 mode 2. Set the system to a 2.1 or 4.1 Mode at "System Preset"(m => System Setup => factory setup => System Preset) | 1. During recording (BD or DVD) the voices were mixed | 1. Select "surround 2" as Play Mode | |
| The DM System has little or no low bass expand) to "low" or "high"subwoofer has been connected or is operating Output" (m => System Menu => Sub Output) or connect it to an operational external subwoofer using Sub-Out3. The DM System is in a poor acoustic location 3. Where possible, set up the system in a different position (e.g. closer to the wall)(volume level increase) Speaker Menü => Room Comp => subwoofer) | 1. Listening at a (very) low volume2. The output for an external subwoofer is activated but no | 1. Set "Bass expand" (m => Speaker Setup => Bass2. Deactivate the output for an external subwoofer at "Sub | |
| The DM System has too much low bass expand) to "low" or "off"3. The DM System is in a poor acoustic location 3. Where possible, set up the system in a different position (e.g. closer to the wall)(volume level increase) Speaker Menü => Room Comp => subwoofer) | 1. Listening at a high volume and activating the "Bass expand"2. Using an external subwoofer with too high a level3. Where possible, set up the system in a different position (e.g.4. Equalisers have been set in the "Room Comp" menu | 1. Set "Bass expand" (m => Speaker Setup => Bass2. Adjust the external subwoofer (to a lower level)4. Correct or delete the settings for the room adjustment (m => | |
| The DM System has too little top bass closer to the wall)(volume level increase) Speaker Menü => Room Comp => subwoofer)or reduced | Speaker Menü => Room Comp => subwoofer) | 1. The DM System is in a poor acoustic location2. Equalisers have been set in the "Room Comp" menu3. The bass level in the "Tone Control" menu is set to neutral Speaker Menü => Tone Control => Bass)4. Use of an external subwoofer with the wrong phasing (phase adjustment) between internal and external subwoofers | 1. Where possible, set up the system in a different position (e.g.2. Correct or delete the settings for the room adjustment (m =>3. Increase the bass level in the Sound Regulation menu (m =>4. Correct the phasing on the external subwoofer to suit the DM internal subwoofer or change the position of the external subwoofer |
| The DM System has too much upper bass closer to the wall) | 1. The DM System is in a poor acoustic location | 1. Where possible, set up the system in a different position (e.g. |
| 2. Equalisers have been set in the "Room Comp" menu | 2. Correct or delete the settings for the room adjustment (m => | |
| (volume level increase) Speaker Menū => Room Comp => subwoofer) | ||
| 3. The bass level in the "Tone Control" menu is neutral or 3. Decrease the bass – level in the Sound Regulation menu (m => Speaker Menū => Tone Control => Bass) | ||
| The DM System has too little or too much level in the whole bass range Level Trim =>subwoofer) set the desired volume level for the subwoofer | 1. The volume level adjustment for the subwoofer is set wrong | 1. In the Speaker Menu (m => Speaker Menu => |
| The DM System sounds "flat" (too little treble) sound setting is set very low | 1. The listening area has severely dampened acoustics or the trebleSpeaker Menū => Tone Control => treble) | 1. Increase the treble setting in the sound settings menu (m => |
| 2. A pure stereo signal is being played in one of the surround modes | 2. Set the DM System to stereo play mode | |
| 3. Equalisers have been set in the "Room Comp" menu | 3. Correct or delete the settings for the room adjustment (m => | |
| (volume level increase) Speaker Menū => Room Comp => front) | ||
| The DM System sounds sharp or aggressive (too much treble) treble sound setting is too high | 1. The listening area is acoustically hard (less dampened) or theSpeaker Menū => Tone Control => treble) | 1. Decrease the treble setting in the sound settings menu (m => |
| 2. Equalisers have been set in the "Room Comp" menu | 2. Correct or delete the settings for the room adjustment (m => | |
| (volume level increase) Speaker Menū => Room Comp => front) | ||
| The sound signal sounds (very) distorted of the DM System | 1. Listening at very high volume, which leads to overmodulation device) | 1. Immediately reduce the volume (also to avoid damaging the |
| 2. Use of an analog input with a signal level that is too high (level | 2. Decrease the level of the source if this has a volume control | |
| of the source is higher than 2Veff) | ||
| "Phono" setting | 3. Use of Line2 / Phono input with a Line-level source and the => System Setup => factory set => line2 config) | 3. Set the Line 2 /Phono – Input to "line" at "line2 config" (m |
| 4. Use of Zone2 – Output to operate an external device with a menu (m => System Setup => Output Config => | 4. Reduce the volume for the Zone2 – Output using the Volume | |
| level that is set too high zone2 vol) | ||
| the signal processor of the DM System will be overmodulated | 5. With multi-channel recordings it is theoretically possible that dynamic) | 5. Set the "dynamic" to "comp" (m => System Setup => |
General maintenance advice
In order to ensure that your Canton loudspeakers continue to give you pleasure for a long time please follow these care instructions: Never expose the loudspeaker cabinet to direct sunlight. Avoid extremes of temperature and protect your loudspeaker from humidity. Do not clean the surface of the cabinet with alcoholic or abrasive cleaning agents. Use of a lint-free cloth is recommended.
Play-in time
A loudspeaker needs a play-in time of approx. 15 – 20 operating hours to develop its full performance potential. During this time the properties of all the mechanical parts alter until they reach the values laid down in the design of the loudspeaker, i.e. the chassis suspension becomes more flexible and the playback quality improves.
Attention:
natural_image
Exterior view of a black industrial air conditioner unit (no visible text or symbols)2
natural_image
Coiled black cable with multiple connectors and labels, no visible text or symbols3
4
natural_image
Coiled black cable with connectors and connectors, no visible text or symbols5
natural_image
Black electrical plug with metallic pins, no visible text or symbols6
natural_image
Coiled transparent cable with black connectors, no visible text or symbolsnatural_image
Modern computer monitor mounted on a stand with a black-and-white rack beside it (no visible text or symbols)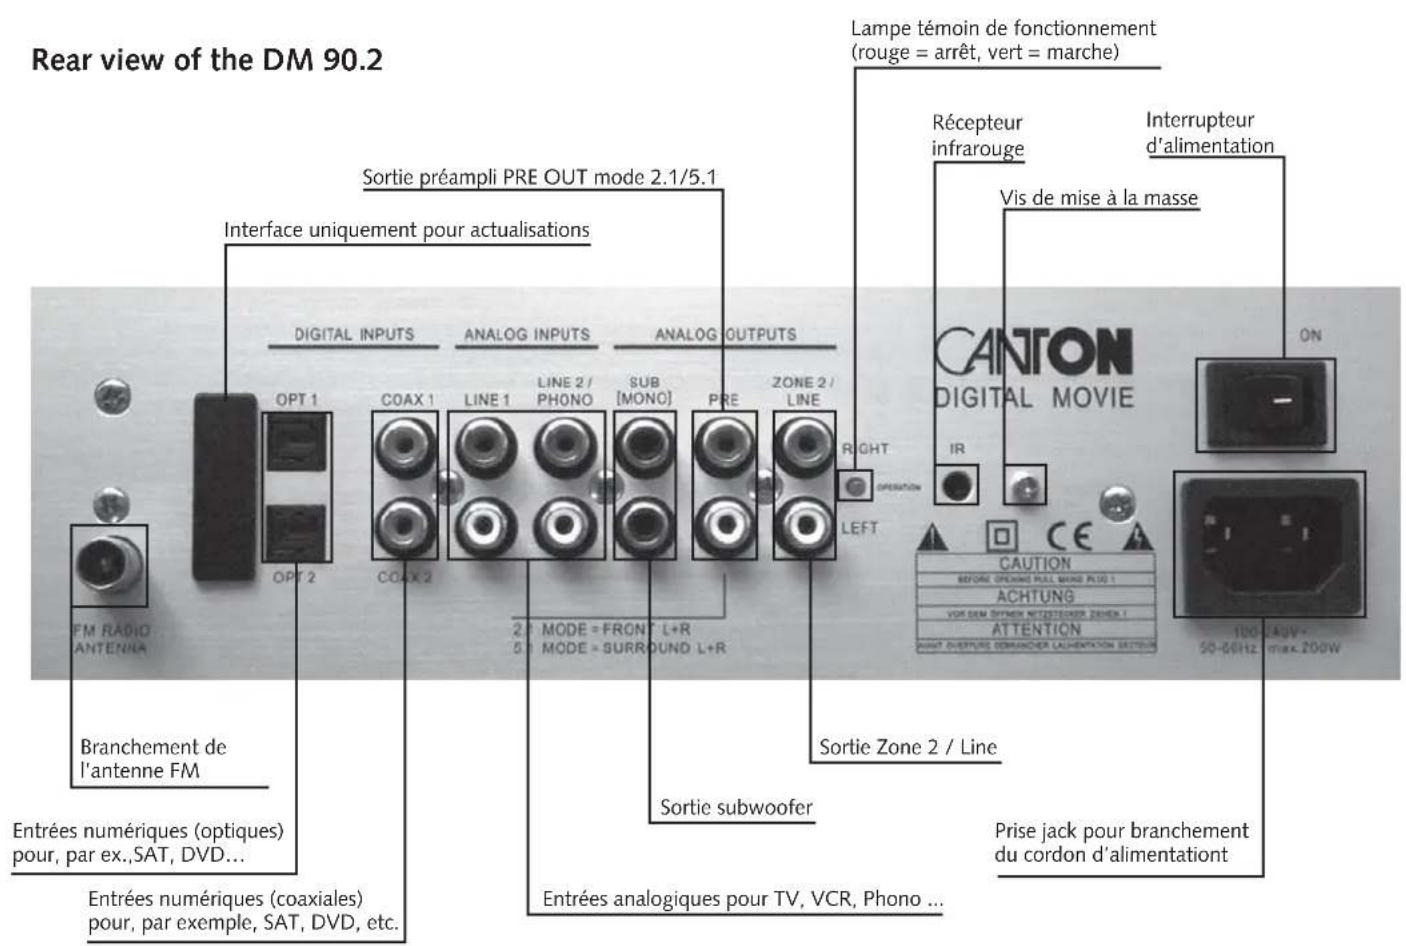
Raccordement des sources
flowchart
graph TD
    A["Analog"] --> B["mode m/st"]
    C["dvd sat tv tuner 89.30"] --> D["m"]
    E["setup"] --> F["speaker setup system setup"]
    G["exit"] --> H["output"]
Speaker Setup

Effacer des sources

Manufactured under license from Dolby Laboratories. Dolby, Pro Logic, and the double-D symbol are registered trademarks of Dolby Laboratories.
Manufactured under license under U.S. Patent Nos: 5,956,674; 5,974,380; 6,487,535 & other U.S. and worldwide patents issued & pending. DTS, the Symbol, & DTS and the Symbol together are registered trademarks & DTS Digital Surround and the DTS logos are trademarks of DTS, Inc. Product includes software. © DTS, Inc. All Rights Reserved.
TruSurround XT, SRS and the symbol are trademarks of SRS
Garantie-Urkunde Guarantee Certificate . Certificat de garantie . Certifi- edor
- German loudspeaker tradition
- System description
- Package contents DM 90.2
- Positioning the DM System
- Connecting the DM 90.2
- Connecting the source devices
- The video signal connections are made directly between the source devices and the image display device. The image source to be used is selected directly from the menu of the image display device.
- Remote control
- Setting up the remote control
- Using the remote control
- Operating the DM System
- Initial installation
- Main menu
- Tuner
- Reduction of hissing in stereo reproduction
- Saving a radio station
- Selecting a saved radio station
- Optional settings of the DM System
- Settings Menu
- Loudspeaker Menu
- System Menu
- Learn Menu
- Deleting source devices
- Renaming the source devices
- Programming the main keys
- Register your remote control with a DM System
- De-register your remote control from a DM System
- Troubleshooting and Optimisation
- General maintenance advice
- Play-in time
- Attention:
- Raccordement des sources
- Speaker Setup
- Effacer des sources
- Garantie-Urkunde Guarantee Certificate . Certificat de garantie . Certifi- edor
Brand : CANTON
Model : DM 20
Category : Home Theater System