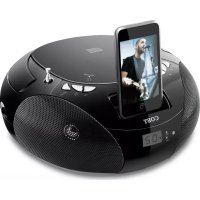
CSMP142 - Docking station COBY - Free user manual and instructions
Find the device manual for free CSMP142 COBY in PDF.


| Brand | Coby |
| Model | CSMP142 |
| Product Type | iPod docking station with CD player and AM/FM radio |
| Dimensions (L x W x H) | 253 x 236 x 123 mm |
| Weight | 1.7 kg |
| Power Supply (mains) | 110/220 V ~ 60/50 Hz, 14 W |
| Battery Power | 8 C batteries (not included) |
| Main Functions | Universal iPod dock, CD player (CD, CD-R, CD-RW), AM/FM radio with telescopic antenna, full-function remote control, 3.5mm headphone jack, full-range speakers |
| Radio Bands | AM (530-1710 kHz), FM (88-108 MHz) |
| CD Programming | Up to 20 tracks |
| CD Compartment | Top loading |
| Display | Indicators for CD, iPod, FM stereo functions |
| Remote Control | With CR2032 batteries included |
| Maintenance and Cleaning | Soft, dry cloth; for CD lens, use dry cotton; do not use chemical products |
| Safety | Do not open, do not expose to moisture, unplug during storms, avoid overloading outlets |
| Spare Parts and Repairability | Contact a qualified technician; use identical replacement parts |
| General Information | Manual available in multiple languages; website: www.cobyusa.com |
Frequently Asked Questions - CSMP142 COBY
User questions about CSMP142 COBY
0 question about this device. Answer the ones you know or ask your own.
Ask a new question about this device
Download the instructions for your Docking station in PDF format for free! Find your manual CSMP142 - COBY and take your electronic device back in hand. On this page are published all the documents necessary for the use of your device. CSMP142 by COBY.
USER MANUAL CSMP142 COBY
Portable CD Boombox for iPod
Instruction Manual Page 2
ES
Please read carefully before use. Léa el manual antes de usar
Controls at a Glance 6
Front View 6
Top View 7
Rear View 8
Remote Control 9
Connecting Power 10
Using the DC Power Supply 10
Using the AC Power Supply. 11
Installing/Replacing the Remote Control Batteries .11
Stereo Headphone Jack 12
RaDio MoDE 14
iPoD MoDE 15
CD MoDE 16
To use the CD Player 16
Selecting a different track 17
Searching for a passage on a track 17
Repeat function 17
Programming of track numbers 17
Table of Contents
CD MaiNTENaNCE & SaFETY 19
Cleaning CDs 19
Cleaning the Lens 20
TRouBIESHooTiNg 21
SPECiFiCaTioNS 25
SaFETY NoTiCES 26
Package Contents
Please make sure that the items shown below are included in the package. Should an item be missing, please contact the local retailer from which you purchased this product.
Coby CSMP142 (Main Unit)1.
AC power cord2.
iPod dock adapters*3.
Remote control with CR2032 battery 4.
- Dock adapter cartridges are included for your convenience and are subject to change. Apple includes dock adapters with their recent iPod models.
Features
Universal dock for iPod charges and plays your favorite iPod music
Top-loading CD player with programmable track memory
AM/FM radio with telescopic FM antenna
3.5mm headphone jack
Full-range speaker system
Full function remote control
Getting Started
Controls at a Glance
Front View
4sll6u3
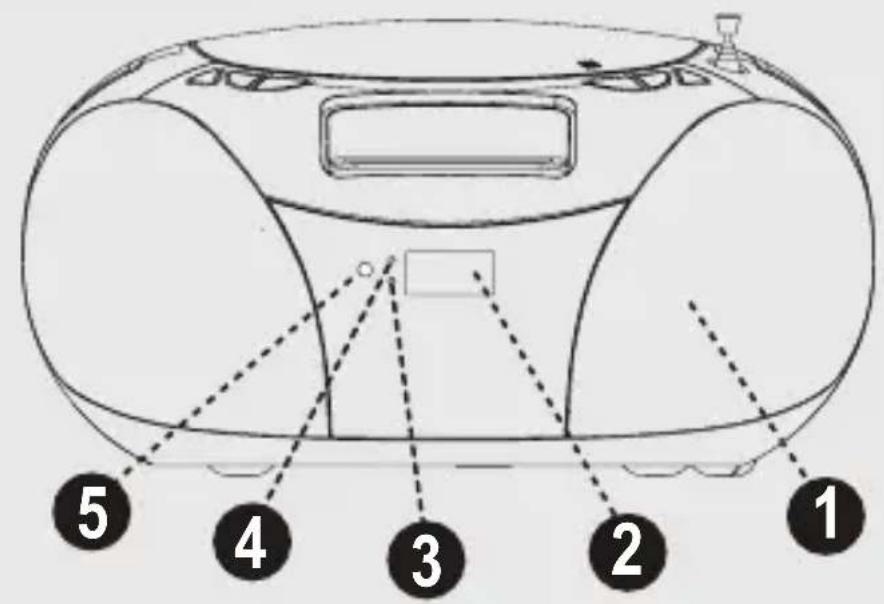
SPEAKER1.
DISPLAY 2.
Displays CD functions
iPod INDICATOR 3.
Displays when iPod is docked
FM STEREO INDICATOR 4.
Displays when radio is tuned to an FM Stereo station
REMOTE SENSOR5.
Getting Started
Top View
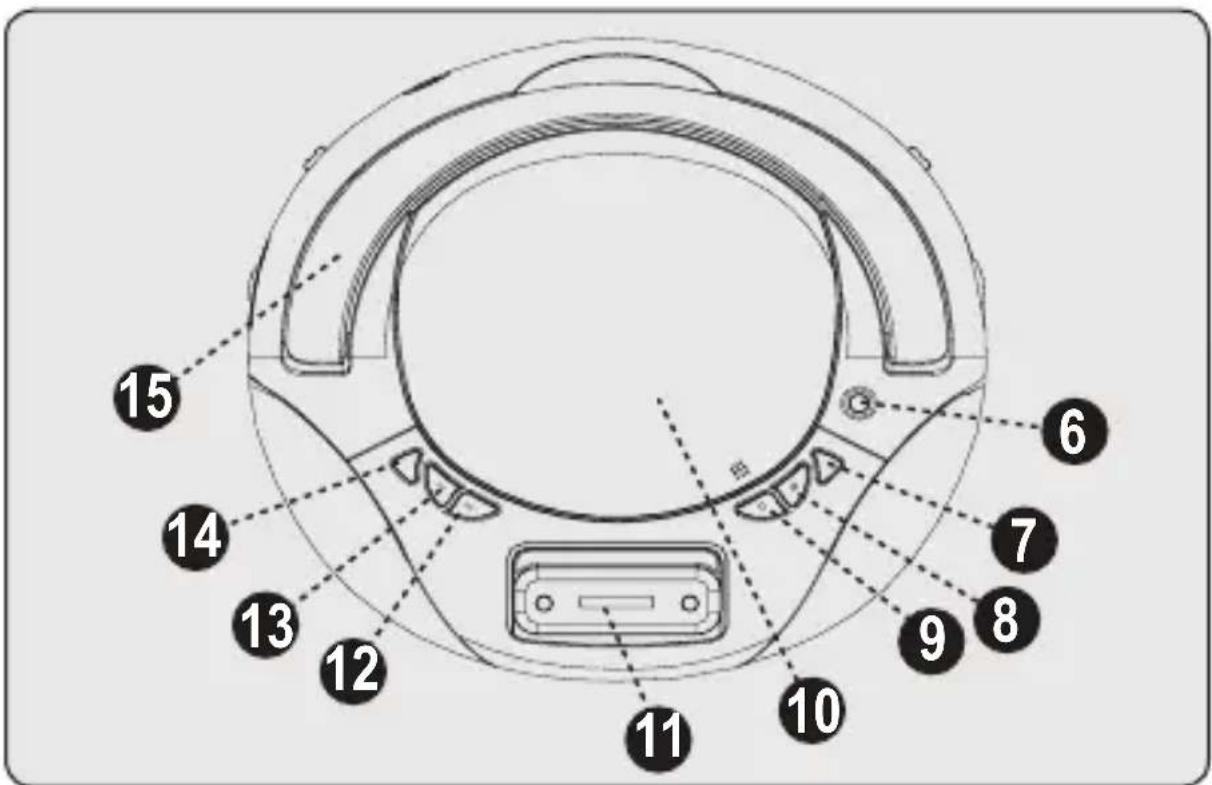
English
TELESCOPIC ANTENNA 6. (for RADIO only)
PROGRAM (for CD only) 7. Programming and control of track playback
PLAY/PAUSE (for CD only) 8.
Start or pause CD
playback
STOP (for CD only) 9. Press to stop CD playback or delete a program
CD DOOR 10. Lift at open/close mark to open
iPod UNIVERSAL DOCK 11. CONNECTOR Connect your iPod
NEXT (for CD only) 12. Skip to next available CD track
BACK (for CD only) 13.
Skip to the previous CD track
MODE (for CD only) 14. Press to select Repeat or Random playback
HANDLE15.
Getting Started
Rear View
4s116u3
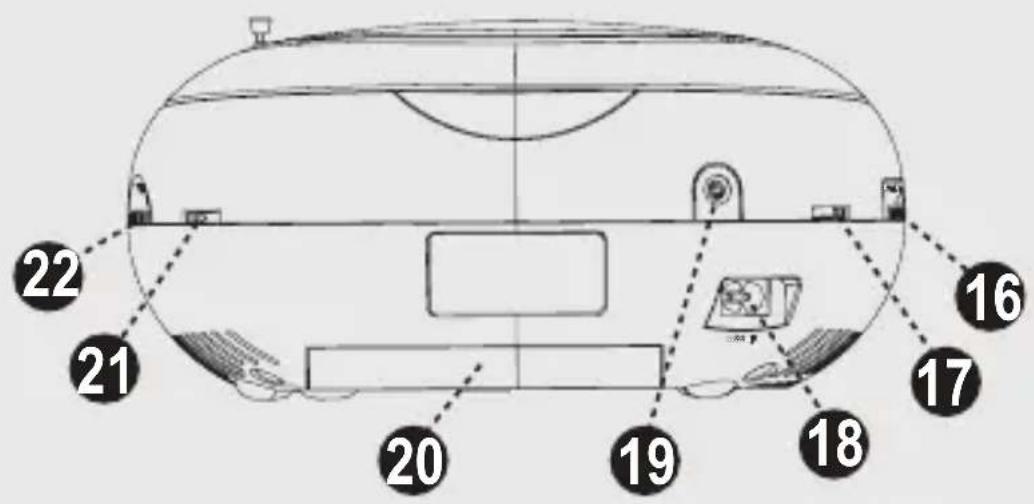
VOLUME CONTROL 16.
Adjust the sound level
FUNCTION SELECTOR 17.
Select the playback source (Radio, iPod, CD) or turn the unit off
AC POWER SUPPLY 18.
Connect the power cord here
STEREO HEADPHONE JACK 19.
Connect a pair of 3.5mm stereo headphones here
BATTERY COMPARTMENT20.
BAND SELECTOR 21.
Select the radio band (AM, FM, FM ST)
TUNING KNOB 22.
Adjust the radio frequency to tune to stations
Getting Started
Remote Control
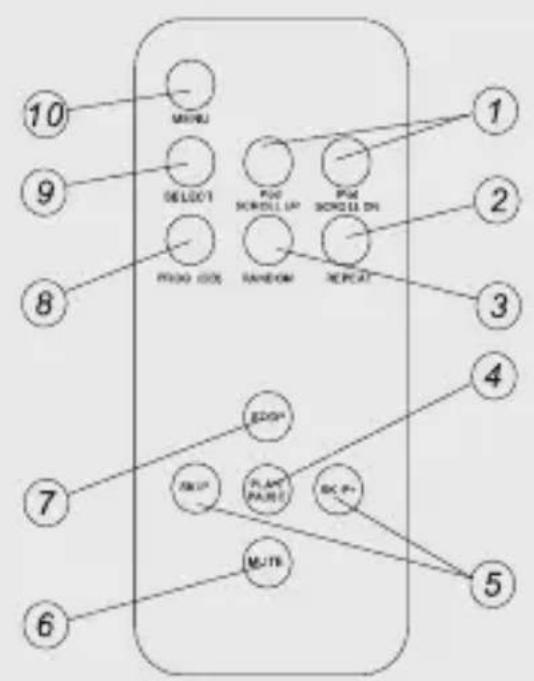
English
SCROLL UP/DN (iPod only) 1.
Scroll up/down through iPod menus
REPEAT2.
RANDOM 3.
PLAY/PAUSE 4.
SKIP + / - 5
MUTE 6.
STOP7.
8.PROGRAM (CD only)
Program a custom CD play list
SELECT (iPod only) 9.
Confirm iPod menu selection
- MENU (iPod only)
Access the iPod menu
Connecting Power
Connecting the device to an electrical power supply can save batteries. If you choose to use batteries, make sure that the device is unplugged from the wall before inserting them.
Using the DC Power Supply
Open the battery compartment and insert 8 × "C" batteries (not included), matching the "+" and "-" ends to the polarity indicators.

When replacing the batteries, be sure to safely dispose or recycle the old batteries. Do not burn or bury the old batteries.
Incorrect use of the batteries may result in corrosive leakage.
Do not mix different types of batteries.
Do not use any batteries not recommended by the manufacturer.
Do not mix old and new batteries.
Remove the batteries when not using the device for an extended period of time.
Do not expose batteries to excessive heat.
Using the AC Power Supply
Make sure that the voltage of your electrical power supply corresponds to the voltage indicated by the manufacturer. If the voltage is incorrect, consult your dealer or service center.

This unit should be used with 120V or 220V wall outlets, only. The voltage selector on the bottom of the unit must be set to the appropriate voltage before connection.
Connect the electrical cord by plugging it into the wall outlet. Keep objects clear of the cord where it connects to the device and to the wall. Do not stretch the cord.
To completely disconnect the device from the electrical supply, unplug the power cord from the outlet.

For your safety, unplug the device during electrical storms.
Installing/Replacing the Remote Control Batteries
Your remote control comes with batteries pre-installed. Remove battery insulator tape before use. Batteries should be replaced when remote control performance diminishes or stops.
To replace the batteries:
Open the battery door on the back of the unit.
Remove the battery door.
Getting Started
Insert one "CR2032" 3V + lithium battery, matching the "+" and "-" ends to the polarity indicators.
Return the battery door to its original position.
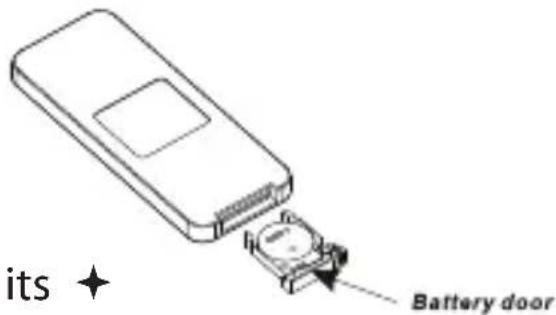

Batteries contain chemical substances. Dispose of used batteries properly.
Stereo Headphone Jack
The stereo headphone jack will accommodate any headphone set equipped with a 3.5mm mini plug. Insert the plug into the stereo headphone jack for private listening. Headphones are not included.

To avoid damaging your ears, reduce the VOLUME to a low level before connecting and using headphones. While you are listening, readjust the VOL-UME to a comfortable level.
General Operation
Select the source by setting the FUNCTION SELEC-1.
TOR to iPod, CD or RADIO.
Set the desired volume level using the VOLUME 2.
KNOB.
To turn off the unit, set the FUNCTION SELECTOR to 3.
OFF.
Radio Mode
Set the FUNCTION SELECTOR to RADIO. 1.
Set the BAND SELECTOR to the desired band: AM, FM 2. or FM ST.
Turn the TUNING CONTROL to search for the desired 3. station.

If the BAND SELECTOR is set to FM ST and you have tuned the radio to an FM stereo station, the FM Stereo Indicator will light.

Extend the telescopic antenna and orient it in the direction of the radio signal for optimum FM radio reception.
The device contains an internal antenna for AM radio reception. To improve reception, move the device to a location nearer the signal.
iPod Mode
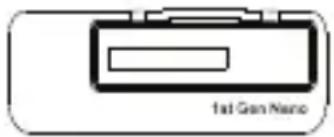
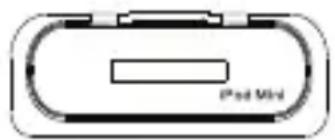
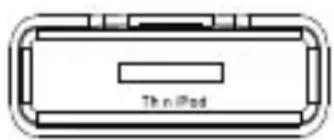
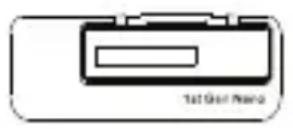
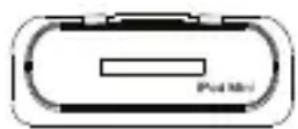
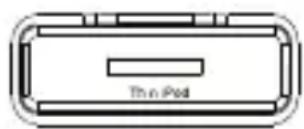
For optimal connection, this device includes connection adapters for a variety of iPod makes and models. Before connecting your iPod to the dock, you must insert the appropriate adapter for your iPod model into the dock connection.
Snap the compatible iPod into the dock connector. 1.
Set the FUNCTION SELECTOR to iPod. 2.
iPod playback will begin automatically. 3.
Your iPod will begin charging immediately upon 4. docking.
1st Gen Nano iPod Mini Thin iPod
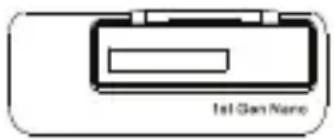
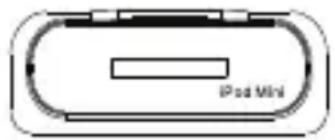
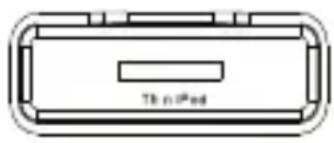
iPod Nano 2GB/4GB iPod Mini 2GB/4GB 3rd Gen Nano 4GB/8GB
5th Gen 30 GB
iPod Classic 80GB
iPod Touch 8GB
The MENU, SELECT, PLAY/PAUSE, SKIP +/- , iPod UP/DOWN, FOLDER UP/DOWN and VOLUME keys on your device and remote control correspond to your iPod's playback features. Use these keys to begin or pause playback, select tracks, change volume, etc. You may also use the volume control dial on the device to adjust the volume.

Turning off the unit will not turn off your iPod. To avoid draining the battery, power down your iPod when not in use. If your iPod battery is drained at the time of docking, it may take up to 6 minutes of charging before the iPod will respond.
CD Mode
The CD player supports audio discs, CD-R and CD-RW. Do not attempt to load CD-ROM, CDi, VCDs, DVDs or data CDs in this device.

Though this device is able to read CD-R and CD-RW discs, disks which are scratched, scuffed or of otherwise poor quality may not be read. Failure to play back CD-R or CD-RW disks does not necessarily indicate a device malfunction.
To use the CD Player
Set the FUNCTION SELECTOR to CD. The display will briefly indicate your selection.
To open the CD player door, raise it by the corner marked OPEN/CLOSE.
Insert a CD, CD-R or CD-RW disc with the printed surface facing up. Gently press the player door to close it.
Press PLAY/PAUSE to begin playback. Press again to pause/resume.
To stop CD playback, press STOP.

CD playback stops automatically when the CD compartment is opened, the radio function is selected, or at completion of the final track.
Selecting a different track
During playback, press NEXT or BACK on the unit or remote control unit to select the next/previous track. If you have selected a track number in Stop or Pause mode, press PLAY/PAUSE to resume playback. To return to the start of the current track, press BACK once.
Searching for a passage on a track
Press and hold BACK or NEXT to read the track in fast forward or reverse mode at reduced volume.
When you have found the desired passage, release the BACK or NEXT button. Normal playback will resume automatically.
Repeat function
Select REPEAT for continuous repeat playback of the current track. Select REPEAT ALL for continuous repeat playback of the entire CD. Select RANDOM for playback of tracks in random order.
Programming of track numbers
Up to 20 tracks can be programmed in any order. If desired, a given track can be programmed more than once.
To program tracks:
In STOP mode, press BACK or NEXT to select a track.
CD Mode
When the desired track number appears, press the PROG button once to record the track. The display will briefly flash 'PROG' followed by the track number selected.
Repeat steps 1 and 2 to select and program additional tracks.
To start playback of your programmed tracks, press PLAY/PAUSE.
Program Check
In STOP mode, press the PROG button. The display unit will display the track numbers in the order programmed.
Deleting a Program
To reset the memory and delete the program:
Open the CD door.
Set the function selector to RADIO.
Press STOP once.
CD Maintenance & Safety
Operating Precautions and General Maintenance
Place the device on a hard, flat surface only.
Do not expose the device, its batteries or CDs to moisture, dirt or excessive heat.
Do not block ventilation. A gap of at least 15cm must be kept between the ventilation openings and the surrounding surfaces to ensure proper ventilation and avoid overheating.
All mechanical components are self-lubricating and do not require grease.
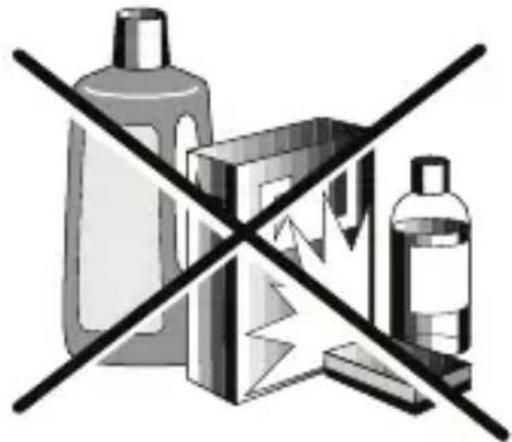
Use a soft and dry cloth to clean the unit. Do not use cleaning agents containing alcohol, ammonia, benzene or other abrasives, which may damage the device.
Cleaning CDs
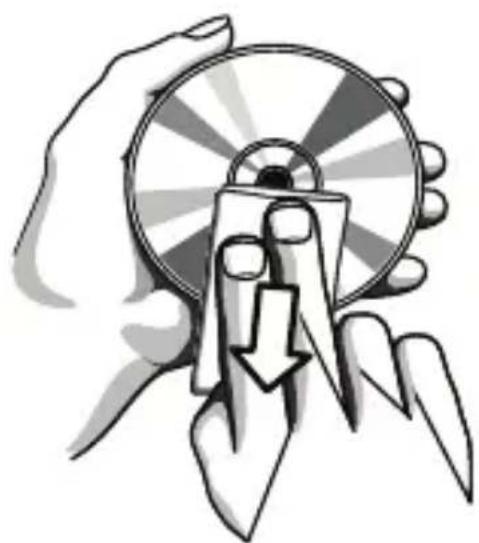
Use a soft and clean cloth to wipe away fingerprints or dust from the surface of the disc. Wipe in a straight motion from the center to the edge. Very small dust particles and slight will not affect the sound quality.
Never use chemical products such as sprays for conventional (vinyl) records, anti static aerosols, benzene or thinners to clean your CDs.
CD Maintenance & Safety
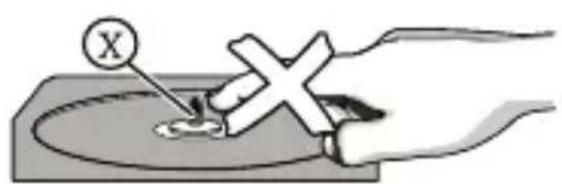
To reduce the risk of scratches, store CDs properly when not in use. Do not expose CDs to direct sunlight, high humidity or excessively high temperatures for long periods of time. Never affix labels to your CDs.
Cleaning the Lens
Dirt on the lens may cause CDs to read incorrectly and skip during playback. To clean the lens:
Unplug the power cord.
Open the CD door.
For dust or dry particles, blow lightly on the lens. Remove particles using the camera lens brush. Repeat as needed.
For fingerprints, use a dry cotton swab to clean the surface of the lens, wiping gently from the center to the outside. Repeat as needed.
Troubleshooting
If you have a problem with this device, please read the troubleshooting guide below and check our website at www.cobyusa.com for Frequently Asked Questions (FAQs) and firmware updates. If these resources do not resolve the problem, please contact Technical Support.
Address
Coby Electronics Technical Support
150 Knowlton Way
Savannah, Georgia 31407
techsupport@cobyusa.com
Web
www.cobyusa.com
Phone
800-727-3592: Mon-Fri, 8:30AM-9:00PM EST
Saturdays, 9:00AM-5:30PM EST
718-416-3197: Mon-Fri, 8:00AM-5:30PM EST

For your safety, never attempt to repair the device yourself. Attempting to do so will invalidate the warranty. Internal components of the device carry a risk of electric shock.
No sound/electric power
Confirm that volume is adjusted.
Confirm that power cord connections to device and wall outlet are secure.
Confirm that batteries are charged and properly installed.
Troubleshooting
Confirm that device is turned on.
No display unit or button function
Turn off and disconnect the device from power source to clear potential electrostatic discharge. Wait a few minutes, then plug in and turn on the device again.
Intermittent crackling sound during FM reception
Extend and position the FM aerial for optimal reception.
iPod does not dock properly
Confirm that the appropriate iPod adapter is in place in the docking station.
Confirm that iPod is properly installed in the docking station.
Check for obstruction on device dock and iPod dock connector.
iPod does not respond/iPod is playing but no sound comes out
Confirm that iPod is properly installed in the docking station.
Confirm that volume is adjusted.
Check that iPod functions are working properly. You may need to reset your iPod.
Troubleshooting
Unit/iPod performance is erratic
Move the device away from potential sources of external interference such as computers, modems, wireless devices (routers) or fluorescent light.
Confirm that iPod is properly charged.
Confirm that iPod is properly installed in the docking station.
Check that iPod functions are working properly.
No remote control function
Confirm that batteries are charged.
Replace batteries if needed.
Check Remote Control function by pointing it at the remote sensor (to the right of the display).
No disc information displayed
Confirm that a CD has been inserted in the player.
Confirm that inserted CD (CD-R) contains data.
Check the CD for dirt, scratches or smudging.
Replace/clean as needed. (See CD Maintenance section.)
Check the lens for dirt, fingerprints or condensation.
Clean as needed.
Troubleshooting
Skipping during CD playback
Check the CD for dirt, scratches or smudging.
Replace/clean as needed. (See CD Maintenance section.)
Confirm that the program sequence has not been activated.
Specifications
| Power Supply AC 110/220V ~ 60/50Hz DC 12V = 8 x “C” batteries (not included) | |
| Power Consumption 14 W | |
| Frequency Range AM 530 to 1710 KHz FM 88 to 108 MHz | |
| Speaker Impedance 8 ohms | |
| Headphones 3.5mm stereo | |
| Weight 3.8 lbs | |
| Unit Dimensions (LWH) 9.96 x 9.29 x 4.84 in. | |
English
Specifications and manual are subject to change without notice.
Safety Notices
4s116u3
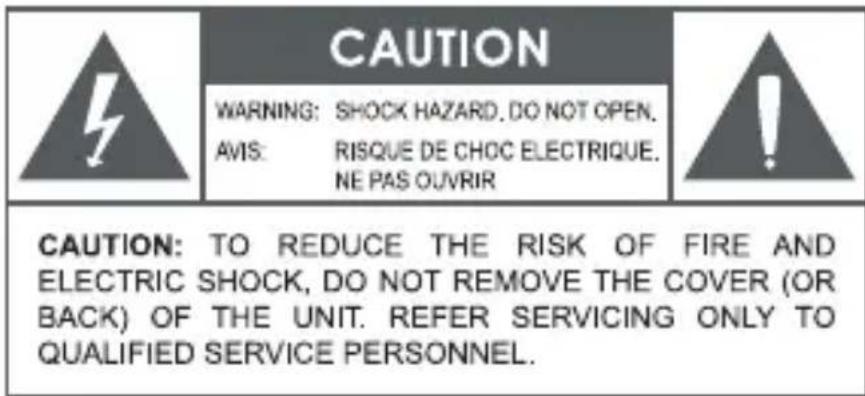
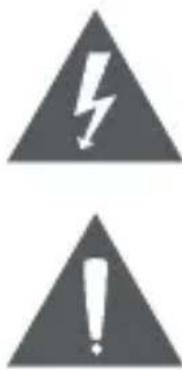
The lightning flash with arrowhead symbol within an equilateral triangle is intended to alert the user to the presence of uninsulated "dangerous voltage" within the product's enclosure that may be of sufficient magnitude to constitute a risk of electric shock.
The exclamation point within an equilateral triangle is intended to alert the user to the presence of important operation and servicing instructions in the literature accompanying the appliance.
For Customer Use:
Enter below the serial number that is located on the rear of the unit. Retain this information for future reference.
Model No. CSMP142
Serial No.
WARNING: To prevent fire or shock hazard, do not expose this device to rain or moisture. Dangerous high voltage is present inside the enclosure. Do not open the cabinet.
CAUTION: To prevent electric shock, match wide blade of plug to wide slot of outlet and fully insert.
Protect your hearing: Hearing experts advise against the constant use of personal stereos played at high volume. Constant exposure to high volumes can lead to hearing loss. If you should experience ringing in the ears or hearing loss, discontinue use and seek medical advice.

For recycling or disposal information about this product, please contact your local authorities or the Electronics Industries Alliance: www.eiae.org.
FCC Statement:
This device complies with Part 15 of the FCC Rules. Operation is subject to the following two conditions:
(1) This device may not cause harmful interference, and
(2) This device must accept any interference received, including interference that may cause undesired operation.
Note: This equipment has been tested and found to comply with the limits for Class B digital devices, pursuant to Part 15 of the FCC rules. These limits are designed to provide reasonable protection against harmful interference in a residential installation. This equipment generates, uses and can radiate radio frequency energy and, if not installed and used in accordance with the instructions, may cause harmful interference to radio communications. However, there is no guarantee that interference will not occur in a particular installation. If this equipment does cause harmful interference to radio or television reception, which can be determined by turning the equipment off and on, the user is encouraged to try to correct the interference by one or more of the following measures:
Reorient or relocate the receiving antenna.
Increase the separation between the equipment and receiver.
Connect the equipment into an outlet on a circuit different from that to which the receiver is connected.
Consult the dealer or an experienced radio/TV technician for help
Use of shielded cable is required to comply with Class B limits in Subpart B of Part 15 of the FCC rules.
Do not make any changes or modifications to the equipment unless otherwise specified in the manual. If such changes or modifications should be made, you could be required to stop operation of the equipment.
Important Safety Instructions
Read Instructions: All the safety and operating instructions should be 1. read before the product is operated.
Retain Instructions: The safety and operating instructions should be 2. retained for future reference.
HeedWarnings: All warnings on the product and in the operating 3. instructions should be adhered to.
Follow Instructions: All operating and usage instructions should be 4. followed.
Cleaning: Unplug this product from the wall outlet before cleaning. 5. Do not use liquid cleaners or aerosol cleaners. Use a damp cloth for cleaning.
Attachments: Use only attachments recommended by the manufac-6. turer. Use of other attachments may be hazardous.
Water and Moisture: Do not use this product near water (e.g., near a 7. bath tub, washbowl, kitchen sink, laundry tub, in wet basements, or near a swimming pool and the like).
Ventilation: Slots and openings in the cabinet are provided for venti-8. lation to ensure reliable operation of the product and to protect it from overheating. These openings should never be blocked by placing the product on a bed, sofa, rug, or other similar surface. This product should not be placed in a built-in installation such as a bookcase or rack unless proper ventilation is provided or the manufacturer instructions have been adhered to.
Power Sources: This product should be operated only from the type 9. of power source indicated on the rating label. If you are not sure of the type of power supply to your home, consult your product dealer or local power company. For products intended to operate from battery power or other sources, refer to the operating instructions.
Power-Cord Protection: Power supply cords should be routed so 10. that they are not likely to be walked on or pinched by items placed upon or against them, paying particular attention to cords at plugs, convenience receptacles, and at the point which they exit from the product.
Lightning: For added protection for this product, unplug it from the 11. wall outlet and disconnect the antenna or cable system during a light- ning storm or when it is left unattended and unused for long periods of time. This will prevent damage to the product due to lightning or power-line surges.
Safety Notices
Overloading: Do not overload wall outlets, extension cords, or in-12. tegral convenience receptacles as this can result in a risk of fire or electric shock.
Object and Liquid Entry: Never push objects of any kind into this 13. product through openings as they may touch dangerous voltage points or shout-out parts that could result in a fire or electric shock. Never spill liquid of any kind on the product.
Servicing: Do not attempt to service this product yourself as opening 14. or removing covers may expose you to dangerous voltage or other hazards. Refer all servicing to qualified service personnel.
Damage Requiring Service: Unplug this product from the wall outlet 15. and refer servicing to qualified service personnel under the following conditions: a) when the power-supply or plug is damaged; b) if liquid has been spilled or if objects have fallen into the product; c) if the product has been exposed to rain or water; d) if the product does not operate normally by following the operating instructions. Adjust only those controls that are covered by the operating instructions as improper adjustment of other controls may result in damage and will often require extensive work by a qualified technician to restore the product to its normal operation; e) if the product has been dropped or damaged in any way; f) when the product exhibits a distinct change in performance—this indicates a need for service.
Replacement Parts: When replacement parts are required, be sure 16. that your service technician has used replacement parts specified by the manufacturer or have the same characteristics as the original part. Unauthorized substitutions may result in fire, electric shock, or other hazards.
Safety Check: Upon completion of any service or repairs to this prod-17.uct, ask the service technician to perform safety checks to ensure that the product is in proper operating condition.
Heat: The product should be situated away from heat sources such 18. as radiators, heat registers, stoves, or other products (including amplifiers) that produce heat.
Índice
CoNTENiDoS DEI PaQuETE 32
FuNCioNES 33
CóMo EMPEZaR 34
1st Gen Nano iPod Mini Thin iPod
iPod Nano 2GB/4GB iPod Mini 2GB/4GB 3rd Gen Nano 4GB/8GB
5th Gen 30 GB
iPod Classic 80GB
iPod Touch 8GB
Coby Electronics Technical Support
150 Knowlton Way
Savannah, Georgia 31407
techsupport@cobyusa.com
La Red
www.cobyusa.com
Refermer le compartment.

1st Gen Nano iPod Mini Thin iPod
iPod Nano 2GB/4GB iPod Mini 2GB/4GB 3rd Gen Nano 4GB/8GB
5th Gen 30 GB
iPod Classic 80GB
iPod Touch 8GB
Ouvrir le compartment CD.
Ouvrir le compartment CD.
Coby Electronics Technical Support
150 Knowlton Way
Savannah, Georgia 31407
techsupport@cobyusa.com
Site Web
www.cobyusa.com
Telephone
Coby Electronics Corporation
1991 Marcus Ave, Suite 301
Lake Success, NY 11042
www.cobyusa.com
www.ecoby.com
Coby is a registered trademark of Coby Electronics Corporation. Printed in China.
COBY es lamarca registrada de COBY Electronics Corporation. Imprimido en China.
- RaDio MoDE 14
- iPoD MoDE 15
- CD MoDE 16
- Table of Contents
- CD MaiNTENaNCE & SaFETY 19
- TRouBIESHooTiNg 21
- Package Contents
- Features
- Getting Started
- Controls at a Glance
- Front View
- Top View
- Rear View
- Remote Control
- Connecting Power
- Using the DC Power Supply
- Using the AC Power Supply
- Installing/Replacing the Remote Control Batteries
- Stereo Headphone Jack
- General Operation
- Radio Mode
- iPod Mode
- 1st Gen Nano iPod Mini Thin iPod
- CD Mode
- To use the CD Player
- Selecting a different track
- Searching for a passage on a track
- Repeat function
- Programming of track numbers
- Program Check
- Deleting a Program
- CD Maintenance & Safety
- Operating Precautions and General Maintenance
- Cleaning CDs
- Cleaning the Lens
- Troubleshooting
- Address
- Web
- Phone
- No sound/electric power
- No display unit or button function
- Intermittent crackling sound during FM reception
- iPod does not dock properly
- iPod does not respond/iPod is playing but no sound comes out
- Unit/iPod performance is erratic
- No remote control function
- No disc information displayed
- Skipping during CD playback
- Specifications
- Safety Notices
- For Customer Use:
- FCC Statement:
- Important Safety Instructions
- Índice
- CoNTENiDoS DEI PaQuETE 32
- FuNCioNES 33
- CóMo EMPEZaR 34
- La Red
- Site Web
- Telephone
- Coby Electronics Corporation
Brand : COBY
Model : CSMP142
Category : Docking station