
20ID3-60BL.2B - Cordless hammer drill DEXTER - Free user manual and instructions
Find the device manual for free 20ID3-60BL.2B DEXTER in PDF.
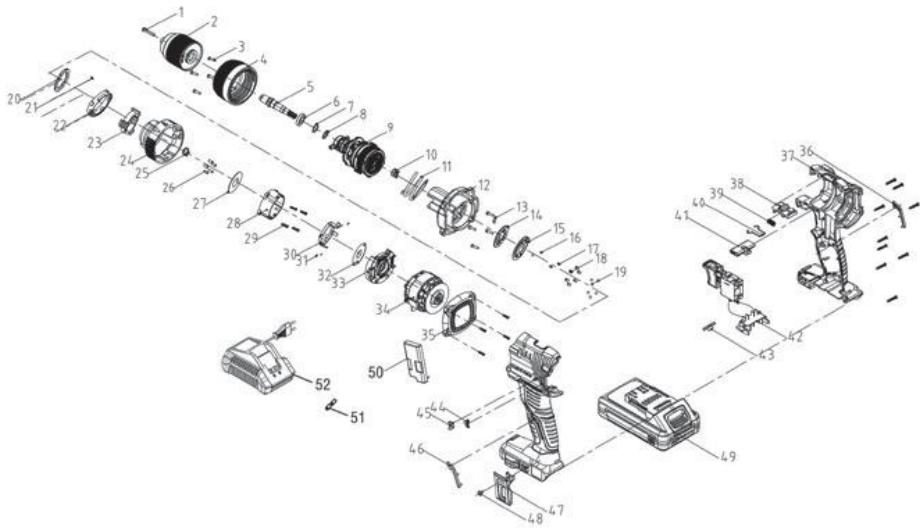
| Product type | Cordless hammer drill |
| Brand | DEXTER |
| Model | 20ID3-60BL.2B |
| Rated voltage | 18 V DC (Max 20 V DC) |
| No-load speed | 0 – 500 / 0 – 2000 rpm |
| Impact rate | 8000 – 32000 bpm |
| Chuck capacity | 13 mm |
| Max drilling diameter (wood) | 45 mm |
| Max drilling diameter (metal) | 20 mm |
| Max drilling diameter (concrete) | 18 mm |
| Max torque (dynamic) | 60 Nm |
| Weight (without battery) | 1.24 kg |
| Sound pressure level | 79.6 dB(A) |
| Sound power level | 87.6 dB(A) |
| Vibration (metal drilling) | 2.5 m/s² |
| Vibration (concrete drilling) | 5.6 m/s² |
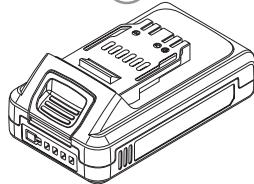
| Battery type | Li-ion 18 V (compatible with UP20) |
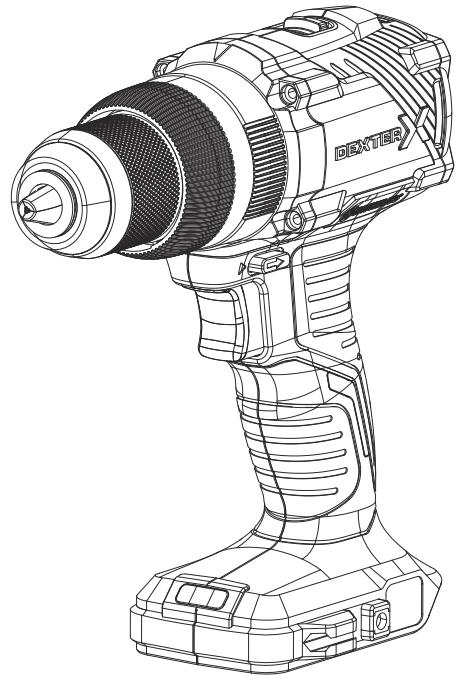
| Charger type | UP20 charger (compatible) |
| Motor | Brushless |
| Warranty (tool) | 5 years |
| Warranty (battery / charger) | 3 years |
| Main features | Variable speed, forward/reverse, drill/hammer mode, LED light, keyless chuck |
| Maintenance and cleaning | Clean with a dry cloth; do not use water or chemicals; no lubrication required |
| Safety | Double insulation (class II), overload protection, automatic shut-off in case of jamming |
| Spare parts and repairability | Detailed parts list in the manual; repairs only by an authorized service center |
Frequently Asked Questions - 20ID3-60BL.2B DEXTER
User questions about 20ID3-60BL.2B DEXTER
0 question about this device. Answer the ones you know or ask your own.
Ask a new question about this device
Download the instructions for your Cordless hammer drill in PDF format for free! Find your manual 20ID3-60BL.2B - DEXTER and take your electronic device back in hand. On this page are published all the documents necessary for the use of your device. 20ID3-60BL.2B by DEXTER.
USER MANUAL 20ID3-60BL.2B DEXTER
Specific safety warnings & instructions for cordless impacts drills

EAN CODE: 3276007795516
The machine is intended for driving in and loosening screws as well as for drilling in wood, metal and concrete.
Tools with electronic control and clockwise / anticlockwise rotation are also suitable for screwdriving.
Do not use machines, tools and accessories for additional applications (see manufacturer's instructions) or for works other than those for which they are designed for.
The drill and screwdriver bit recommendations are to be observed.

WARNING: Read all safety warnings, instructions, illustrations and specifications provided with this power tool. Failure to follow all instructions listed below may result in electric shock, fire and/or serious injury.
Save all warnings and instructions for future reference.
SPECIFIC SAFETY WARNINGS
1/ Safety instructions for all operations
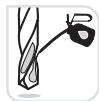
A. Wear ear protectors when impact drilling. Exposure to noise can cause hearing loss.
B. Brace the tool properly before use. This tool produces a high output torque and without properly bracing the tool during operation, loss of control may occur resulting in personal injury.
C. Hold the power tool by insulated gripping surfaces, when performing an operation where the cutting accessory or fasteners may contact hidden wiring. Cutting accessory or fasteners contacting a live wire may make exposed metal parts of the power tool «live» and could give the operator an electric shock.
2/ Safety instructions when using long drill bits
A. Never operate at higher speed than the maximum speed rating of the drill bit. At higher speeds, the bit is likely to bend if allowed to rotate freely without contacting the workpiece, resulting in personal injury.
B. Always start drilling at low speed and with the bit tip in contact with the workpiece. At higher speeds, the bit is likely to bend if allowed to rotate freely without contacting the workpiece, resulting in personal injury
C. Apply pressure only in direct line with the bit and do not apply excessive pressure. Bits can bend causing breakage or loss of control, resulting in personal injury.
Additional safety warnings
- Switch the power tool off immediately if the application tool becomes blocked. Be prepared for high torque reactions which cause kickback. The application tool becomes blocked when it becomes jammed in the workpiece or when the power tool becomes overloaded.
- Hold the power tool securely. When tightening and loosening screws be prepared for temporarily high torque reactions.
- Secure the workpiece. A workpiece clamped with clamping devices or in a vice is held more secure than by hand.
- Use suitable detectors to determine if utility lines are hidden in the work area or call the local utility company for assistance. Contact with electric lines can lead to fire and electric shock. Damaging a gas line can lead to explosion. Penetrating a water line causes property damage or may cause an electric shock.
- Always wait until the power tool has come to a complete stop before placing it down. The application tool can jam and cause you to lose control of the power tool.
- Hold the power tool firmly with both hands and make sure you have a stable footing. The power tool can be more securely guided with both hands.
- In order to prevent the power tool from being switched on unintentionally, always unlock the lock on button. To do so, briefly press the On/Off switch.
-
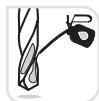
Application tools can become hot during operation. There is a risk of burns when changing the application tool. Use protective gloves to remove the application tool.
-
Children and frail people must not use this tool. Children should be supervised at all times if they are in the area in which the tool is being used. It is also imperative that you observe the accident prevention regulations in force in your area.
RESIDUAL RISKS
Even when the tool is used as prescribed it is not possible to eliminate all residual risk factors.
The following hazards may arise in connection with the tool's construction and design:
- Risk of electrocution if electric cables are drilled into - Always grasp the tool by designated handles, do not touch the drill bits.
- Damage to the respiratory system - Wear respiratory protection masks containing filters appropriate to the materials being worked. Ensure adequate workplace ventilation. Do not eat, drink or smoke in the work area.
- Damage to hearing - Always wear effective hearing protection and limit exposure to noise.
- Damage to eyes from flying dust and debris particles – Always wear suitable eye protection.
- Injury caused by vibration - Hold the tool by designated handles and limit exposure to vibration. See "RISK REDUCTION".
- Injury caused by dust - Dust created by operating the product can cause respiratory injury. wear an appropriate dust control mask with filters suitable for protecting against particles from the material being worked on.
RISK REDUCTION

WARNING: the vibration emission and noise emissions during actual use of the power tool can differ from the declared total value depending on the ways in which the tool is used, especially what kind of work piece is processed; Identify safety measures to protect the operator that are based on an
estimation of exposure in the actual conditions of use (taking account of all parts of the operating cycle such as the times when the tool is switched off and when it is running idle in addition to the trigger time). Depending on the actual use of the product the vibration values can differ from the declared total! Adopt proper measures to protect yourself against vibration exposures! Take the whole work process including times the product is running under no load or switched into consideration! Proper measures include among others regular maintenance and care of the product and application tools, keeping hands warm, periodical breaks and proper planning of work processes!
This tool may cause hand-arm vibration syndrome if its use is not adequately managed. Helping to minimise your vibration and noise exposure risk:
- Always use sharp chisels, drills and blades.
- Maintain this tool in accordance with these instructions and keep well lubricated (where appropriate).
- If the tool is to be used regularly then invest in anti vibration and noise accessories.
- Plan your work schedule to spread any high vibration tool use across a number of days.
It's recommended to wear ear protection during operation with this machine.
SYMBOLS DESCRIPTION
| Read instruction manual carefully | |
| CE | This device complies with the applicable European directives and an evaluation method of conformity for these directives was done. |
| EAC | Single mark of circulation of products on the market of the Member States of the Customs Union |
| This device complies with applicable Ukraine technical regulations | |
| Waste electrical products must not be disposed of with household waste. Please recycle where facilities exist. Check with your local authorities or retailer for recycling advice. | |
| Recyclable products subject to extended producer responsibility. Observe the associated sorting instructions. | |
| Safety glasses mandatory | |
| Ear protection mandatory | |
| Protection gloves mandatory | |
| Dust mask mandatory | |
| This danger notice warns of damage to the appliance or others properties, or may cause physical injuries. | |
| For indoor use only, do not expose to rain. | |
| T3.15A | If the current of the charger is higher than 3.15A, the current to the outlet will be stopped by the fuse. |
| Read the instruction handbook and follow all warnings and safety instructions. | |
| Protection Class II | |
| Use and store the battery within an temperature below 45°C | |
| Do not disassemble, crush, heat above 100°C; Never expose the battery to microwaves or high pressures. | |
| Li-lon battery. This product has been marked with a symbol relating to 'separate collection' for all battery packs and battery packs. It will then be recycled or dismantled in order to reduce the impact on the environment. Battery packs can be hazardous for the environment and for human health since they contain hazardous substances. |
| Always unplug the device after use or before maintenance | |
| To reduce the risk of electric shock, do not expose to water |
UP20 Universal: compatible only with Sterwins UP20, Lexman UP20, and Dexter UP20
TECHNICAL DATA
| MODEL | 20ID3-60BL.2B | |
| RATED VOLTAGE | 18V d.c.(Max.20V D.C.) | |
| SPEED n0 | 0-500/0-2000/min | |
| IMPACT RATE | 8000-32000 /min | |
| CHUCK CAPACITY | Ø13mm | |
| MAX DRILLING DIAMETER | Wood | 45mm |
| Metal | 20mm | |
| Concrete | 18mm | |
| STATIC STALLING TORQUE | 29.5Nm | |
| DYNAMIC PEAK TORQUE | 60Nm | |
| WEIGHT | 1.24kg | |
| SOUND PRESSURE Lpa | 79.6dB(A) | |
| SOUND POWER Lwa | 87.6dB(A) | |
| UNCERTAINTY Kpa, Kwa | 5dB(A) | |
| VIBRATION TOTAL VALUE Drilling in metal ah,D | 2.5m/S2 | |
| VIBRATION TOTAL VALUE Impactdrilling in concrete ah,ID | 5.6m/S2 | |
| UNCERTAINTY K | 1.5m/S2 | |
| BATTERY PACK AND CHARGERINFORMATIONS | mpatible with all UP20®batteriesmpatible with all UP20®chargers | |

WARNING:
The vibration and noise emissions during actual use of the power tool can differ from the declared values depending on the ways in which the tool is used especially what kind of workpiece is processed;
The emissions value need to identify safety measures to protect the operator that are based on an estimation of exposure in the actual conditions of use (taking account of all parts of the operating cycle such as the times when the tool is switched off and when it is running idle in addition to the trigger time).
-
The declared vibration total value and the declared noise emission value have been measured in accordance with a standard test method and may be used for comparing one tool with another.
-
The declared vibration total value and the declared noise emission value may also be used in a preliminary assessment of exposure.
-
Evitati riscurile associate vibrantiilor
- Avoid vibration risk.
Suggestion:
1) wear glove during operation
2) limit operating time and shorten trigger time
OPERATION

WARNING : The device should be disconnected from the mains before putting into operation
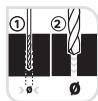
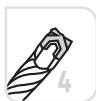
BIT INSTALLATION
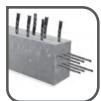
When selecting a drill bit, use the right type for your job. For best performance, always use a sharp drill bit.
- To open the chuck jaws, hold its collar while turning the sleeve in the counter clockwise direction. Insert the drill bit deeply into the chuck, and then center the bit in the chuck jaws.
- To close the chuck jaws, hold the collar while turning the sleeve in the clockwise direction.Tighten securely.
- Remove the drill bit in reverse order.
NOTE: The chucks of reversible drills are always fixed by a screw with a left hand thread. The screw must be loosed before the chuck can be removed if necessary. To loosen the screw, turn it in a clockwise direction.
FORWARD / REVERSE ADJUSTMENT
- For forward (clockwise) rotation, push the forward/reverse switch to the left position.
- For reverse (counterclockwise) rotation, push the forward/reverse switch to the right position. Although an interlock prevents reversing the tool while the motor is running, allow it to come to a full stop before reversing.

WARNING: If the forward / reverse switch is in the central position, the tool can not be switched on.
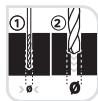
SELECTING THE IMPACT/DRILL MODE
The impact/drill switch should be set according to the type of action required.
The tool has two settings:
- Drill mode: For drilling into wood and metal. Use standard drill bits.
- Impact mode: For drilling into stone and masonry. Use masonry drill bits.
VARIABLE SPEED TRIGGER SWITCH

WARNING: Always check that the power supply is the same as that indicated on the nameplate of the tool.
This tool has a variable speed switch which can reach higher speed with increased trigger pressure. Speed is controlled by the pressure to the switch trigger. The variable speed feature is particularly useful when starting drilling. It also enables you to select the best speed for a particular application.
To limit the maximum speed of the tool, rotate the dial on the front of the trigger until the desired setting is achieved. Turn the dial to the "+ direction to increase the speed and to the " - direction to decrease the speed.
NOTE: It is recommended to use the variable speed feature for a short time only. Do not continuously operate the tool at different speeds. It may damage the switch.
LED WORKLIGHT
The tool has a LED light to illuminate the work area and improve vision when working in areas with insufficient lights.
The LED light will switch on automatically while the trigger switch is depressed
START DRILLING
Start the tool by squeezing the variable speed trigger switch. Release the trigger to stop the tool.
HOLE DRILLING
When attempting to drill a large diameter hole, it is sometimes best to start with a smaller drill bit then work up to the required size. This prevents overloading the drill.

WARNING: Many accidents occur because of unforeseeable situations. Please pay attention that drilling-out a small hole may cause the drill bit to jam in the hole, especially when drilling metal.
- Remember to use a "wood-pecker" action on deep holes to allow the swarm to be ejected from the hole.
- If the drill bit snags, switch off immediately to prevent permanent damage to the drill.
- Try running the drill in reverse to remove the bit.
- Keep the drill in line with the hole. Ideally, the drill bit should enter at right angles to the work. If the angle is
changed during drilling, this could cause the bit to snap off, blocking the hole and perhaps causing injury.
- Reduce pressure as the drill is about to break through the item being drilled.
- Don't force the drill, let it work at its own pace.
- Keep the drill bit sharp.
DRILLING WOOD
For maximum performance when drilling larger holes, use auger bits or spade bits for wood drilling.
- Set the tool to the drill mode.
- Begin drilling at a very low speed to prevent the bit from slipping off the starting point. Increase the speed as it bites into the wood.
- When drilling through holes, place a block of wood behind the work piece to prevent ragged or splintered edges on the back of the hole.
DRILLING METAL
For maximum performance, use HSS drill bits for metal drilling.
- Set the tool to the drill mode.
- Mark off the center of the hole using a center punch.
- Use a suitable lubricant for the material you are working on.
- Begin drilling at a very low speed to prevent the bit from slipping off the starting point.
- Always clamp sheet metal. Support thin metal with a block of wood to avoid distorting it.
DRILLING CONCRETE
For maximum performance, use high quality carbide-tipped masonry drill bits when drilling holes in brick, tile, concrete etc.
- Use the drilling mode initially then revert to the impact mode once the holes are established.
- Apply light pressure and medium speed for best results in brick.
- Apply additional pressure and high speed for hard materials such as concrete.
- When drilling holes in tile, practice on a scrap piece to determine the best speed and pressure.
NOTE : Reverse rotation during impact drilling may damage the drill and drill bit.
SPECIAL SAFETY INSTRUCTIONS FOR BATTERY PACK AND CHARGER
a) This appliance can be used by children aged from 8 years and above and persons with reduced physical, sensory or mental capabilities or lack of experience and knowledge if they have been given supervision or instruction concerning use of the appliance in a safe way and understand the hazards involved.
b) Children shall not play with the appliance. Cleaning and user maintenance shall not be made by children without supervision.
c) Before the use of the charger and the battery pack, read the instruction manual for it carefully.
d) During the charge process, the current used should correspond to the current of the battery charger.
e) Never let moisture, rain or splashed water reaches the charging location.
f) The ambient temperature must not exceed 50^ . Never expose the device to direct insulation.
g) Only switch off the current when the battery pack has been inserted into the box or has been pulled out of the box.
h)Storage-battery pack, which are defective or damaged or can no longer be recharged, must be disposed of as hazardous waste. Hand them over at a special collection point Never harm our environment.Do not throw unusable storage-battery pack away into the domestic waste,into free or into water.
i) If the electrical cable is damaged, the wire may only be replaced by the supplier or by his repair workshop. Have repairs carried out only by an authorized specialist only.
j) Use only storage-battery pack, which have been produced by the original manufacturer.
k) Always keep the surface of the charger free from dust and dirt.
Insert the battery pack into the charger. Follow the guidelines provided concerning polarity.
m) Always remove battery pack before working on the machine.
n) When the battery pack is outside the drill, cover the contacts to avoid short circuits (e.g. from tools)
0)Do not throw Li-ion batteries into water or fire, risk of explosion!
p)Protect the battery pack from impacts, and don't open it.
q)Never discharge the battery pack completely and recharge occasionally if not used for a prolonged period.
r) Do not recharge non-rechargeable batteries, as they can overheat and break.

RESIDUAL RISKS: Even when the tool is used as prescribed it is not possible to eliminate all residual risk factors. The following hazards may arise in connection with the tool's construction and design:
- Damage to lungs if an effective dust mask is not worn.
- Damage to hearing if effective hearing protection is not worn.
- Health defects resulting from vibration emission if the power tool is being used over longer period of time or not adequately managed and properly maintained.

WARNING: This machine produces an electromagnetic field during operation. This field may under some circumstances interfere with active or passive medical implants. To reduce the risk of serious or fatal injury, we recommend persons with medical implants to consult their physician and the local implant manufacturer before operating this machine.
MAINTENANCE

WARNING: Do not allow brake fluids, gasoline, petroleum-based products penetrating oils, etc... come in contact with plastic parts. They contain chemicals that can damage, weaken or destroy the housing, thus compromising the integrity of the double insulation.

WARNING: Always disconnect the device before performing any adjustment or maintenance operation. If the supply cord is damaged, it must be replaced by the manufacturer or its service agent in order to avoid a hazard. Disconnect from the power supply immediately if the supply cord is
damaged. Take care not to expose this tool to the rain. If the carbon brushes need to be replaced, have this done by a qualified repair person (always replace the two brushes at the same time) Your power tool requires no additional lubrication or maintenance. Never use water or chemical cleaners to clean your power tool. Wipe clean with a dry cloth. Always store your power tool in a dry place. Keep the motor ventilation slots clean. Keep all working controls free of dust. Occasionally you may see sparks through the ventilation slots. This is normal and will not damage your power tool. The ambient temperature range for this tool use is 0^ - 40^ . The relative humidity of the area must be not more than 80% without direct exposure to rain and excessive dust content of the air. There are some user serviceable parts in your power tool.
Please refer to the list of spare part list of the manual.
A. INSPECTING THE MOUNTING SCREWS
Regularly inspect all mounting screws and ensure that they are properly tightened. Should any of the screws be loose, tighten them immediately. Failure to do so could result in serious injuries
B. MAINTENANCE OF THE MOTOR
The motor unit winding is the very "heart" of the power tool. Exercise due care to ensure the winding does not become damaged and /or wet with oil or water
C. INSPECTION OF THE CARBON BRUSHES (for brushed model only)
The motor employs carbon brushes which are consumable parts. Since excessively worn carbon results in motor trouble, replace the carbon brush with an identical part when it becomes worn to or near the limit. In addition, always keep carbon brushes clean and ensure that they slide freely within the brush holder.
TROUBLE SHOOTING
| PROBLEM | POSSIBLE CAUSE | SOLUTION |
| PRODUCT DOES NOT START | Not connected to power supply | Connect to power supply |
| Other electrical defect to the product | Check by a specialist electrician | |
| The battery is low power | Need to charge the battery pack before operating | |
| THE MACHINE STOPS WORKING AFTER ROTATING SLOWLY | Air vents are blocked | Clean the air vents |
| The battery is low power | Need to charge the battery pack before operating | |
| UNUSUAL VIBRATION DURING USE | Bit is not well assembled | Disassembly and assembly the drill bit by strictly following instructions |
| SPARKING-visible THROUGH THE HOUSING AIR VENTS | A small amount of sparking may be visible through the housing vents | This is normal and does not indicate a problem |
| UNSATISFACTORY RESULT | Drill bit is worn or not adapted to the material to drill | Replace with new bit or check the compatibility between drill bit and material to drill |
STORAGE AND TRANSPORTATION CONDITION
STORAGE
This product :
- must be stored in a dry place
- must be stored away from sources of high temperatures and exposure to sunlight
- must avoid sudden temperature changes during storage
- must be stored without packaging is not allowed
- must be stored in the manufacturer's packaging in warehouses at an ambient temperature of +0 to +40^ . Humidity should not exceed 80% .
TRANSPORTATION
This product :
- must be transported in closed vehicles in accordance with the rules for the carriage of goods in force on
this type of transport.
- during transportation and handling operations, the packaging with the product should not be subjected to sharp impacts and the effects of precipitation.
- when unloading / loading, it is not allowed to use any type of equipment that works on the principle of clamping the package
- must be transported at ambient temperature from -20^ to +50^ . Relative air humidity should not exceed 90% .
- after transporting the device in winter conditions, it is necessary to keep it at room temperature for at least 2 hours until the moisture is completely dry.
PROTECT OUR ENVIRONMENT
CAUTION! This product has been marked with a symbol relating to removing electric and electronic waste. This means that this product shall not be discarded with household waste but that it shall be returned to a collection system which conforms to the European WEEE Directive. Contact your local authorities or stocks for advice on recycling. It will then be recycled or dismantled in order to reduce the impact on the environment. Electric and electronic equipment can be hazardous for the environment and for human health since they contain hazardous substances.
WARRANTY
Dexter & UP20 products are designed to the highest DIY quality standards. We offer a 60-month warranty for DEXTER product (tool), and a 36-month warranty of UP20 products (charger & battery) from the date of purchase. This warranty applies to all material and manufacturing defects which may arise. No further claims are possible, of whatever nature, direct or indirect, relating to people and/or materials. Dexter products are not intended for professional use.
In the event of a problem or defect, you should first always consult your Dexter dealer. In most cases, the Dexter dealer will be able to solve the problem or correct the defect.
Repairs or the replacement of parts will not extend the original warranty period.
Defects which have arisen as a result of improper use or wear are not covered by the warranty. Amongst other things, this relates to switches, protective circuit switches and motors, in the event of wear.
Your claim upon the warranty can only be processed if:
- Proof of the purchase date can be provided in the form of a receipt.
- No repairs and/or replacements have been carried out by third parties.
- The issue is not a matter of normal wear and tear.
- The tool has not been subjected to improper use (overloading of the machine or fitting non-approved accessories).
- The required maintenance and repair works have been performed correctly.
- There has been no forcing, improper handling, unauthorized use, or accidents.
- There is no damage caused by external influences or foreign bodies such as sand or stones.
- There is no damage caused by non-observation of the safety instructions and the instructions for use.
- There is no force majeure on our part.
- No incorrect parts have been used, parts not made by Dexter, whereas they prove to be the cause of deterioration.
- The tool / battery / charger have been in a wet environment (dew, rain, submerged in water,...).
- A description of the complaint is enclosed.
The warranty stipulations apply in combination with our terms of sale and delivery.
Faulty tools to be returned to Dexter via Dexter dealer will be collected by Dexter as long as the product is properly packaged. If faulty goods are sent directly to Dexter by the consumer, Dexter will only be able to process these goods if the consumer pays the shipping costs.
Products which are delivered in a poorly packaged condition will not be accepted by Dexter.
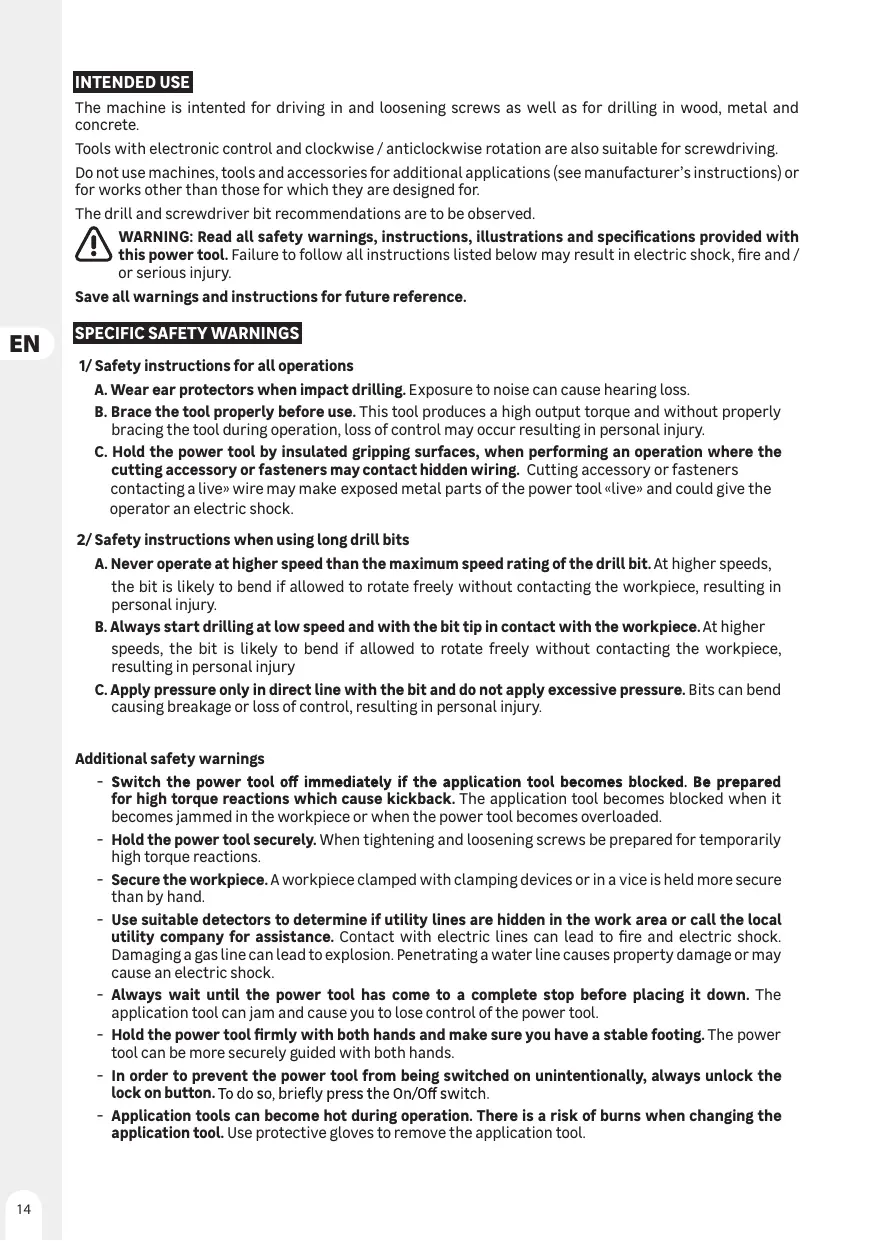
| n° | Description | n° | Description | n° | Description | n° | Description |
| 1 | Screw M6X24T type | 16 | Steel ball | 31 | Inner ring side pin | 46 | Left decorative part |
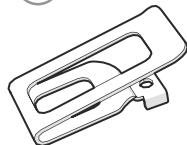
| 2 | Chuck | 17 | Sound spring | 32 | Big gasket | 47 | Belt hook No3 |
| 3 | Screw ST3*14(T type) | 18 | Torque needle roller | 33 | Motor end cap | 48 | Screw M4X8 |
| 4 | Torque sleeve | 19 | Steel ball | 34 | Motor and pcb assembly | 49 | Battery pack |
| 5 | Output shaft | 20 | Gasket for torque sleeve | 35 | Back cover | 50 | Protection board and support assembly |
| 6 | Deep groove ball bearing | 21 | Screw 2.5*8 T type | 36 | Right decorative part | 51 | Heat shrink tube |
| 7 | Steel ball | 22 | Toggle ring | 37 | Housing | 52 | Charger |
| 8 | Small gasket | 23 | Internal thread | 38 | Speed adjustment button | ||
| 9 | No.62 powder metallurgy assembly | 24 | Indicating ring | 39 | Spring for speed adjustment button | ||
| 10 | Impact spring | 25 | Circlip | 40 | No.7 elastic steel wire | ||
| 11 | Torque spring | 26 | Self-locking pin | 41 | Push rod | ||
| 12 | Front housing for gear box (Built-in moving teeth disk) | 27 | Gasket | 42 | Switch assembly | ||
| 13 | No 11 Tuning fork | 28 | Back shell for gear box | 43 | Transparent lampshade | ||
| 14 | Sound gasket | 29 | Srew ST2.8*12(T type) | 44 | Left arrow | ||
| 15 | Cover plate | 30 | Toggle support | 45 | Right arrow | ||
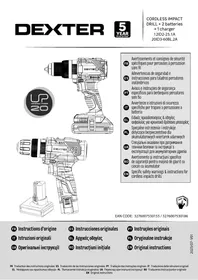
PR Perceuse a percussion brushless sans fil+2 batteries ^+ 1 chargeur
EN Cordless brushless impact drill ^+ 2 batteries ^+ 1 charger

EANCODE:3276007795516
FR Mode d'emploi
EN Instructions Manual


Thank you for purchasing this product. We recommend that you read the installation, user and maintenance instructions carefully. We have designed this product to ensure your complete satisfaction. If you require assistance, the temat your retailer is on hand to help you.
A
x1
F x1
D x2

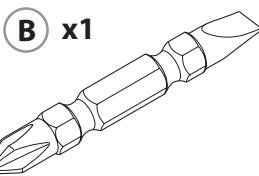
E x1

Attention danger / Caution danger

Hors tension / Power off

This product is recyclable. If it cannot be used anymore, please take it to waste recycling centre.
Industrial Type Design Reference: 20ID3-60BL.2B
DEXTER
SN SSSSSS XX DDMMYY nn PPPPPP (SN: Serial No., SSSSSS : Supplier code, XX :Factory ID, DDMMYY: Production date, nn: number of version of product, PPPPPP : Incremental number)
The object of the declaration described above is in conformity with the relevant Union harmonization legislation|L'objet de la déclaration précit ci-dessus est conforme à la législation d'harmonisation de l'union applicable|Elobjet de la déclaration descrita anteriormente es conforme à la législation de armonizacion pertinente de la Unión|Objecto da declaracion acima descrita esta en conformidade com alegislation de harmonização da Uniao aplicavel:|
References to the relevant harmonised standards used or references to the specifications in relation to which conformity is declared|Références des normes harmonisées pertinentes appliquées ou des specifications par rapport auxquelles la conformité est déclarée|Referencias a las normas armonizadas pertinentes realizadas, ou referencingias a las espécricaciones respecta a las cuales se declara la conformadid|Referencias as normas harmonizadas pertinentes realizadas ou referencingias as espécricações para as quais a conformadidade é declarada|
When applicable, the name and number of notified body number|Le cas échéant, le nom et le nombrep de l'organisme notification|Cuando corresponda * el nombre y nulo mero de laboratorioico notifications que haya emitido la certificacion y la referencia al documento|Quando aplicavel * o nome e numero do laboratorioico notifications que emitiu acertificacao e a referencia ao documento|
2006_42_EC_MACHINE
machinery|Machines|maquinas |maquinas|
EN 62841-1:2015+A11:2022
EN 62841-2-1:2018+A11:2019+A1:2022+A12:2022
2014 30 EU EMC
Select the responsible and type code
Select the responsible and type code
2024/4/16
Signature
Modello di prodotto/prodotto|Model produktu/productt|Movrελο πτροίντος/Προίσν;|Modelul de produs/produsul;|
90806008
La presente dichiarazione di conformità è rilasciate sulla responsabilità esclusiva del fabbricante|Niniejsza deklaracja zgodnosi wydana zostaje na wylączna odpwiedzialnosc producenta. |Etnuw uia kai dieuunou ton kataaekuaan n tou eouiootevou aTnpouou toul Denumirea si adresa producatorului saa reprezentantului sau autorizat:
ADEO Services, 135 Rue Sadi Carnot - CS 00001 59790 RONCHIN - France
La presente dichiarazione di conformità è rilasciate sulla responsabilità esclusiva del fabbricante|Niniejsza deklaracja zgodnosi wydana zostaje na wylaczn opdowiedzialnosc producenta.1H top ouo oumopwouon eckdietau m atokAioTik eU0vTu kataoKuaOri|Declaratia de conformitate this emis pe raspunderea exclusiva a producatoruiui
90806008 - EAN Code: 3276007795516
Industrial Type Design Reference: 20ID3-60BL.2B
DEXTER
SN SSSSSS XX DDMMYY nn PPPPPP (SN: Serial No., SSSSSS : Supplier code, XX :Factory ID, DDMMYY: Production date, nn: number of version of product, PPPPPP : Incremental number)
L'oggetto della dichiarazione di cui sopra è conforme alla pertinente normativa di armonizazione dell'Unione/Wymieniny powozjej przemdiin nineijsjej deklaracijs jest zgodnyz o odnośnymi wymaganiemi unijnegro prawodawstwa harmonizacyjngoI O stroxo tsδiλωσnsrou tερiyapéetai raptamav eviaoi áuμwovc μe tn oxetikn evwziakкνoμθ σοι εναρύνισκ; Objectul declaretiae descris mis ai sue este in confortamente cu legislata comunitarà relevantà de armonizare a Uniunii
Riferimenti alle pertinenti norme armonizzate utilizzate o alle specifiche in relazione alle quali è dichiarata la conformità|Odwo Iania do odnosnych norm zharmonizowanych, ktore
zastosowano, lub do specfikaci, w odniessienu do ktorch
deklarowana jest zgodnosc:Mvieia tvw evaproviouevv TpOToTvw ToxpiotioovTu nVvia tvtpoiaqau v 6e an me tioe cldawv ta nmuoppwon:|Referintele standarderarmonize relevante folosite sau referintele specciilior in legatura cu care se declara conformitatea:
Dove applicable * il nome e il numero del laboratorio notifiedo che ha filasciato la certificazione e i riferimento al documento|W stosownych przypadkach * notyfikowana nazwa i numer laboratories, ktore wydalo certifikat oraz odniesienie do documento|Otrou loxui* to ywsoTOniouévo 6vouka kai tov apoió tou evpaoTpiou TOU EeEdoe TIV TIOToiOniou kai tvnv avapopó oTo EyypaOluUnde este cazul * numele si numarul de laborator notificati care a eliberat certificarea si trimiterea la document|
Select the responsible and type code
Luogo e data del rilascio|Data wydania i是我国Tóntoç και ηερομηνίας κδοσης||
Select the responsible and type code
2024/4/16
Signature


- SPECIFIC SAFETY WARNINGS
- 1/ Safety instructions for all operations
- 2/ Safety instructions when using long drill bits
- Additional safety warnings
- RESIDUAL RISKS
- Even when the tool is used as prescribed it is not possible to eliminate all residual risk factors.
- RISK REDUCTION
- SYMBOLS DESCRIPTION
- WARNING:
- OPERATION
- WARNING : The device should be disconnected from the mains before putting into operation
- BIT INSTALLATION
- FORWARD / REVERSE ADJUSTMENT
- SELECTING THE IMPACT/DRILL MODE
- VARIABLE SPEED TRIGGER SWITCH
- WARNING: Always check that the power supply is the same as that indicated on the nameplate of the tool.
- LED WORKLIGHT
- START DRILLING
- HOLE DRILLING
- DRILLING WOOD
- DRILLING METAL
- DRILLING CONCRETE
- SPECIAL SAFETY INSTRUCTIONS FOR BATTERY PACK AND CHARGER
- MAINTENANCE
- INSPECTING THE MOUNTING SCREWS
- MAINTENANCE OF THE MOTOR
- TROUBLE SHOOTING
- STORAGE AND TRANSPORTATION CONDITION
- STORAGE
- TRANSPORTATION
- PROTECT OUR ENVIRONMENT
- WARRANTY
- DEXTER
- SN SSSSSS XX DDMMYY nn PPPPPP (SN: Serial No., SSSSSS : Supplier code, XX :Factory ID, DDMMYY: Production date, nn: number of version of product, PPPPPP : Incremental number)
- 90806008
- ADEO Services, 135 Rue Sadi Carnot - CS 00001 59790 RONCHIN - France
Brand : DEXTER
Model : 20ID3-60BL.2B
Category : Cordless hammer drill